zoothorn
-
Posts
4752 -
Joined
-
Last visited
-
Days Won
3
Everything posted by zoothorn
-
No I should've tho.. looked great. I had a window open, & door alot too, but I did think of your advice. Will buy before next fire. Tbh it's impossible to use unless flippin cold I think.. so could be October next time. Main things ticked tho: draw seemed good, stove paint smoke ( assumed so) subsided... & main thing: it'll be mighty economical!! Woohoo! Makes a total mockery of my main s'room one already. So I can run this entirely from forraged wood from lanes/ spots all around. No doubt at all.
-
I think I'll get used to it/ not notice tbh. Could be a very- last on the list jib tho. After the whippet. And Wilbur is waaay down still. Did just fire her up tho! Thx zoot.
-
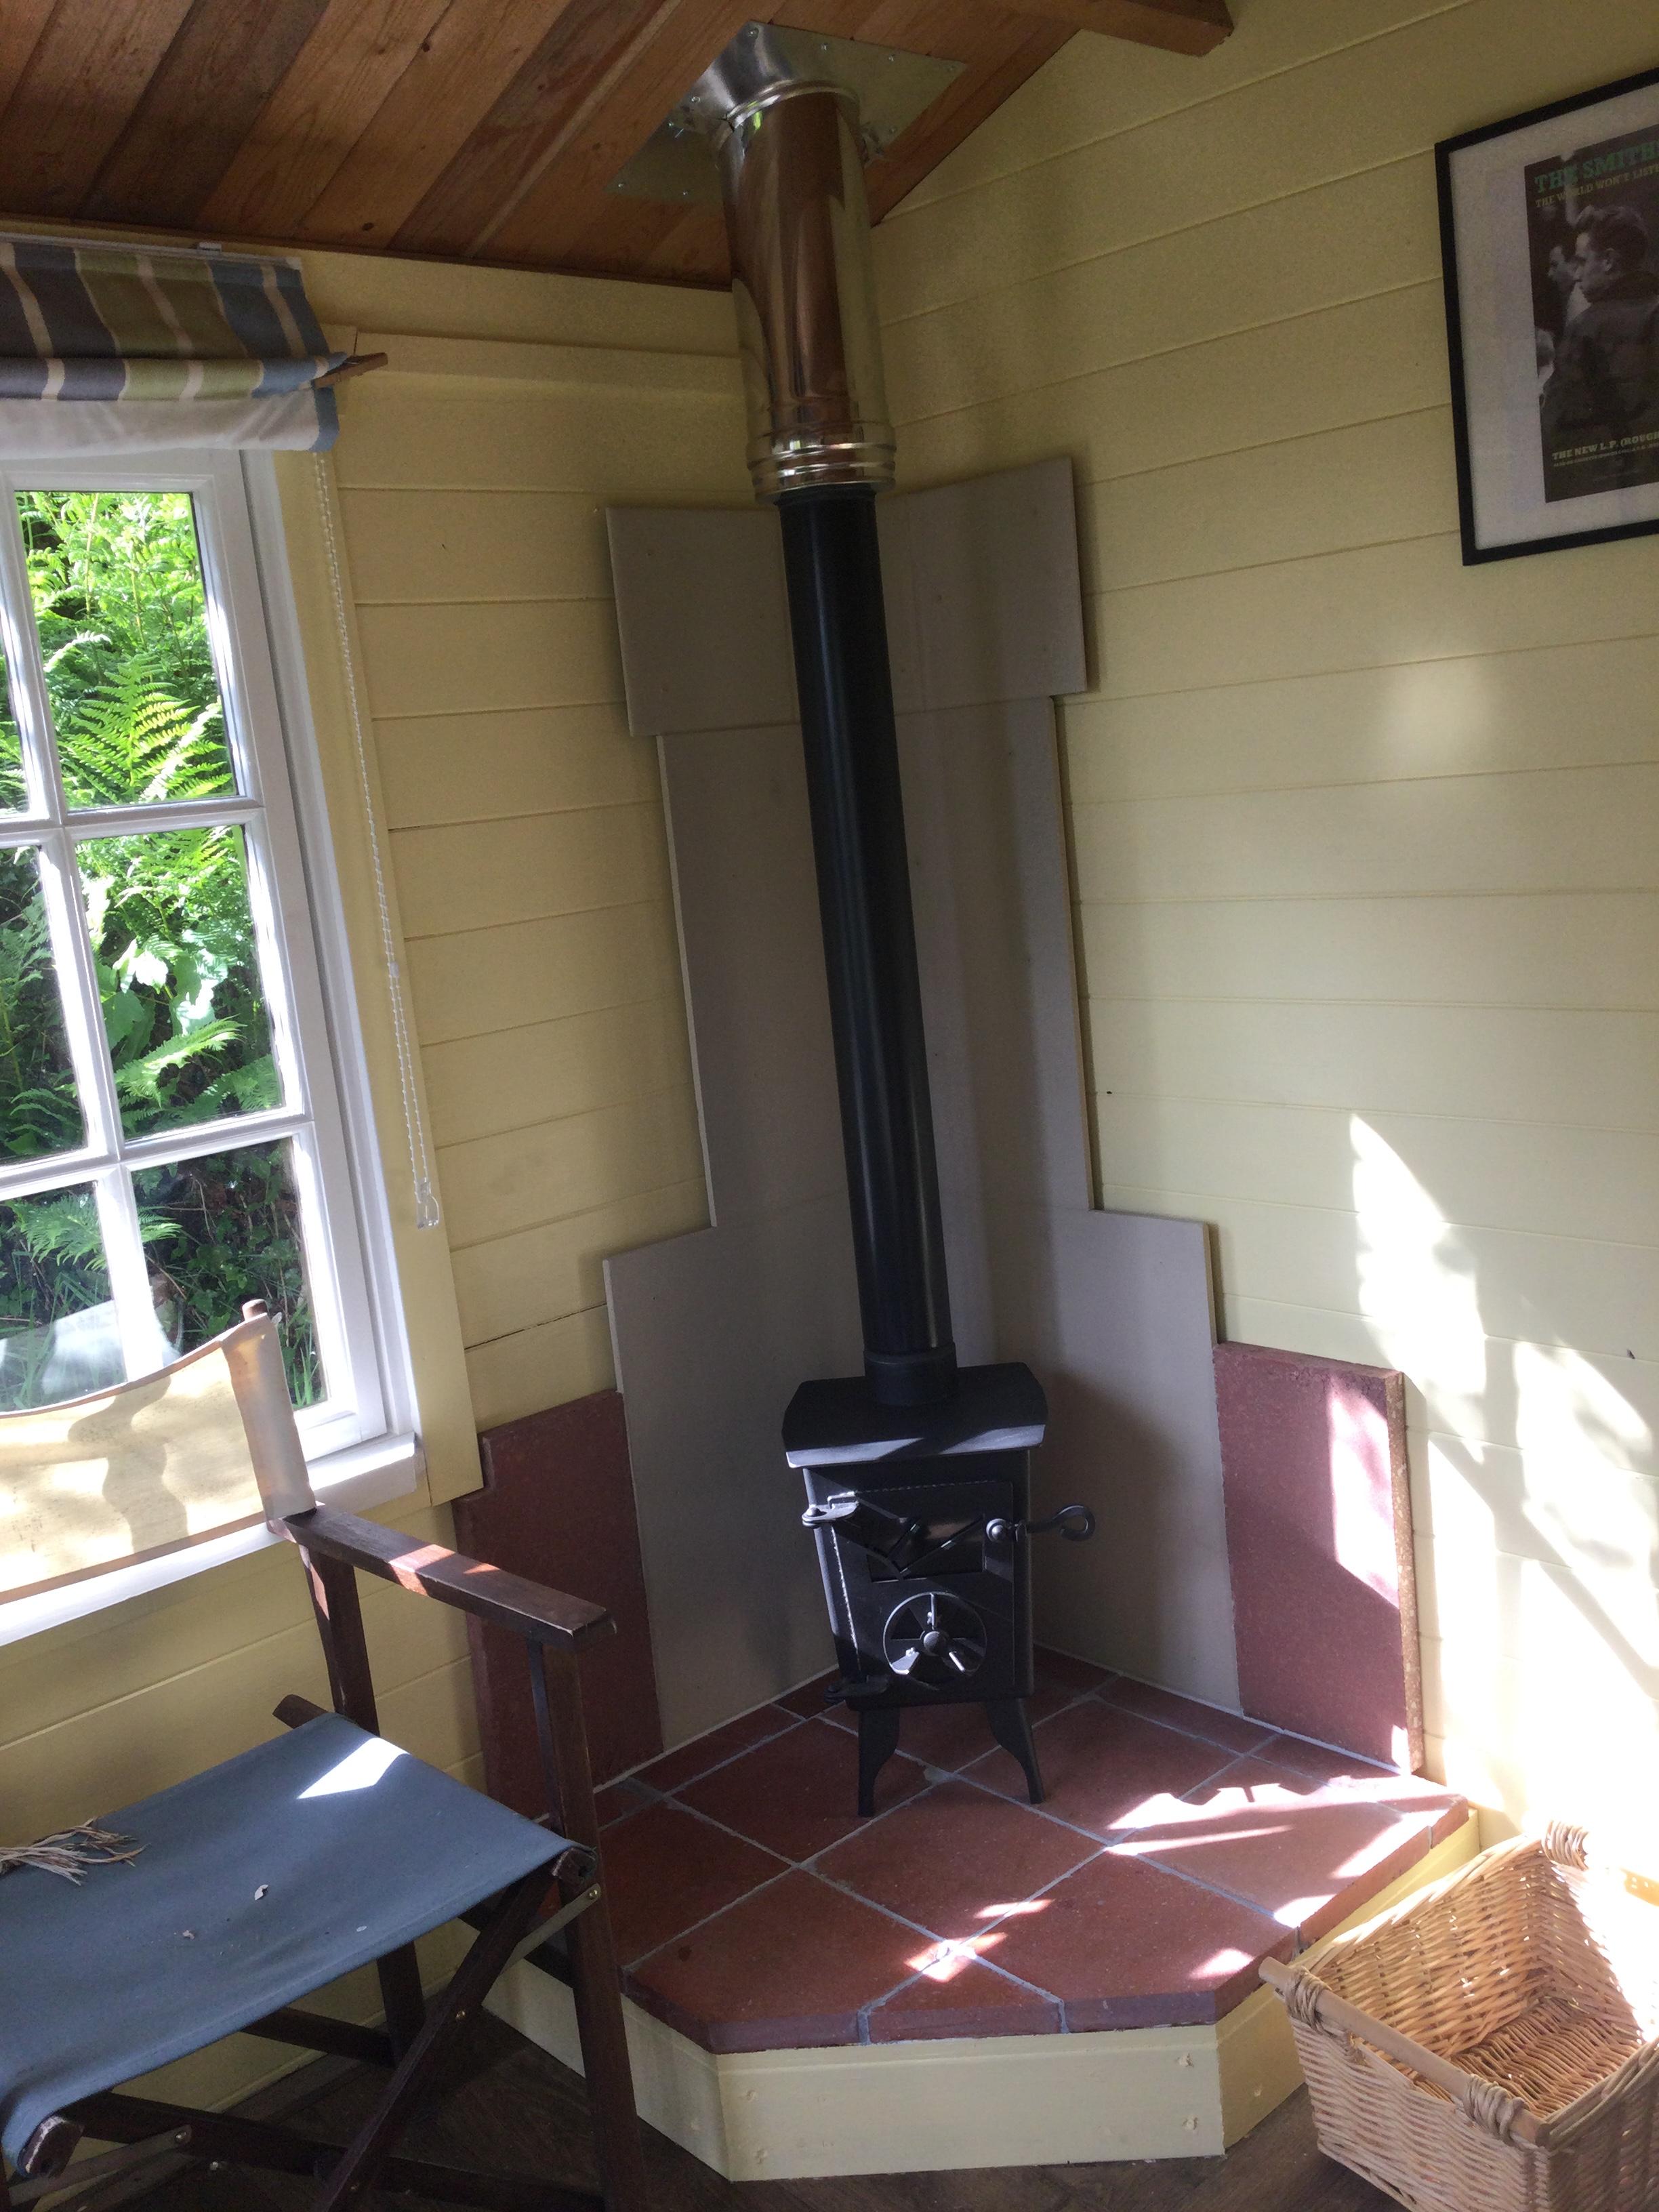
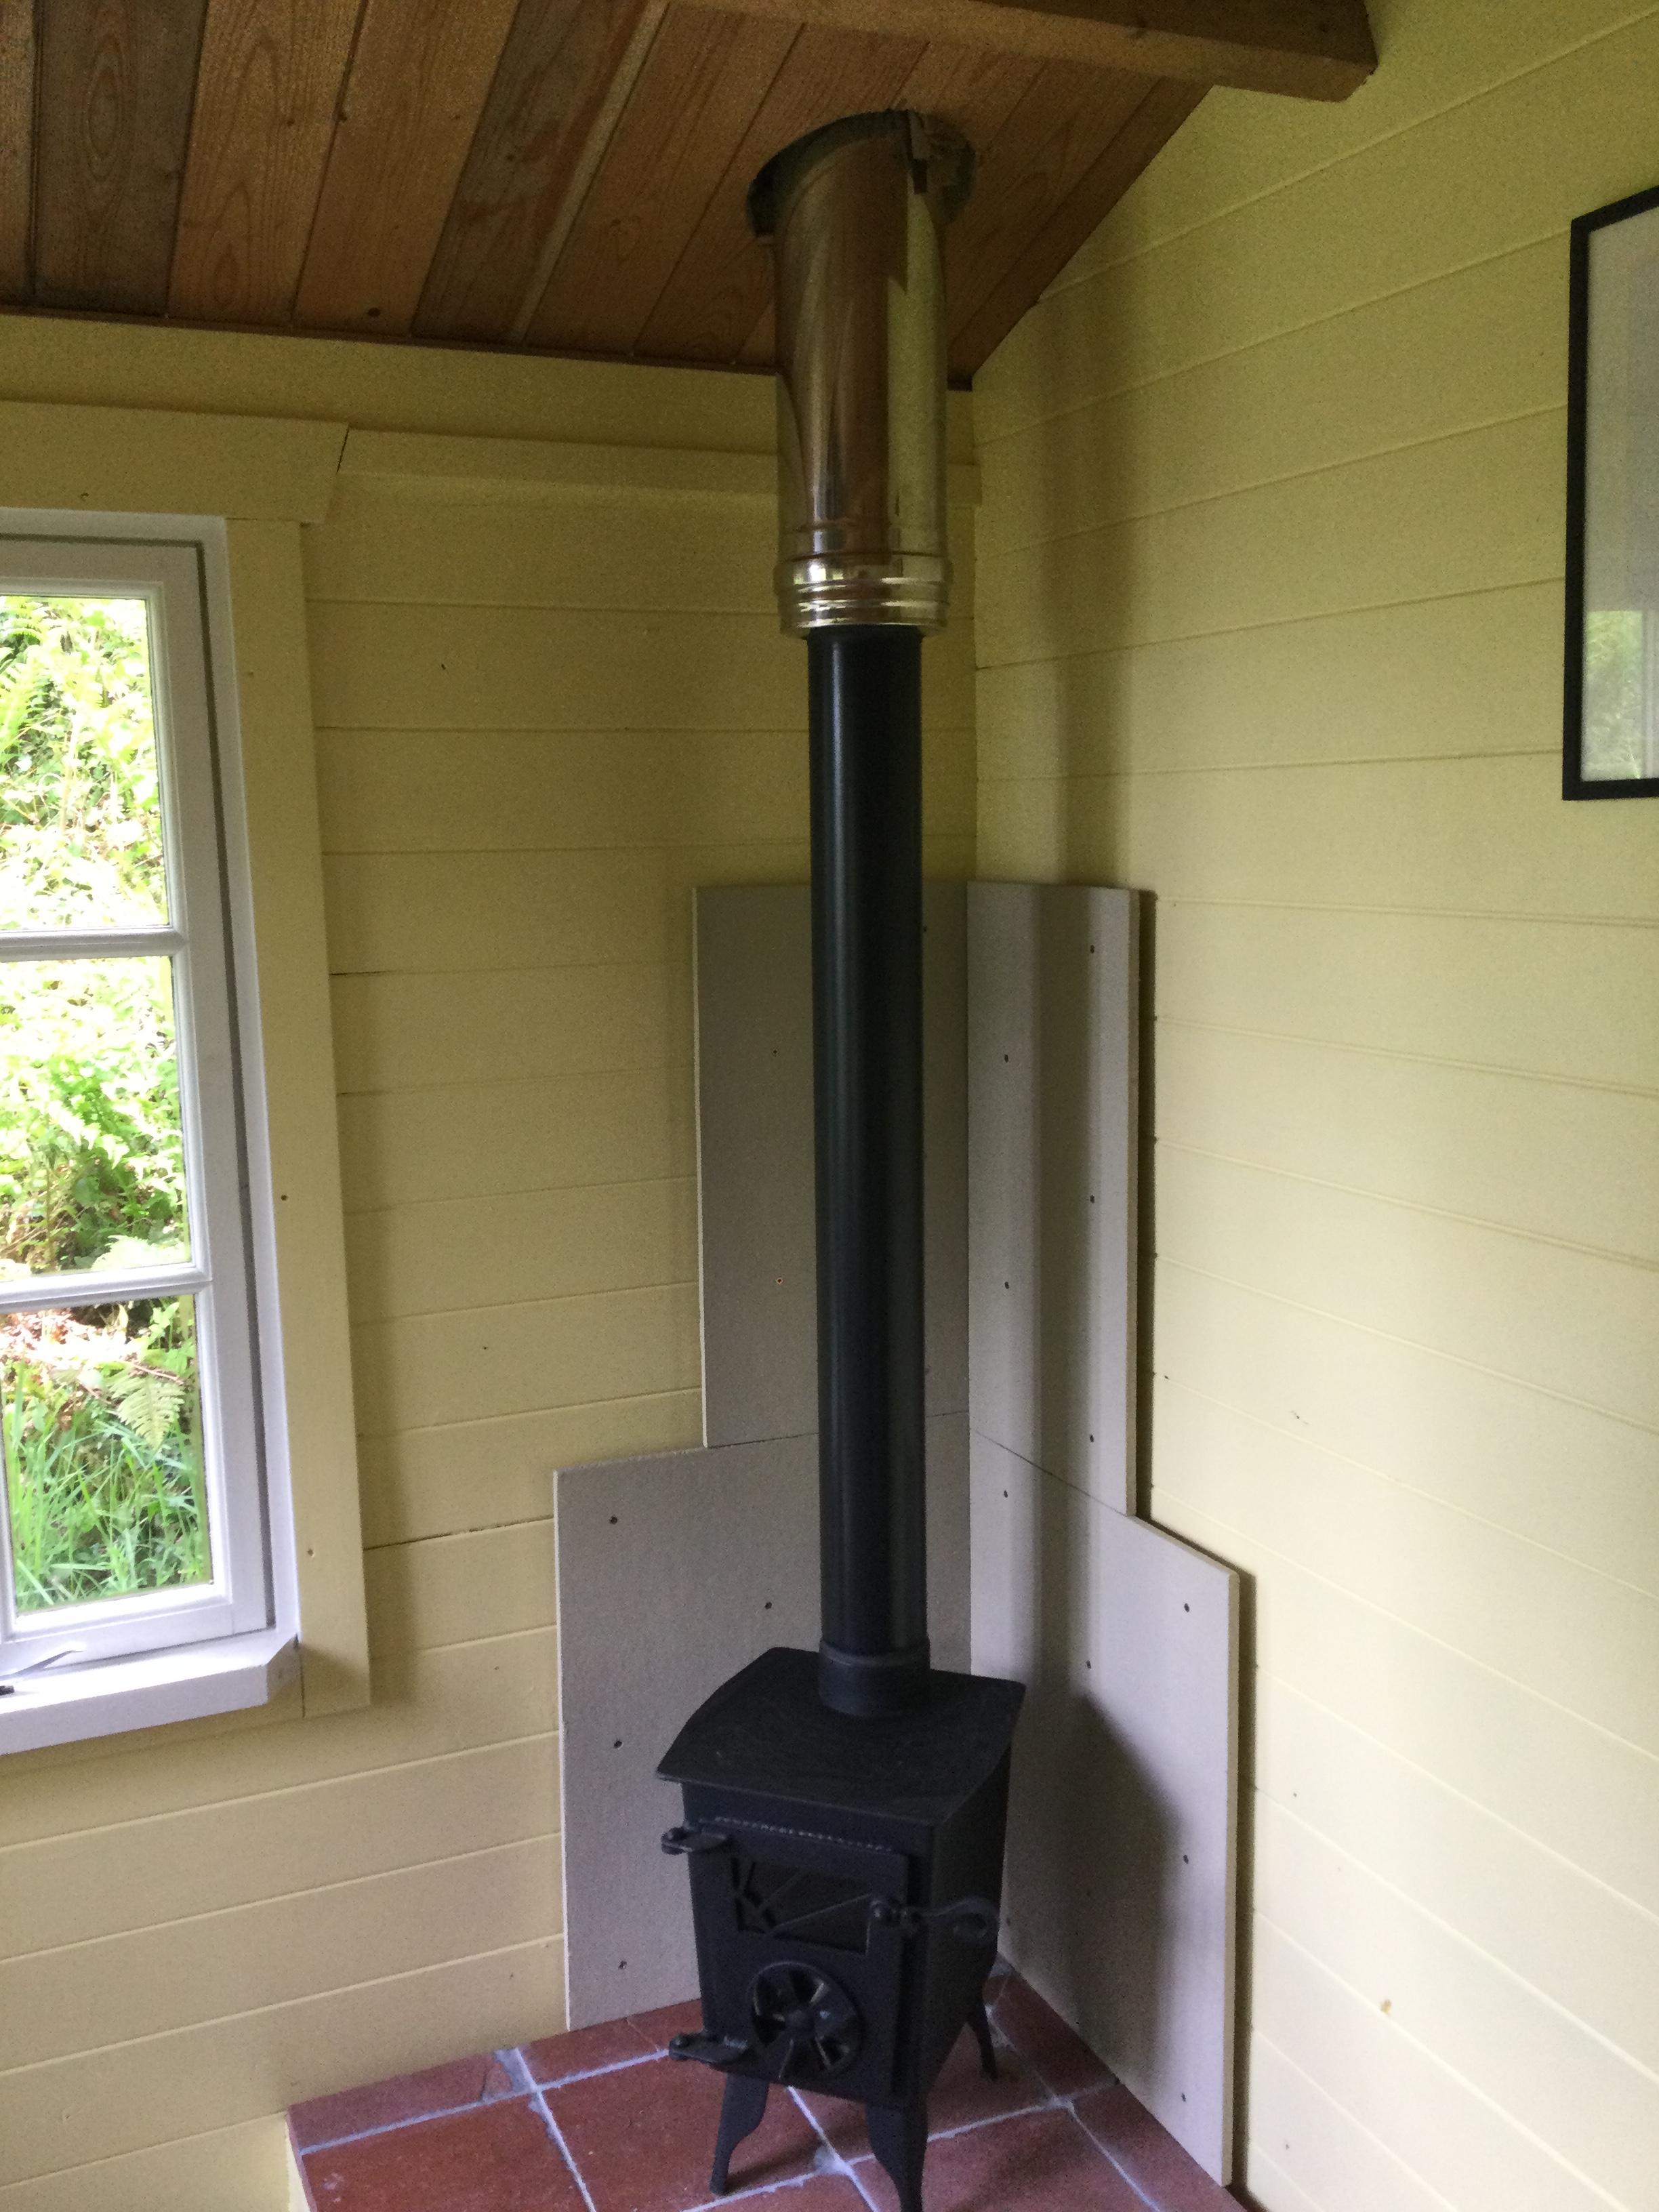
Just fired her up! Omg there was all sorts of smoke nasties coming from the stove, but I saw from general 'all over' areas not vent areas.. & subsided after a fretful 3/4hr. I think. Blazingly sauna- hot. Wow. I only did a small fire as Peter suggested too. This thing is mighty capable, fab design. But have I got twice what I need? Hmm.. seems so to me. 2 other concerns: the twinwall gets almost as hot as the single, you can barely put a hand in more than a second; now I did the fire test of a knauff fluff offcut ( stuff I ID'd a few posts before).. & wouldn't catch/ impressive. Lastly the fireboard directly behind/ nearest stove gets mighty hot just from my small fire. I checked outside @ this exact spot, hand on wall, & cold as can be. I am therefore putting alot of trust this muuri paint + cement board. Quite a 2 hours! Much guinness needed, for strength. Zoot.
-
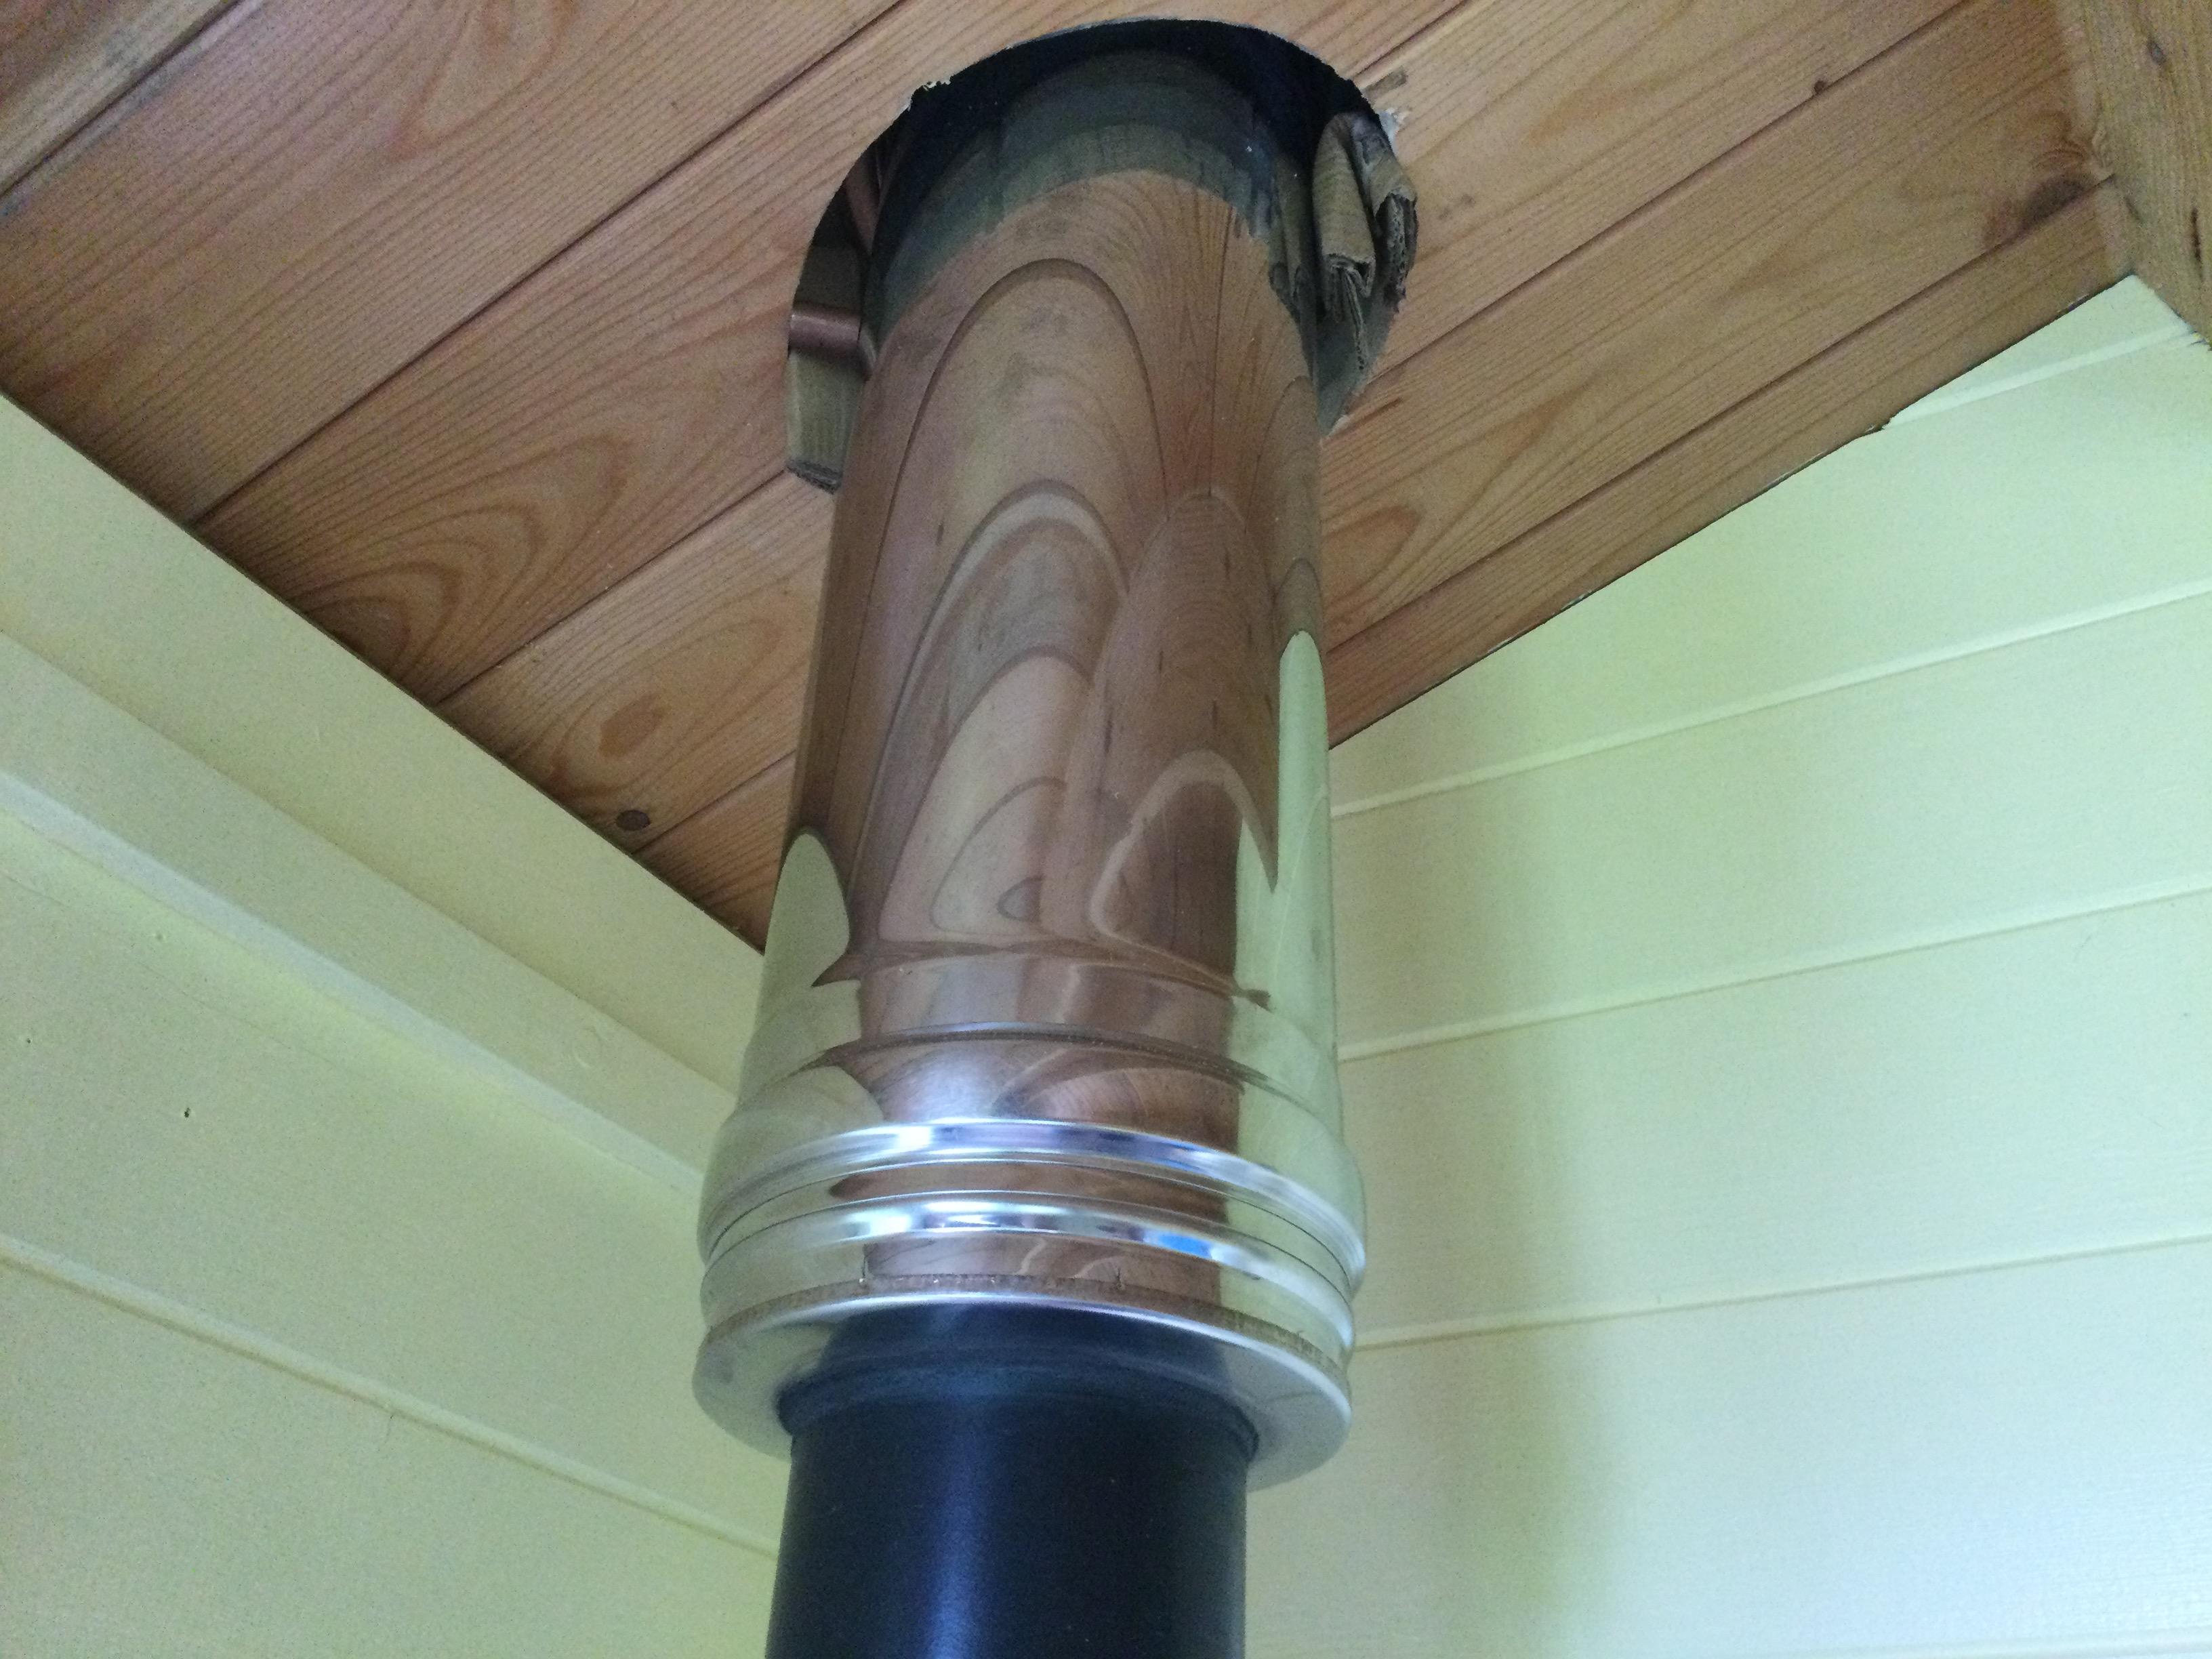
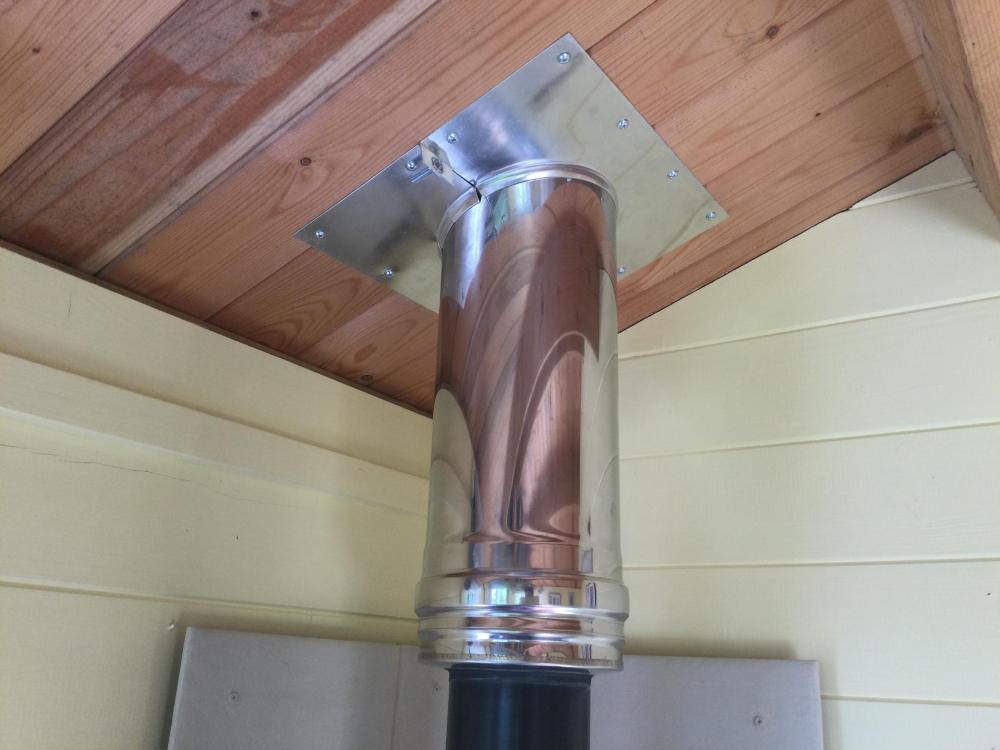
Hi Peter- that's one thing I forgot then. But I guess it's too late now having set for a week, so when I fire up 1st will be same now as if I wait-? 1/2 a cut up 450mm pave slab each side, & ceiling plate nipped to shape around trickier LHS of flue. A bit 'zincy' but cheap & you don't look at it.
-
I will do when a cold snap comes ProDave.. I'll roast in there now. If we had 26*C in feb last year, we might get 5*C in june.
-
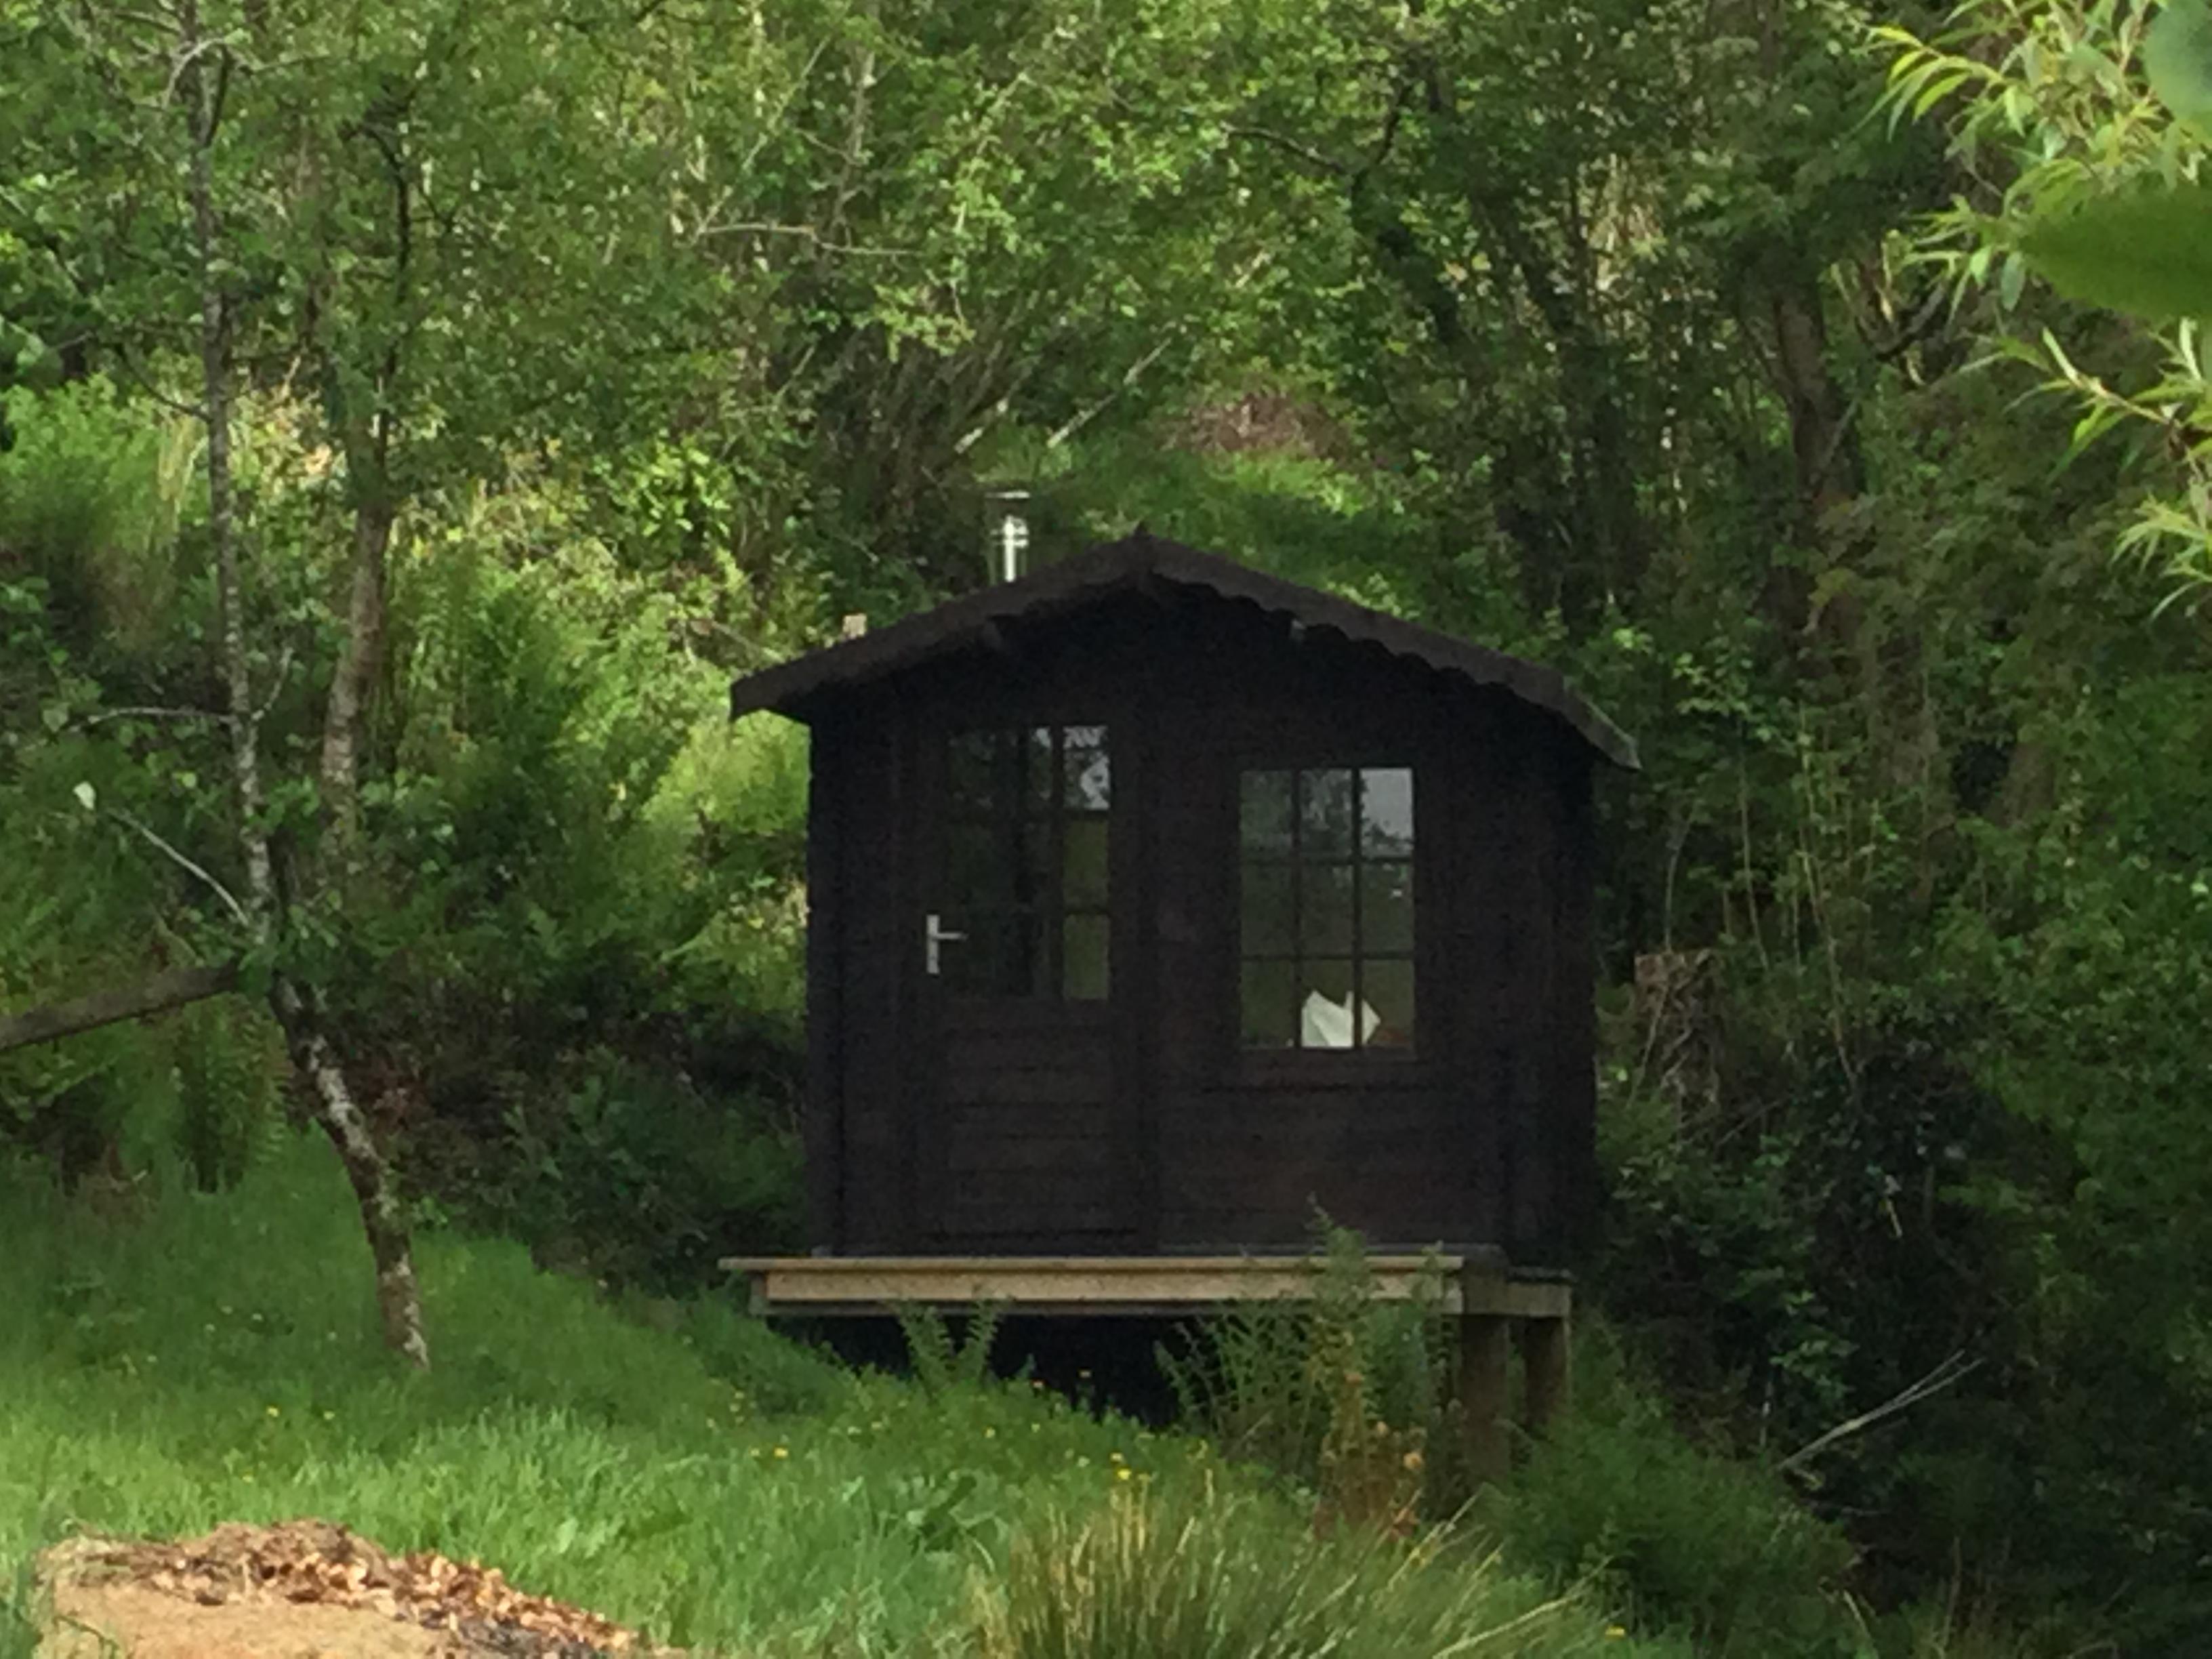
Last bits done/ job fully complete. I'll add an update once fired up, maybe september or so.. but hugely grateful to all for the help ( & patience with my Q's!). Zoothorn.

-
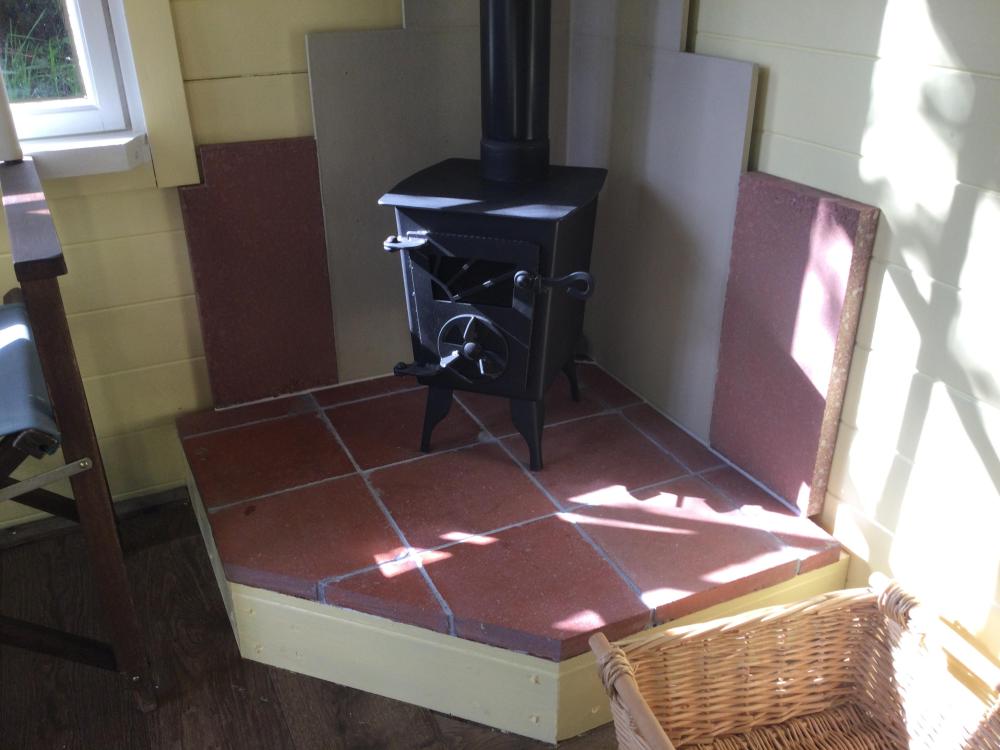
I do, but wasting 3/4 of a board, @ £15.. So I'm going to try the Muuri painted tiles 1st. Monitor. I think Im far enough from flue at 8", top area. If they get super hot.. I can remove & redo. Looking forward to firing her up! Hoping for a silly cold snap. Thanks, zoot.
-
Paint 10" sq (8mm D) ceramic tiles 2x in Muuri paint... then gun adhesive/ stick to walls here? Pic again. Also could do same around stove, to broaden the fireboard width by 10". Pic again..

-
I am certainly taking great advice.. no doubt there: followed Peter's steps to a T & I was on a sure footing. Thanks. Good that's sorted then. Wait for plate/ flue done. Checked in rain last ev & all's well. Really pleased too. ---- Very last Q if I can chaps. As you can see on page before, I was an eejet measuring & fell short with my fireboard. So top of enamel flue is unprotected by 9" H. Now thankfully the black flue is a good 8" away from both side cabin walls here. Would I be ok to just paint the walls say 3x in Muuri paint? Or should I wait & add 10" H more cement board? When an offcut comes along.. Annoying. Thanks, zoot.
-
Good idea.. will do a test. Sand eh? Interesting. Am I stuffing it right up to fill the whole rubber johnny? Or just a band around the ceiling section removed. Thanks. Zh
-
Hmm.. seems good to go then, but no rush if waiting on my plate thing. So will see if Peter &/or ProDave concur maybe 1st. Thanks Onoff, zoot.
-
Anyone know if this particular loft roll is ok to go in my ceiling gap? Say it's non-combustible.. https://insulation4less.co.uk/products/knauf-combi-cut zh
-
Hi SAS. That sounds like the one Ive gone for.. as long as there's a bit of give.. should be ok. Cheers, zoot.
-
Hi Onoff. No unfortunately I don't have or I'd use it to heighten the boards' area up to the black flue top bit. I measured wrongly in fact for the 4 sections of board I cut & used from 1 sheet, hence the odd sized bits & not high enough. Mistake. Ive gone for my ebay one. I just mocked up two 158mm W halves in cardboard, as the seller shows its W to be. & with a bit of bending- should do. Just need to find some rockwool bits. I do have some knauff insulation roll, the beige stuff ( in a white/ blue big roll). Would this be similarly fire resistant? Thanks, zoot
-
@ProDave I wonder whether I could fettle this to play ball.. https://www.ebay.co.uk/itm/293358505044?hash=item444d878c54:g:9k0AAOSwfVpYq-vP
-
Aha great thanks, understood. I forgot rockwool was non flammable. I do have my 1" of ecotherm board sandwiched between my roof layers. A bit late in the day, but this is no issue.. is it? Grateful, zoot
-
Hi ProDave, useful link thanks. Did see these things. Thing is as it's on a slope, this won't fit too well I'd have thought? Its that pesky oval shape etc. What about something in the 1" gap around twinwall, actually in the ceiling? Thanks, zoot
-
I've got a few things to address before firing up. 1. is sealing around fireboard gaps/ joins, got some NN'sense fire tube stuff. 2. Im a bit short on the fireboard, so need something to add top of enamel flue -ideally an offcut cement board bit, if I can find. 3. I have wedges in my ceiling oval at the mo, I was going to add L shape brackets, under the johnny, 3 to secure flue solidly but was in a rush. So maybe add say two inside @ pic 2? 4. some plate thing to cover over the ceiling oval cutout, not so easy being an oval shape. 5. Lastly: something actually in the ceiling gap.. Ive seen some folks stuff rockwool here. Need to find offcut/ can do this job & 4 in time. No rush, warm weather on it's way. Thanks, zh
-


-
Job.. done! Woohoo! Started raining of course soon as I cut me hole.. & (new) gun whatnot broke when I went to stick my johnny down. But rain stopped, dried up.. & fab results. This, I think, is the most satisfying build job so far. 4 hours flat out 'blitzed' it. It warrants a zoot musical interlude, before pics tomorrow. Thanks so much. Zooter.
-
Good tip that. Will do. Finally looking fwd to the job now.. dreading it just 2 days ago. So important all this prep you see, for me. Thx zoot.
-
Appreciated. Super silly prep i know.. but important job to have every facet ready, job understood & a plan in place. I think Im set. Just a good weather window & can crack on. My stove guy replied at last, said tho my 'spiggot' male end seems long, using plenty of cement smeared around it should be fine w'out cutting a bit off. Good. All weather silicone to buy, use my screws ^ then galv spray the heads (? my idea) then a layer of this sealant ontop of them too. Putting some also on the jonny-flue join too. Thanks- Zoot Doing a mock
-
Peter forgive me a newbie's question.. are these screws suitable, to fix the outer alu flange of the johnny down thru felt/ into my osb roof? Or do I need something 'special' ? https://www.screwfix.com/p/easydrive-flange-head-flange-self-tapping-screws-8ga-x-100-pack/6553h Thanks, zoot.
-
Hi Onoff no Im far from attempting this flue job yet.. as I still cannot understand the correct joining of these 4 pieces. Thanks for link though/ will get in due course. Zoot.