-
Posts
4375 -
Joined
-
Last visited
-
Days Won
31
Everything posted by Iceverge
-
Oversheeting 'Big 6' fibre cement roof
Iceverge replied to Glenn's topic in Roofing, Tiling & Slating
Regarding insulating insulated sheets aren't tremendously expensive. Even a minimal 25mm or so of Insulation would be worth it. If you really can't afford it or just want to stop condensation drips I would layer a run of chicken mesh over the purlines to support roofing felt and then use standard sheeting. There's a roof very almost level done on a stable here and it has never dipped. -
Oversheeting 'Big 6' fibre cement roof
Iceverge replied to Glenn's topic in Roofing, Tiling & Slating
Yikes...... Sounds like a recipe for a forever roof.Not in a good way unfortunately. What you have at the moment can be tackled systematically and safely. If you layer up new roof on old asbestos noone will want to come within a mile of it . If you take appropriate precautions you can remove the Asbestos yourself and get it disposed correctly. If you're able to take the time and care it'll save a lot vs a contractor. -
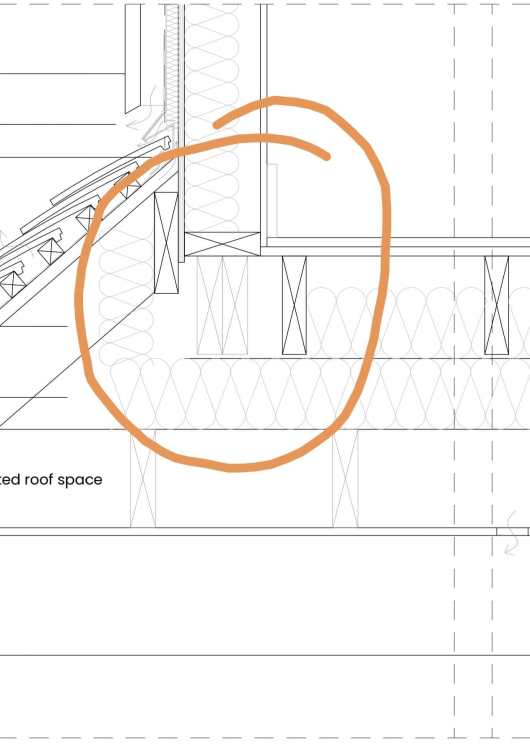
That drawing seems to carry some magical thinking in a few areas . I'm really not certain what went on in this area. It doesn't fill me with confidence that your designers details were up to scratch. Do you have any specification as to what the builders were working to? Any pictures during construction? What is your specific objection to the work? Aesthetics or is it unsafe or leaking? What may help is if you have any wider drawings of the same area. Particularly sections.
-
There's a mistake here. I think I should have said 200mm cavity in the second example.
-
Upgrading rafter ties to proper joists
Iceverge replied to SimonD's topic in Garage & Cellar Conversions
How "good" does this need to be? I'd be surprised if you couldn't wiggle something up into place. 50mm would be enough bearing. Maybe use 2 plys of longer bendier timber like 150*25 instead of a single 150*50. You could "truss" the roof by adding vertical support to the existing joists from the rafters. -
Target U-values… Cost/benefit sense check… What am I missing? 🤷🏻♂️
Iceverge replied to fatgus's topic in Heat Insulation
Economic fabric first probably wouldn't be very nice to live in. It would only include the smallest windows necessary for fire escape purposes and they would be the lowest legally acceptable spec. For comfort I would always upgrade to thermally good windows before going behind Bregs insuation. -
Target U-values… Cost/benefit sense check… What am I missing? 🤷🏻♂️
Iceverge replied to fatgus's topic in Heat Insulation
Good quality 3g white/white uPvc. Anything more expensive is just buying an Audi instead of a Skoda in my view. More $$$ without any more performance but at least the neighbours will be envious. -
Standard dense blocks 7.5N is the norm in Ireland. Thermalites really add almost no insulation compared to making the cavity just a few mm wider. They're lighter to lift but crack easier and don't take wet plaster as well. Swings and roundabouts. 100mm dense blocks 175mm cavity batt 36 100mm Thermalite (0.18) will get you to 0.18W/m²K. Blocks and insulation~£65.14/m² If you used 100mm dense block 175mm cavity batt 36 100mm dense block ~£48.12 per m² You'd be at 0.174W/m²K
-
Yes sorry I was speaking in a general sence. Talk to the SE on this case. From further research and it might have some favourable qualities for a raft foundation. Flows well around complex reinforcement. Less heavy work with rakes and boots ducting the pour would mean less chance of damaging the UFH pipes.
-
Double the price. Intolerant of any small gaps in the shuttering. Can't pour it on slopes. That's my understanding of the down sides. Everything else seems better.
-
Target U-values… Cost/benefit sense check… What am I missing? 🤷🏻♂️
Iceverge replied to fatgus's topic in Heat Insulation
They do an option for Softwood stick builds too. Something like an 8*2 won't actually carry much more heat than an I joist. Espically if you add a cross battened insulated internal service cavity. Run it through uBakus to compare. Agreed fire is a concern. Would something like cereal fiber cement be an option? An layer of Rockwool Frontrock outside the OSB sheathing would protect from a fire in the cavity. -
UFH - validate my thinking plus some questions
Iceverge replied to Bigdeadbadger's topic in Underfloor Heating
Out of interest if we were to switch to an ASHP at stores 50deg 300l would only store about 7kWh. We'd need daytime dearer electric to top up. That would leave 7kWh heated at 13c/kWh at a COP OF 2.5 = 37c 2kWh @ 24c/kWh @ COP of 2.5 = 19c Total 56c/Day. Vs €1.17 now. 61c/day saving and an ESHP is about €2400. Payback would take over 10 years by which time I would worry the ESHP may need replacing . Just like when we built I don't think there's a case for a heat pump for DHW alone when you can avail of reasonable night rate electric. -
UFH - validate my thinking plus some questions
Iceverge replied to Bigdeadbadger's topic in Underfloor Heating
300l direct UVC here. 2x 3kW immersion. Water stored at 70deg on TOU tarriffs. Does a family of 5 ok. Can store 14kWh before the tap water gets cool. We use 9kWh daily for 5 in the house. Need to run it an extra hour in the evening if inlaws stay. Annual cost is €420. -
Nice. There's a residential and residential lite. Is the upgrade worth it for an extra €15/month?
-
Target U-values… Cost/benefit sense check… What am I missing? 🤷🏻♂️
Iceverge replied to fatgus's topic in Heat Insulation
I would go for an as designed and as built U value of 0.2W/m2K. Otherwise you'll be charged for 0.13 and not see the benefit. I prattle on about U values as much as anyone else here but there's other fish to fry. Noise and Fire etc. I would disregard anything with PIR between the studs in these grounds alone. Likewise triple gasketed 3g glazing is important for noise and thermal comfort. Have you priced stick build? Pump it with cellulose and you get the best of a lot of worlds. -
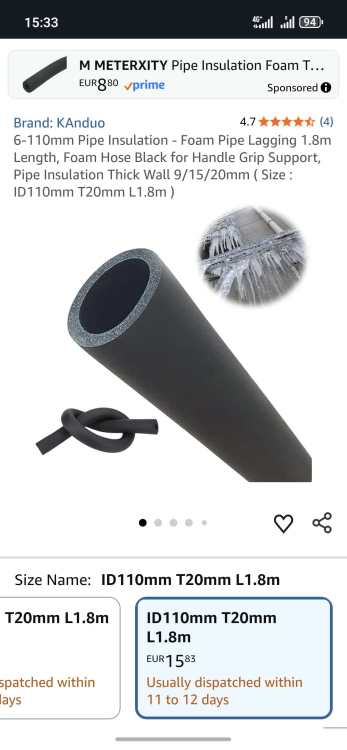
Pour concrete around it. It'll last for a century. One caveat, I would be worried about vibrations being transferred directly from the concrete into the pipe or if the slab settled it could crack the pipe. To avoid this I would excavate and consolidate well under the pipe. Wrap the length under the concrete in some pipe installation. And maybe include some mesh bridging over the top.
-
UFH - validate my thinking plus some questions
Iceverge replied to Bigdeadbadger's topic in Underfloor Heating
Don't bother with a boiler or ASHP and get Aerobarrier instead. Find £100 for a willis heater and a 3Kw Immersion for now. Gather data for a year or two and then fit the exact ASHP that suits your house. You can also bide your time on eBay and display models this way and pick up a bargain. -
Our 5g supplier has decided to pull their service. We have a fixed antenna on the wall outside with a Cat6 to the router. Would this cable do for starlink or is it a special one?
-
That's a mistake you make once. After dealing with a load of concrete drying in the wrong place once you learn to be robust with the drivers re waiting times and putting down their phone and backing the lorry up a few more ft to exactly where you need it.
-
I must admit it does look good. Mentioning of twice the material price in some places though. @Oz07 any insight here? @lizzieuk1 maybe if you had a sheet of polythene inside the EPS and really boulstered up the shuttering at the outside you could get the SE on board. From what I read it's every bit as strong as normal concrete. Self build is where we push the envelope after all!!
-
I did a bit of reading. It's apparently very sensitive to getting the slump exactly correct. Small variations of temp can make it difficult to work. Also because it's so runny you need to hermetically seal the EPS or you'll have leaks of watery cement paste and it'll make the concrete crumbly. Normal concrete seems a better fit.
-
I don't think the caution urged is anything against the SCC. More so DIYing an insulated slab without an experienced crew. I've never used it but it sounds ideal for pouring inside rising walls as a subfloor for example.
-
Target U-values… Cost/benefit sense check… What am I missing? 🤷🏻♂️
Iceverge replied to fatgus's topic in Heat Insulation
From my understanding the applied fools don't last as long. Ligter colours suffer less thermal exoasuand contraction too. -
Target U-values… Cost/benefit sense check… What am I missing? 🤷🏻♂️
Iceverge replied to fatgus's topic in Heat Insulation
Different profiles and hard ware and quality of assembly make a big difference.


