Nick Thomas
-
Posts
383 -
Joined
-
Last visited
Everything posted by Nick Thomas
-

More foundation fun - straw bale garden room on clay
Nick Thomas replied to Nick Thomas's topic in Foundations
700* 😅 -
More foundation fun - straw bale garden room on clay
Nick Thomas replied to Nick Thomas's topic in Foundations
I'm having a break from the lime render before starting the next coat. Decided to convert a bunch of offcuts from the ceiling and floor into a unit running the length of the round window wall. I can screw it to the floor joists and render right up to it, to make it integrated AF. Leaving the render behind it just basecoated will save me some too. I had to buy some 2x1 and 2x2 to make a frame to hang everything off, and all I could get on a Saturday afternoon was rough-sawn from b&q, so I got to play with an electric planer too. Progress so far... well... it's a pine box ^^. Don't stand on it yet. I'm planning to divide it into three compartments with panels made out of planks surrounded by 2x1, which will make it a bit sturdier. The perimeter is all 2x2. I was going to have a go at mortise and tenon joints, but chickened out and am just using lots of glue and pocket screws. I guess I'll need trim pieces on the front, and some jiggery-pokery to get the wood closer to the lime. The sink will be in the corner closest to the door - probably a counter-top one, to minimise holes through the worktop, with a couple more bits of 2x2 to support it underneath. Then a couple of sockets in each of the other compartments. Cables and pipes will come through from the back. Doors? I guess? They'll have to be flush with the trim, the floorboard offcuts being used for the worktop aren't long enough to give me a decent overhang ^^. Each compartment will be about 7000mm wide at the front, so 2x 350mm doors? I don't have any wood for them yet. I need wood for shelves too. I've got some old decking boards that were going to be the floor; maybe they'd look alright, planed up a bit.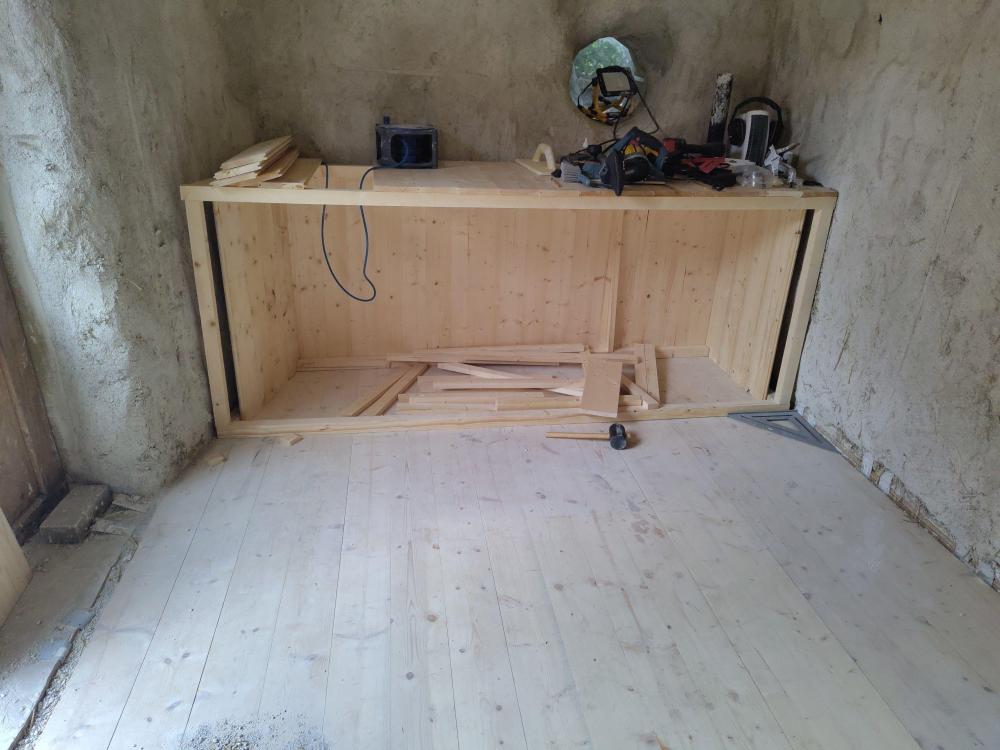
-
I was staring at my garage door last night while planing some wood. What a good idea ^^. It sounds like your supplier is saying their doors have a U value from 4.8 to 5.4 W/m²K, which is... not much. Basically the same as single glazing. You can convert it to an R value by dividing 1 by it: U=5.4 = R=0.18. Doesn't sound insulated at all... ("Rating" is a weird term to use here, but they're giving you the unit so I'm confident it's not an obscure rating scheme. Language barrier?) Don't think I'd get planning permission to convert my garage into living space, so if well-insulated garage doors *do* exist that might help a lot.
-
Hah, I meant my calculation was naive, not yours ^^. You're doing great, tackle the jobs you have time for and come back to the rest when you can.
-
More foundation fun - straw bale garden room on clay
Nick Thomas replied to Nick Thomas's topic in Foundations
I did come across some rules while working out the planning and building regulations constraints. No prohibition - at least, none that I found - but if you're building within a certain distance of the boundary (which I definitely am) then the height and footprint limits are reduced compared to if you were building out of brick. With the lime render on, the fire resistance is very good, so maybe one could argue that it's not equivalent to, say, a wooden shed - but I'd rather not be talking to them at all 😅. -
More foundation fun - straw bale garden room on clay
Nick Thomas replied to Nick Thomas's topic in Foundations
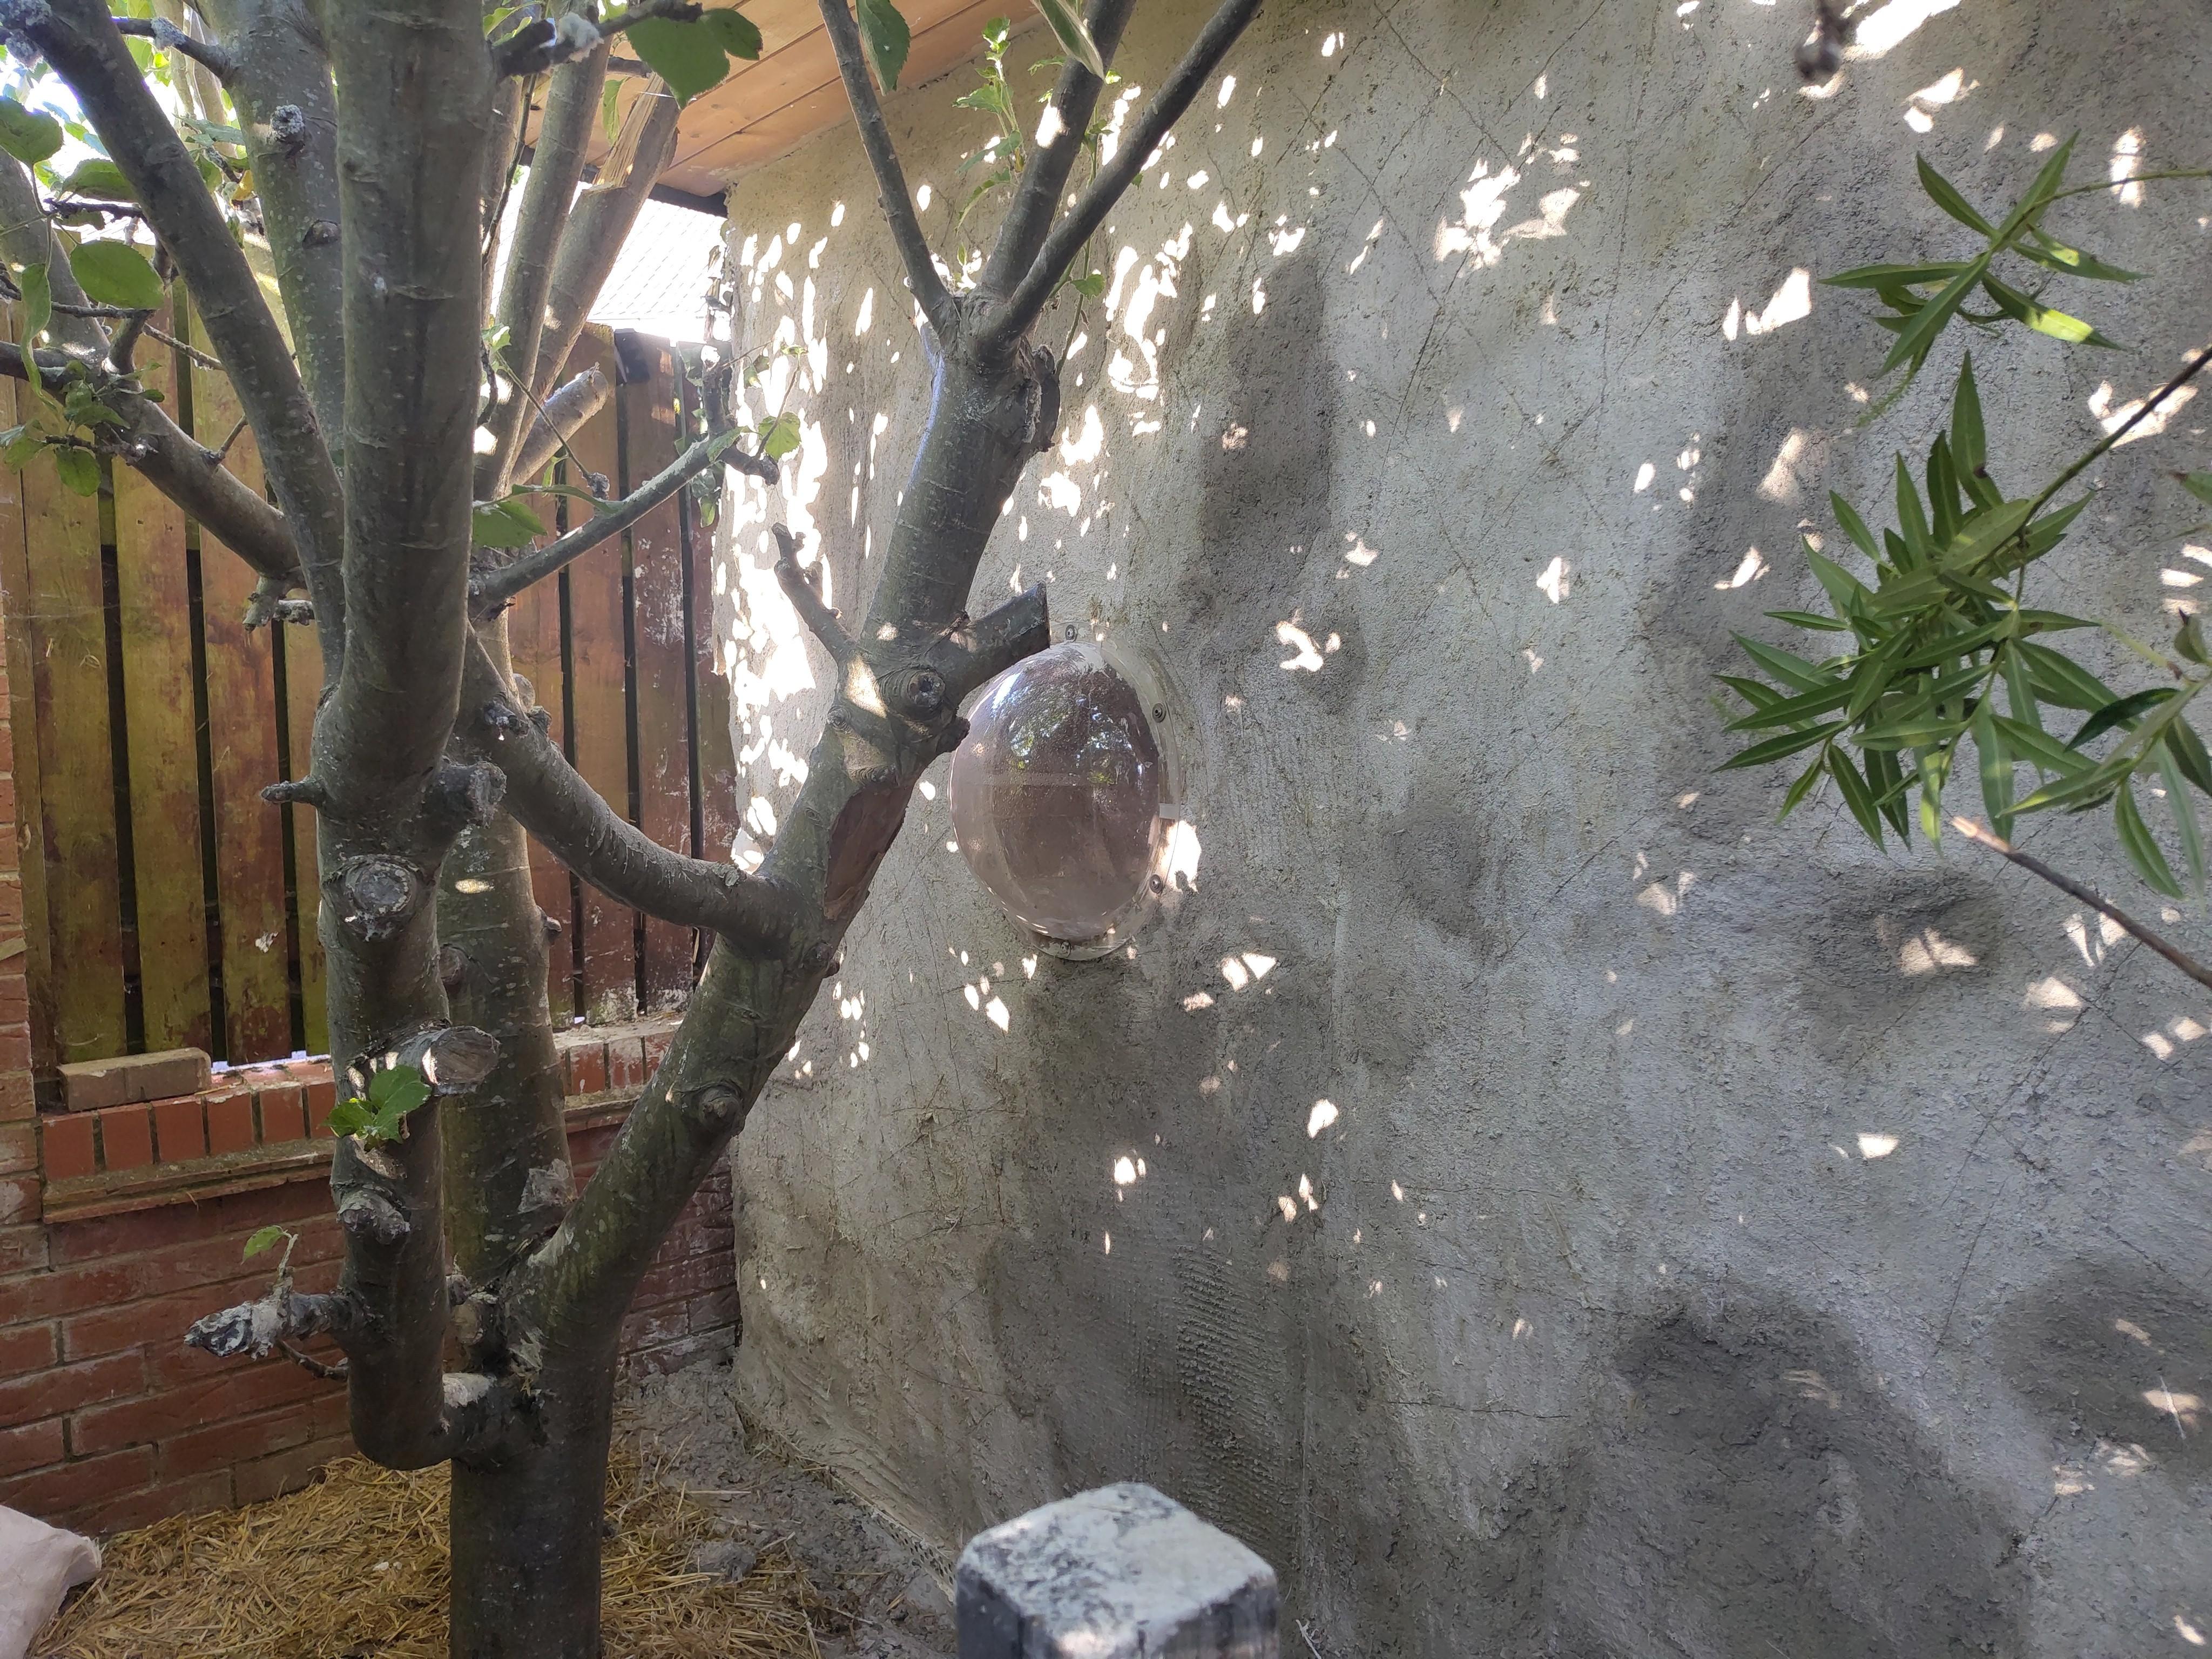
OK, I wasn't expecting it to look this good. Amazing what a bit of dappled light can achieve. Keeping the tree alive was absolutely worth it ^^. The bubble window is only on temporarily, it'll come off again for the next coats. Looks alright though.
-
It was a very naive calculation, but it gives you a ballpark to see how you feel about the costs upfront. Retrofitting this stuff later can be a pain ^^. Also remember that it's an assumption based on when it's 0 outside; seems the mean in January in Reading is actually 5°C. Getting up to temp, as @JohnMo noted, would require extra heat going in above the 1.15kW - that's just what's required to *maintain* the temperature difference (i.e., how much heat is leaving the building, and so, how much need to be replaced to maintain steady state). One benefit of better insulation is that the same size of heat source will get the building up to temperature faster in the mornings. It does take time to install, but, it'll probably be faster if you do it in the first place rather than retrofitting it ^^.
-
More foundation fun - straw bale garden room on clay
Nick Thomas replied to Nick Thomas's topic in Foundations
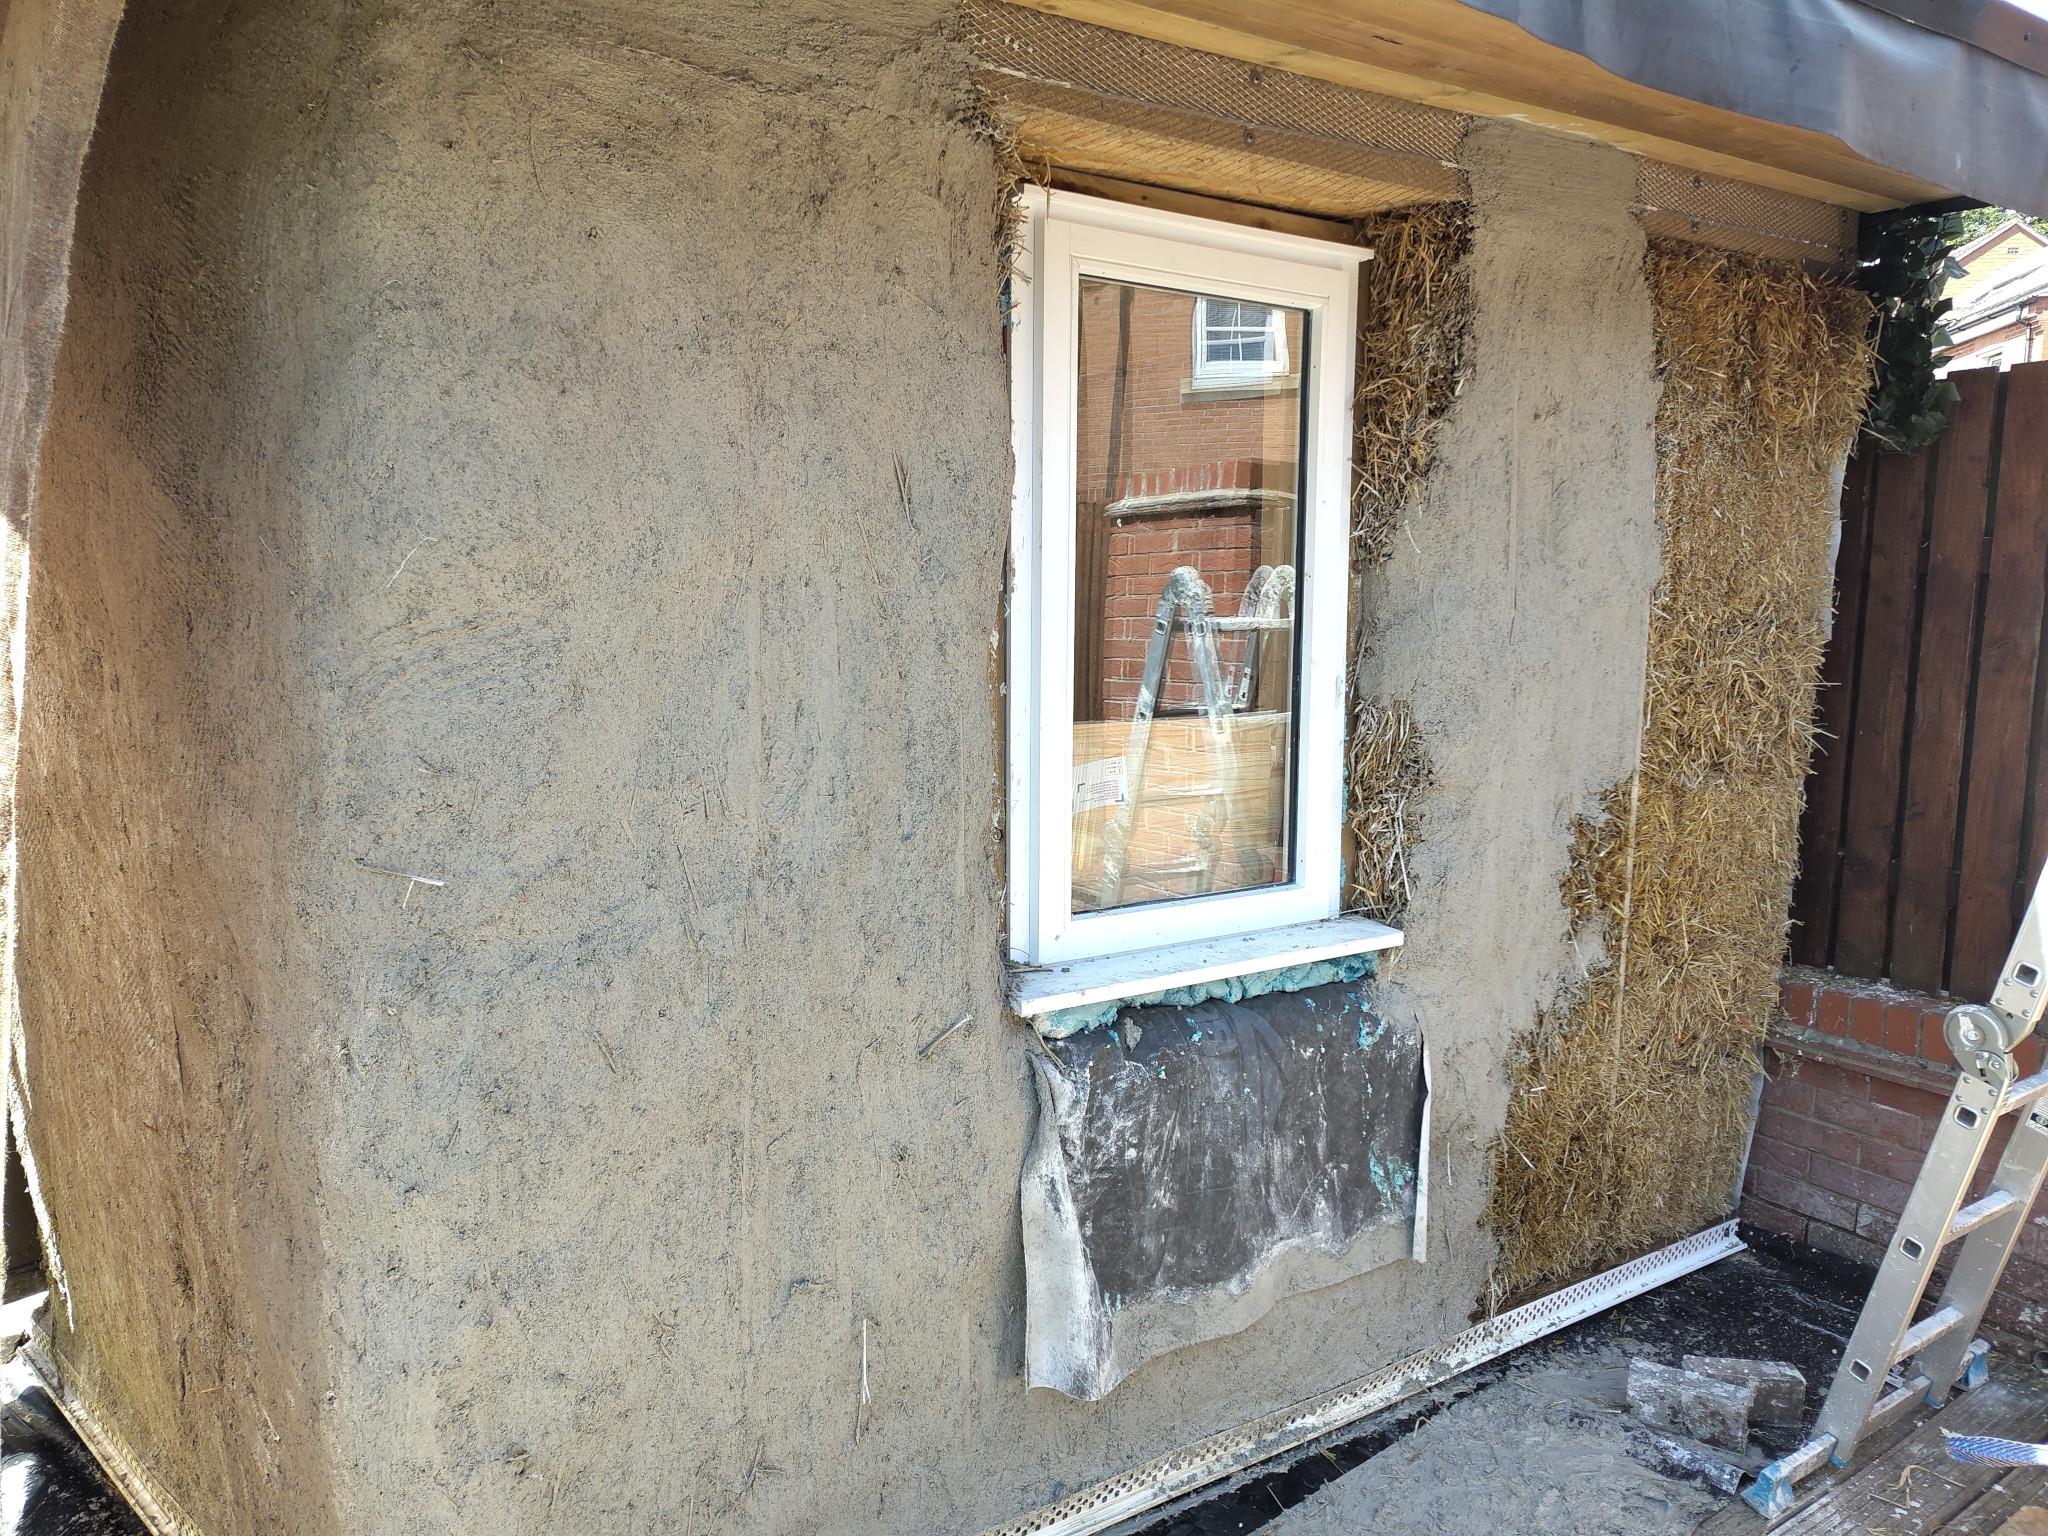
OK, basecoat on all but a tiny section of the outside now - and a few awkward bits of reveal. Eleven bags of lime used, nine remaining. That's a lot thirstier than I expected, but the remaining bags should be sufficient to do the straightening coat (1:2.5 lime:sand) and I can always buy some pre-mixed finish coat, since I'd need to get the finer sand for it anyway. Hessian up - and regularly watered - to protect from wind and sun externally, which makes getting pictures a pain, but here's a few I remembered to take. So far it all seems pretty sound. I've had to redo a few small sections, especially in places where the straw is loose - soft bales or bale ends, at the reveals and corners. It's a nightmare to get it to stick when it's like that, and you can easily end up with voids behind the render. Presumably this would be less of a problem if I'd done a stipple coat ^^. Easy to find and fix though - and the rest of the render holds the straw firmly in place while patching. I could have been more diligent about scratching up this coat; sometimes I've forgotten, or thought "I'll do that tomorrow" and by then it's too hard to rework. Not really anticipating any problems as a result, though, it's really rough. Next up is straightening; I've got a darby, but could do with a pool float. Don't really want to pay £60 for one though. I also need a wood float, although the temptation is to just attach a handle to a bit of offcut ^^.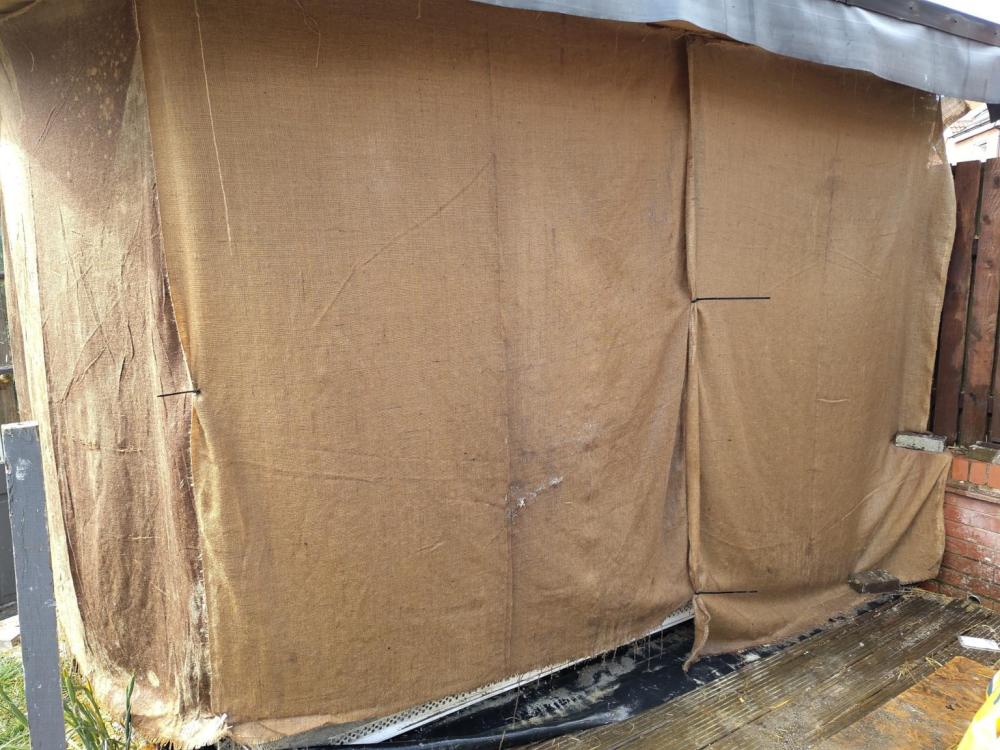


-
Helping family member buy a house
Nick Thomas replied to Jilly's topic in P2P lending, Crowd Funding and Alternate Sources
It's tough if you don't have the money upfront - mortgage terms and conditions make all the inventive approaches a breach of contract. Although, uh, one could ask how they might come to find out *cough*. Currently my sister owns a house and I have a charge on it with the land registry; that'll come off when she finishes repayments to me, or as part of a sale. Pretty sure mortgage companies would object mightily to that one. I didn't find much in the way of useful products when I was looking to get her housed - all the products seemed aimed at intergenerational wealth transfer. I *did* interview for a job with this lot a couple of years ago though: https://www.generationhome.com/ . Seemed like it might have helped, but I didn't dig into it much as they wanted employees to spend two days a week in an office in London, bless 'em. edit: Yeah, "Income Booster" and "Deposit Booster" lets your family member have a mortgage while you improve their eligibility without living there. Of course, they charge a premium for it. -
Get triple glazing and the windows could perform better than the walls 🙈! I'd definitely want some insulation in addition to the logs, myself. Apparently a good, lime rendered straw bale wall hits U=0.171. Probably overkill ^^.
-
My walls are 450mm thick 😅. Straw bales, not logs, but definitely not the right option for maximising space. A quick google tells me a 70mm log wall has a U-Value of 1.41 W/m²K. Going naively, since your log cabin is 5.0M X 3.8M X 2M (ish), you can say you've got about 35M² of wall, about 19M² of floor, and the same again for the ceiling. So at 0 outside and 20 inside, you'd lose ~1kW through the walls. If you went the 150mm rockwool approach in floor and ceiling, the U value is about 0.26, so you'd lose ~145W through those in total. Insulate the walls a bit, and the heat demand could be more like 300W.
-
Hi. Great project! I recently put together a cold roof on 2x6 rafters for my own garden room. The full buildup, from top to bottom, was - * EPDM membrane * OSB deck * 2x6 joists * 50mm ventilated air gap * 100mm RWA45 rockwool * 25x50mm battens * 50mm rockwool * resilient bars * 12.5mm t&g pine You'd probably want an airtightness membrane too; I wasn't super worried about interstitial condensation in my case. Loss of head height below the rafters was a bit over 50mm (the lower layer of rockwool got compressed a bit between resilient bar and battens), and it was an absolute pig to fit from below, but I'm pretty happy with it. About halfway through the insulation I did find myself wishing I'd just gone for a warm roof to save on the effort, but like you, trying hard to fit within PD. The air gap needs to be ventilated; I've got a significant roof overhang, so I'm just putting some 70mm circular vents in the underside of that. PIR as the lower layer would probably be easier; I ended up using the rockwool and resilient bars as I was more concerned with acoustic than thermal insulation.
-
How to measure the angle of a patio?
Nick Thomas replied to puntloos's topic in Roofing, Tiling & Slating
My smartphone has a spirit level application (https://f-droid.org/packages/org.woheller69.level/) which is surprisingly great - although YMMV with the quality of the sensors in the hardware, of course. It's been very handy for measuring the actual angles of things that are already up, though. Just make sure you use a flat side on the phone, not a side that has protruding buttons or cameras or whatever. Don't ask me why I need to say this. -
More foundation fun - straw bale garden room on clay
Nick Thomas replied to Nick Thomas's topic in Foundations
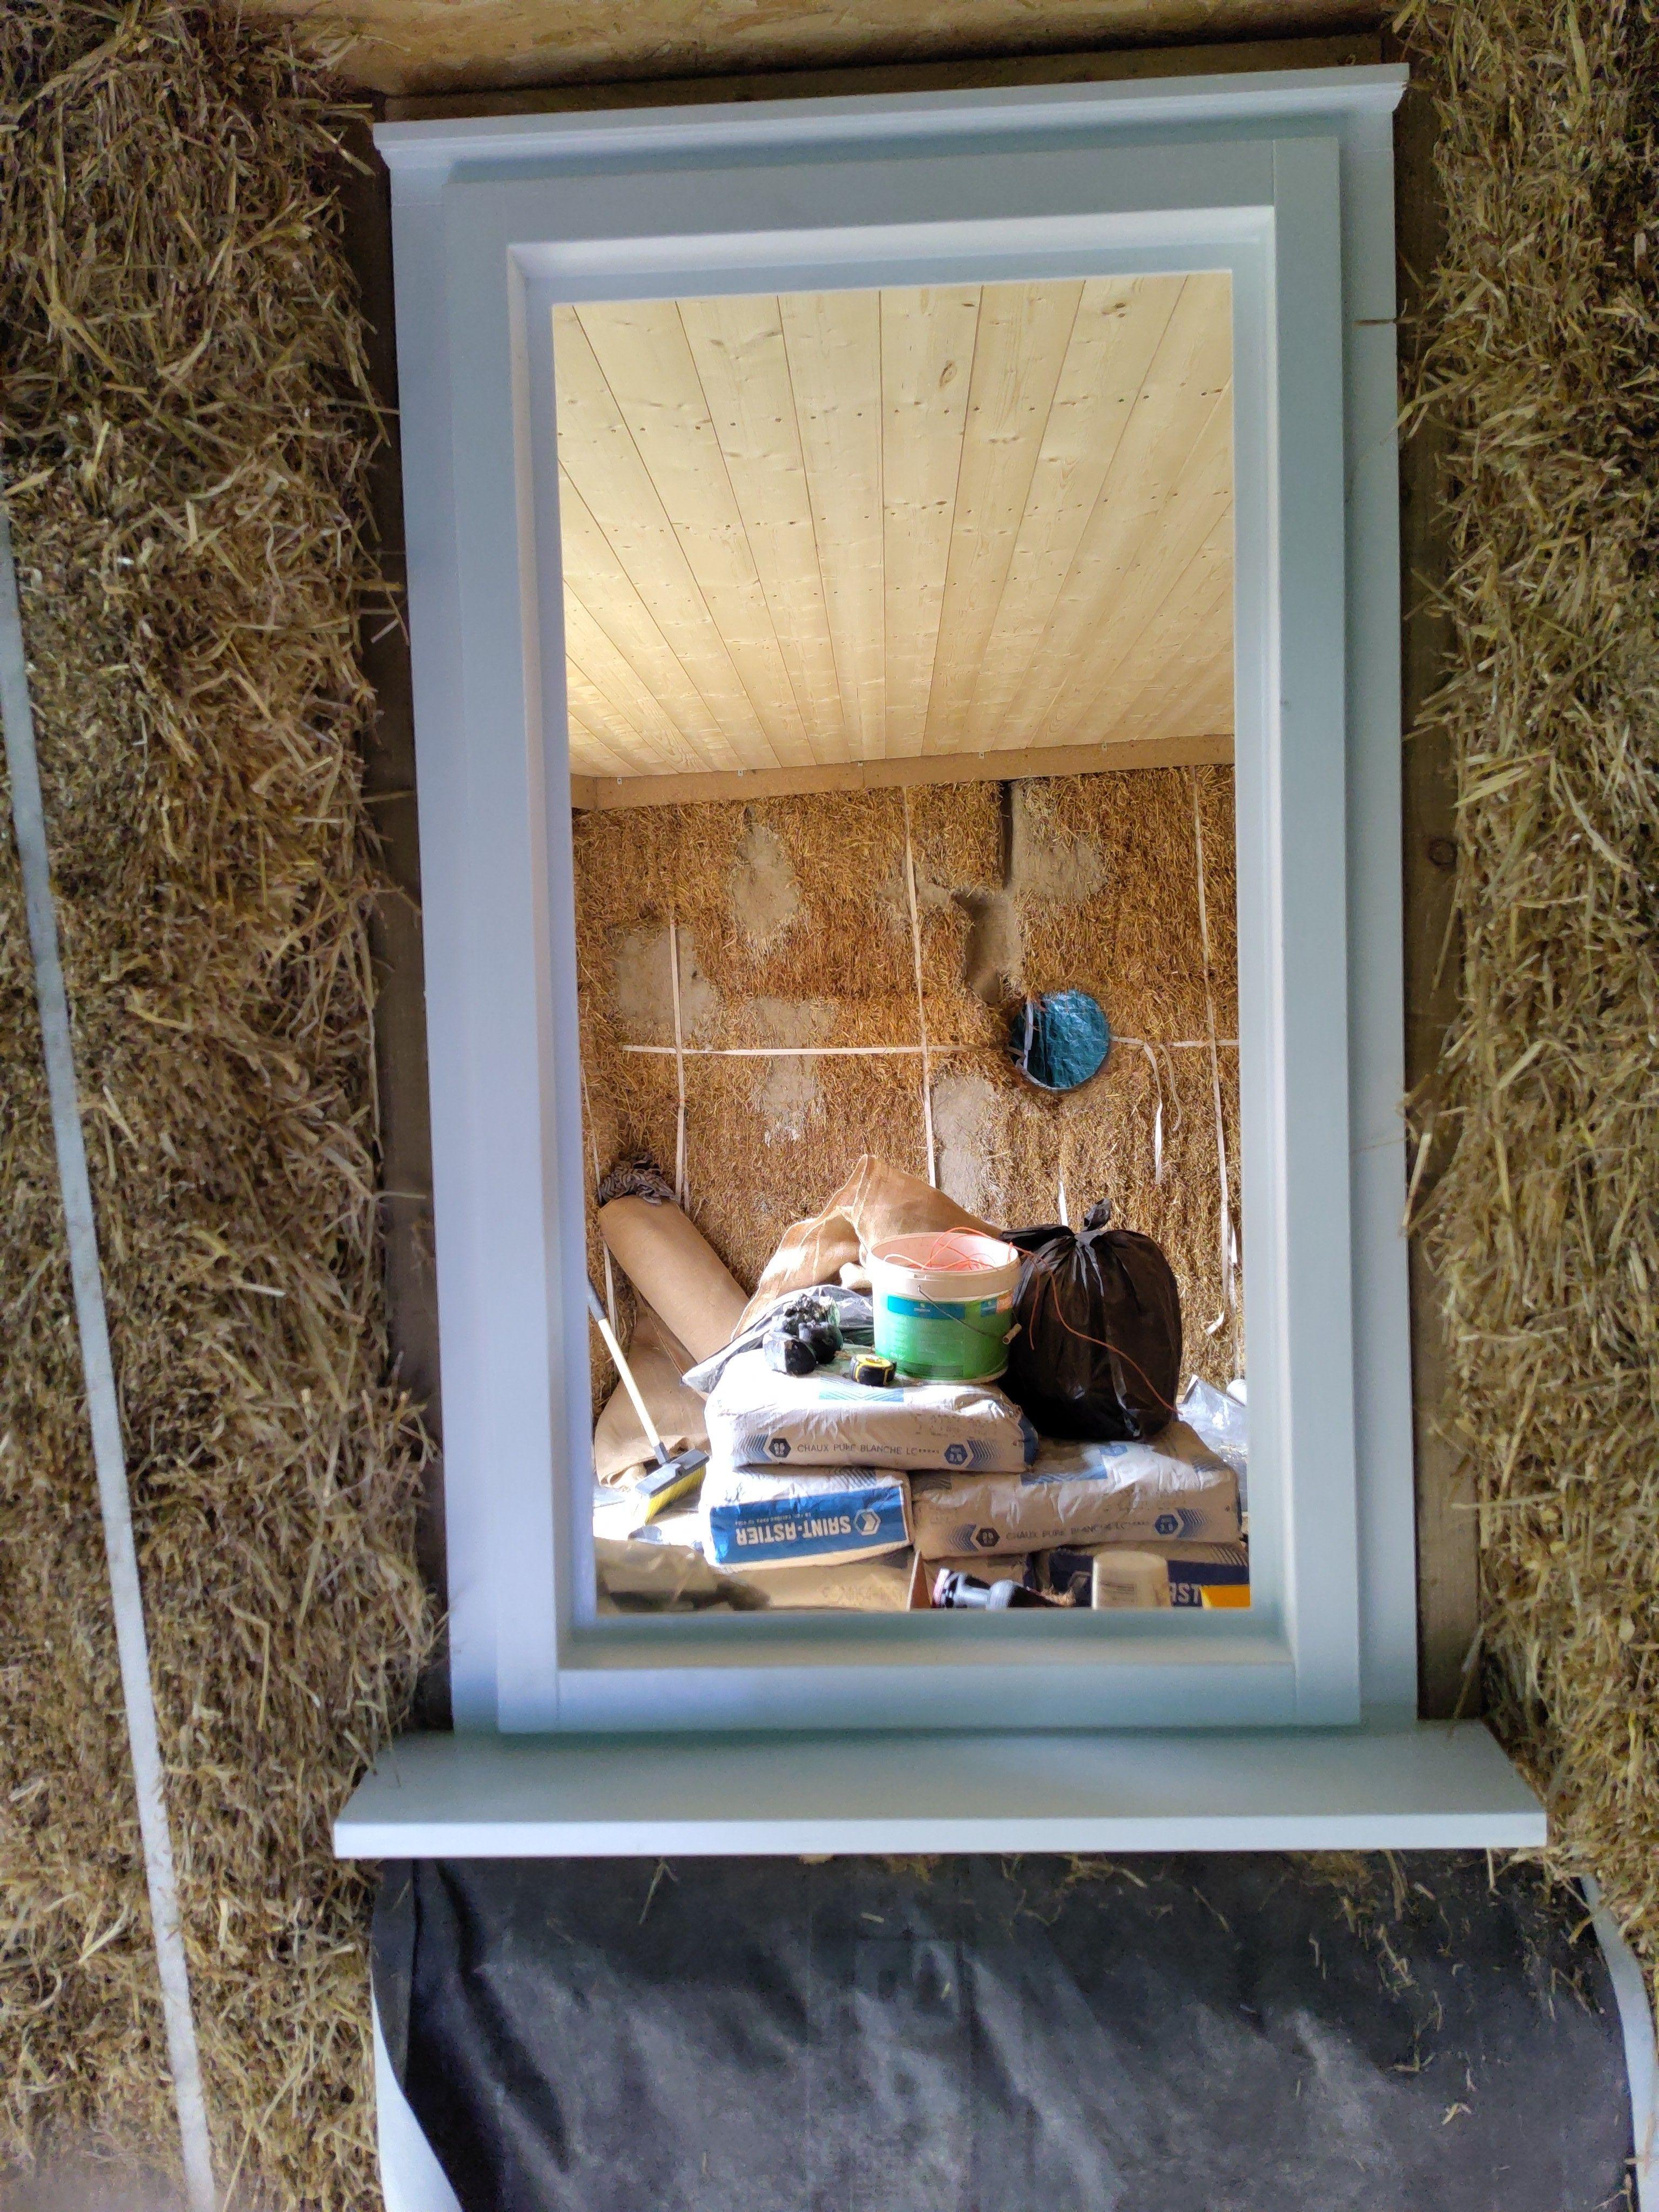
OK, basecoat mostly on inside - it's just a few little bits around the windows now. Bag number six ran out slightly before I was finished. Onto the outside next :D. Also got the window board on for the square window, and clad the subframe There's a 20mm lip so the render can come up flush to it, and some butyl tape around the perimeter of the window for airtightness. Also a very slight bit of wedge-shaped gapping because nothing I do seems to be quite square ^^. I'll just fill that, I suppose. The windowboard got a bit involved. There's about 60mm between it and the straw bales underneath - it's level with the inside of the window subframe. It's also quite flimsy 18mm furnitureboard, and really wouldn't have been happy with the bales flexing underneath it. The top of the bales needed rendering anyway, for fireproofing, but I wasn't convinced that'd be enough to support it either. I ended up putting 5x hazel stakes down through the bales and cutting them off at ~50mm below the level of the windowboard, then putting a basecoat of render down on top of the bales to be more-or-less flush with the stakes. Then I put some 2x2 and 2x6 down on top of that, screwed to the subframe, to each other, and also to the hazel. I'd run out of 2x8 ^^. There's a small gap between the render and the wood; I guess I can squash another coat into there once the existing has dried. Windowboard on top of the subframe, 2x2, and 2x6, glued and nailed to all three. It's feeling pretty sturdy; final job will be to go round it with the router(?) to get a nice curved form instead of the current baby-lethal corners. I plan on doing that after I've finished all the plastering, so I don't accidentally make it too short ^^. 14 bags of lime left. The cement mixer was absolutely worth the money.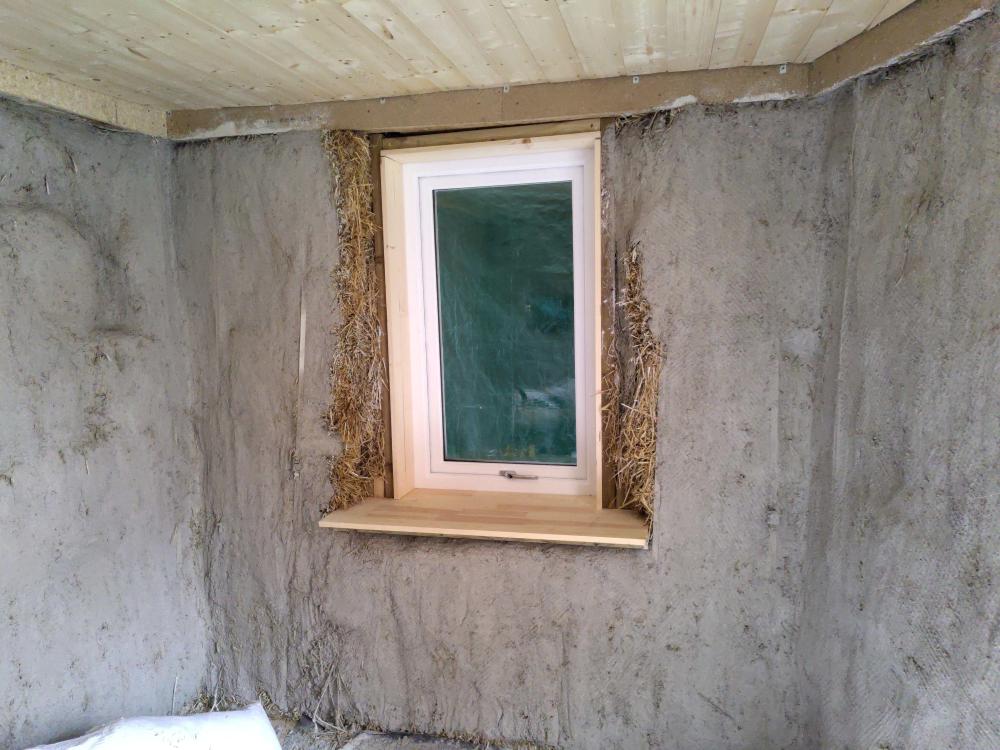
-
More foundation fun - straw bale garden room on clay
Nick Thomas replied to Nick Thomas's topic in Foundations
Rendering / plastering continues. Currently settled on a 2:1 sand:nhl3.5 mix, after going as high as 1.5:1 to start - but I don't think it's necessary to be that lime-rich. Today I finally managed to mix up some successful long-straw material too, which is *great* for dubbing out. Most of it went into straightening the corner on the right hand side. I'm just taking handfuls of the stuff and rubbing it onto the walls at this stage. I mixed the first bag and a half with a paddle mixer; that was enough to convince me to go out and get a cement mixer, which has done the second bag and a half. It does mean I can't have my table saw any time soon, so I'm going again with the rendered sill. The mix isn't sticky enough to hang on upside down; I'm planning to try a mix that's cut 50:50 with lime putty, which should help. If not, I guess I'll have to get some bendy ply and make a sleeve for the hole to give it some support ^^. Seventeen bags left. Oh, and corners are an absolute nightmare. The render mesh would help, but is slated to be floated into the next coat - which I'm planning to have go floor to ceiling. Right now I'm just coming to flush with the roofplate.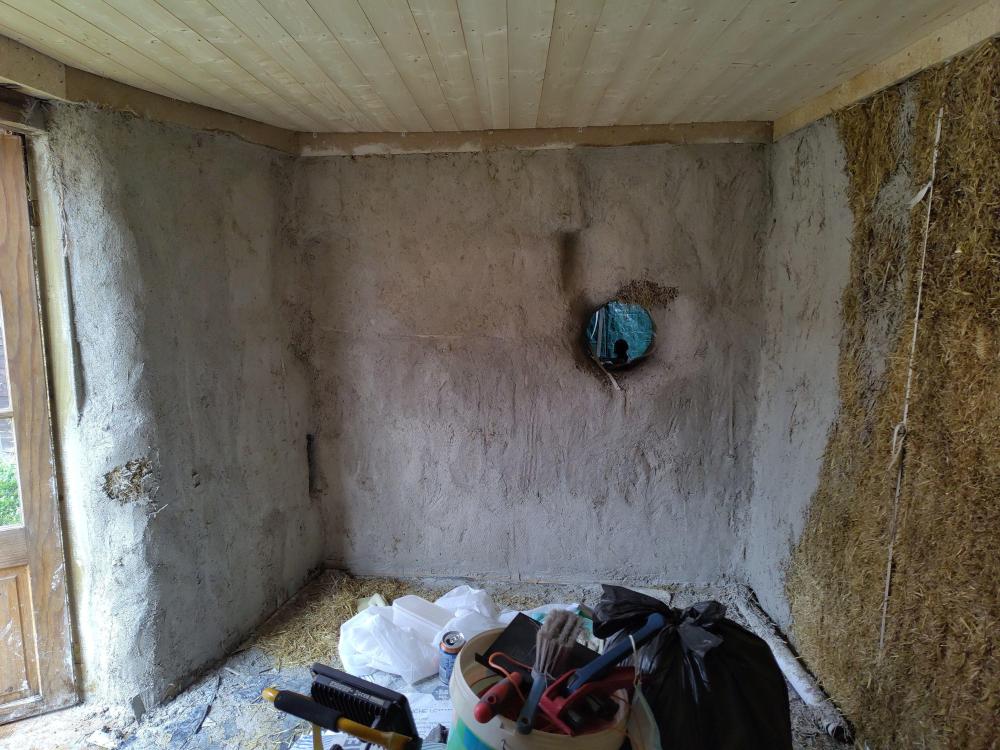
-
More foundation fun - straw bale garden room on clay
Nick Thomas replied to Nick Thomas's topic in Foundations
Hmmm. I know nothing about electronics, honestly, but reading https://en.wikipedia.org/wiki/Mineral-insulated_copper-clad_cable#Properties_and_comparison_with_other_wiring_systems makes me think I'd want it in conduit too. I'm building regs exempt for the most part, but part P still applies, of course. -
More foundation fun - straw bale garden room on clay
Nick Thomas replied to Nick Thomas's topic in Foundations
I did accidentally turn it into a wedding venue the other day...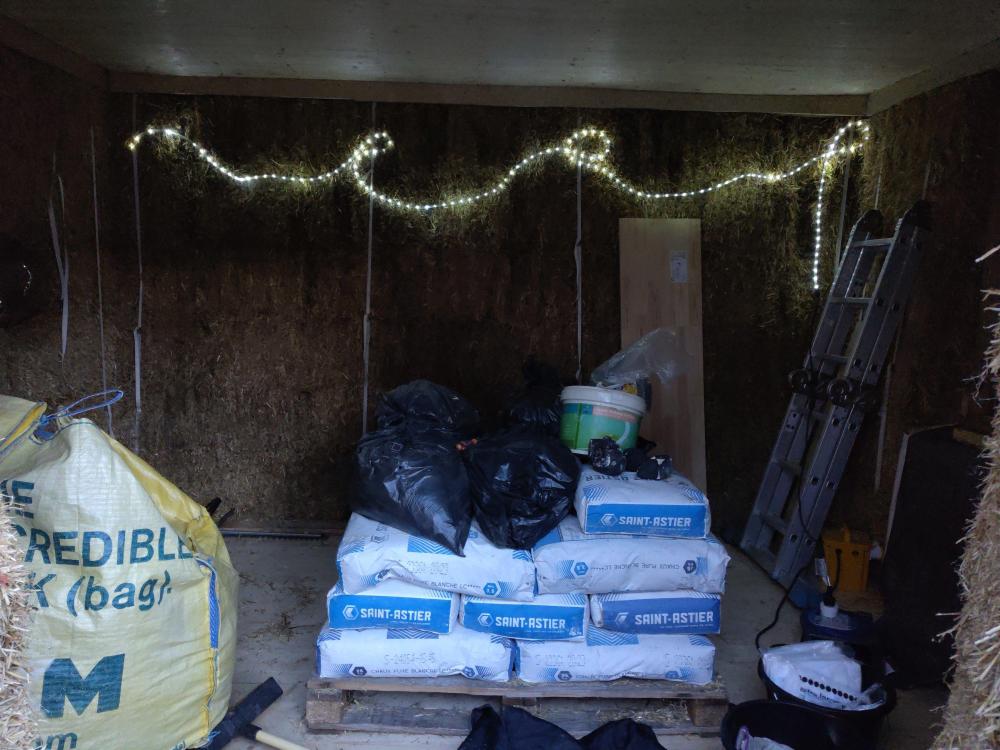
-
More foundation fun - straw bale garden room on clay
Nick Thomas replied to Nick Thomas's topic in Foundations
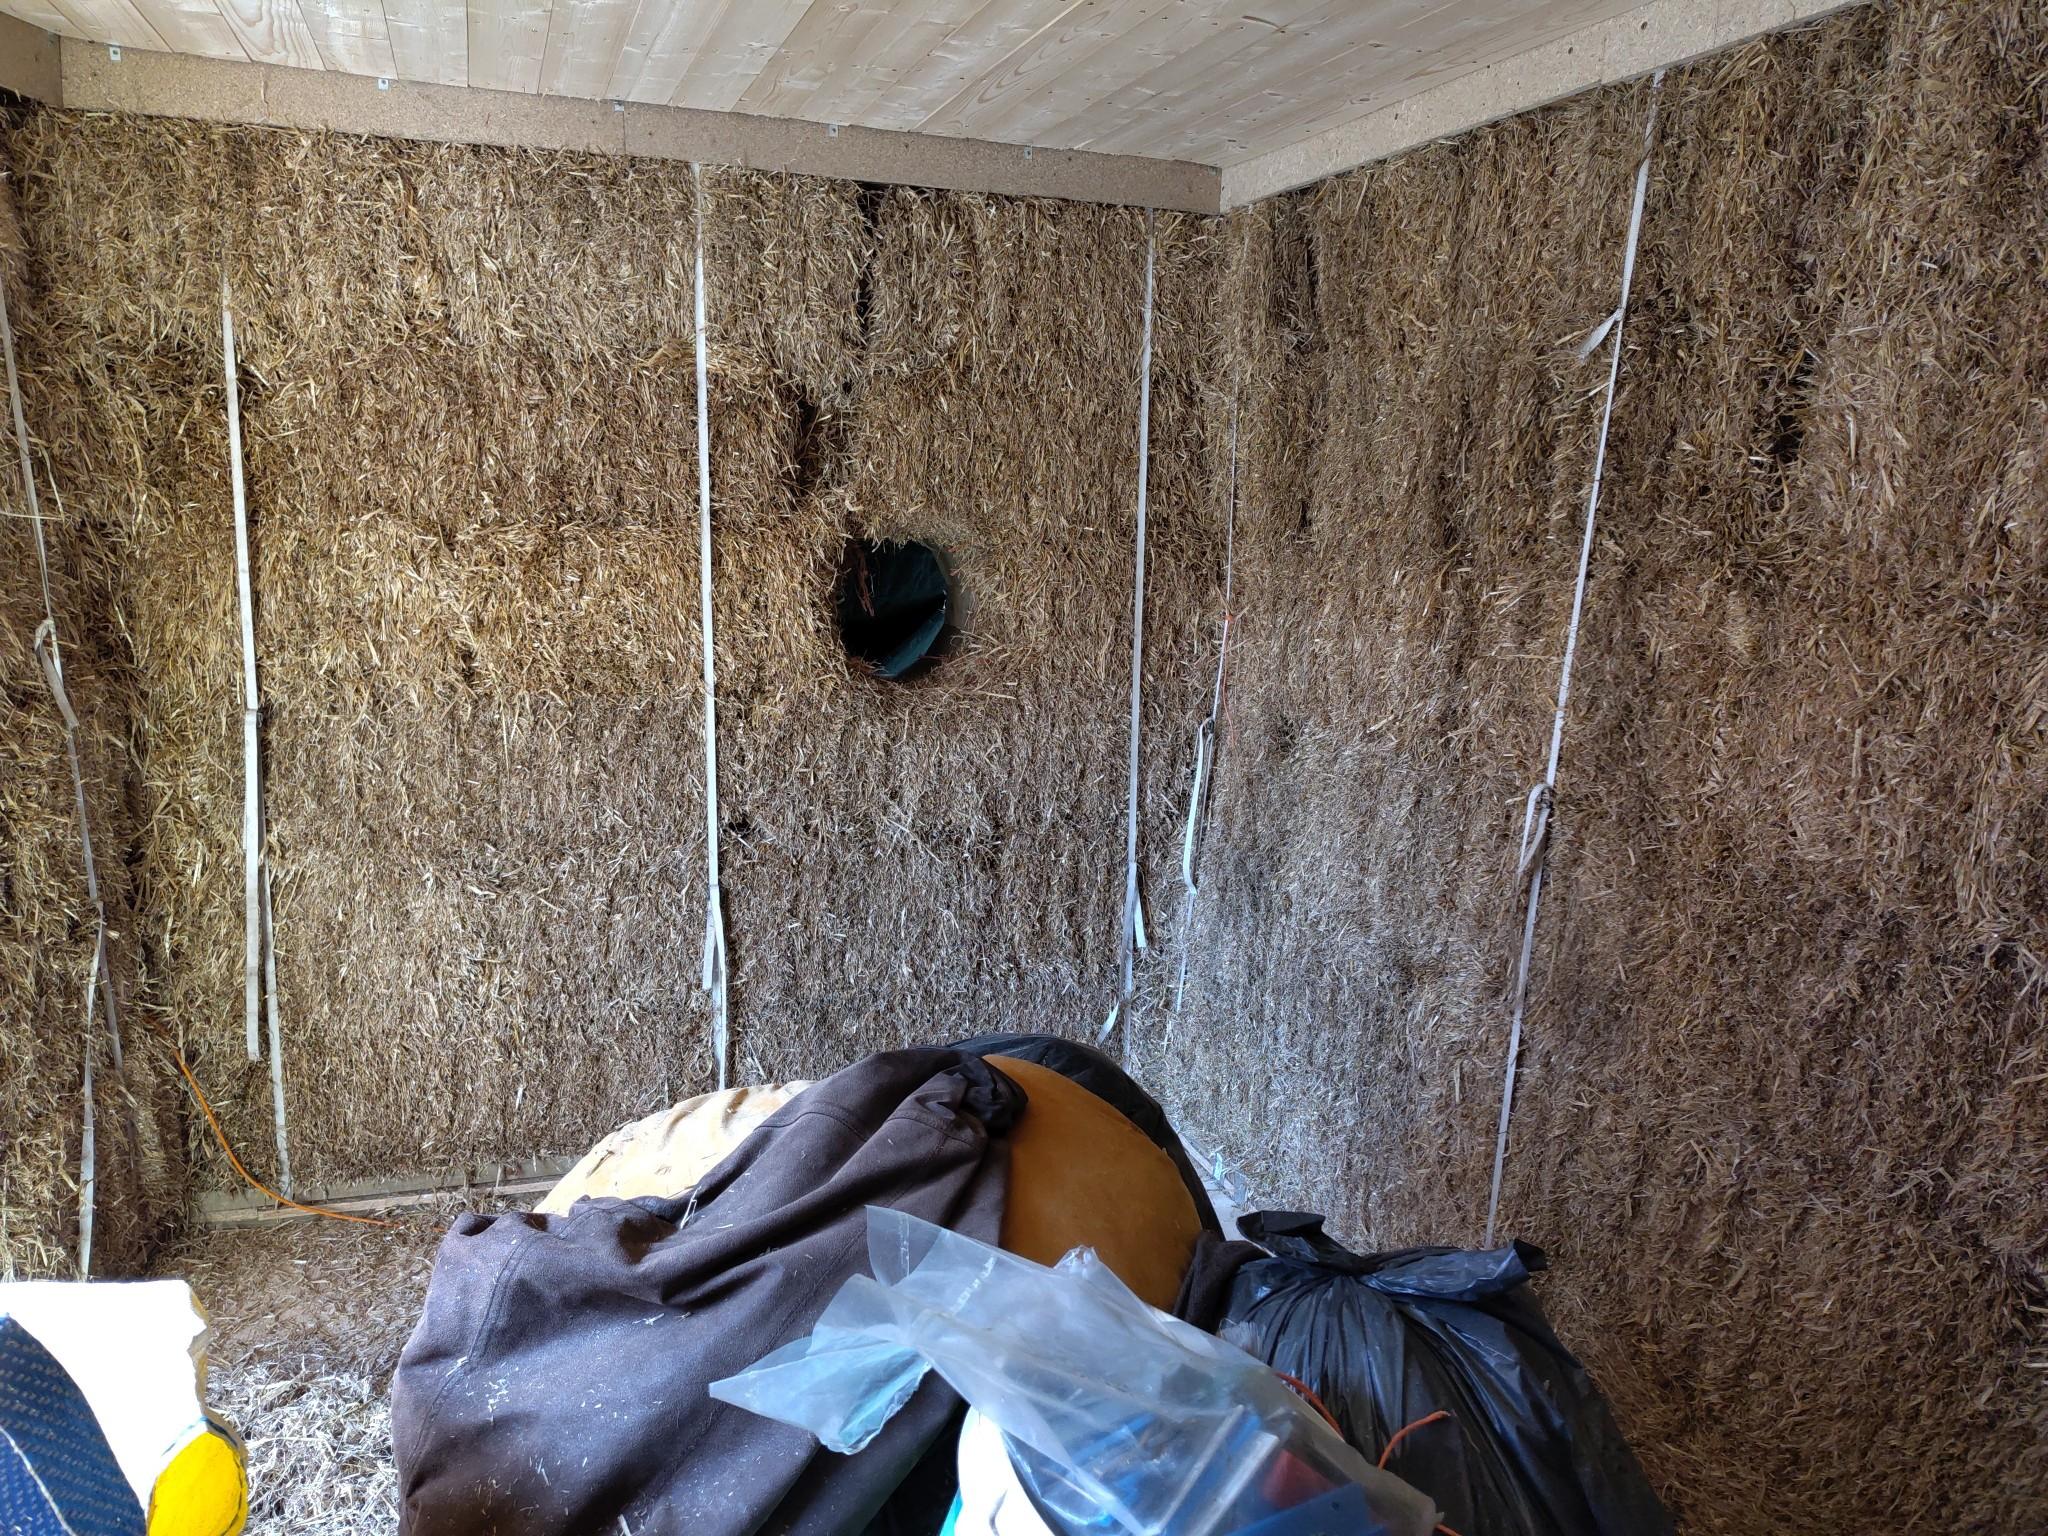
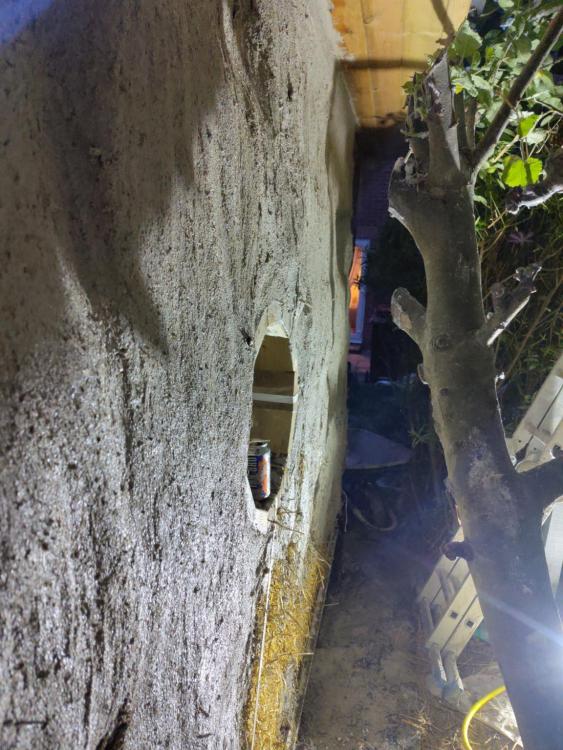
There is a plan, but it's pretty minimal. I'll have power, network, and water come in through a couple of conduits along the bottom-left of the wall as seen in the pic above (there's a *cough* intentional *cough* gap two bales up where the front wall meets the side wall) but terminate it all near that corner - I don't plan to run any cables along the walls. I'm thinking very slim units along that wall, with a miniature sink in front of the circular window. Waste out the same way through a third conduit. Sockets, and a wifi extender plugged into the network cable, will be hidden in the closest unit, where it enters. I don't want a big light or anything like that - it's a small room and the ceiling is pretty low. Not keen on fixed wall lights either. I figure I can always plug in a lamp or scatter some battery-powered lighting around. To start, the electric provision is just an extension cable plugged into the garage, but I'll get it upgraded to a proper cable off the consumer unit at some point. I don't think I'll ever need more than four sockets, but it's always possible I might add more solar panels to the garden room's roof, so I'll size for that. In general, you can dig out channels in the bales for conduits, and run cables or pipes through them - you just render over the conduit to make it invisible. It's such a tiny room though, I don't see a lot of benefit to it. -
More foundation fun - straw bale garden room on clay
Nick Thomas replied to Nick Thomas's topic in Foundations
Plastering / rendering started in earnest today. My arms 😀 (Having another go at the render sill, for better or worse). That's 1/20 bags on the wall. It's already feeling like I might be a bit short of material ^^. I used coconut fibre on this batch for reinforcement; it seemed fine, but I'm not convinced I put enough in. More in the next batch.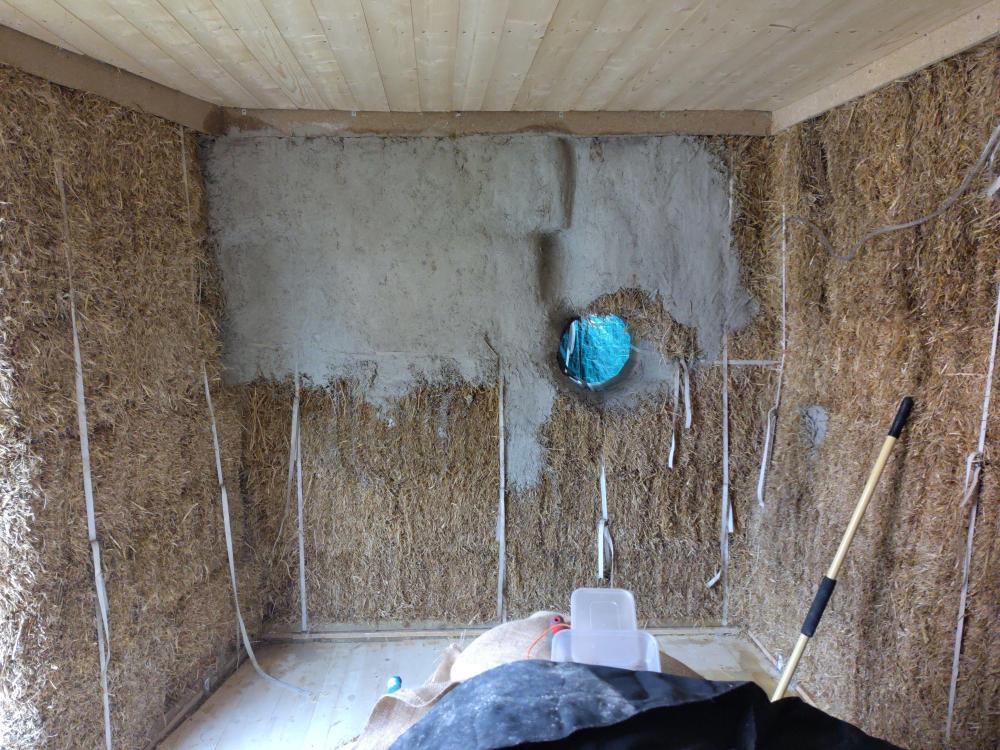
-
More foundation fun - straw bale garden room on clay
Nick Thomas replied to Nick Thomas's topic in Foundations
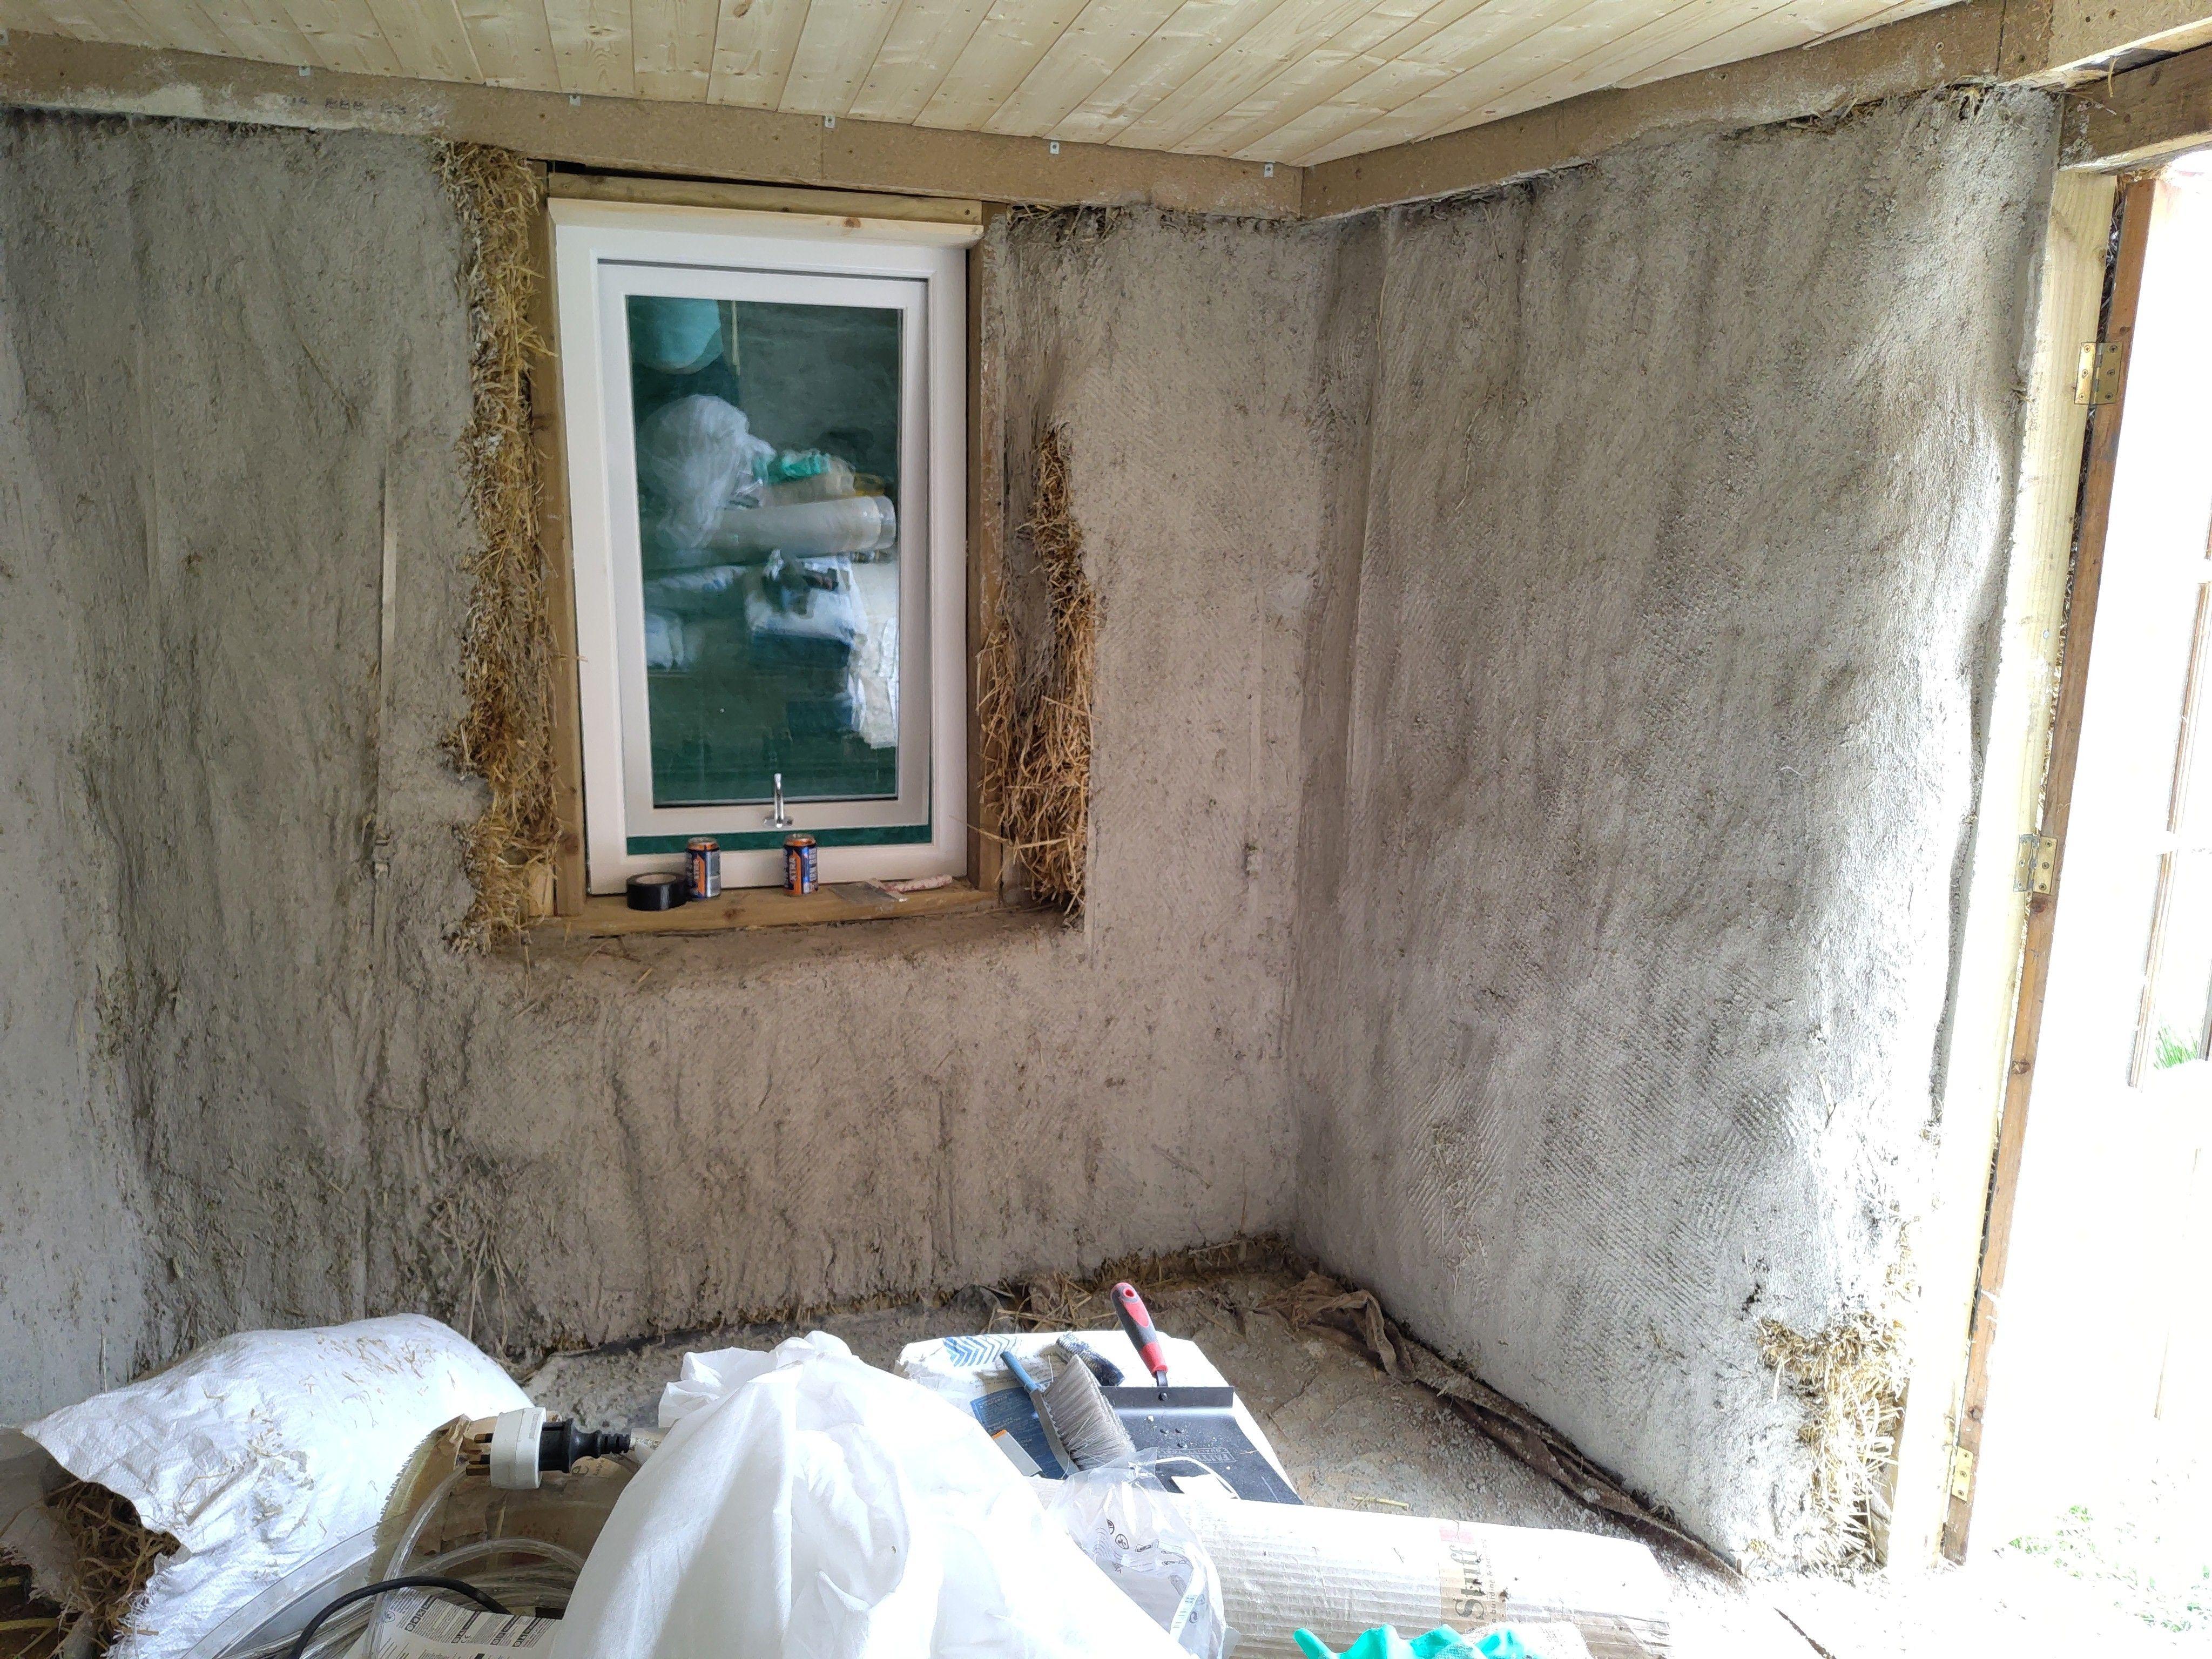
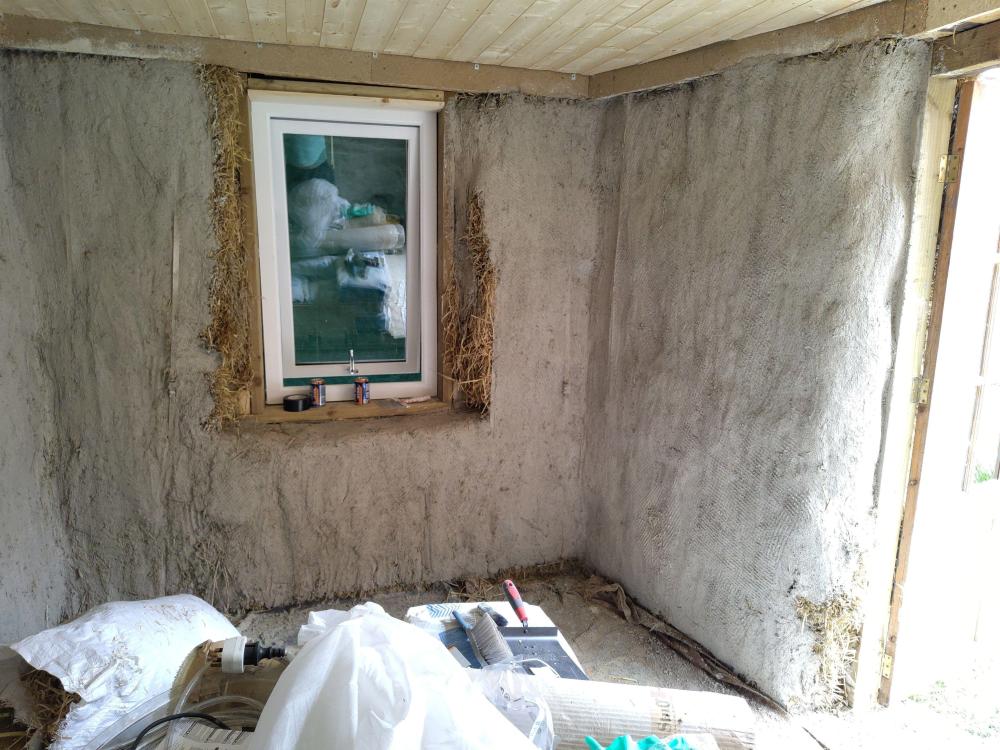
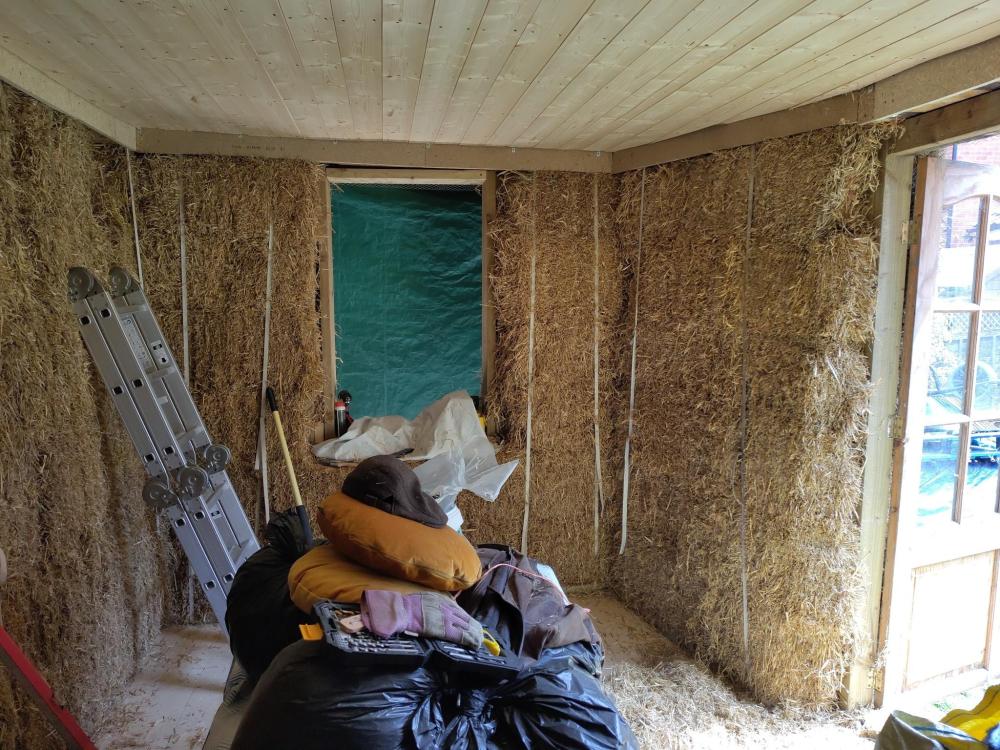
Fitted me a window \o/ (^ is from before I fitted the double glazing. If you peer closely you can see some of my experiments in dubbing-out hollows in the wall, too) Even with all the gappy timber around it, the noise reduction is very noticeable. I guess i'll fill those gaps with expanding foam 🤷♂️ then put in the internal sill and some window board, and build up the reveals ready to render. The window came bare, and I had designs on oiling it, but cheaped out on pine and it turned out to be engineered wood - with lots of finger joints - so I gave in and painted it. White will hopefully blend into the walls once they're limewashed, and if not, it'll be easy to paint another colour. My wife suggested fire engine red...? For the round window, I experimented a bit with lime rendering the inside of the void, but I'm not convinced it's strong enough to be the finish. So I might need to replace the 20cm timber ring with a 45cm one, to give it a wooden lining. To make that the same way I made the 20cm one, I'll need a table saw *sigh*.

-
More foundation fun - straw bale garden room on clay
Nick Thomas replied to Nick Thomas's topic in Foundations
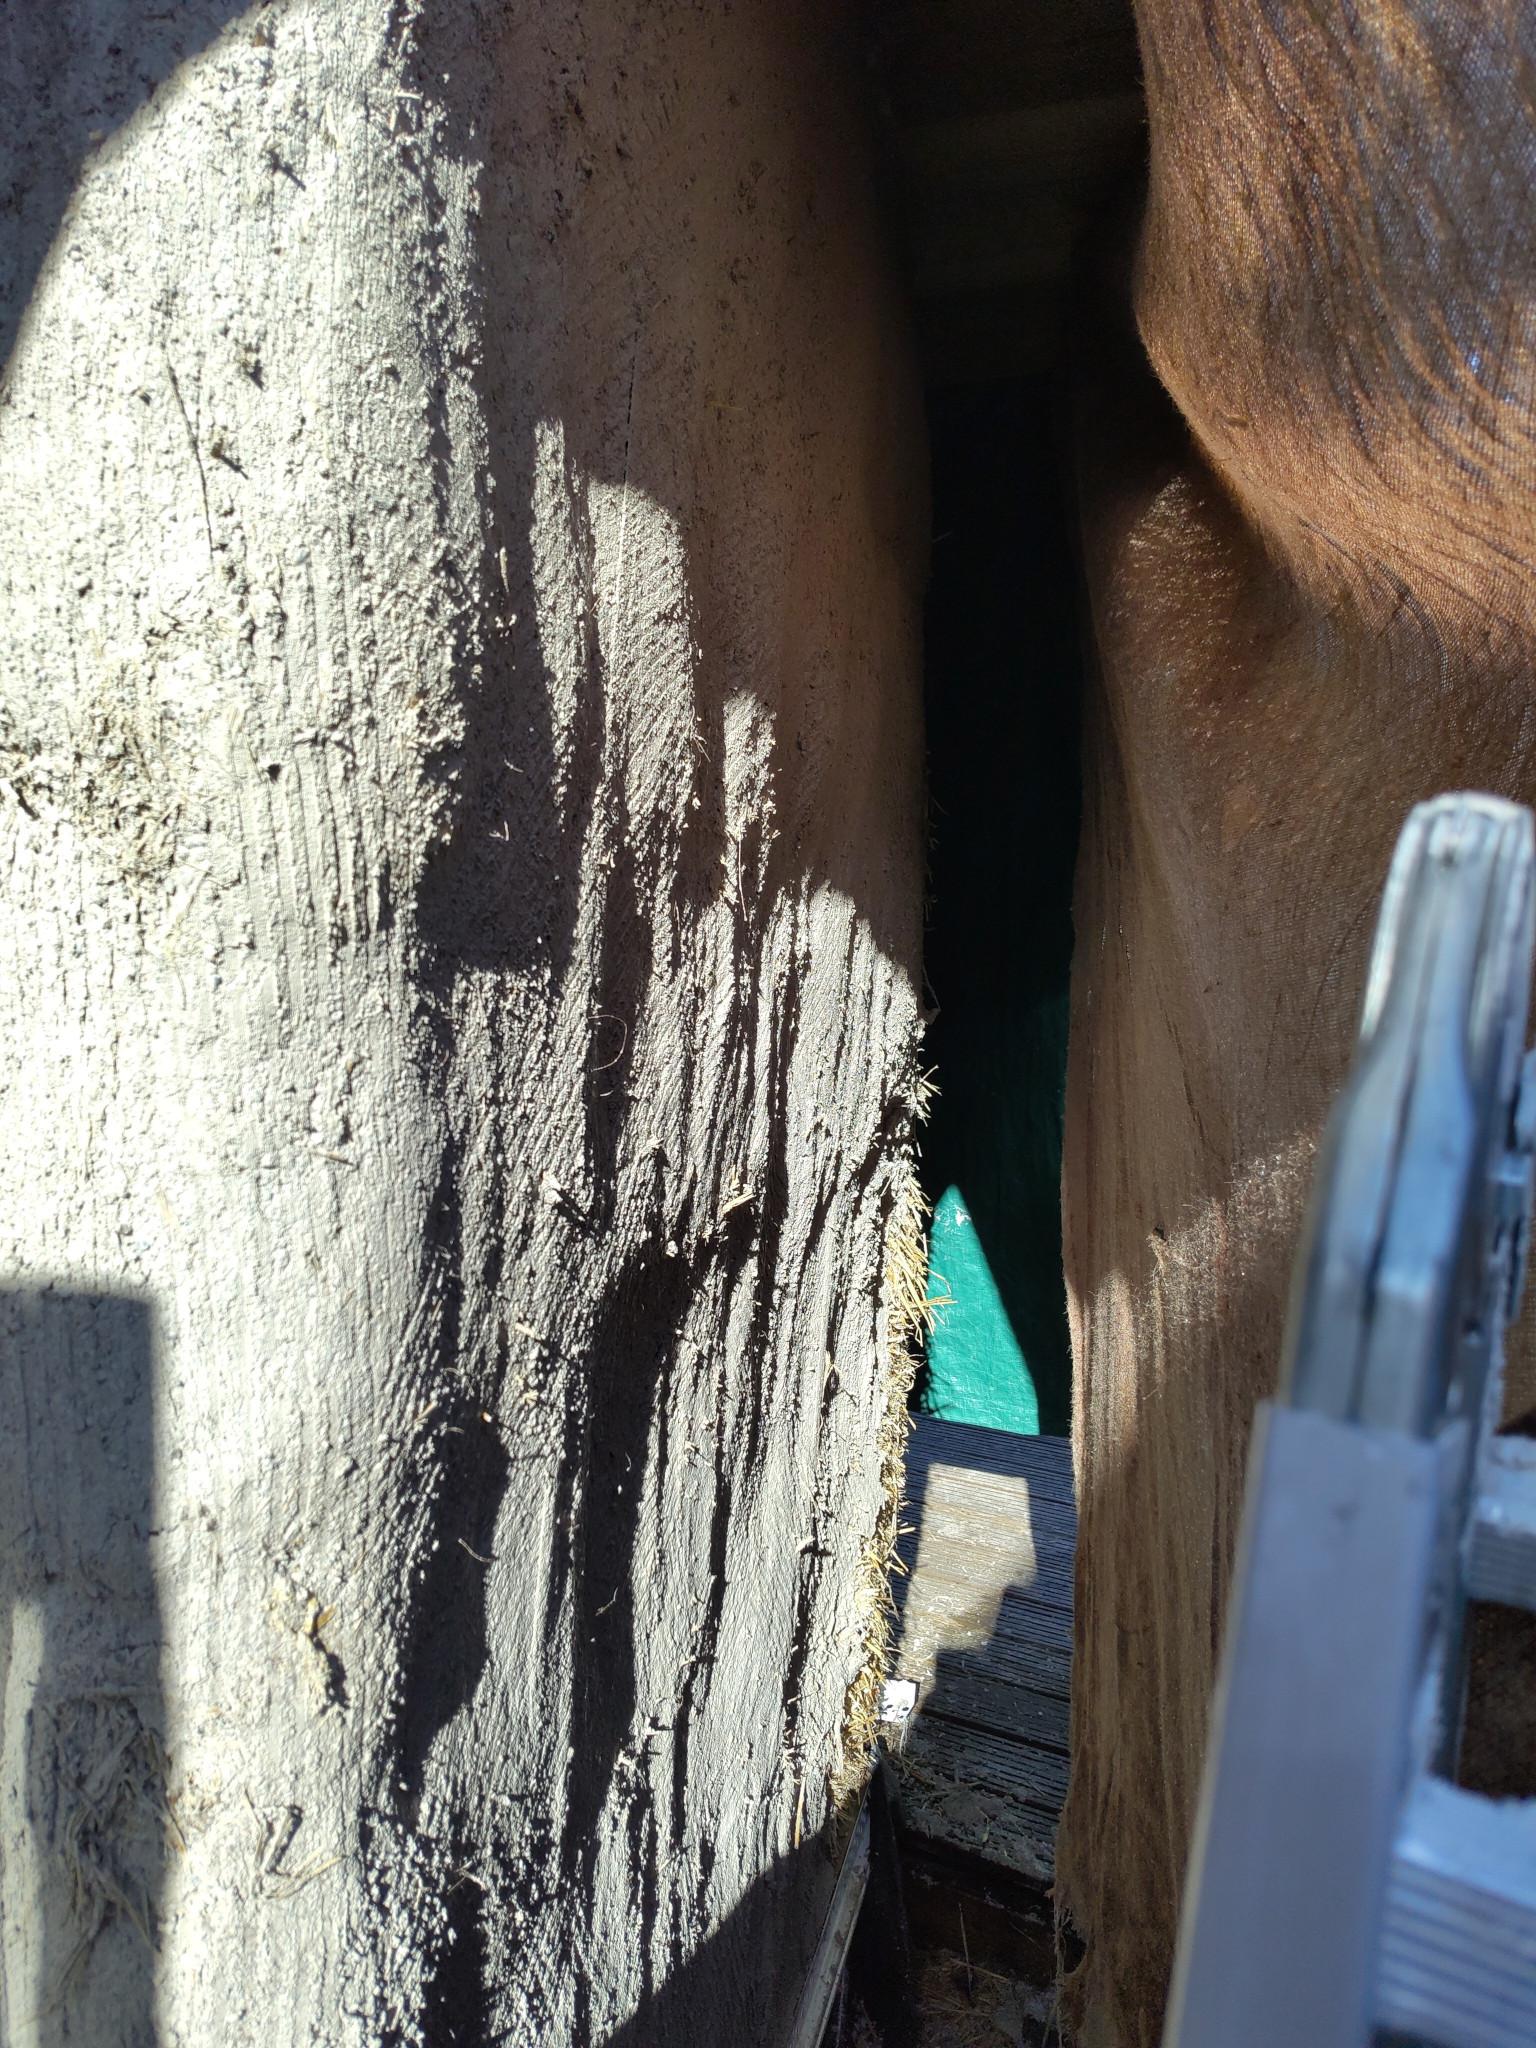
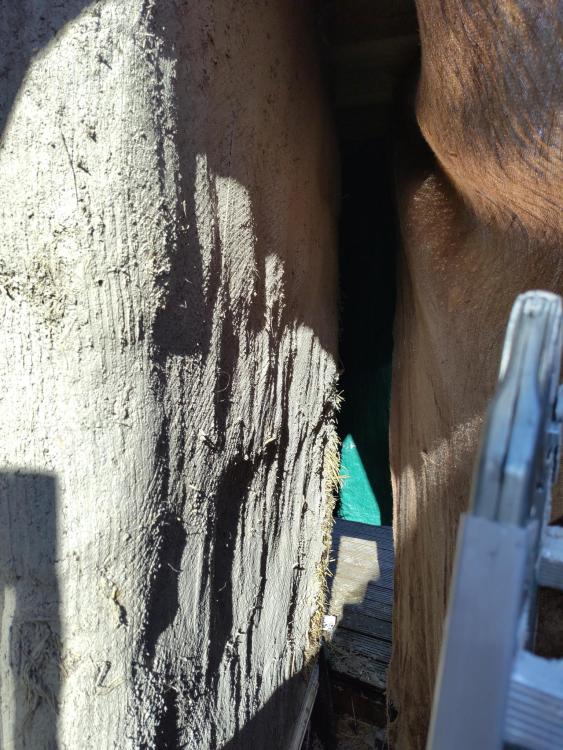
Inside (mostly) trimmed. I managed to break the blade of the alligator saw on a joist hanger, and cut through the extension cable with the hedge trimmer, so a good day's work ^^. The confined space made it a fairly nasty job - ear defenders and face mask, at minimum. The wall with the circular window in it is starting to look a bit unfortunate; the bale above ends right at the corner of the opening. Will reevaluate once the wooden frame is fixed in place, as that might give it some support - worst case I have to fit a lintel in there somehow, I guess. The lean on the back wall's corner is also very visible now. Not much I can do about it given the lack of access to the other side though. Call it character.
-
What to do with Excess/Cheap Power?
Nick Thomas replied to puntloos's topic in General Alternative Energy Issues
I'm not up on the logistics of it all, but export is measured at the meter in your house, not out in the grid somewhere, so I'd imagine the scope for losses is pretty minimal. Going through the inverter has an efficiency cost, but that's small - and paid whether you're using it locally or exporting it. Battery storage does imply some loss - I think the peak export rate is slightly more than the regular import rate to compensate, on flux? These kinds of adjustments to the overall picture are small, though, whereas the CoP idea was giving an impression of a very large adjustment. I do treat the grid as interseasonal storage, but it doesn't really have any of it, so doing this doesn't contribute to, say, burning less gas in winter in the same way real interseasonal storage would. If you need cooling, absolutely use it for cooling, though ^^. -
More foundation fun - straw bale garden room on clay
Nick Thomas replied to Nick Thomas's topic in Foundations
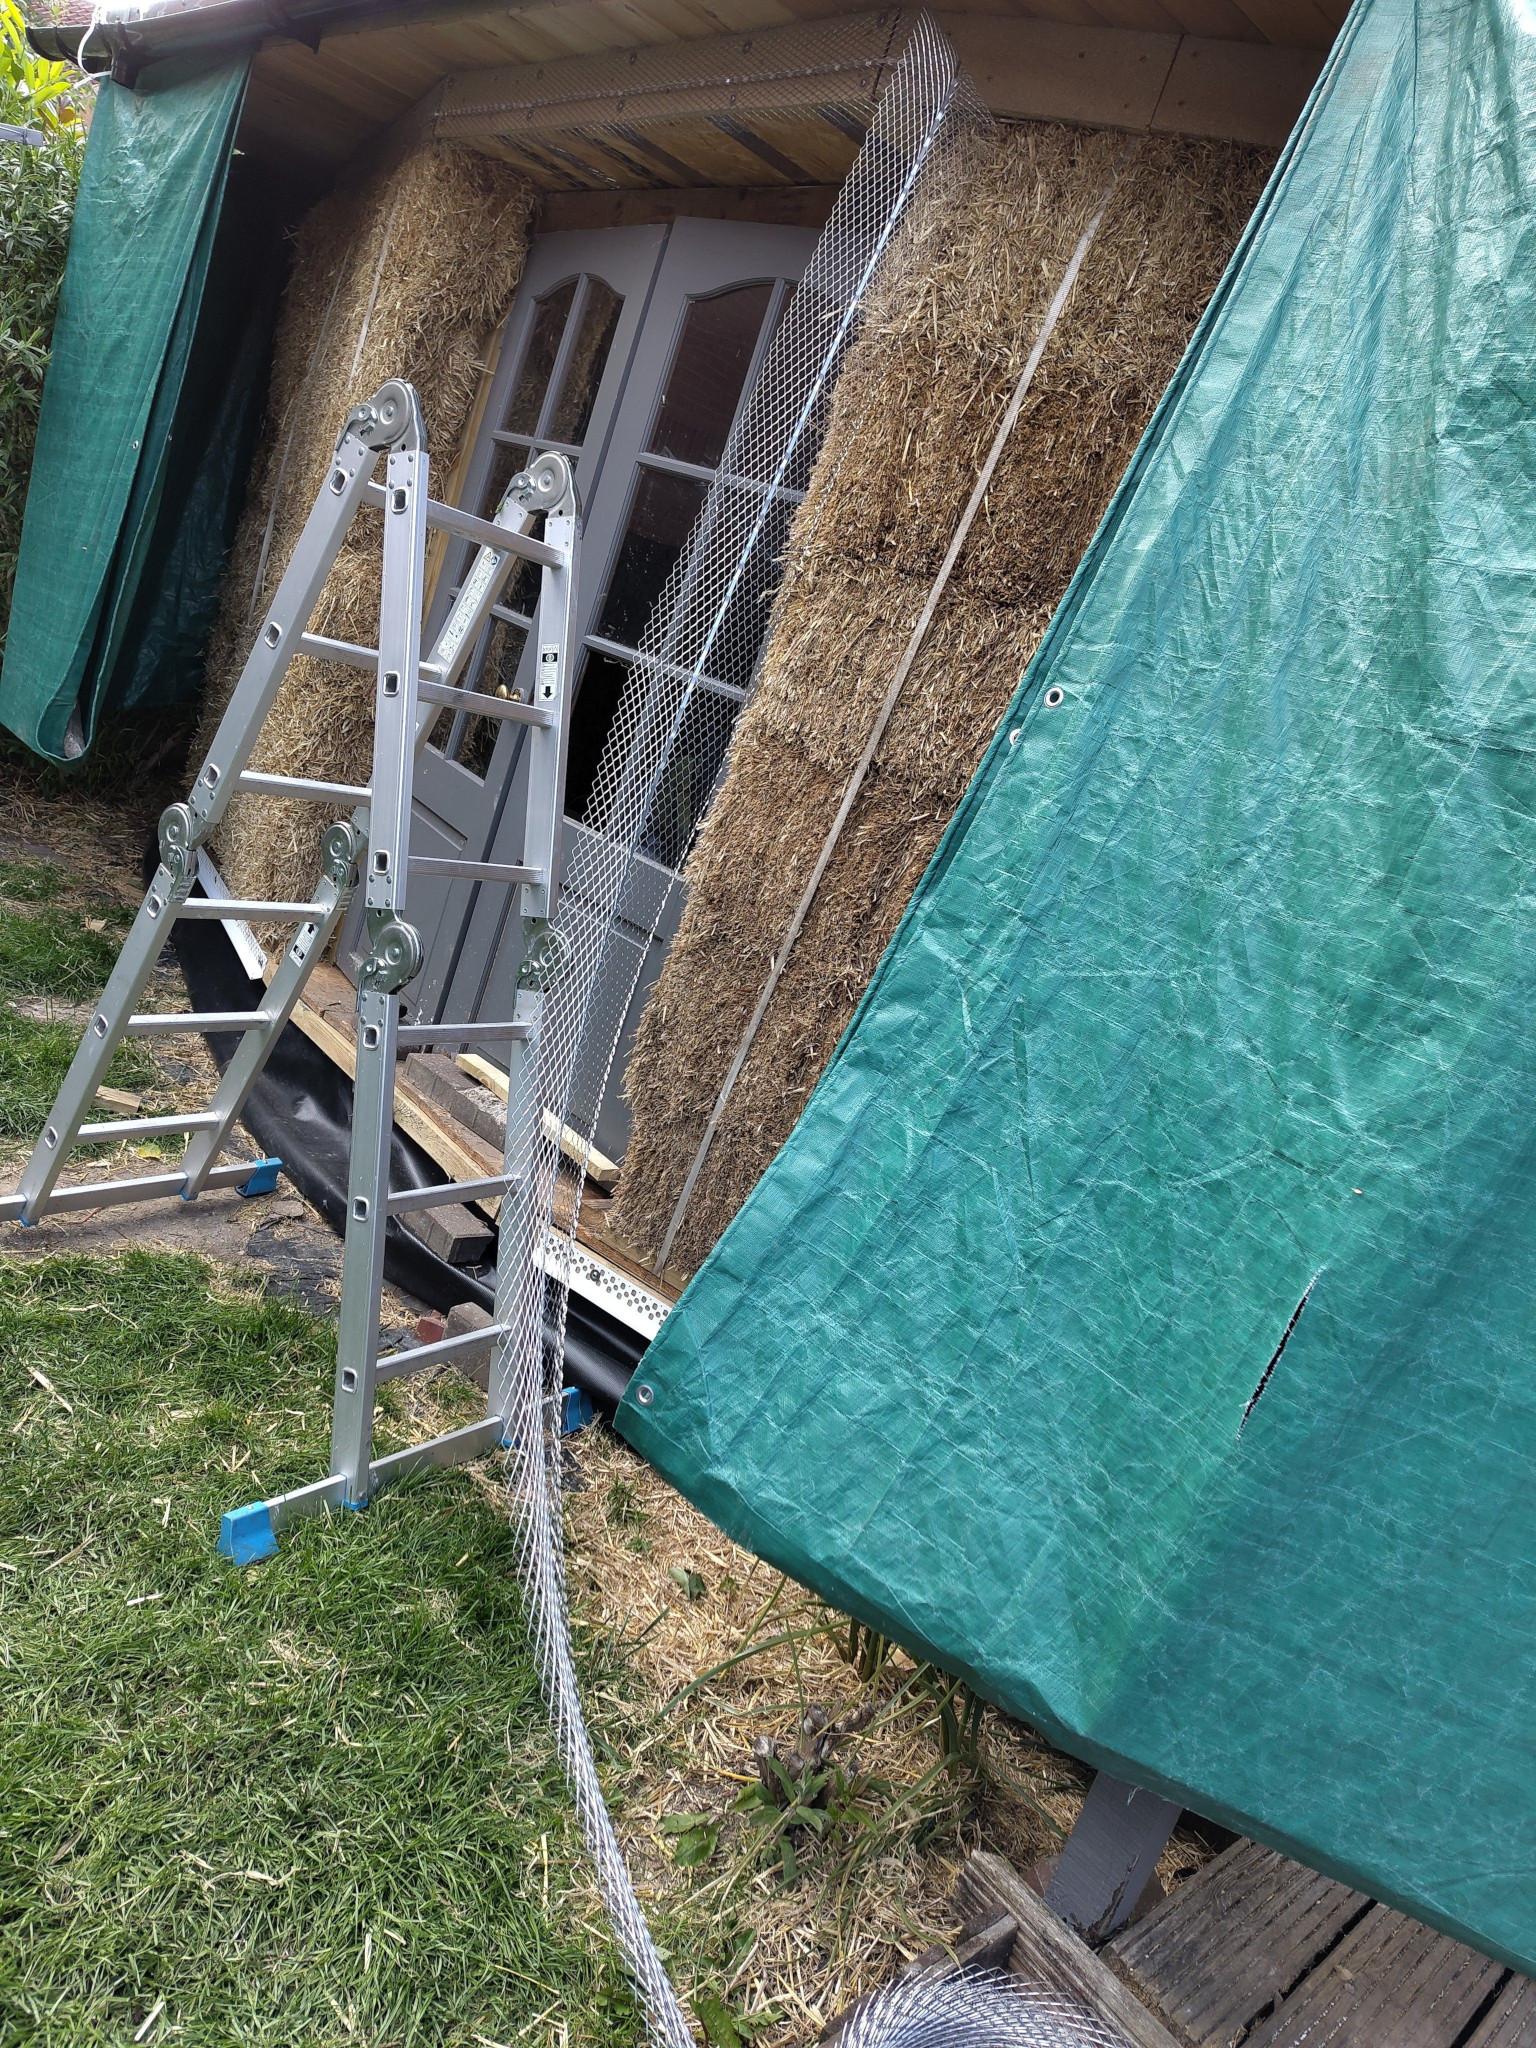
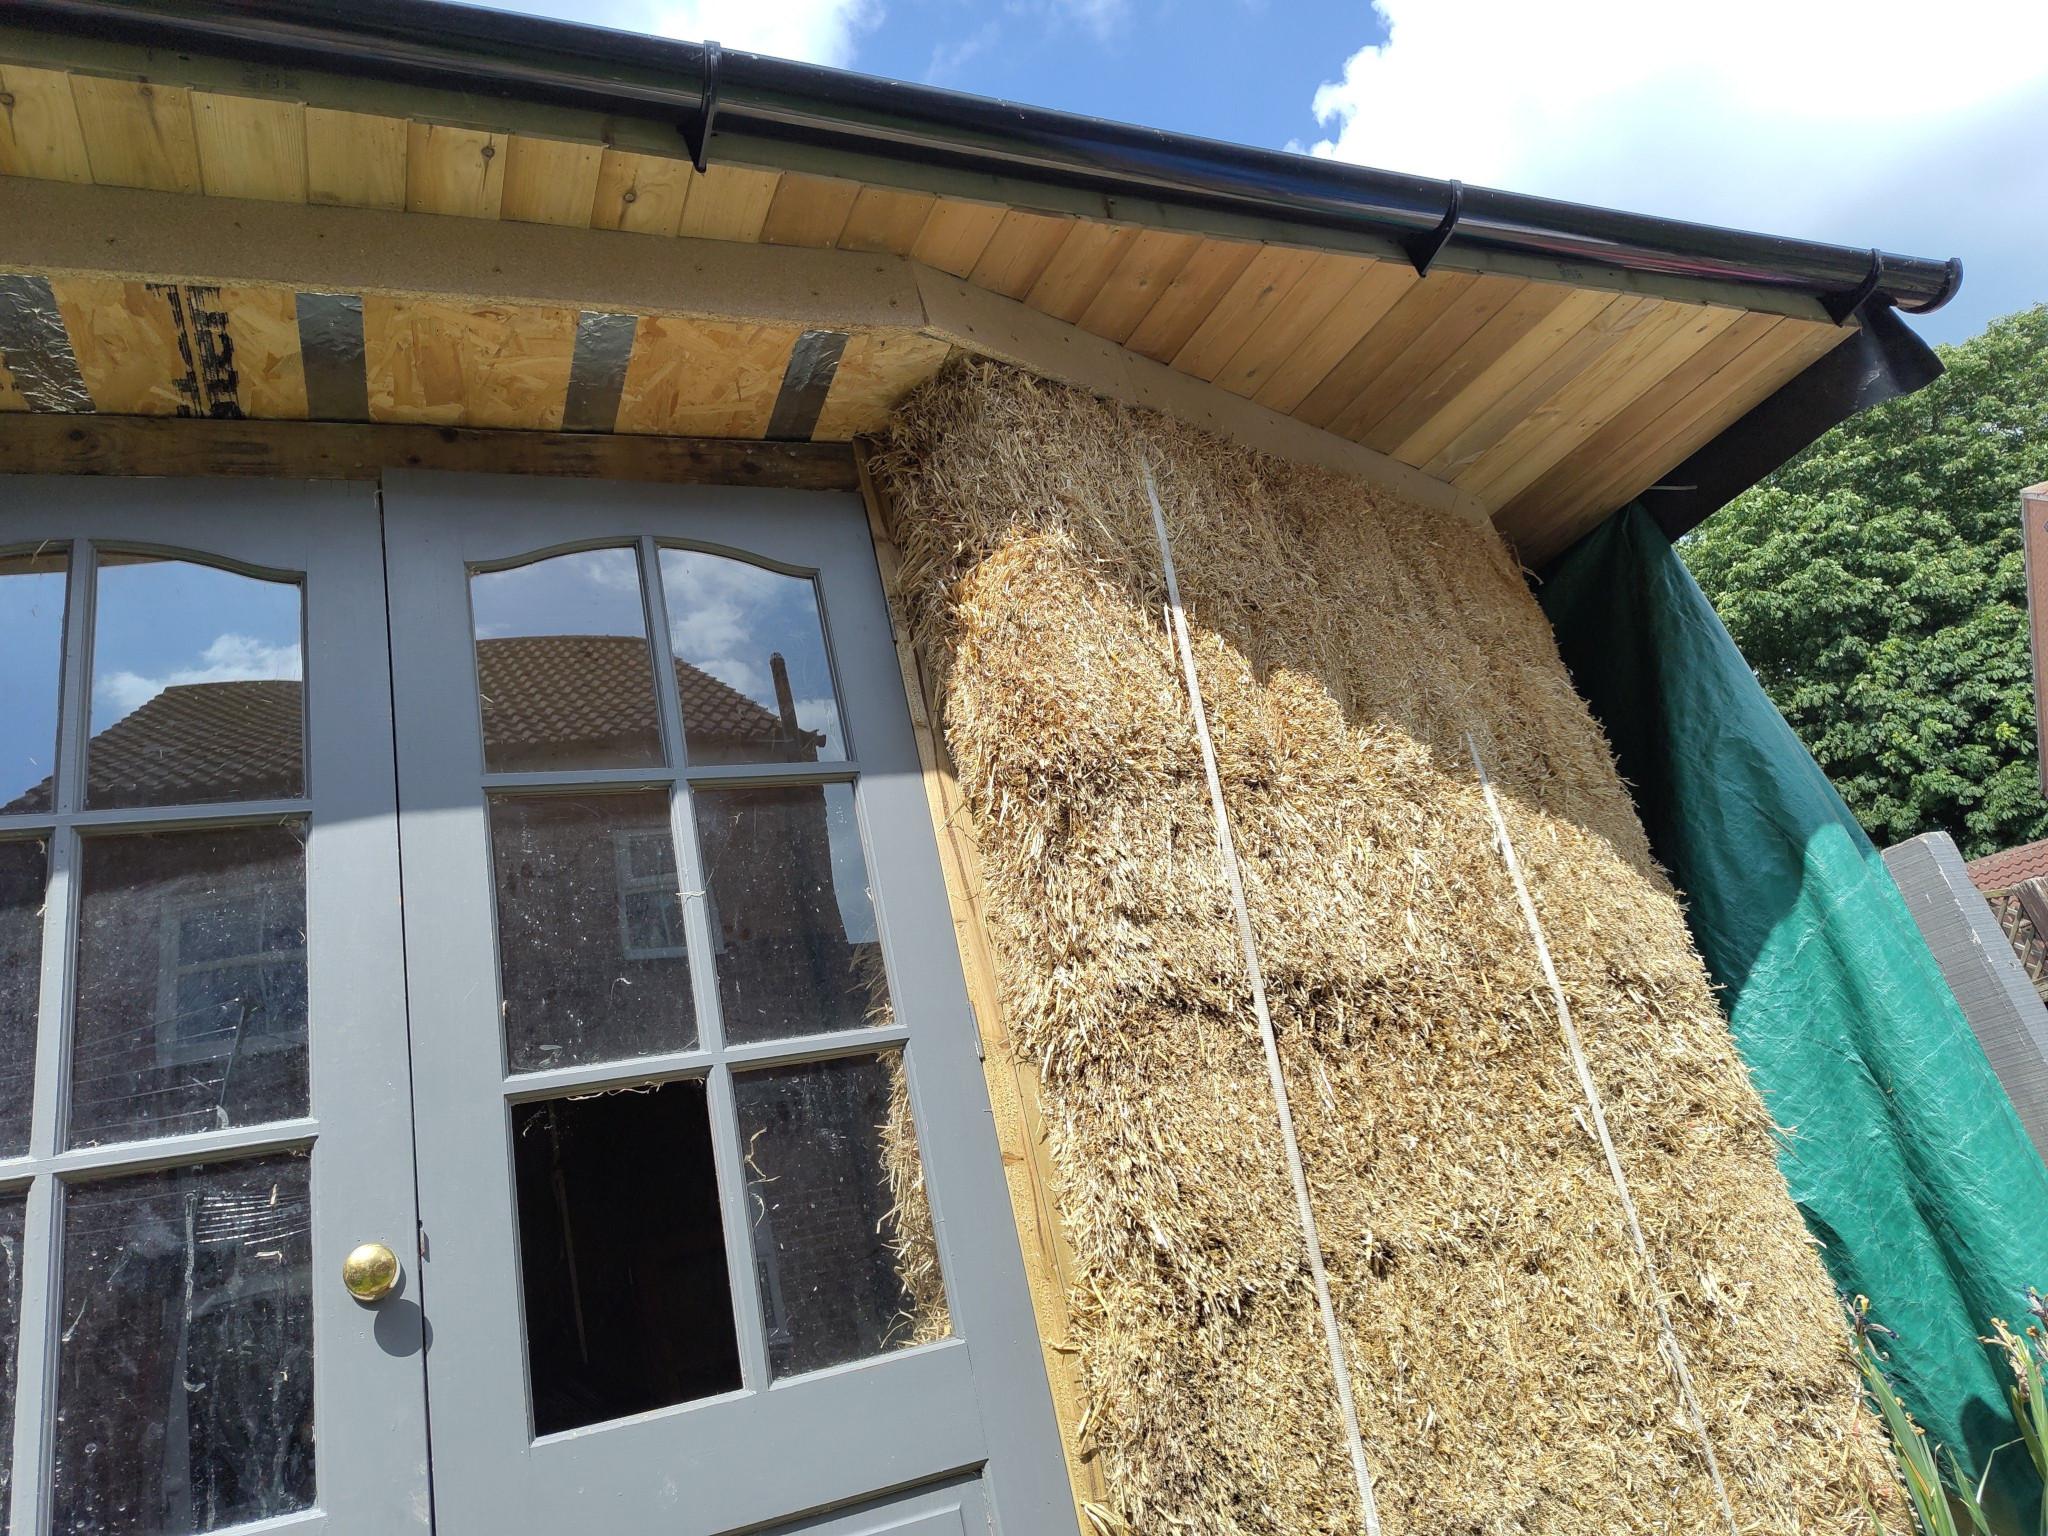
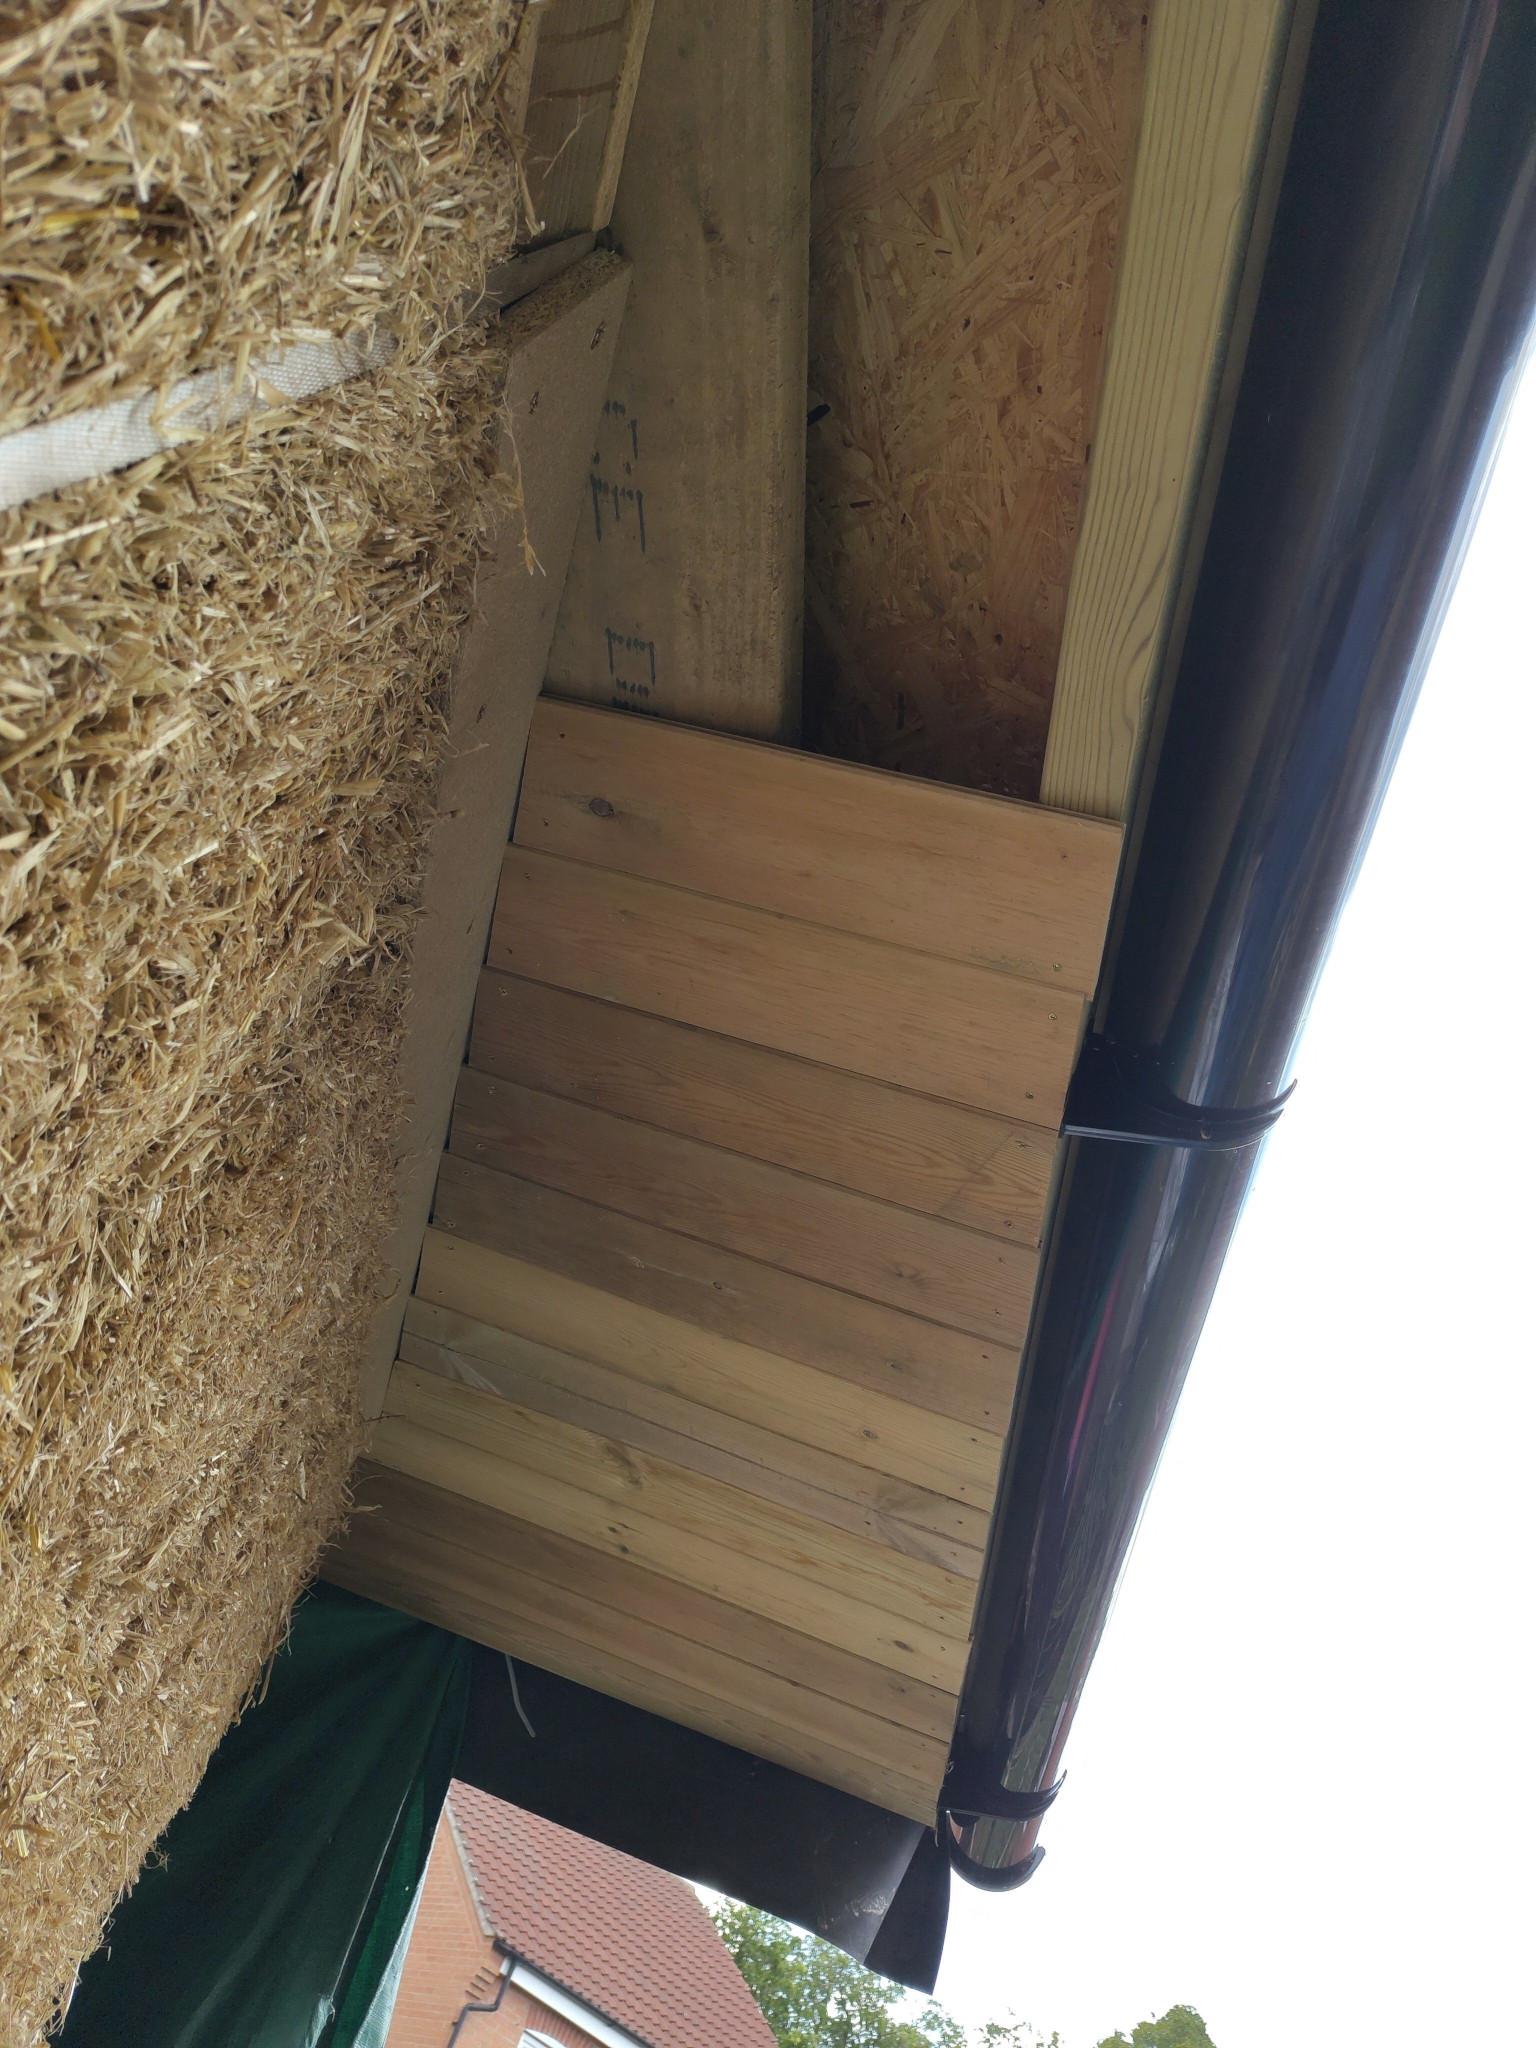
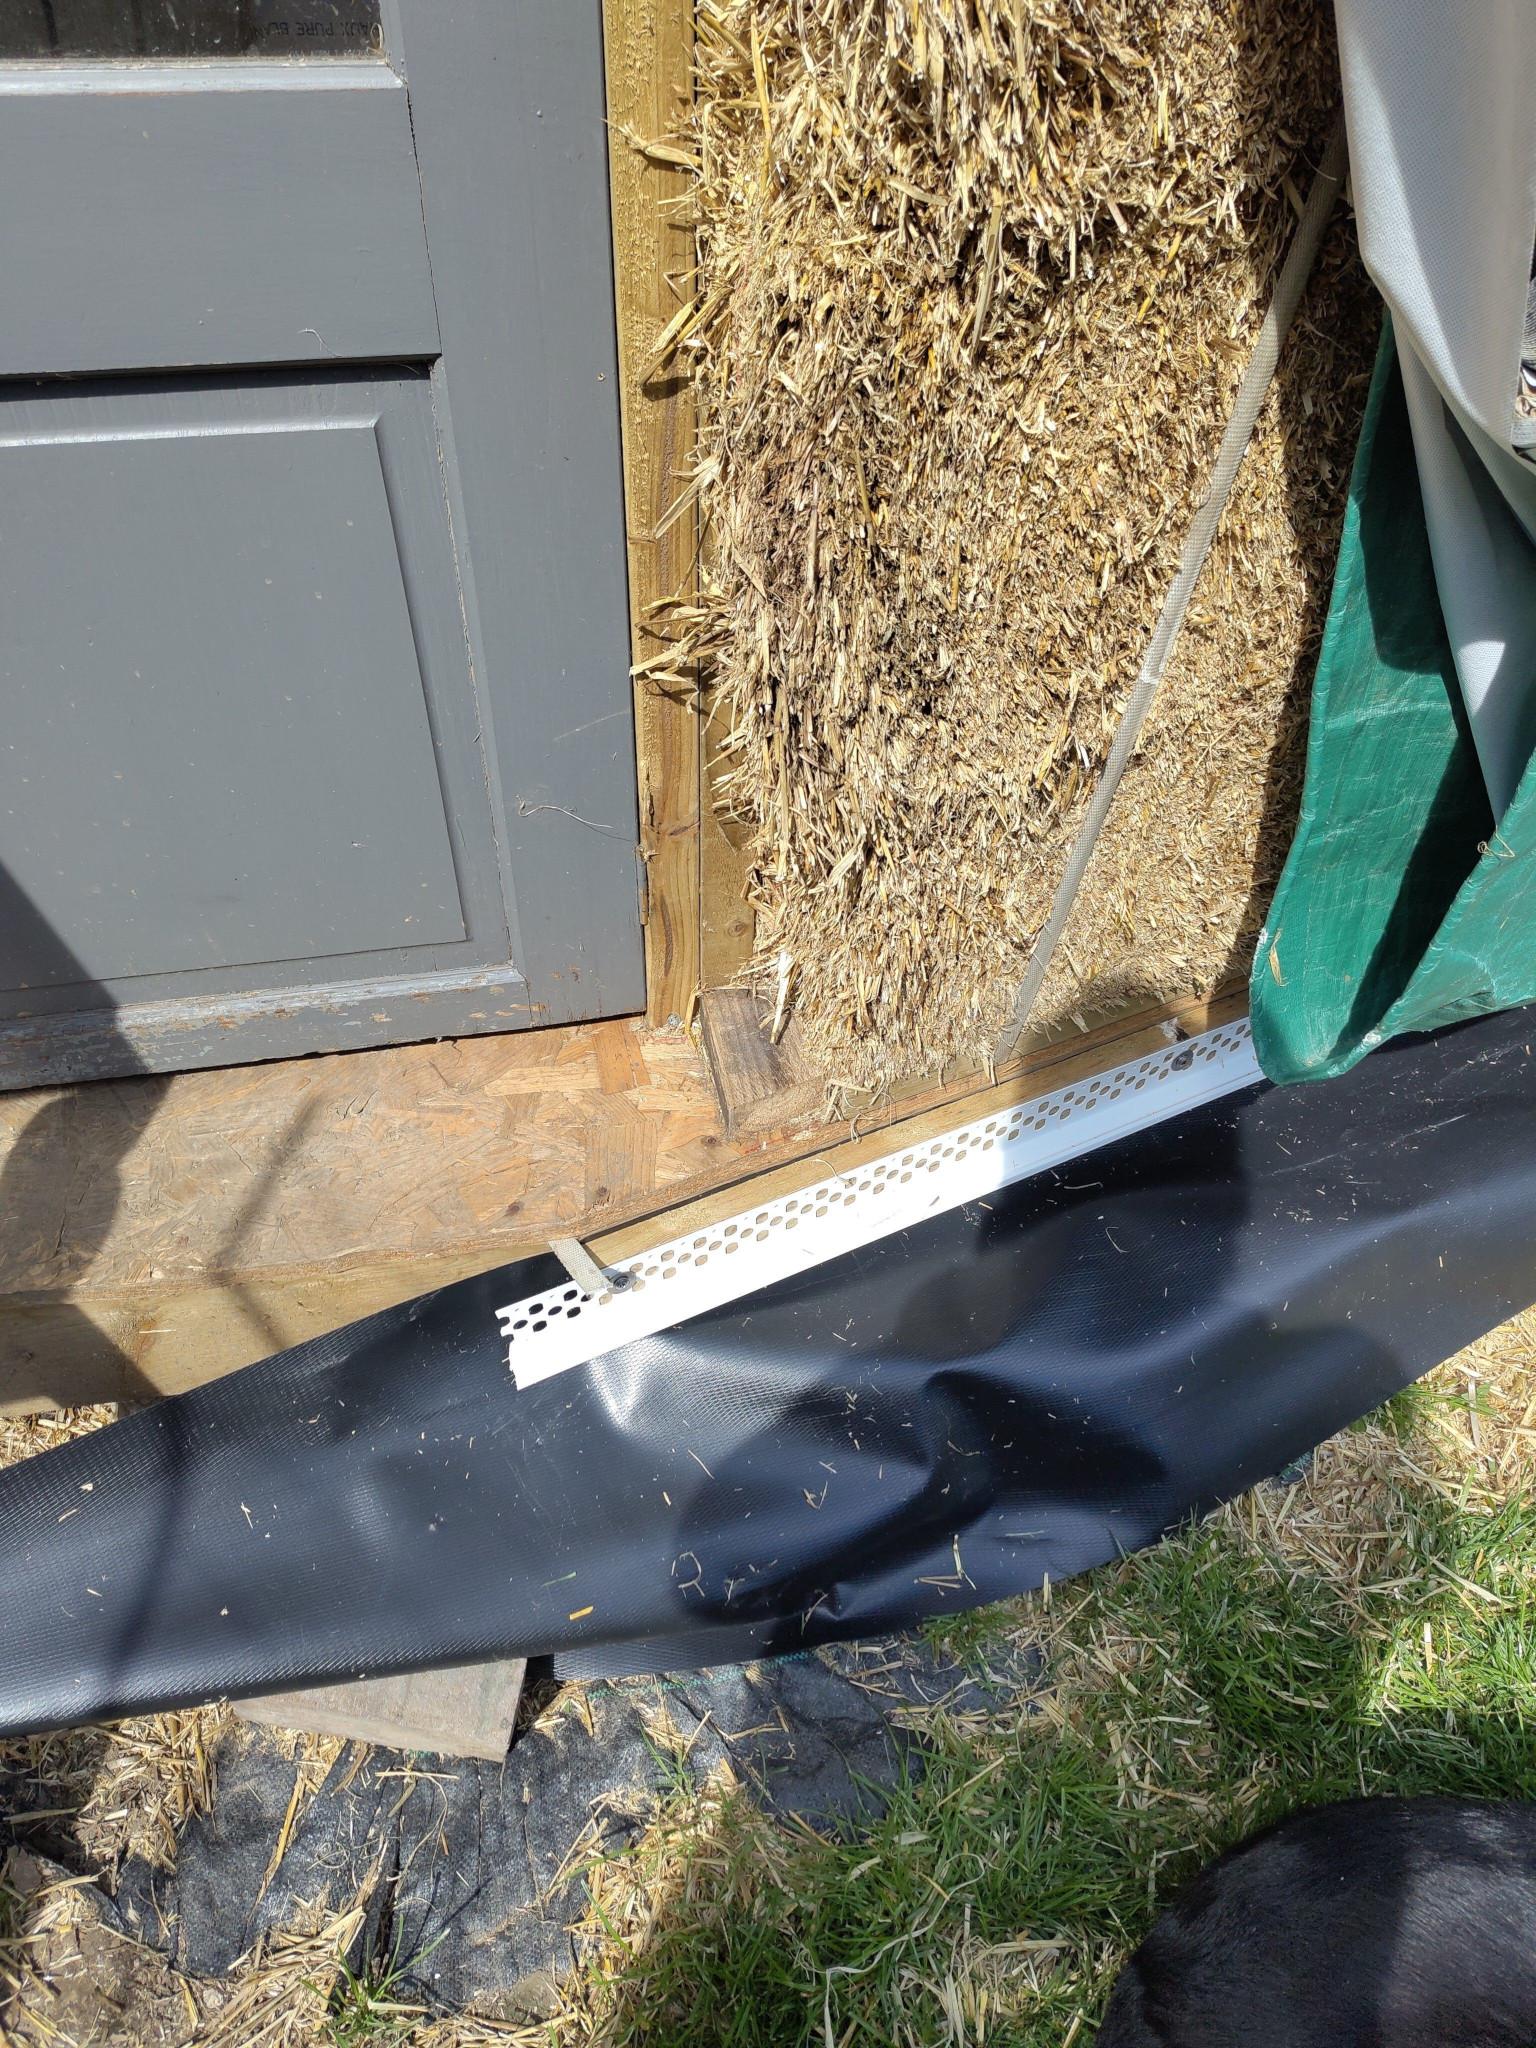
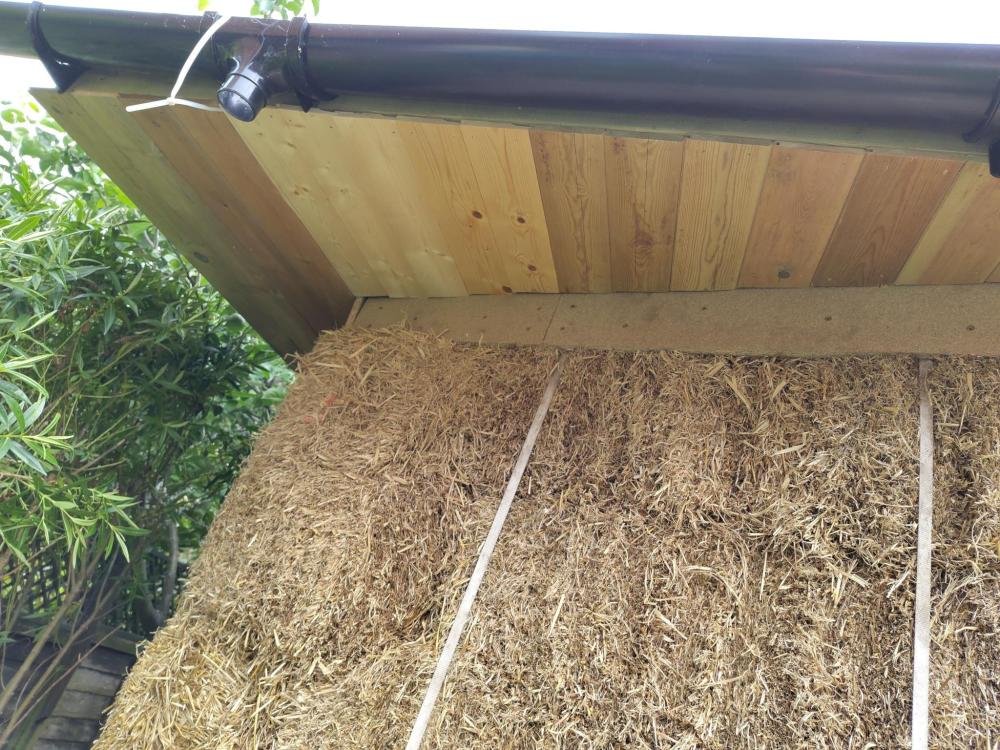
Now we're motoring. Got the underside of the roof clad and finished covering the roofplate with particleboard: There's a few rough edges to it, but it hid far more of them than it introduced ^^. Installed bellcast render bead and DPC skirt at the base, all around the perimeter Really need to trim them back and work out how the render is going to look. The pictured corner is the worst one since most of the bale's "ear" is gone down there. I'll end up sculpting it with lime-straw mix, I imagine. Finally, got some stainless steel expanded metal lath covering the roofplate and the junction with the straw. Apparently it's more usual to use hessian or reed mats to cover over wood when lime rendering, but I'm a bit skeptical of it. Time will tell ^^. I've got it (and the beading) fixed with stainless steel screws and washers at 600mm centres, but apparently 100mm (!) is better, to minimise movement of the lath. I'll do that with some staples, I think. I'm going to experiment with moulding a door and window head using more of the lath; I figure I can make a sort of J shape with the mesh by fixing strips with the screws then pulling up, so the screwhead is on the inside of the lath, and fixing similarly to the roofplate, overlapping the lath that's already there. It should be a pretty shallow angle, and if it doesn't work, I can just cut it off and do the cladding approach, I guess ^^. I've just ordered the sand for rendering; I'm hoping to get the inside trimmed, then start dubbing out uneven sections and hollows early next week before moving on to a stipple coat.


-
Hey hey. These folk aren't a *million* miles from you and might be interesting for the lime render part specifically: https://suffolkstrawbaleholidaycottage.wordpress.com/tag/lime-render/ . I assume if you're getting a timber frame from a supplier, you won't need the hazel sticks and straw bales ^^. Good luck and keep us updated!
-
In-Roof Systems - options and opinions
Nick Thomas replied to AppleDown's topic in Photovoltaics (PV)
One of the upsides of an MCS install is that it must come with an insurance-backed guarantee. Which means that even if... ...happens, then whoever was insuring them at the time still pays for the repairs. With the regular caveats about insurance companies being evil, obviously. Even at MCS prices, the payback on my system is ~7 years, the rated lifespan 25 years, and it has a reasonable chance of lasting much longer than that.