
Susie
-
Posts
403 -
Joined
-
Last visited
-
Days Won
1
4 Followers


Recent Profile Visitors


Susie's Achievements
Regular Member (4/5)
207
Reputation
-

What wall type should I use?
Susie replied to BotusBuild's topic in General Self Build & DIY Discussion
I just asked David to look at this thread and we both thought the image doesn’t give enough height for a four post ramp. Are you planning on stacking cars? Could the bonnet be open whilst the car is in the air. Having had a 4 post ramp in our old industrial unit where the car could not be lifted fully due to the lower ceiling David likes the fact that now as you know our ramp can lift the car to the top of the lift with the bonnet open. Have you thought about a carcoon in the garage to keep a car in. The carcoons can have a tickle charge for the battery and you can drive the car in wet and they dry out nicely. You need to plan the garage layout out just like the home. -
Advice on economy 7/9/10 tariffs for meter upgrade due to RTS switch off
Susie replied to jfb's topic in Electrics - Other
If you don’t have storage heaters now the switch over probably won’t affect you too much. Perhaps the property did once and they where removed. Did you use timers for washing machine or immersion heaters to make use of economy 7 it’s not just what was on the one CU, eg old storage heater CU. Presumably you are going to have a smart meter installed, there could be a wait for a 3phase smart meter as the installation involves a little more knowledge than the average switch over and there was a shortage of supply of 3phase meters once. we switched over 2 years ago EDF did the switch they where useless first year with them and they never got it all reporting our useage correctly. They knocked off £600 for the inconvenience though. Moved to Octopus and from day one it worked correctly but we have had a few wobbles when rates change etc reassuringly they always know how much electricity we are using and on what tariff even if the in home display is incorrectly showing me my solar outgoing rate. A few emails and messages and it got sorted. Once you have a smart meter with a counter for two rates then you can change between economy 7 to economy 10 or any other time of use tariff. It would be worth looking back at your bills now and seeing how much it would have cost you had you been on standard rate 24hrs. We currently get paid slightly more for our outgoing electric (solar) then the off peak economy 7 rate so I use as much as I can immersion, dishwasher, even the bread maker at night and we are better off both in winter occasionally storage heater and summer being on economy 7. We also run a business from home and are both here all day so use a fair bit of daytime electric. You really need to do your sums based on your own usage. -
Local Authority Refusing To Visit - No Sign Off
Susie replied to BTC Builder's topic in Building Regulations
Do you have the LABC app on your phone. I have found this a good way to bypass the switchboard and emails and get a person to site. -
Converting a drystone wall to a mortared wall
Susie replied to sb1202's topic in Landscaping, Decking & Patios
If you have more stone available, ours came out of the knock down, you could rebuild as a Cornish Hedge. As a quick guide it’s two walls tapering inwards to each other with the gap in between each wall filled with soil and rubble, then grassed over, planted up or our original ones have trees now growing through the centre. Also look up Devon Bank (hedge) it’s similar but no stone you could adapt yours by rebuilding one side only and banking up the other side. -
To clarify Cornwall planning/conservation will not allow PVC windows in listed buildings even if very good looking like wood they want wooden frames or as original. Im hoping one day this will change but whilst we are building our new home we have no spare funds for our current home.
-
It would be wise to check with your local window supplier first. we looked into this for our windows and rational and heritage both offer windows that are in other listed buildings around the country. Our local supplier came out to quote and see which would most likely be accepted by the local council. It turned out neither, the supplier is in Devon we are 10 miles inside Cornwall, he said he had installed many alternative 2G and 3G windows in Devon but Cornwall would never approve them. Our converted barn was converted in 2000 from a disused and half falling down barn, we are part of a larger group of buildings (same curtilage) with the farm house being the reason we are listed. Our listing for all the barns mentions windows of 6 panes, nothing more architectural. The windows still need replacing but the funds are needed elsewhere. I’m hoping one day Cornwall council listings will change their mind.
-
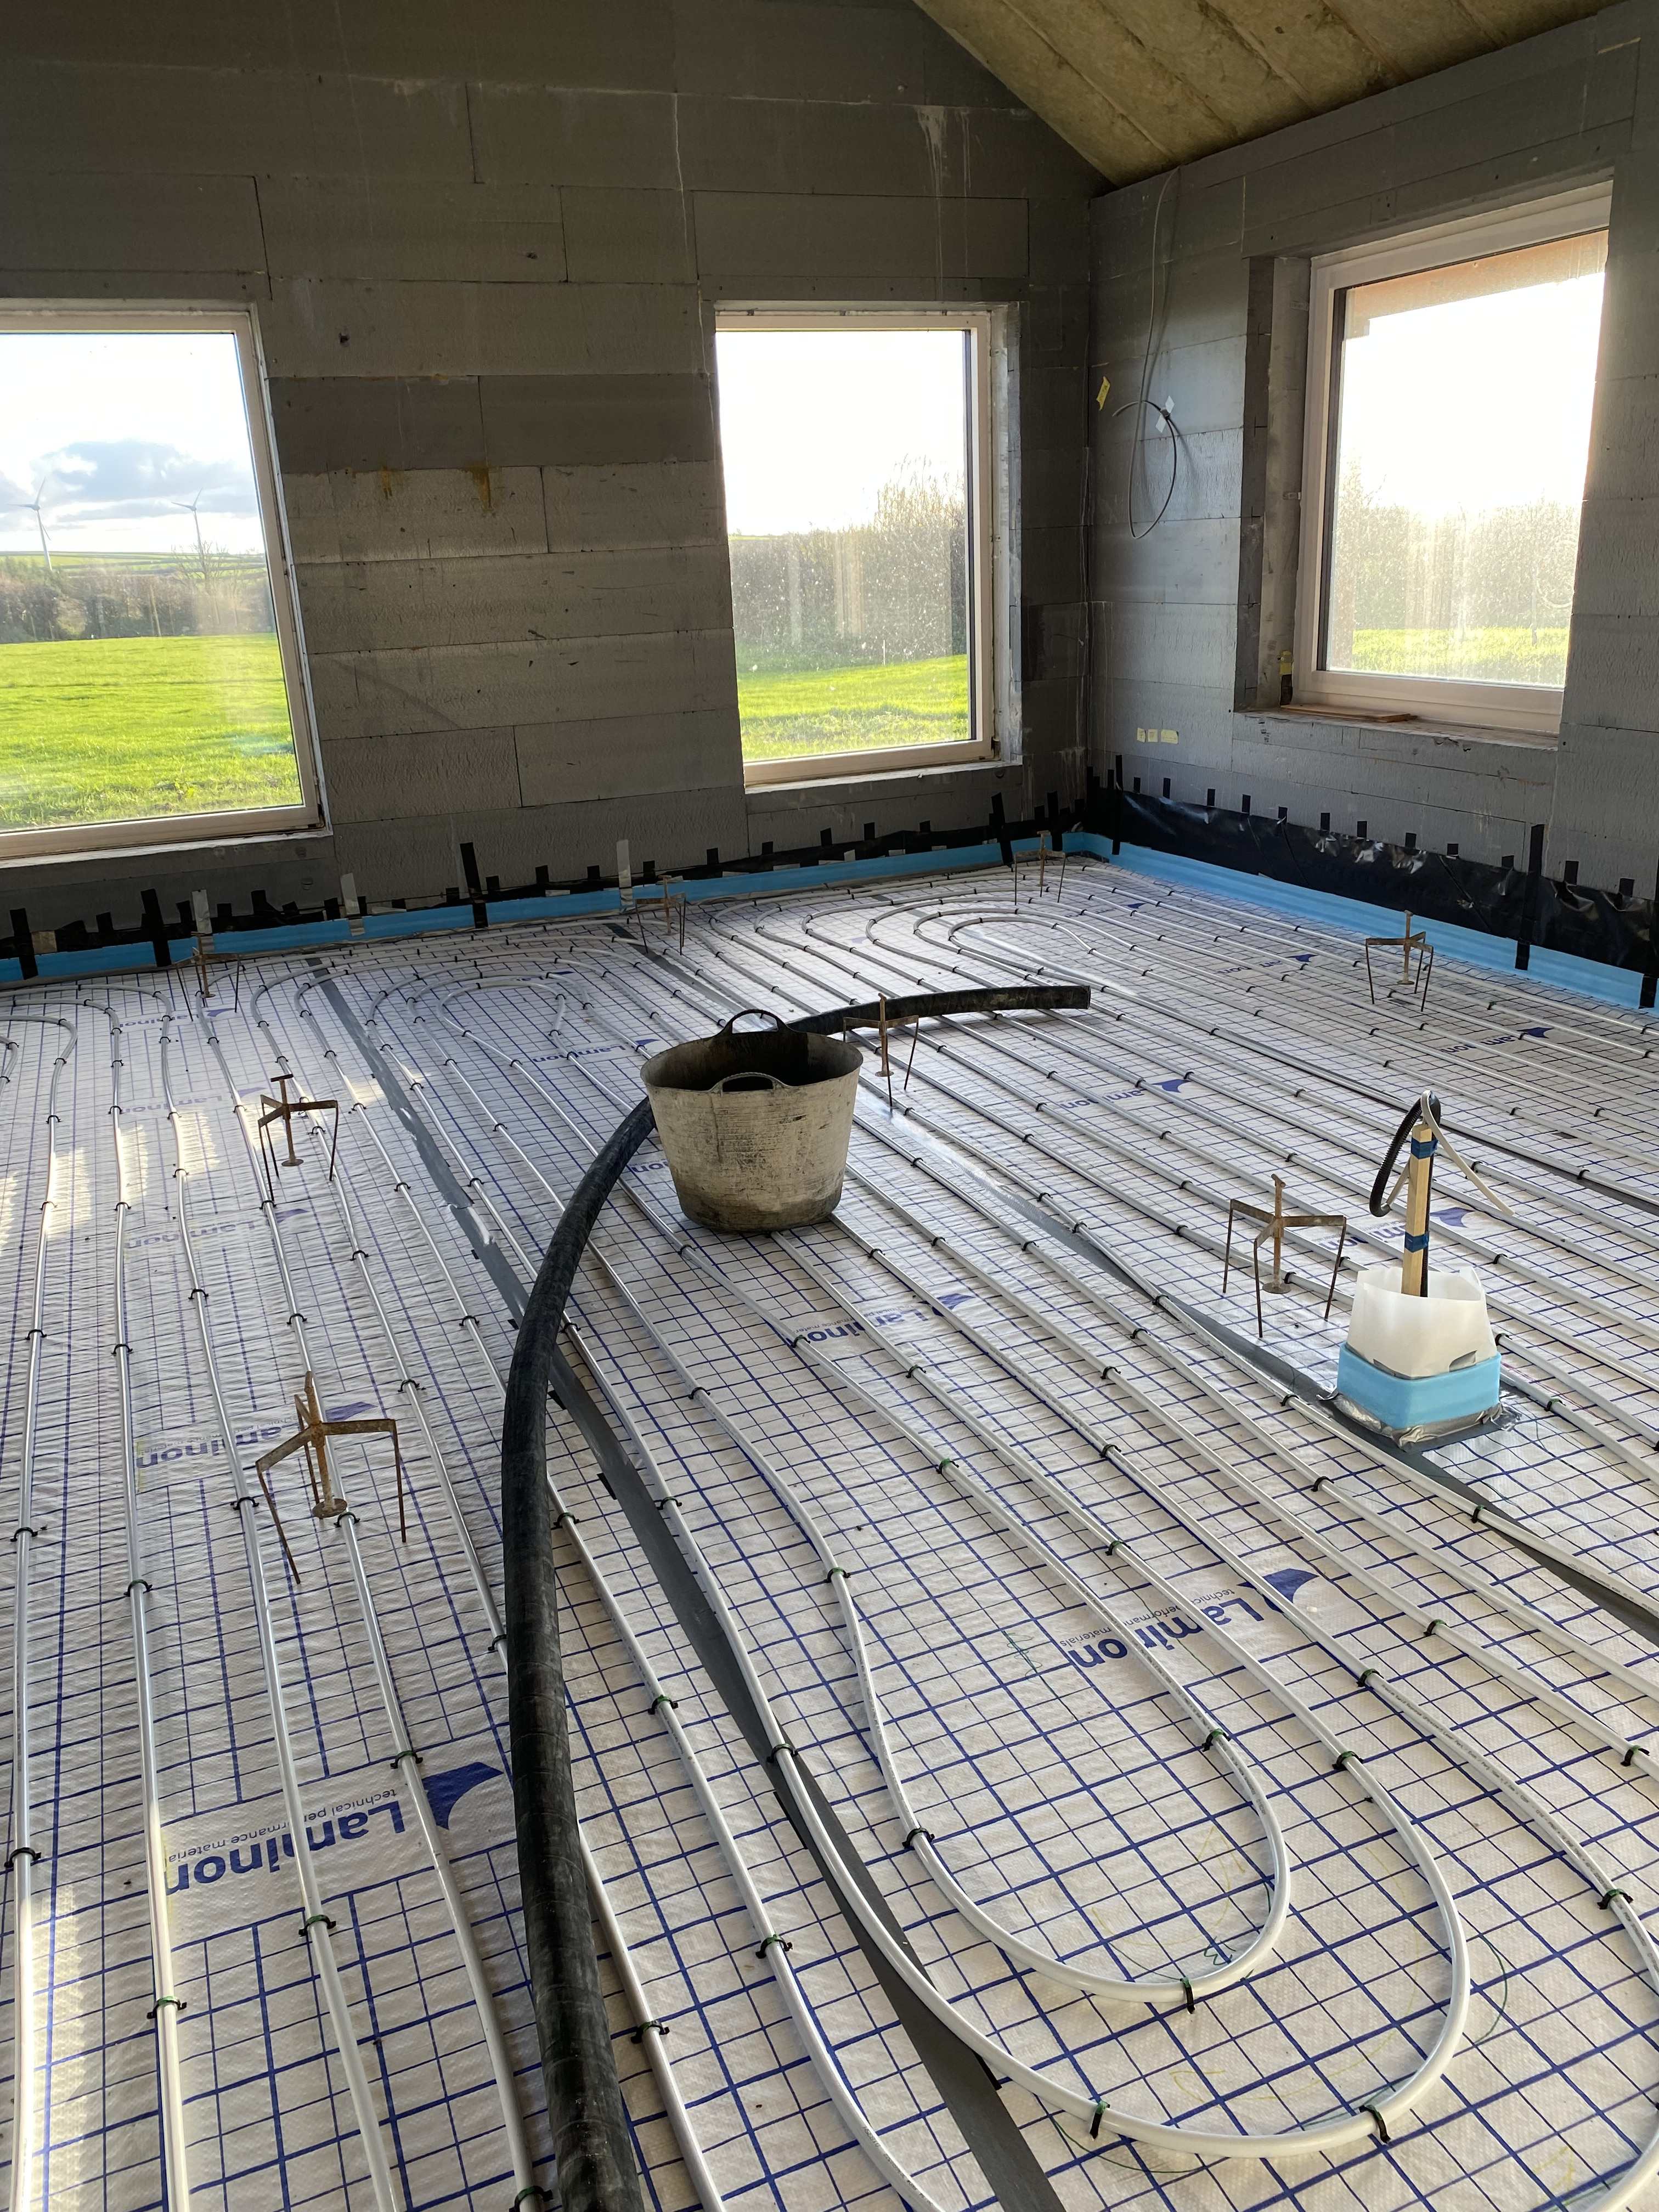
I can recommend the lamb on heating grid @torre mentions it also acts as the slip membrane between insulation and screed. I also have the build hub UFH stapler if you want to borrow it. The stapler is passed member to member, I would pay for postage to you and you keep for the next user and post to them.

-
UFH and screed complete and the Plastering starts in the vaulted area.
Susie commented on Susie's blog entry in The Old Cow Shed
I’m glad it’s useful, you do need to remember we are a bungalow, we found the roof insulation and floor insulation to be obviously much more than a house with another floor but we did particularly want/need a bungalow. ICF is fairly expensive but again that was our choice. it’s also amazing how costs have increased in such a short time, we are just about to order our front door and the original quote from Norrsken is now more than double so we are looking elsewhere. -
Unvented hot water cylinder (electric)
Susie replied to AidanGee93's topic in Boilers & Hot Water Tanks
The two consumer units may be because in 1995 we were installing the radio time signal for Economy 7 (in the country as opposed to towns) and storage heaters etc were often put on the second CU. -
UFH and screed complete and the Plastering starts in the vaulted area.
Susie commented on Susie's blog entry in The Old Cow Shed
@DevonMade we put the ducts through the roof when tiling the roof. -
UFH and screed complete and the Plastering starts in the vaulted area.
Susie commented on Susie's blog entry in The Old Cow Shed
Hi @DevonMade We’re having a Willis water immersion system for the UFH you can research that on the forum and a conventional vented hot water cylinder heated on economy 7 or solar diversion. We can install both ourselves so no labour costs, parts can be replaced quickly and cheaply if required. The cylinder has a shower coil and a shower take off to keep our options open. It’s mostly going to be just 2 adults. We have found living here it’s a lot harder to find tradesmen (plumbers particularly) than back in Manchester. If you need one there is a wait so you can be without heat/DHW etc, if it’s summer the holiday let’s seem to get priority. The above answer I would understand not to be as the norm. MVHR we have chosen the Zehender Q350 with pre heater (frost protection) buying online and installing ourselves. This is one of the few things that has come down in price in the last 3 years since research started. I was going for a vent axia but have read on here about bearings being changed after a few years (5 years?) and the price change has pushed me to the Zehender it’s better spec and quieter. Good luck with your own build. -
UFH and screed complete and the Plastering starts in the vaulted area.
Susie posted a blog entry in The Old Cow Shed
Weeks 56 to 74 The UFH is laid and the screed is providing a lovely wobble free surface for the ladders and makes brushing up so much nicer. Our neighbour kindly lent us his scaffold tower so that we could insulate the vaulted ceiling in the open plan area which is approx 5m high. This has enabled me to finish insulating between the rafters with 140mm of Rockwool and I have PIR sheets to put up under the rafters. For cutting both the Rockwool and the PIR I created a few templates of different angles and had them ready for when my husband came to help pass them up to me. Once the Rockwool was finished we both took it in turns on the scaffold tower fitting the PIR. Having a vaulted ceiling in the openplan area and partially vaulted elsewhere will give us plenty of light and nice high ceilings but for now they are awkward to cut around to insulate and ensure the VCL is tight around the junctions. The time spent doing this will no doubt be forgotten once we move in and it is starting to feel closer. We marked out the kitchen island location and dining room table location to get first fix electic lighting located and measured for the kitchen units. For my birthday treat our daughter came to stay and dog sit our elderly Greyhound so that we could go shopping looking at kitchens. We spent almost 4 hours in Wren Exeter with Harvinder but we think we have ordered a lovely kitchen and pantry. Unfortunately our neighbour needed the scaffold tower back but said we could borrow it again as soon as he had finished with it. We then decided we should book in the plasterer as things were starting to come together, rather luckily for us our plasterer had just had a job cancel on him and when we spoke to him on a Thursday he said he could start next week either Tuesday or Wednesday. As we hadn’t finished insulating one side of the vaulted ceiling we said we couldn’t be ready that quick unless he wanted to quote for fitting the PIR and the VCL, which I had already purchased most of. We then spent the weekend and Monday getting first fix electrics in the kitchen and mocking up where the TV was going to get the electrics and room wall lighting ready. Things have therefore started to move on quicker than we expected, so we are hopeful of moving in by winter this year with a working kitchen, one bathroom and one bedroom finished at least. Kitchen design render. Testing TV and speaker location. Even with the plasterboard lifter its hard with 3 on the scaff and one on the lifter, so glad I'm not doing it. Taking time off the insulation has meant I can tidy the UFH expansion foam up in all the rooms and the trip hazards we kept ignoring at door room openings, whilst being on hand for the plasterers if they need more tape etc or have any questions. Once they have finished with the VCL membrane I might finish the VCL I started before we borrowed the scaffold tower or I could take a rest from the build and catch up on so many other things, even paint schemes maybe. I have caught up on the build paperwork this weekend. The total spend to date including the provisional kitchen figure of £15,000 which includes VAT, units, worktop, tiles and some appliances so not the reclaim amount. Total to date £238917 over 135m2 is £1770 m2 for a 3 bed, 2 bath, bungalow This is broken down as follows. General £4200 Carpentry £500 Kitchen £15100 Roof insulation, inc membrane and tapes etc £4500 First Fix Electrical £1230 First fix plumbing and partial bathroom costs (ongoing) £1430 UFH £900 Drainage and gutering £8540 Floor insulation inc tape and membranes £2670 Screed £2740 Cladding (over ordered but ideas are developing) £5690 Render £3090 Solar 7.5 KWp £8570 Roof £23300 Windows £20870 no front door yet. ICF Construction £119600 Pre build costs and fees etc £15830 The back of envelope guesstimate of future spend is £35k to finish apx £2k per m2- 8 comments
-
- 11
-

-
I taped mine up the walls and the studs. two layers of insulation with staggered overlaps then a thin slip sheet before the UFH. the slip sheet is also taped up the walls my dpm is taped up more so the slip sheet is also taped to this. can you get any insulation in the studs below screed level? Easier to put in first and gives something to tape onto. Then maybe some noggins for the plasterboard later. I presume you’re having UFH, all the layers you tape up the walls and studs should be neat and tight. This gives something for the expansion foam something to stick to in the studs where there would otherwise be nothing.
-
Floor slab insulation. Test my logic please?
Susie replied to saveasteading's topic in Barn Conversions
Still ongoing. Hope to put my last insulation order in soon. The points you get can be used across all the group sites but I haven’t purchased much more on the other sites. -
Floor slab insulation. Test my logic please?
Susie replied to saveasteading's topic in Barn Conversions
I have been buying my insulation from https://www.insulationsuperstore.co.uk/ I have had multiple deliveries from them, at least 10. I have purchased rock wool and PIR only once did the delivery come on a huge truck most came on a small van and the drivers were very friendly, delivered from SIG or Markovich, with good delivery communication. The Rockwool I purchased by the pallet, the PIR by the sheet mixing my order 80mm and 100mm and spending the minimum for free delivery which meant I was not stacking rooms full and risking damaging corners. I was often getting discount codes or used my account points to get money off never paid the full price.