


jayc89
-
Posts
1389 -
Joined
-
Last visited
-
Days Won
1
Everything posted by jayc89
-
I hit really lucky with a locally brickie that came recommended - he had 6 weeks at the start of 2022 in which he could have built our shell, weather permitting. Unfortunately our planning was knocked back so we didn't have the foundations etc ready for him. I've now pretty much accepted I'm going to be waiting 12-18 months for anyone worth using when the new plans (hopefully) get the green light.
-
I pretty much agree with all your points; 1) I don't think we will include an accessible shower. If push came to shove. we'd likely transition the downstairs w/c utility into a wet room, but I hope it won't be a concern for the next 30-40 years at least! 2) That's one of my concerns too - there will be light coming through from the kitchen window, which is reasonably sized (approx 1.5m) and the door into the new hallway will be glazed so will also allow some light through, but it's far from perfect. I'm not sure how best to remedy this though. 3,4,5) We're not entirely sold on the new hallway, porch, utility, w/c layout. I'd be just as happy to have a larger utility (with an external door) and w/c, to give us more space. The hallway in general feels like it's there just because we have the space so is less of a concern if we lose it. The porch would have its merits, but again, I'm just as happy to hang our coats in the utility! 6) The master bedroom has light from the south aspect through the wardrobe area and then doors to the north-west corner. We did concern one/two windows on the westerly aspect too, but weren't 100% 7) Totally agree with this and it's one I've racked my brain and spoke to our architect about multiple times. There is a (currently glazed) window in the north-easterly most corner of the section of hallway running along the stairs (where the bottom most cupboard is shown) but it gets very little light anyway so won't remediate this concern on its own. I think in general, the rear hallway/utility area needs a rethink and the lighting in general needs deeper consideration. We have the space to play with, I'm just struggling to make it all "flow".
-
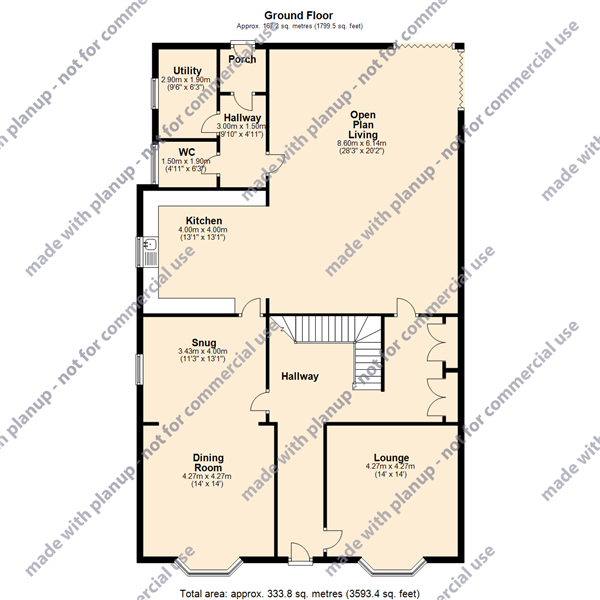
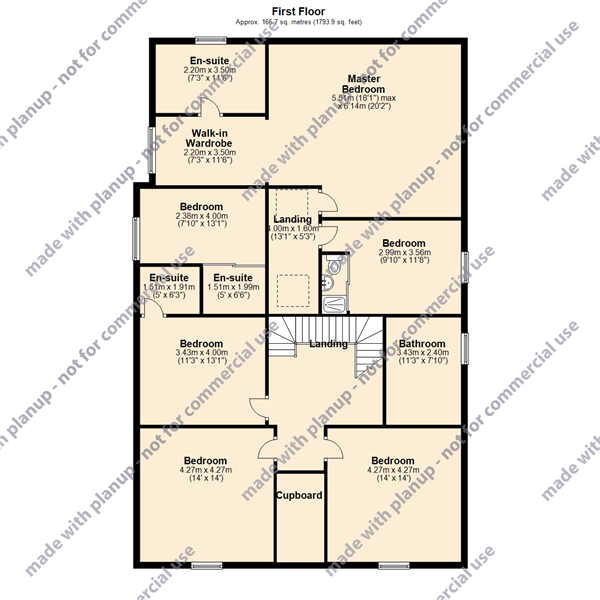
It's been a while since I've posted on here. Our planning permission got knocked back on the grounds of it being too dominant in relation to our neighbour. Given the site plans, I'm not convinced that is the case, but rather than going down the route of appealing, we're back to the drawing board, so to speak. The council requested the extension be reduced by at least 3m so our architect is suggesting we do that, but build out the full width of the existing property instead so we don't actually lose that as floor space. Something like this; Key points; The extension is stepped in 0.5m from the existing property because our boundary also slopes in, so this gives us enough width to still get a car (and wagons, during construction) to the rear of the property The extension footprint is actually bigger now, the first floor is arguably too large to accommodate what we want on the ground floor, resulting in a 6th bedroom being added, just to fill the space, really. As ever, your feedback is greatly appreciated!
-
It did have me confused when they quoted 0.33!
-
Our slab will be the finished floor so I plan to prep the area; insulation, UFH pipes and then get someone else in to pour it. We’ve had someone quote to use “10mm aggregate flowing concrete” but I was expecting the quote to include the compressive strength of the concrete (C30 etc) Is this normal?
-
I’ve been struggling to find anyone who covers our area (Yorkshire) to do our insulation. One quote that did come back was at £18/sqm for a 175mm cavity. The quoted beads have a U Value of 0.33. How does that compare to other people who have used blown EPS beads?
-
Our extension will cover what was the original rear external wall of our house. The original house is 215mm solid wall construction, whereas the extension is cavity wall with an expected u value of 0.17. I'm concerned about thermal bridging where the two join. Should the original external wall, which will become an internal wall, also be insulated?
-
Local council are doing another £99 scheme, which would be pretty useful as our loft space is 80 sqm. Apparently it includes top ups. Survey happening next week. Anyone know what a "top up" would consist of, and the expected improvements from having it done?
-
It's not very warm let's light the fire
jayc89 replied to JohnMo's topic in Stoves, Fires & Fireplaces
7 degrees here. The central heating hasn't turned off since 4pm (old house, now wall insulation). The stove will be getting stoked as soon as I fit the mantel above it! -
I'm starting to price up the work for our extension, I'm looking to fill our 175mm cavity with EPS beads but I'm struggling to find installers who aren't only interested in the Council/Government grant work. Can anyone recommend a company to install EPS blown beads in the North East/Yorkshire area?
-
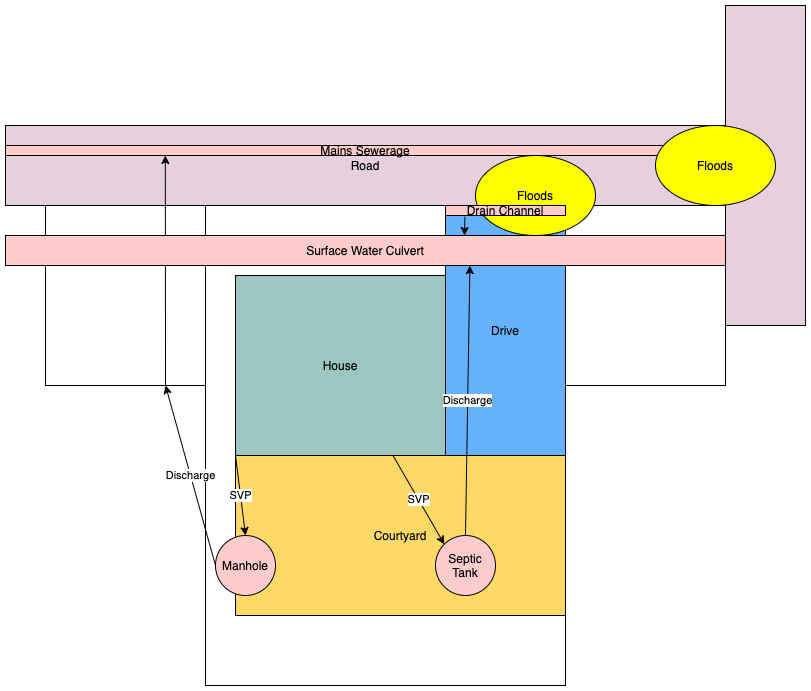
Not easily, this entire side is lower than the road itself. I believe the junction's pipe drained into the water culvert, hence both the road and our drain channel backing up at the same time.
-
It's a farm house, we bought from farmers... The best part is, the original part of the building connects to the mains sewer so was upgraded at some point, it's the extension that connects to the original septic tank... Rainwater - my suspicion is the water's backing up through the drain channel on our drive, I was wondering whether we could do away with using the culvert entirely and install a large soakaway somewhere (we have 1.5 acres of paddock at the rear of the property) Soil pipe - the one that connects to the septic tank is only used by the master ensuite (upstairs) so it exits the house in between the two floors.
-
We live one door down from a road T-junction. When it rains, the T-junction and the front of our driveway, where we have a drain channel, floods pretty badly, to the extent that some cars turn around at the T-junction. There is a surface water culvert running under our front garden where our drain channel, and I suspect the road's storm drains discharge to, I suspect this is why both back up at the same time. The council/water company are aware of the problem, we haven't lived here long, but it seems to be an ongoing saga (since the 2007 floods) Poorly drawn illustration; My concern is two-fold; - where the bottom of our drive floods, is pretty close to the corner of the house, which is a 1850's property, solid brick walls, no DPC etc. - one of the SVPs still connect to an old septic tank which also discharges into the water culvert, so who knows what's in that flood water... (we were informed when we purchased the problem that this is now an illegal connection and needs changing) So I'm trying to figure out if there's anything I can do. My best idea is to - relocate to the SVP that goes into the septic tank to the mains manhole - disconnect entirely from the water culvert and build and discharge all rain water into a soak-away at the rear of the house, somewhere. (I think I could then also claim a rebate from the water company... ?) Or am I missing something? Is there anything less intrusive I can do?
-
Are there any consequences to using expanding foam (I have a boat load of the stuff!)? The hole that needs blocking is at the end of the run and the next branch is approx 2m away so far enough for the foam not to reach.
-
I have an old, approx 5", soil pipe that runs below a solid slab that I need to fill/block/seal before laying insulation etc. I can only see 4" expanding plugs at Toolstation which aren't big enough. The other end of the pipe connects to the mains sewerage pipe below ground level, which I will eventually disconnect when it's dug out. For now, I need a quick/easy way to seal the pipe (opposed to the current plastic bag rammed down it). Will wire wool + expanding foam to the trick?
-
Yep I suspect it's the mixer that connects your flow and return to your pump/manifold. One of these - https://www.wundatrade.co.uk/shop/home/underfloor-heating-manifolds-and-pump-sets/premium-pumpsets/premium-pumpset-grundfos-eup-pump-stainless-steel-manifolds/ Any smart stats should work, but you'll need them wired into a wiring control system like the UH8 to call for heat, enable pump, open zone actuators etc.
-
It's a good point and I'm not sure how to mitigate that as 225mm above the top of the lean mix would be touching the vertical DPC. Any ideas?
-
Between the EPS and Slab? I plan to add that, it's just omitted from the diagram, doh.
-
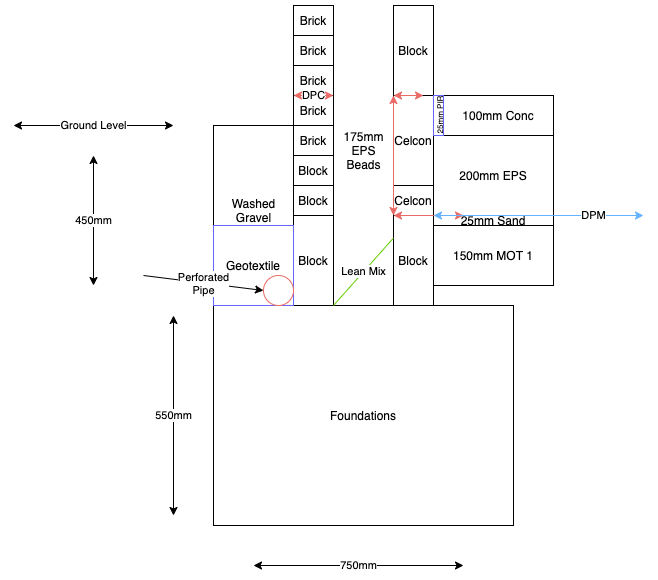
Here's what I'm currently thinking; 750mm wide trench (as I can only get 600mm or 750mm wide digger buckets) 175mm wide cavity Foundations are 550mm thick meaning the brickies have less work below ground level. French drain around the external perimeter to protect the EPS beads below DPC. Brickies to fit both the internal/external DPCs. I'll tape the DPM onto the internal leaf DPC once the roof's on, before fitting the floor insulation/UFH/slab. This provides a U-Value of 0.144 at the join between the wall and the slab and a general u value of 0.183 for the rest of the wall. Thoughts?
-
The research evidence on security alarms
jayc89 replied to Adsibob's topic in Networks, AV, Security & Automation
There were a spate of burglaries on our road a few weeks ago. Multiple garages/sheds broken into all on the same night. They seemed to be targeting power tools, for some reason. Given we've just gone through a fairly big, obvious, house renovation, there are loads of tools in our garage/house. I have a number of Ring security cameras, plus their alarm system set up in both the house and on the garage. We didn't get broken into. Maybe we were just lucky? -
Are you suggesting the same thing here? DPM below insulation and then slab? Lapped up the inner side of the inner cavity wall leaf to above ground level?
-
Thanks, that's super useful! The DPC may need dropping. I was trying to keep it above 150mm from ground level just for an easy lift, but given the existing house doesn't have a DPC at all, my BCO might be more lenient... I was going to forget about the floor insulation and slab until I'm water tight (and two of the existing walls are knocked down so it can all be poured at the same time). Leaving an additional 100mm of the lower internal DPC for the DPM to lap under when I'm ready. Given the slab will be the finished floor, I was planning on using something self-leveling/self-compacting like Cemfloor HPC.
-
We use a pretty good joiner, I think he's Selby based, we have him penciled in to do our extension roof. I'll PM you his number as I'm not sure he'd appreciate me plastering it over the internet.
-
What about something like this? EPS Beads all the way down, french drain at the foot of the external leaf, but the DPC/DPM is slightly different; The thinking being, by keeping the Celcon/Thermalite and the EPS on the dry side, it should remain more thermally efficient.
.png.465cdd1f6d7c63c3e45d807319a4cdc7.png)
-
Sorry, I have lots of questions I assume the red line is the DPM - why run that over the EPS, rather than keeping the EPS dry? Are there any wheepholes etc on the first external course to allow water to escape into the french drain? Why only two lightweight blocks and not either/or; 1 below to fully join the cavity and slab insulation? 1 above to improve the slab perimeter insulation? Why DPC below the first lightweight block AND above the last? Is there another internal DPC at the finished floor level, or is that mislabeled? Whats the benefit of the blocks running along the bottom of the cavity? Are you aware of any similar details being approved by BCO? 100mm vs 150mm conc slab? I guess both would be reinforced?