Search the Community
Showing results for tags 'landscaping'.
Found 9 results
-
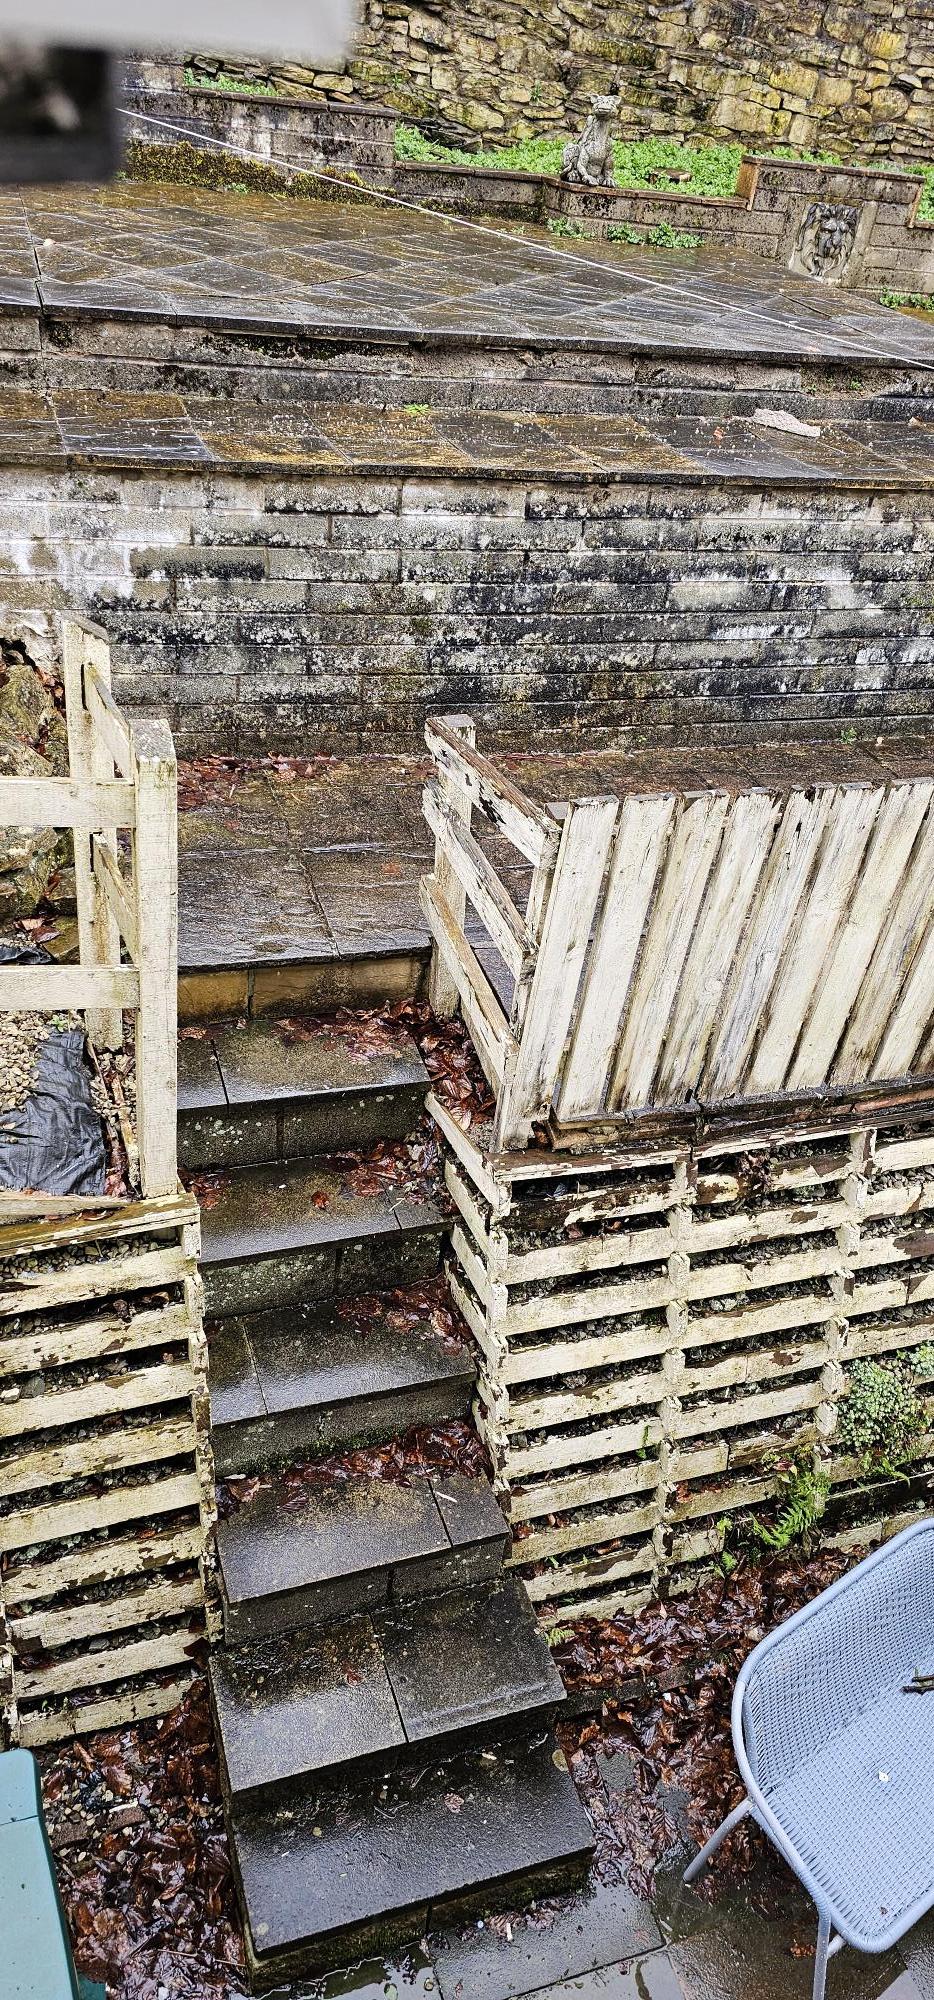
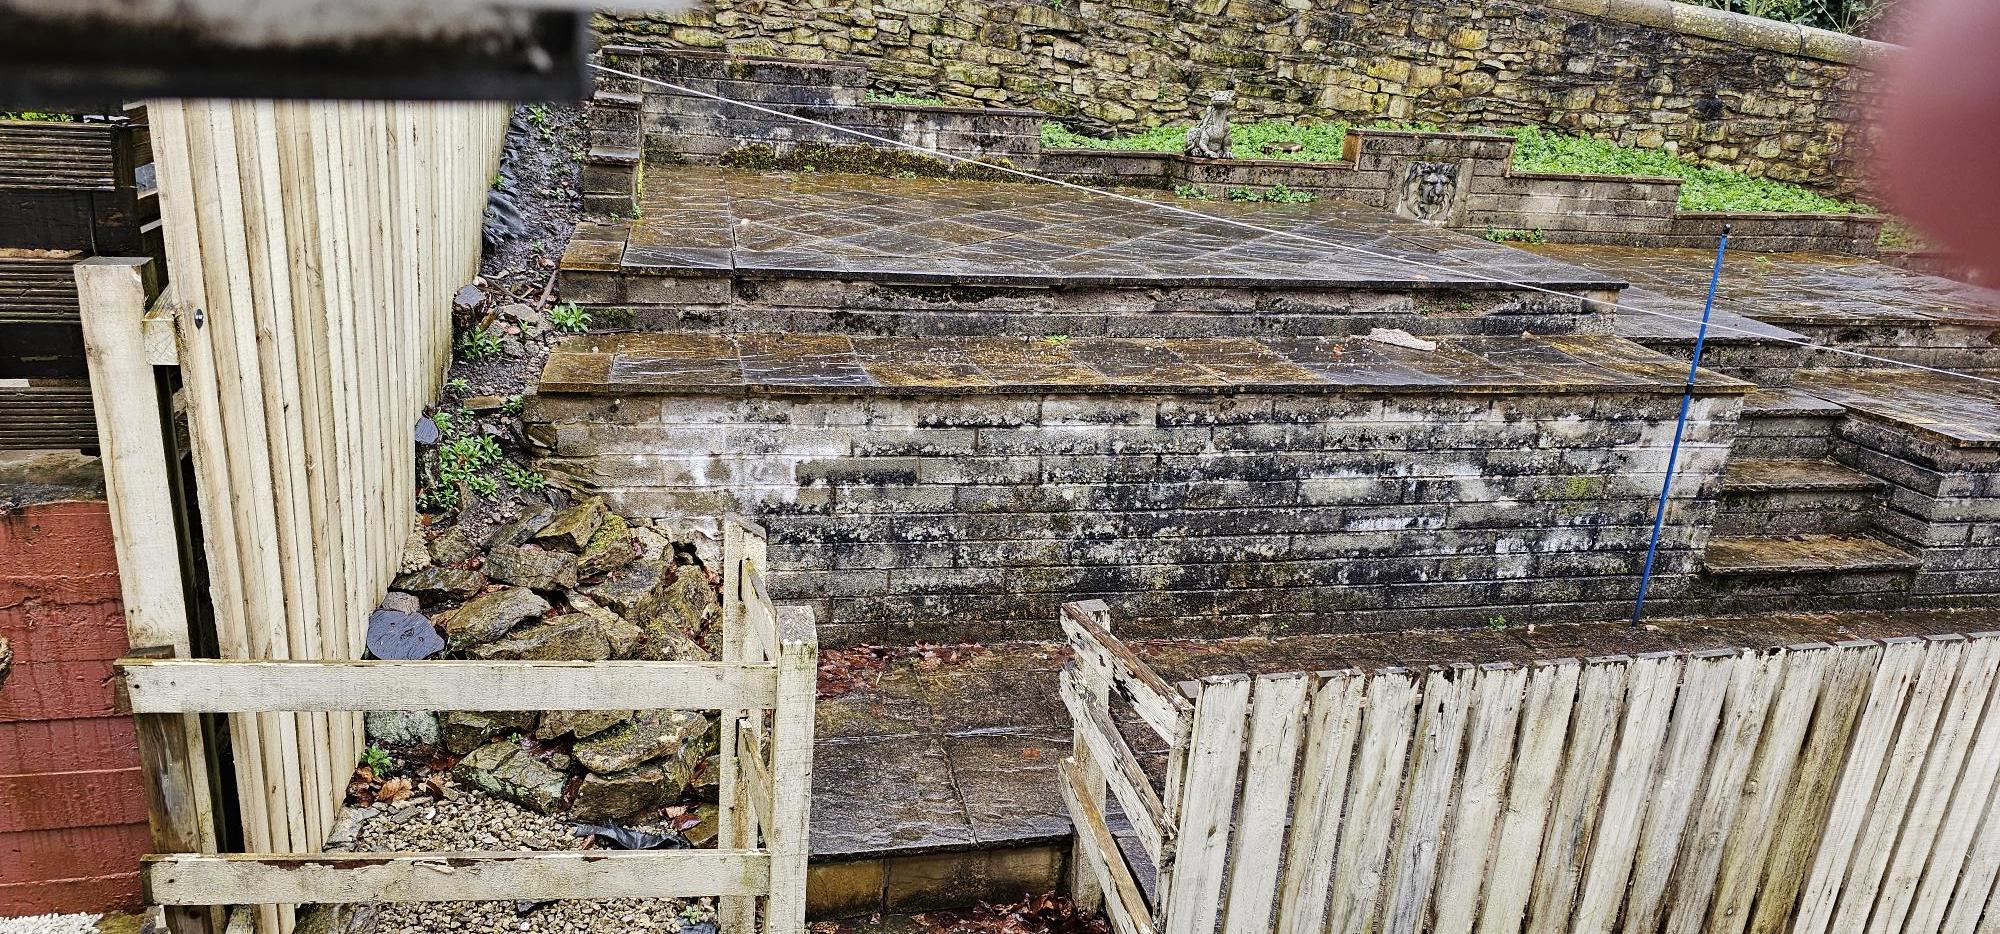
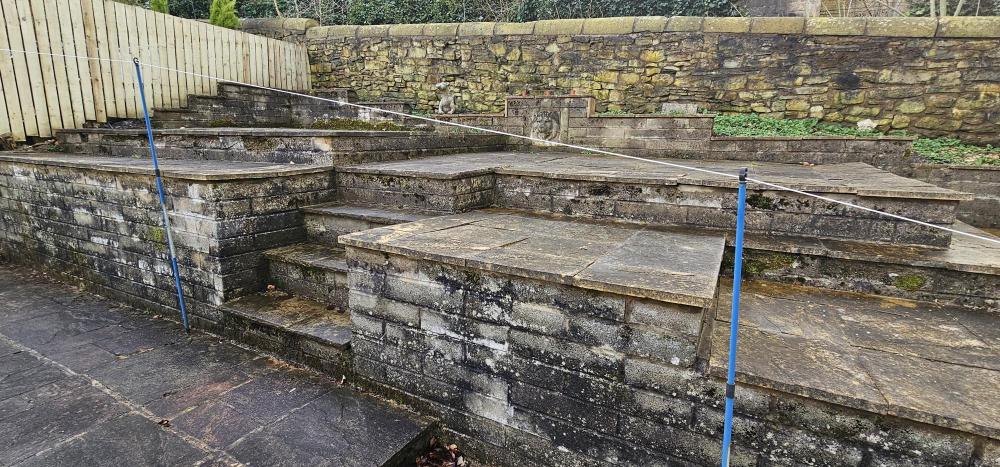
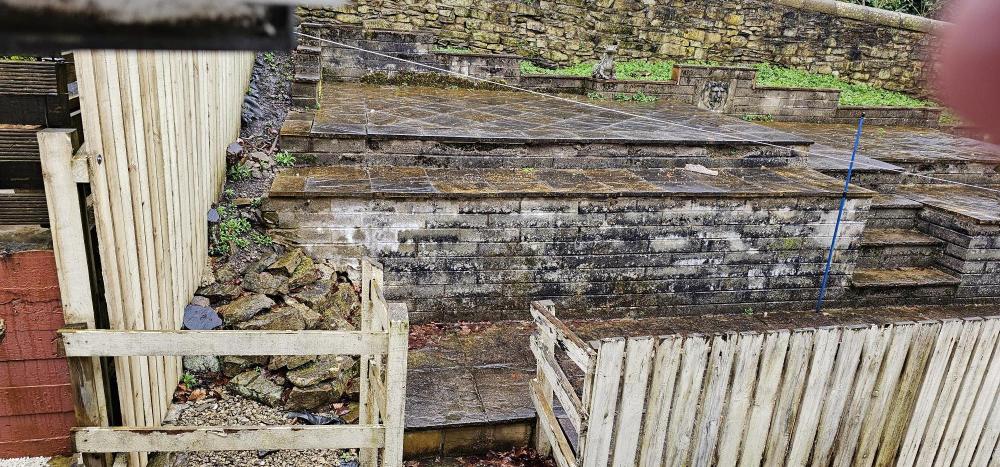
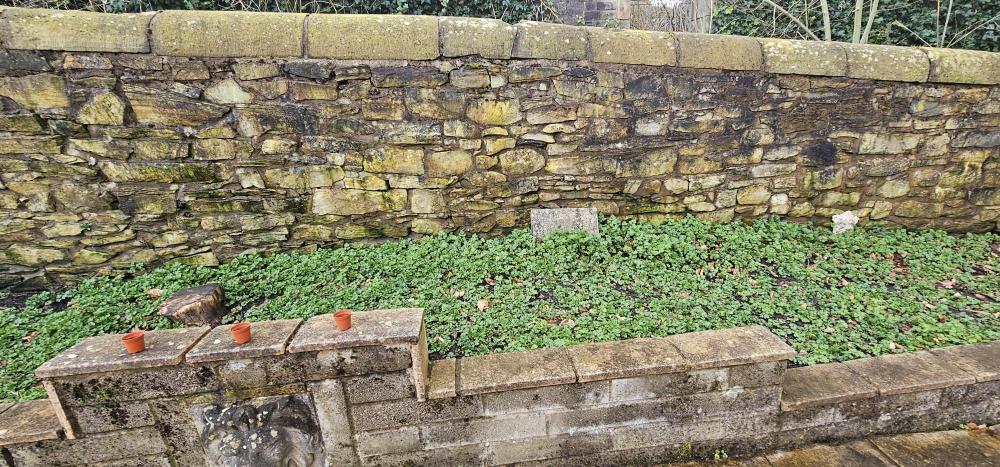
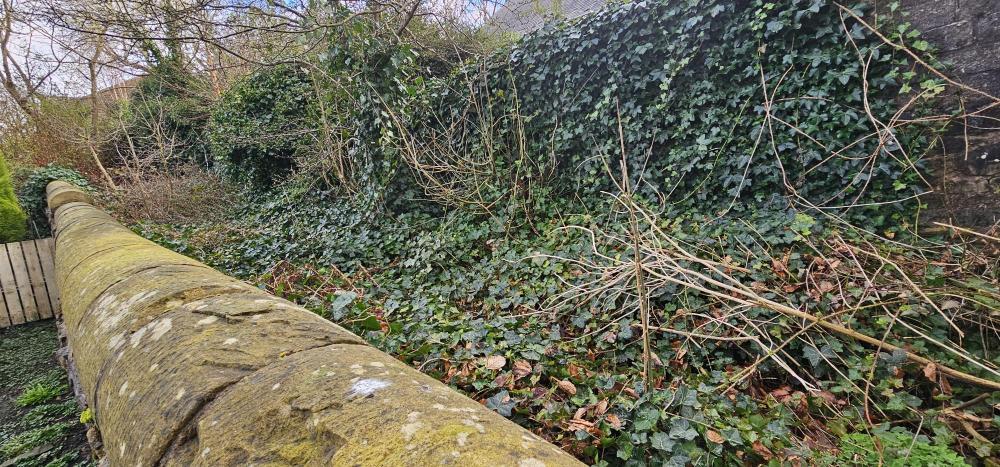
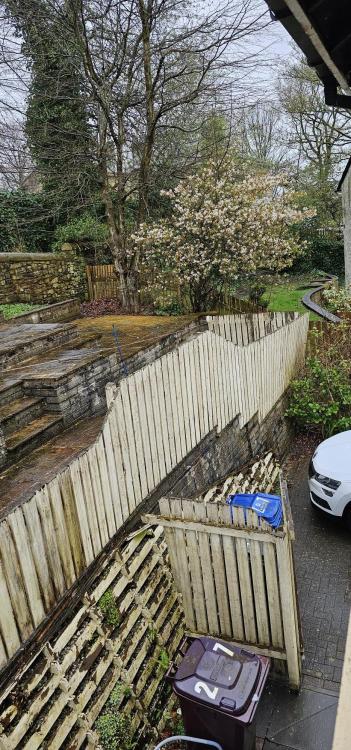
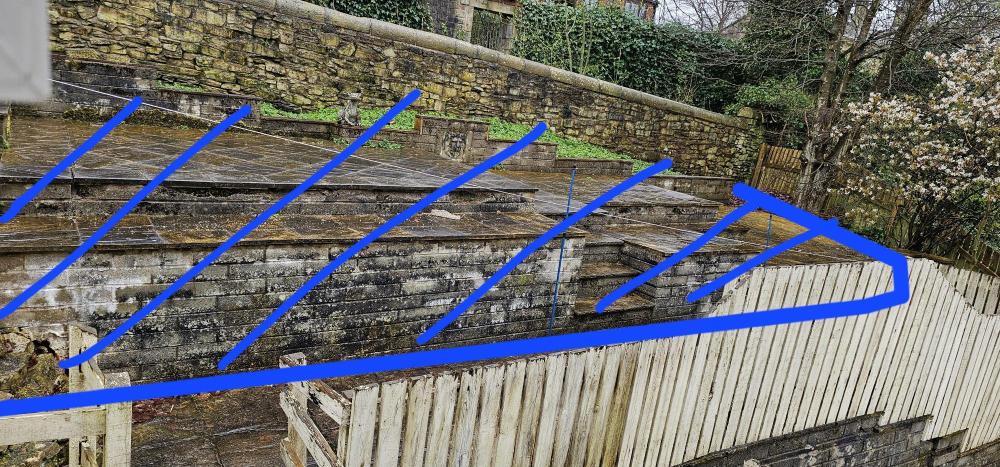
 First of all if this seems like a garbled wall of text it reflects my addled overthinking brain. So the TLDR would be any suggestions to make this a decent space? I have bought a house with a fair size but completely unusable garden. It has a total of 8 different levels of terrace, a lot of which is totally unusable because of sheer drops and narrow spaces. I have a small patio and then a 1.7m high timber crib retaining wall which, although stable at the moment is currently rotting away. This merges into a blockwork retaining wall at the right hand side (some of the blockwork is built directly onto the timber!) and holds up the first two terrace levels. About 1.8m back from this there is a further 1.3m elevation to the first of a hodgepodge of levels that vary in height from 0.28 - 0.38m. Then there is the final blockwork wall at the back, some soil and then the boundary wall which is owned by the church we back onto. The quality of the current structures is giving me a real concern, the wall at the very back (with the lions face) the footings don't extend to below the flagstones, the wall is cracking at the right hand side and is just overall very poor quality. I have been constantly racking my brain as to the best way to go about this, I would and will hire a structural engineer but I can't tell him what I want. The first idea I had was to increase the height of the first retaining wall to the rear of the timber crib, and then backfill this in so that the whole top level is one level, I've given this up as a bad idea though because the of the quality of the existing blockwork. Second idea would be to dig out everything after the first level. and take it as far back to the boundary wall as possible before building another retaining wall to shore up the church wall. I have no idea how much this is going to cost, how to stage the works etc. Next door on the left has got a concrete slab base a bit higher than my garden, so probably need to retain this as well. Next door on the right their garden is well below the level of mine so not much needed on that side. I have attached pictures. The blue highlighted section is the one I am thinking about digging out.
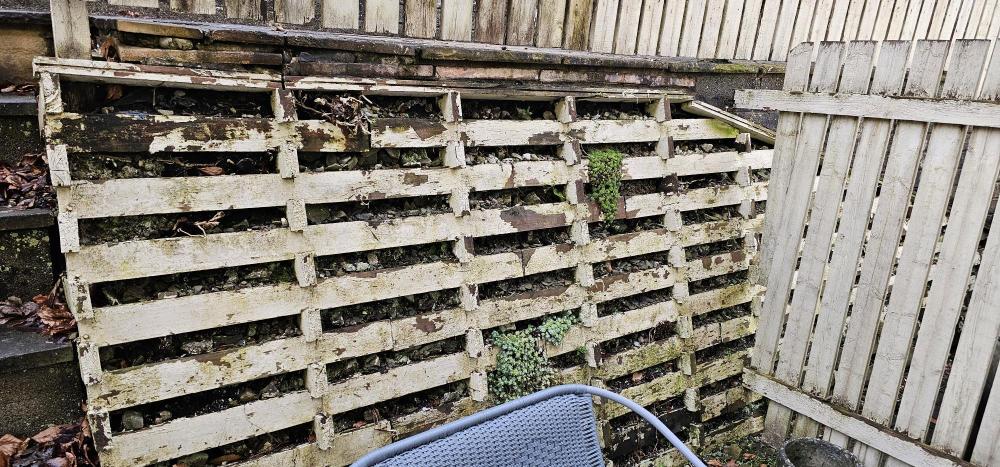

-
Hi, I've been creating a few shrub borders as follows: - 10cm x 10cm x 5cm blocks made of cement/concrete material. - sub-base of MOT, base of mortar. 2 questions: 1 - I have gaps of 1-6mm particularly on the curves. I am concerned about freeze/thaw/repeat in the winter causing damage. The options I've come up with are: - dry mortar brushed/poked in and misted with water. - wet mortar pointed. - a resin base product such as Fugabella piped in. I initially thought of polymeric sand, but that seems to need a pervious base, so I've ruled it out. 2 - What size gaps can I leave alone and not bother filling/pointing? First time I've done anything like this so pointers are much appreciated! Thanks, Steve

-
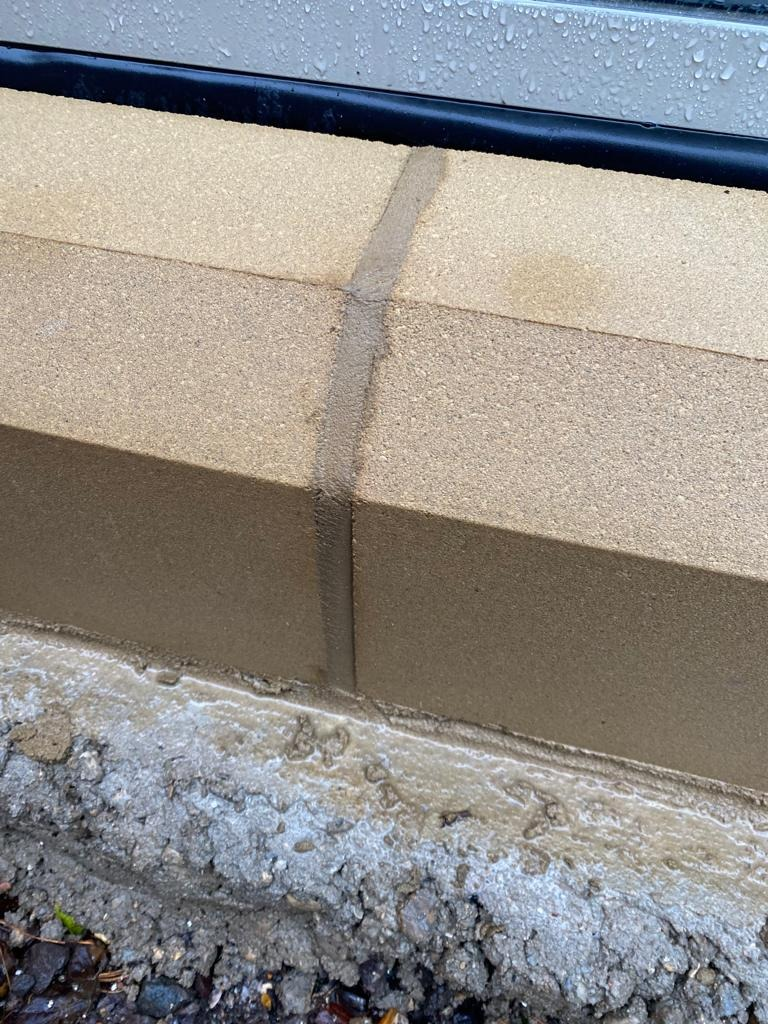
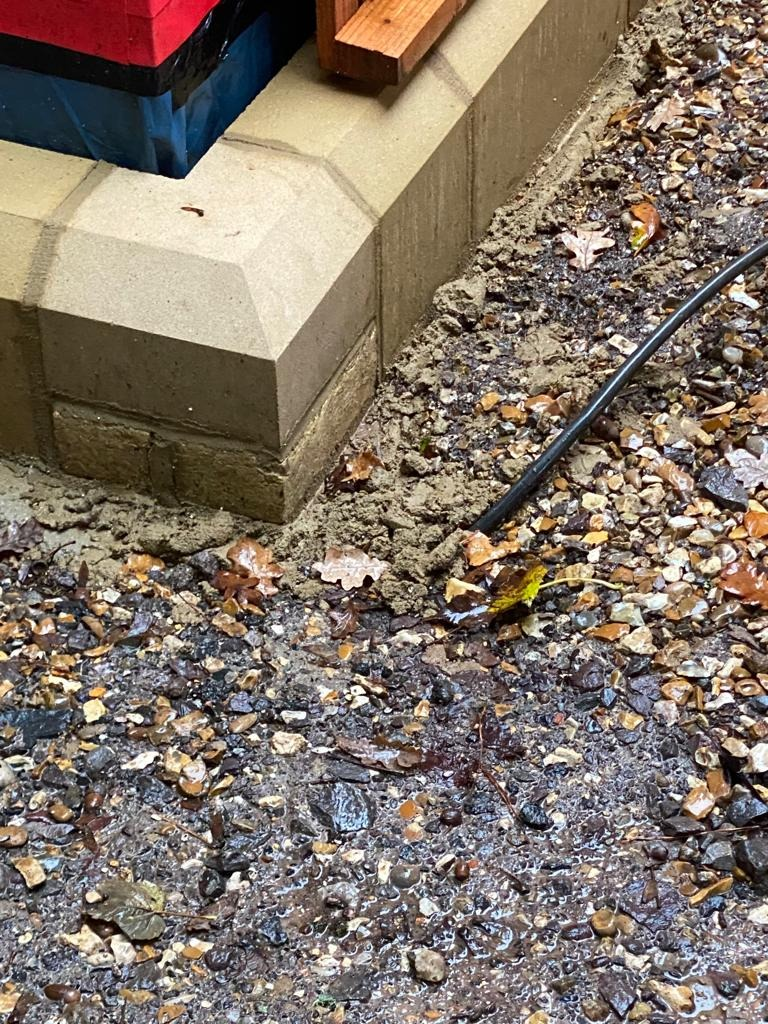
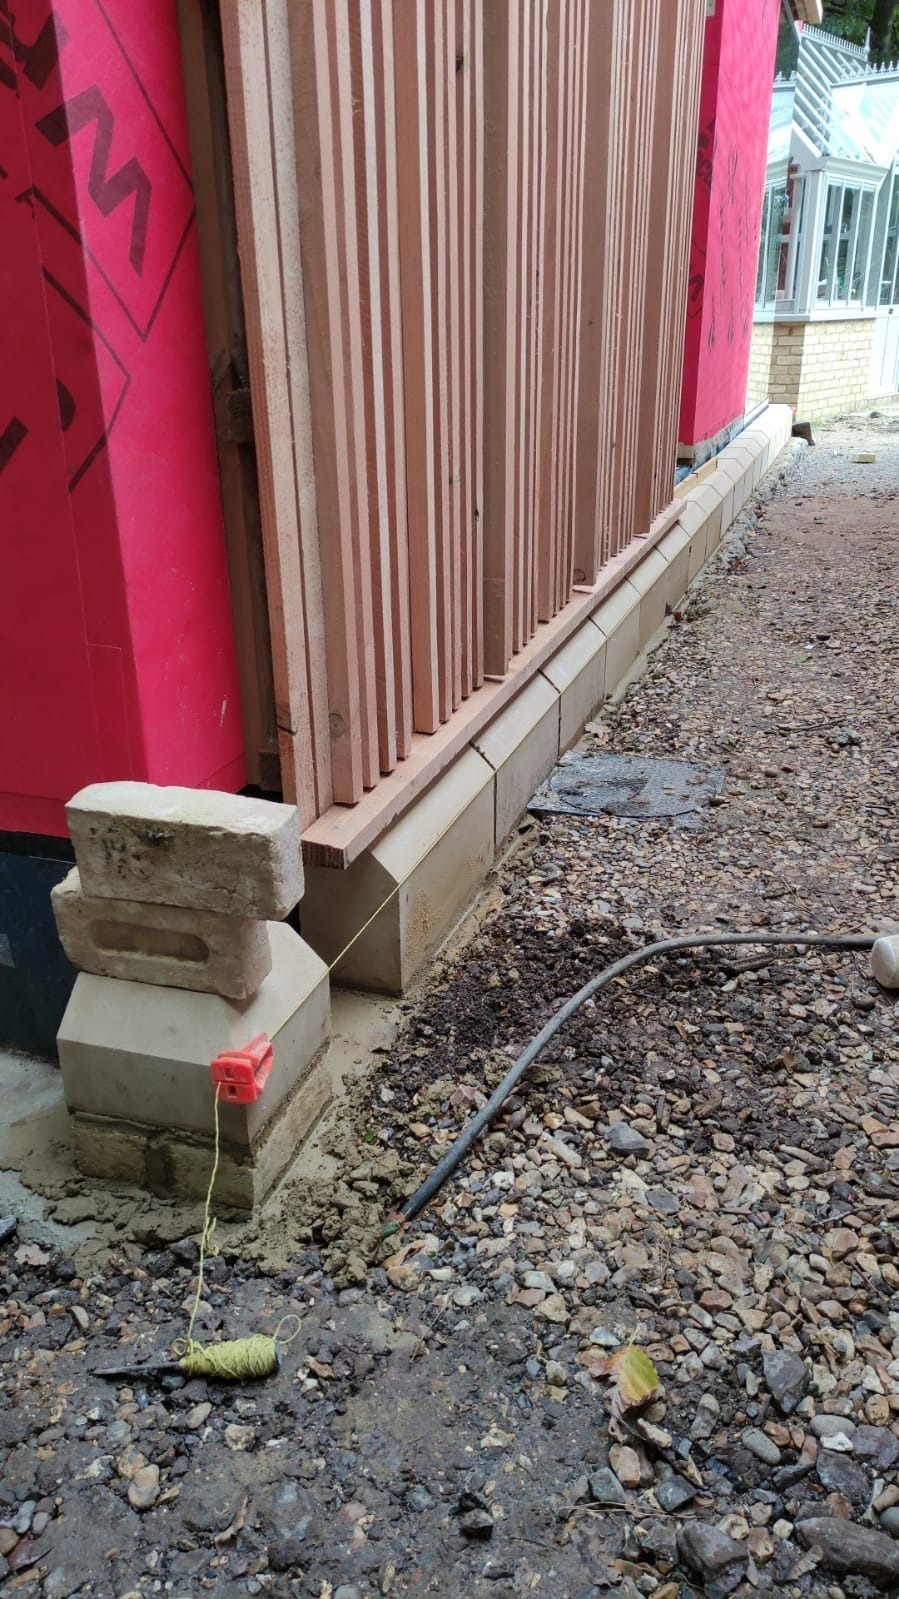
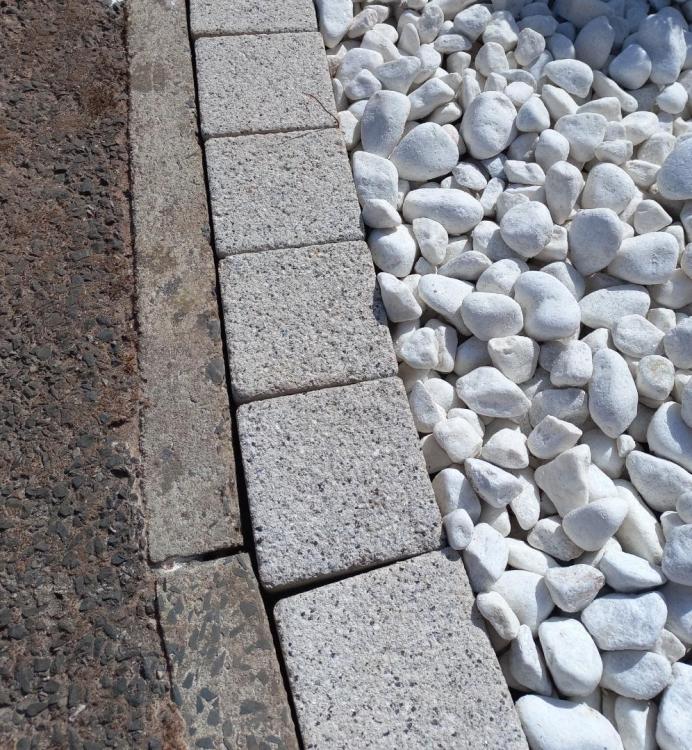
 Hello, We've had some very special cast stone plinth blocks installed in a sandy 'bath' colour. Our groundworker - a bricklayer by trade - has installed them with a 10mm joint using yellow mortar (despite us having a convo on site re the joints being as thin as possible, ie 3mm and in a colour-matched mortar). Given that we wanted to achieve something that looks seamless, I think it looks awful! - see photos at bottom. I'm going to ask him to repoint with a colour-matched mortar - sadly it'll be too late to achieve a thinner joint now. Has anyone worked with cast stone blocks who could offer some advice about how to point them neatly and what a good mortar to use is? Thanks!


-
Good morning all, Thank you for allowing me to take part in this forum. Just to introduce myself, my name is Eric and I'm a newbuild homeowner. The reason why I am writing on this forum is to seek guidance from other more knowledgeable users in regards to landscaping. I am based in East Devon, in an area which is predominantly very clayey. The land where my development was constructed used to be farmland, and so I assume that it is quite fertile. Anyhow, I think I'll just start off describing my concerns in chronological order: At reservation stage, the developer provided us with a standard specification setting out finishes, colours, etc. One of the items in the spec was the finish to the garden areas (back garden and a strip out front along the facade). The spec stated that the ground would be finished with a 150mm thick layer of topsoil. I was quite glad that this was the case, as my concern was that the underlying clay would challenge the garden's ability to drain rainwater. Fast forward to completion, we get the keys to the house and to my surprise, the garden was topped off with site-won material, i.e. clay. In addition, the plot was plagued with stones the size of fist. To me that didn't look like topsoil... However, the next question I asked myself was: what is topsoil anyway? Doing some research, I found that there is a British Standard entitled "Specification for topsoil" (BS 3882:2015 - in case you're interested). This standard sets out the requirements for a soil to be classified as topsoil. One of these requirements is that the "maximum coarse fragment content" greater than 50mm has to be 0%. In other words, stones greater than 50mm in diameter should not be present at all, which is something that my garden clearly doesn't meet. I have gone back to the developer with this (it's been more than a month already) and they are still figuring out what to respond. I am not trying to be picky here, but I've paid a large sum of money for my new home and I will always try to make sure that I obtain a quality product that meets the minimum standards. I should add that the NHBC standards specify that gardens should be finished with a minimum of 100mm of topsoil. NB: my neighbours have placed a ver thin film of topsoil on their garden after picking out the majority of big stones. They then planted some grass seed and it's growing well. However, I think as soon as they start transiting the grass, the clay will compact and it'll become boggy with rain, which will eventually compromise the health of the grass, etc. I would be grateful if others could share their views/experiences on the matter, as I'm not sure if I'm making this a bigger issue than what it really is? Thank you very much, Eric
-
Hoping for help. Single parent fed up of being duped or relying on my Dad. Recently had a driveway completed by what seemed like a reliable company with good reviews. Unfortunately the job started off well and then was a rush finish to get to another job and the end result worries me for how it will stand the test of time. Even more worrying was they then demanded I pay cash less then 24 hours after it was finished and wouldn't even listen to my questions of why it was not completed properly. I didn't pay cash and made sure there was a trail through my bank. My question is advice on how to proceed. They set the edging stones ready for tarmac. When the base layer of tarmac was laid by another company the edging not up against the house started to move and dip. Tarmac company took pictures and said they would have to come back to do top layer at a later date. Contacted the company with video and had a builder friend confirm they had just laid the edging on a bed of sand and it needed cementing to be able to with stand vehicles. Eventually after chasing they came out to fix. Except instead of cementing the edging in and leveling they just piled a load of cement to haunch it (if I'm saying it right) which I have now been told by several people is not good practice especially as there is no cement under the bricks and in some places is way too much and is a mess. My question is should I have the cement removed and bricks relayed in the hope we don't break any of the bricks and be sure it is done properly. Cut the cement back and continue with landscaping and keep my fingers crossed it lasts. Or any other suggestions. Any help appreciated. received_223539519011893.mp4 VID_20200820_091139.mp4
-
Hi all, Very much a novice with a small project here but this looks like the place to come to get some great advice and experience. We are landscaping our garden and have just finished decking outside the kitchen door area. There is a very ugly block concrete wall directly opposite the door, running down our lovely new decking which is an eyesore but cannot be changed. It is north facing and gets 0 sun exposure all year round so I cannot hide with planting. We looked at timber cladding it but the opposite side of the house will be timber, as is the decking so I thought that might be too much wood. We have decided to go with Corten to cover it as I really like the look once it has 'weathered'. I think it will work well alongside the timber as well. My question is, how to I fix it to the concrete block wall? Ideally I do not want to have to put timber framing up as it will eat into the decking space. Can I just screw/ nail it to the wall? Do I need special screws/ nails for this? I would like them to bend in with the Corten once it has weathered. I have trawled through Google but have only found one vaguely useful video on how to put it up (attached directly onto the concrete (not block) wall with "Hammer-set" Heavy duty nail drive anchors.). These stand out against the rust colour though and i would like to avoid that. Has anyone else done anything similar? Any advice very welcome. Thank you
-
Hi All, I just wanted to introduce myself. My name is Michael, 33 years old, Psychological Therapist and I live in Lancashire. I'm hoping to undertake a garden renovation project over the next couple of summers and would appreciate any advice I can get. I'll post some pictures shortly, including the 'plans' I have, which include raised beds (rendered concrete blocks), composite decking, artificial turf and a porcelain patio. I'm hoping to do most of the work myself! Cheers, Michael
-
I want to think about the design of the garden before my brain gets decisioned out. Can anyone recommend some software that is easy to use. I don't mind paying. TIA.
-
Having completed the initial groundworks last year (see Part 15) it was great to get the digger back and be able to spread the remaining sub and top soil over our site. All in all, there has been around 150 hours of digger time to get all of the site landscaped. Other than using stone excavated on site to edge parts of the driveway and round the back of the house, most of the digger time (supplemented for earth moving with a dumper) has been spent on earthworks. At the front of the house, we had formed our terraces last year so 'only' had to cover with top soil. At the rear of the house, a lot more work was required as we had to spread what was still a sizeable amount of subsoil, before we could finish with topsoil. The result of all that work was a barren 'moonscape' of soil. Having considered all of my gardening options, and in particular the exposed nature of our site, I opted to go for a very simple garden scheme - a mix of lawned grass and wildflower meadow. With 2/3 of an acre to seed, I opted for the big guns and got a local farmer in to power harrow and air seed the meadow areas. He also harrowed and raked the lawned areas for me, but they did require good old human input to get an acceptable and stone light (I won't say free) bed on which I could sow lawn seed. I sourced both lawn and meadow seed from a local merchant, opting for a local species rich meadow mix, boosted with some annual and bird/bee wildflower seeds. On those areas which the air seeder couldn't reach, I used an aero broadcast seed sower / "fiddle" sower. For those who haven't used one, it's a very simple yet effective bit of kit. The lawn seed was sown at a rate of around 45g / sq m, and the meadow grass at 3g /sq m (to allow space for the wildflowers to grow) 6 weeks on, the grass has established itself and our site is starting to look rooted in its surroundings. Looking forward to next year to see some colour in the meadow areas. Stone lined entrance - large stone will eventually have a house name sign on it. Driveway, lined with timer (old 75mm posts) and small stones at the corner Meadow area - depending how this looks, the lawn area may be extended back a little to shape the meadow with flowing curved lines. You can see our treatment plant at the bottom right of this photo. A diversion channel filled with stone and small stones around the plant lid are in place to prevent water running onto the lid and flooding the pump chamber. The slope between the two terraces has been sown with wildflower meadow grass, so the terraces are hidden when looking from the road below. if this doesn't work / look quite right, I have the option of converting to lawn grass. How we have finished the space between the two sections of the house. It will of course take time for the grass to get properly established, and no doubt there will be many changes made, but overall things are looking good and the house feels that it should be there / always has been there. Meantime, we are just waiting for the fencer to come and erect two new boundary fences and replace an existing one to enclose the site from the adjacent field and neighbouring site.