
Redoctober
-
Posts
836 -
Joined
-
Last visited
-
Days Won
3
Everything posted by Redoctober
-
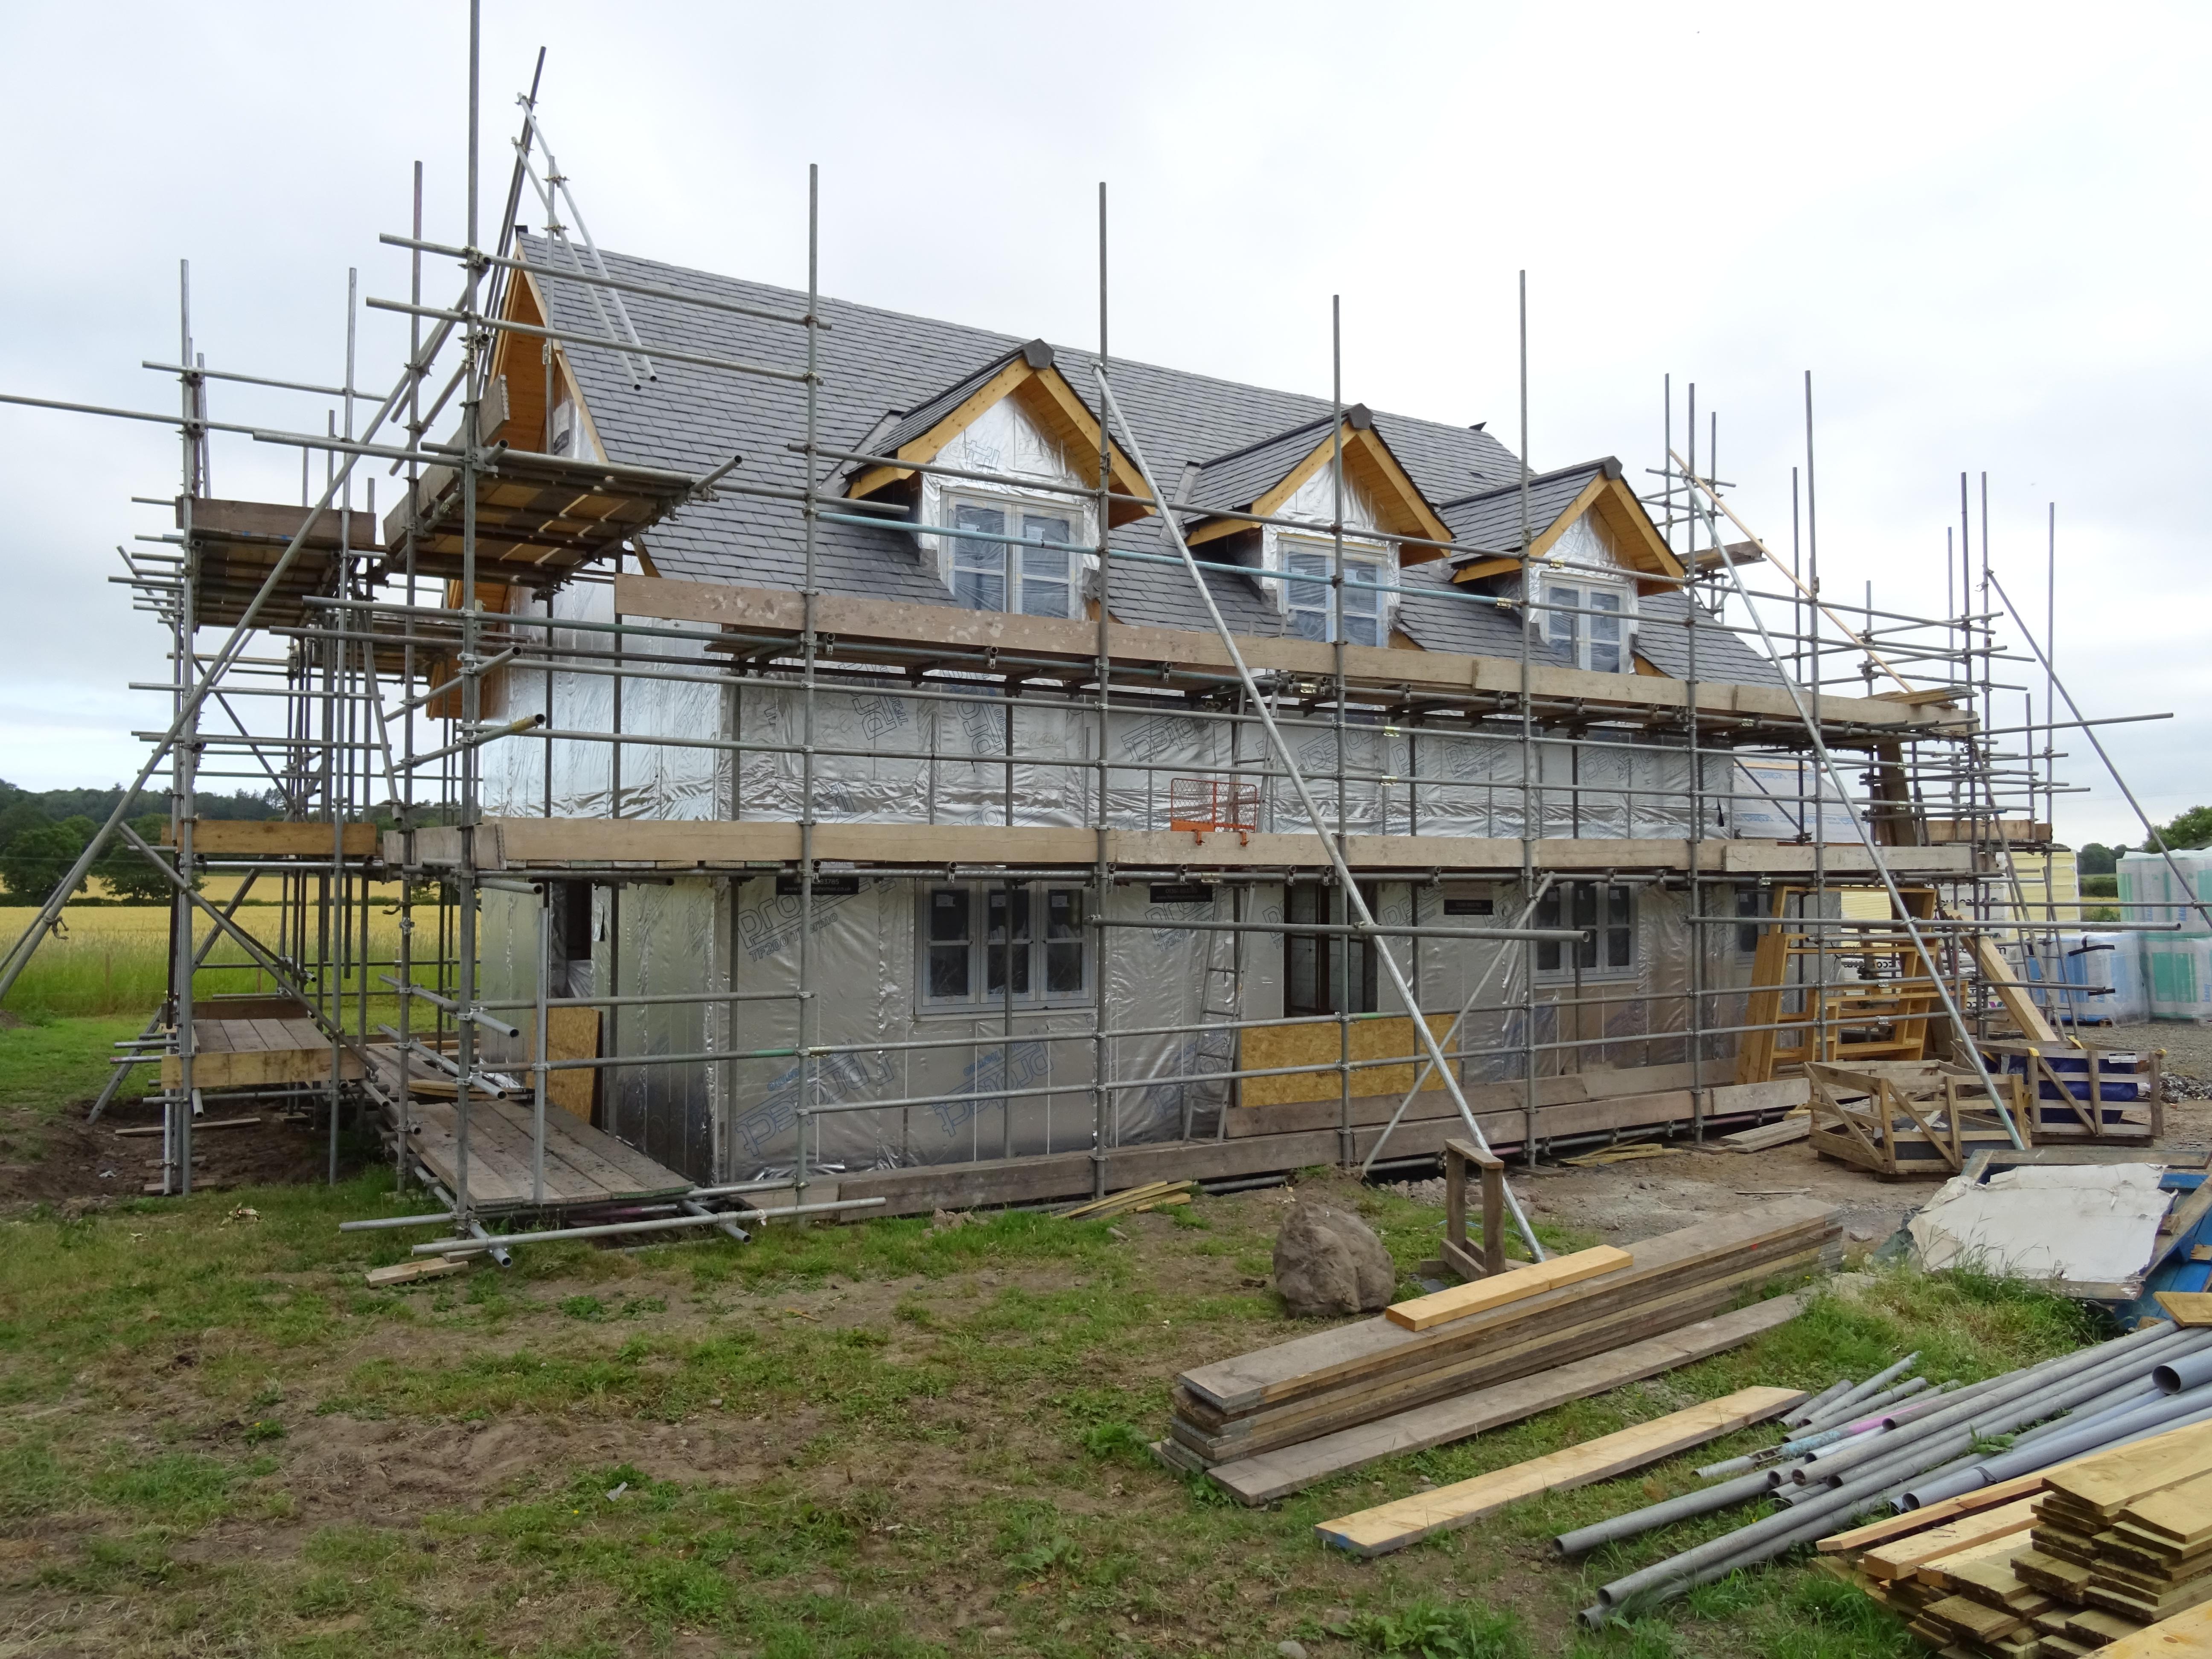
A few photos of the stone work that has now started on site, whilst others continue to prepare the upstairs for the first fix. I have also included an image of the "biscuit screed" laid upstairs over the UFH pipes. Close observers and those who have read previous entries, will notice that the windows have been corrected with fire battens fixed. Anyway, the stone is called a local blend and is made up of Perthshire stone, Cumbria stone and Borders Buff. The Quoins have a hint of lilac to them, to have blend in with the colour palette of the stones. The Red things seen in the photos are glass fibre Fire Socks - They fill the cavity at the corners and other strategic locations. Either these can be used or indeed 45mm x 45mm battens.
-
Yes, I do believe we have been fairly lucky with the trades employed. The one area I thought I could make a saving was on the scaffolding but that just came back and bit my backside. Not a good experience at all with them sadly.
-
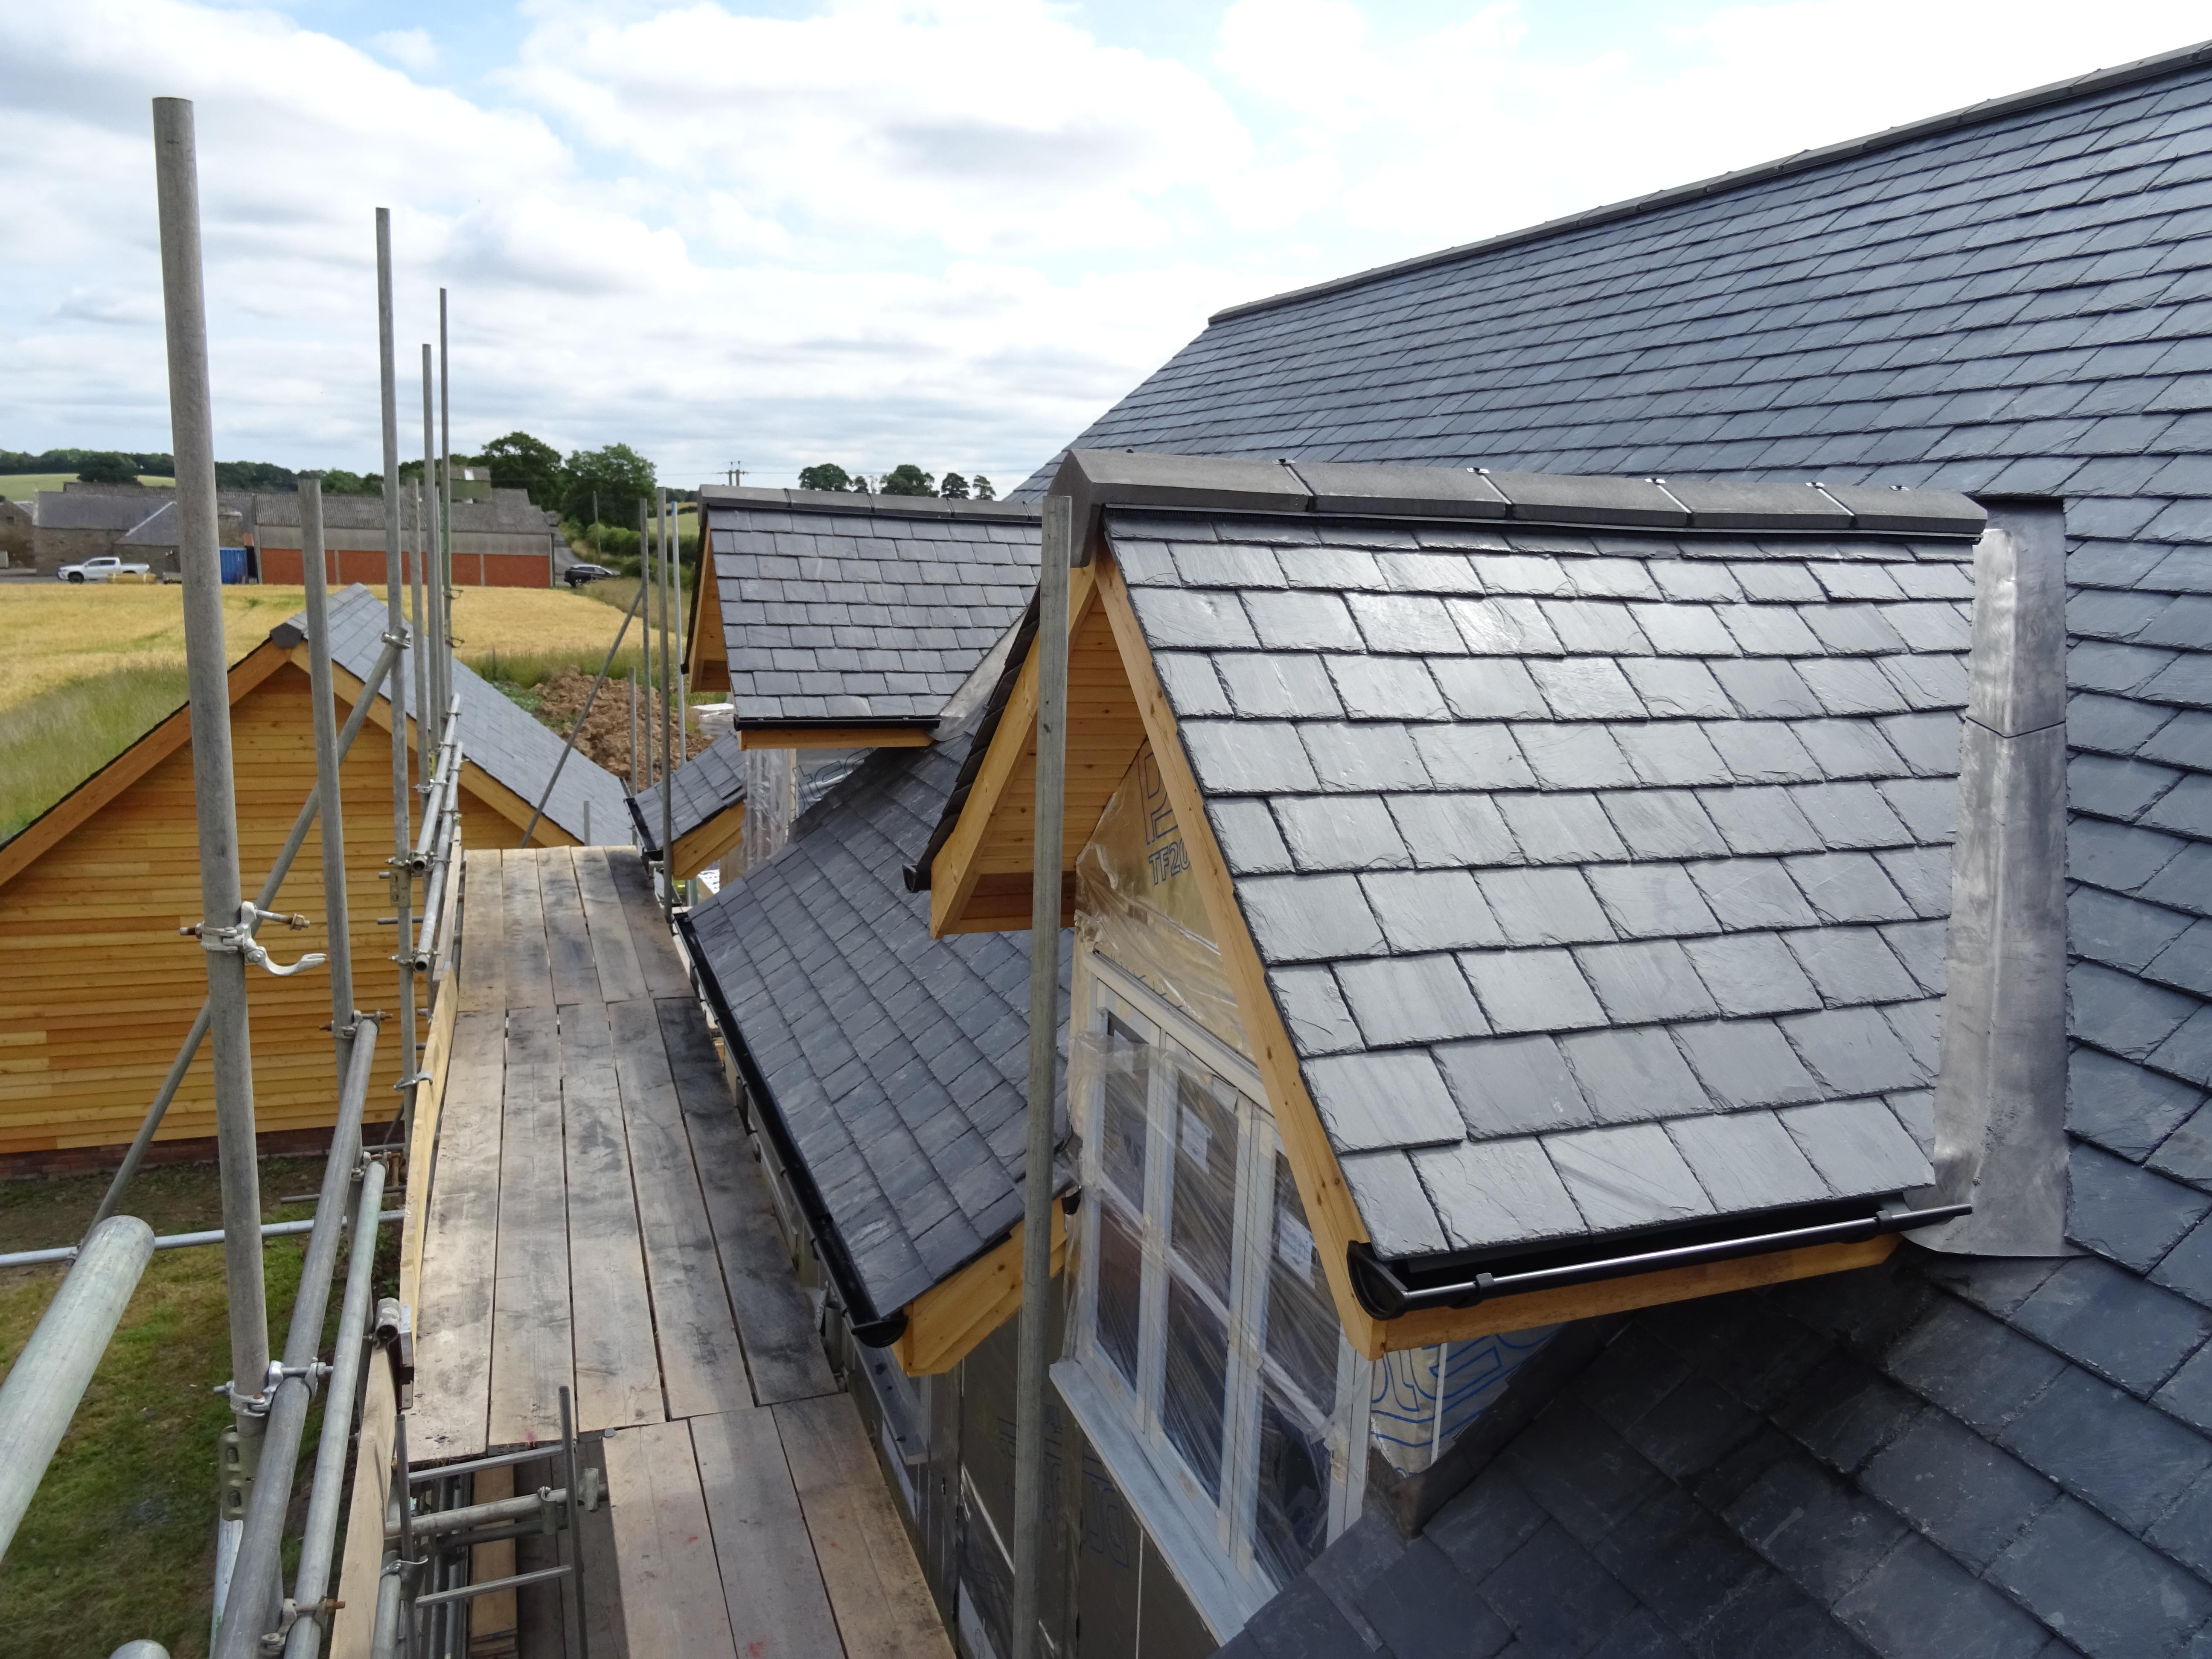
@Christine Walker that is a shame as our roofer did exactly that. He sorted them into heavy & medium at his yard and then transported them in crates to the site. He was an exceptional roofer and his band of 3 men worked tirelessly through the heat and installed them across the entire roof together with the lead work in 8 working days.
-
Crazy as it may seem, I don't know as I paid the roofer on a supply and fit basis.
-
Hi these are exactly what we used - very impressed - a quick photo to show how well they sit etc.

-
that is one cracking location.
-

The Build - Insulation ahead of 1st Fix - UPDATE
Redoctober commented on Redoctober's blog entry in Our Journey North of the Border
Yes sorry @CC45 forgot to mention last time round - It is 8 parts sand and 1 part cement with a splash of water. Tested it today and what was laid yesterday is rock solid. -
The Build - Insulation ahead of 1st Fix - UPDATE
Redoctober commented on Redoctober's blog entry in Our Journey North of the Border
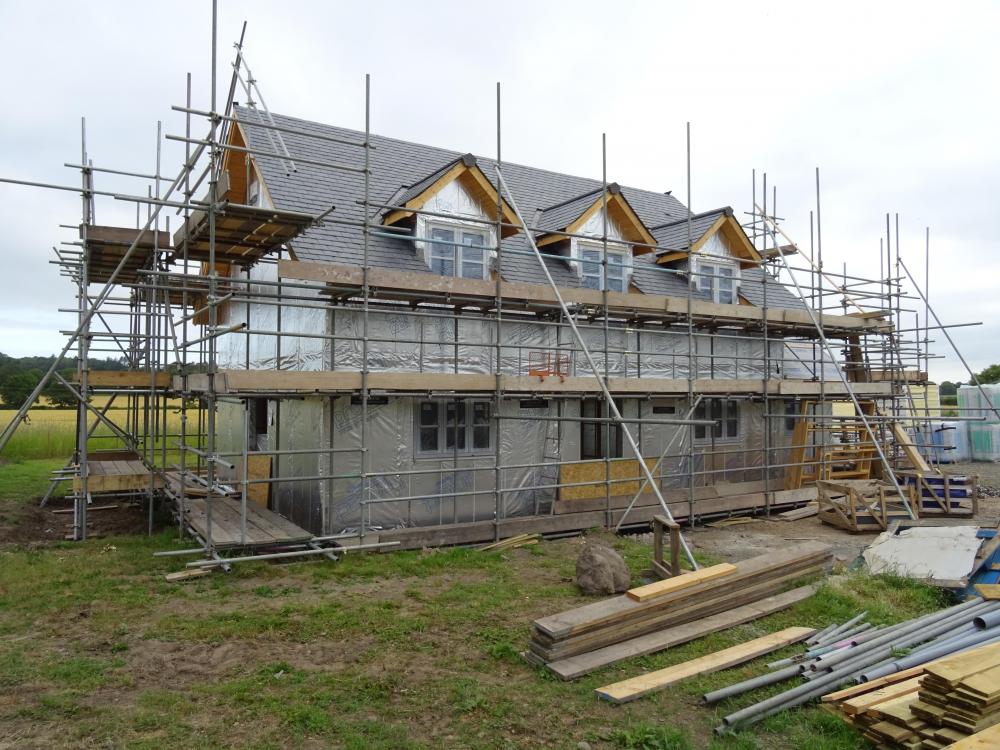
Unfortunately it was and proved to be quite a work out for someone like me who in a previous life drove a desk! Anyway really pleased with the frame, it's construction and erection. Fleming Homes. Would recommend them. -
Thanks. I will know more in the morning as the guy doing the internal bit and the WBS installation will be in site.
-
Good point @PeterW What are my options ?
-
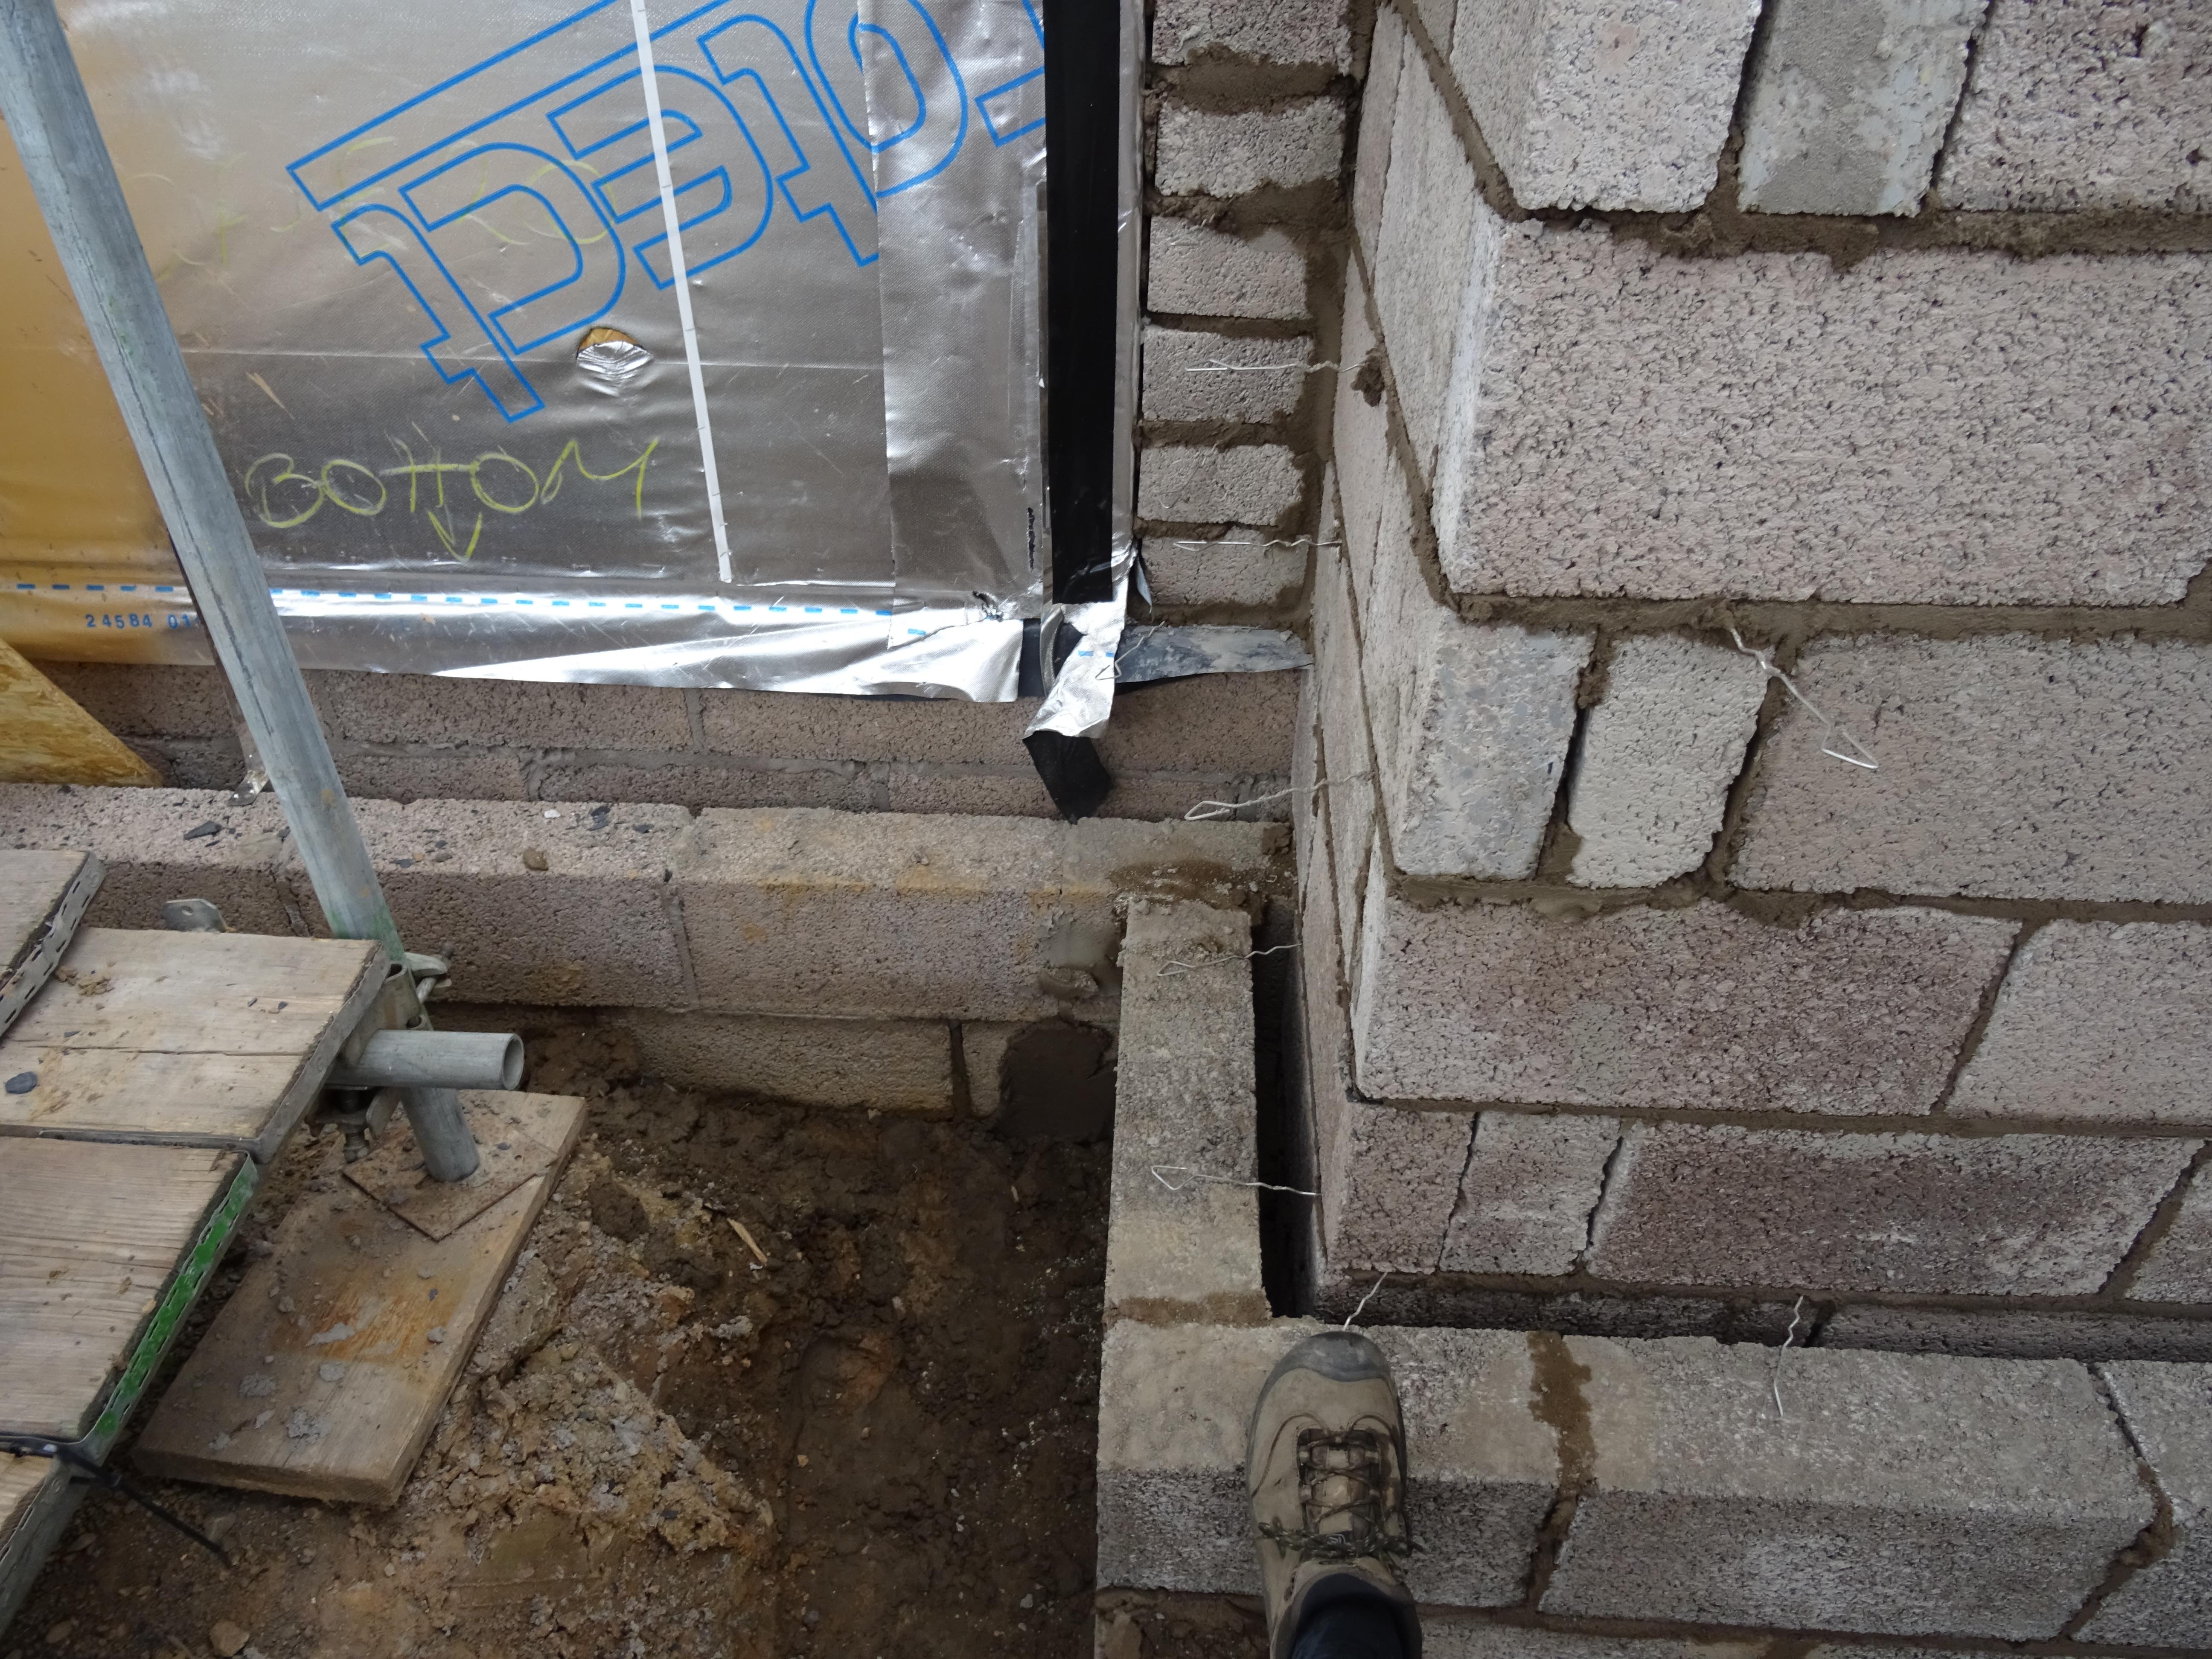
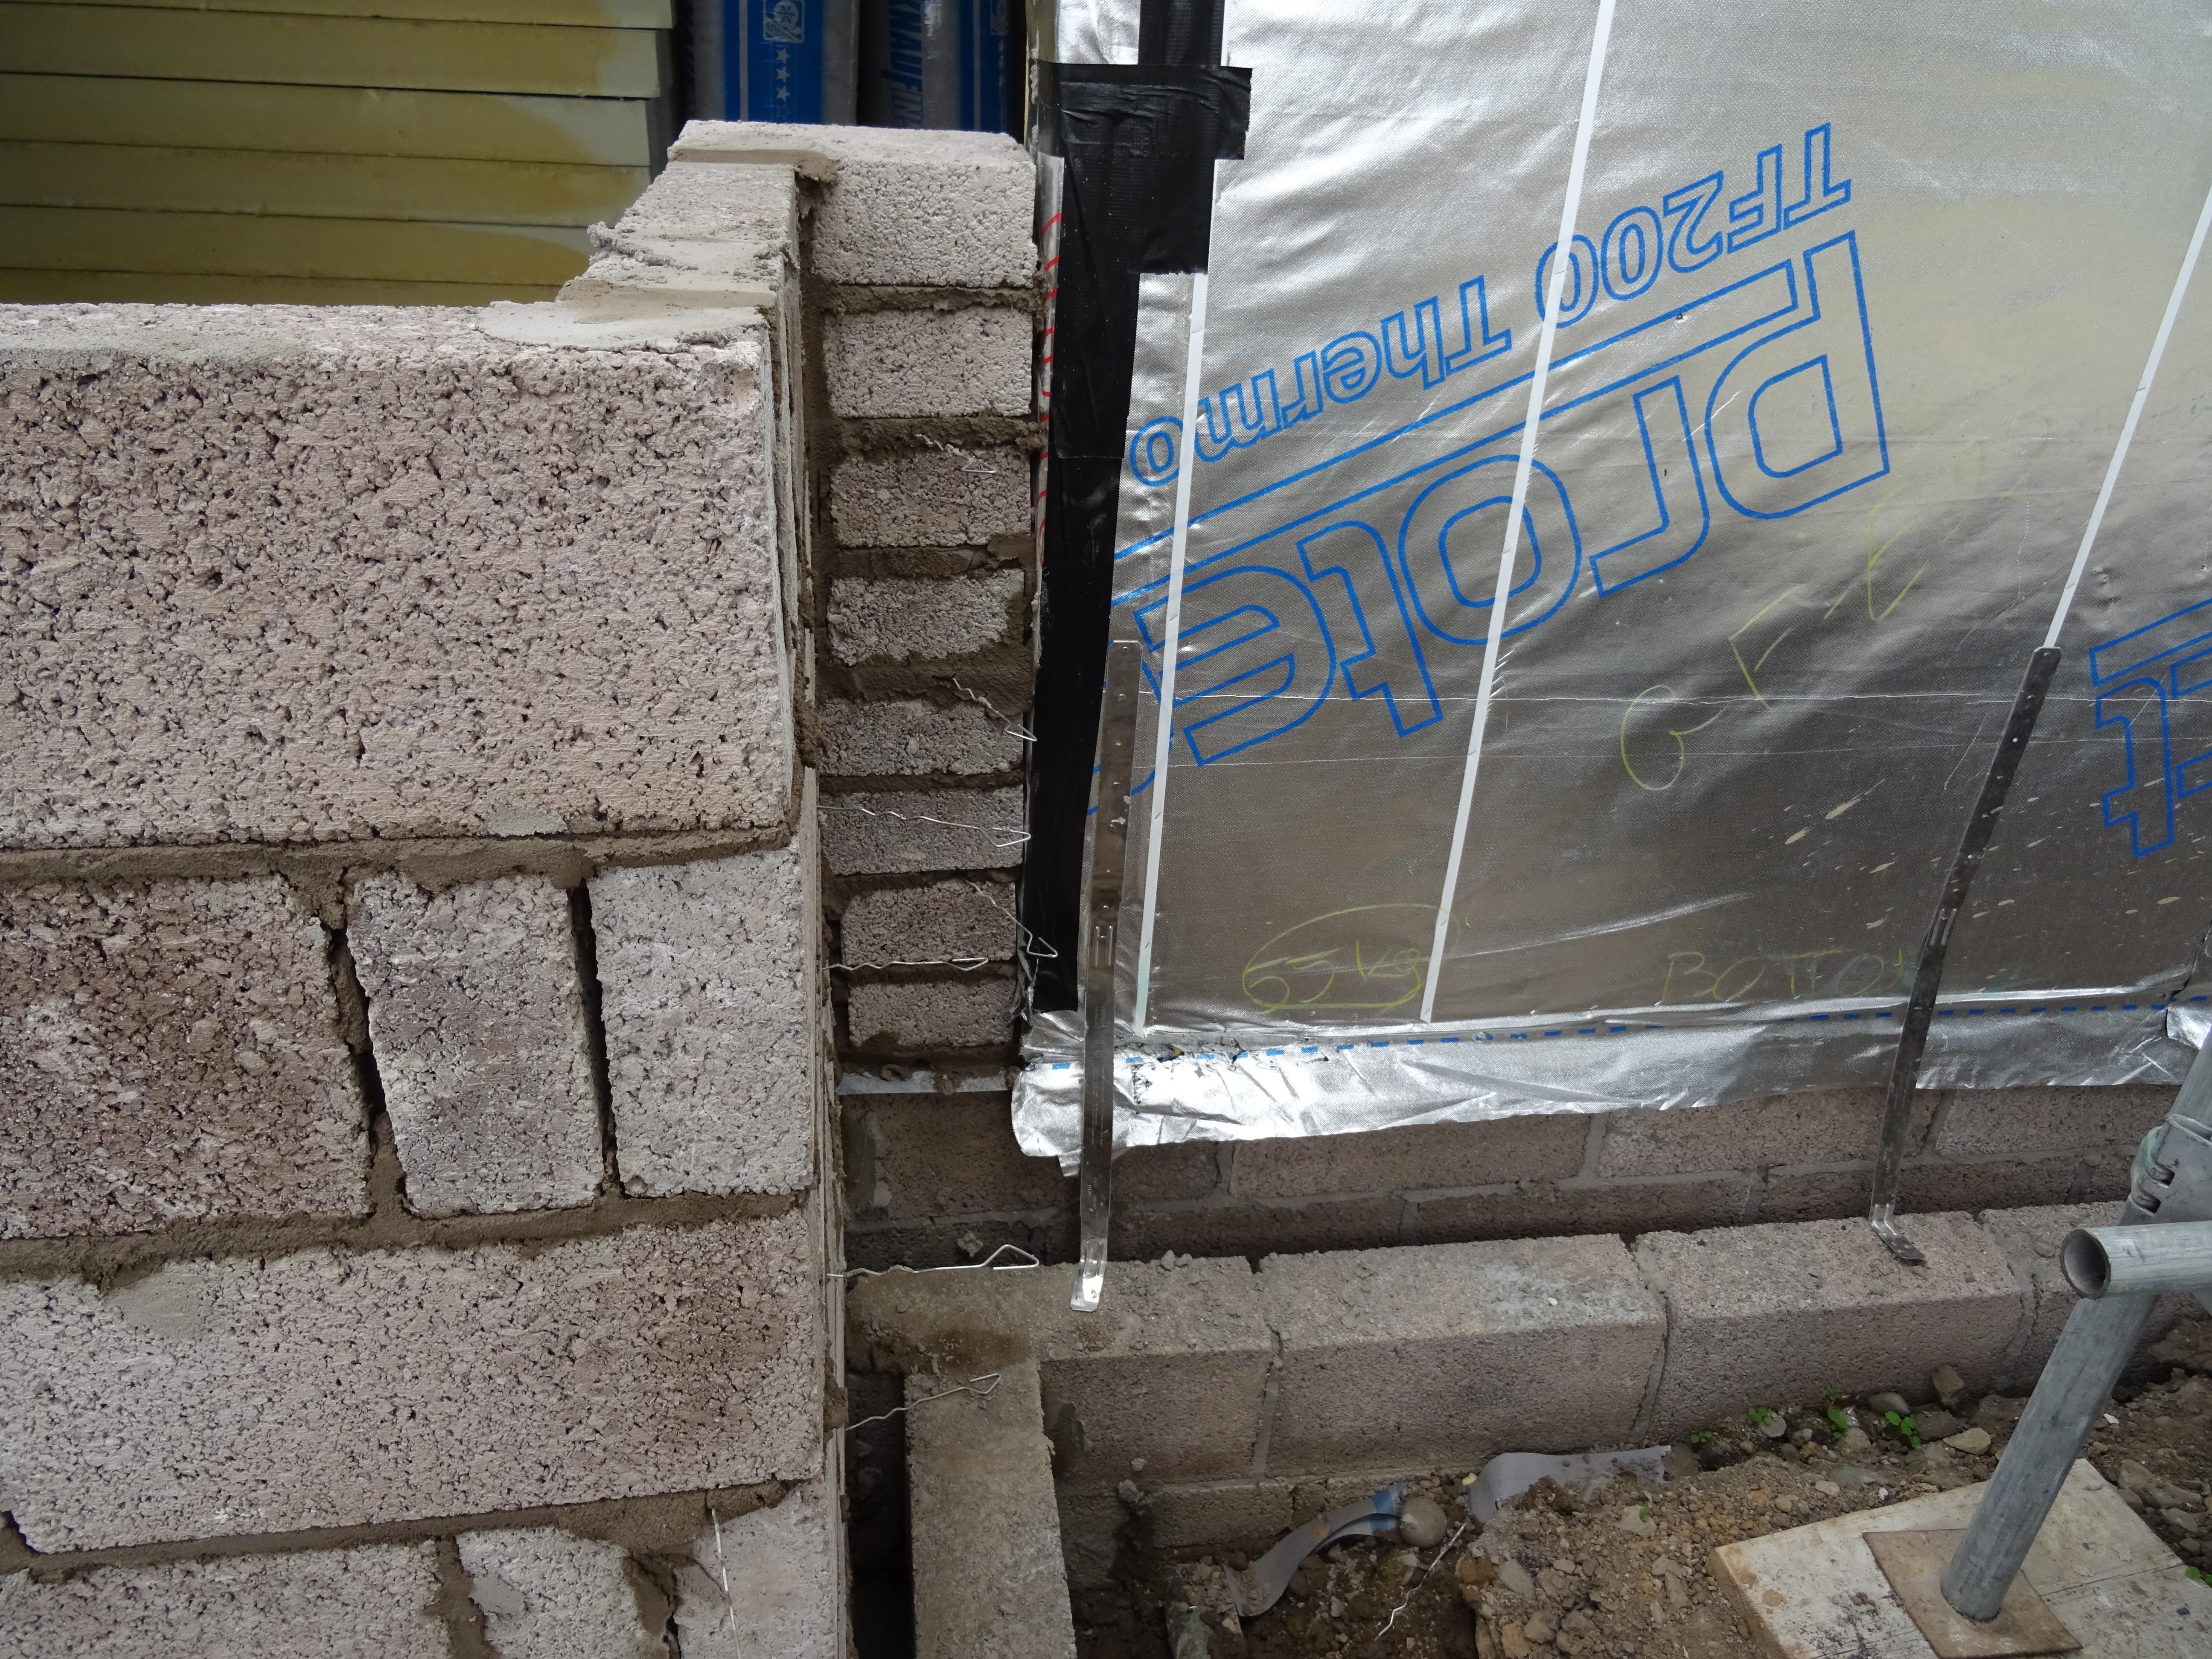
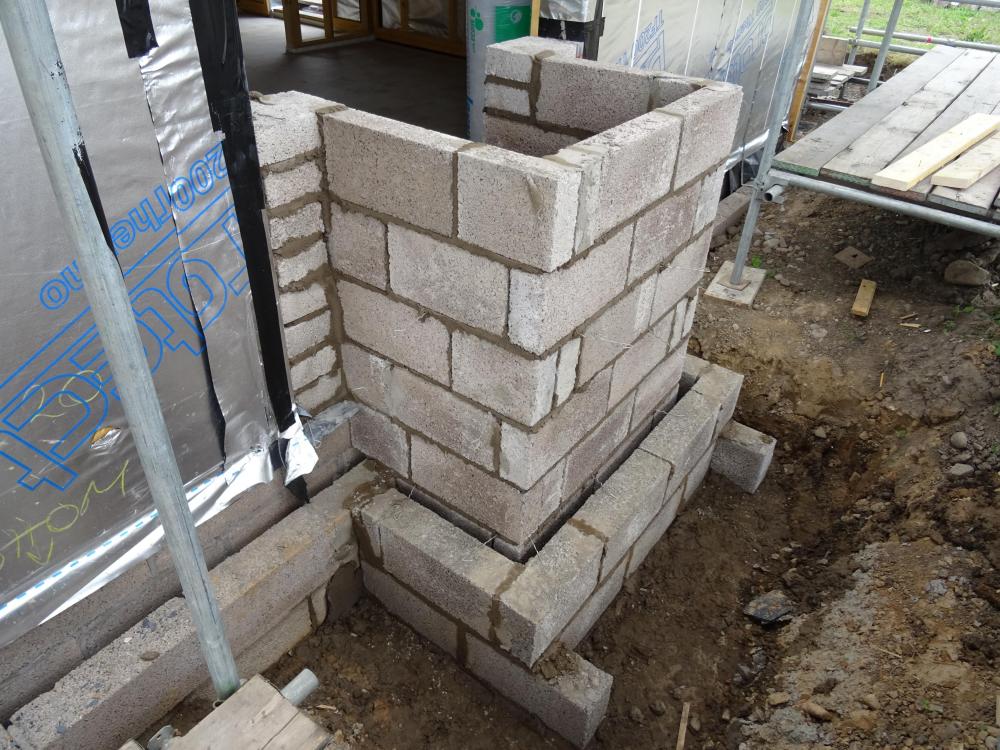
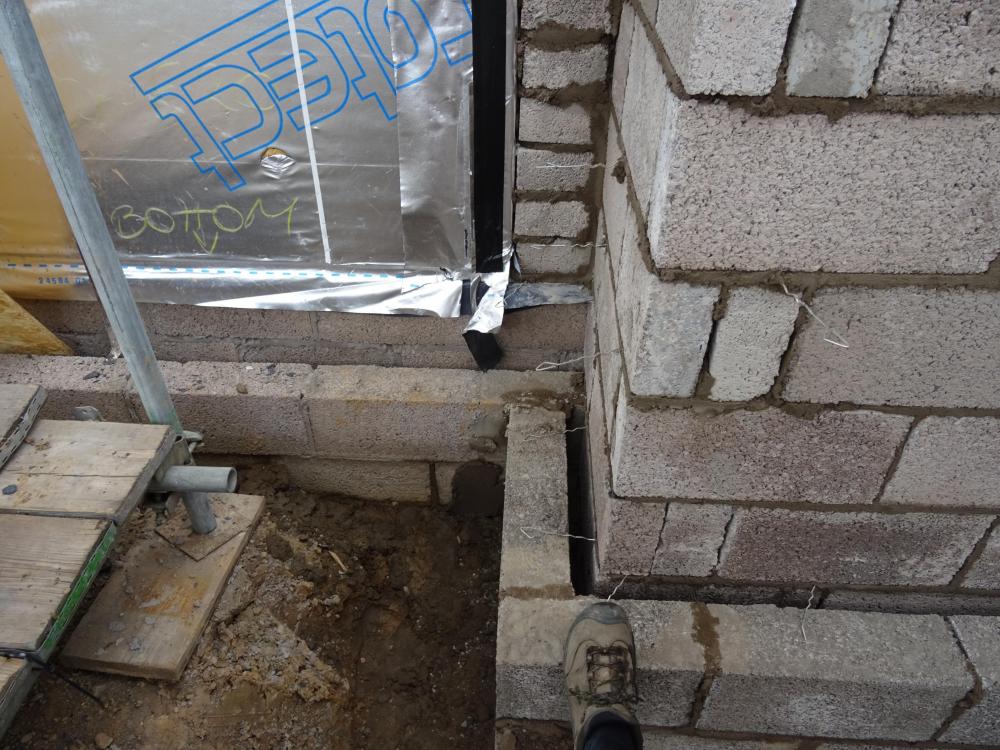
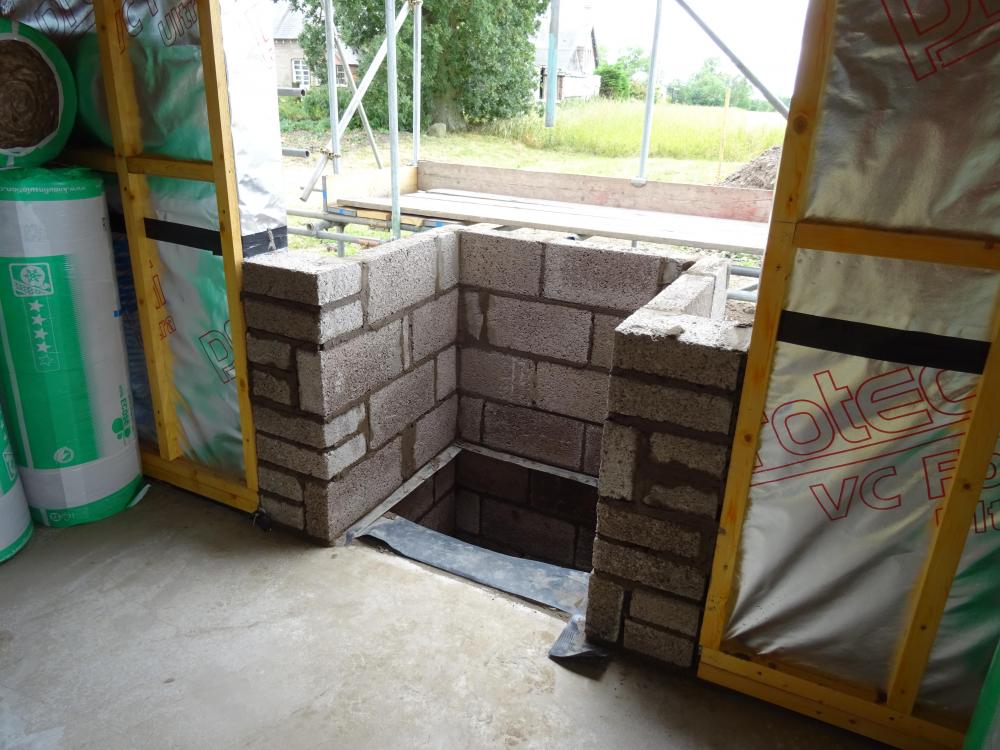
@Ed_MK Not sure how advanced you are with teh chimney but as I mentioned previously, ours started today and these photos may be of assistance. The basically show the external chimney being constructed in block work, a cavity and then the blocks on which the external stone will sit on and rise up from. The chimney has been constructed so that it sits flush with the internal panels of the TF.

-
The Build - Insulation ahead of 1st Fix - UPDATE
Redoctober commented on Redoctober's blog entry in Our Journey North of the Border
The battens are 33mm deep and the eggerboards going on top will be 22mm The screed is a lengthy job as it has to be transported upstairs in buckets by yours truly whilst the lad is mixing and the builder spreading ! Should be finished tomorrow though. These pictures might also assist.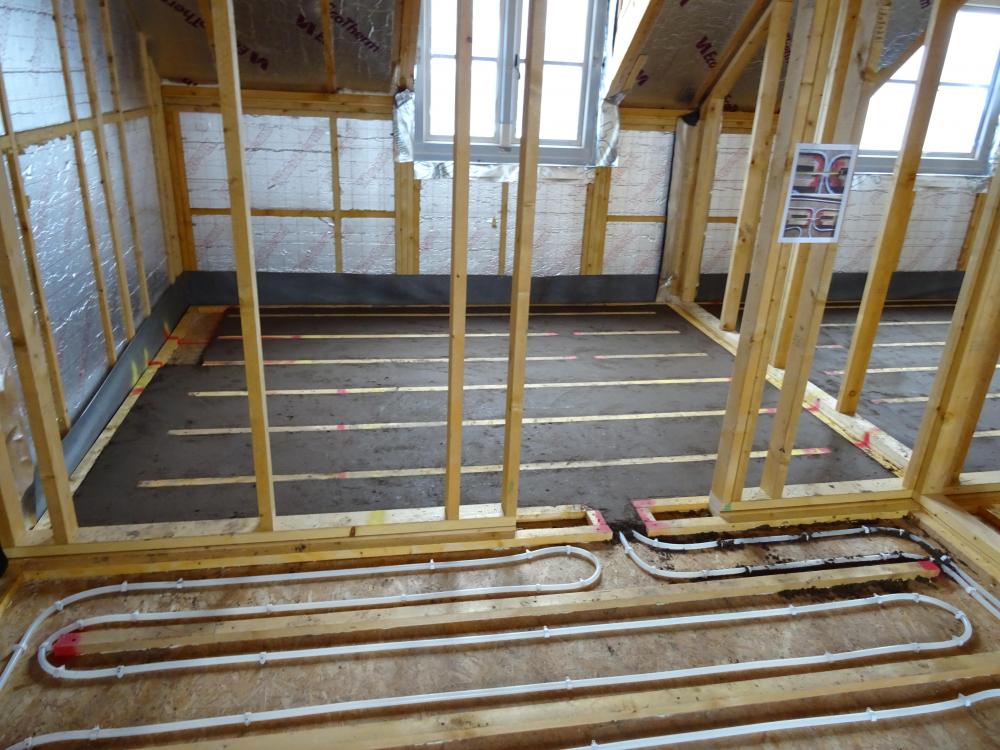

-
Enjoy Sunday lunch and celebrate another milestone / achievement. Well done.
-
The Build - Insulation ahead of 1st Fix - UPDATE
Redoctober commented on Redoctober's blog entry in Our Journey North of the Border
Good point @ProDave I will discuss this with the UFH fitter and screed layers Monday - thanks. -
Water connection
Redoctober replied to recoveringbuilder's topic in General Self Build & DIY Discussion
@Christine Walker we are in the Scottish Borders and have recently had a road crossing trench dug and back filled for water. A local company dug the trench, back filled and installed a boundary box the other side of our hedge and stop cock in the plot itself. Total cost just shy of £1k - the road crossing was a single track road, no more than 3 metres wide - see my blog for images - -
The Build - Insulation ahead of 1st Fix
Redoctober commented on Redoctober's blog entry in Our Journey North of the Border
@CC45 - additional images uploaded under a new entry - hopefully they will assist. -
The Build - Insulation ahead of 1st Fix - UPDATE
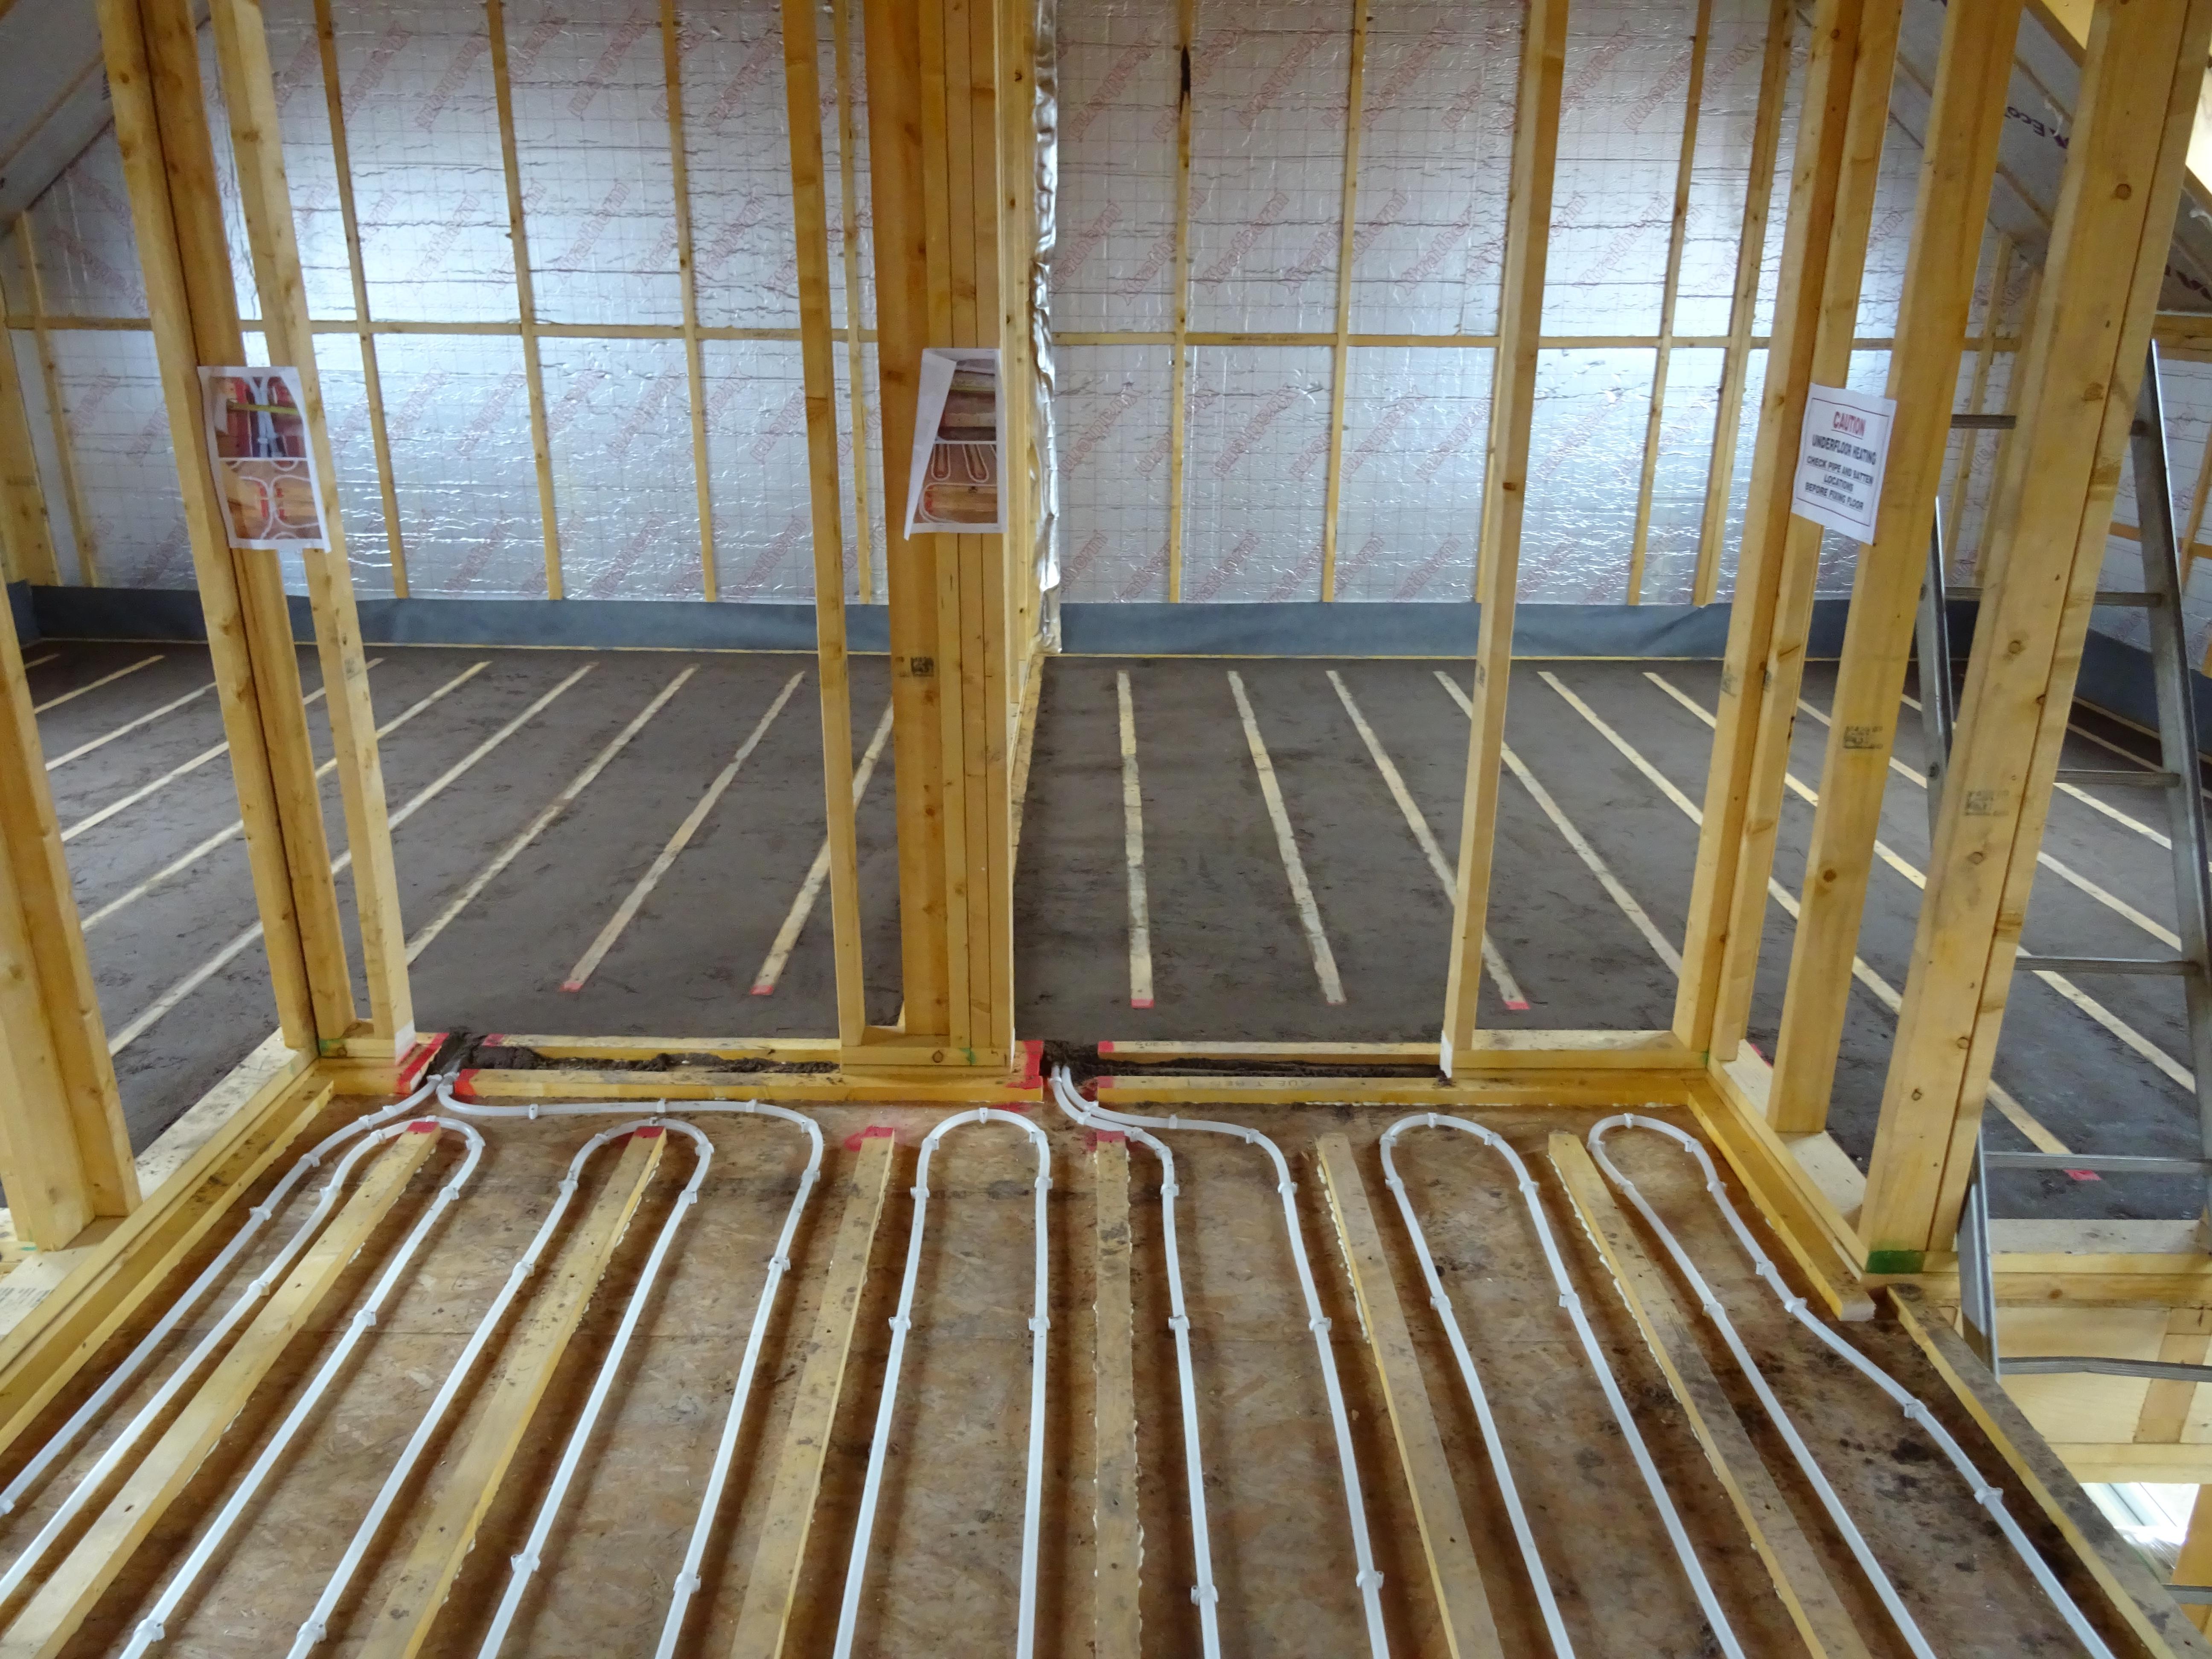
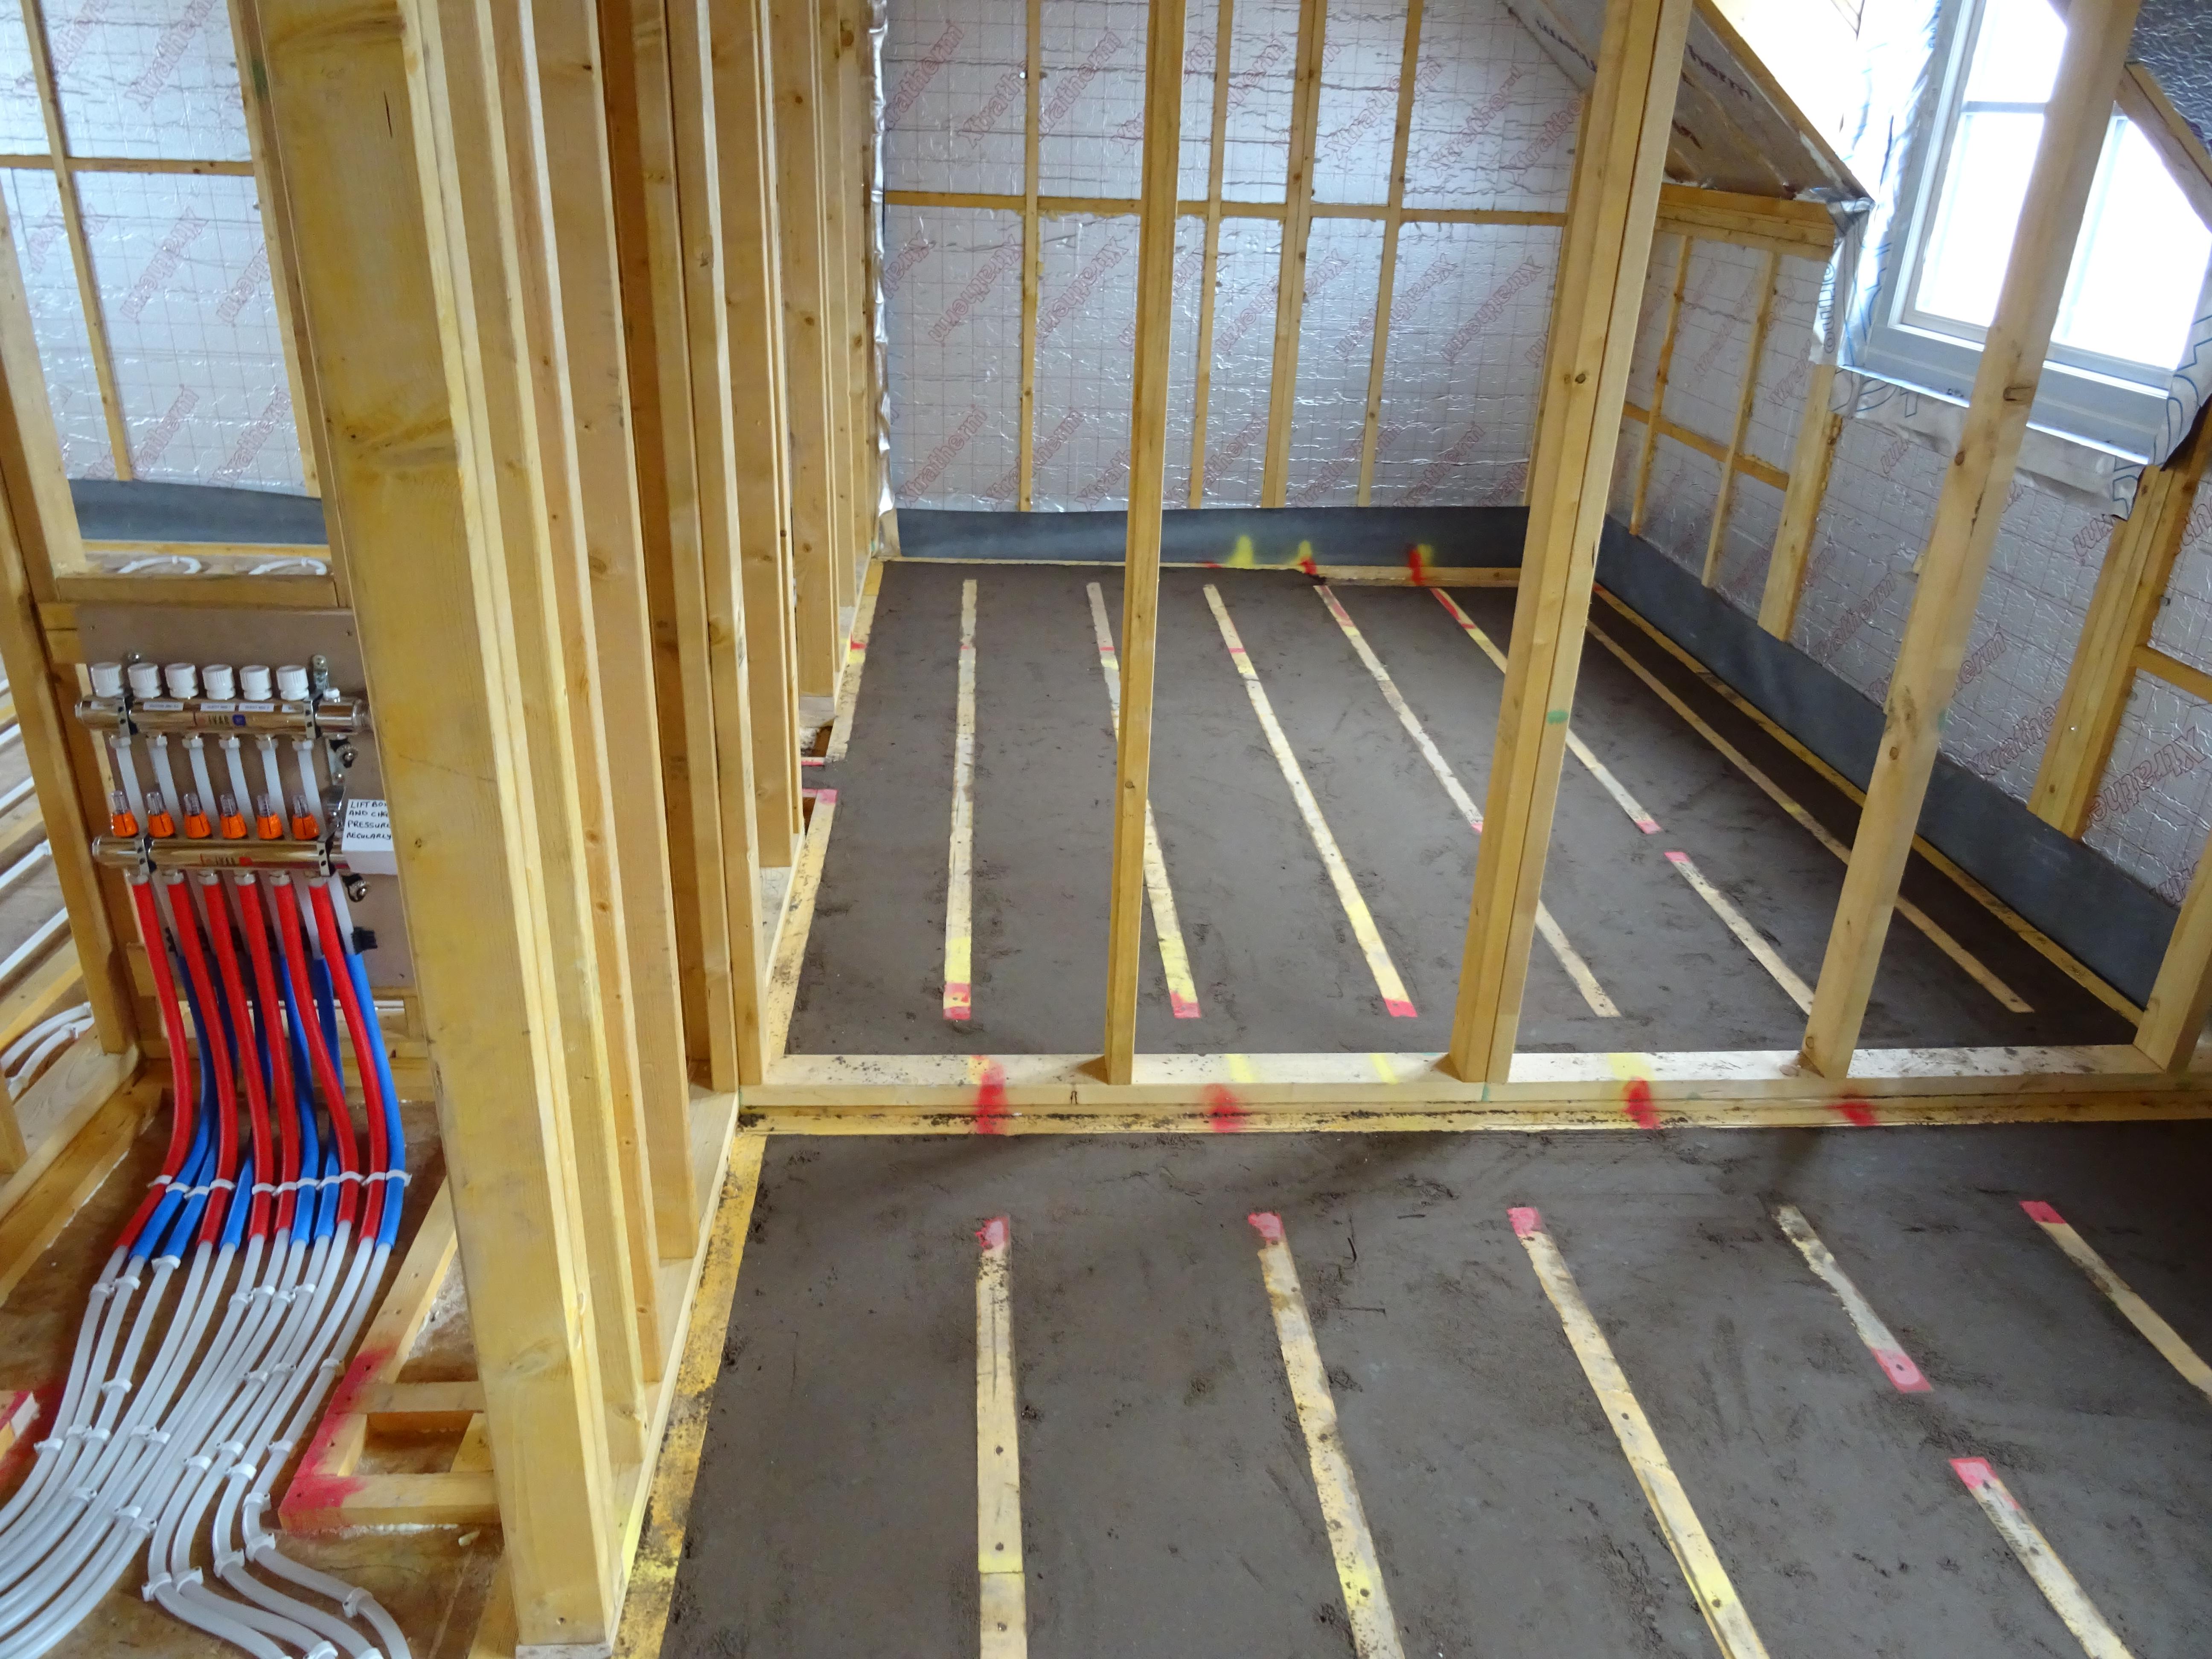
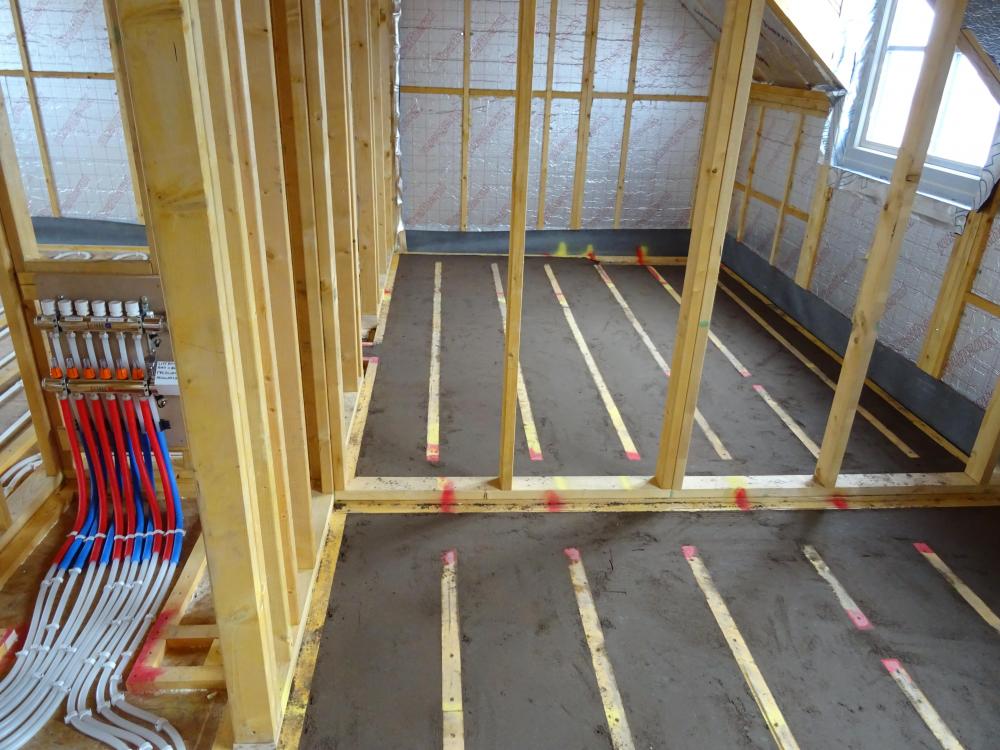
Redoctober posted a blog entry in Our Journey North of the Border
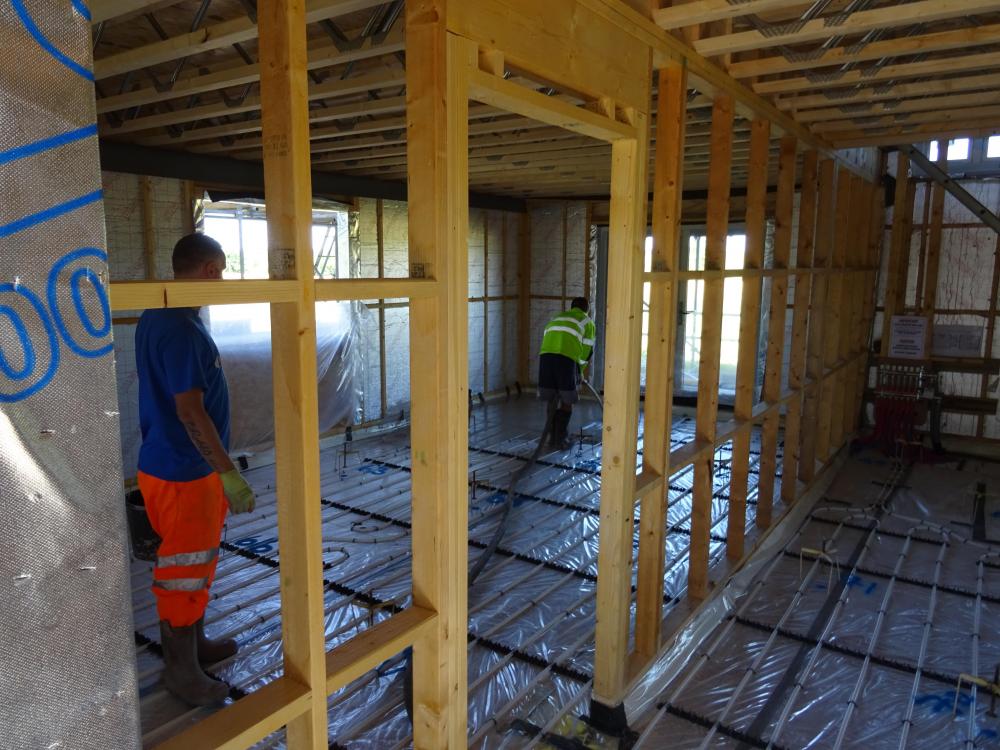
A few more images showing the completed UFH network for upstairs, the servicing battens downstairs and also some additional "supports" to accommodate the fitted kitchen units. I have really been impressed with the UFH fitter - he has even supplied photos of vulnerable positions so there should be no excuse for puncturing a pipe after the screed and boarding has gone down. You will see the areas left "unpiped" in the en-suite and bathroom areas. The manifold is stored in the landing cupboard. -
The Build - Insulation ahead of 1st Fix
Redoctober commented on Redoctober's blog entry in Our Journey North of the Border
Hi @CC45 - Yes, I will upload the photos over the weekend as the screed mix goes down on Monday. The screed mix will go to the top of the battens and then the egger boards sit across that and the battens. -
The Build - Insulation ahead of 1st Fix
Redoctober commented on Redoctober's blog entry in Our Journey North of the Border
Hi @Pete Yes the battening is in preparation of the UFH pipes, which were laid today. No spreader plates will be used, just a "biscuit mix" screed covering the entire floor. This "biscuit mix" is an 8:1 sand and dry cement mix - which will then be covered by 22mm eggerboard flooring. -
The Build - Insulation ahead of 1st Fix
Redoctober commented on Redoctober's blog entry in Our Journey North of the Border
Exactly that @newhome -
The Build - Insulation ahead of 1st Fix
Redoctober commented on Redoctober's blog entry in Our Journey North of the Border
Hi @ProDave I don't think so, in fact I would almost say they didn't as I didn't see any such "device", although in fairness I wouldn't know what a "Tony Tray" is, even if it dropped on my foot!! ? So by way of a lesson for those like me, what is a Tony Tray and what is the purpose of it? -
The Build - Insulation ahead of 1st Fix
Redoctober posted a blog entry in Our Journey North of the Border
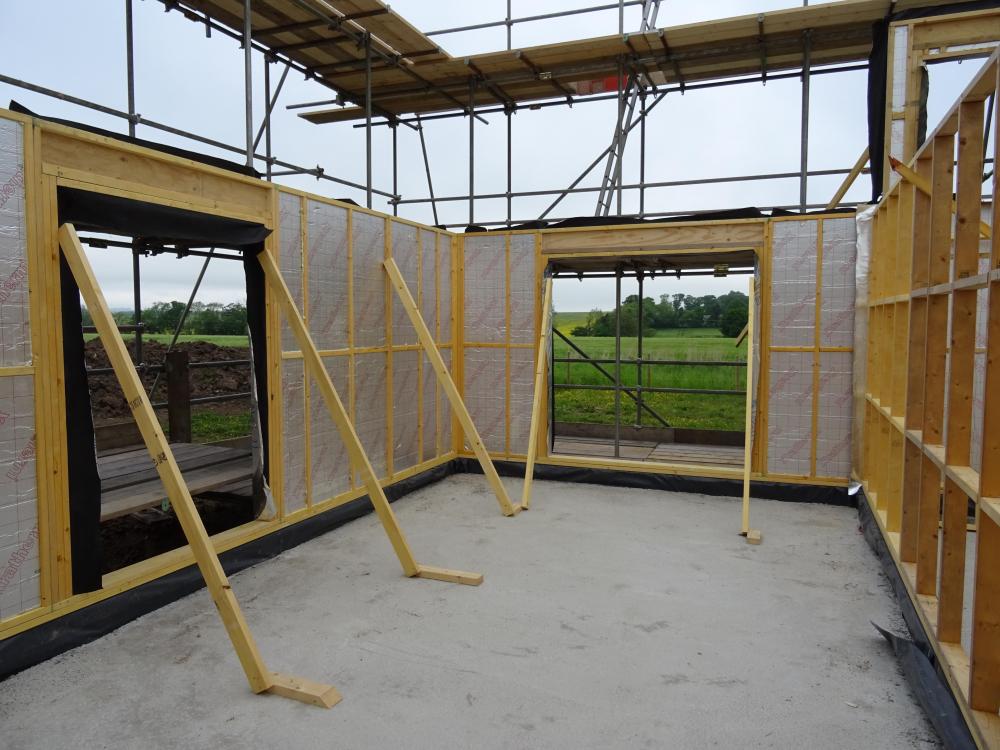
A quick pictorial update. The ground floor screed has set allowing those involved to install the additional 50mm rigid insulation to the inside of the external walls of the TF which had 120mm factory fitted insulation pre fitted. They then set about putting up the Vapour/Air Tightness Barrier — Protect VC reflective foil. The next stage will be the 50mm service batons and this will allow the electrician to start the first fix. Whilst this has been going on, the UFH pipes for upstairs are being installed and outside, the roofers are finishing of the rear facing section of the roof. As a footnote to a previous entry which detailed my mistake regarding the incorrect positioning of the windows, these will be corrected next week at a cost of £300. Sometimes it is the fer of the unknown that can de-stabilse you - Yes it's £300 but in the scheme of things.............. Thanks - PW. -
Damn, damn, damn: I have just realised
Redoctober replied to ToughButterCup's topic in General Construction Issues
Exactly the same with ours. The front run was OK but the back was too close. One of many errors committed by the so called professionals. Can't wait for the day it all comes down. The scaffolding has been the problem child of our build to date. -
Yes they will be finished in K-Rend. The thing that is still up for discussion is how to finish off the boards - over hangs etc. Sorry not really up to speed with the correct terminology as yet !!
-
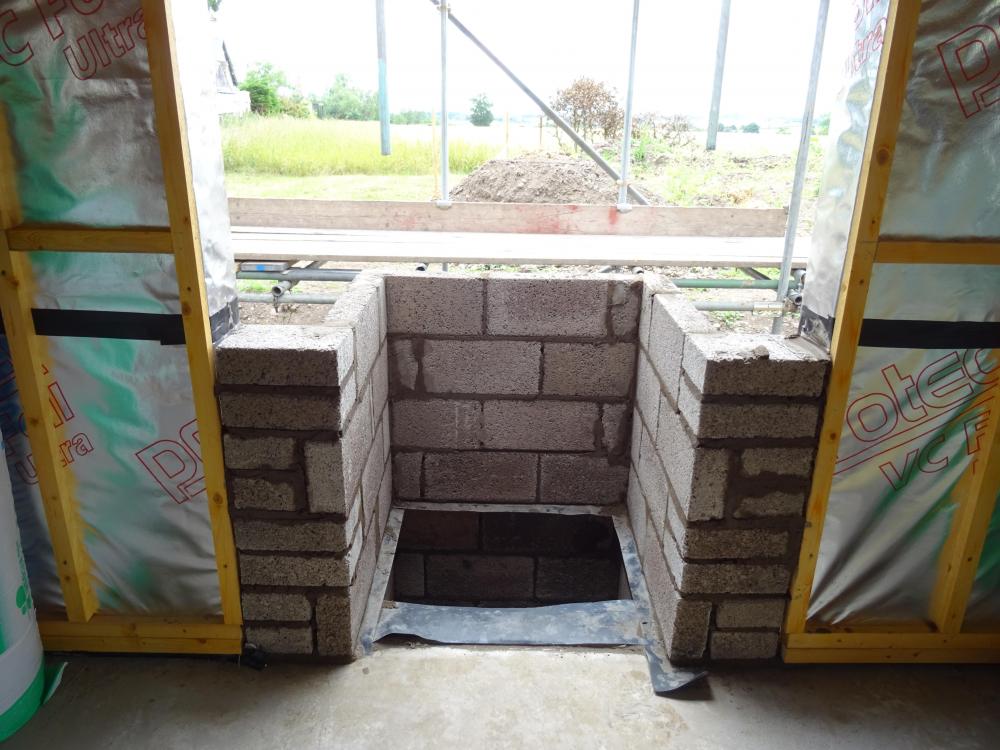
@Ed_MK I'm not sure this is going to be of any help just yet but we too are having an external chimney built which will house a WBS, so in a similar position to you. The attached photos show the "hole" from the inside [left hand opening] and the external shot will show where the chimney will be built. Our builder is planning to start the external block work this coming week. The guy installing the WBS will also be taking care of the following - Supply & fit - 5kw w/b stove, 1 Fresh air kit, installation materials including liner, vermiculite, Granite hearth, Wood Beam mantle and HETAS Certificate. The Joiner will have to board up the "hole" as we will not be having the whole opening as a finished product if that makes sense. Hopefully, once our work starts, some further photos will assist. In a final attempt to offer something constructive - during our research stage we contacted Stoves on line and they priced it all up for us and sent through some "plans" / diagrams of how it was to be fitted. Might be worth your while if time is on your side?