WWilts
-
Posts
782 -
Joined
-
Last visited
Everything posted by WWilts
-
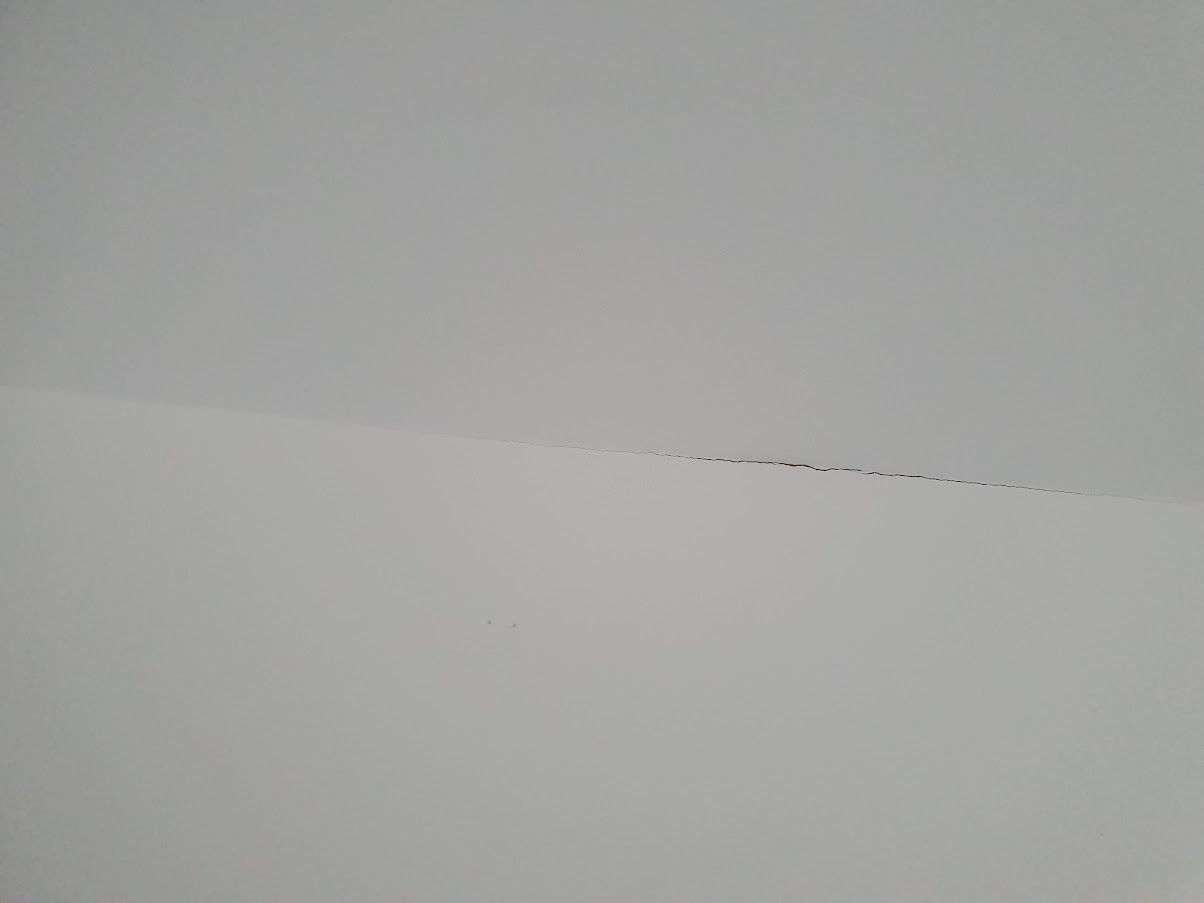
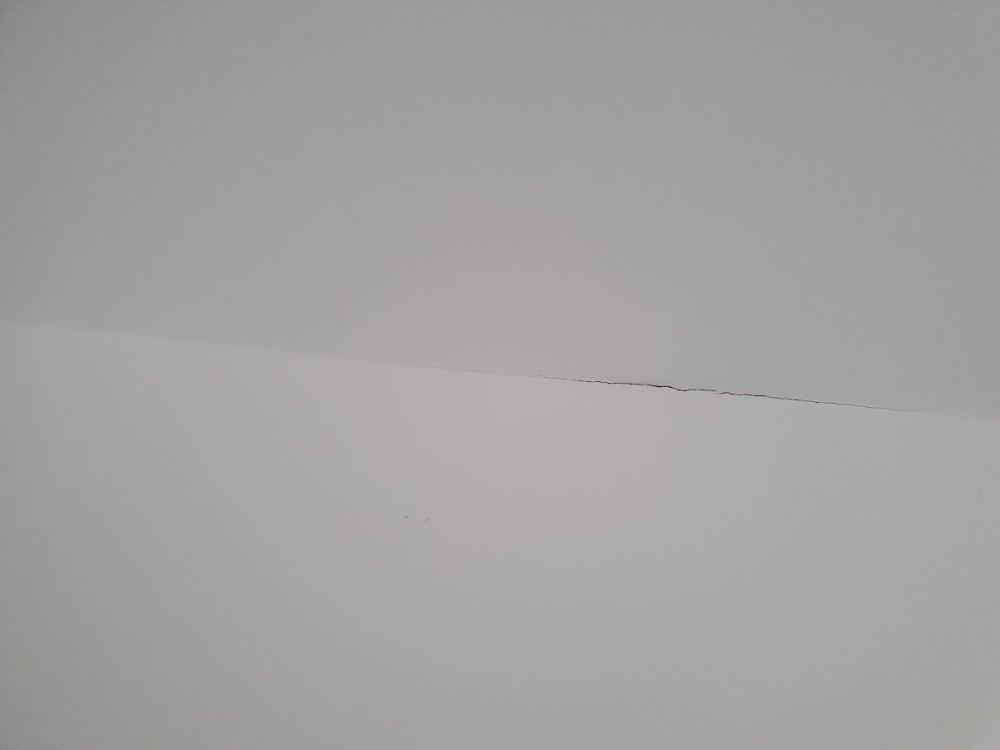
Fair bit of attention to detail, incl tonytray for first floor void (joist space), airtight taping around all door/window frames, cables & pipes care to not penetrate Celcon (airtight) blocks, sealed first floor pendant light penetrations, ducting through external walls sealed. Weaknesses: ground floor to plasterboard wall junction, not taped. Used expanding foam to reduce permeability first floor ceiling to roofspace: some PIR inserted later but no airtightness sealing so far. Electrician swears the PIRs don't let air through. Not convinced. Will need to think of a way to seal the perimeter of the round ceiling PIRs that jut up into roof space. What solution for cracks in first floor ceiling though? And potential cracks? Frontrunner emerged: Acryrub SWS (Soudal window system). Advantage over airtight paint is the white colour. For all studwall/ceiling junctions
-
New build in progress. Cold roofspace. Plasterboard wall & ceiling. With scrim and skim at wall/ceiling junction. At stud wall/ceiling junction, a crack has appeared in the skim. Concern: crack will let air through into cold roofspace. In hindsight many things should have been done. But now the question is, what will reduce the risk of air leaks at the stud wall/ceiling junction? Especially at internal stud walls that run perpendicular to timber joists. That is where the crack has appeared at junction with ceiling. Stud walls top plate fixed to roof trusses, bottom plate fixed to timber joists. Considering airtightness paint (which goes black but can then be painted over with white to match the rest of the room) Considered also plaster coving fixed with expanding foam adhesive, or Contega Solido tape (later painted over). Contega might not adhere to the powdery paint Considering also anti-crack acrylic sealant Or even OB1 sealant/adhesive What would be most cost-effective? (Have Blowerproof paint, and OB1)
-
Downdraft extractor fan socket, plug & cable
WWilts replied to WWilts's topic in Electrics - Kitchen & Bathroom
Will take a look in the daylight -
Downdraft extractor fan socket, plug & cable
WWilts replied to WWilts's topic in Electrics - Kitchen & Bathroom
Afraid to fiddle with the socket mounting, for such reasons. (Just a layperson here, anyhow) Something to bend the plug would help. Perhaps -
Downdraft extractor fan socket, plug & cable
WWilts replied to WWilts's topic in Electrics - Kitchen & Bathroom
The panel will be in the way, once the extractor is turned by 180 degrees to face the hob. The plug will have to project out less from the socket.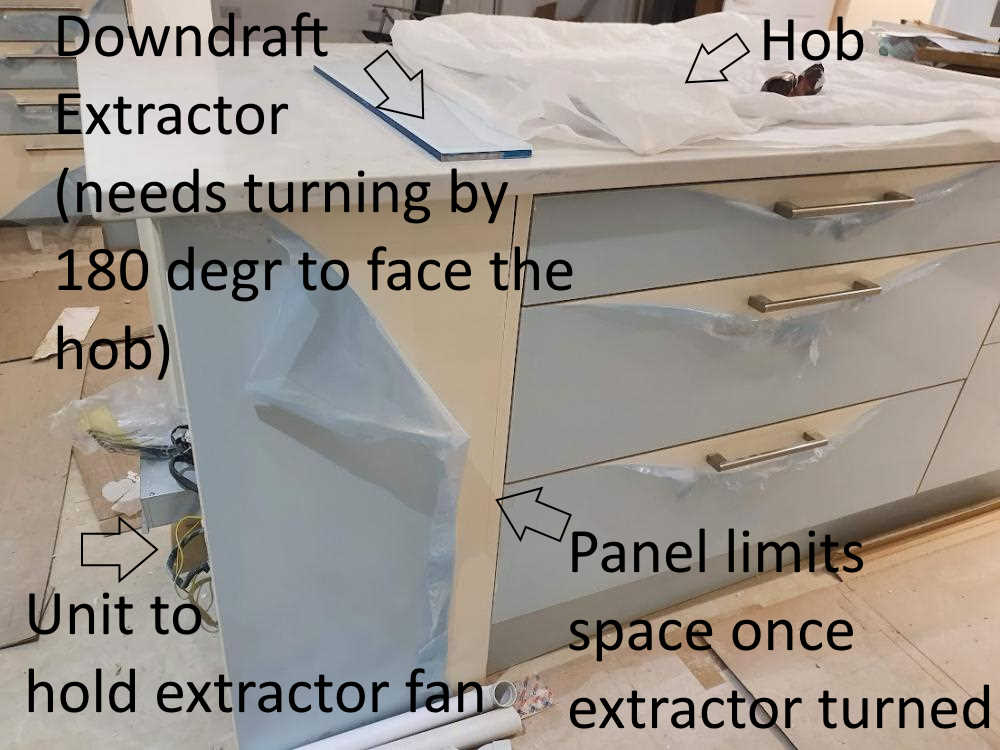
-
Downdraft extractor fan socket, plug & cable
WWilts replied to WWilts's topic in Electrics - Kitchen & Bathroom
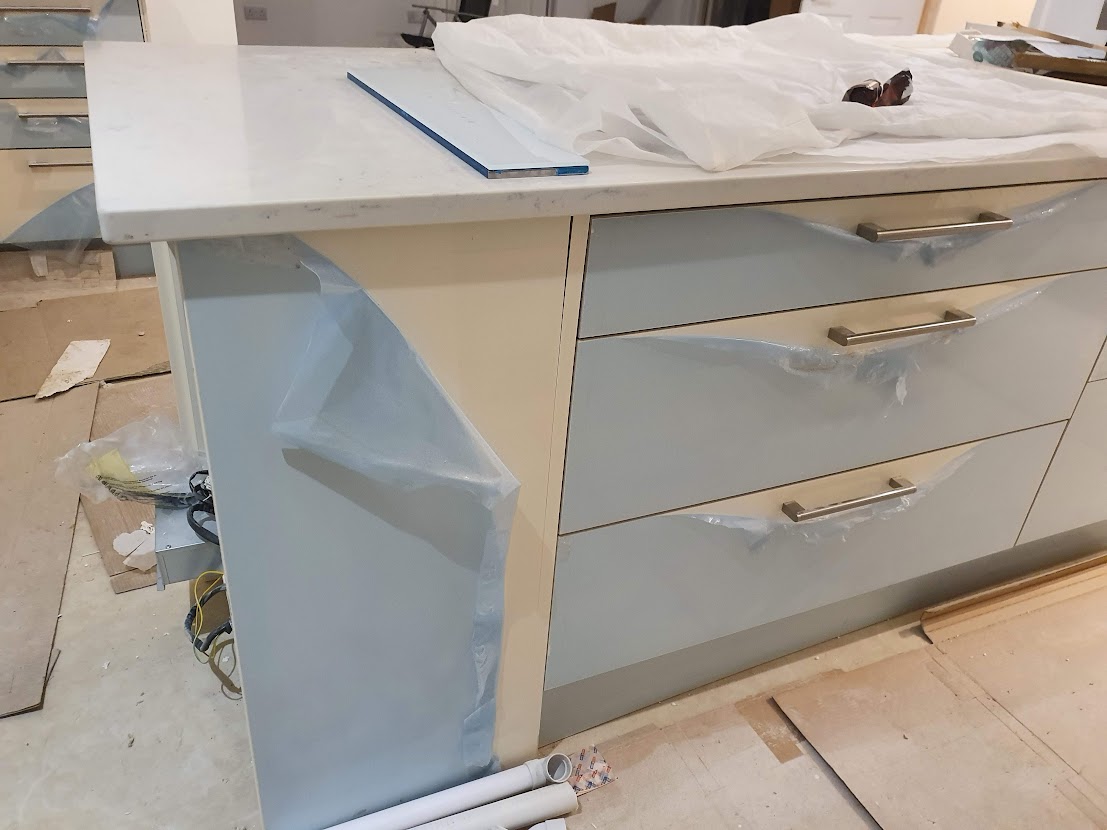
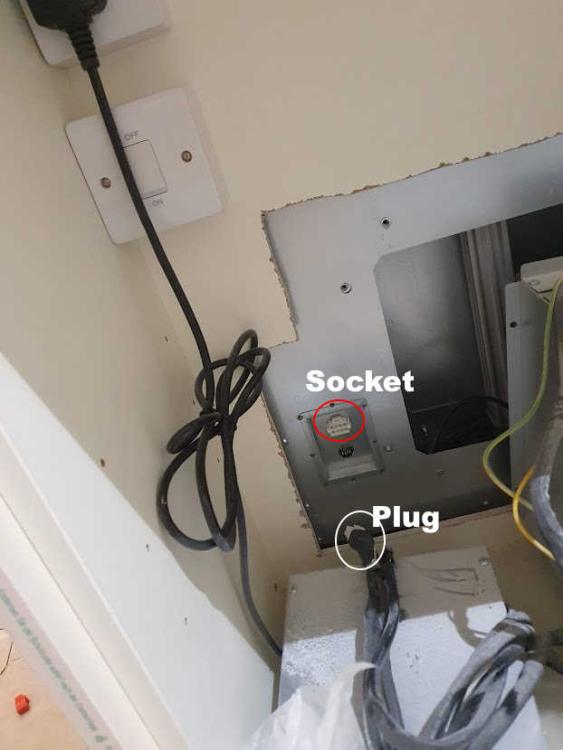
The extractor unit in the pic needs to be turned by 180 degrees to face the opposite way. When that is done, the socket sits very near to a carcass panel. The carcass has drawers on the other side of that panel. So even cutting out the panel would not entirely solve the problem. The problem is that the plug projects out and would push up tight against the carcass panel. If it could be squeezed in at all. Therefore looking for some arrangement that can be squeezed into the limited space between the socket and the carcass panel. -
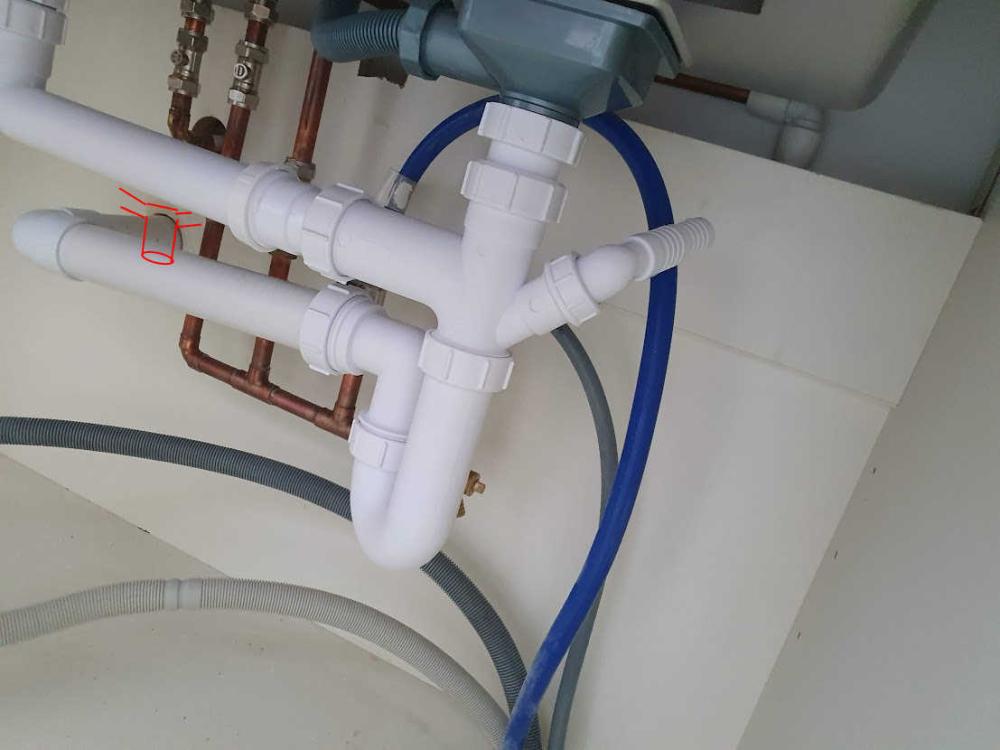
True. Perhaps a bottle trap with AAV on the waste, after the double nozzle T?
-
Would this work as well? (T cut into the 40mm waste) Because the waste goes into a soil pipe with foul WC waste, perhaps with an air admittance valve added after the dishwasher waste? So that the stench is less likely to enter the 2 dishwashers that drain into the double nozzle?
-
Downdraft extractor fan socket, plug & cable
WWilts posted a topic in Electrics - Kitchen & Bathroom
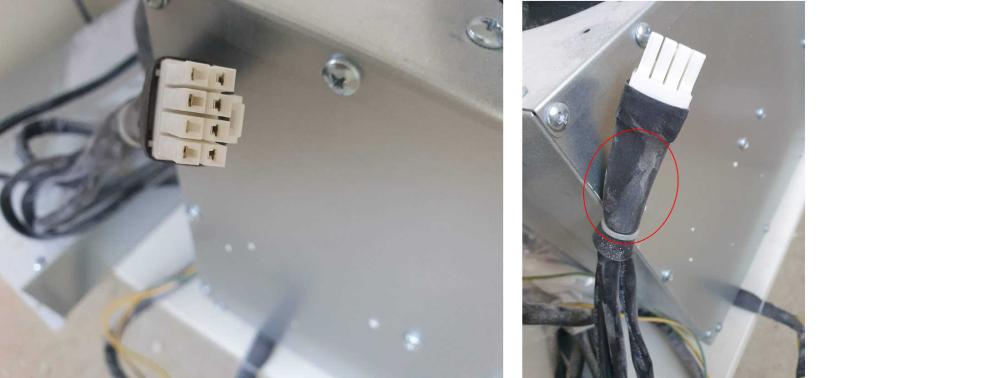
New build in progress. Extractor needs to be turned by 180 degrees to face the hob. Not a problem to turn it around, EXCEPT The fan plug (pic, circled red) projects out and would not squeeze into the very limited space available (drawer unit carcass wall limits the space) How to make the plug project less? Some kind of adaptor & extension? Fiddle with the plug? Other?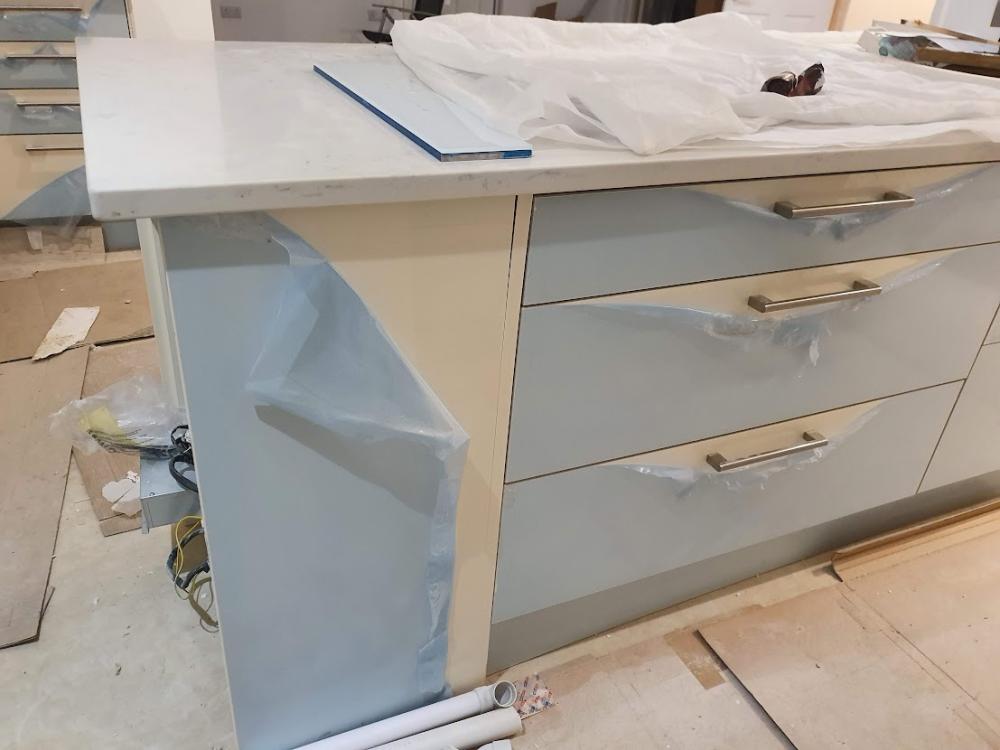
-
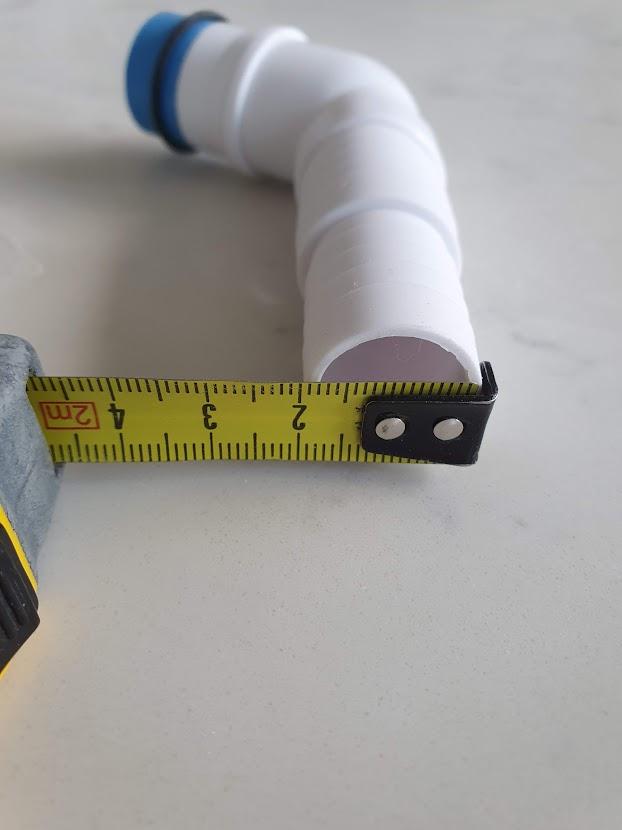
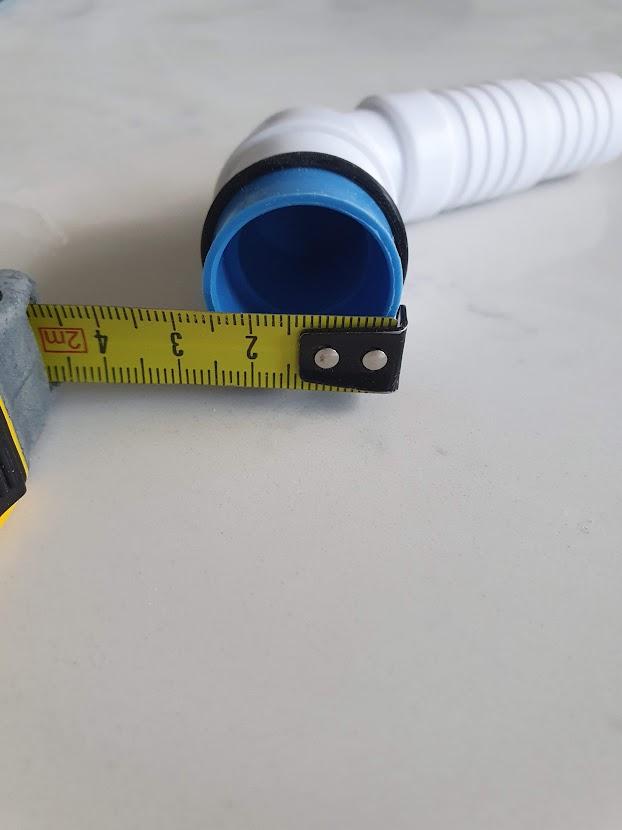
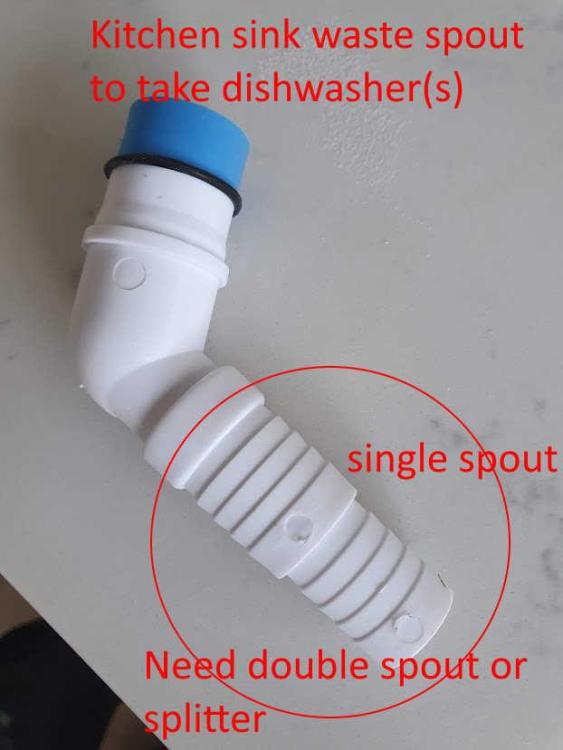
New build in progress. Kitchen sink waste kit has single spout to take 1 dishwasher (pic) How to connect 2 dishwashers? (are spout splitters available? something else to make this work?) PS Sauber double sink, waste kit appears to be European measurements rather than standard UK (pics)


-
New build in progress. Patio has porcelain pavers on pedestals. For edging (about 200mm above surrounding ground level), porcelain paver upstands intended. Qu: Can porcelain paver upstands be fixed to Celcon blocks? If yes, what adhesive?
-
Standard pedestal ok for you (1 ton load bearing)? There are heavy duty pedestals too (2 ton).
-
New build in progress. Porcelain pavers 20mm thick, 600mm square, on pedestals. How strong are such pavers? Do they need a pedestal at the centre? Any other tips?
-
How to fill the gap between stone and fascia?
-
New build in progress. 3 phase supply to kiosk. Zappi EV charger 3 phase 22 kW tethered, being installed tomorrow right at kiosk. Question: What cable(s) do we need to order for connecting the power to the charger? We had some 5 core armoured cable left over, but that seems unsuitable because the armour will have to be stripped out.
-
Pedestals are to bridge the height difference between weepholes and finished floor level. Question is what concrete to use (cost is a consideration)
-
New build in progress. Patio, pedestals will support porcelain pavers. Now planning the base. Already some concrete on compacted stone in place, but about 450mm below finished patio level. Not level. Current plan: Use existing hardcore on site to raise level a bit. Then pour 100mm thick concrete. Then set pedestals on the concrete, with pavers on top. Question: What curing time to allow before placing concrete on pedestals? Prefer to get on with pedestals within days rather than wait weeks for curing. Is there a solution to accelerate the process that is reasonably low cost?
-
New build in progress. Patio to have porcelain pavers (probably 600mm square) on "self levelling" pedestals. Level base. Max 450mm height of patio surface from sub-base. Qu: Any recommendations for a) Pedestals? (supplier/manufacturer) b) Porcelain pavers?
-
Presumably OB1 will work similarly well (have some of OB1 lying around already)
-
New build in progress, LVT flooring laid over Cemfloor screed holding UFH pipes. What adhesive will serve well to hold down "T" threshold bars?
-
New build in progress. This is one of the best finishes around electrical boxes. Some have giant gashes in the plasterboard. Main contractor brings in trades. Electrician is otherwise very obliging. Qu: Whose responsibility is it to repair the damaged bits? ]
-
So, covering up weepholes with patio hardcore is a no-no.
-
If a raised patio is laid above weep hole level, how to let the damp out of the weep holes? And how much does it matter if a section of weepholes is blocked up? How is this challenge designed out usually?
-
Drops of 600mm or more need guard rail to prevent falls. Drop here is under 450mm Still looking for solutions to the edging. Maybe even pavers laid vertically?
-
New build in progress. Raised patio (450mm high) being designed. Aim is nice looking but affordable. Already existing: a concrete sub-base. Irregular surface. Idea so far: Porcelain atop pedestals. Probably hardcore tamped down. Then pedestals on hardcore. Question: What would be a low-cost way to close off the edges? Some kind of vertical slab? A single skin wall? Could have rubble / slope down from patio to ground (450mm drop) Thinking out aloud