ruggers
-
Posts
326 -
Joined
-
Last visited
Everything posted by ruggers
-
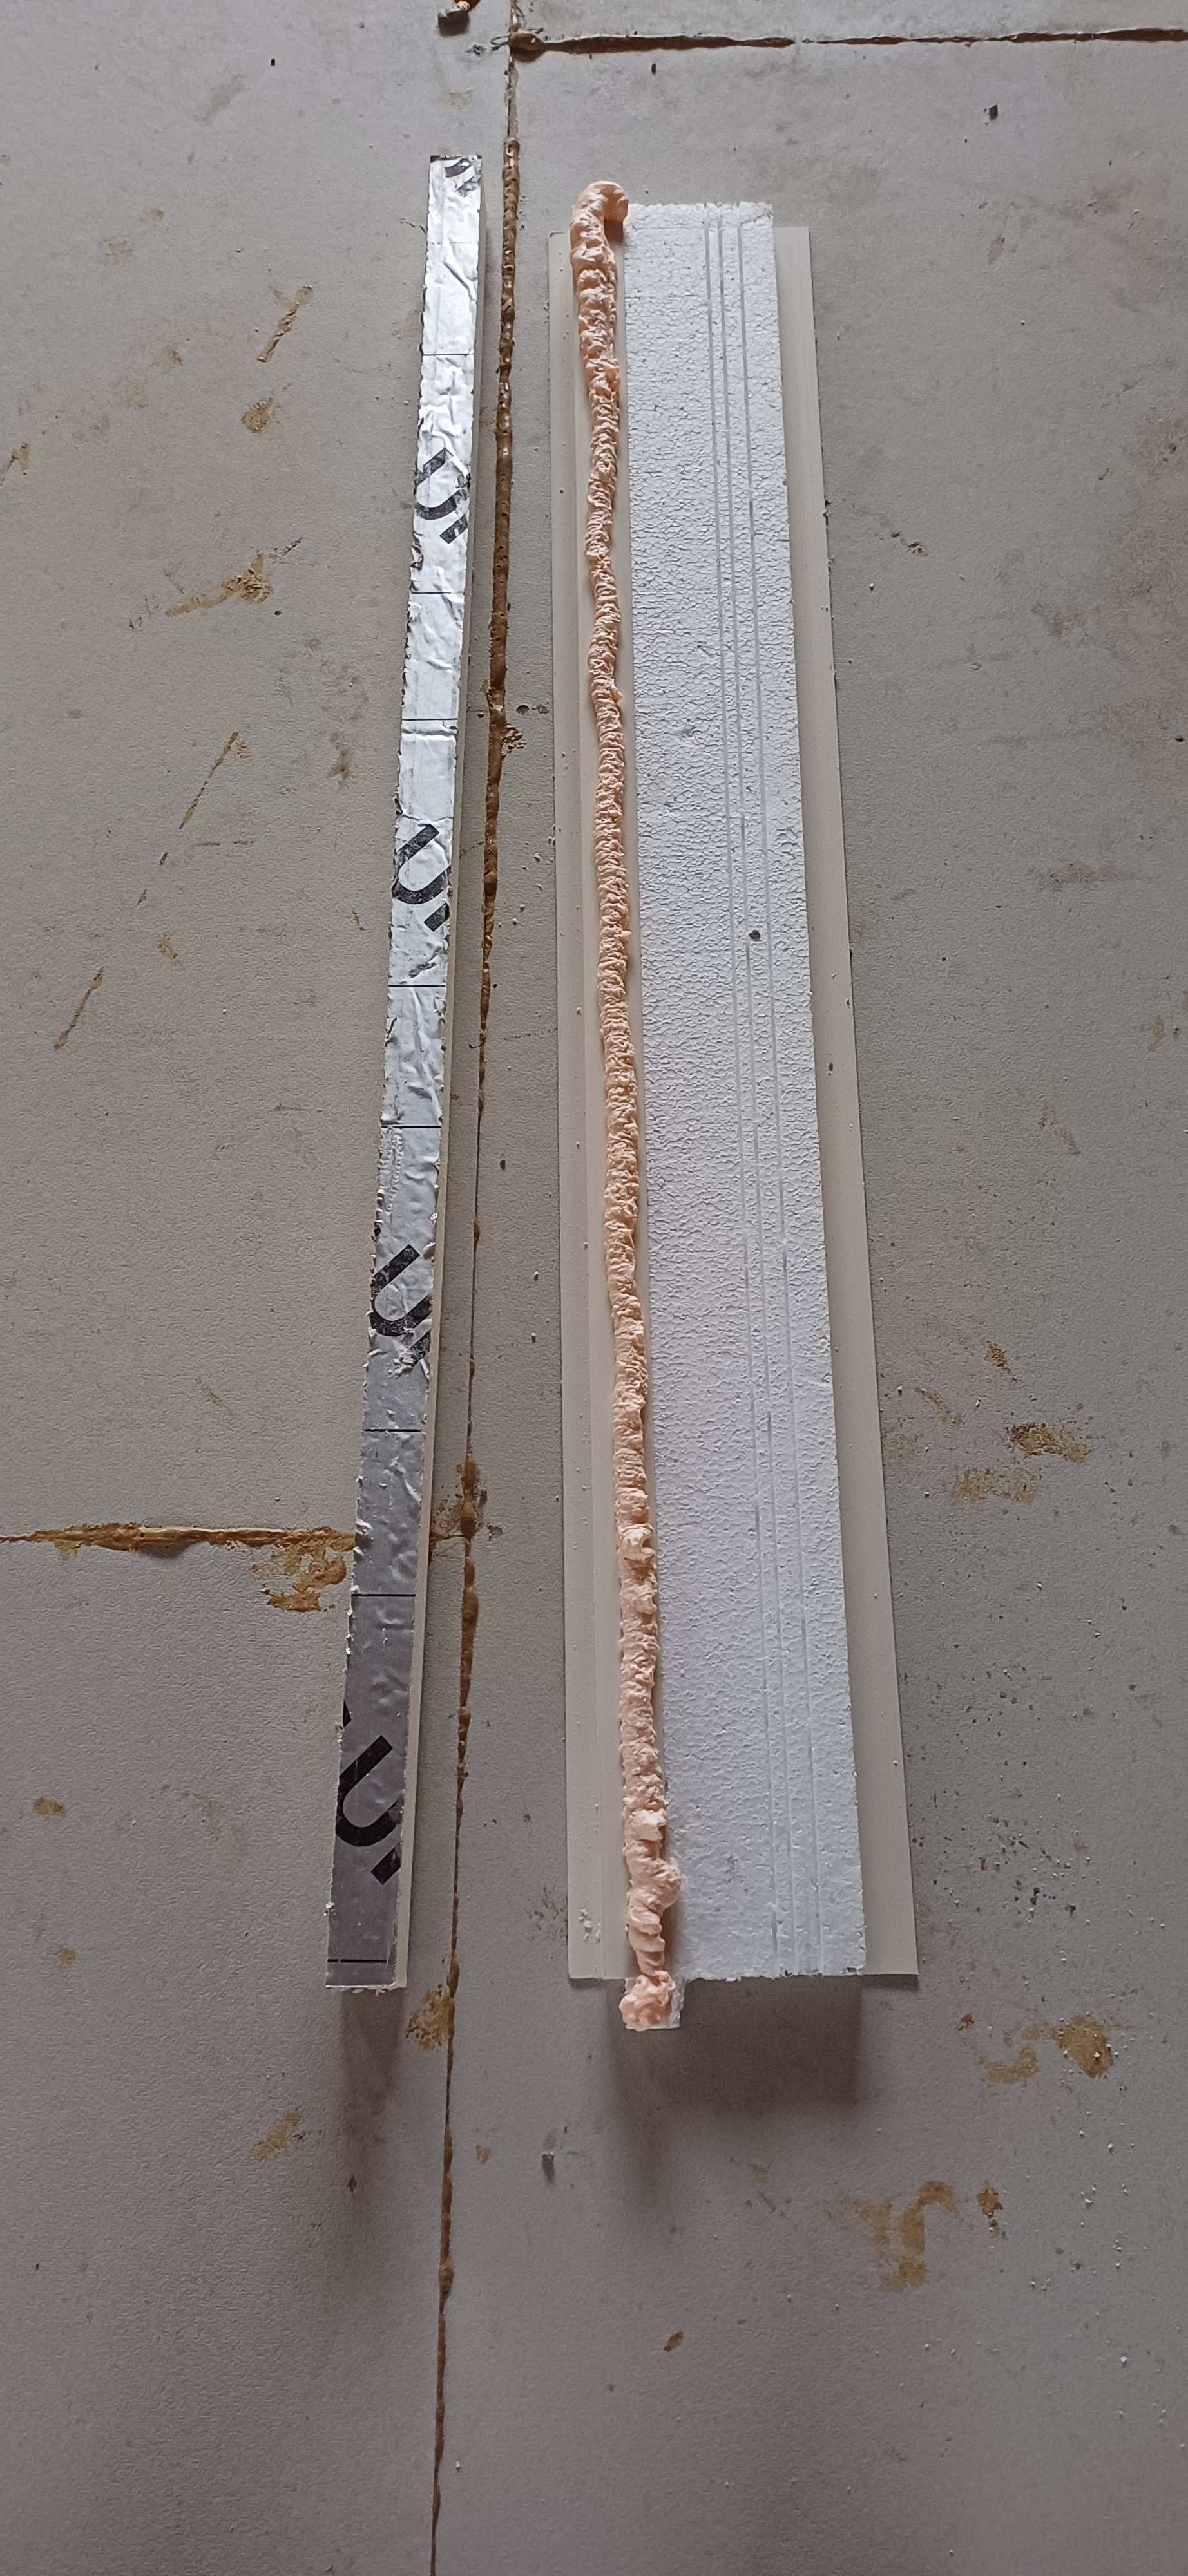
If i was to do it again, I'd still modify the closer, but I'd keep the pir flush with the inner block reveal. I set my pir back by the thickness of the closer, 25mm so that the full 150mm closer wdth would fit in purely because i thought all of the eps was bonded to it, and it may be with other brands, but these aren't and the eps was a friction fit into the c shaped plasic at the end which goes against the outside wall. I'd keep the pir flush with the inner reveal but have a checked reveal set back 25mm then i could add a 37.5mm insulated plasterboard to the reveal without taking up window frame width. Maybe using plasterboard pu foam is better to adhere the board to the reveal but I've had no issues with dab before and agree your screeded finish will be better. Ill try a floor tile comb.
-
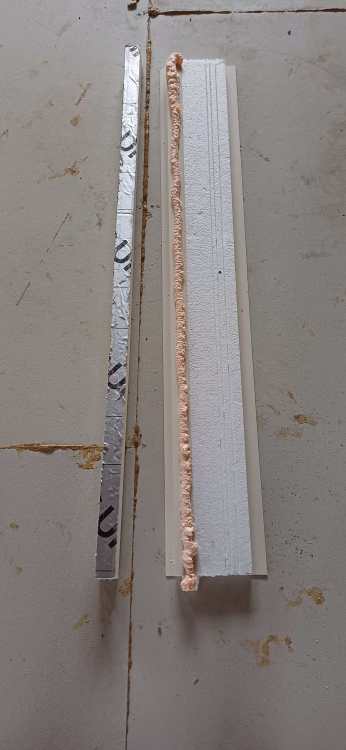
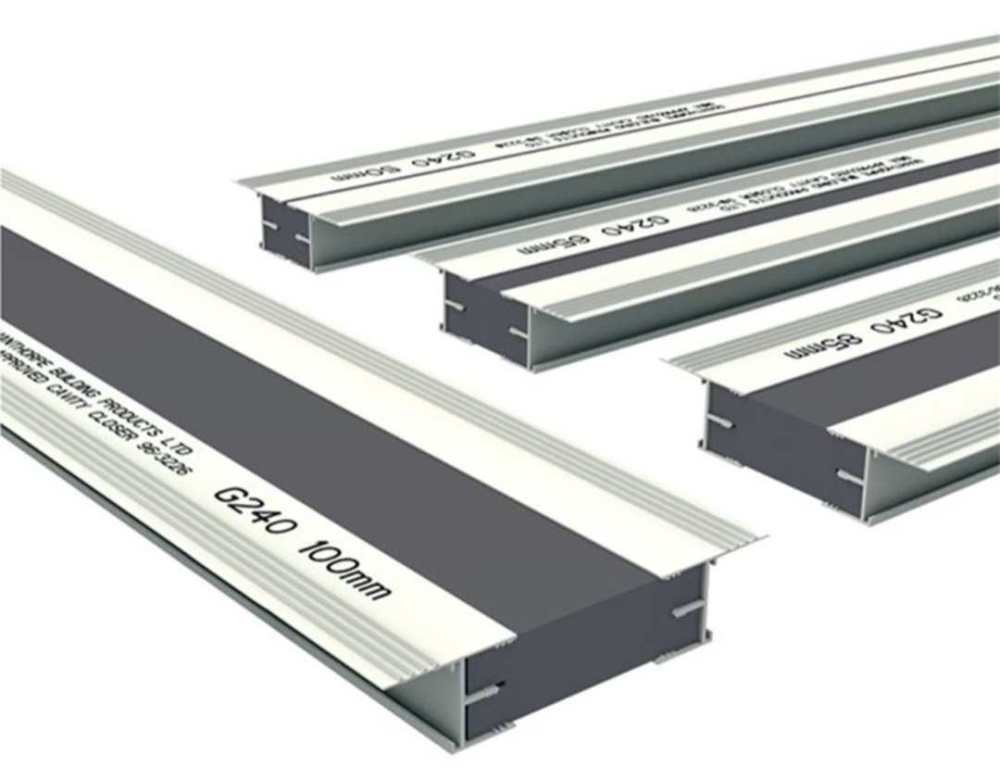
Hi Mike, wet skimming the block walls and not dot and dabbing boards on would give a good air tight seal, but the reveals have been closed off with plastic cavity closers. They're pretty flimsy 2mm plastic which overlaps the inner and outer masonry and a 25mm thick piece of eps is attached to it which can be cut to suit the cavity width. Ive chose to modify the closers to be thicker by bonding pir and foil taping it, then setting my windows back 25mm to minimise cold bridging. The closers on their own offer very little insulation to the reveals being thin eps. I could have still improved these further, but you often learn things after its too late. If wet skimming walls you'd sill need something over the smooth plastic closers to skim onto. Some of the tapes claim to be skimmable. You need tape between the window to wall to maintain air tightness. Ceiling barrier to walls taped too.

-
Hi, lost track of time since the last reply, had to do 11 long days straight on the build. Not using aero barrier but did get a quote for just under 3k. Although good, if applied afterthe house is all boarded, i feel like its only going to seal against the available surfaces and not behind them so if anything settles in it may not be as affective in the future. I've bought a wagner pro sprayer and so i plan to spray all of the walls with liquid avcl. But since your advice to skim the reveals prior to applying the brush on avcl which has fibres in too, im going to apply some more self builder nutterism and parge the blocks with bonding agent and then spray the walls. Tapes will still be used at reveals and ive used air tight foam too.
-
Hi Nick, when you say multiple runs of 60mm tape, do you mean all 4 sides of the window in one continuous swoop, then another over lapping the tape each time until you reach the desired width?. Or do you go 360 on the inside window edge and then 360 on the closer outer edge nearest to the room side? First option wod use a lot of tape. I got the flexi adhesive parge coat on yesterday, just scraped it hard to the block and it went on nicely. Was the thank me later to this aimed at longevity or ease of spread compared to sand and cement? I'm considering doing the inner walls the same now with multifinish before i spray them with airtight membrane (dont think my shoulder will thank me later), Could be over kill but self builders often aim high. Do you have a preference for tape brands you use or they all much alike?
-
@Nickfromwales I'll give the flexi adhesive a go this weekend, only needs to be a few mm thick then so should dry quick. Get all the closers cut ready, and fit them with a bit of hybrid polymer and if needed some twist nails. I was looking at some soudal tape 200mm, they do two types. One has a self adhesive window strip side, then a peel off butyl side on the masonry edge. The extra tape is the same, but then the full area between the two strips is also a peel off adhesive strip. Not ure if this will make it easier or harder to apply for a full 4 sided opening in one go. I need a decent upstairs ceiling membrane too. I was asvused to use ampatex db90 with siga fentrim 50/85 (£85 quid is steep) because its prefolded and saves tons of tkme. Do the full upstairs before the stud walls go up so its only the perimeter edge to tape up.
-
I'll have a look whats delivered tomorrow, theyre all dkfferent. If theres an outer wing too, i can cut it off or it will be hidden between the frame and brick anyways.
-
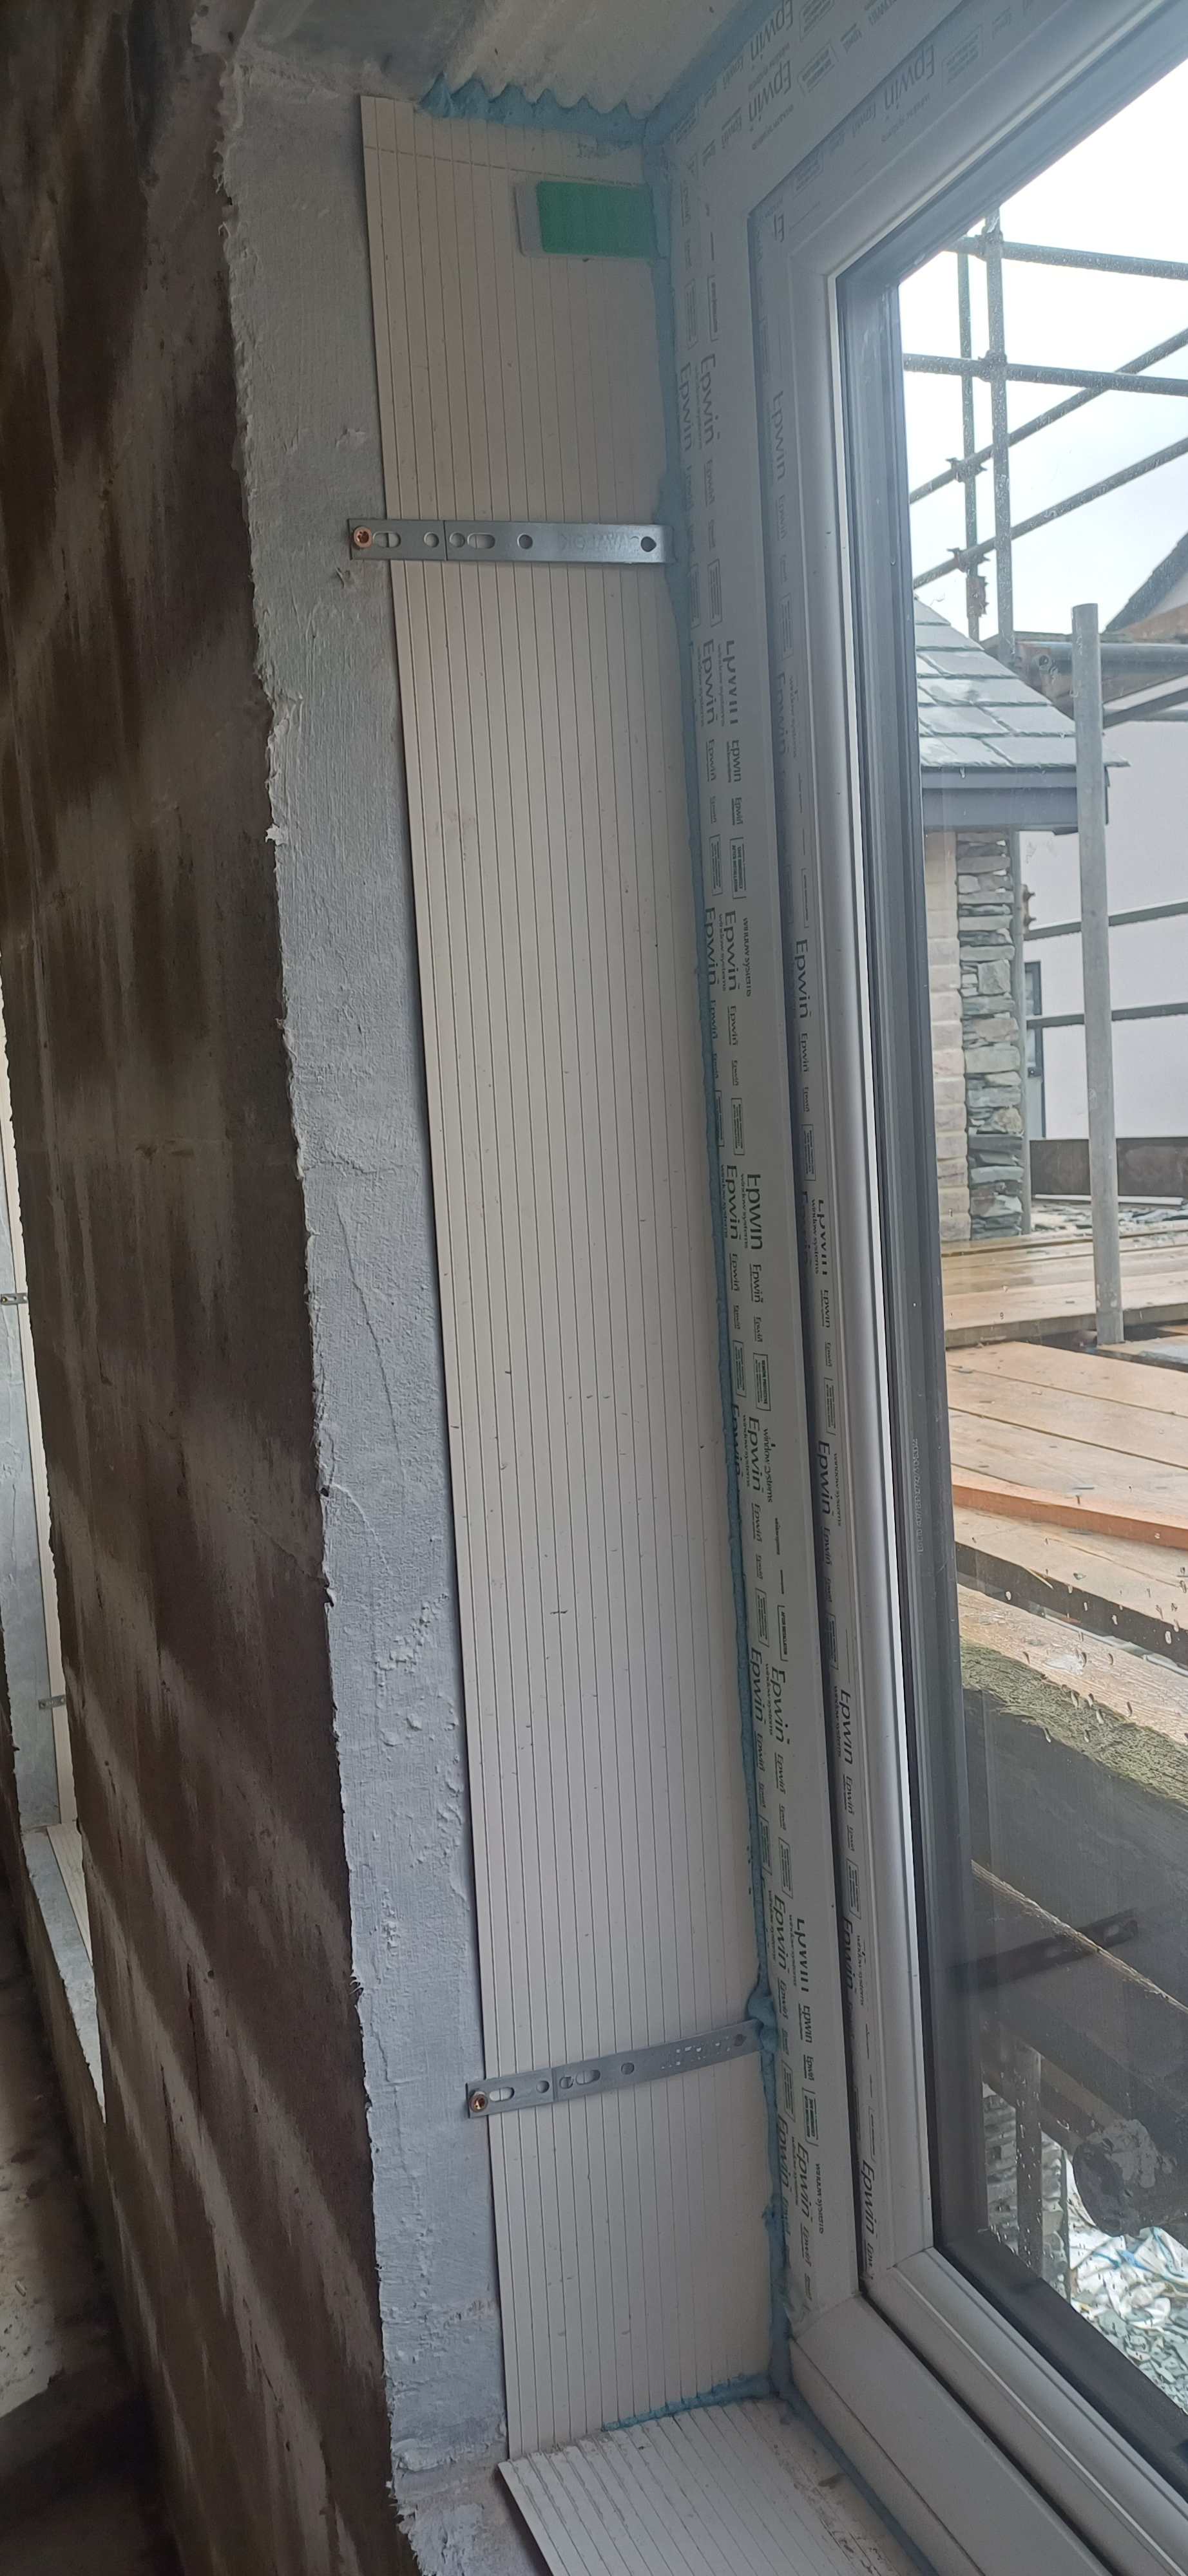
What does the 150 - 200 mean? Most of my vertical block reveaals are 1050 to 1275mm high. I've used the brush on around the full house perimeter before i built the masonry hangers into the block work diring construction and its quite an easy product to apply and it does fill a lot of the grainy holes, a parge would give this a better finish but i thought the liquid avcl would have a better lifetime bond to the blocks rather than adhesive then painting over that? The cavity is 150mm, frames set back 25mm. Ill assume the closers wings are 25mm, so there will be 150mm of plastic to cover. I didnt think theres a need to paint over the whole closer. I proposed to tape the inside closer edge to the parged or liquid sealed inner leaf block, then use a folded tape to tape the window frame to the closer 15/50mm or similar. Then adhere my plasterboard to the reveals over everything. If i don't vertically tape the closers edge to the inner block before the windows are fitted, ill be taping over metal window straps too so the tape wont be continuous betwen plastic and masonry, it will be taping over metal too.
-
I want to ensure the laps/wings of the plastic closer have a good seal to the inner block work and need the closers fit before Tuesday windows. The brush on soudal lq has reinforcement fibres in and is a paste and much thicker than what will be sprayed onto the inside block work later on using their sp version. Its already bought. Passive purple is great but the price was far too expensive.
-
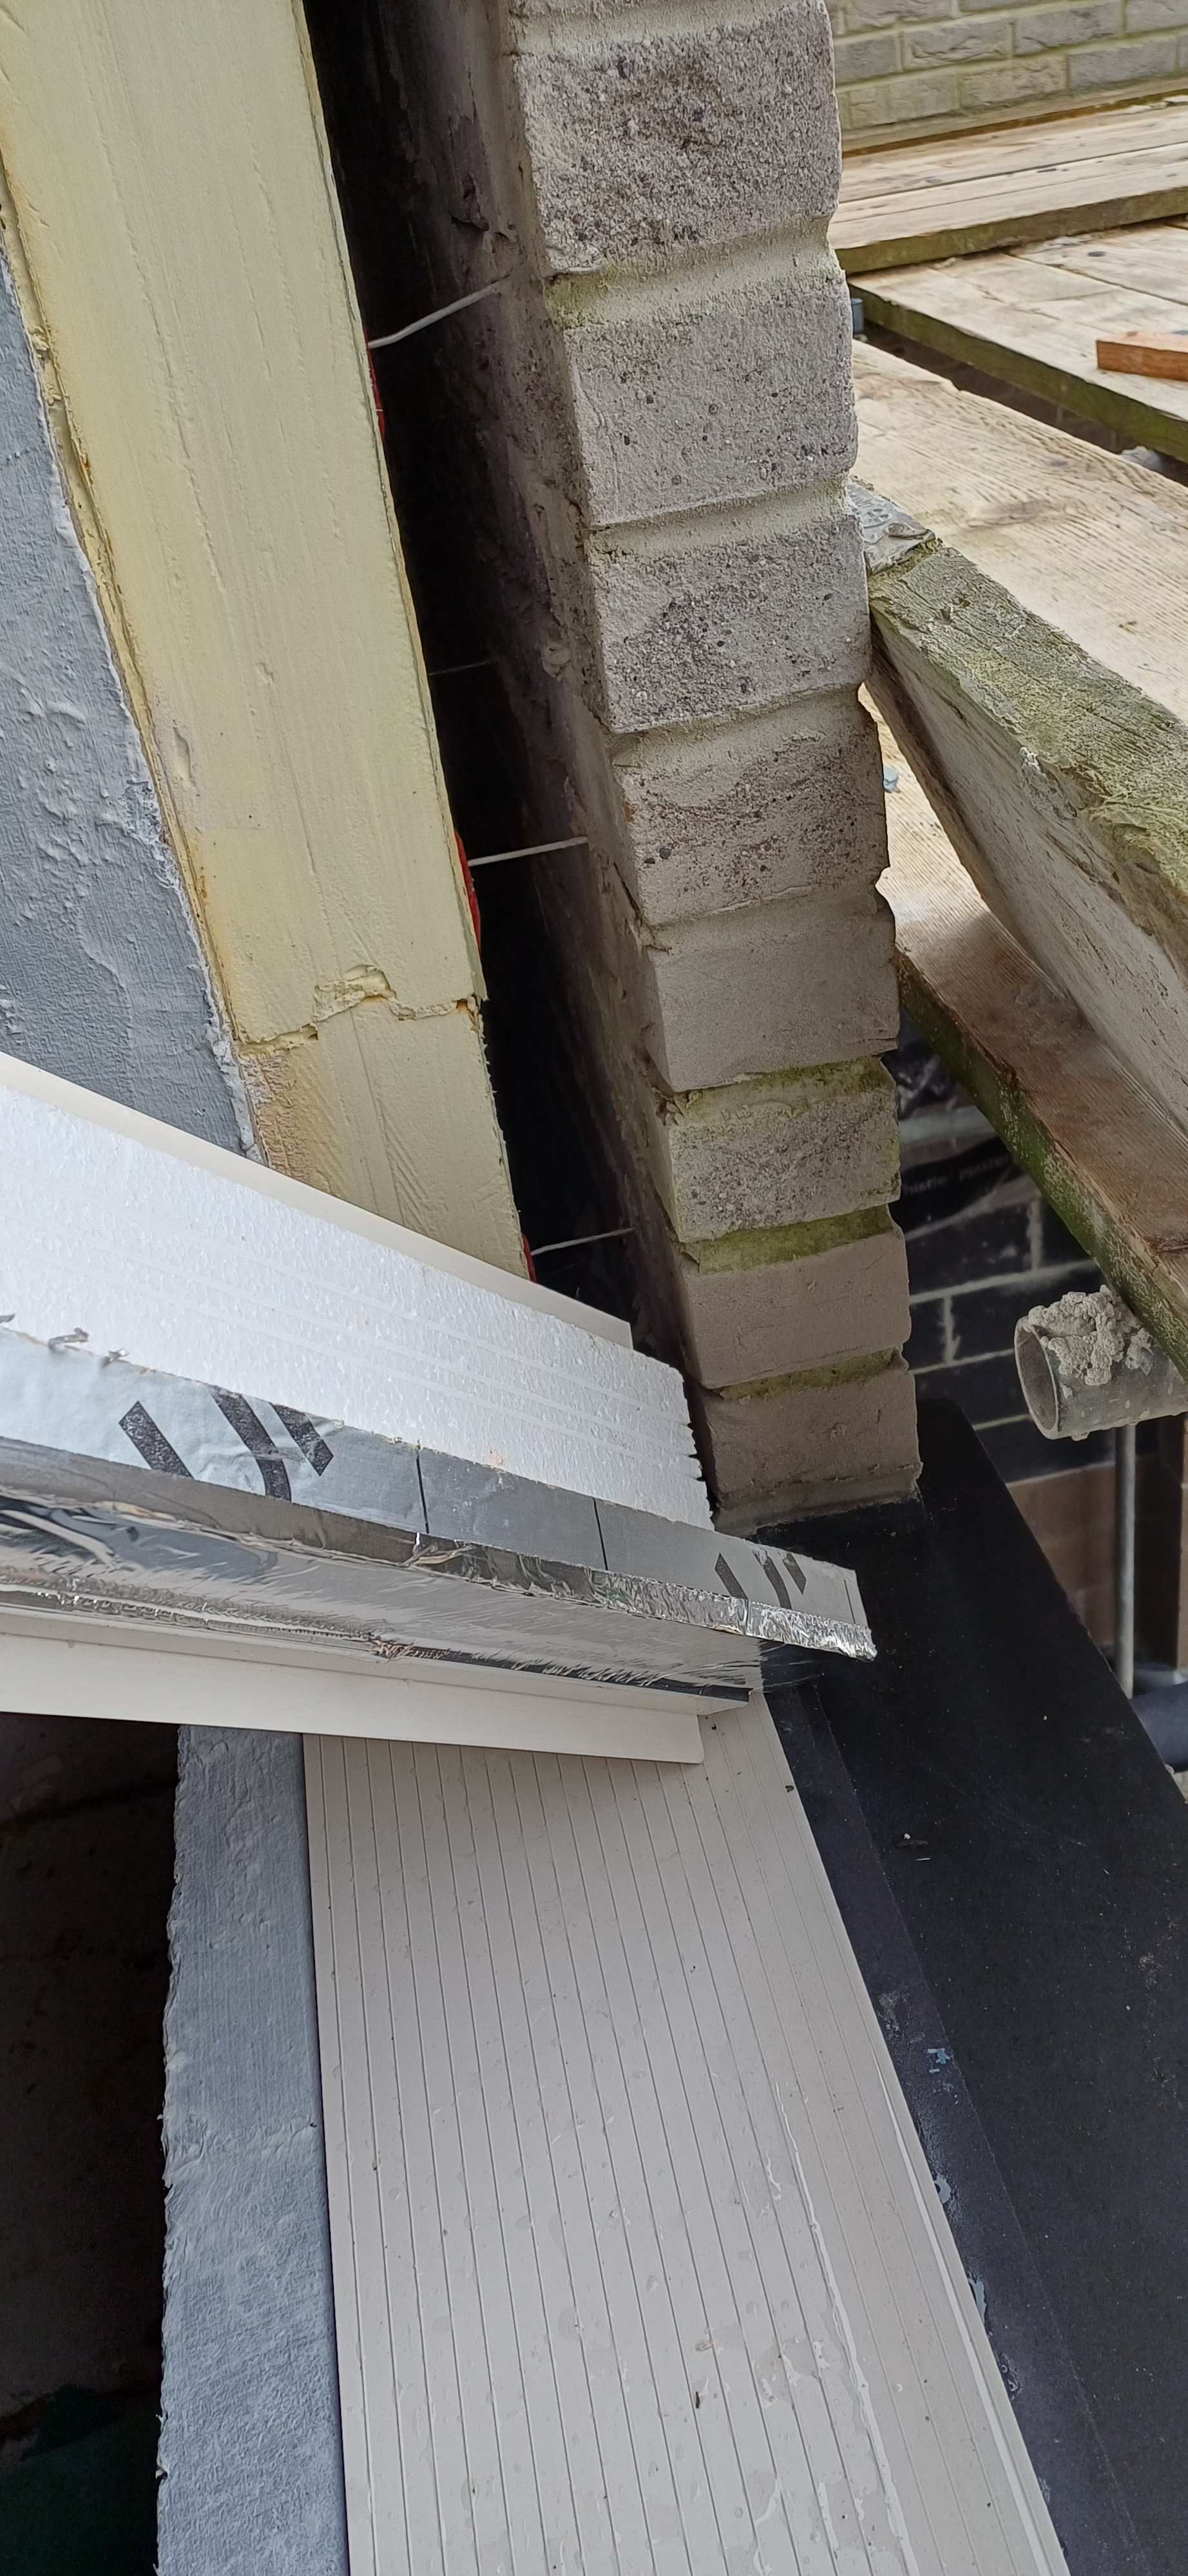
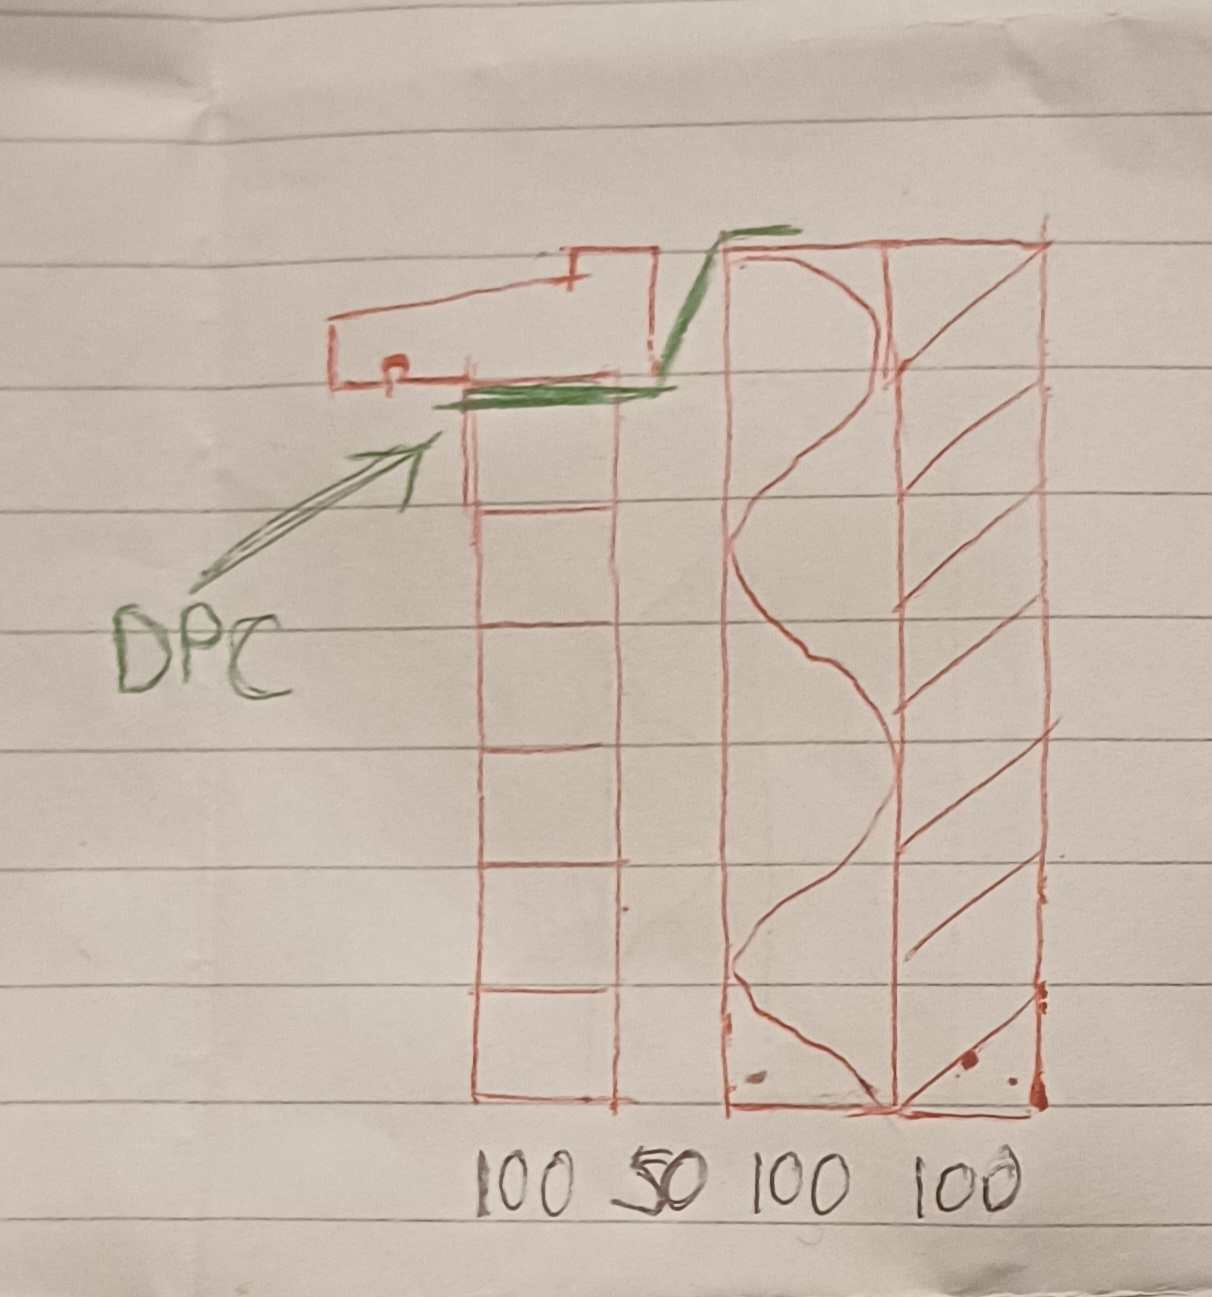
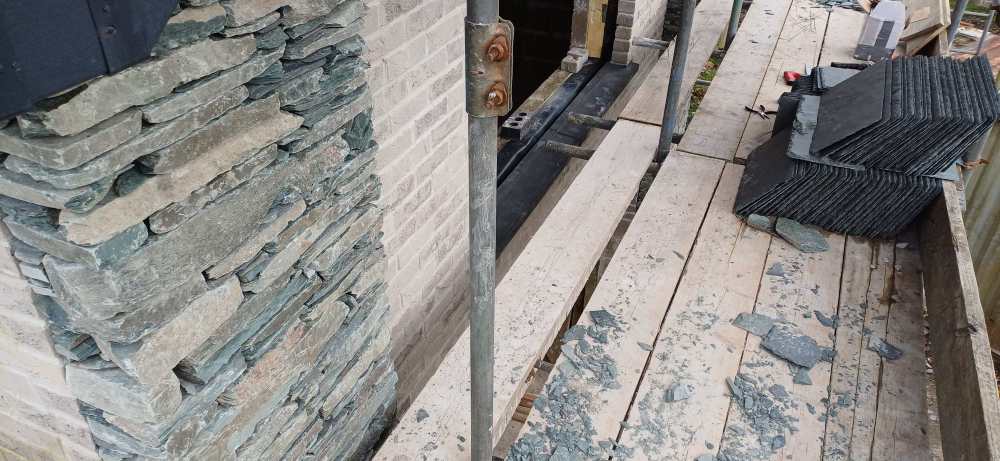
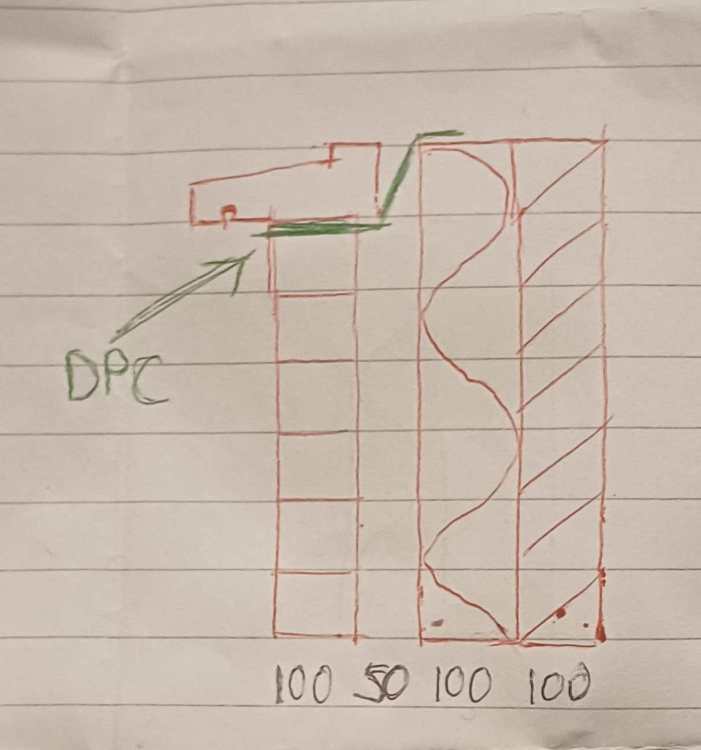
Hi, I'll reply to you both. Correct me if theres a better order to do this before or after the windows are fitted next week. I was thinking i need to do some upfront work. See picture for my window reveal. Its 100mm dense block inner, 100mm pir set back by the depth of the plastic cavity closer 25mm. 50mm air gap, 100mm facing brick. I'm going to fit the cavity closers this weekend before the windows go in. Im modifying them and adding 50mm thick pir to make them 75mm total, the extra bit wont bridge the cavity, but will overlap the set back window frame. I'm using soundal soudatight brush on around the reveals, the rest of the walls will later be sprayed after chases are completed Cant get anyone to wet plaster so dot and dab boards. I planned to paint the reveals this weekend to seal up pores in the blocks, then add the cavity closers over lapping, then tape closers to blocks, then windows fitted with the straps drilled into the inner block work, and then touch up over the brackets and screws with tape or more membrane. That way any air tight tapes are adhering to painted blockwork and will adhere much better than to bae dusty blockwork. I thought if i fit closers, then windows in, then try to paint over it all and tape closers to blocks it will get messy. It sounds like i need to parge coat the reveals with sand a cement asap, then add soudal liquid membrane paint, then cavity closers, then windows fitted, then tape over? @Nickfromwales
-
Which airtight tape is best for window reveal cavity closers to blockwork? I need to start buying air tight tape for various areas of the build, but first up, i need to order some asap to seal the plastic cavity closers to the internal block work reveals before the windows get fitted next week. I've just realised I'm going to need to tape one side of the closer before the frames go in. I'm having the frames set back into the cavity by 25mm, so window reveal fixing straps are being used, these will over lap the closer, meaning taping later wont make a decent seal. Siga fentrim was suggested for some areas but its very expensive. Just to add, all block work reveals are painted in airtight paint and closers will be modified to be thicker.
-
Copper vs aluminum clouts for slate roof?
ruggers replied to ruggers's topic in Roofing, Tiling & Slating
He only specified nails. The hooks are very expensive -
Copper vs aluminum clouts for slate roof?
ruggers replied to ruggers's topic in Roofing, Tiling & Slating
No one could get me a price until the new year. Did you use 2.65 or 3.35mm? Cheapest i can get is £89 per 5kg of 2.65mm, which is a lot cheaper than online. Amazon is £82 but not sure what they'll be like. -
I'm having a slate roof installed on a self build, 400 centres, and I want to know if copper clout nails should be used or aluminum? The slates are 250 x 500mm 7 to 9mm thick. 38mm clouts required and 30mm for the eaves course. Aluminum 3.35mm or the roofer says if using copper I could use 2.65mm. I want the roof to last 40 yrs+ Some online reading says aluminum may fail between 20 and 30 years is this true? We're 3 miles inland off the West coast, there's a few houses around but we do get a bit of wind in winter.
-
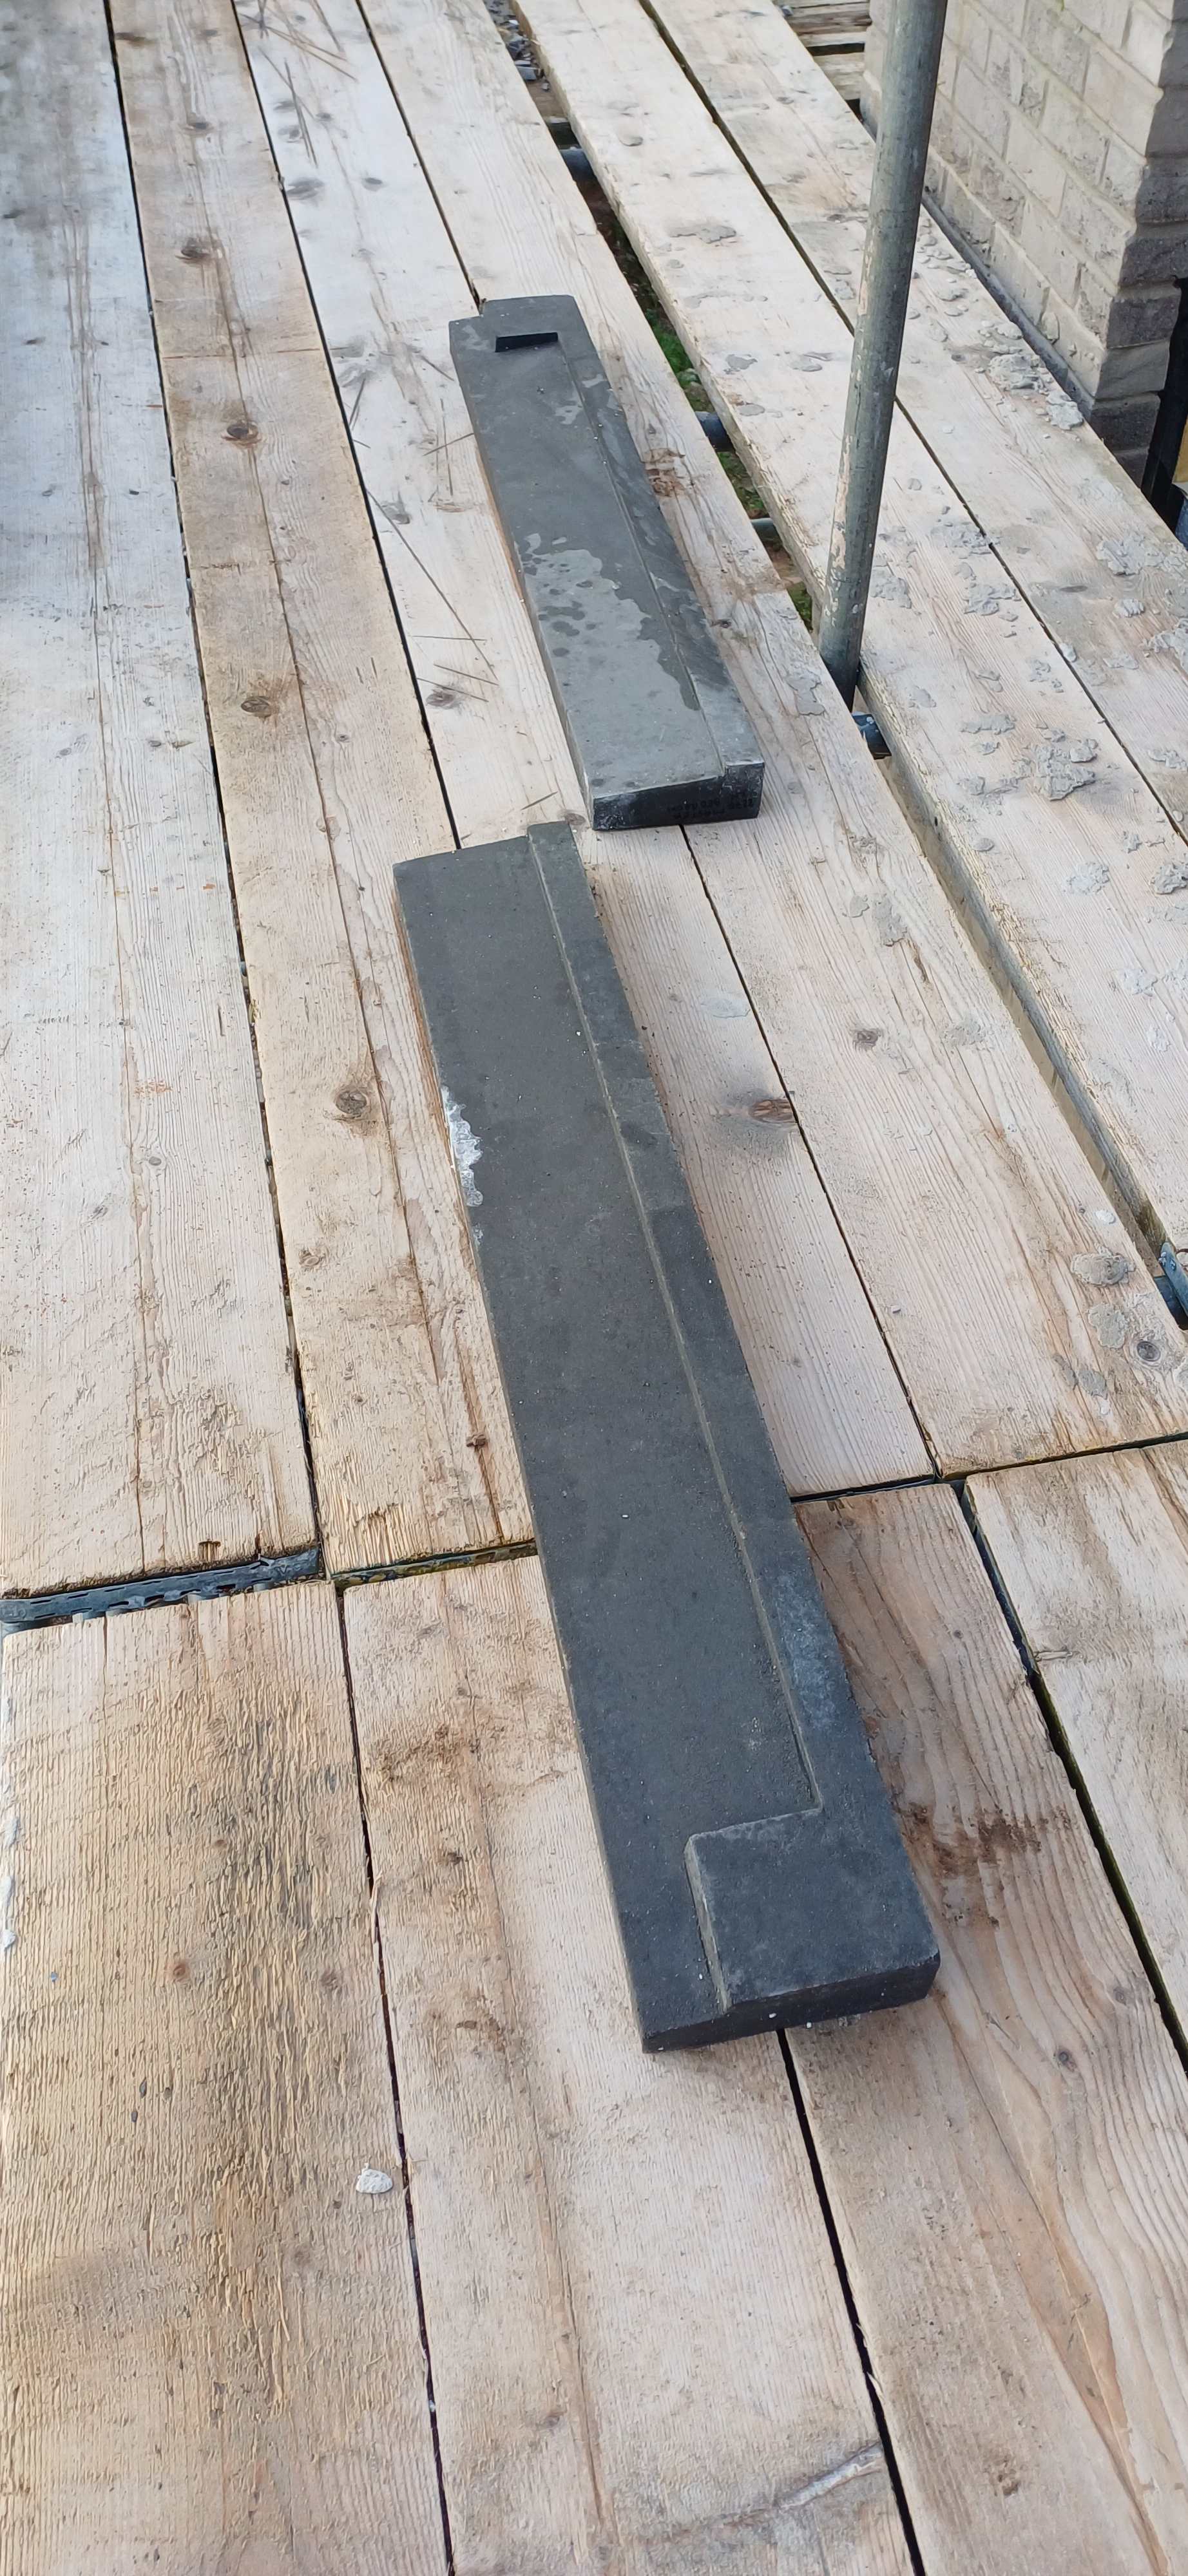
Yeah its creating a slip plane they say. So many methods people choose from, full mortar bed underneath, others spot bed them. Full length 100mm dpc vs full length stepped dpc. Small cut of dpc over the stooled top or not. Expansion foam between any joints if the cills are in 2 halfs. I'm not sure if this is a good or bad idea because the foam between isnt goijg to compress if theres mortar above in the joint. Some use a hybrid ploymer to fill the gap not mortar. The correct dpc detail and the centre pointing are the details i need to get right. These are being installed tomorrow
-
These are the cills, just basic stooled.

-
@Oz07 Thats what I was thinking but I wanted to see what others have done in case I'm missing something. The water cant get into the house because theres an open cavity gap.
-
As in 125 underneath the cill, up the back of it and then back over the top where the UPVC frame and cill sit over the cast stone? Any idea what the benefit of an external cill tray as opposed to just having 100mm DPC under the stone cill? My rear windows won't have stone cills , they'll be UPVC frame and cills direct onto the brick work with DPC or stepped tray underneath. It just feels like a stepped tray is going to prevent water escaping since theres no weep vents on a cill course where as a window lintel has weep vents every 450 horizontally.
-
The cast stone company won't provide details, they just produce them only and leave it up to the builders. I discussed two methods of installing cills I seen regularly and they said everyone has their own preference. This is what makes me unsure about the stepped DPC, because any water finding its way in from the outside into the cavity won't have anywhere to go, so it will just remain damp against the plastic tray. Why is a stepped tray needed when below the cill is open cavity, or a window head with cavity tray and weep vents? I have some expansion foam left from the brickwork, looks around 8 to 10mm thick but its knowing how far to set it down between the centre joint with them being in 2 parts and colour matching mortar pointed between them. I didn't know there was another option other than just using 85mm stub cill with a 70mm frame, The stone cill raised section is 40mm to bed the upvc cill onto with the frames fixed using window straps.
-
I thought of doing this it might limited the in coming air flow but could be better than nothing. What do the tiles or slates rest on, the over facia vent on the sub facia, and then the top of the capping board finishes in line with top of sub fascia?
-
I'm about to have my cast stone stooled cills fitted into the face brick exterior wall and I need to know if it's best to use 100mm DPC underneath, or a larger stepped DPC. What are the benefits if any of the stepped DPC as per my sketch? My partial fill cavity wall is 100 face brick, 50mm air gap, 100mm PIR, 100mm block. The cills are 65mm in height x 175mm deep so that i can have them set back into the cavity by 25mm, which then allows the windows to do the same. Rear of stone cill to front outer face of PIR=25mm. I planned to install a trimmed cavity closer under the cill, so a stepped angled DPC would interfere with this unless folded at 90 degrees.
-
@lookseehear hi, thanks for the detail. I don't think it works because the idea of the tilt fillet is to keep the slates right at the eaves to prevent them dropping, and also means the weight of the eaves course is on the timber fillet and not on the upvc facia. Adding the over fascia vent then puts the weight back onto the fascia rendering the tilt fillet useless unless I'm missing something obvious.
-
Thanks, I'd looked at this one the other day. I'll order some after ive checked the merchanta proce. Just wanted to check i was getting the good stuff and not wasting my time. Definitely won't be using it for any crimes @SteamyTea, some people are just evil.
-
Which brick acid is best for cleaning up any mortar residue off brick faces. Ive seen a few advertised as brick and patio cleaners but I'm wondering if they're too weak and i require a proper acid to dilute down. My bricks are new and are light grey. I have a few area where the rain caught it before it fully set, whether thats efflorescence or not?
-
Whats the best way to secure a 200mm horizontal soffit board and a fascia to 400 centre trusses. The rafters are 35mm wide and 150mm long on the untrimmed plum cut ends. Would I be better off installing a 150 x 25mm treated sub facia then add 18mm fascia or capping board over it for a better finish and more secure? I have 205mm soffit detail on the horizontal runs plus the gable ends. The soffit will butt up against the outer of the facing bricks as theres 2 courses of brick over the window lintels. What are my options to fix the soffit too? Would I screw a horizontal 4x2 to the side of each rafter 205mm long and then nail the facia into these? Or, fix a vertical 4x2 to the rafter with it up against the facing brick to nail the soffit into? This would mean nailing into end grain which isn't as strong.
-
What are my options for to vent my cold loft at the eaves end of the roof? I'm installing slates on my self build roof 35 pitch. 200 soffit. The ridge doesn't have to be vented but I'm looking to install a different ridge tile to the traditional vented ridge with visible rubber spacers. Because I'm installing MVHR which is going in the loft, I'm looking for as much air movement as possible for the summer heat build up. https://mayanroofingsystems.com/system/ridge/all-in-one/ I'm installing anthracite UPVC soffit and fascia and know that there vented soffit boards, but are there other options? I'd prefer not to have the weight of the slates bearing onto the fascia so a tilt fillet is likely to be used which rules out over fascia vents. I'd image continuous vented soffits attract a lot of dirt because my current white ones with circular vents are filthy every 2 years.