RandAbuild
-
Posts
215 -
Joined
-
Last visited
-
Days Won
1
Everything posted by RandAbuild
-
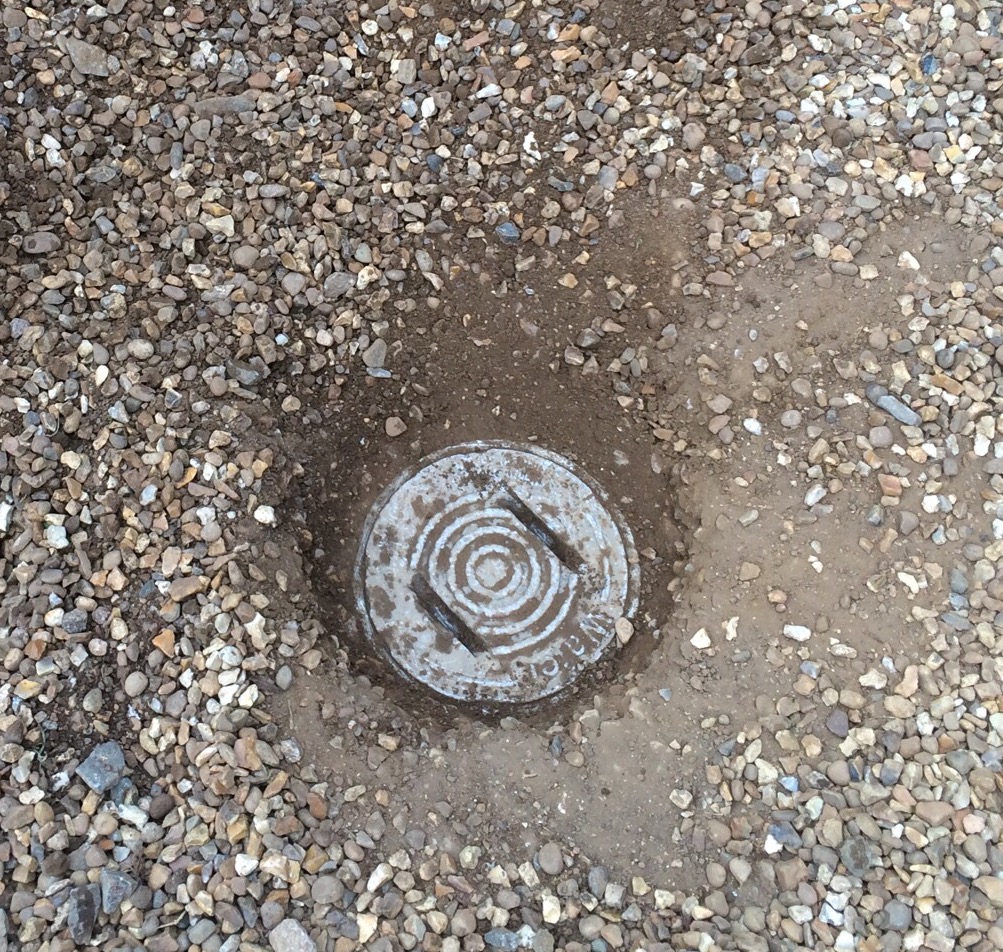
This is an old water stopcock inspection chamber - not a meter housing It appears to be made of aluminium. The 2 slots suggests it needs to be unscrewed, but it won't budge without the right tool.

-
Vijay - I'm sure you can do this but I don't think it's necessary. Building Control was OK with leaving it as bare earth. 150mm is the minimum - I think ours is at least 200 and 300 in places.
-
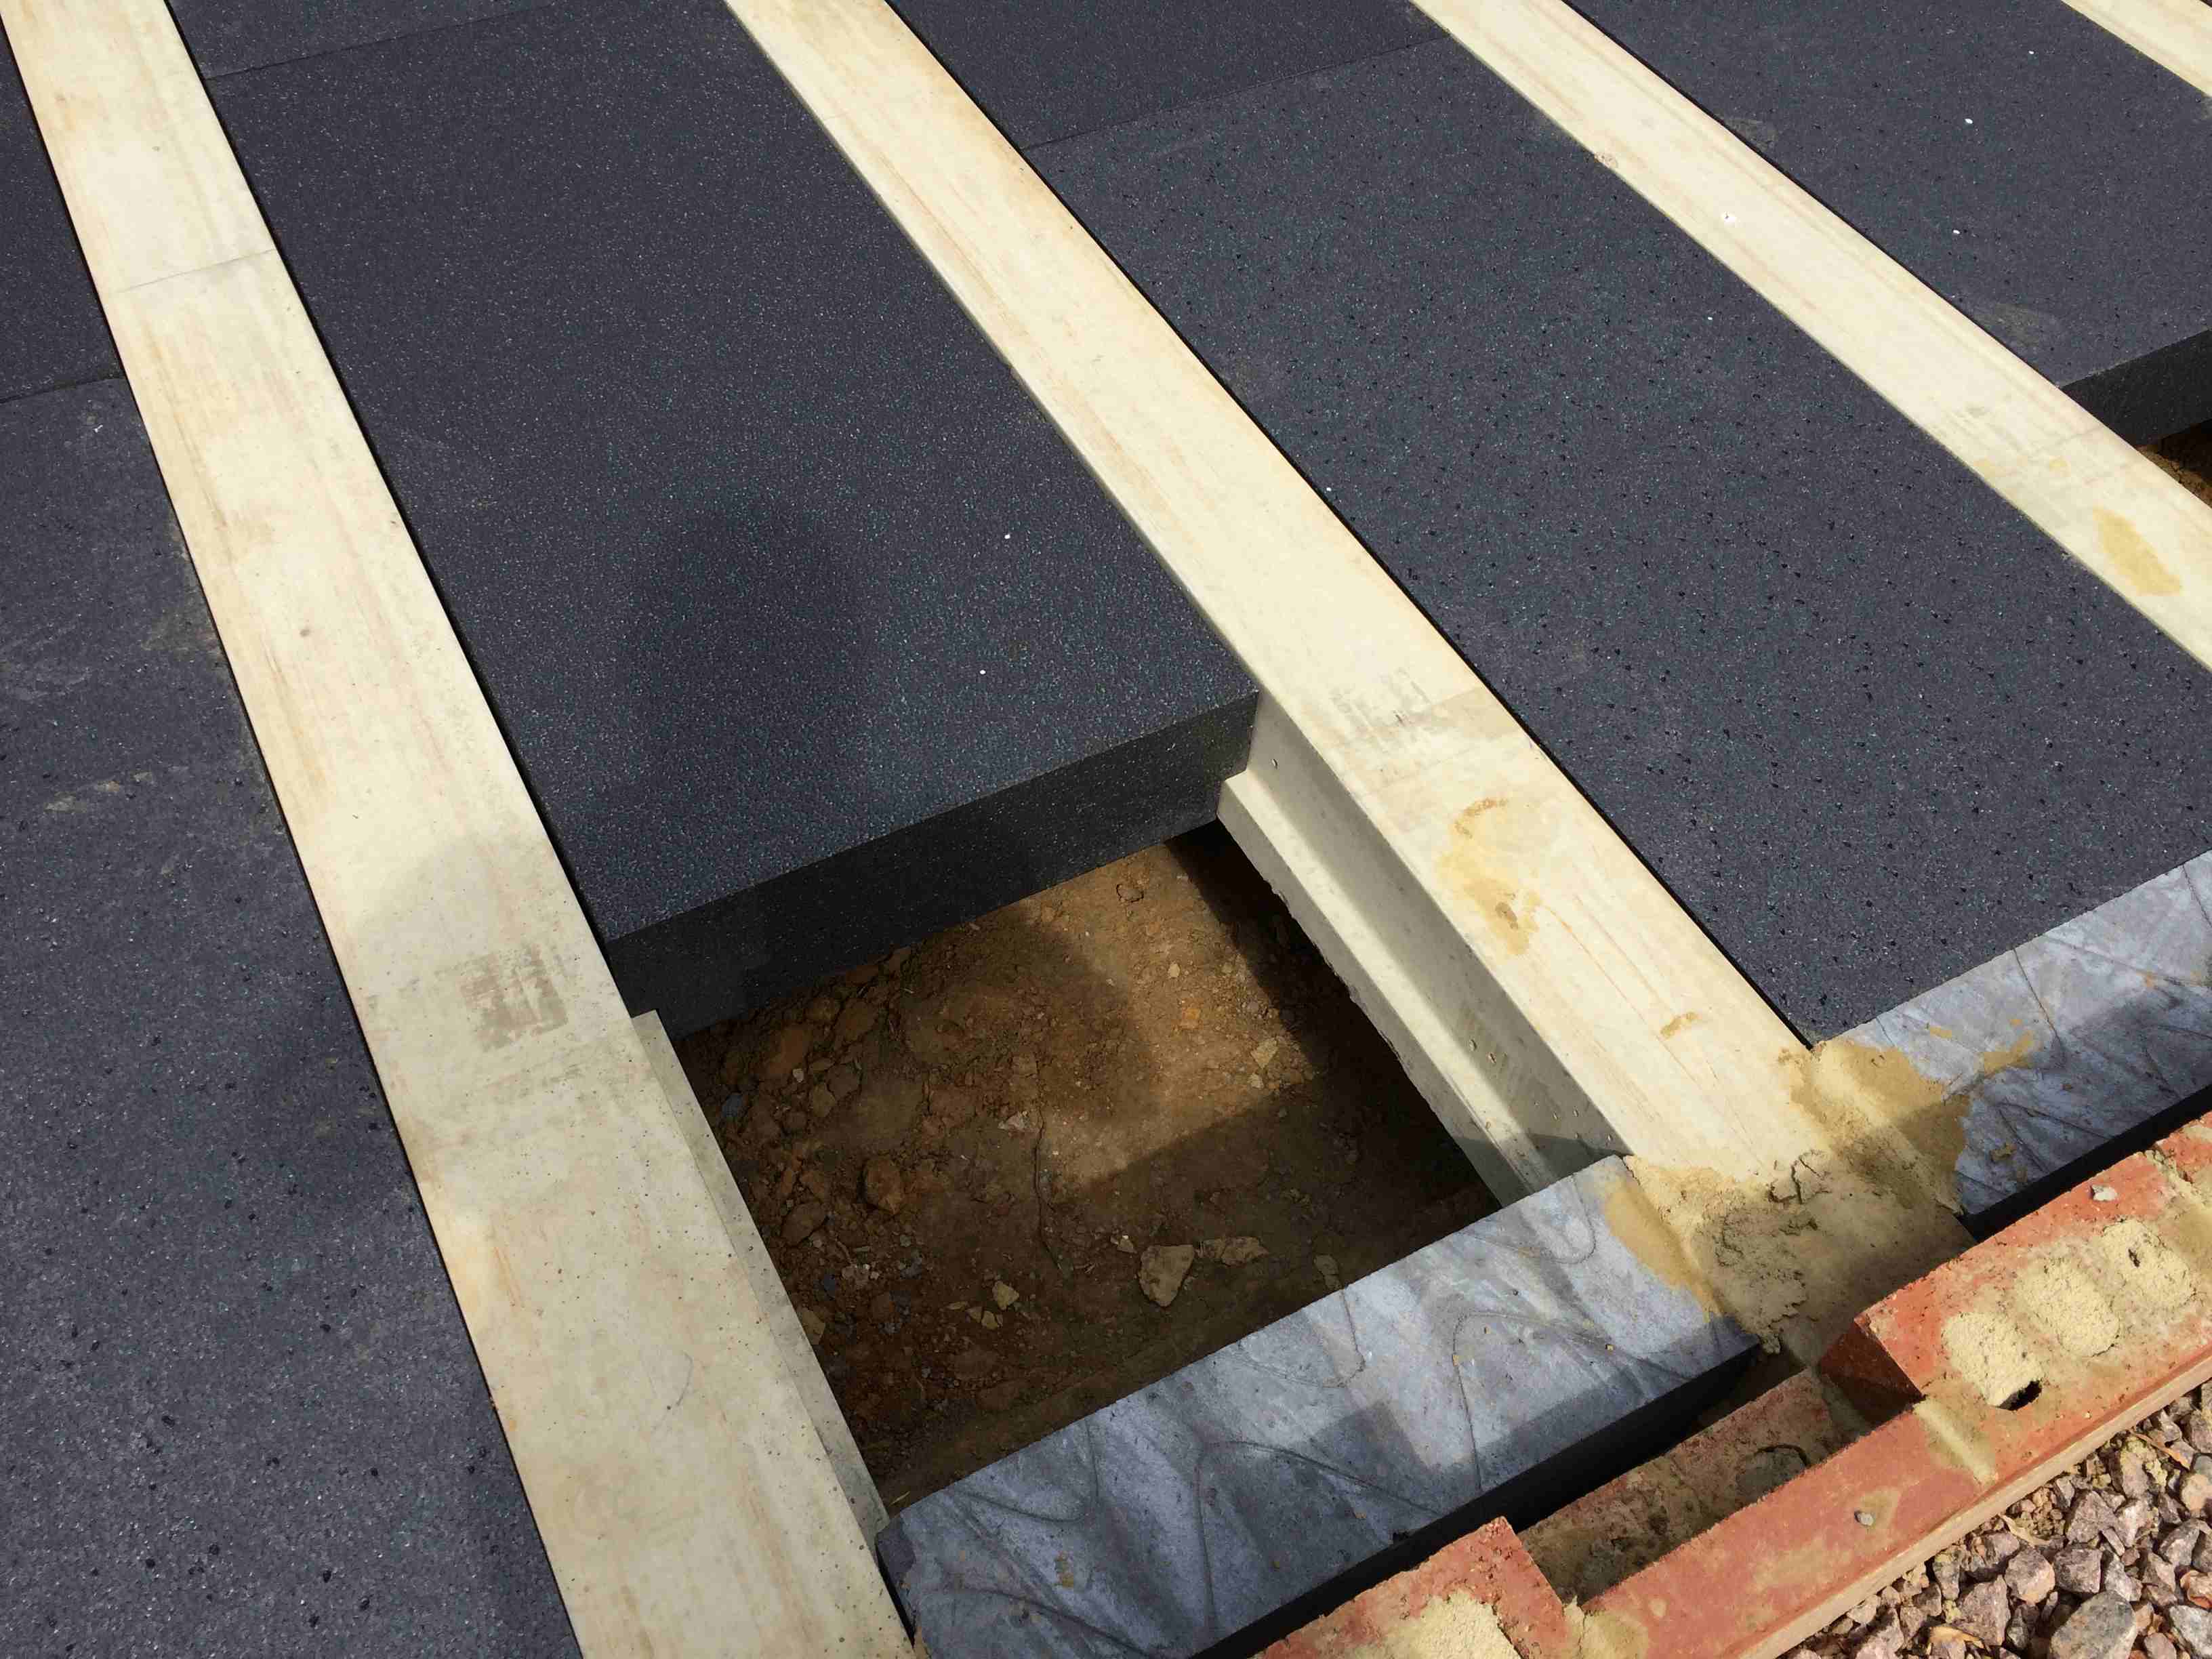
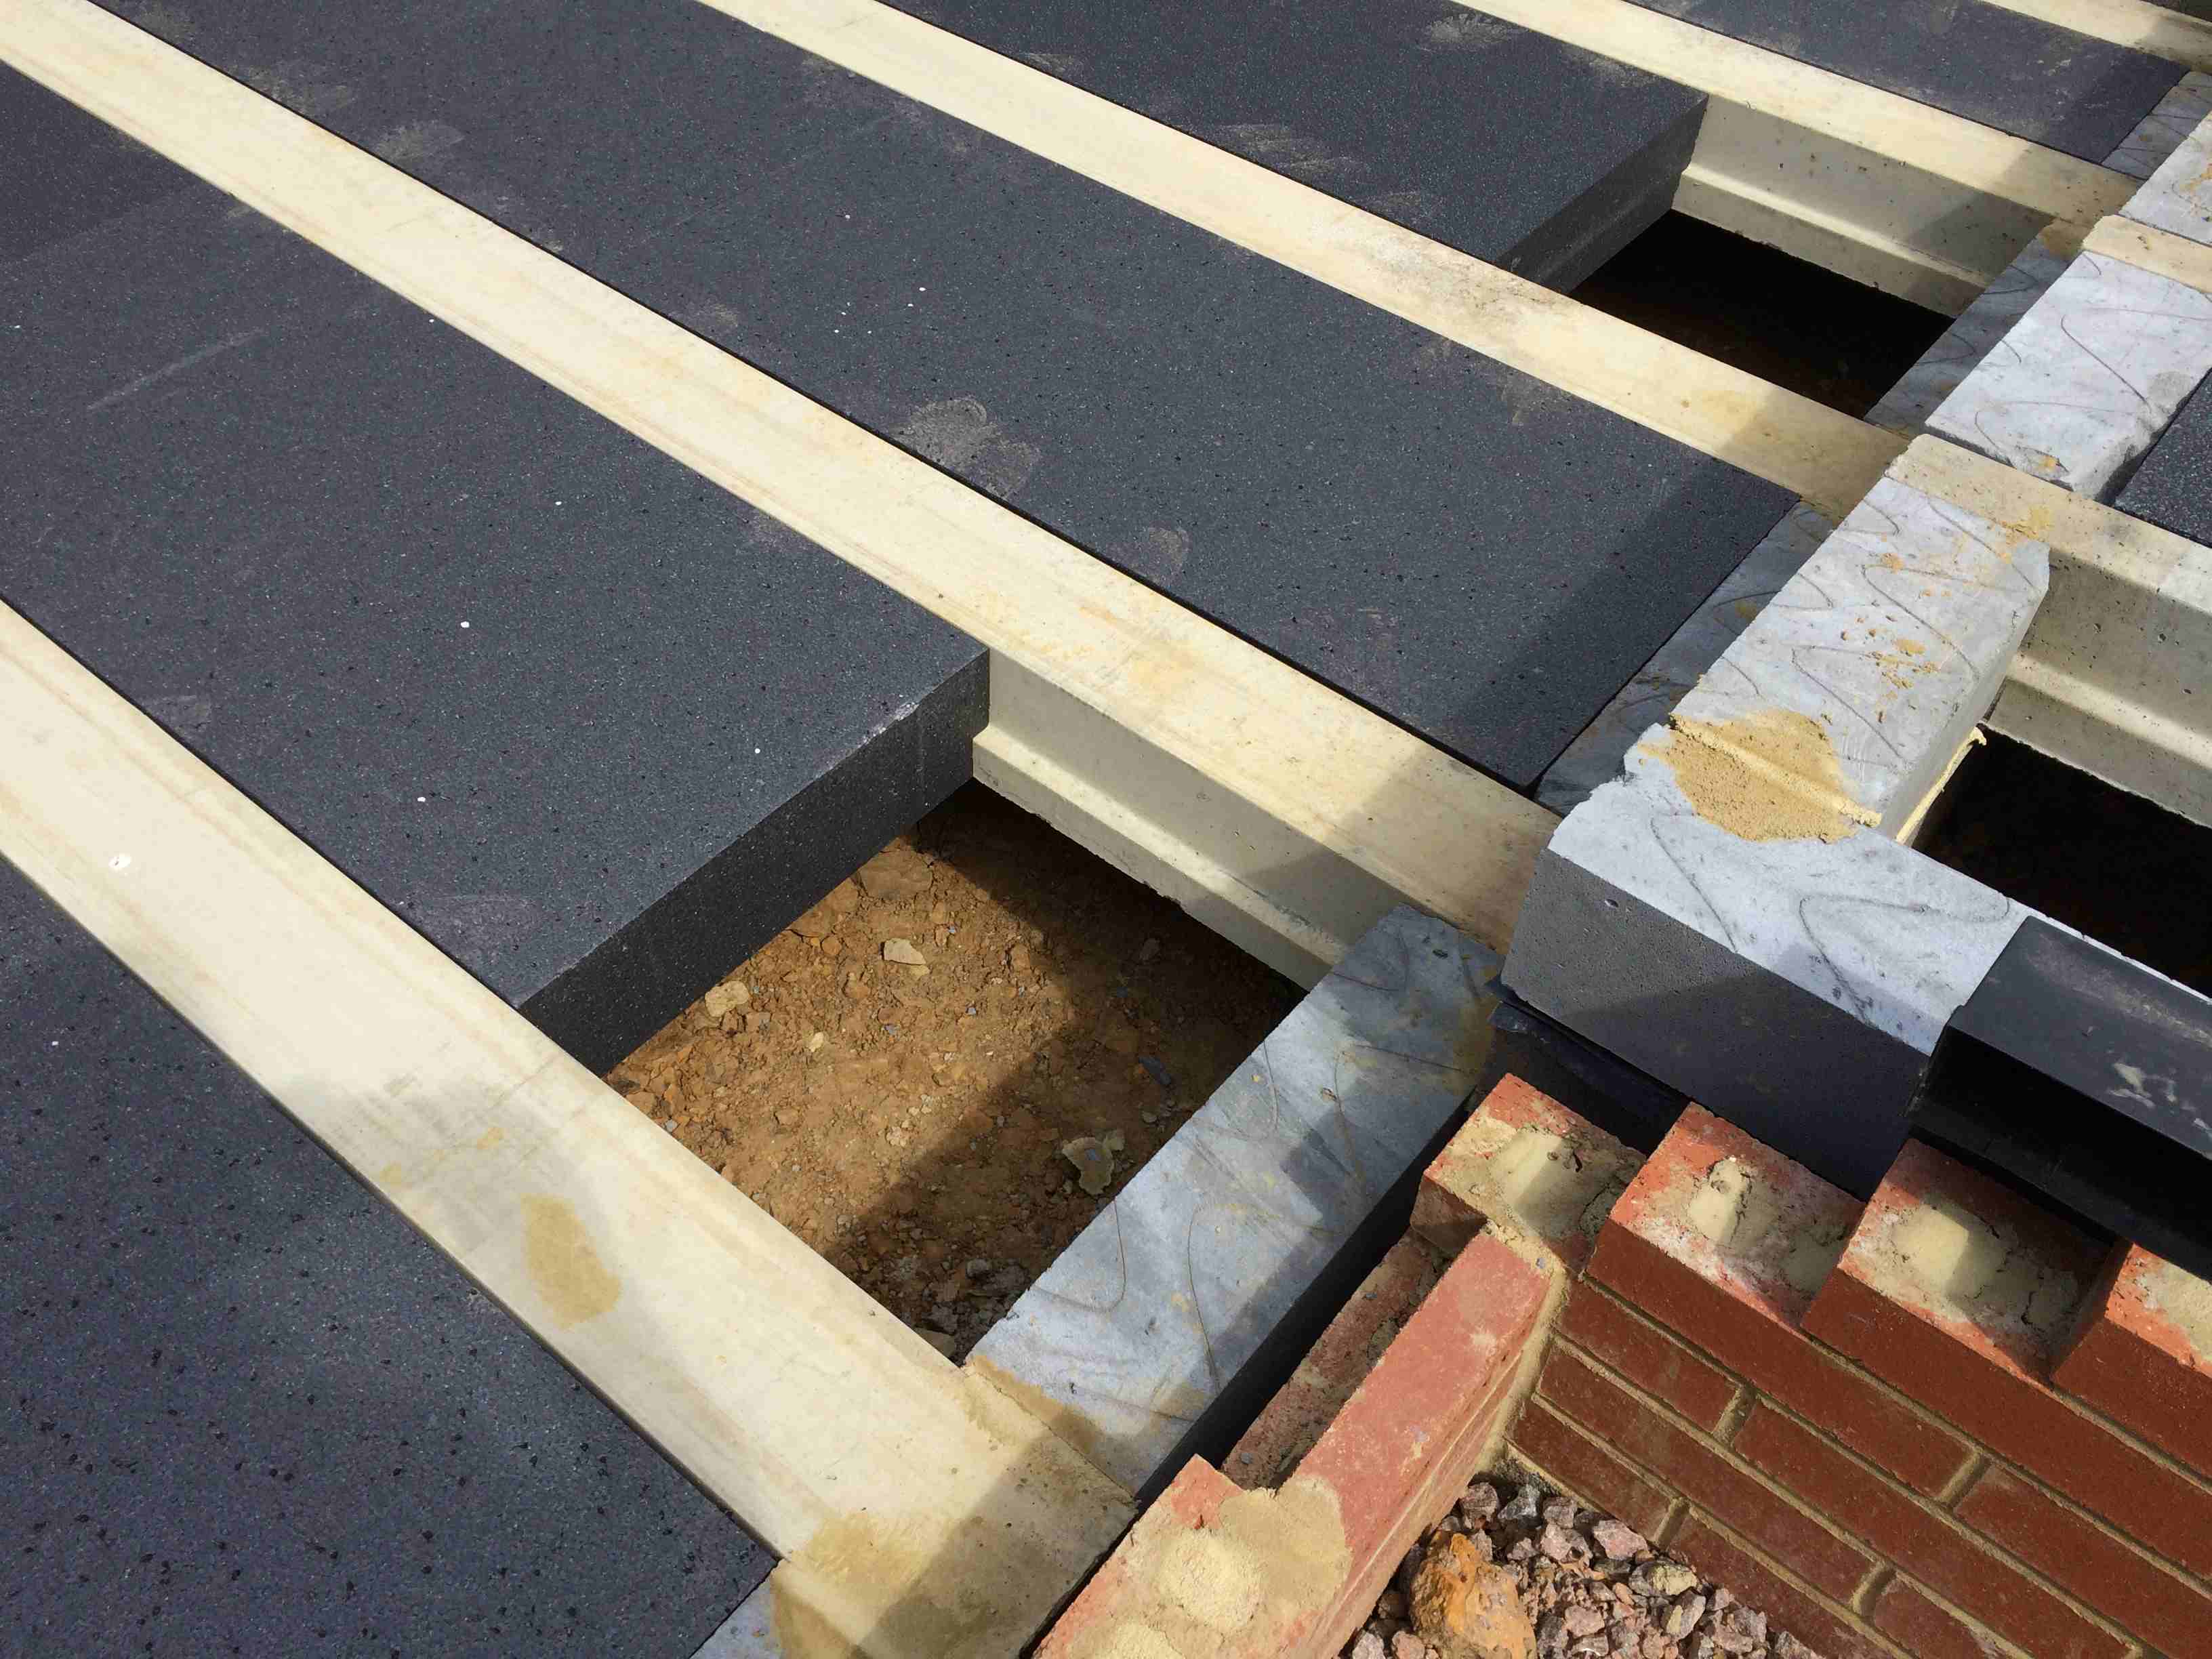
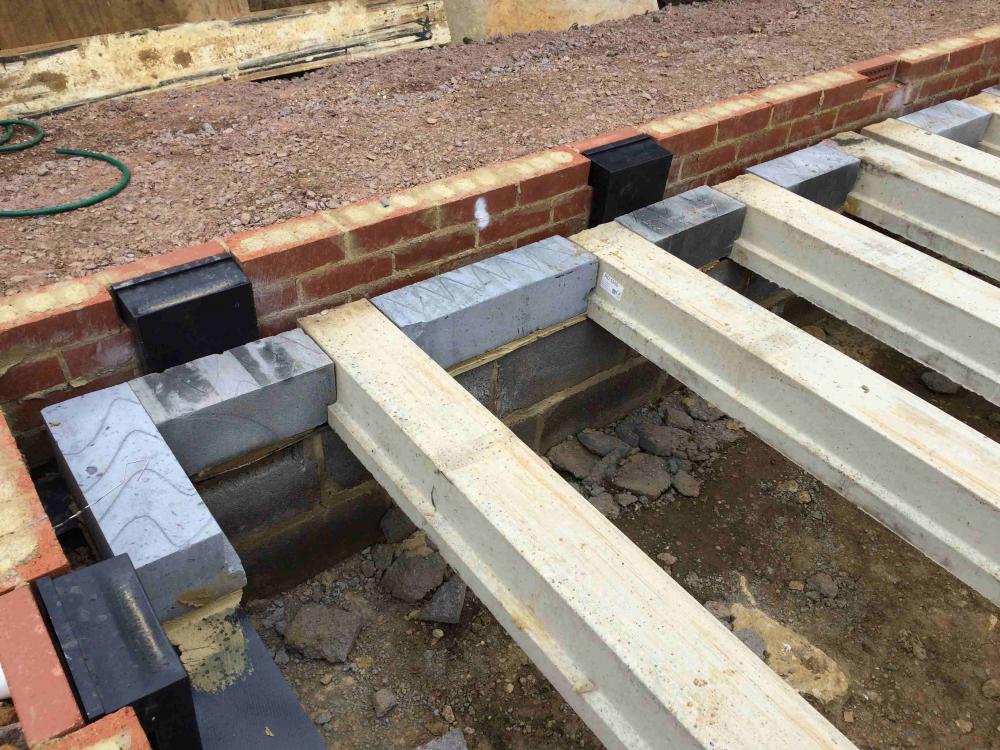
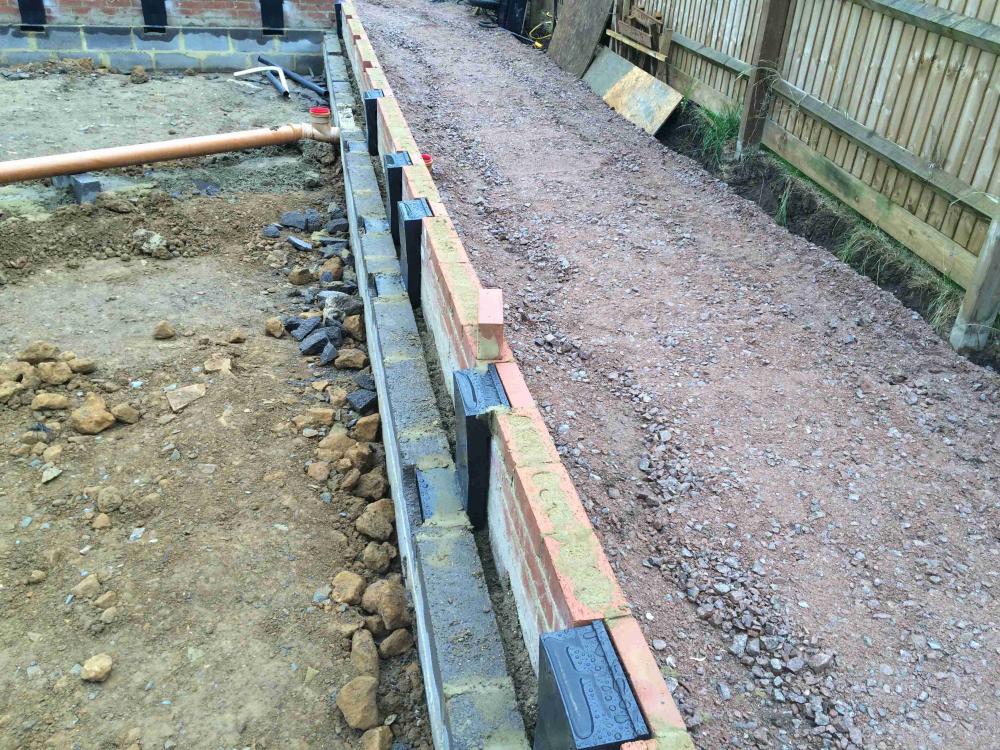
No, the membrane goes above the beams & insulated blocks, then 80mm EPS sheet, then 70 reinforced screed + UFH. A normal beam & block floor has nothing underneath the beams, just min 150 air gap.
-
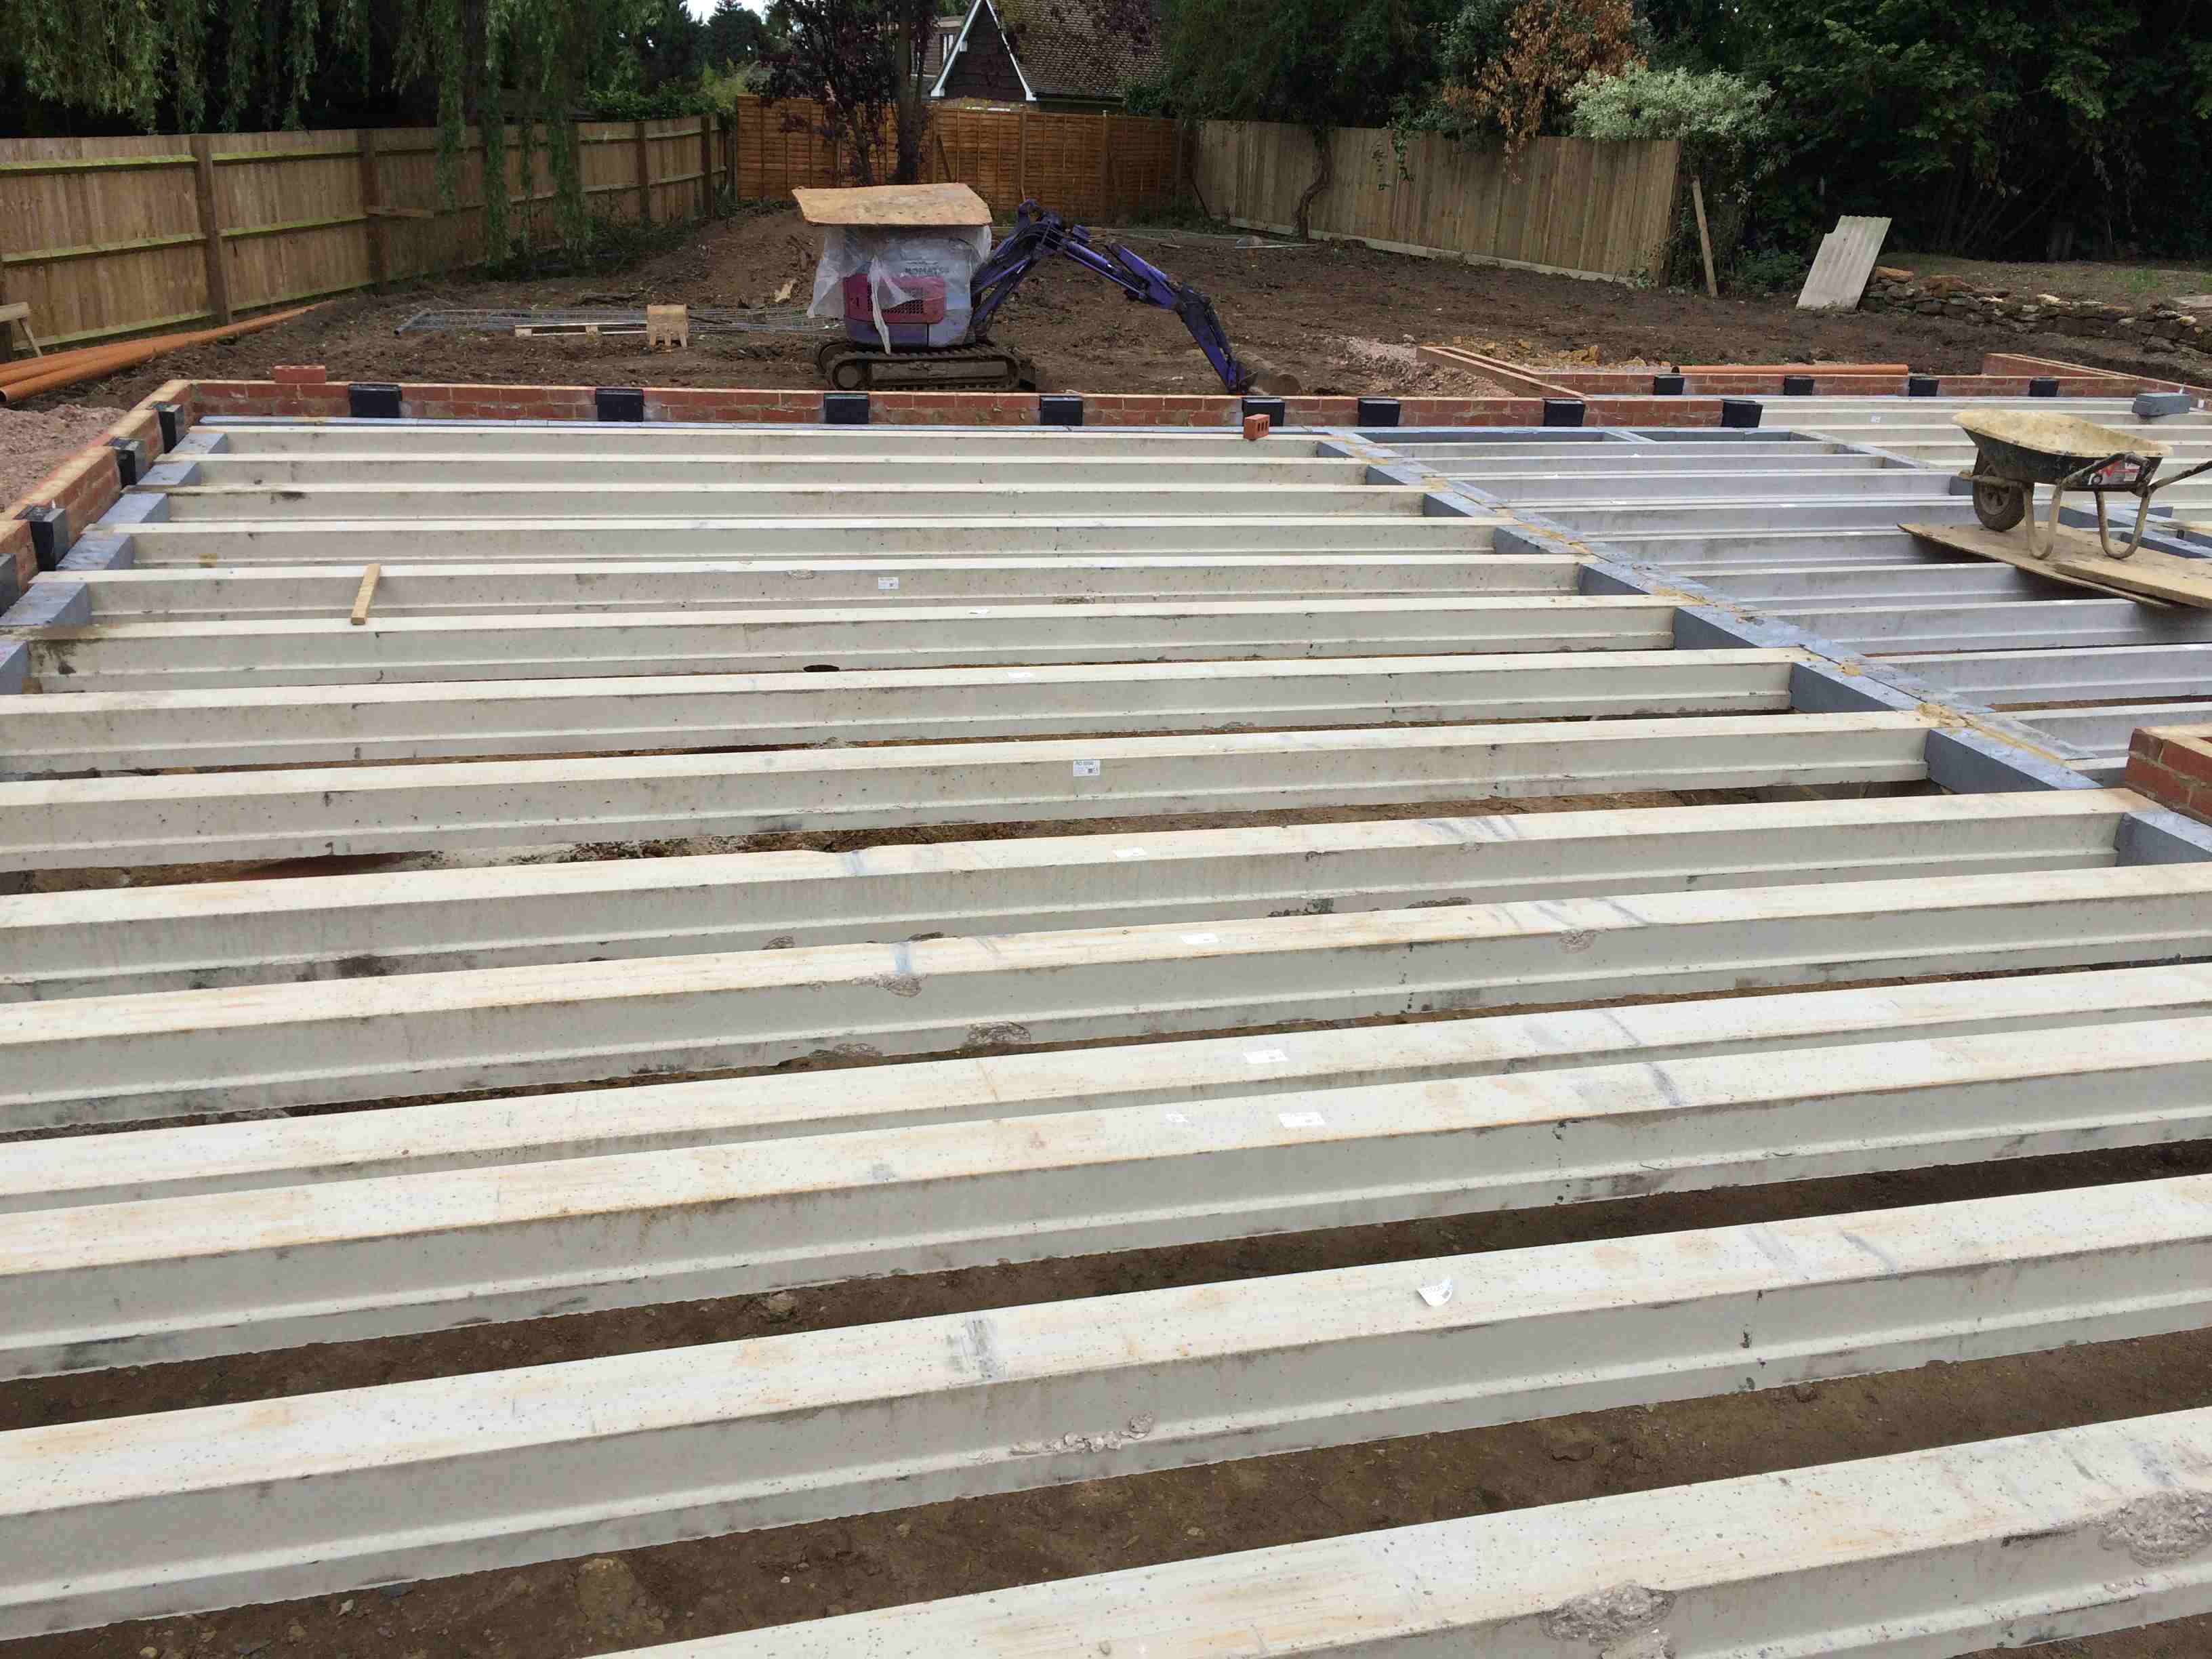
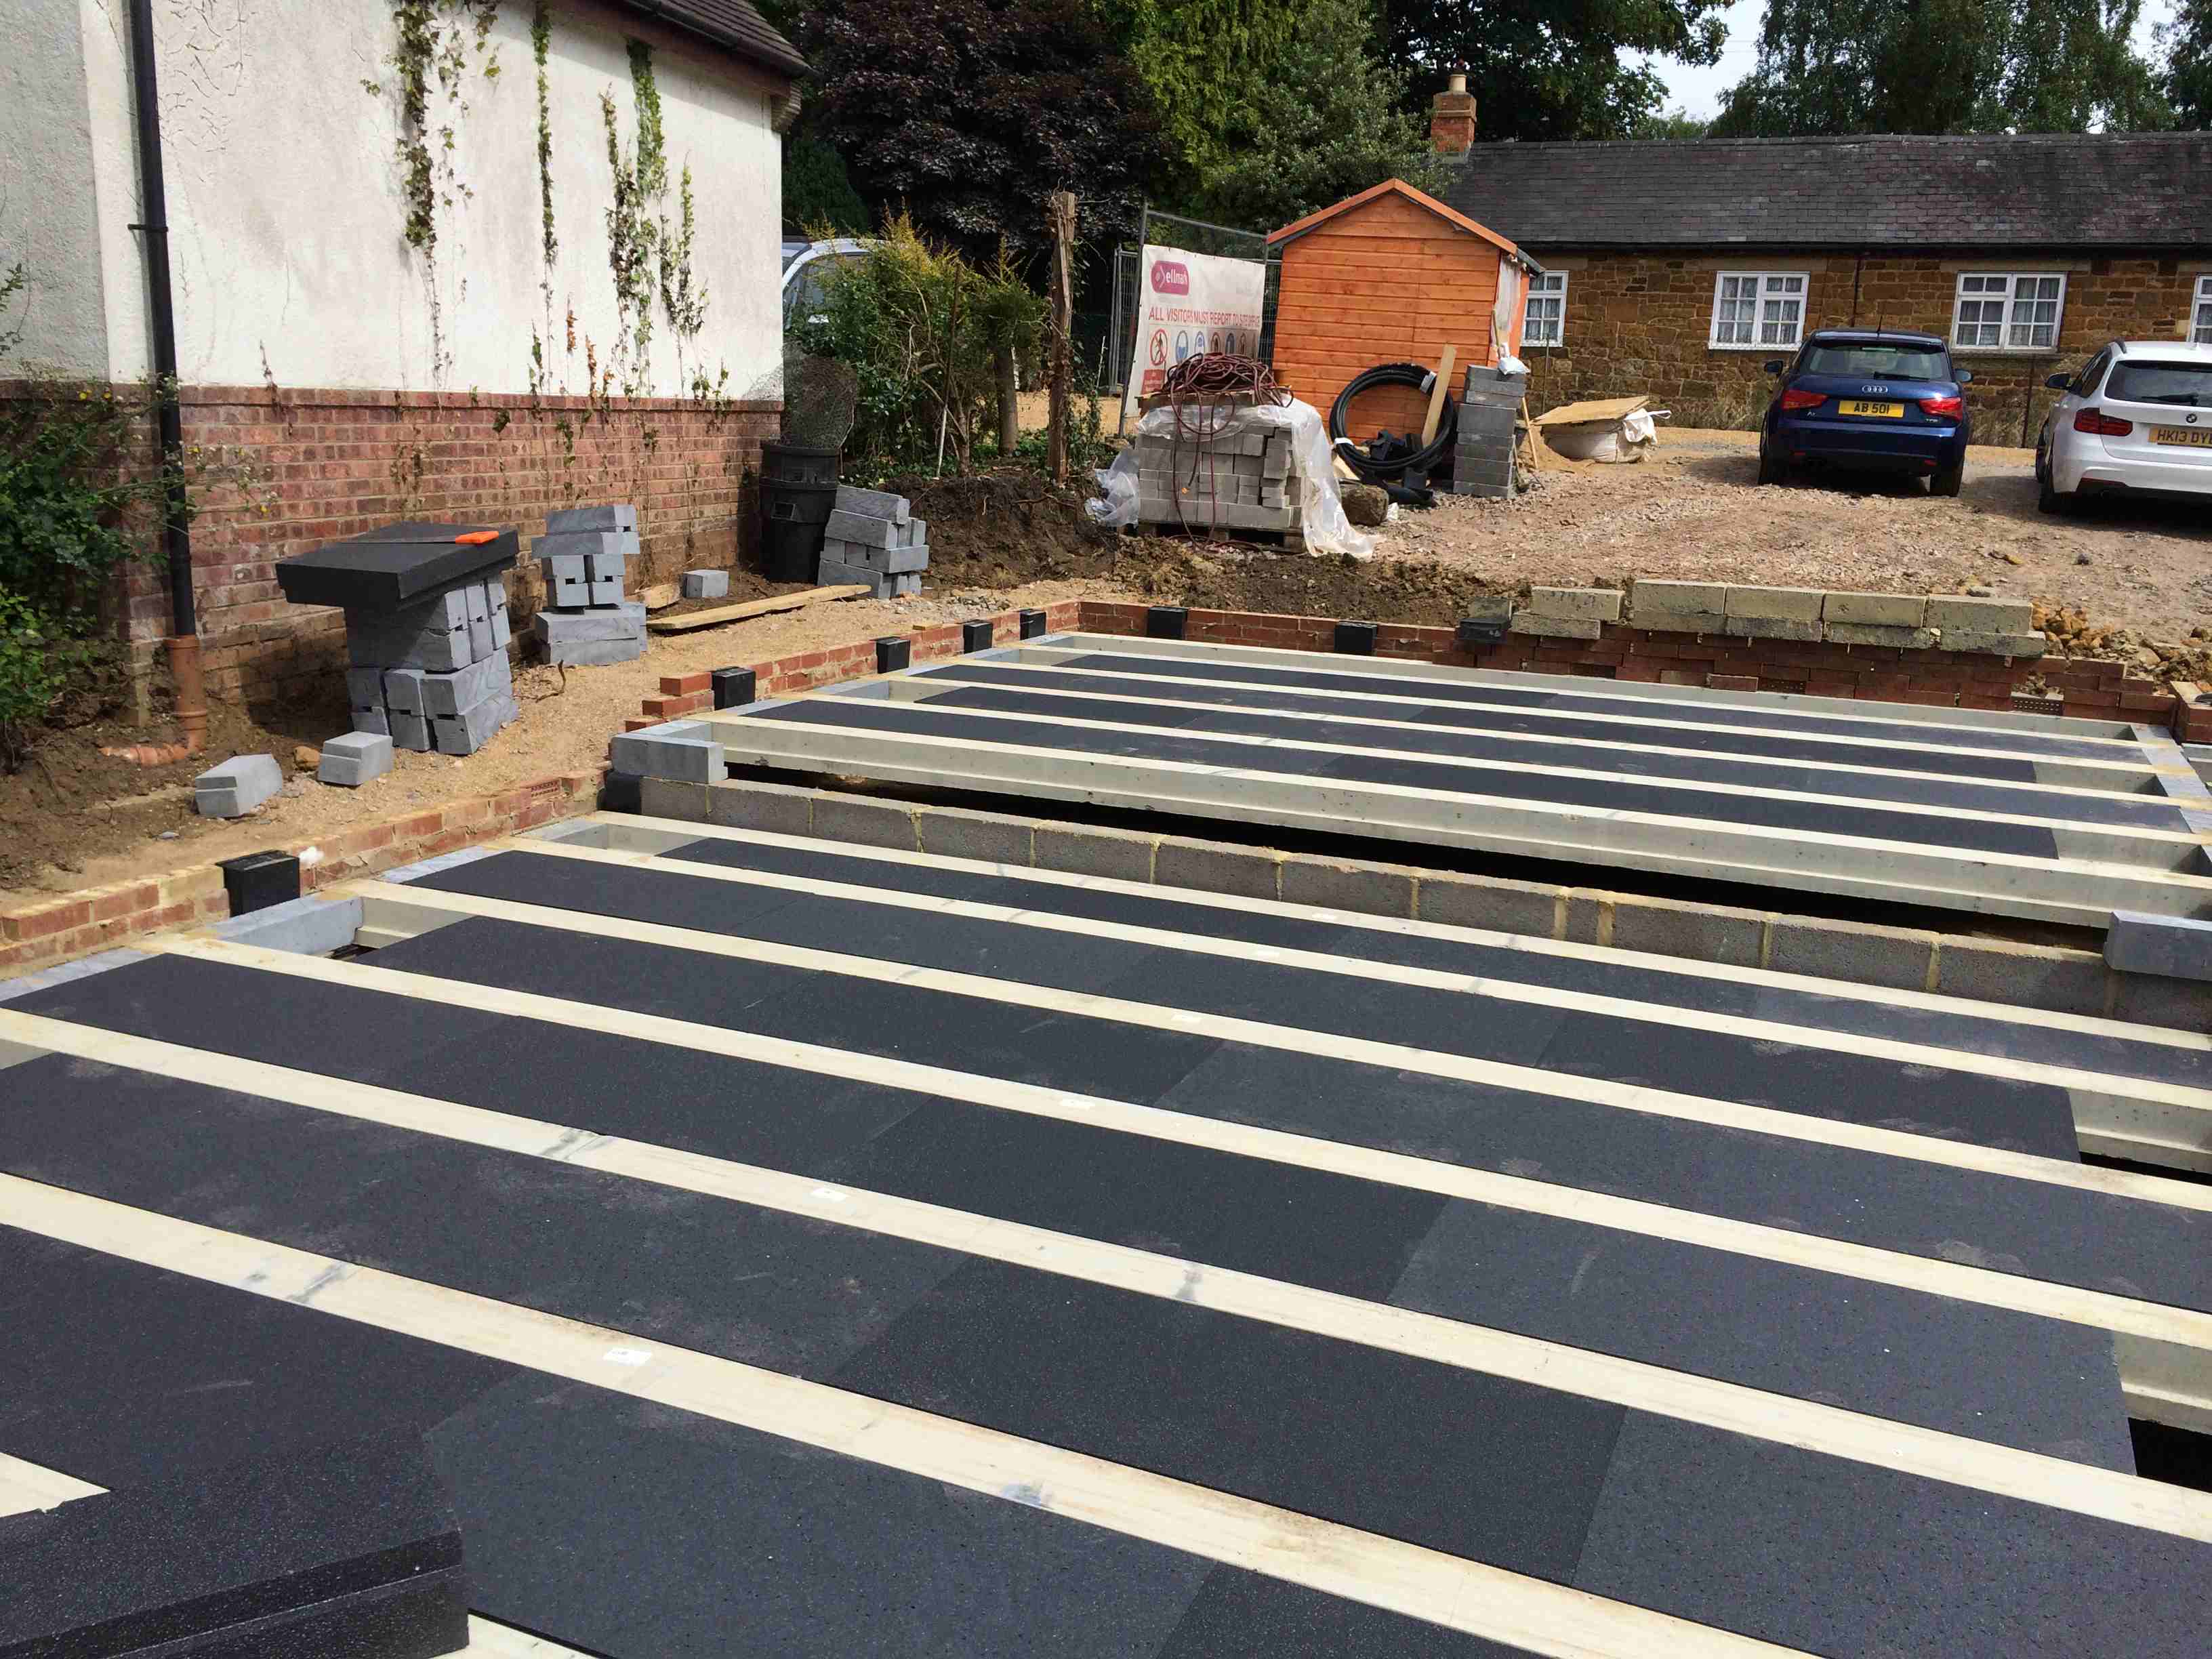
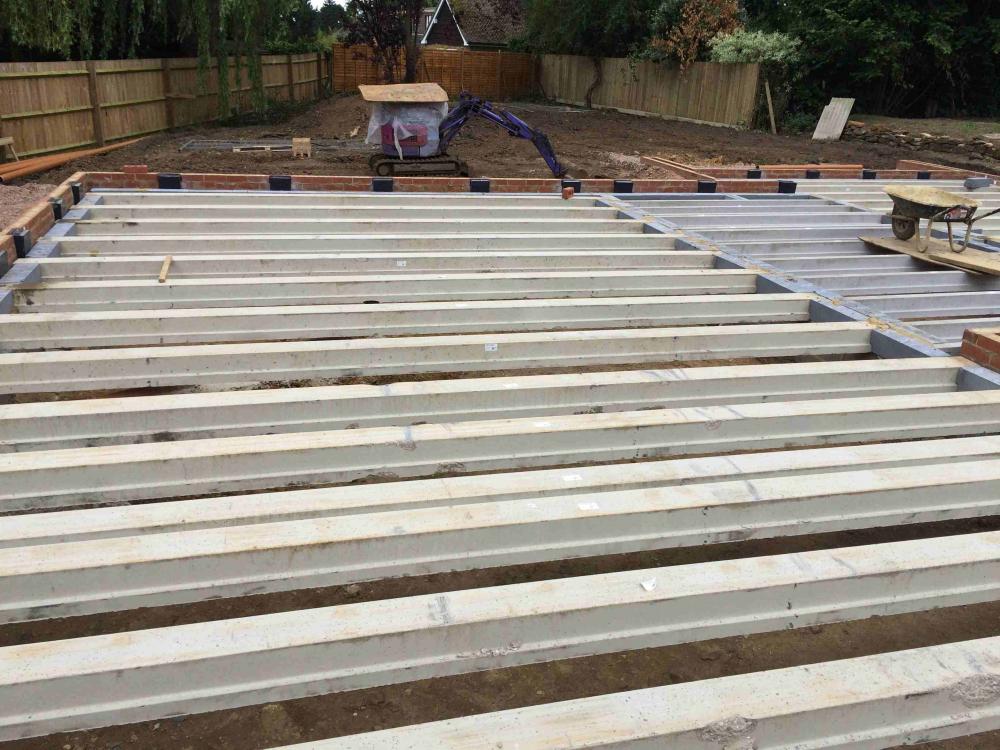
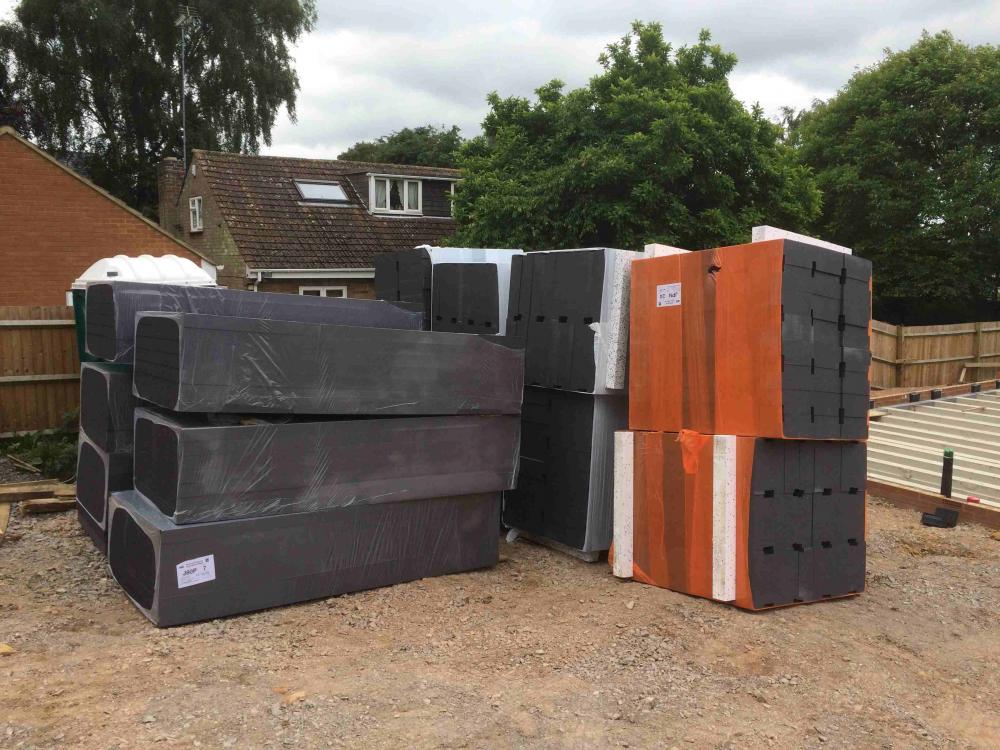
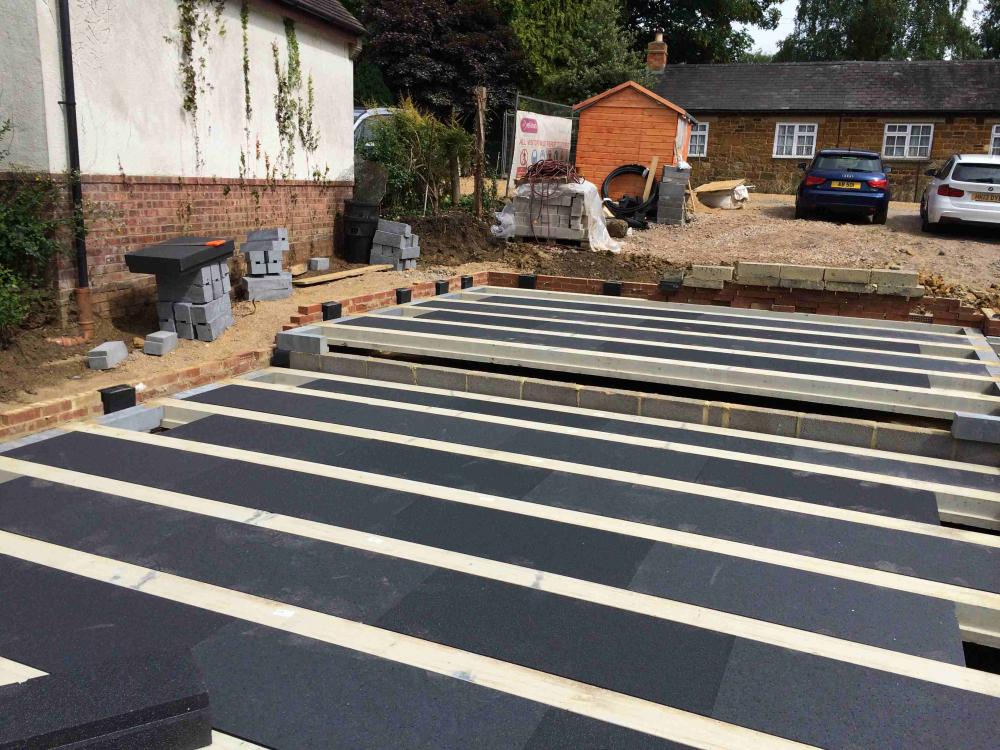
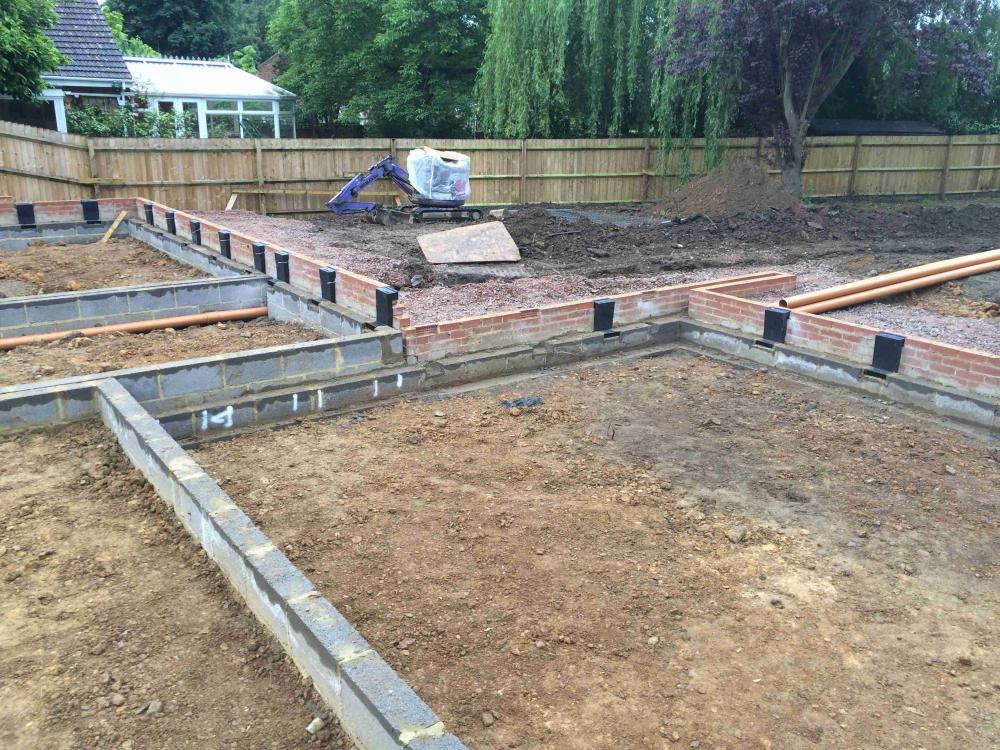
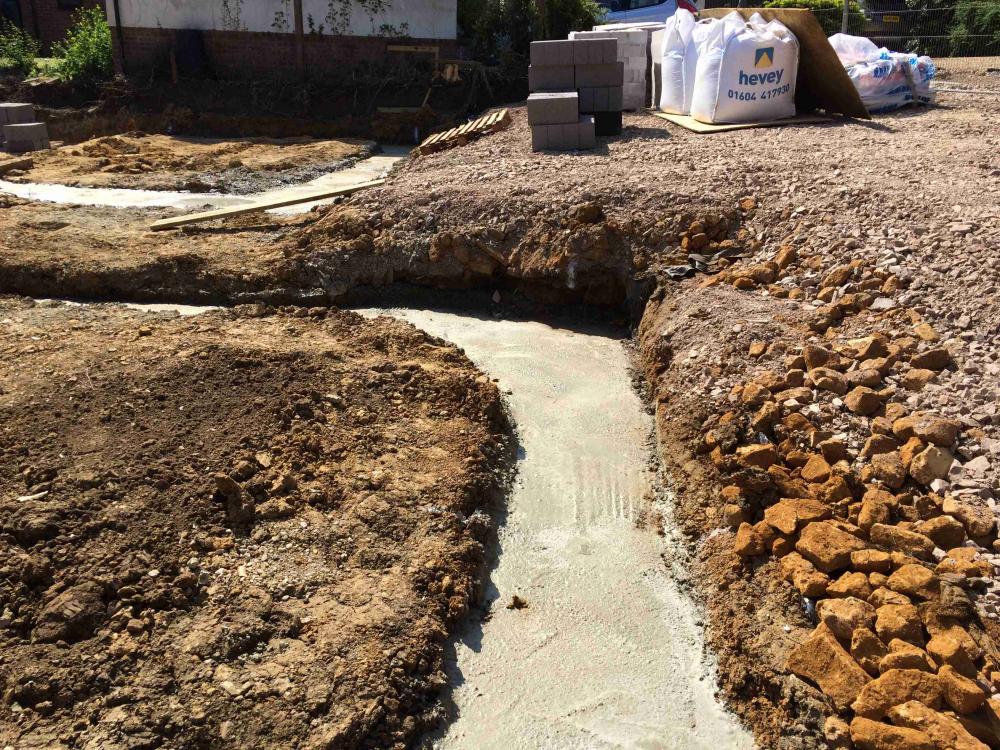
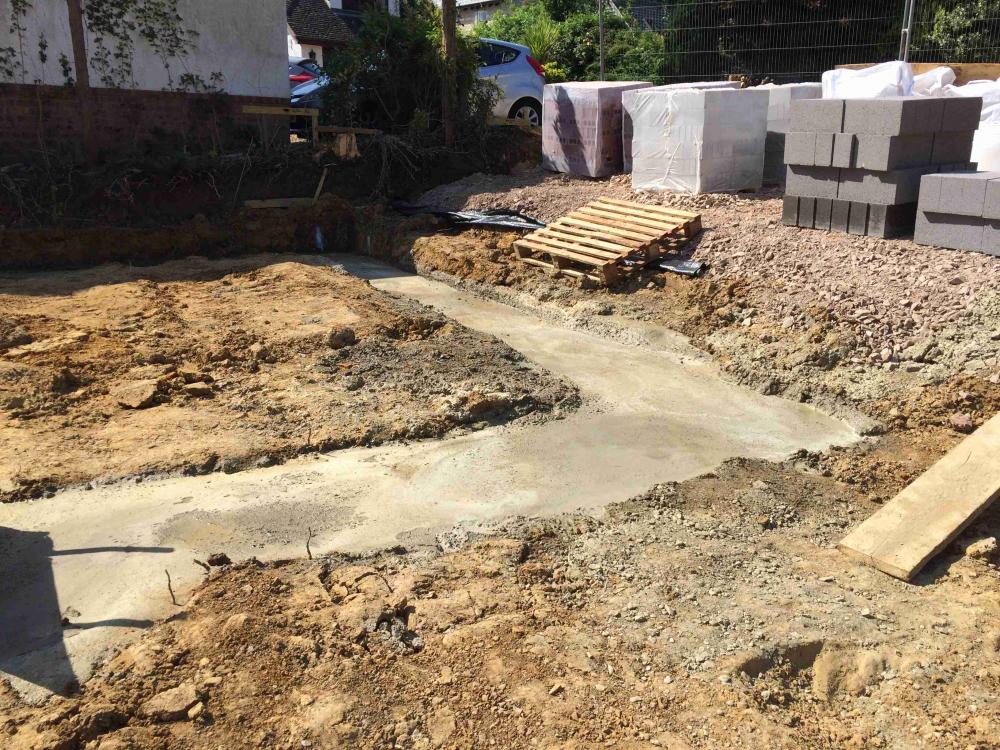
Jetfloor is now mostly in - the final insulation will go in later. The tricky part was the positioning of the large (420kg - we have a span of 5.5m) ground beams. We hired a 17m telehandler for the day, but lining it up so it was central to the building was a problem. It also tended to nip the dpc in places, resulting in lots of to-ing and fro-ing. The insulation thickness will vary between 80mm above the beams to 230mm between them. With a P/A (perimeter to area) ratio of 0.46, this results in an overall U value of 0.15.


-
Site hut & storage
RandAbuild replied to worldwidewebs's topic in General Self Build & DIY Discussion
I was about to go buy a secondhand caravan when the bricklayer suggested we buy a shed for them to use for 'welfare'. They've taken to it like a duck to water - it gives them their own dry space when it rains and they've even bought in their own chairs to sit a read the paper and have their breaks. I've put up a couple of noticeboards for H&S, drawings and messages etc. Good news is we can dismantle it and relocate it somewhere in the garden. We also have a portaloo at £25 a week, but this will go when we have the frame up and can provide a temporary toilet in the house. I hope to use the house for some secure storage too. -
You and Terry are welcome any time Jan - give is a call
-
I do like a well ventilated sub floor!
-
Soil stack to 110 drain -- the wrong way and right way
RandAbuild replied to TerryE's topic in Waste & Sewerage
Barney12 Yes, that looks like it would work. Does it give you enough roof to get the GF WC in? -
Soil stack to 110 drain -- the wrong way and right way
RandAbuild replied to TerryE's topic in Waste & Sewerage
Terry Can't you use a shorter male to female connector like this: http://www.toolstation.com/shop/p96056?mkwid=sK9AILCg1_dc&pcrid=46335772463&pkw=&pmt=&gclid=CJKXo73Ezc0CFXMz0wod8GsIHA or http://www.pipekit.co.uk/shop/10559-Drain-Connector?gclid=CJvX66vIzc0CFa0V0wod7C4Ksg This would give you more space to fit the wc. You may need to cut the pipe as it looks like it extends a long way above ffl. I appreciate Nick's argument about not using these at the start of the stack and they are intended to different locations, but what would catch on such a joint? It is 110mm pipe, and only a few years ago we were using 4". As long as you keep nappies out you should be OK? We only have one internal stack now and it has just been put in - it looks like this...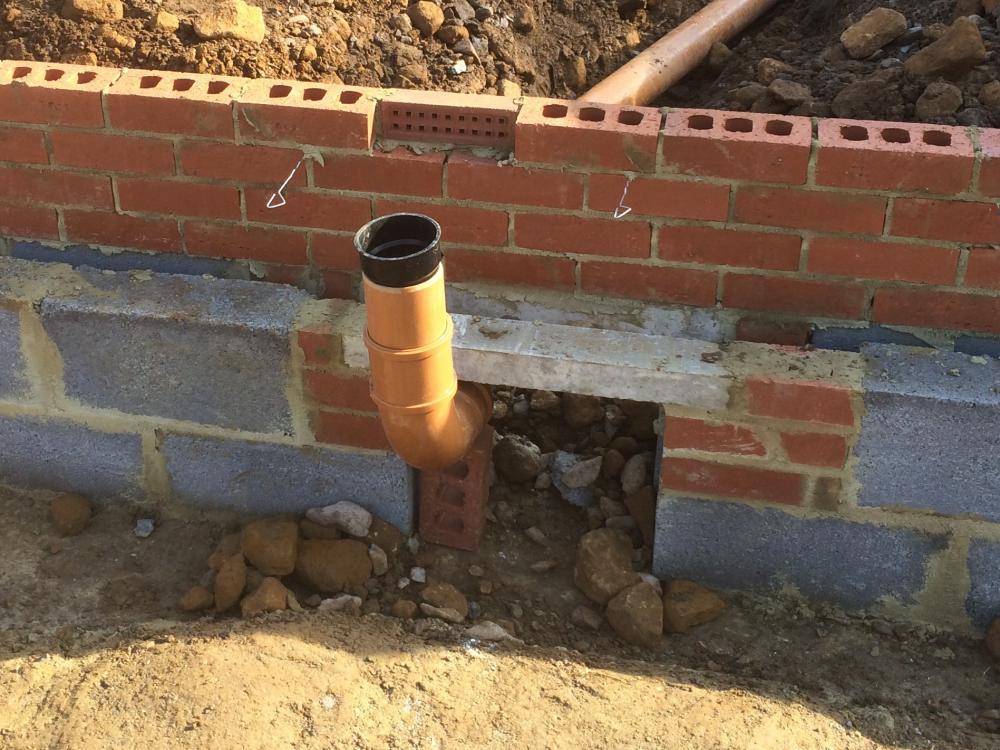
-
Jetfloor beams being delivered tomorrow. Most of these are 5.2m long and weigh in at 330kg each, so we are hiring a 17m telehandler for Friday to set them out. The insulation blocks then arrive next Tuesday.

-
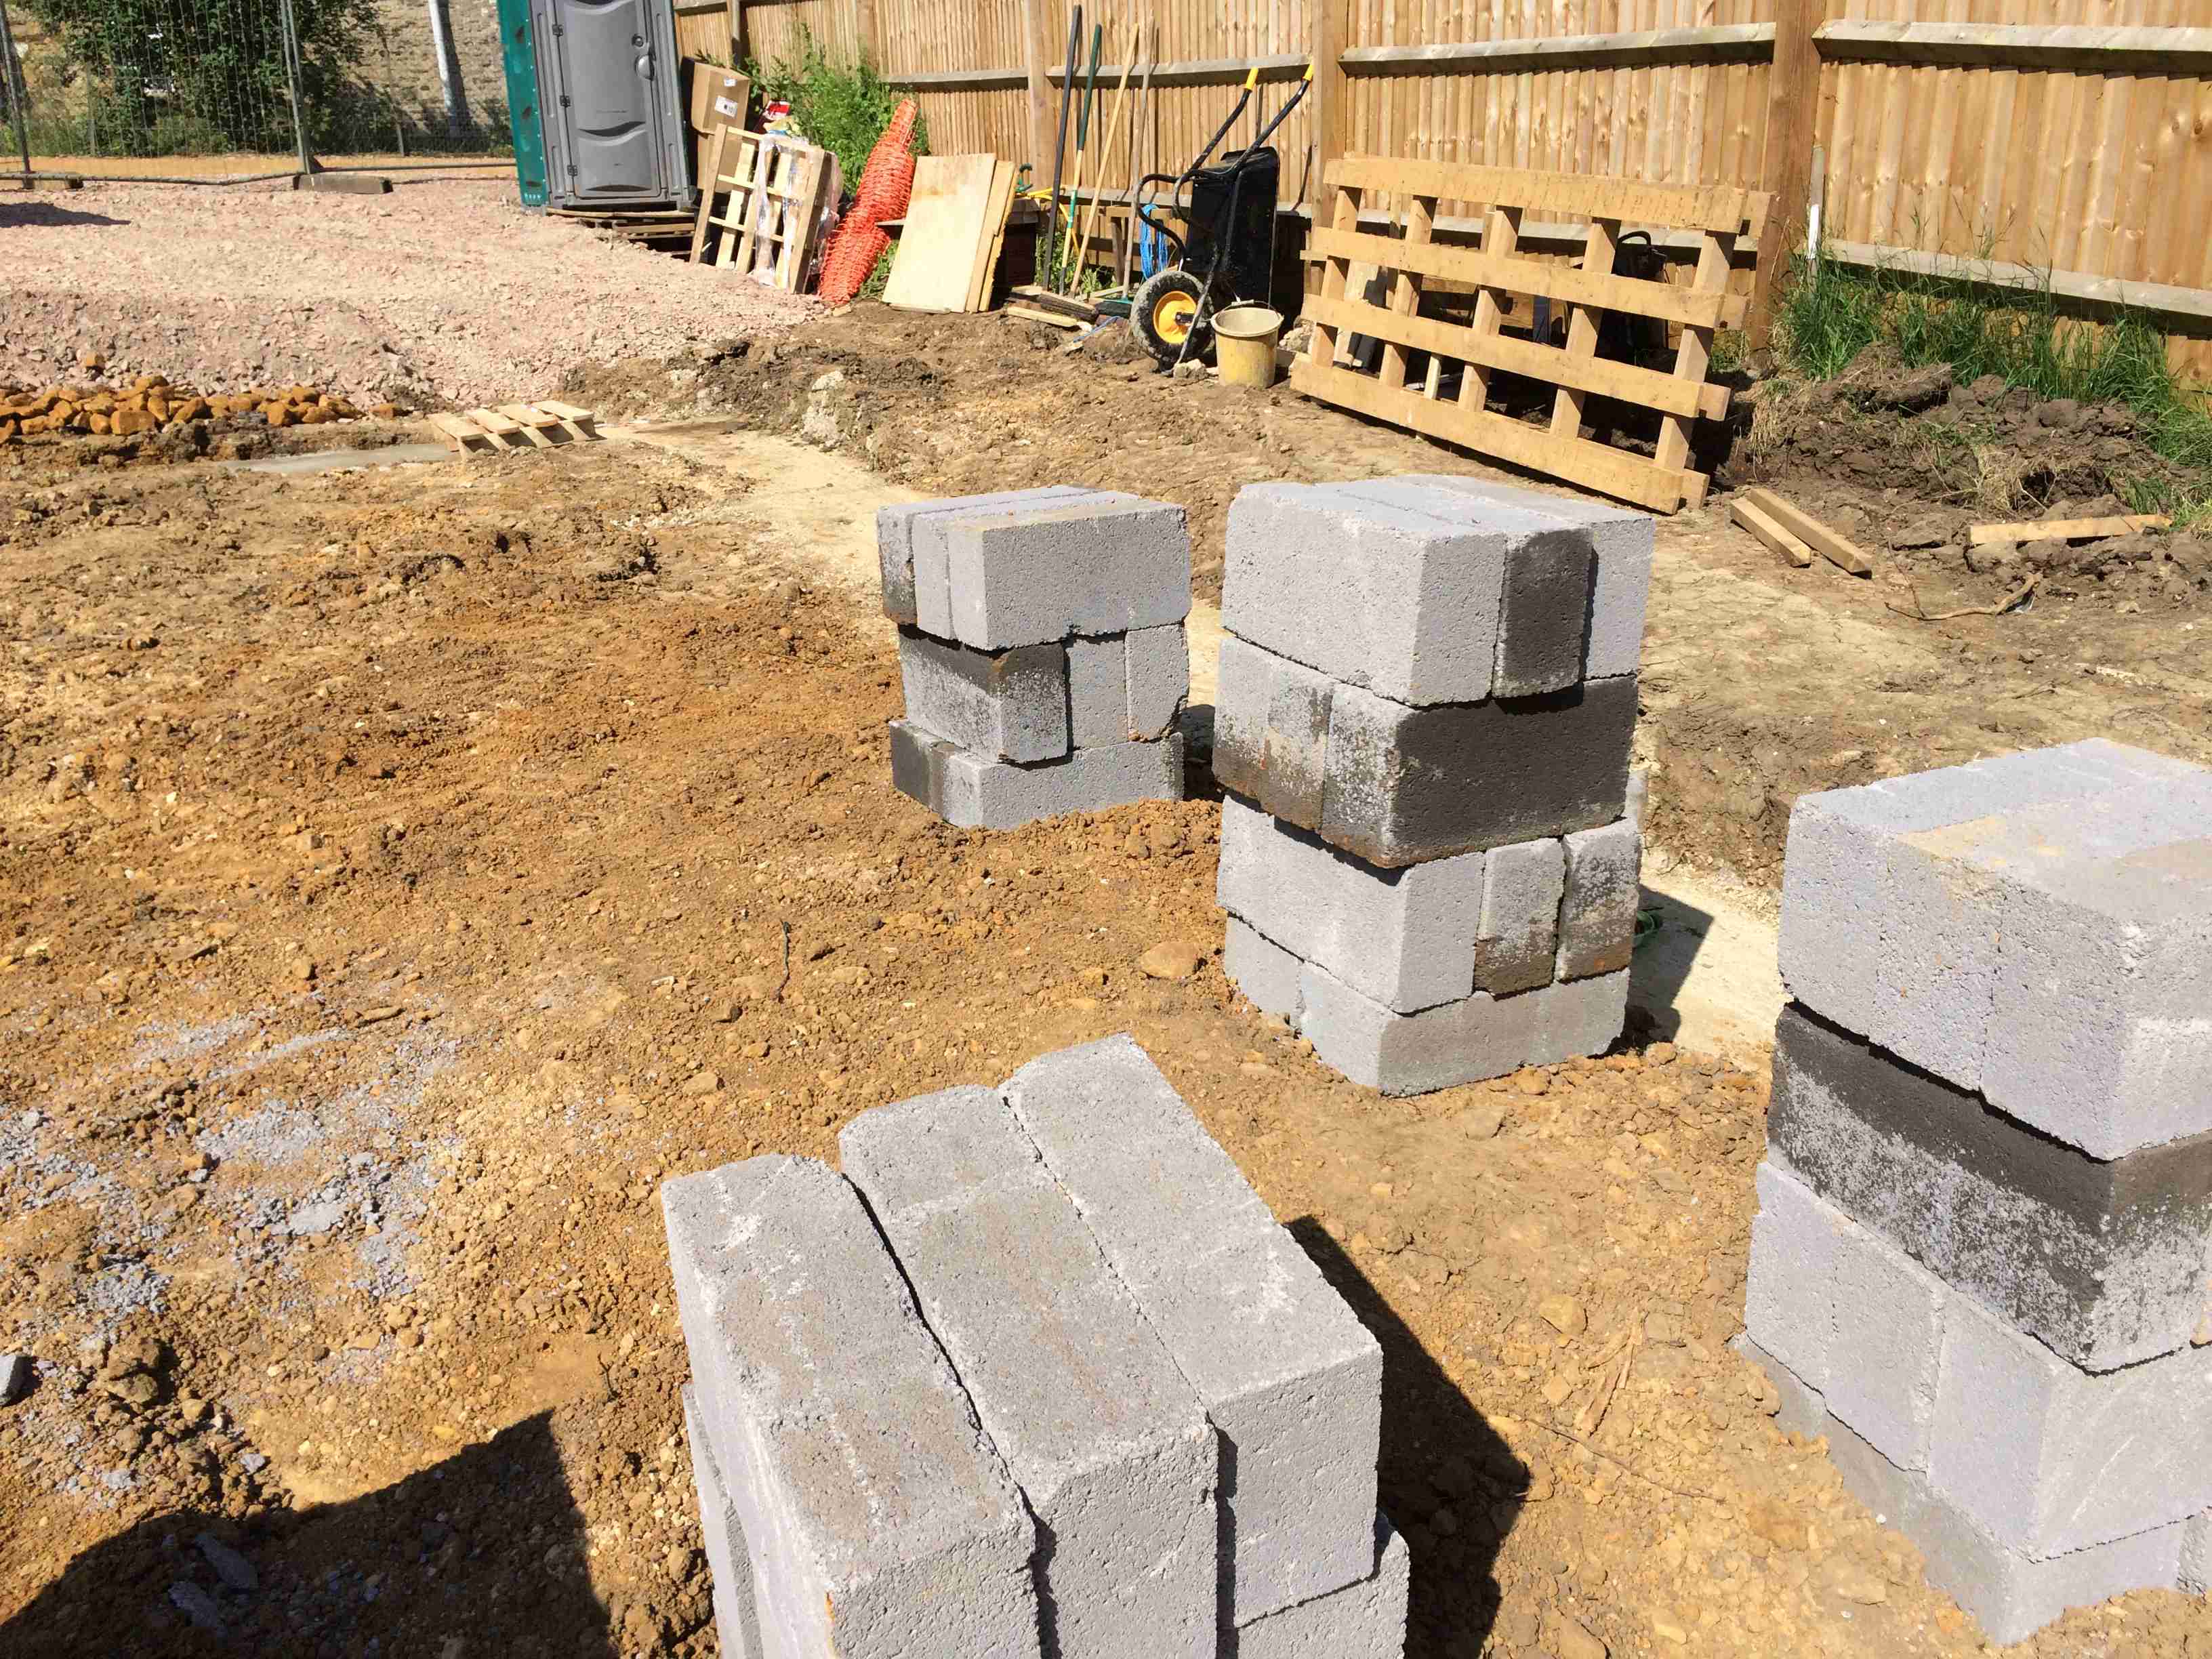
We are using Jetfloor - the blocks between the beams are 485 or 295 wide and 150 deep. Then 80mm grey EPS goes over the top with 70mm reinforced screed/underfloor heating, so the total floor depth is 300mm.
-
Thanks Terry - very helpful. We are waiting for AW to carry out their desktop survey for our supply, which we think is in the main road 50m from our plot. As you say, they take 6 weeks to even look at this and in the meantime we are reliant on a hose from a neighbour's garden tap. Like you, we'll have to have a standpipe as a temporary supply, but I was unaware of their very precise requirements. I'll start to put together a standpipe like the one as you've shown. Interesting you say AW don't allow a hose connector - yet the one shown on the Edwards Standpipes' website has a bib tap with one!
-
What a difference a day makes
RandAbuild replied to RandAbuild's topic in General Construction Issues
It's 17.6m at its widest point and tapers down to 10m at the bottom of the garden. From end to end it's 43m. Our build is 120m2 footprint with rooms in the roof, plus a (large) double garage / man cave. -
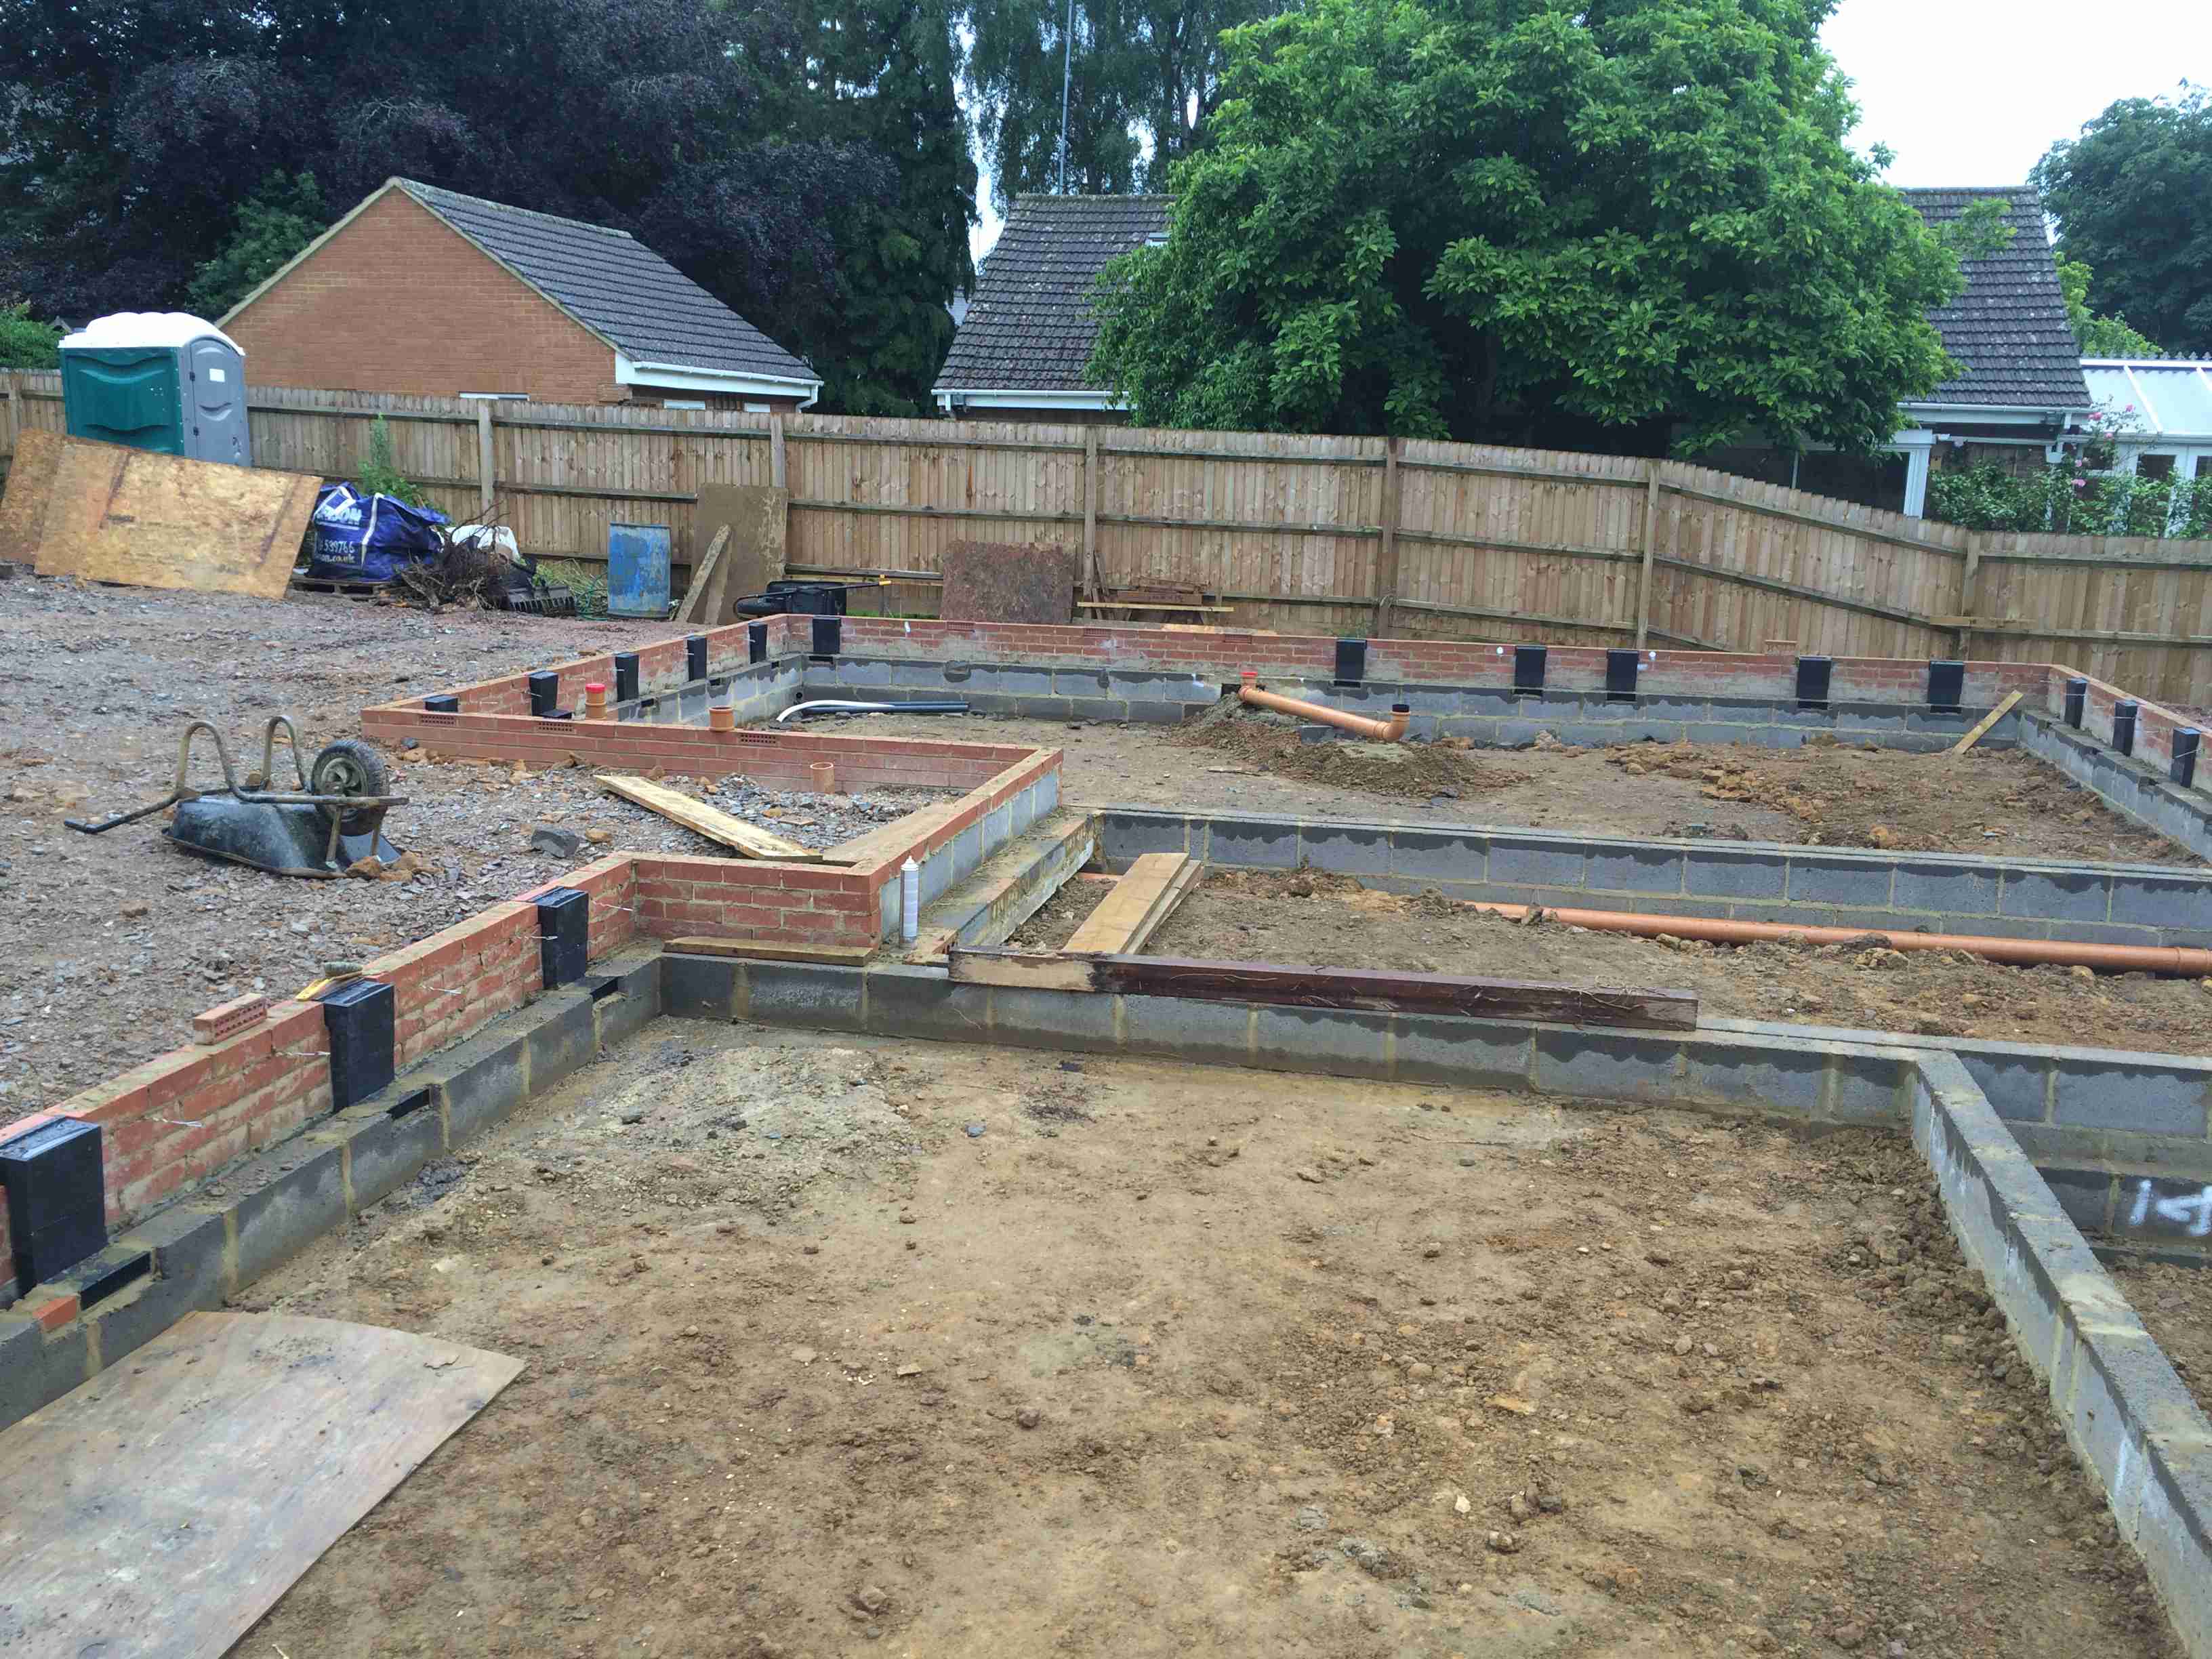
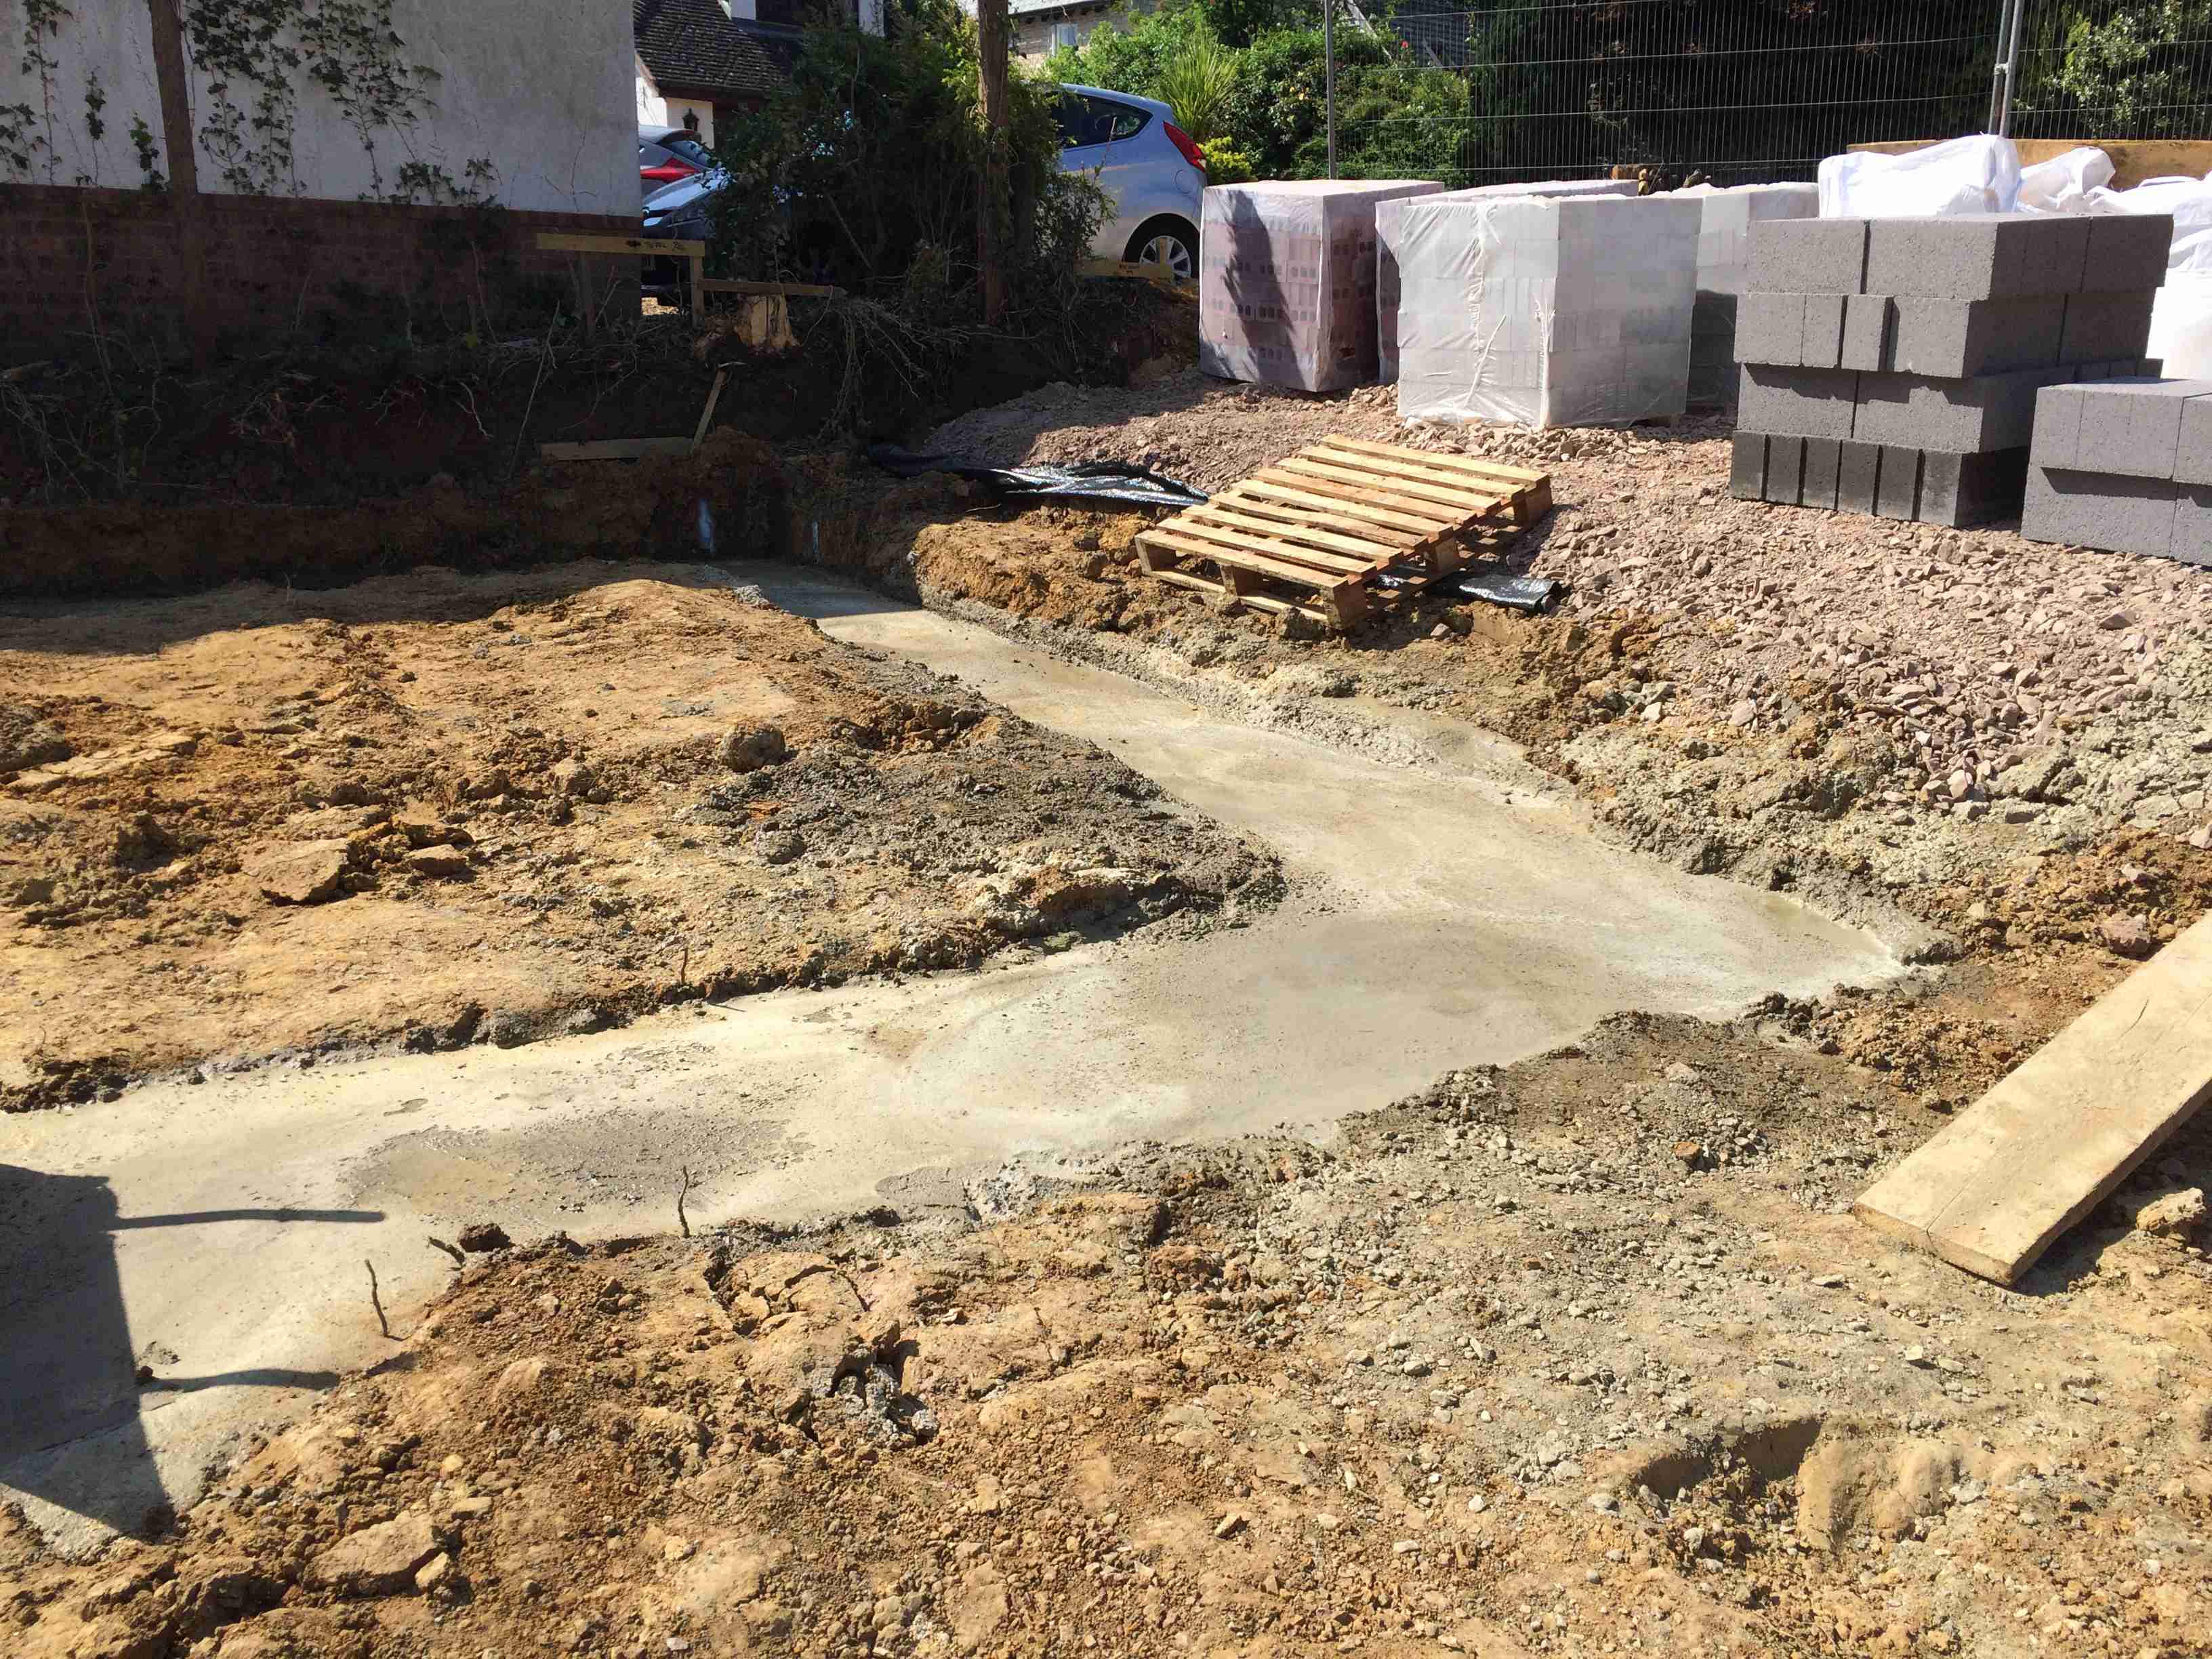
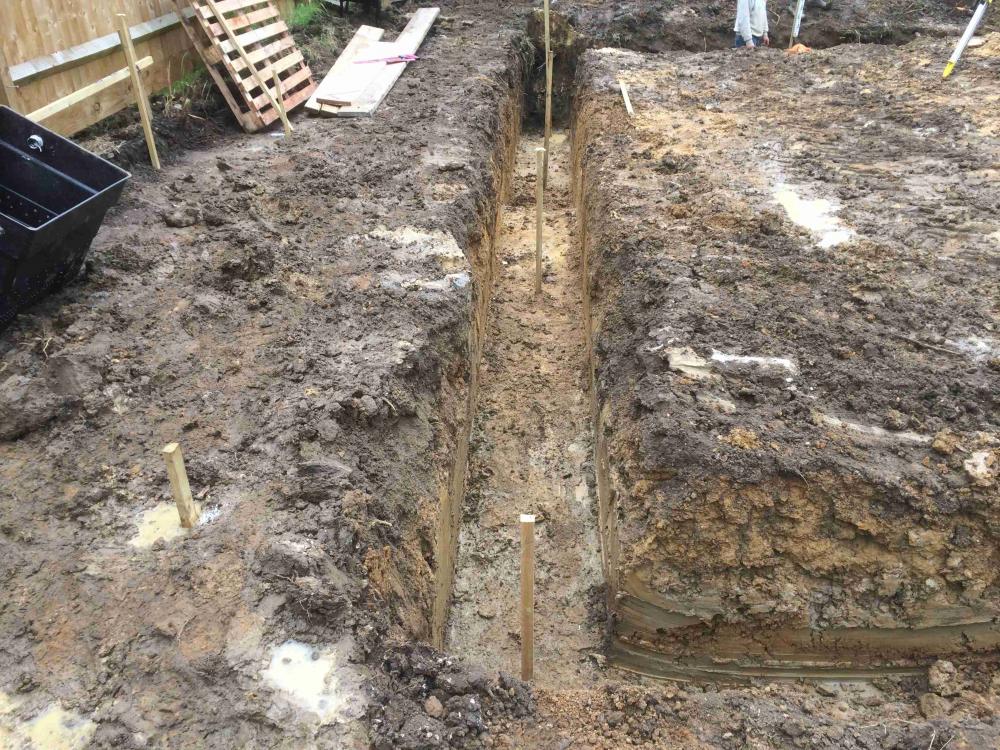
Yes, they are placed centrally to gauge the depth of concrete. They are left in the foundation (you can't get them out once it sets). A useful tip is to mark on the outside of the trench where they are. As the concrete is poured they can disappear from view.
-
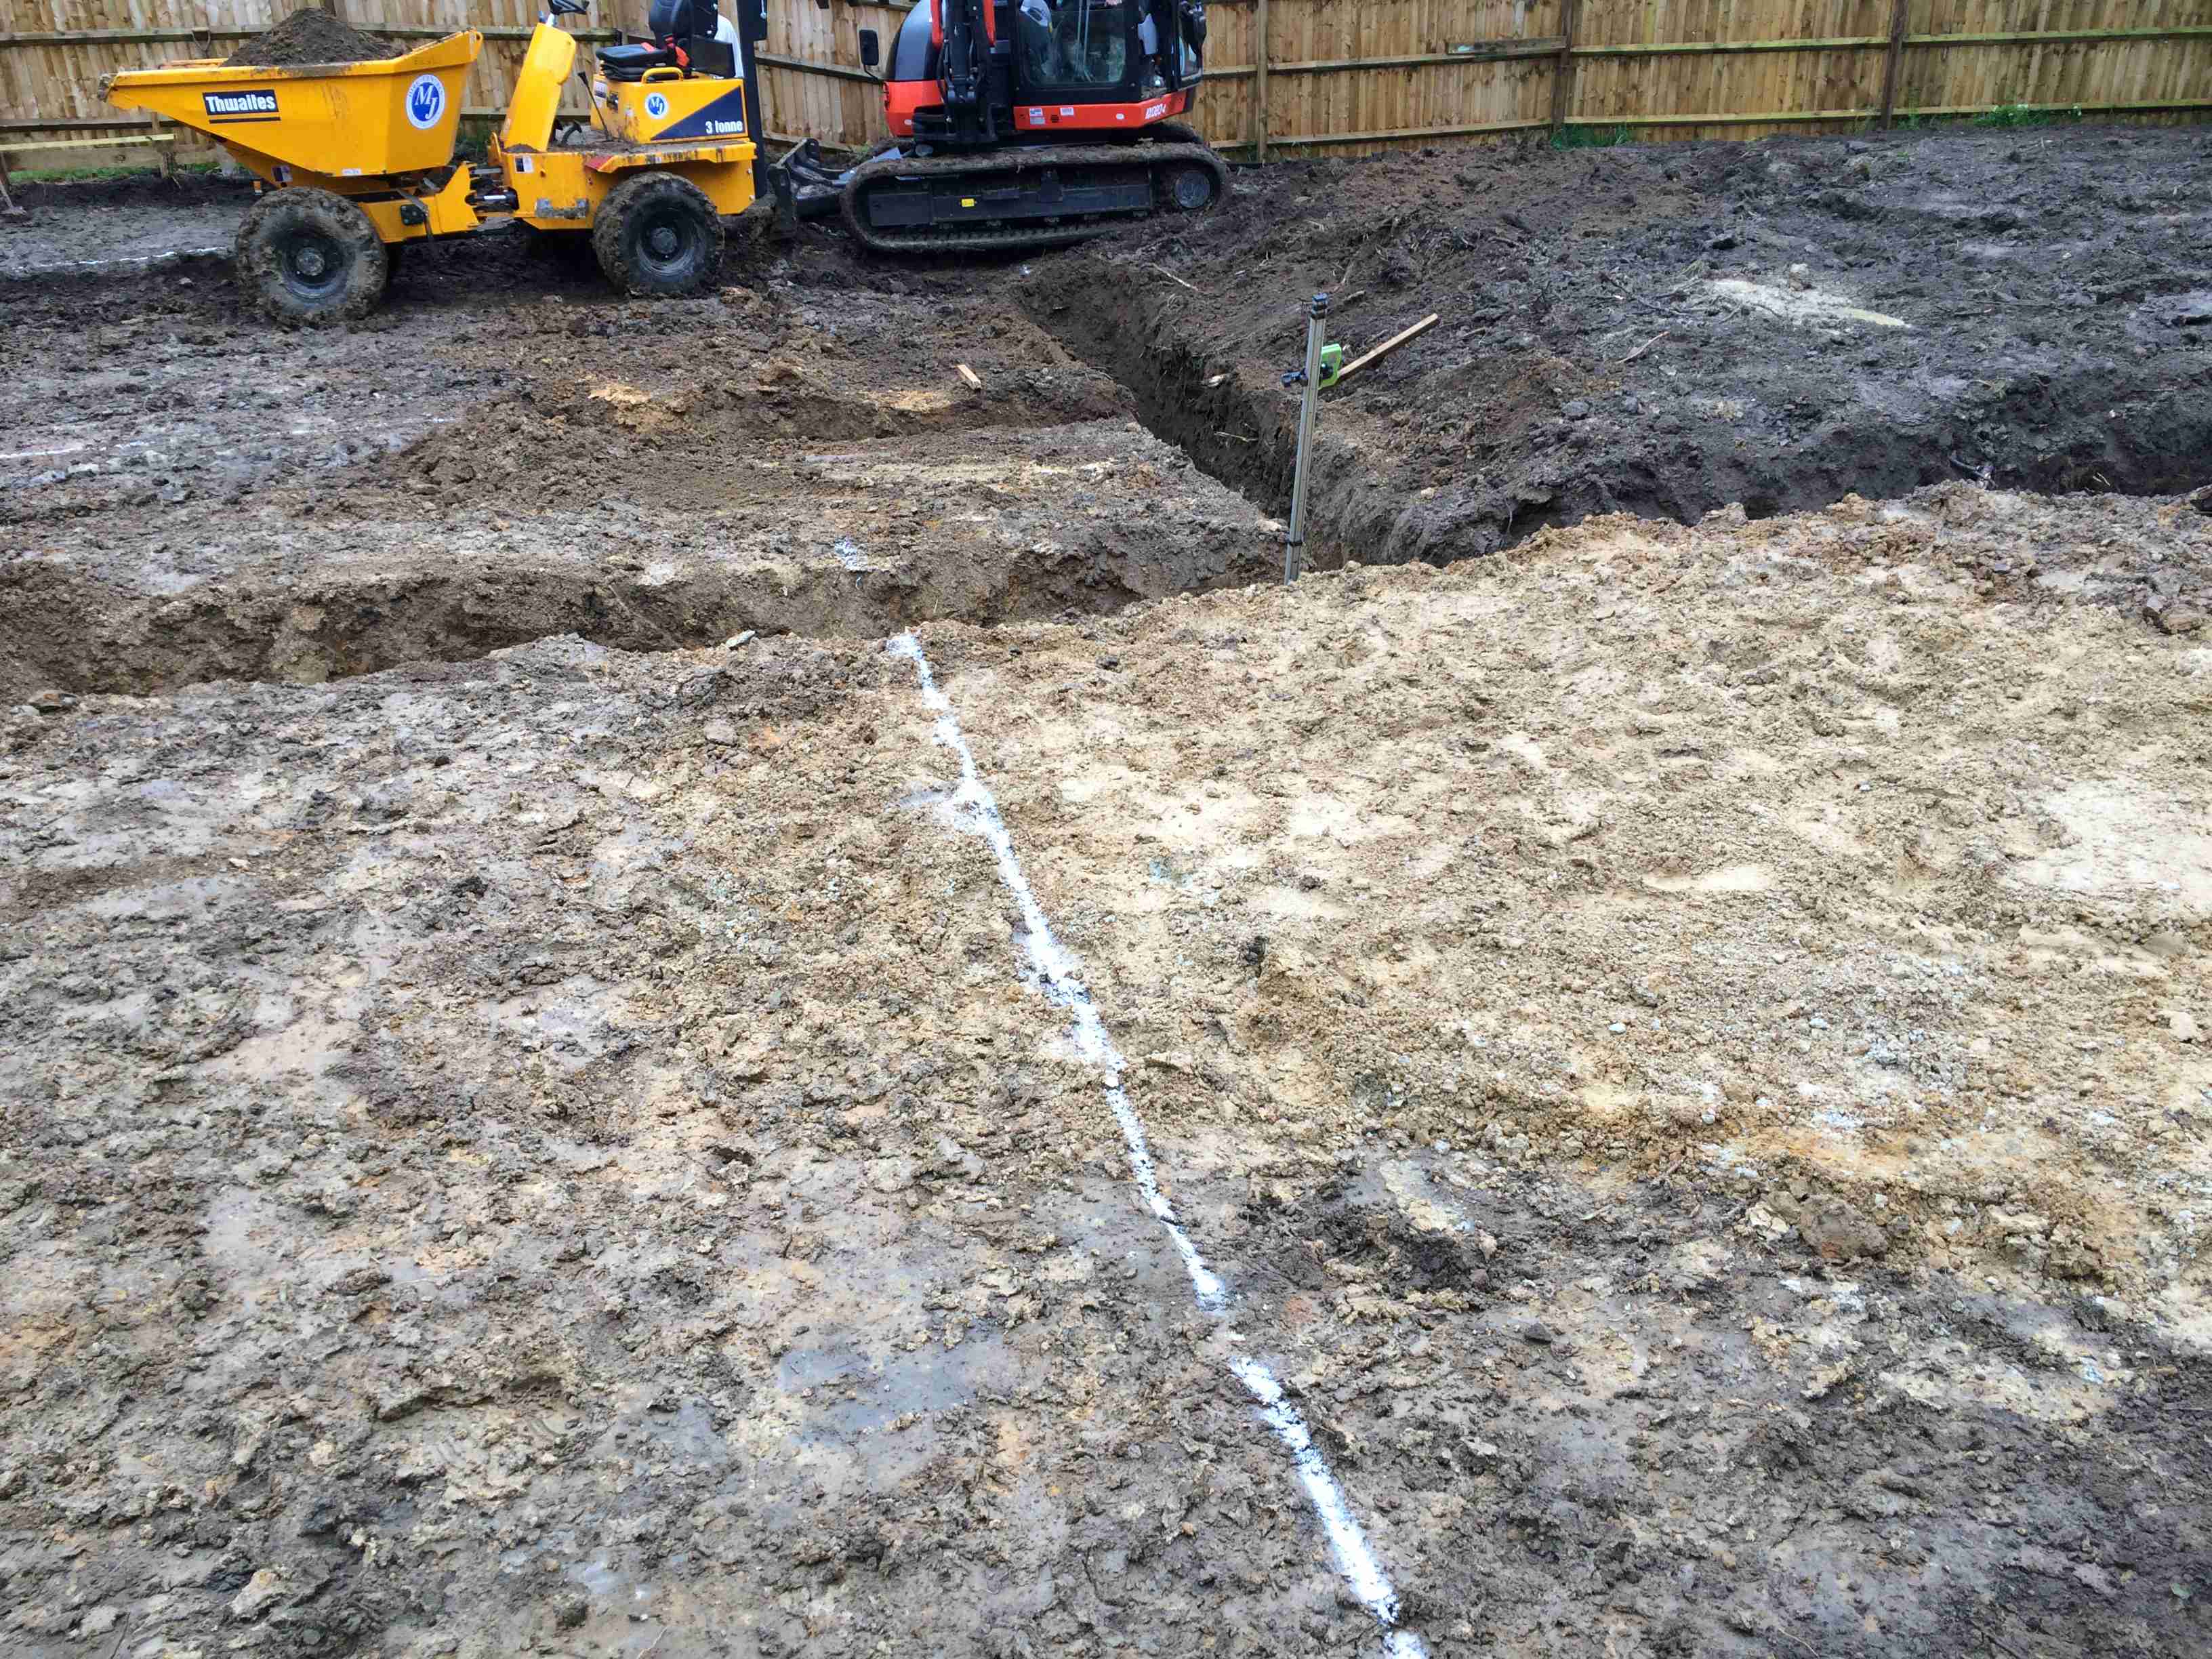
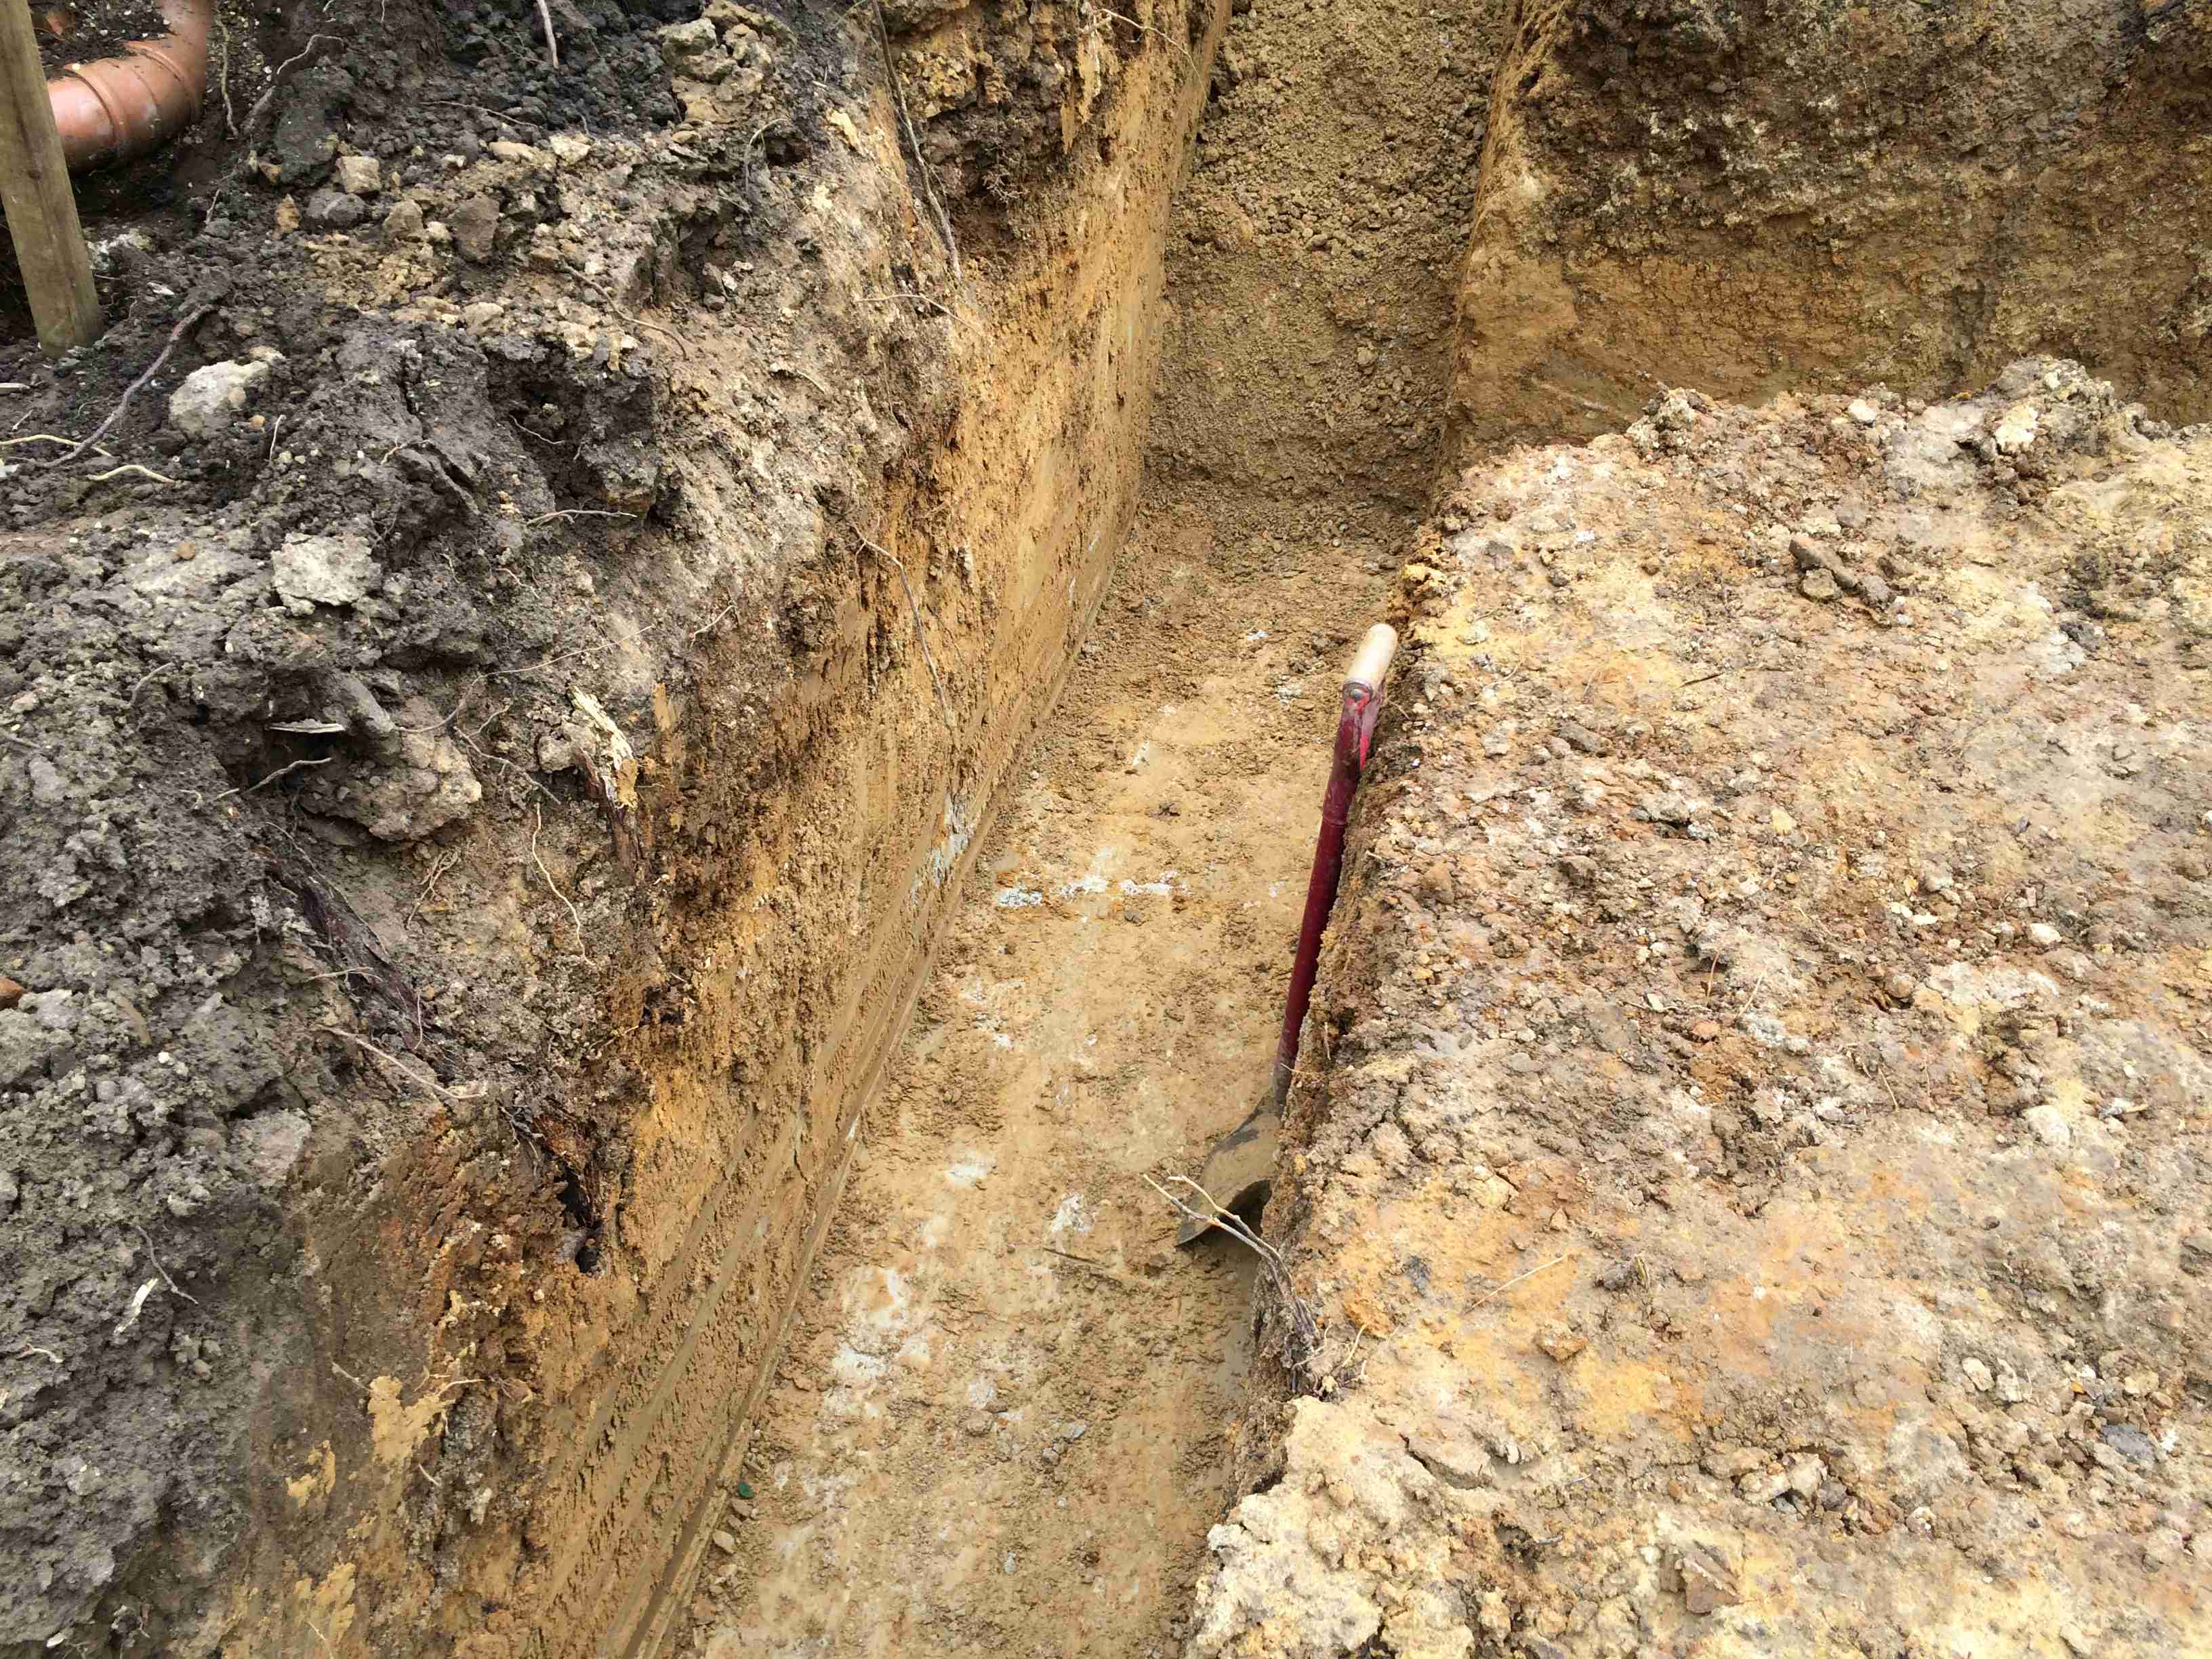
One skill is knowing which foundation to dig first, so you avoid getting 'shut out' with nowhere to stand to dig out others. And keeping to the setting out lines, which get obliterated as you dig out the trench!
-
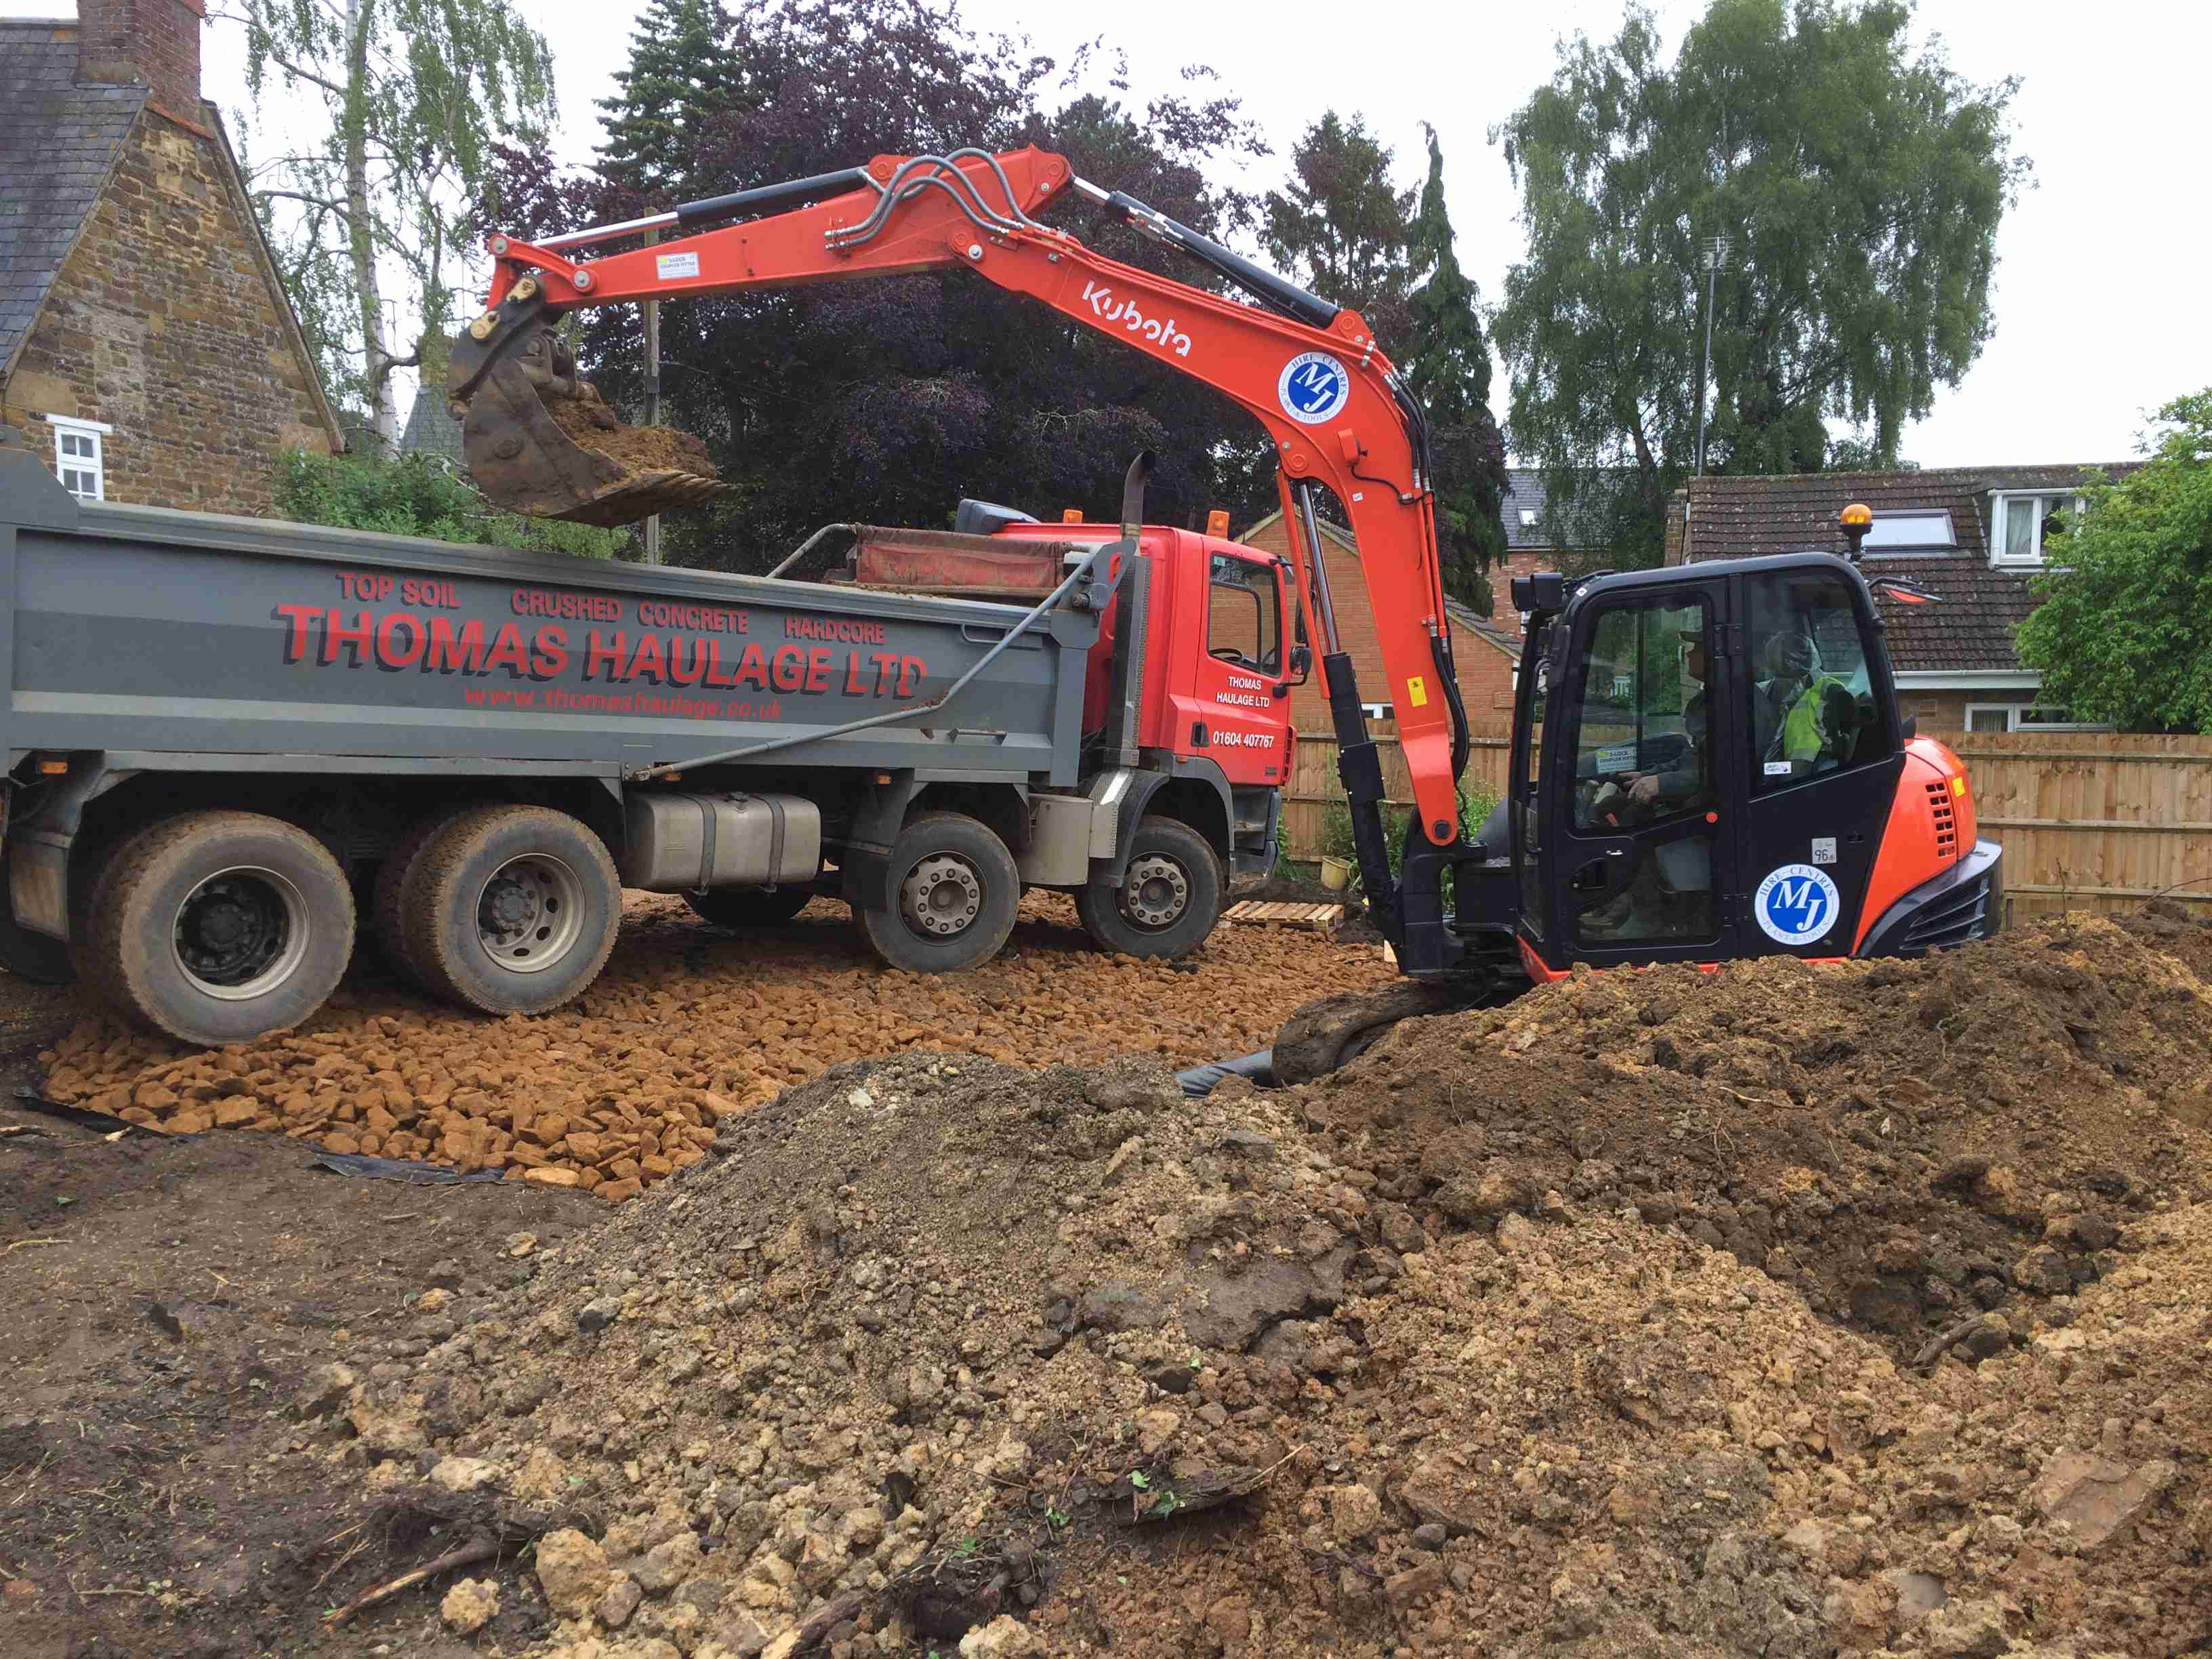
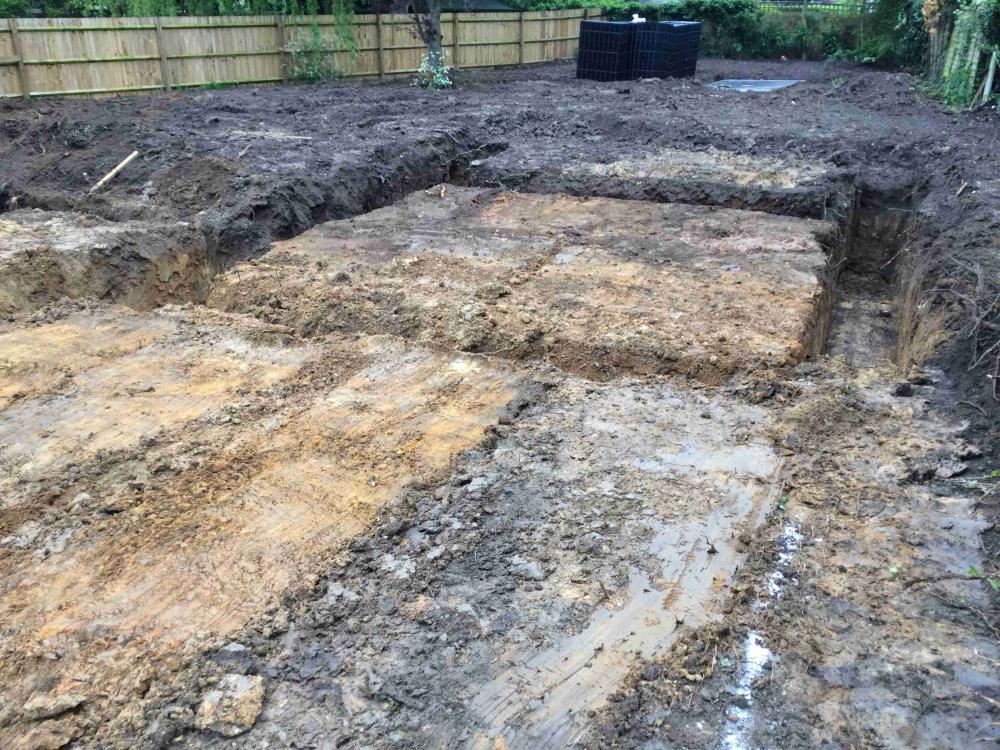
We began with a 5 tonne excavator, before being upgraded to an 8 tonne one. Both would have done the job, but the bigger one was better as it had a longer reach - this was important for reaching the 20 tonne muck away lorries to avoid fouling an overhead BT line. Both made short work of uprooting some tree stumps on site. You should be able to completely strip a site in a few days, as long as the lorries keep coming!.
-
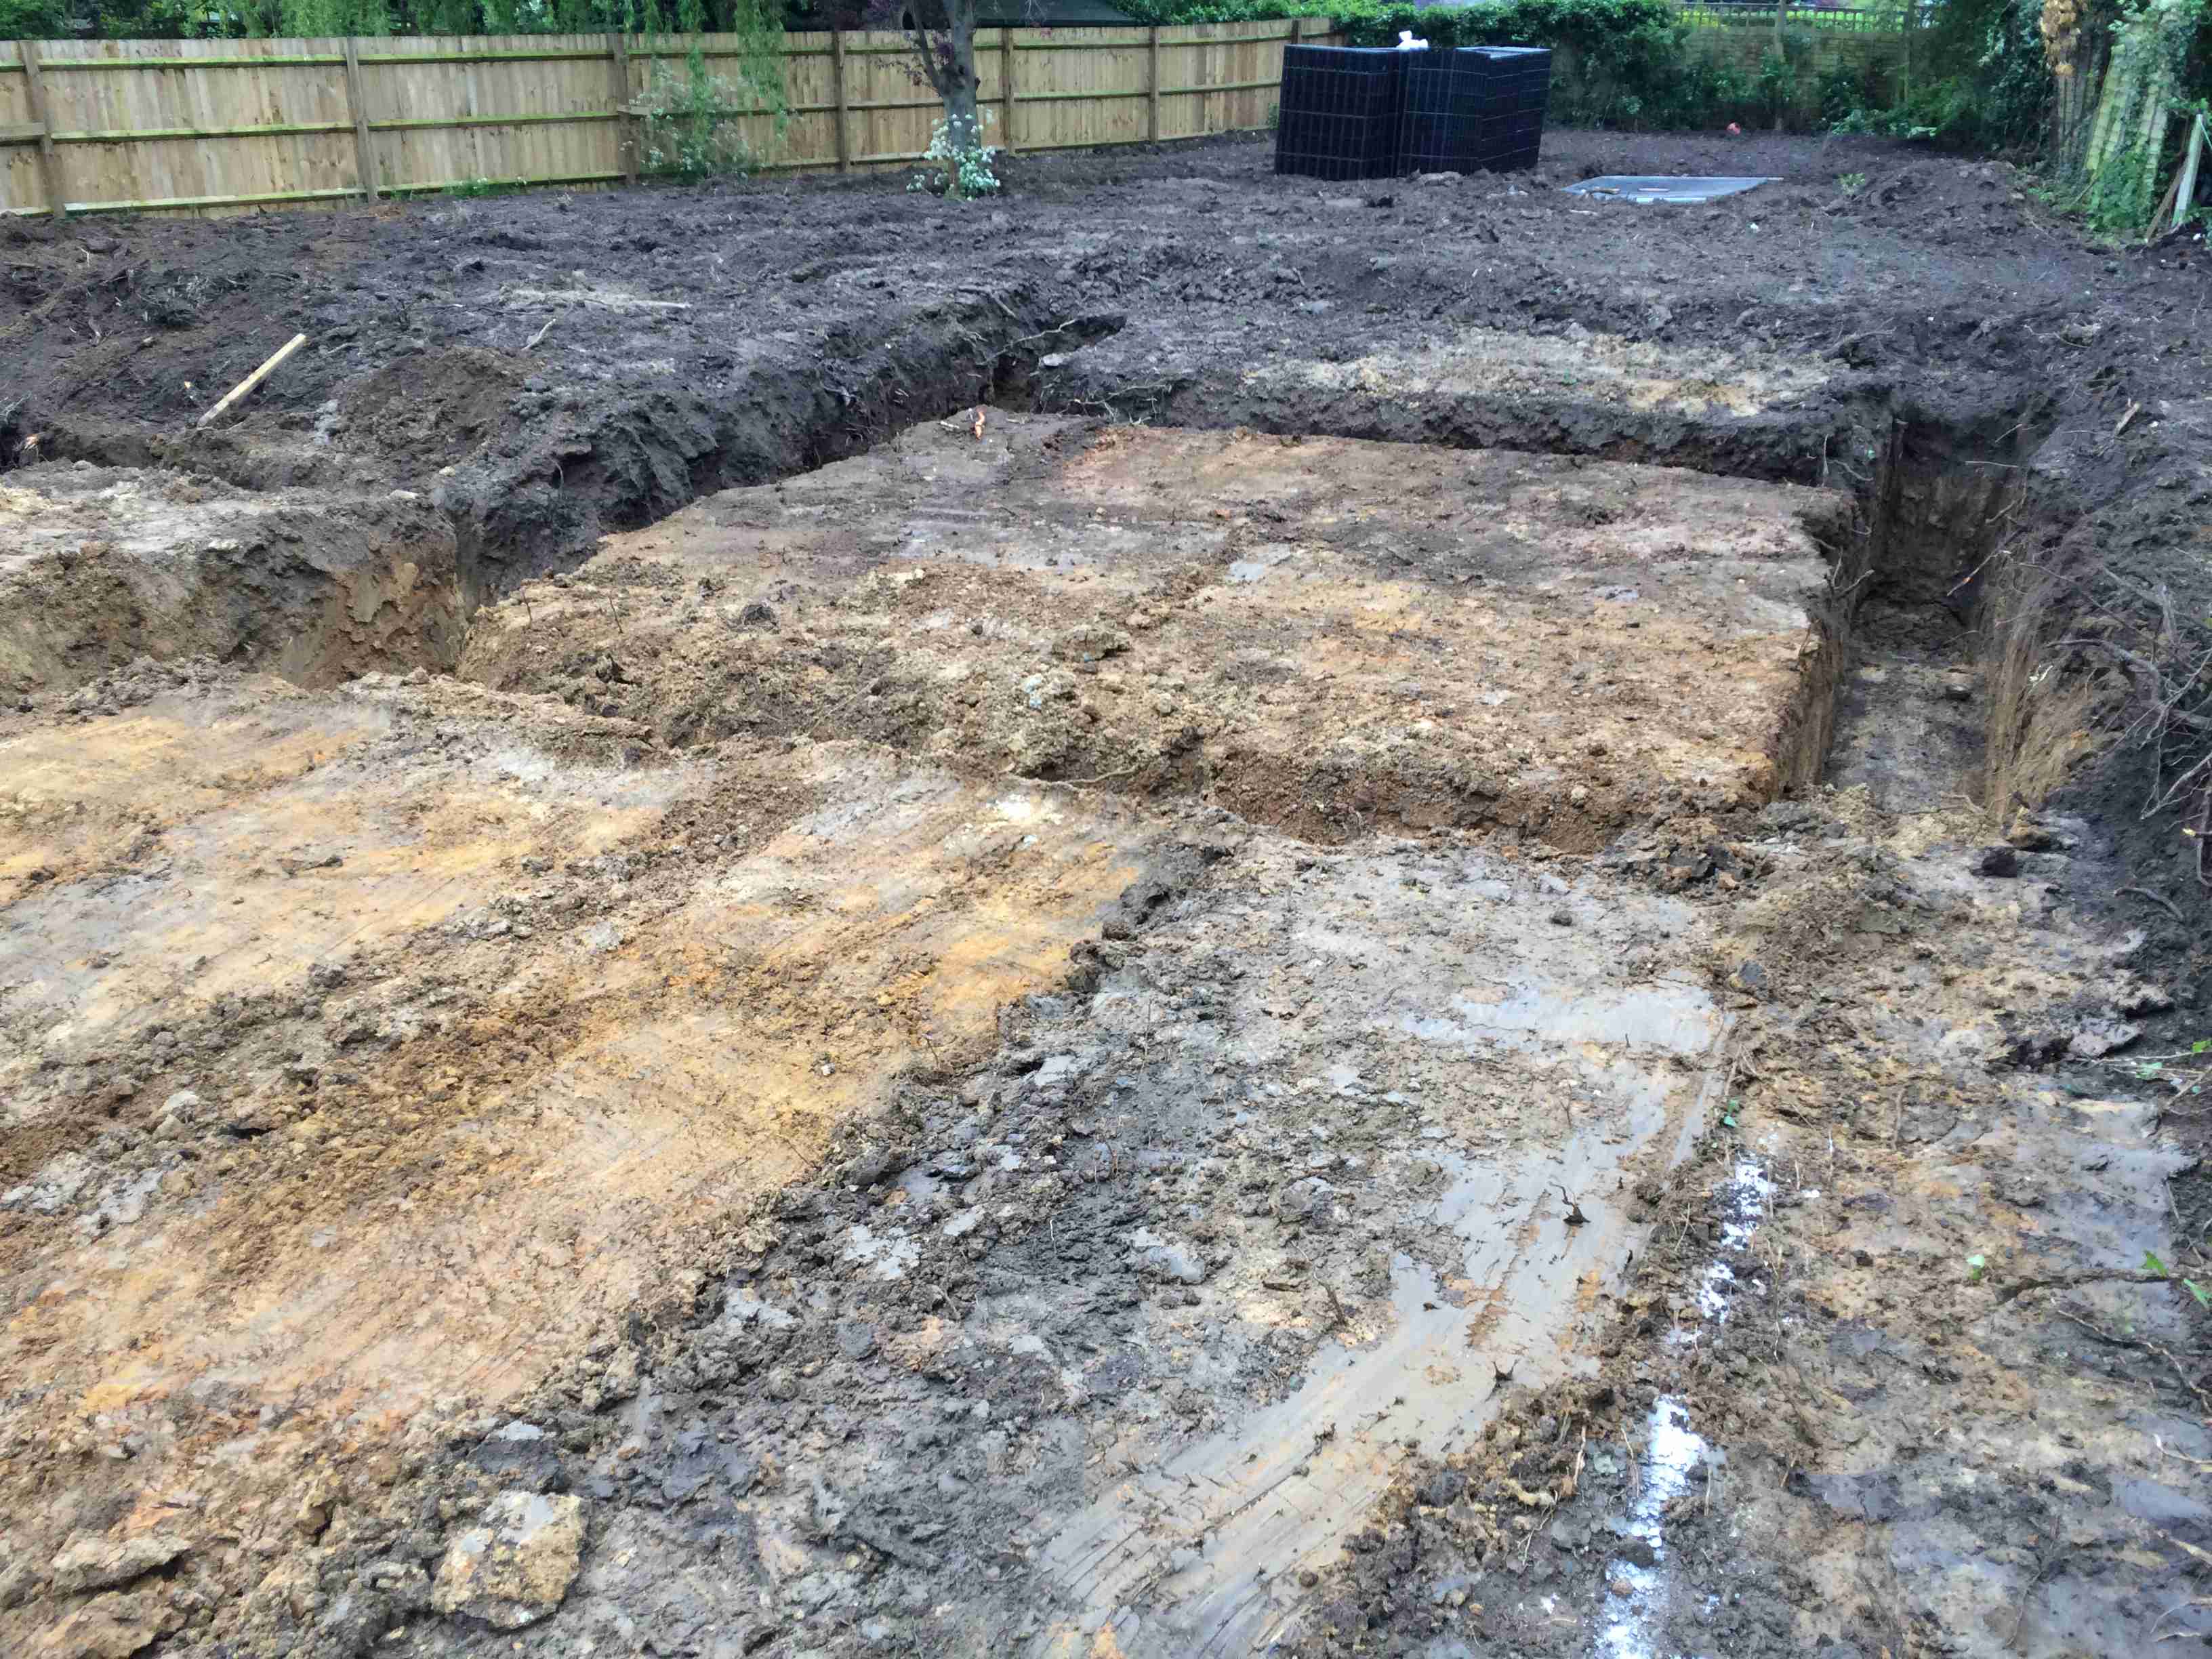
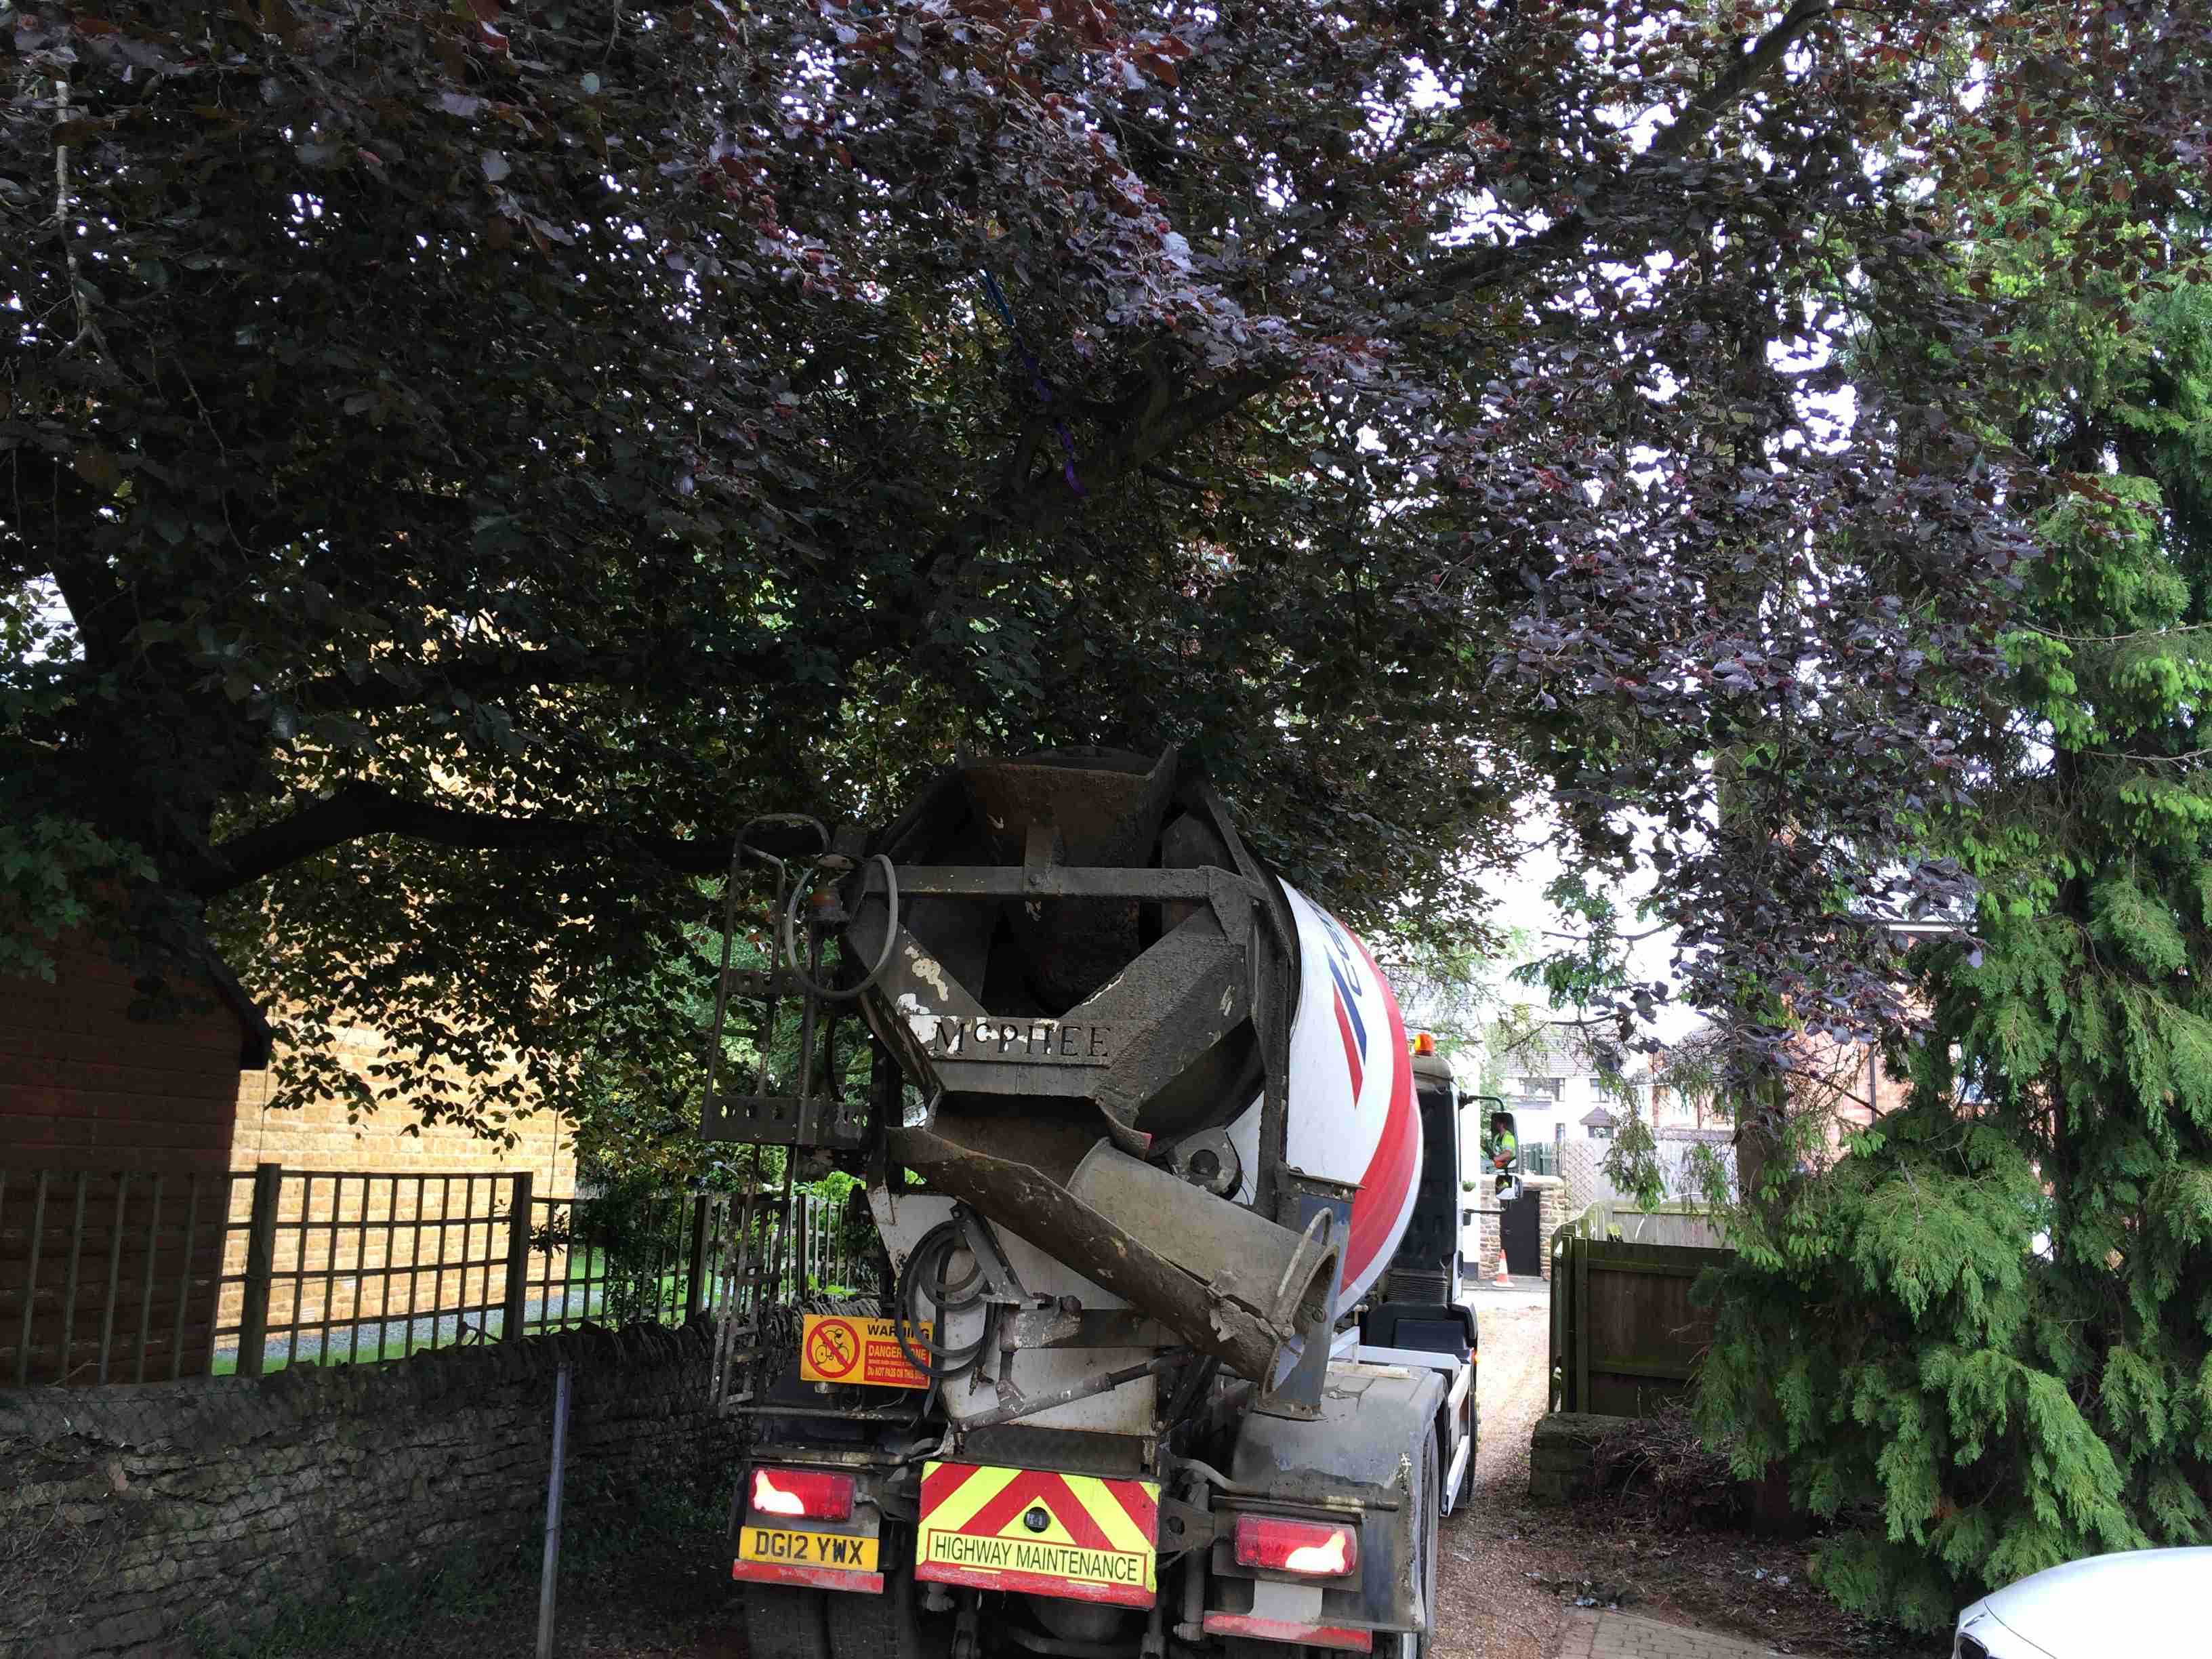
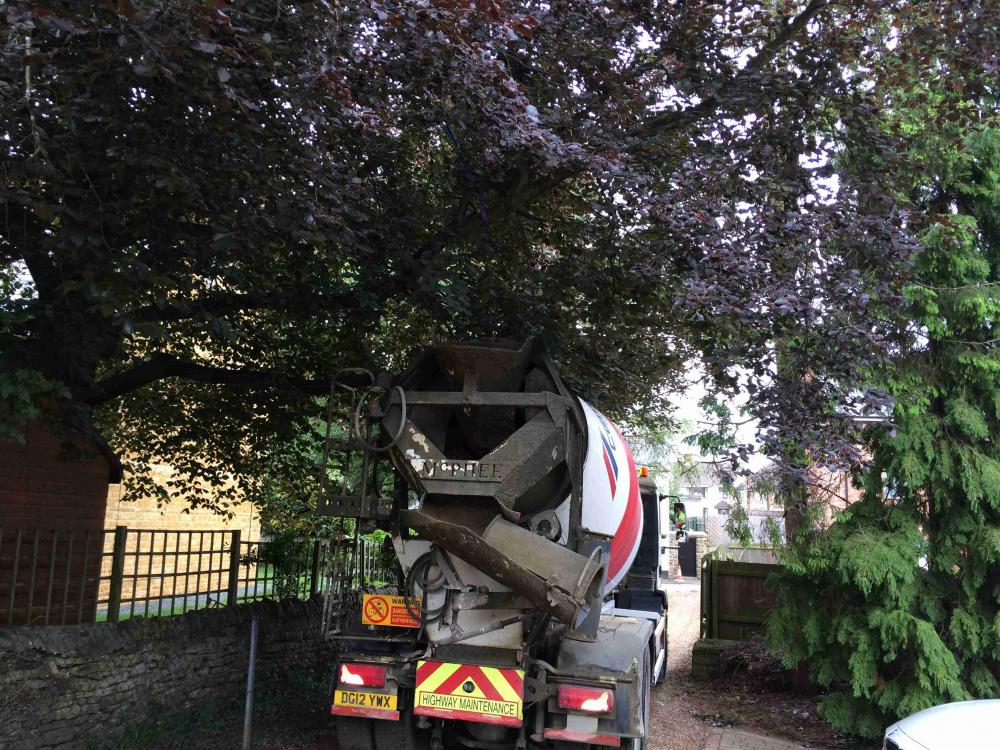
It was a tight fit for the cement lorries. We're glad we jacked up a couple of branches beforehand. Some of the pictures were taken during last week's rain. It transformed the site, which thankfully has now dried out.
-
320 tonnes muck away removed and stone bought in. 100 tonnes of concrete. Nice to be out of the ground!


-
What a difference a day makes
RandAbuild replied to RandAbuild's topic in General Construction Issues
Yes Terry, I hope there's enough room. We jacked up two branches by about 300mm to give us 4.1m headroom. The max height of a 6 wheel 6m3 truck is 3.5m. The drive is standing up quite well so far, even with 20 tonne lorries -
What a difference a day makes
RandAbuild replied to RandAbuild's topic in General Construction Issues
Thanks Jan. Yes, it is looking good in the sunshine, but it's now raining just as they start to dig the footings. Concreting on Thursday - will be glad when this week is over! -
What a difference a day makes
RandAbuild replied to RandAbuild's topic in General Construction Issues
Hi Terry No it's not so bad. We'll fill it with stone for now and top it off with Type 1. Setting out the trenches tomorrow, BCO on Wednesday and concrete on Thursday / Friday. Looks like it's going to be wet tomorrow though - bit of a change from Friday!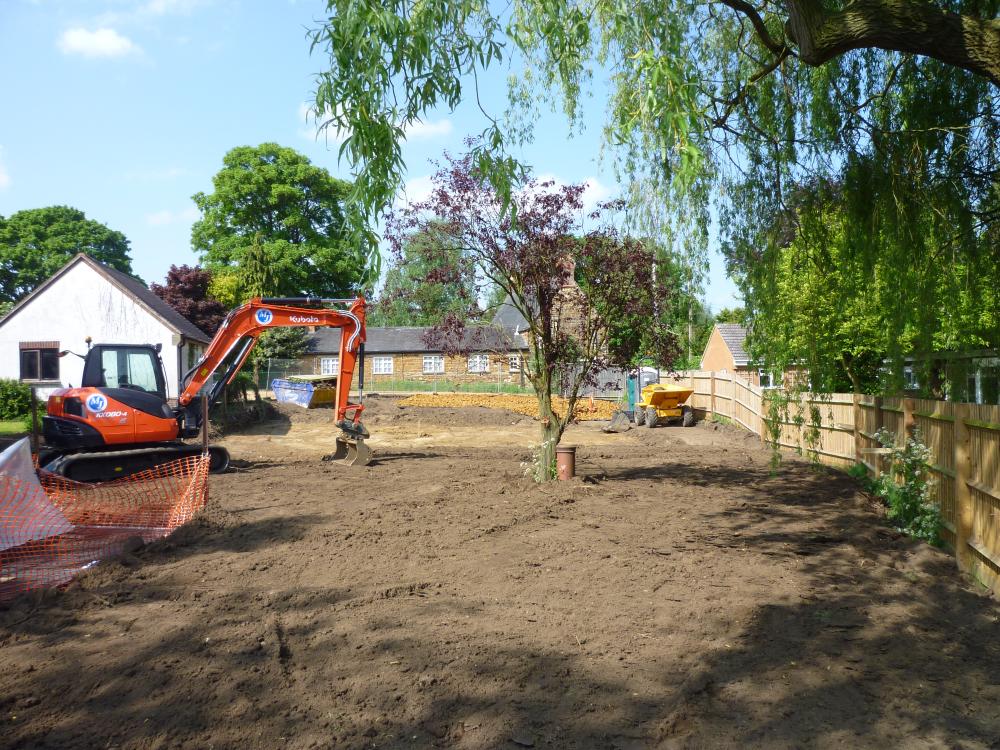
-
The only one we found with BBA certification was Insulslab, but it seems a bit too complicated for a one-off build
-
Structural Warranty Quotes
RandAbuild replied to swisscheese's topic in New House & Structural Warranties
We went with Buildzone and combined B Control & warranty. They use BBS as surveyors. We originally went with LABC but they didn't like passive slab foundations -
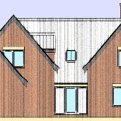
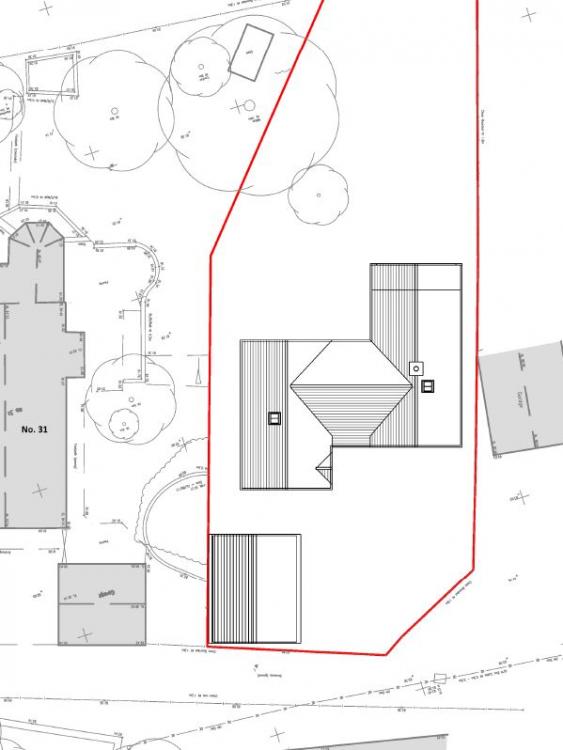
No, it was a garden. No previous buildings. The house is 1+1/2 storey, 2 gable end blocks with a joining hallway/landing
-
In case you're wondering why we needed so much stone, we had 600mm topsoil at the front and had to get down to the subsoil. The stone is quite large (<100mm) but is free-draining and you can dig through it. We'll need to put some Type 1 or Type 2 on top to give a smoother surface.