Onoff
-
Posts
21125 -
Joined
-
Last visited
-
Days Won
206
Everything posted by Onoff
-
😂 Keep asking people until you get the answer you want!
-
Just because you have one!
-
Do what I sketched, don't have the outer 6x2 and skin the outer 3 sides with white upvc fascia instead?
-
You'd best do a drawing! 😂
-
Let's hope your first resin anchor doesn't clash! 😂
-
-
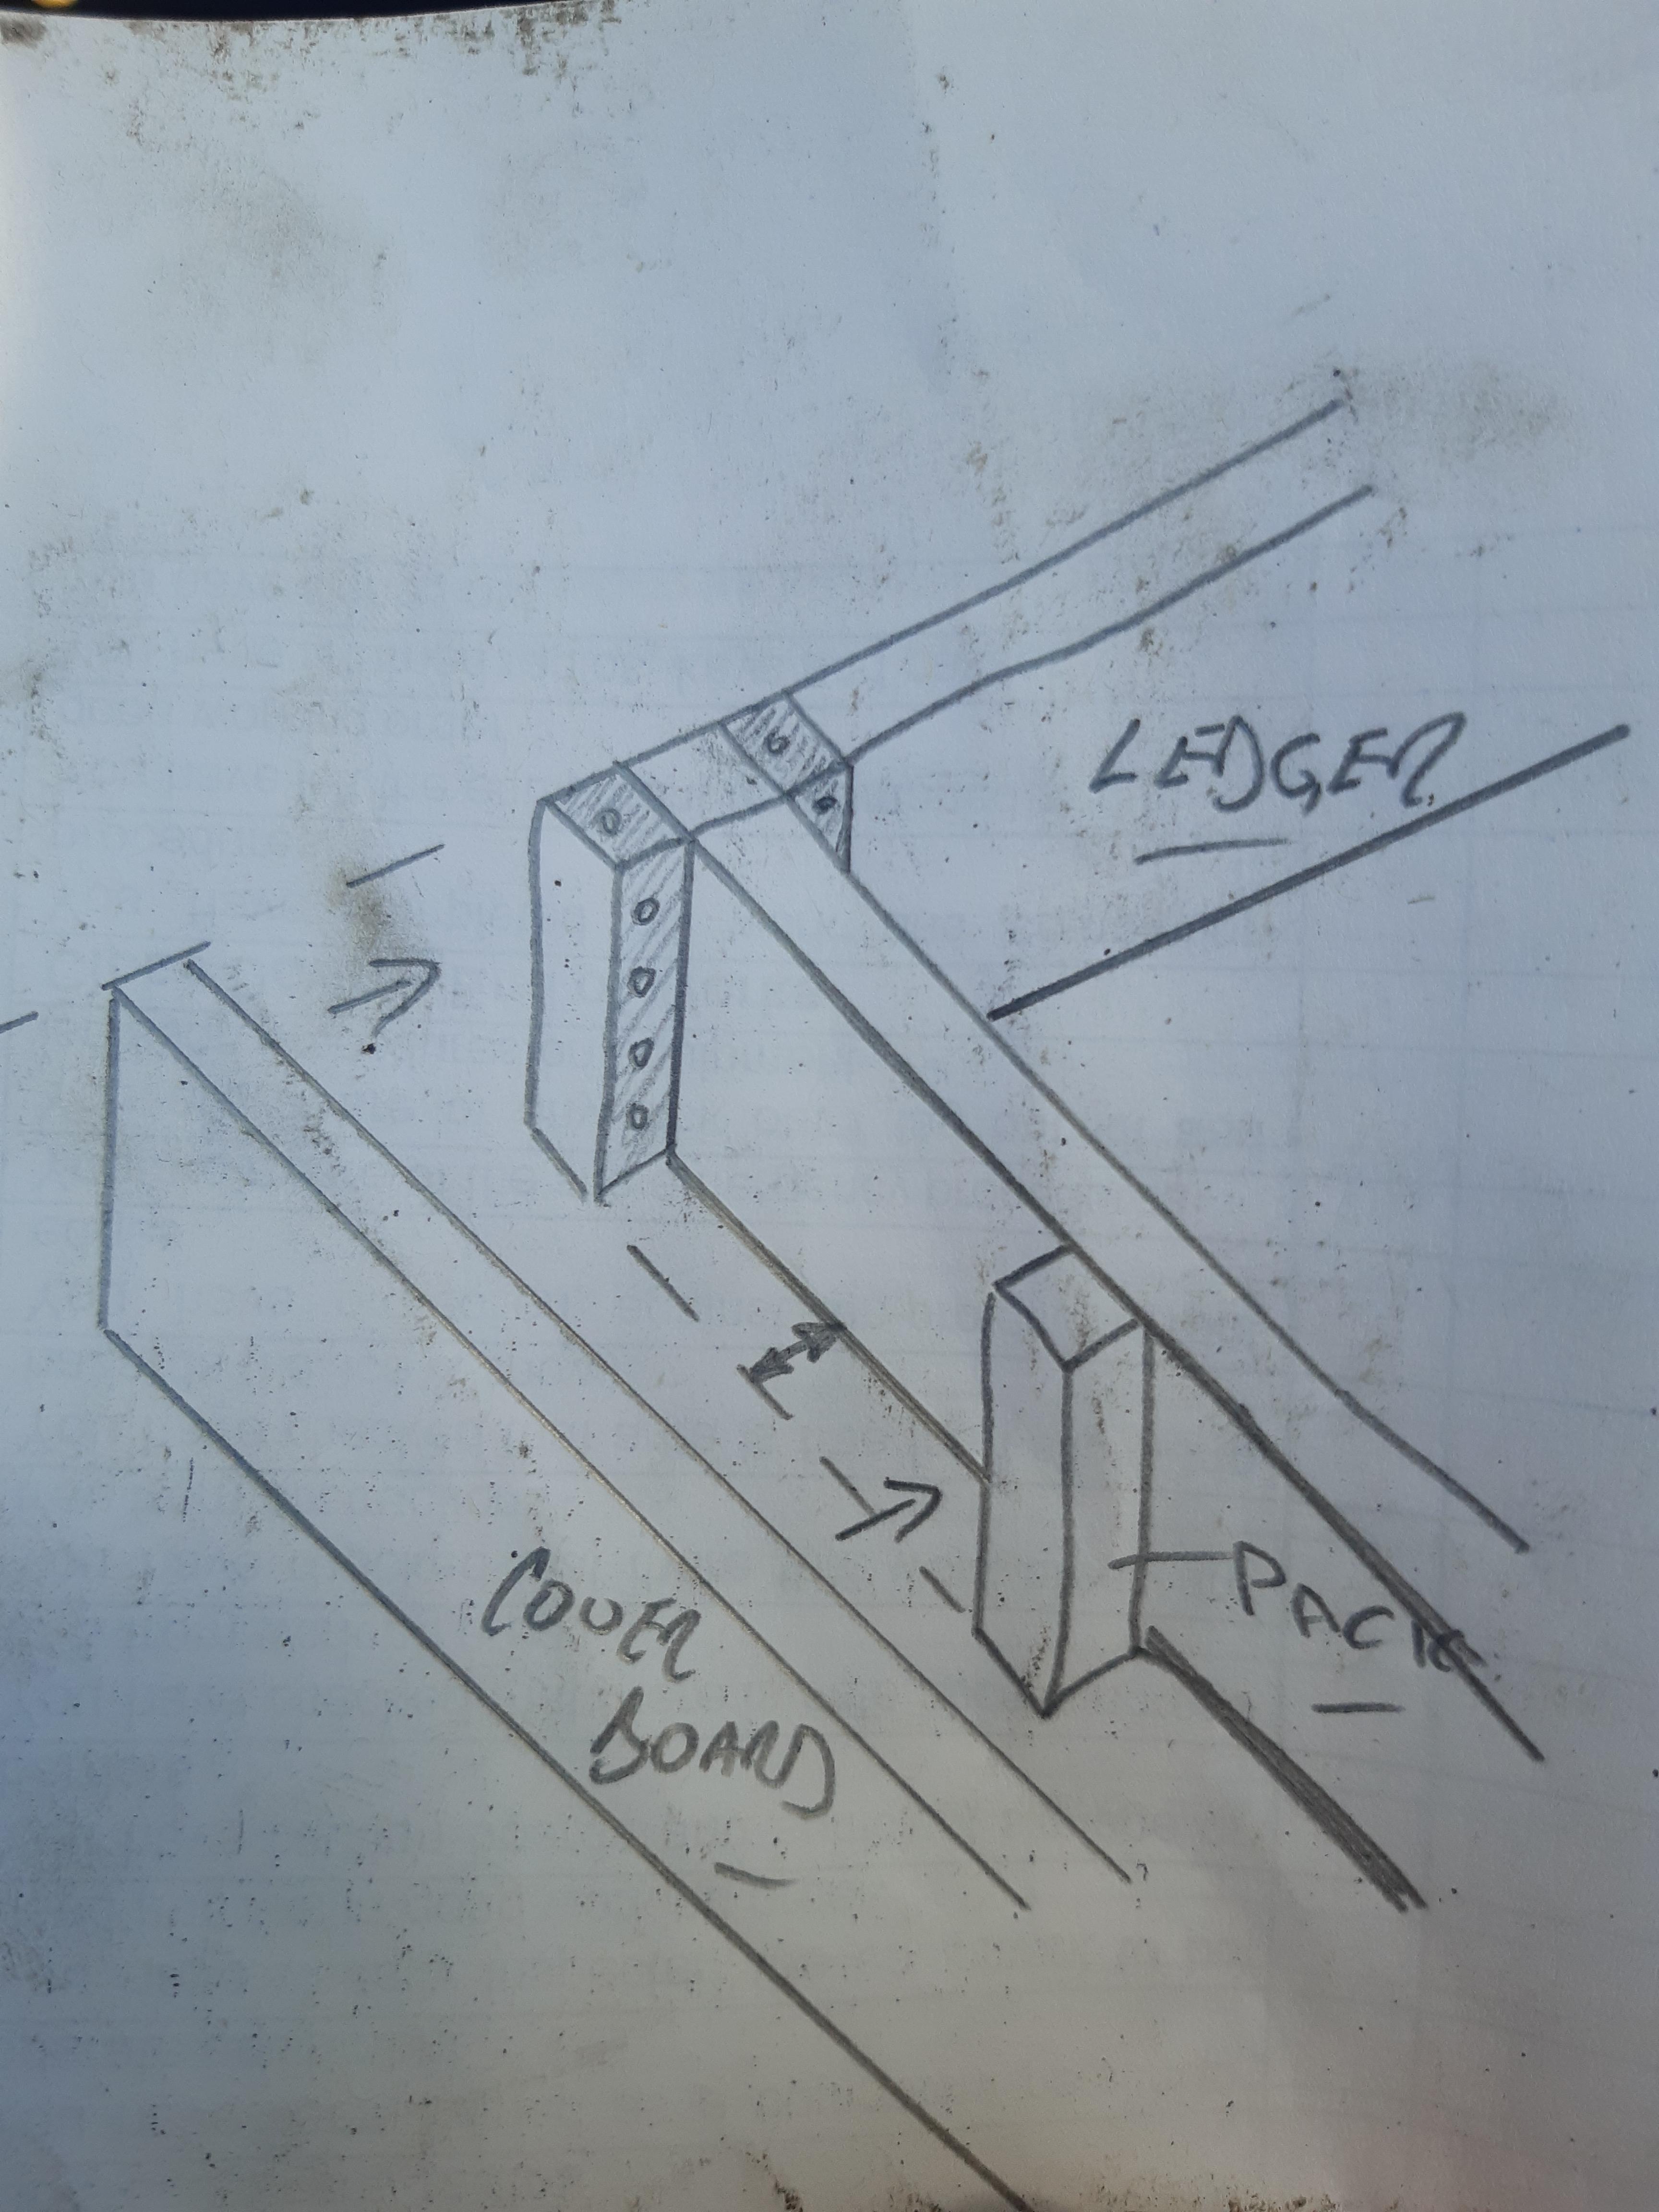
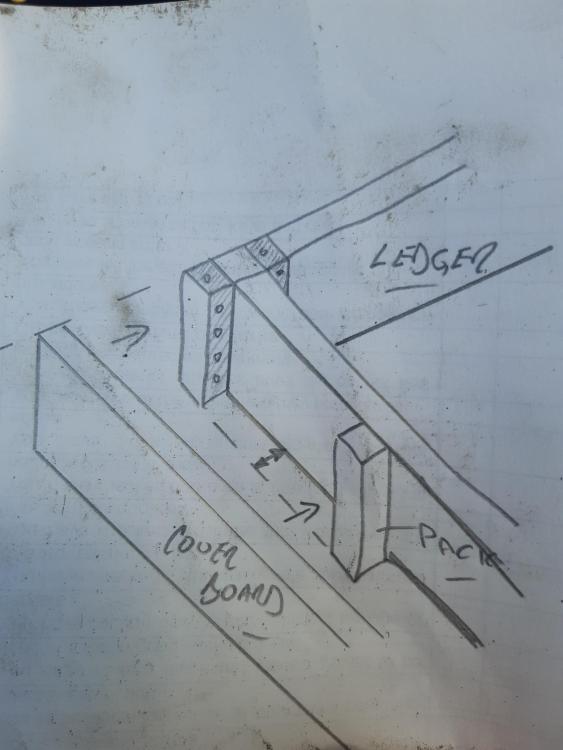
I'd just set the end ones in a bit and use another joist hanger. Much stronger detail that what you've drawn. Then add some "2x2" packs and face with another 6x2.
-
Do you go into the Screwfix branch and pay cash? Or do you order online and collect. Go back in your SF order history? Those ones you linked look about right. Use twisty nails, bend over the top of the timber and down the other side. You might want to put the hangers on the ledger first before you put it up as you won't get round the back to fold them down otherwise.
-
It's a generic joist hanger ffs! Think harder.
-
Yep, same as the ones you used last time! 😂 They'll be galvanised steel not aluminium I suspect.
-
Don't forget you tend to induce mission creep in people, asking the same stuff they've invested time in answering before! 😂
-
Two nuts on one end of the length of the studding, tightened against each other are real useful for holding that end.
-
The other thing I do is protect the stud thread sticking out with tape. Means the resin doesn't get in the threads.
-
With studs in concrete we'll some times give them a little tweak in the right direction with either a length of pipe slipped over them or two nuts on the end and a club hammer. Your best best likely to enlarge the odd hole in the timber. Should have pre drilled the ledger, drilled through to spot the wall, removed ledger, drilled to depth. Put all the studs in in one hit. Pump in the resin push in a stud, onto the next. Ledger would have slipped on pretty much with the odd tweak on the stud with a club hammer.
-

Where is the kWh price heading in 2022?
Onoff replied to epsilonGreedy's topic in General Self Build & DIY Discussion
I've just bought a 6kW diesel genny...not sure why other than it was cheap. -
Well done on staggering home from the pub with that table!
-
Just the prologue.
-
Not my first rodeo. You can at a push use an ordinary hole saw say 25mm dia to counterbore. Or even a router if you make a jig. Bit of a knack to cutting studs to length with an angle grinder. I cut to length with a 0.8 or 1mm slitting disc. Then take the burr off and buff the end with a flap disc. My nuts fit every time.
-
Sounds like you need a 24mm flat wood bit.
-
You could glue in a round of timber, let it set and re-drill the hole(s). Made a start though so 👍
-
I've read up on reactivating or whatever the resin, you can get a special "stuff" 😂
-
I got mine from @Gone Westand I still haven't used it...
-
Matchsticks or cocktail stick to help keep the studs level. Put the smaller washer at the back of the tube if you want. I can't remember what it was for! 😂
-
How does your garden grow?
Onoff replied to recoveringbuilder's topic in Landscaping, Decking & Patios
Is that it the whole crop? Now then, do you just top and tail or string the sides too? -
How does your garden grow?
Onoff replied to recoveringbuilder's topic in Landscaping, Decking & Patios
Had our first crop of runners the other night. Simply top and tailed, chopped with scissors and boiled. With some fish cakes. Very nice. Somebody said you can eat them with butter? I really want to try a runner bean chutney recipe.