zoothorn
-
Posts
4752 -
Joined
-
Last visited
-
Days Won
3
Everything posted by zoothorn
-
Hi chaps, I have a small persistent problem, causing bigger longterm woes & damage. The shower screen seal area, particularly the hinge corner. I've got a new clear 16mm seal strip, with two fins one long one/ other shorter. Firstly- which way round? Long fin bath side, or short fin bath side? (Www info suggests both ways correct!). Secondly- I get an incredibly annoying leak at this area. It's help to ruin the lino, the bottom edge of the bath side section, & creates water ingress to the hardboard underneath the lino. It happens 50% of time I have a shower (leaving me perplexed), & about a good litre+ of water on my lino floor after a shower when it happens. Trouble is I just cannot establish -precisely- where the problem lies. So I can never resolve it. I lay down 2 big sponges on the inside of bath at this corner when I use the shower.. but the leak still happens even so. Driven me absolutely mad for 5 years this. Thanks, Zoot.
-
Hi chaps, hope y'all had a good Christmas break. @Onoff thanks for these photos added 22/12. I've yet to do this gap, because floor kinda ruined by the bathwater flood.. so needing weeks to dry out (hardboard mainly, which was put down under the lino/ a lino job done by pro 2 yrs ago). Lino was coming up in areas you see, due to the water ingress underneath. So I've lifted / rolled back, & aim to restick it back down onto hardboard once this is dry. Lino underside in a state needs prepping too. Urgh. Will jump back on & do the tub gap once lino down. Thanks, Zoot.
-
Hi Mike, thing is if I buy a sheet of this.. I have most of it unused. I know this stuff I used it behind my stove, because, it gets very hot here. There won't be alot of heat behind this leccy bar fire you see. You could put your hand behind easily enough. They dont emit too much heat behind, & they never use two bars, only one. So I dont need "optimum" material here.. just sufficient material. Could you please take a look at my reply above? One with a green sketch. Thanks, Zoot
-
Hi Chaps, sorry I lost track/ just prepping this job now. Thanks for reading & replies. Alas I can't get onto roof to pour anything down chimney. I think perhaps chimney itself (IE the vertical hole) might be blocked anyway (I can't feel a chimney draught.. seems only cavity draught). So I need to do this: Replace my temporary panel, with a better insulated one. If someone can simply advise on my idea here s follows: just whether this idea is decent enough. It might not be perfect, but I cannot do perfect. I just need it 1) to provide insulation at this gap, 2) to be safe enough. So: I have 75mm PIR to take up. I have adhesive. I have 2x large 10mm marble tiles ( or whatever marble effect modern stuff its made from). Idea: cut PIR to the 400 x 400 hole size. Glue two tiles onto it making a 500 x 500 tile area. Glue it to the front of fireplace. The additional tile area at the sides used as a lip, to fasten onto the existing fireplace front. I use intumescent fireproof silicone at the tile junction, & around perimeter, just to make it 'sealed'/ ie no possible way for the leccy bar fire in front (1" min gap away I ask them to put it, minimum) could ever get its heat to the PIR. Thanks, Zoot
-
Here is the mainroom stone 'shell' circa 1965. The far privvy is an addition ( long since gone). This gives a good idea of the 1 big'ish main room. Onto that far end, is my 1 story extension (80's? kitchen, WC). Onto above: this old roof gone, & a 1970's (?) extention added. Onto front: porch addition (80's?). Onto near 'dark' side: 2019 2-story extention, 1 room each. Zooter

-
Aha well I've no chance to borrow one, I don't know anyone in the bloomin country let alone someone who might have such a device. But I'll look into buying, or renting if I can. But I am just working on logic though- if there's no insulation behind ceiling, & roof as per my sketch so close above.. this just HAS to be a cold ingress area. Especially so if my Hifi is in the mainroom, but under stairs, & drawing a bit of the thickish curtain to nip & change an Lp side asap, I notice it's always permanently terribly cold here ( I do as fast as poss.. then return to a cold sofa/ it'll have got cold in the 1 min this took). But I -am- just assuming there IS no loft fluff behind the ceiling pB here. Put your hand on it.. sure feels awfully cold. Thanks j_s
-
Ah yes cool in summer is one thing, but the opposite of what's on the agenda here: it's only winter on the agenda. A good room does both/ cool in summer, warm in winter. My stone main part of the house is exactly half of this. The summer benefit side of things is bggr all trade-off though if a (normal UK summer) it's ideal-cool in here only for 3 weeks in july. Vs 20 weeks of not-ideal-cool winter= no trade off at all. It depends on the stone is my view: porous cotswold limestone, can get warm fast, & become a good insulator. Slate out here, or granite (eg Edinburgh, scots old houses)= a flamin nightmare.
-
@Onoff does your place often feel colder inside than out like mine does? We're in the same boat. I guess easier being one here in one way, ie I could suddenly create havoc if I choose to. And I don't have a cold grumpy partner to deal with (not saying yours is). Today, my WC temp's a potty ( another of my puns..) 10.6*C. But I can -still- see my breath?!! It's like the house refuses to act anything but veryfkncold, even if it's a balmy 10*C inside. My house is an utter @sshole. My arthritis isn't being helped by it that's for sure.. freezing finger right now jabbing at my ipad.
-
Hi there j_s, not sure I've had a post from you before.. thanks. I have added a thickish curtain across the stairwell, which helps as much as closing upstairs bed doors, ie a bit. But the 'back' of the stairs.. isn't able to be covered still. So it's a barrier, with a bloomin big compromised whole side to it. These ideas aren't likely to be -compared- to digging up the floor, as simply my feeling being the vast majority is rising up via floor. But just things I -have- to do, if nothing else just to rule out these other factors being a significant factor. The only one I think could, conceivably be letting any significant ammount of cold in, in the grand scheme of things, is this stairwell ceiling. But I could of course, go ahead & remove it for eg, just to find a thick layer of fluff behind.. scuppering the whole idea. I can't do a test hole here.
-
Hi Peter, understand.. but how much PIR would you say minimum though doing this? It's a smallish cottage you see, every inch of room counts type thing.
-
Great. This is what I need. Any thoughts/ ideas/ suggestions on the possible variety of ways, to do this. So far there are 3 options. ( I assume this ^ isn't a Q directed at me, & one put out for others to hopefully answer.. as I couldn't possibly answer it with my ltd knowledge). Thanks, Zoothorn
-
Hi Onoff, great that helps make it clearer. But this "packer rod" I'm still struggling with. I understand its there to support the trim above now, & solely there for this. But isn't it circular in profile? On your sketch it's a rectangle. This could be possibly: bc the top is to be cut flat, or, bc the the idea is this stuff is to be squeezed into this shape (but if so the top is still circular). Ok. Are we talking the grey foam stuff, circular shaped in diameter, that has a slit one side, used for cladding copper pipe-? If yes, I'll go from here, try to figure out the shape discrepancy. Thanks for sketch! zoot
-
Hi TT, ok so the redoing the pB, was one thing that occured to me too as a "possible" action to take. So you've confirmed this idea had validity. Ok that's helpful. As to me choosing between this (A) & the adding-insulation-to-existing-ceiling idea (B), I have no way of knowing. As I have no experience. I can only then guess, that (B) is potentially easier, & (A) is possibly trickier but would be the better option. But Im just guessing, as I have no experience.
-
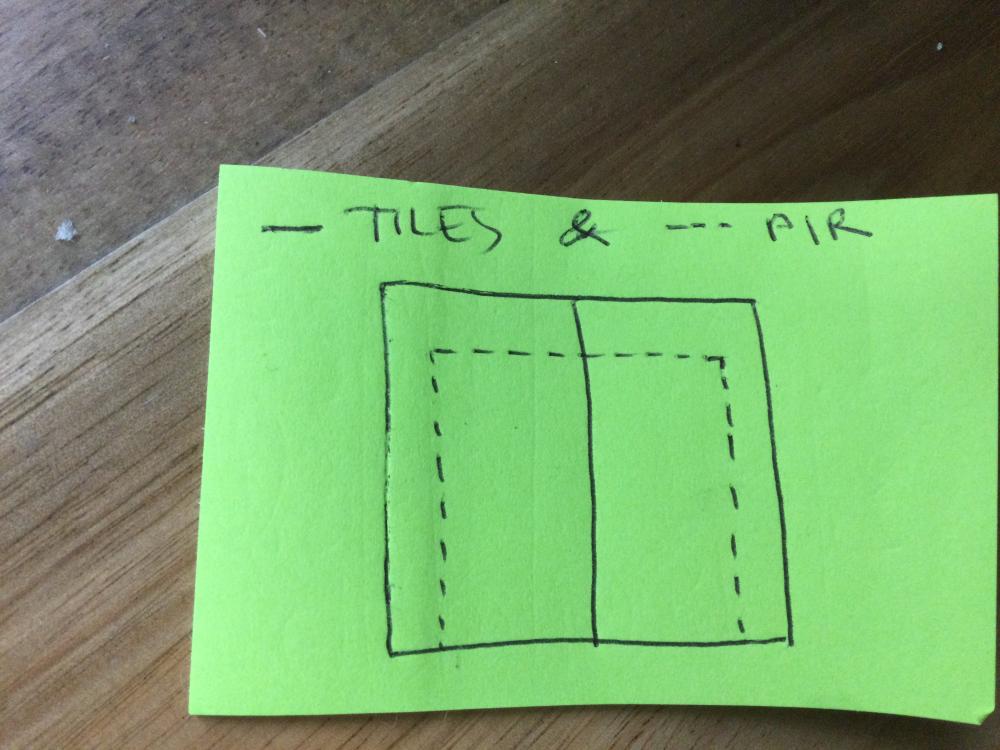
Sketch of this area..

-
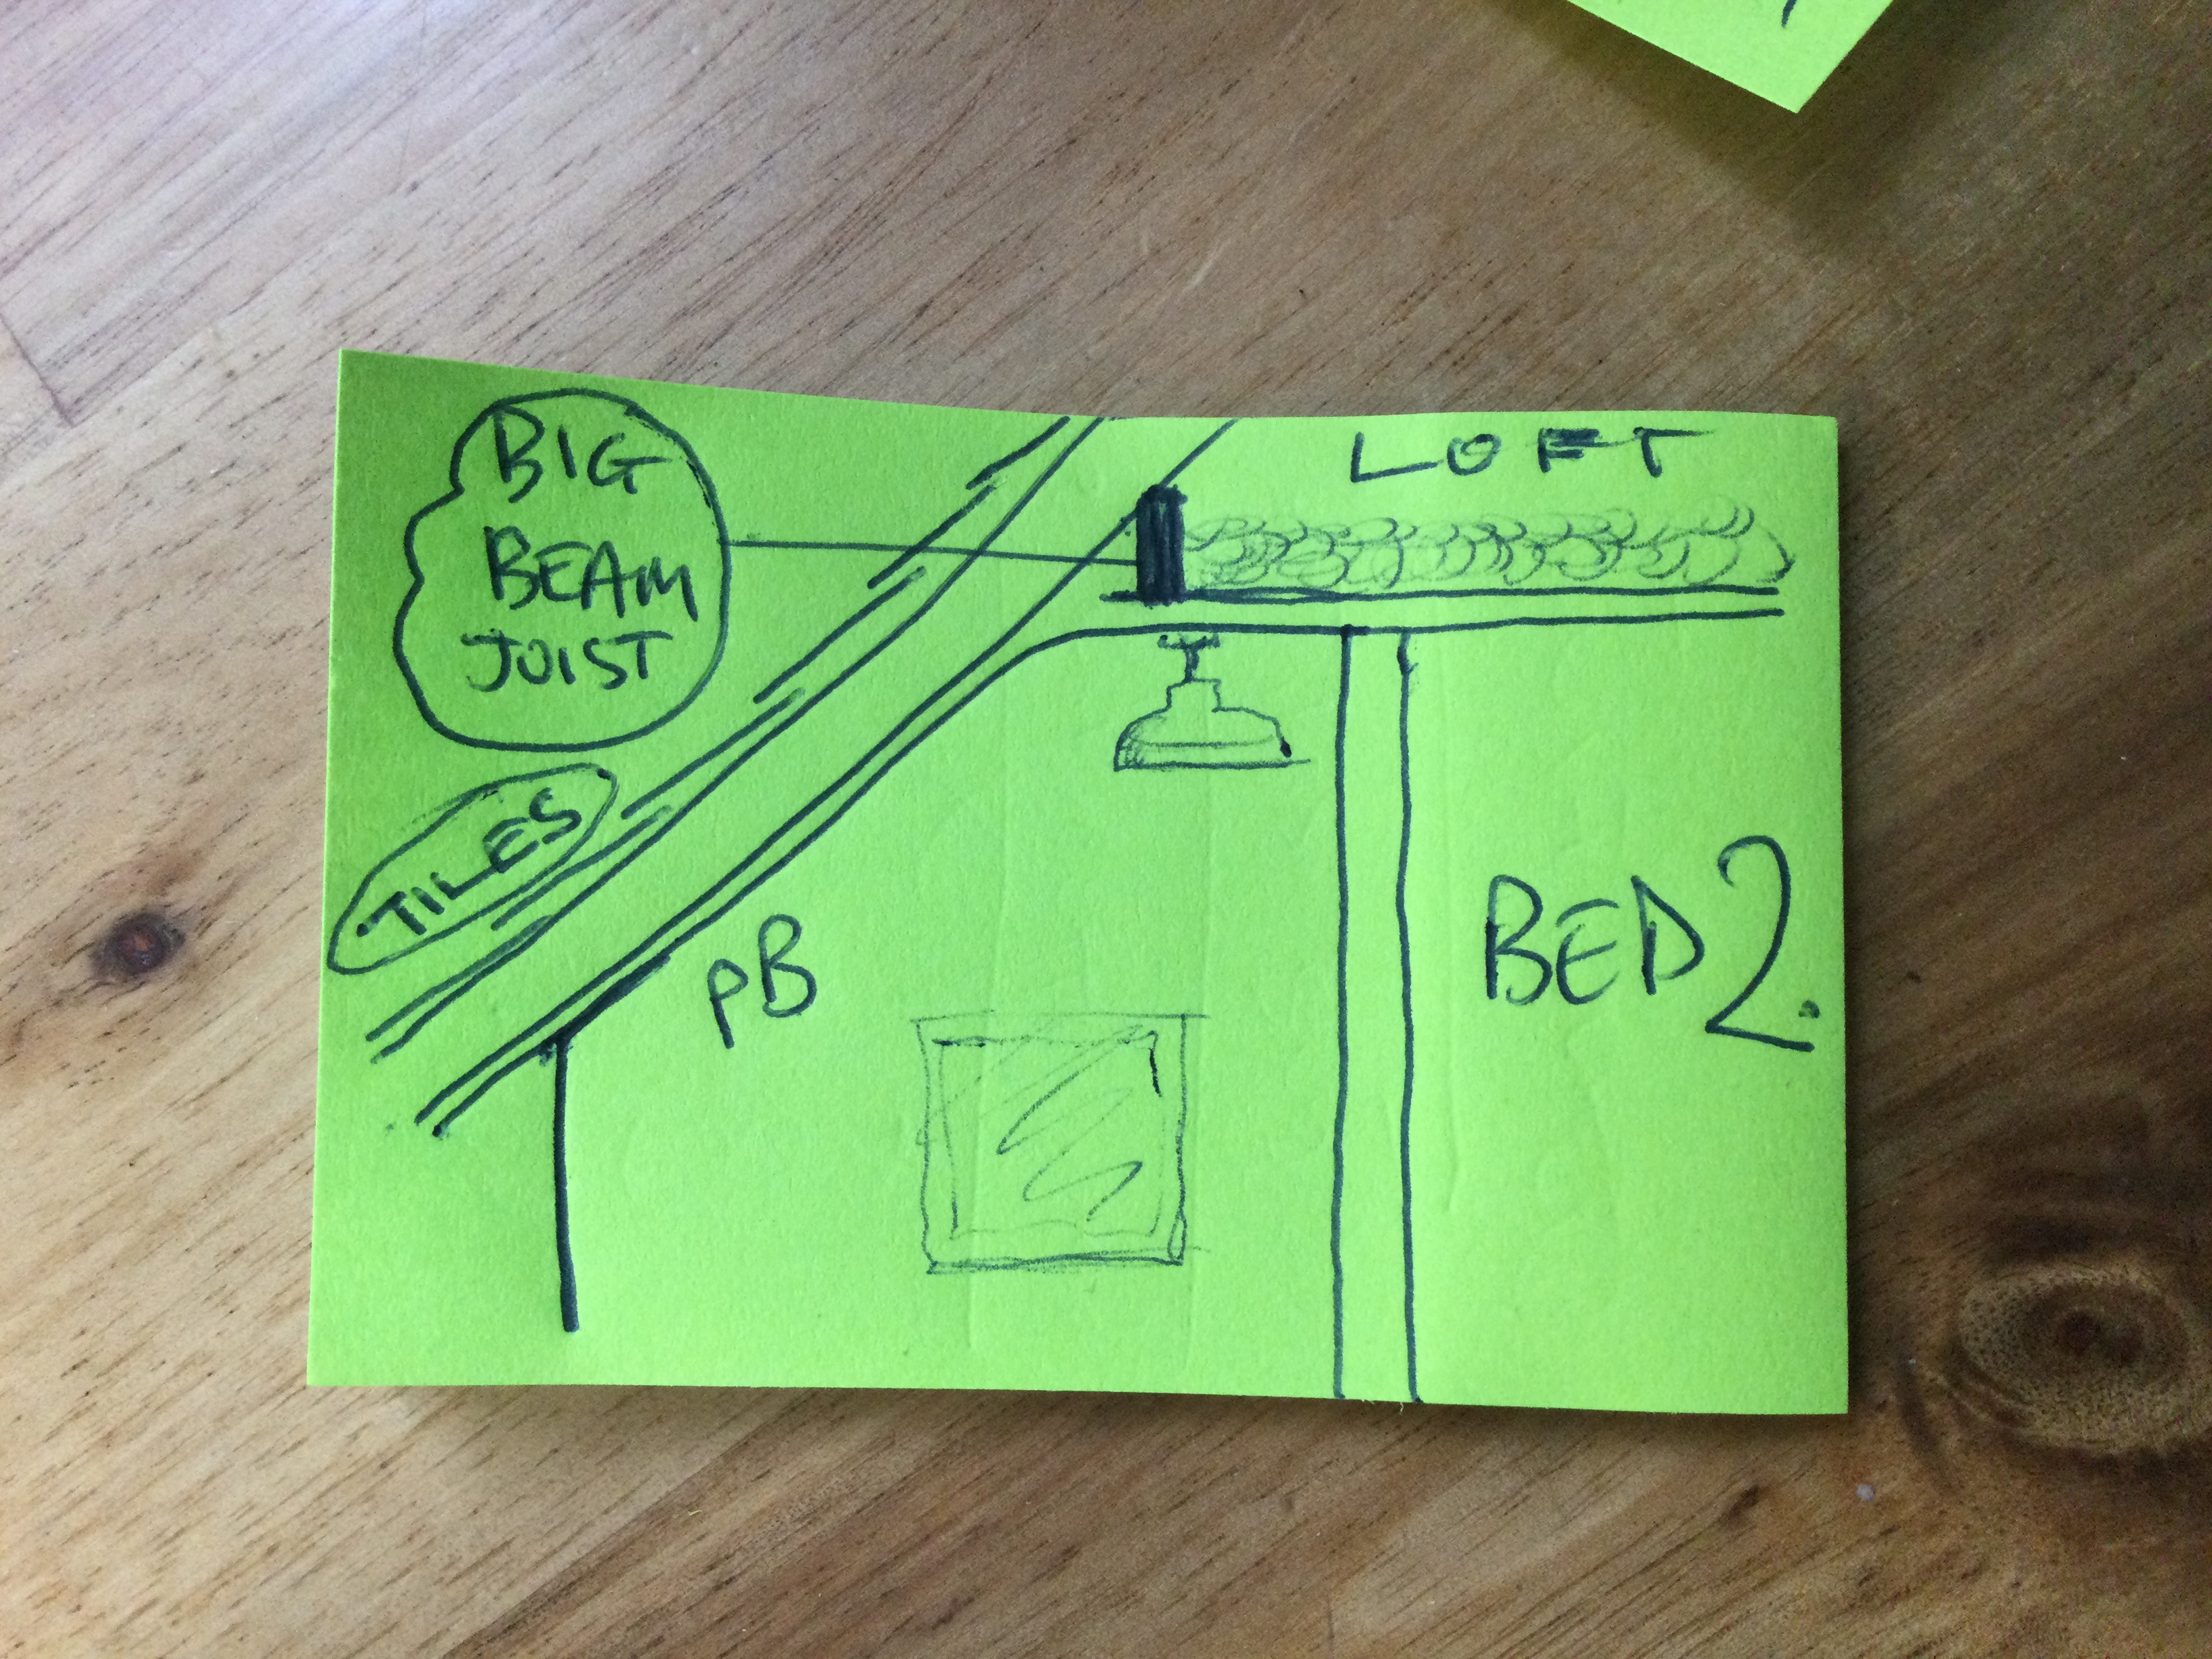
Where the trained housefly is, LHS of light, is where the joist beam is situated. It runs down length of house (front of shot to back of shot), at the point where the ceiling curves down. So this side 45* angled ceiling area.. is more than 2/3rds, it's the vast majority of the stairwell ceiling in fact. The roof felt above it here, being only 6" away. The gap between the pB ceiling & roof felt, within each section rafter to rafer.. I would imagine.. is a void containing no insulation at all. Zoot

-
Chaps, this new cautious approach ( builder do excavating/ quote needed/ job on hold).. means I'm back considering all aspects of where the cold might be entering the room. And whether I can do anything about it, prior to considering this massive (for me) step of excavation which would be a huge upheaval, let alone cost, duration etc. Did some detective work, & one area I'd not previously thought of, has come to mind with regard to a (possible) huge area of cold ingress to this mainroom. I can feel cold pouring down the stairwell. No doubt at all. Ok this could be from a,b,c,d places collectively together, or, one hugely dominating. If I close my upstairs bedroom doors.. I recently realised.. a bit less cold pours down. A bit. Suggesting the majority is -still- entering down stairwell from 1st floor though. So I look suspiciously at my sloped ceiling area of my stairwell area, high up. I go in loft, to see what insulation is stuffed down this slope. I can't see behind a big 9" joist. This blocks sight, & seems to block any access between the plasterboard sloping down behind it.. &.. the roof only 8" or so away. SO. It seems to me, like the stairwell plasterboard sloped ceiling, has no insulation behind it. And the roof only a little above it here. = a freezing cold ceiling area. This sloped side section, being about 2/3rds area of the stairwell ceiling. SURELY this cold source is the main culprit of the -stairwell- cold. But access to it.. to stuff even orange fluff down... is n/a. I'll add photos. Zoot
-
@Onoff cheers for the fag sketch.. gets me into gear 1 to be honest. I still think I should get my builder in to excavate: he might well do the cautious approach & start inward of the edge & 45* sloping down into an excavated area. It's too much of a risk for me alone, & as insurance will be involved should he take the job on: & I can make 100% sure beforehand to check all this insurance aspect, before agreeing. This means I can't afford to crack on with the job now then, alas: I need to get a quote & consider the whole hightened cost. It might mean it's out of my budget. We'll see what his quote is. Thanks, zoot
-
Hi Onoff that's very good of you. I might pick this up after the break, might well be the best idea this.. or I'll end up with a ton of waste grey foam/ innevitably it'll come in 5 or 10 packs, or 1/2 mile long. Still not quite understanding using the adhesive -over- just the grey foam. You say ' cover it with bt1' as one idea. I'm trying to get my head round this.. my head's aching. Surely if I smeared 1/3rd of a tube, of white adhesive, over the grey foam, I'd be left with an untidy finish/ no way of smoothing it over however carefully I tried. It just doesn't click. And it'll be soft, unfirm, so easily damaged. SO. I must be thinking wrongly/ you must be suggesting something entirely different (as so often: a box of forum text is almost impossible to glean meaning from: it's just forums). Thanks, Zoot
-
Crikey, no wonder you had a few extra pages then! Forgive me, but I'm not quite on board with the suggested idea. The grey foam stuff I can visualise, & presume chosen cos it'll squish one end & fill out almost all the way along. The BT1 stuff understood, as likely the best quality stuff. But I imagined it might be just be a case of some sort of plastic beading, to bridge the gap, glued to bath & wall, the lower section cut along say 20mm one end, 40mm this end. Im not quite understanding the grey foam. Or is this the first stage, then some sort of white placcy trim then goes -over- it? Thanks, Zoot
-
It's very odd, all this extention's walls are slightly on the c*ck.. none at right-angles. I can only think the 1830 stone 'rectangle' shell wasn't quite right-angular on this one wall, so they had to compensate for it 'back' as it were when building onto this end. T'other end, where my new extention is.. this seems all ok.
-
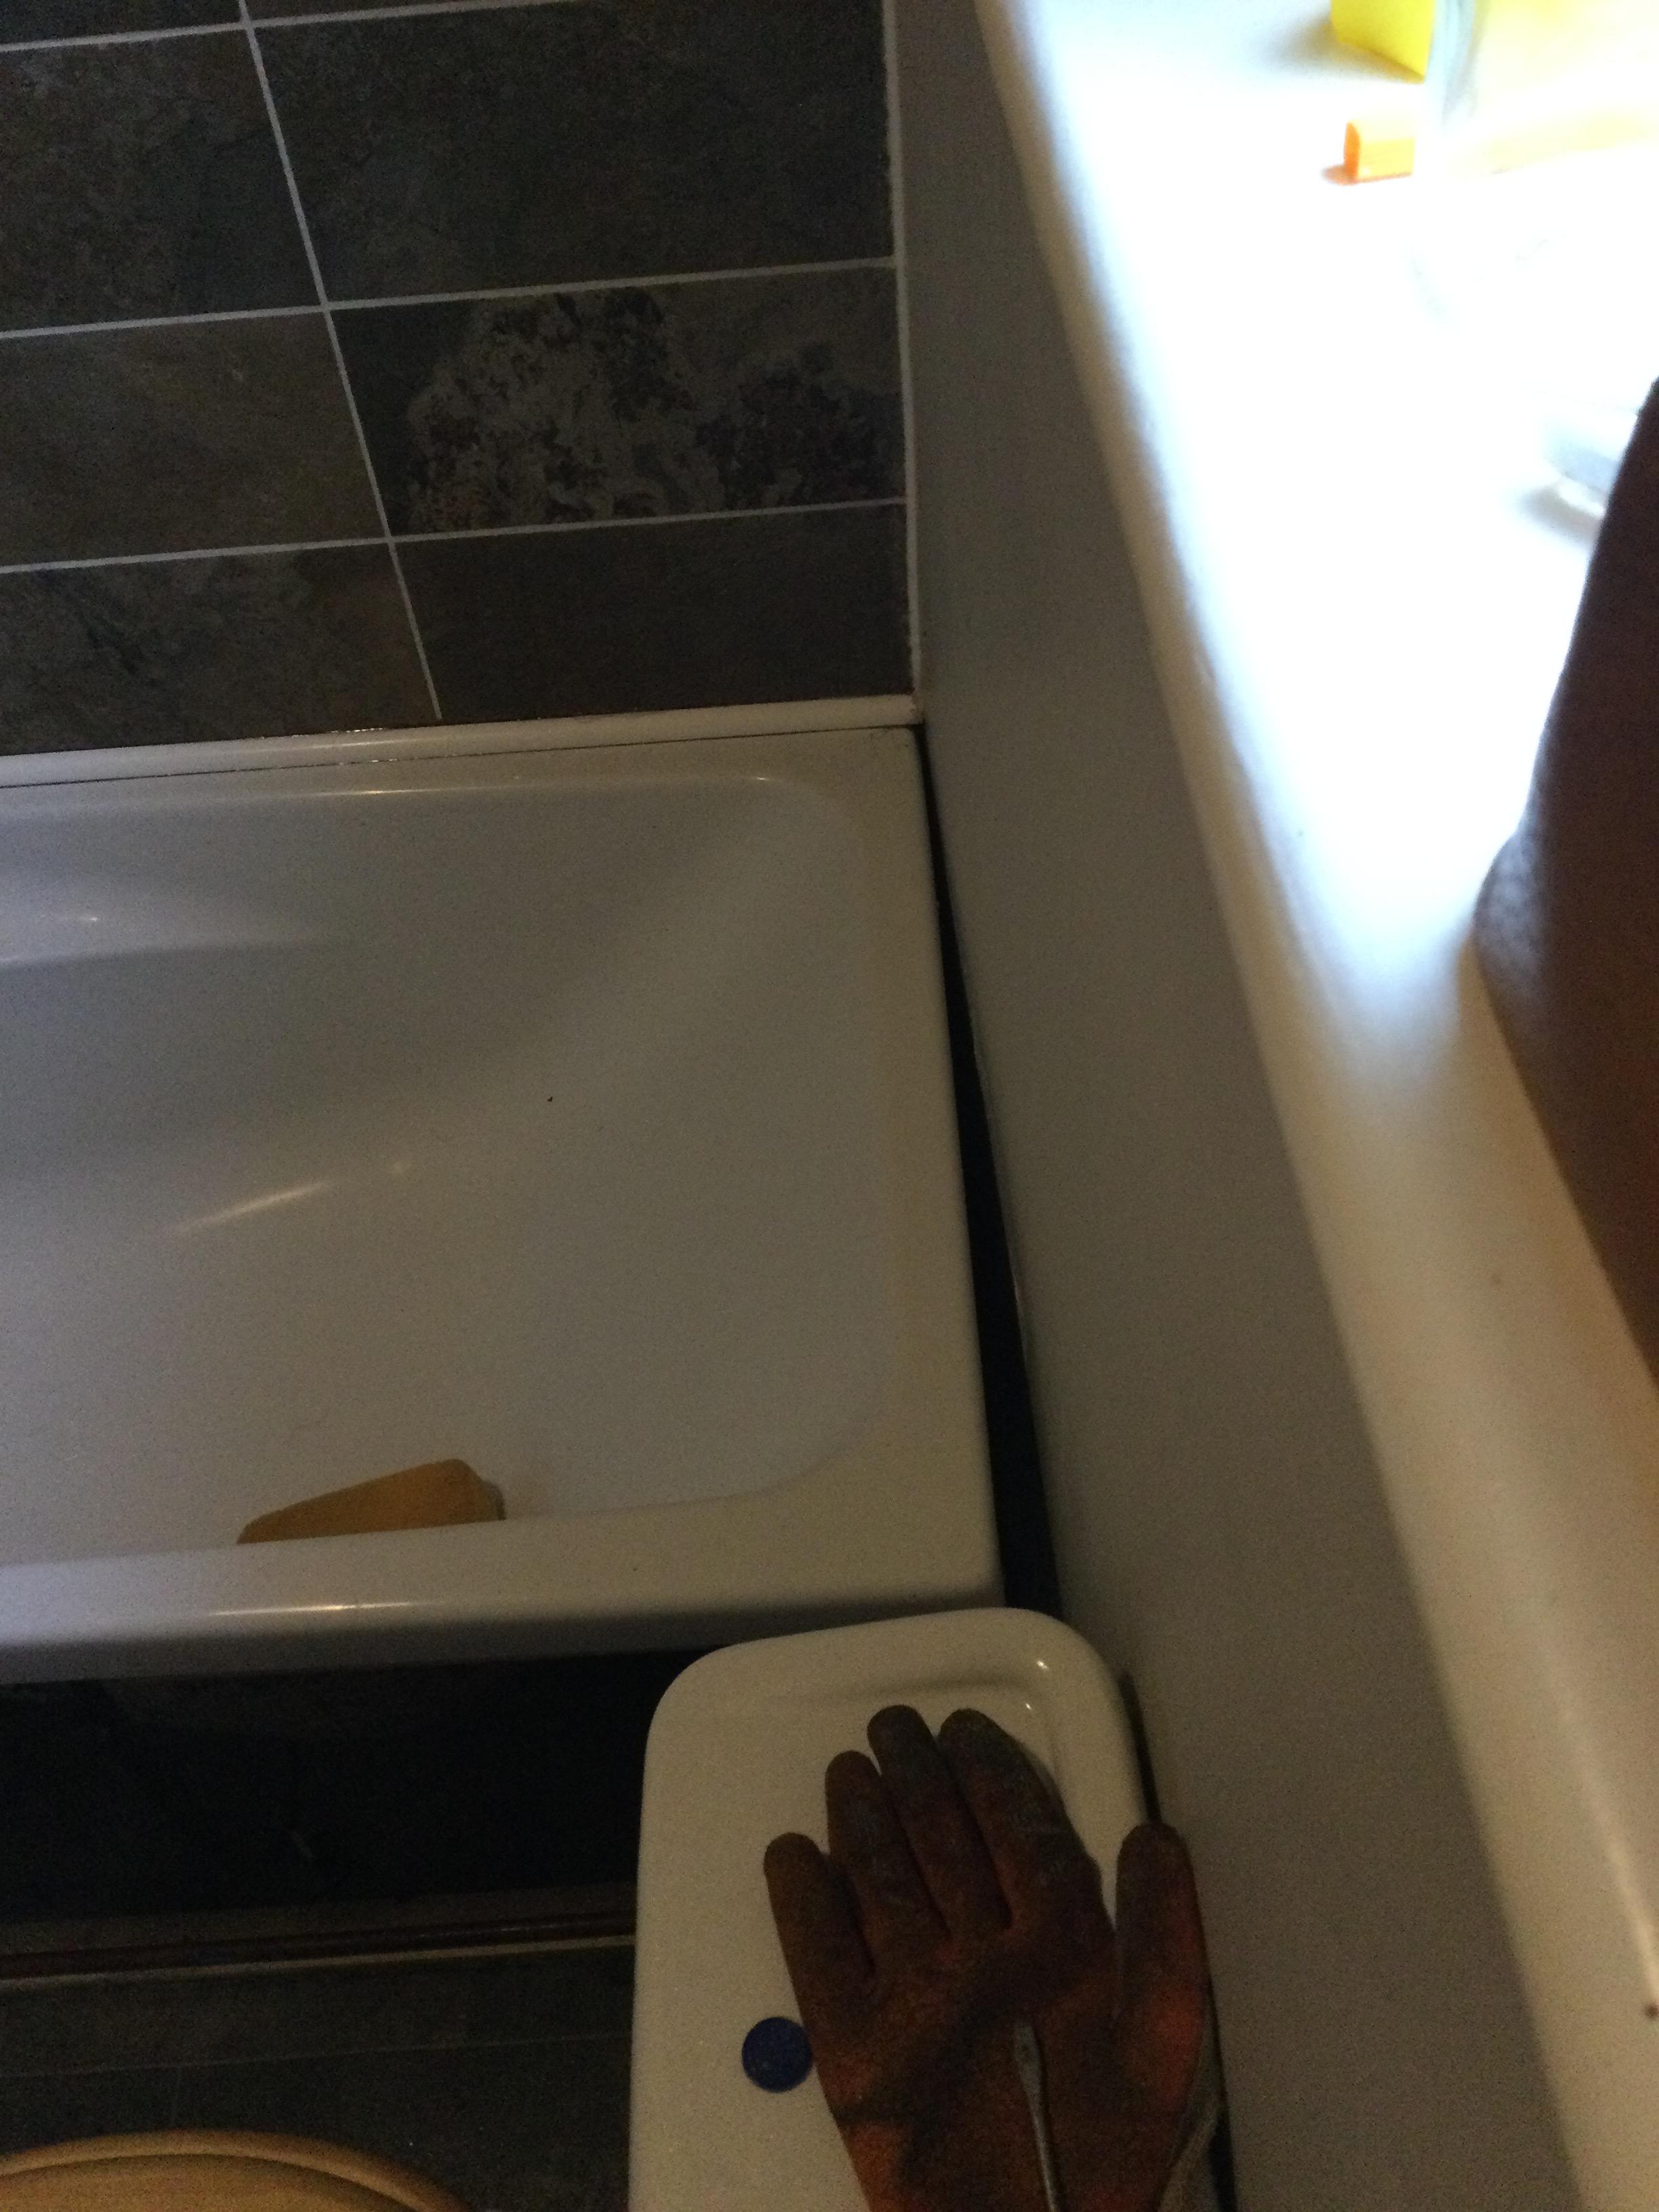
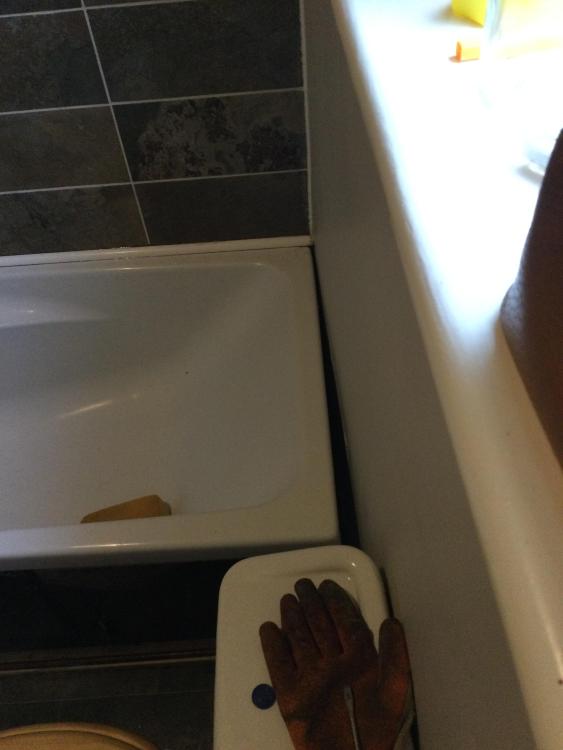
Chaps- I've had this annoying gap at end of bath to wall, now a good time to address it, before I put the side back on. Gap is 7mm.... 35mm this end: the extention walls aren't square, no idea why (I think cottage 'shell' wasn't originally, that this 70's extention was built onto). Could you advise- I do slosh a bit of bathwater down here. Thanks Zoot
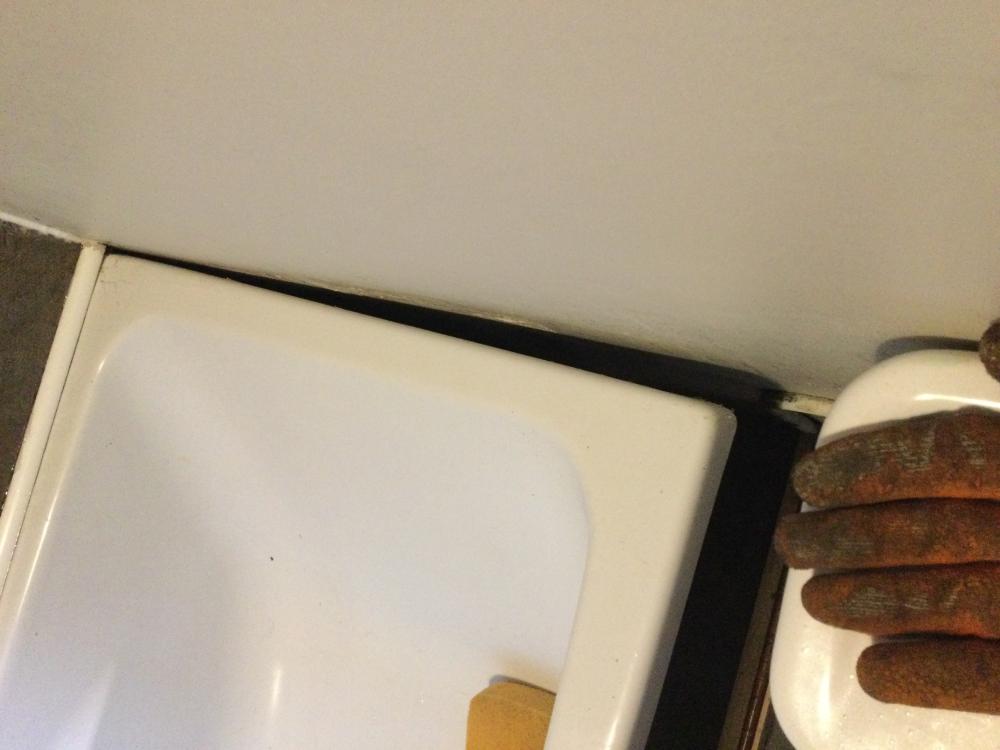
-
The screwfix chap was undoing this ( said he was a plumber & could he show me.. yes sure) & possibly reversed the washer. Anyway, as usual I go with instinct: do what Onoff says & go from there. Spot on. Actually I need tidy up a few more minor things in here whilst bath side is off.. need to keep thread open. Grateful chaps, Zoot
-
Hi ProDave. Yup best idea was try attack it in situ.. so I heated the thing, then let it go cold/ doesn't take long in there, & this helped to shift the cap off. Dug out black washer, seemed too big so trimmed edges/ reversed it: then cap went back on easier & further inward too: seems as Onoff suggested the washer was the issue. Leak stopped. Fab, thanks job done.
-
Yup, but thing is Ive silicone'd immediately under the bath fiberglass hole to the rubber washer, as advised. I could leave this rubber washer on tho.. & hope to get a mm perfect alignment next time, when I remove & fix/ or replace the trap. I think my only feasable idea. Tricky tho. Thanks, Zoot
-
Hi Onoff. Understood thanks. I am 100% sure, before posting this new problem exactly where, & where not, the leak is coming from. Its simply dry at the black/ white junction above. And I can see it coming out the low thing screw cap. And it's dry onward at the junction to main 2m bath sloping pipe (dry on the underside of the sloping pipe too, just as confirmation).