Iceverge
-
Posts
4462 -
Joined
-
Last visited
-
Days Won
32
Everything posted by Iceverge
-
Welcome @Tony t Real world setups are always welcome evidence. What kind of pipes and radiators were there before and afterwards?
-

badly scuffed UFH pipe - repair or leave?
Iceverge replied to Tom's topic in General Self Build & DIY Discussion
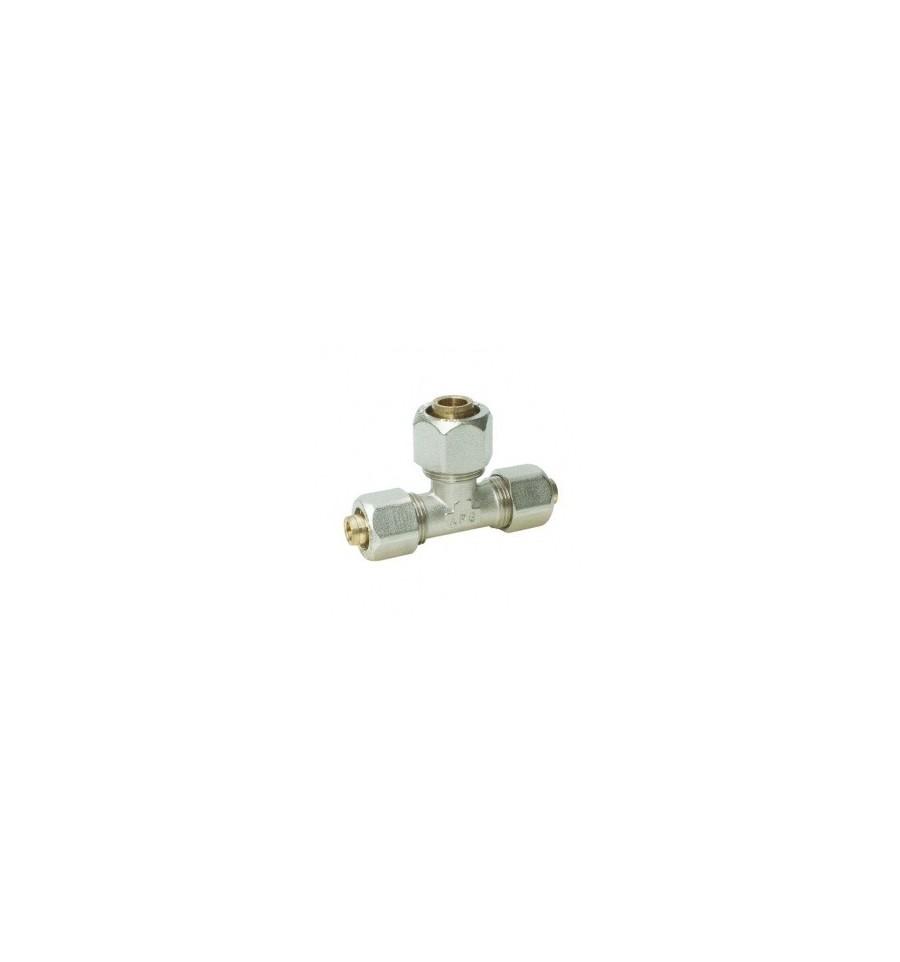
Yup press fit are very good. This type of compression fitting with the built in inserts are very robust too. I wouldn't use these ones which rely on olives. Would it be worth digging up the other pipes anyway and seating them lower in the screed anyway. I'd be worried with so little coverage they would fray and wear over time.
-
badly scuffed UFH pipe - repair or leave?
Iceverge replied to Tom's topic in General Self Build & DIY Discussion
Nobody listens to instructions, nobody reads drawings. They're forbidden from thinking. Not because they're not capable but because there's a cultural rift between those allowed to do the thinking and those allowed to do the doing. It's totally archaic. If I was to do the house again I'd lock the site with one key and keep it that way unless I was there. -
badly scuffed UFH pipe - repair or leave?
Iceverge replied to Tom's topic in General Self Build & DIY Discussion
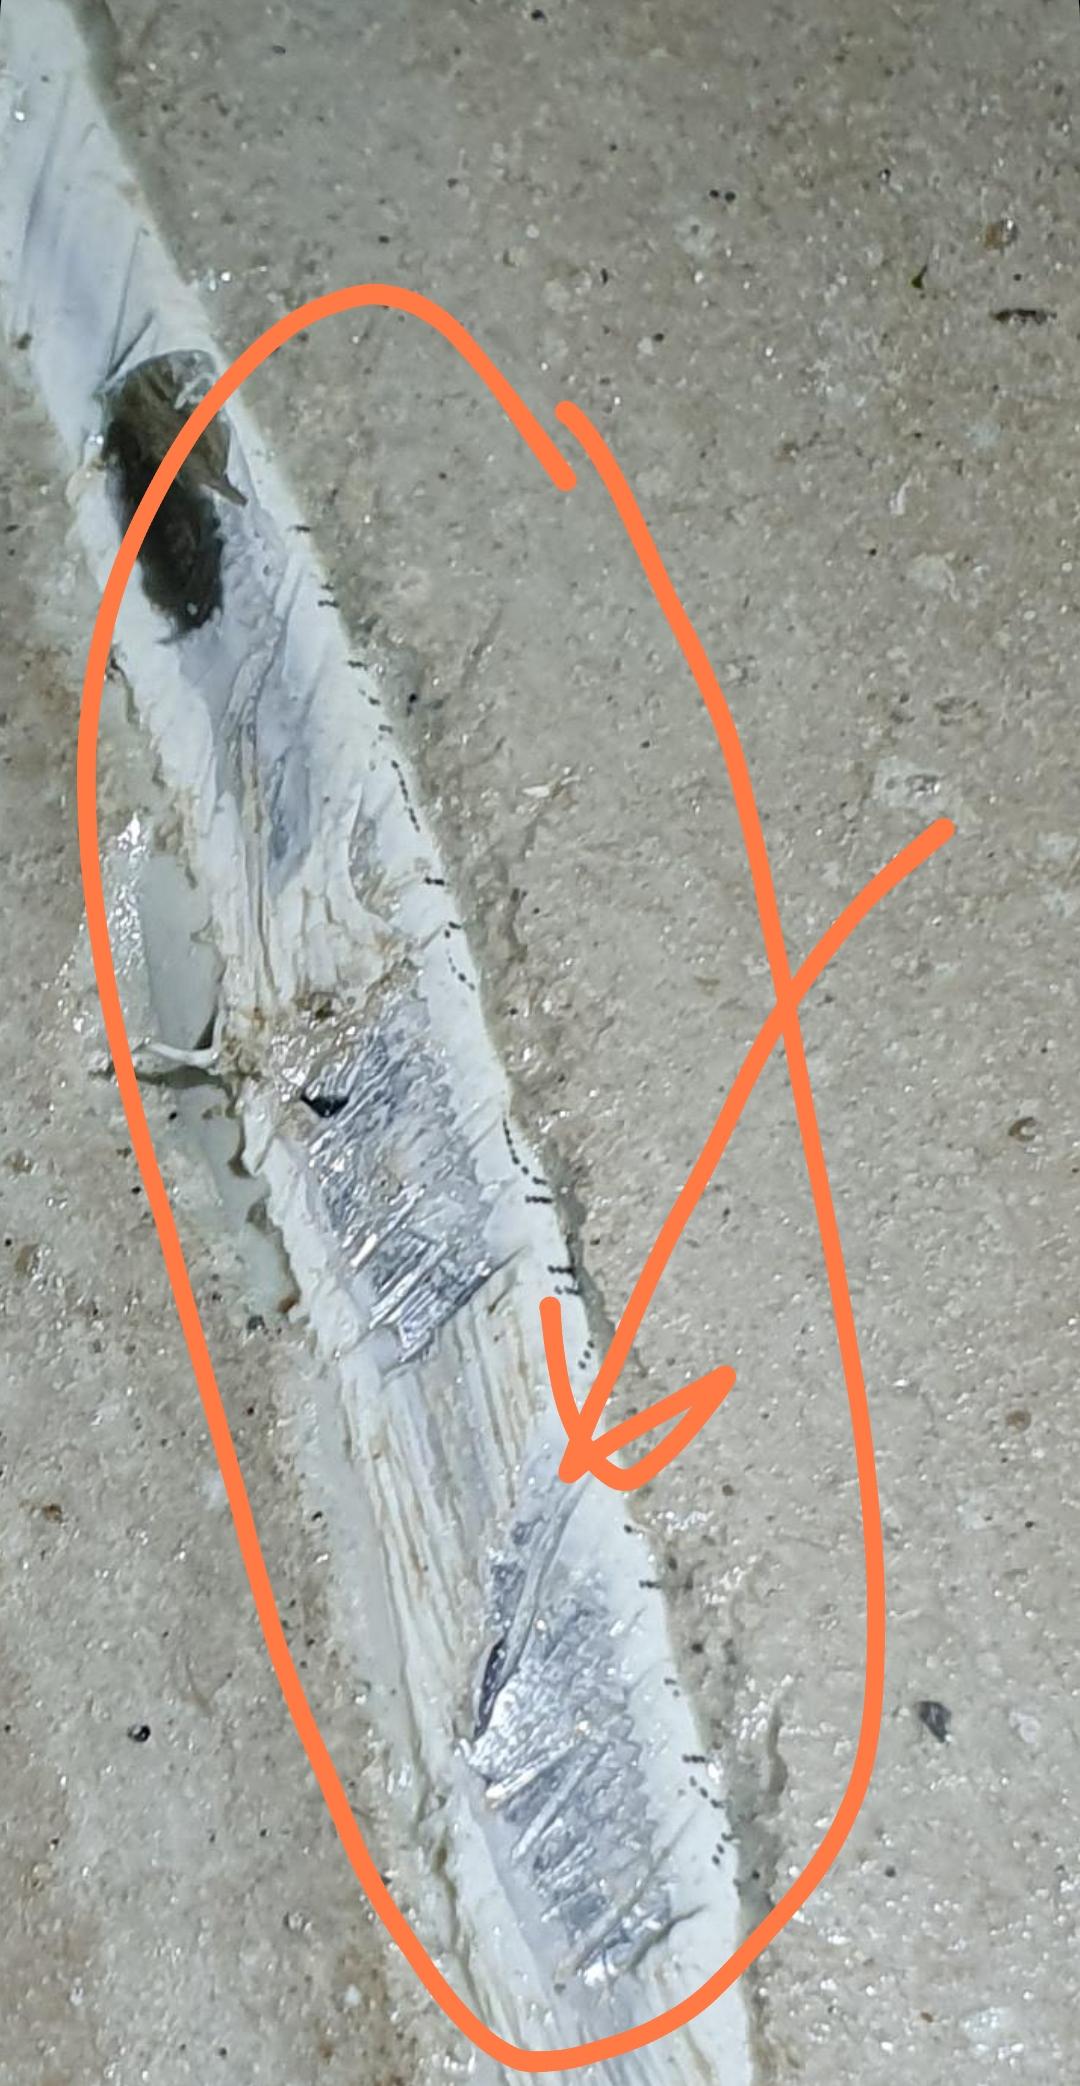
I would cut the three sections back to virgin pipe. It might need to be done with hand tools and slowly. Tooth brushes for the last few bits. I wouldn't let the floor grinding knuckle draggers near it. You'll probably need to do it yourself and charge them for it. Put in 6 joiners and 3 new sections of pipe. Those multilayer fittings with the built in inserts are pretty bombproof. Then pressure test the pipes. Then wrap all the exposed pipe in cling film to protect the joints from the screed and make it easier to repair if needed in future Repour the concrete and forget about it. Charge the grinding company for your time and put it down to experience. -
These statements seem contradictory. If the door is sitting on concrete and the cavity is full of concrete you have a very large thermal bridge. Any chance of a sketch of a cross section please?
-
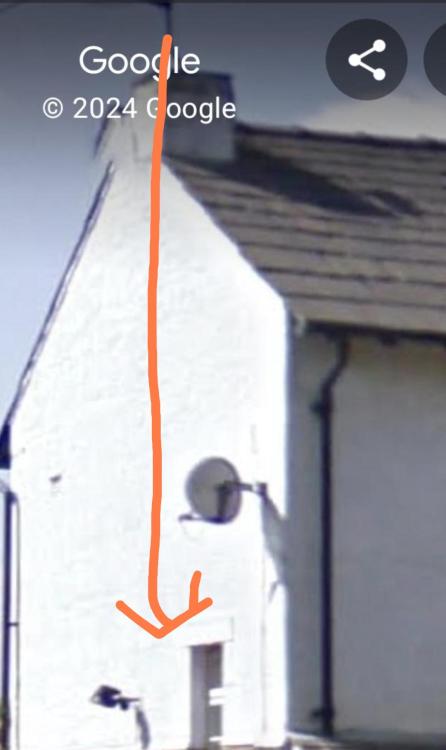
I'm not sure this will solve it. Applying fixes without knowing the cause can be tempting but it's a quick way to burn cash without any guaranteed results. The render above the wall looks pretty good from what I can see. Better pics of course would help. Sellotaping your phone to a long stick and taking a video would work. I've avoided a lot of dismantling by taking phone videos on areas my head wouldn't fit. Can you get into the attic and have a look at the chimney from the inside? Can you look in the bedroom and see if the corner begin that wall is damp? Can you establish is it is a cavity wall or not?
-
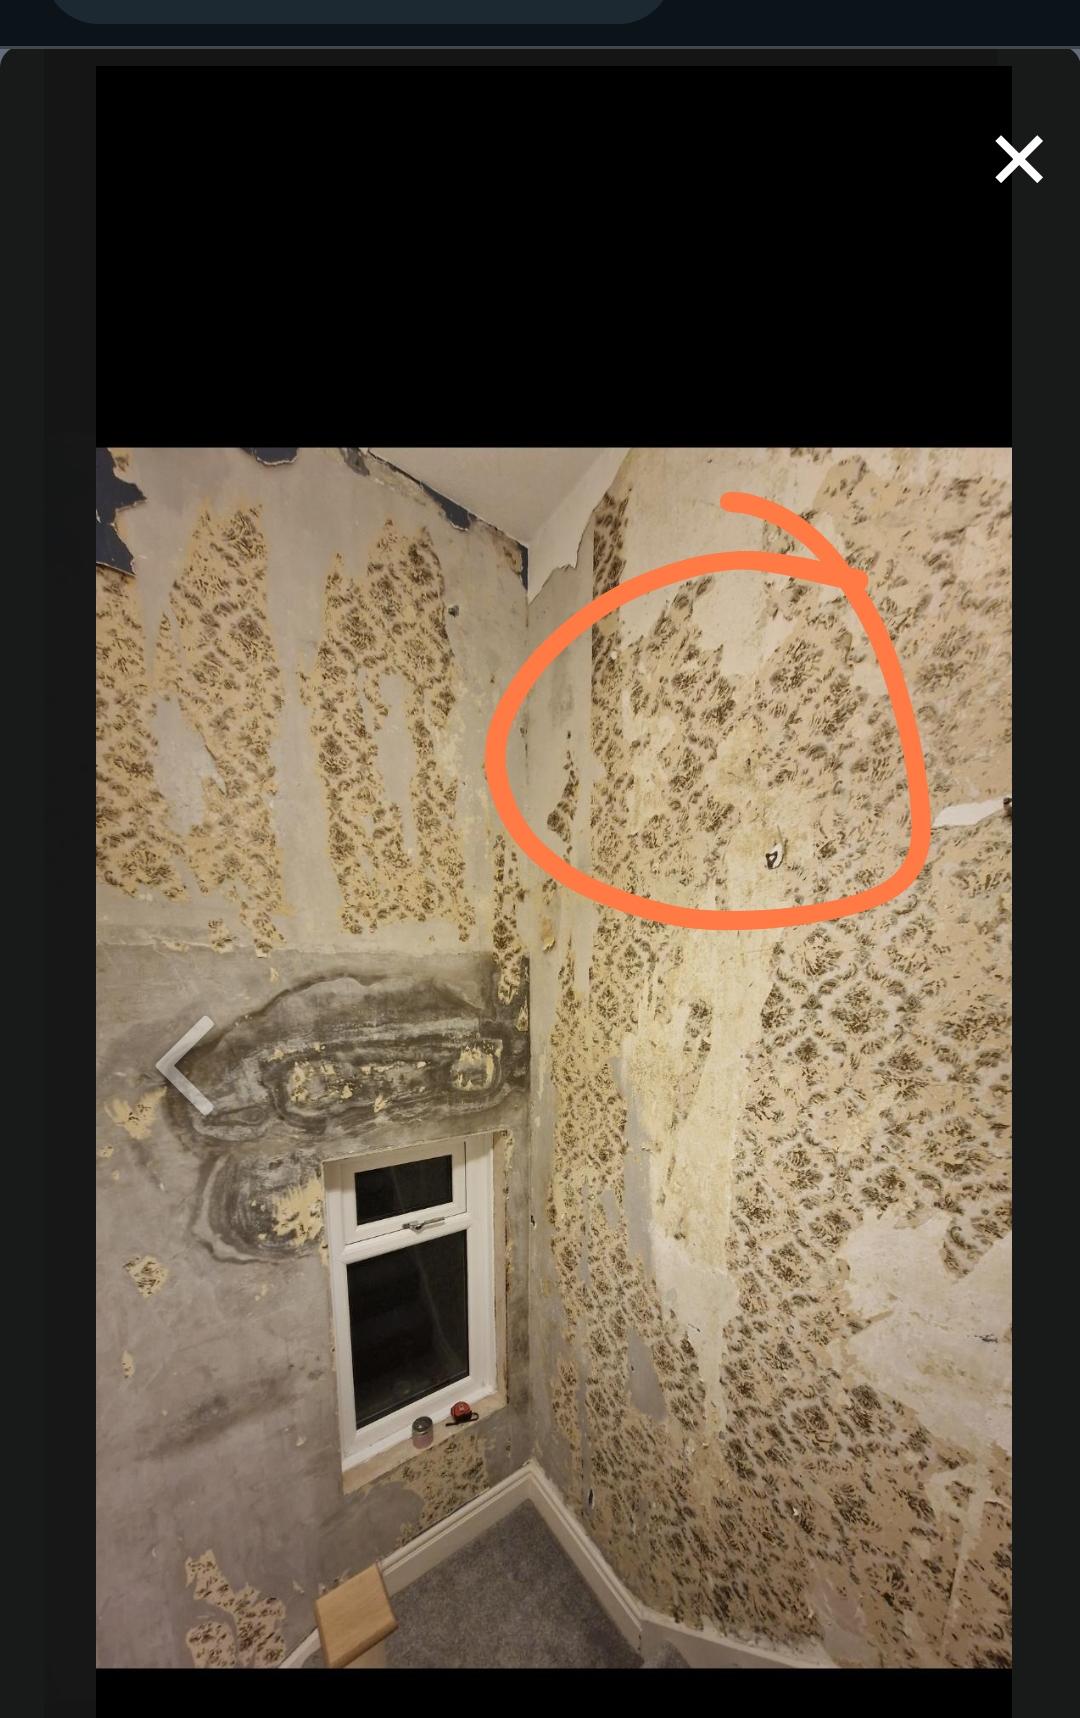
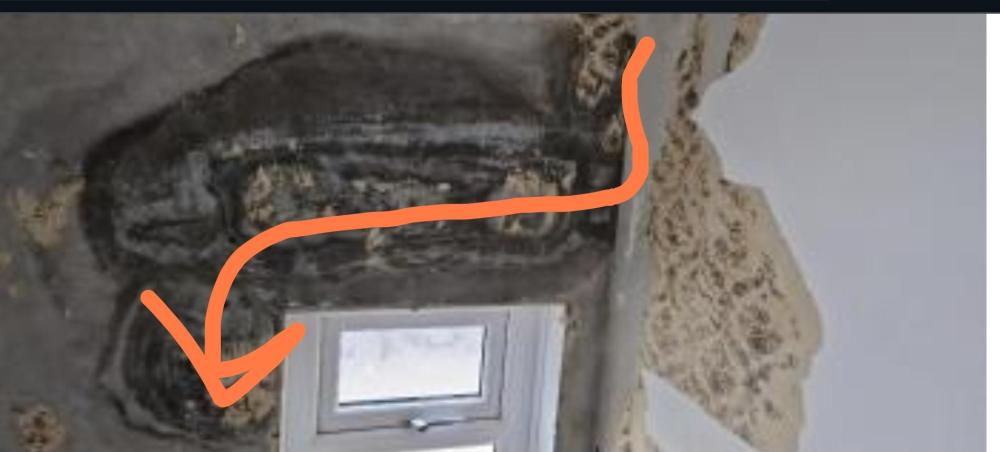
This suggests the "wetting" and "drying" are in balance if the dark patch stays is stable in size. I imagine it's a fault somewhere at the top of the chimney letting rainwater in. The water is stored by soaking into the bricks slowly or maybe a timber lintel and slowly dries through the internal plaster. Rather than risking life and limb on a ladder do you have any enterprising youth nearby with a drone that would take some videos and pics for a tenner? As an aside what is in the area behind this wall? Is it a bathroom?

-
I'm suspicious of the chimney. Is it out of use? I wonder has rain gotten down it and seeped into a wooded lintel?
-
badly scuffed UFH pipe - repair or leave?
Iceverge replied to Tom's topic in General Self Build & DIY Discussion
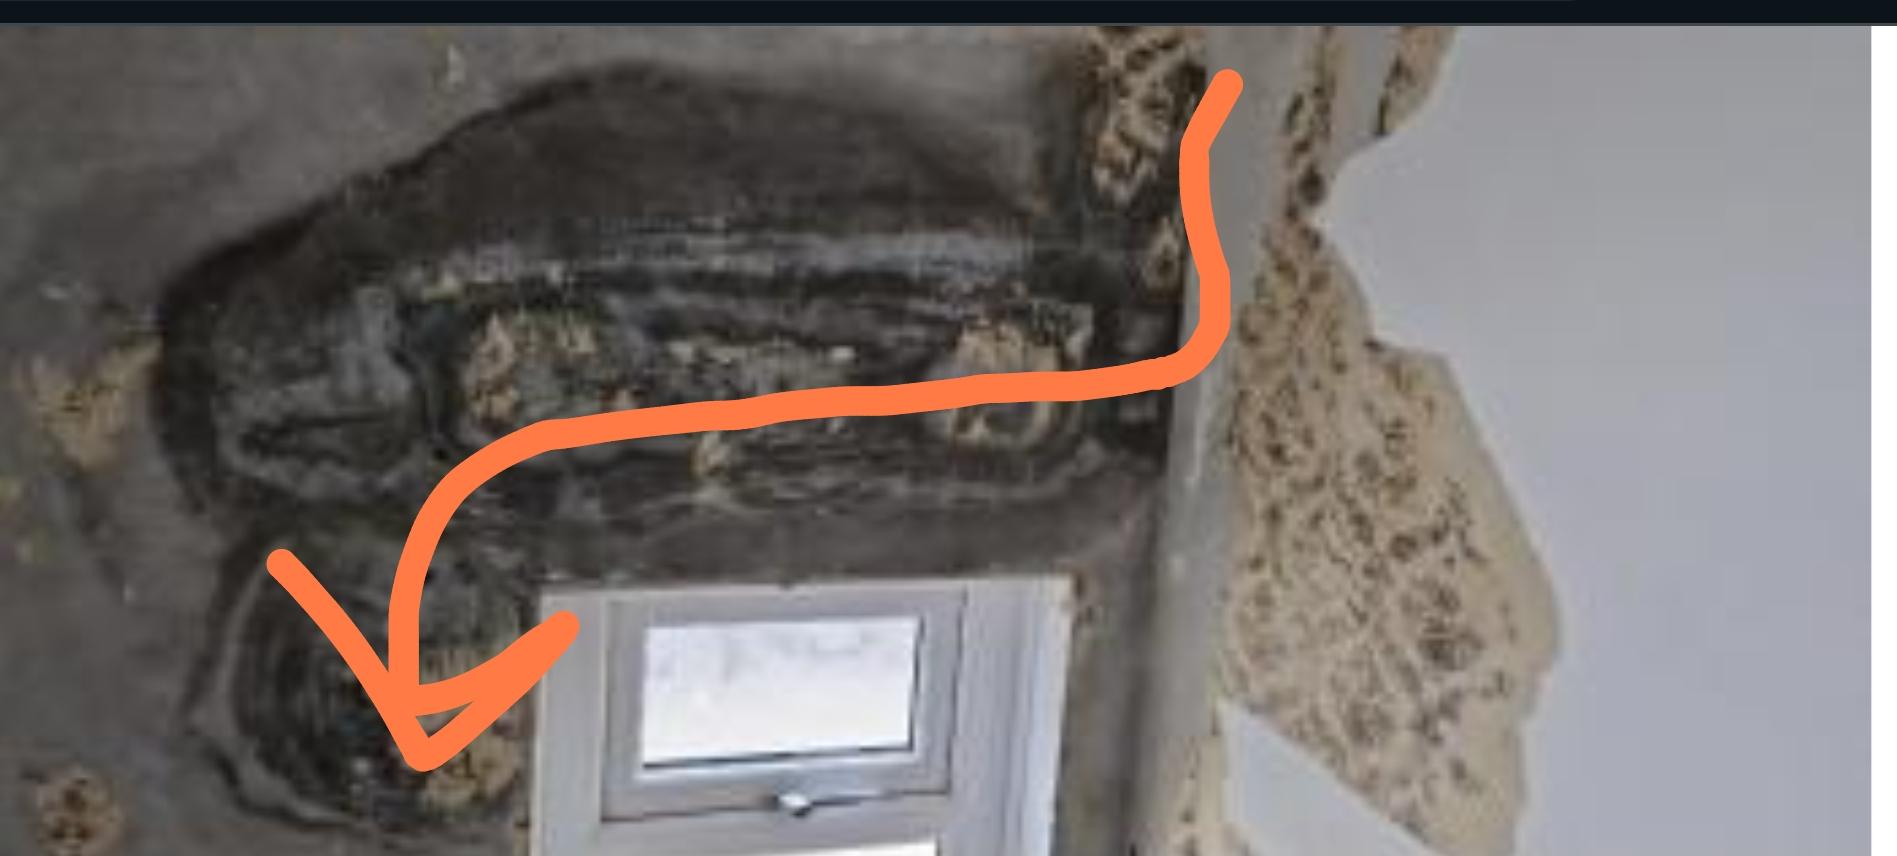
Ah that's disappointing. The trials of self building eh. I would bite bullet and pull it up. There's some quite deep scratches in the pipe, they may be ok now but I wouldn't trust the aluminium not to degrade over time and leak. Is it a single room? Can you lift the whole loop. Can you isolate the loop and do without?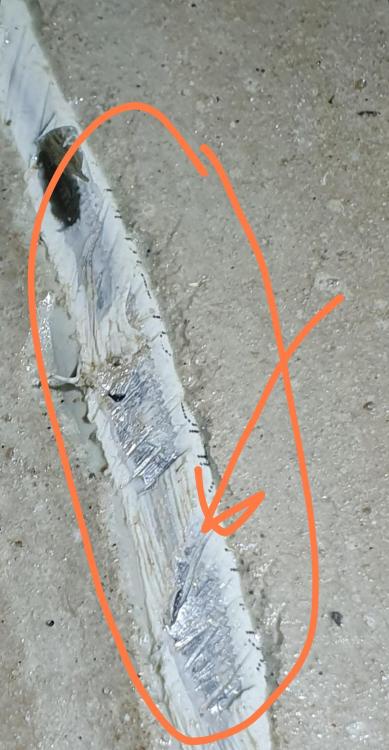
-
Vailant Arostor ESHP or similar would cut the DHW electric to about 40% of your current amount. Installed cost about £2.5k https://professional.vaillant.co.uk/for-installers/products/arostor-domestic-hot-water-heat-pump-58880.html An A2A heat pump would provide heat at 1/4 of the cost of a resistance heater. Installed cost about £1.5k https://www.saturnsales.co.uk/Daikin-FTXM25R-Wall-Mounted-Heat-Pump-Air-Conditioning.html Solar PV and a diverted will roughly provide all the DHW needed from April to September at a rate of 1kWp of panels per person. Cost about £1k per installed kWp.
-
Absolutely infuriating. I tackled one of an evening, manual in hand. I have a fairly technically complex job and I was determined to beat it. After 2 very frustrating hours I gave up and just used a plug-in time switch.
-
Mechanical ventilation design
Iceverge replied to giacomo_z's topic in Mechanical Ventilation with Heat Recovery (MVHR)
The reality of any house is that it's far to dynamic a system to ever be modelled accurately. Factors include, occupancy rates, amount of breathing, number of drying socks, cooking pasta or rice , wind direction, temperature, humidity. How long the door was open or how long the shower ran. The list of variables is massive. Calculations are completely best guess. Humidity levels tend to equalise within a house pretty quickly anyway so if you sort one or two rooms then the rest will follow. The beauty of the above fans is they respond to humidity so get it exactly right in theory. And they're cheap and easy to install too. -
Mechanical ventilation design
Iceverge replied to giacomo_z's topic in Mechanical Ventilation with Heat Recovery (MVHR)
@giacomo_z Bregs are a crude device. They tend to be written for worst case scenario rather than the actual demand and most of us find they massively overventilate a house. Work on 0.3ACH for the whole building as per passivhaus and you'll be closer to a comfortable standard. Say you need 150m3/hr, about 40l/sec. Then 3 X of those above fans should be ok. Install one of them, suck it and see. You'll be surprised given a few days it'll reduce the dampness significantly. Do what you can in the meantime to stop adding to the damp, dry clothes outside if possible for example. Use extractor fans for cooking etc. -
Mechanical ventilation design
Iceverge replied to giacomo_z's topic in Mechanical Ventilation with Heat Recovery (MVHR)
Agreed, I bought a Greenwood CIV2gp on ebay. Keep an eye out and they can be had very reasonably. @JohnMo do you have any recommendations for humidity sensitive vents?
-
Very little I'm afraid. All electric resistance heaters will be identical if they use a thermostat to turn on when the room cools and off when the room heats up. Both of these will cost exactly the same to run and provide exactly the same amount of heat. Running one of these would be about 60p/hr so not the cheapest. Its impossible to say how much it'd cost to heat the house though. Do you have any old gas bills to look at for reference? Bear in mind electric heating will-be the most expensive form of heating. If you do want to buy something I'd get this. It'll do the same job as a fan heater but won't make a racket.


-
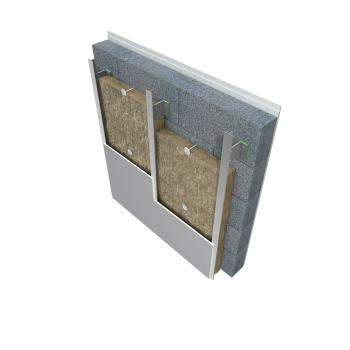
This has me baffled a bit. I'd really like to see a picture of the first floor slab under construction. Were the perimeter blocks definitely included as per the porotherm spec when this was done? Are you sure it was a porotherm floor and not a hollow core slab? I had thought all the moisture had originated from inside but I'm not certain now. Some of this looks like driven rain. Am I correct in thinking you are very near the sea from one of the pictures? As @Mr Punter noted Porotherm is maybe not the most suitable product in such a wet environment but rest assured you're not alone. Lots of other types of solid walled buildings are facing similar issues. I also know of one EWI house and several ICF houses near me that have had issues with the render cracking and falling off. More broadly I think that we need a EWI retrofit option that includes a cavity as this is really important for durable retrofit. Here's a image from Knauf Rocksilk with a standoff cement board. Beeatie Passive did a retrofit with a void created by fiberglass brackets and cement board that was pumped with EPS beads. Both would be excellent options for your house @Catherine Weitbrecht They would lightly be expensive however and unusual options domestically.
-
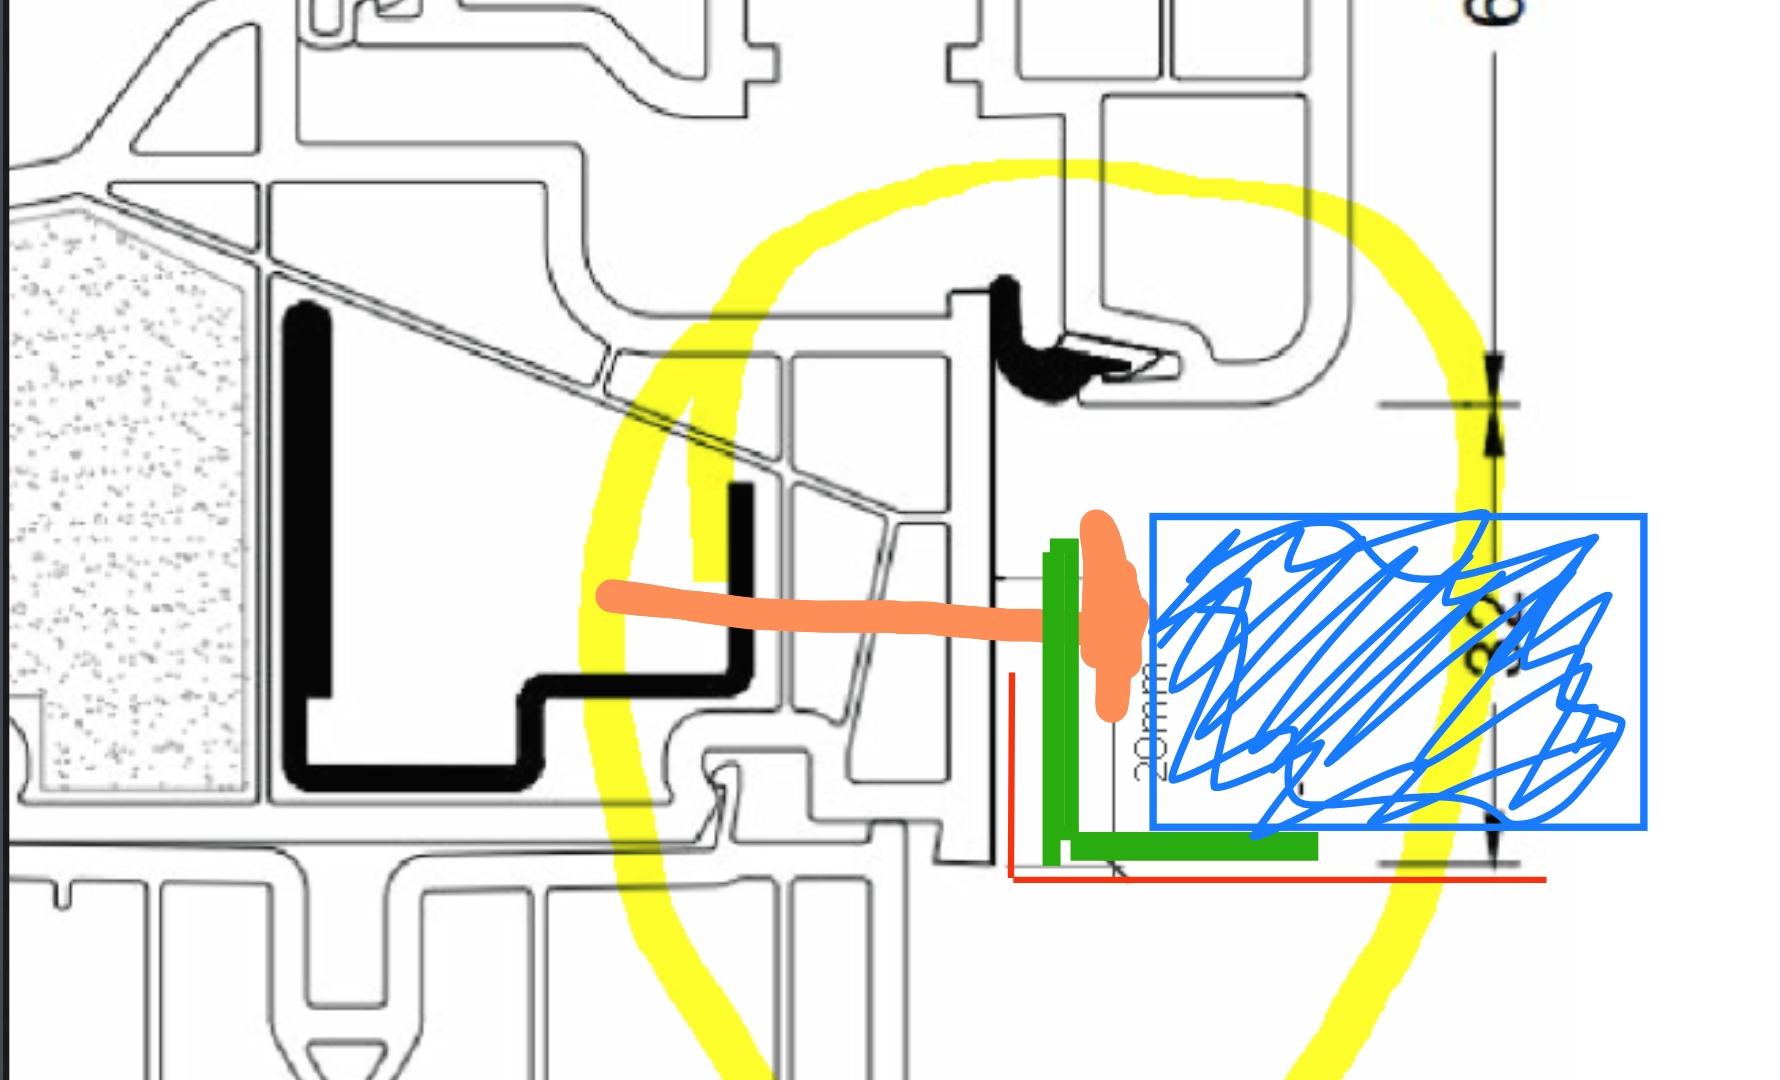
It'd be a bit stronger but not massively. It'd be a thicker J bead too so maybe harder to screw into the correct place. The sketches I did use your actual profile. You can see how tight it is. .
-
Can roof be tied to blockwork on timber-framed house
Iceverge replied to Phil64's topic in Timber Frame
Probably one for @Gus Potter. It's quite a tall building for a house. I would consider engaging a SE for any renovations. Once buildings get tall they get exposed to substantially more wind.
-
Combining EWI and Cavity wall construction on a New build
Iceverge replied to Iceverge's topic in Brick & Block
Here's a couple of screen grabs of that detail from THERM 300mm Cavity. 215mm internal block 100mm external. Filled with EPS beads. The initial 2 courses of blockwork on the external leaf are aerated concrete and externally insulated with 100mm of PIR. The insulation on the flat ceiling is 400mm of mineral wool. 203UB supporting both leafs. The higher the external insulation can be taken up the external leaf the better. However the thermal bridge vs a perfect imaginary steel free junction is about 0.03W/mK. So if you have this junction for 5m at dT20 then it'd be 5*20*0.03 = 3w difference in the heating load vs a perfect junction. Pretty acceptable in my view.


-
Ok how about this. Apply the tape and membrane as above to the 4 sides to air seal the window. Including the brackets. Then but one of these. And screw it into the bottom of the window using something like this. It'd be better to get the screws into the steel frame of the window. There's a rough sketch. 1. Red tape and airtighess member. 2. Green angle bracket 3. Orange self drilling screw into steel frame. 4. Blue window board. You can level the inside of the board with timber on top of the wall. Or perhaps leave a slant towards the room. It'll be less lightly to catch the opening window then with only 7mm clearance.


-
Whats your understanding of french drain? This confused me a bit.
-
The bottom of the window will be the issue I think. How much clearance is there under the sash to the edge of the frame? How thick are you planning on having your window boards?
-
A mixing paddle for a drill would speed things up for mixing up a bucket or two.
-
Post them please. Sounds like a bodge to be honest. You're lightly to need to revisit it unless you do it once and properly.
-
Get a wire brush and screwdriver and rake out some of the old mortar at ground level. Then a bucket of lime mortar, a small trowel and some gloves and have a go at repointing yourself. It's not rocket science. By the time you get to the chimney you'll be plenty proficient to make a tidy job of it.