cwr
-
Posts
348 -
Joined
-
Last visited
Everything posted by cwr
-
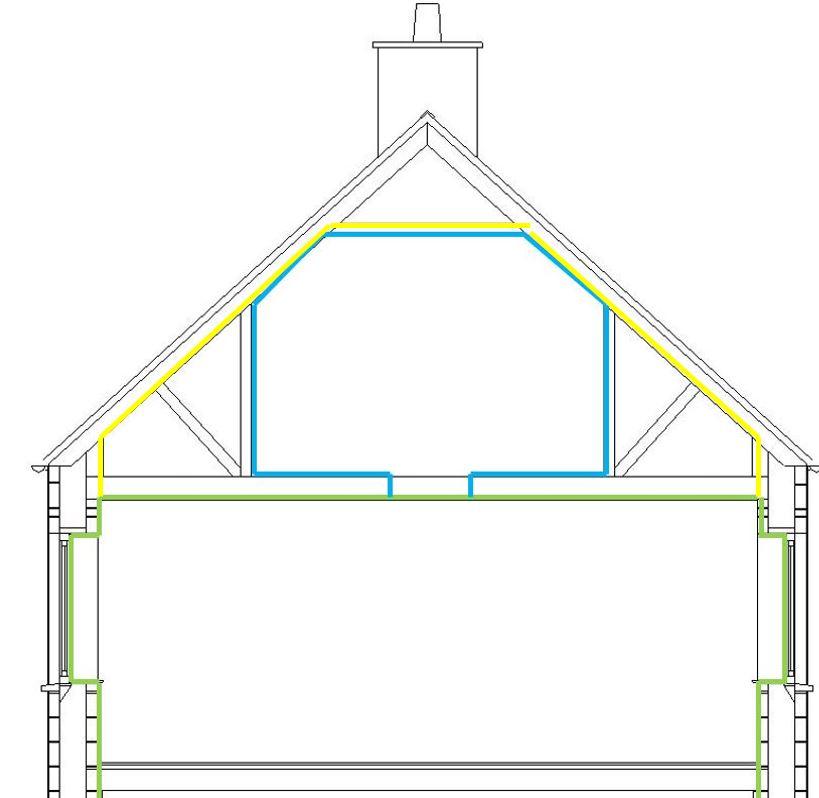
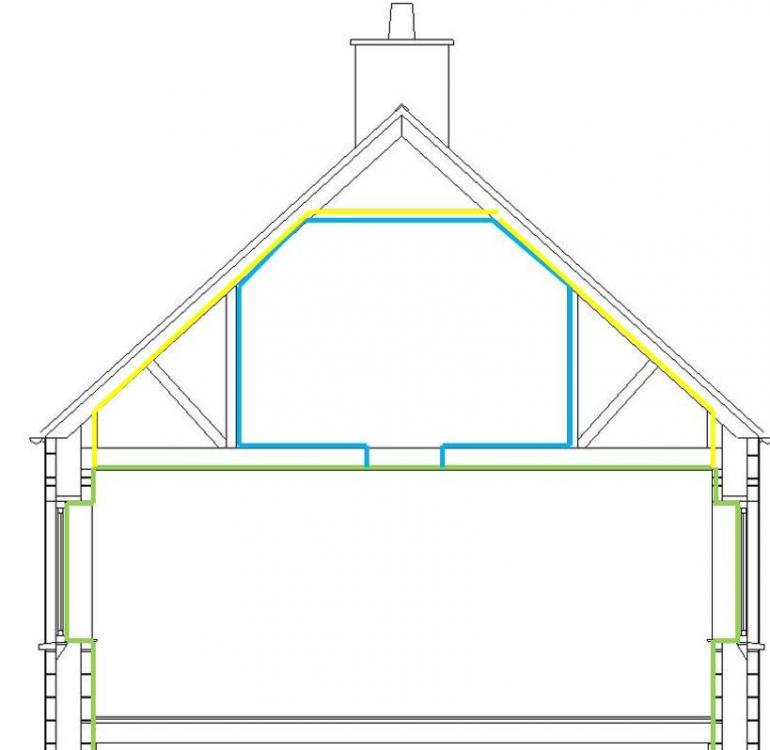
Yes did consider that, would be good for now may not help that much if/when we convert the attic space. If the air tight layer ultimately followed the yellow line in the sketch below, it would be ideal for services etc, but probably a real pain to get round the rafters... Lots of taping to rough swan wood presumably. Would that even work?
-
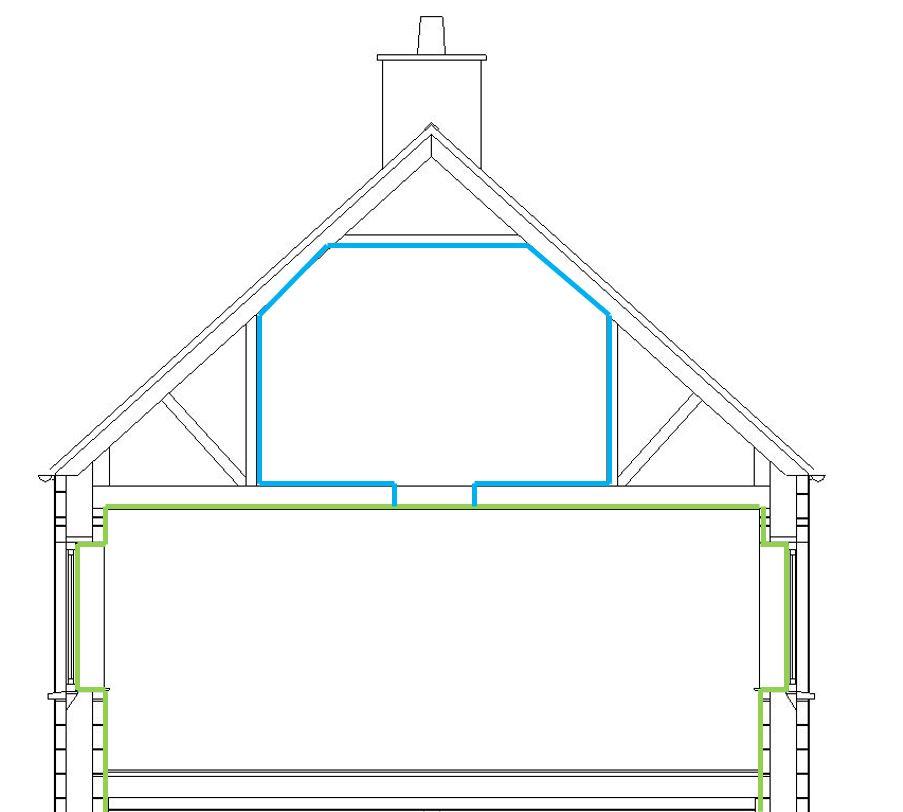
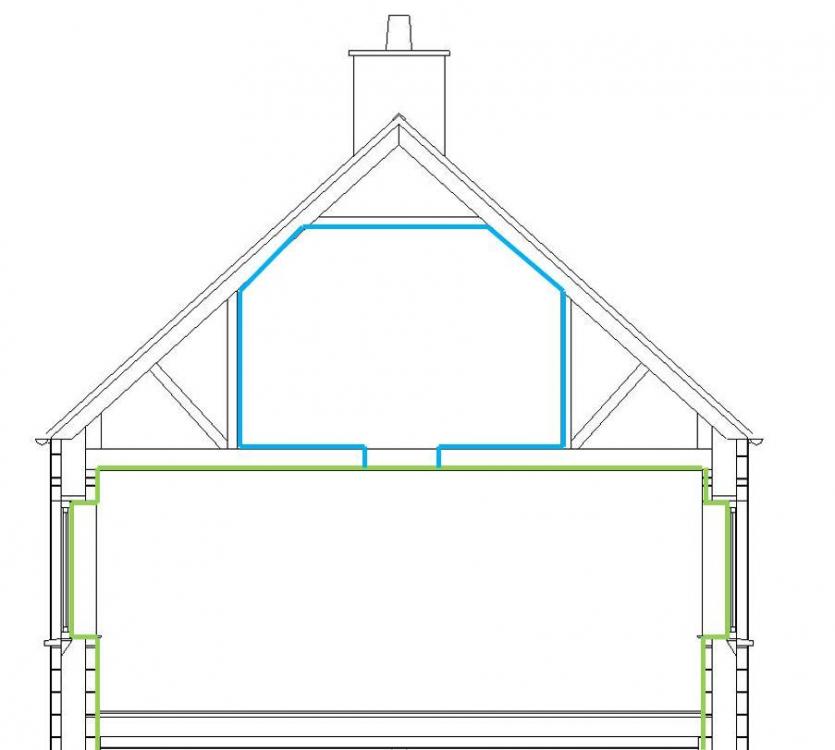
Hi folks I'm debating if I am going about the air tightness at my first floor ceiling the best way. We are to have attic trusses to allow future conversion of the space in the attic, and the build is to have a high level of air tightness. The provisional plan was to have the air tight layer in the first floor ceiling (shown in green below), and use air tight light fittings . Future conversion would then have the air tight layer follow the blue line in the sketch. Seems a bit convoluted though, and possibly not the best approach? Any thoughts on what best to do? Thanks Chris
-
Intrigued with the responses above, I got some silver sand, snowcrete and lime and did some experimenting on an old shed. 5:1:1 mix. Reasonably happy with this. With hindsight I should have put some effort into to applying it smoothly rather than rushidly throwing it on, as I think it would look better with a smooth surface finish.

-
I've heard the of snowcrete but know nothing of it. What mix would you typically use? I might get hold of some and do a trial.
-
Hi folks I am deliberating over external render choices, would be great to get some opinions on this. Wall construction is concrete block, and we want a durable white finish. The options so far seem to be: 1. Sand/cement render, painted. We've ruled this out as don't want to have to keep re-painting every few years 2. Monocouche render such as K-Rend. Have heard a few bad things about K-Rend such as discolouration, green slime growth... Not sure if that is due to lack of maintenance, poor application or just the way it is? 3.Thin coat silicone 4. Thin coat acrylic Has any else had good/bad experiences of K-Rend? Or any opinion on how it compares to one of the thin coat systems? Cheers,, Chris
-
Reasons given are it would be bridging the cavity, fixings would be bridging the vertical DPC, may invalidate guarantee of windows or fitting of them, and its just tradition and everyone does it that way.... With stainless steel fixings and given it'll be a full fill cavity and PVC window frames I'm struggling to see a major problem, though i'm no expert...
-
Ah, I get it. thanks. That looks good. I'd be keen to do the same, though we are being forced by the mortgage lender to involve an architect to oversee the build who is not too keen on bracketing the windows to the outer skin....
-
Hi Joe90. Thanks for sharing that. Can you explain to me about the 'angled button on side of window', is that a bracket off the frame to fix the plasterbaord too, or something simalar? Good point re the stop bead, I'll make a note of that.
-
Yes plan to have PIR closer beneath frame where it's not on the cill. Aim to minimise the overlap of frame to cill to minimise thermal bridging. Main concern is are PVC window frames going to be robust enough or do they need better support? Something like this (Not show is support for PIR or inner cill). Cavity insulation will be EPS bead.
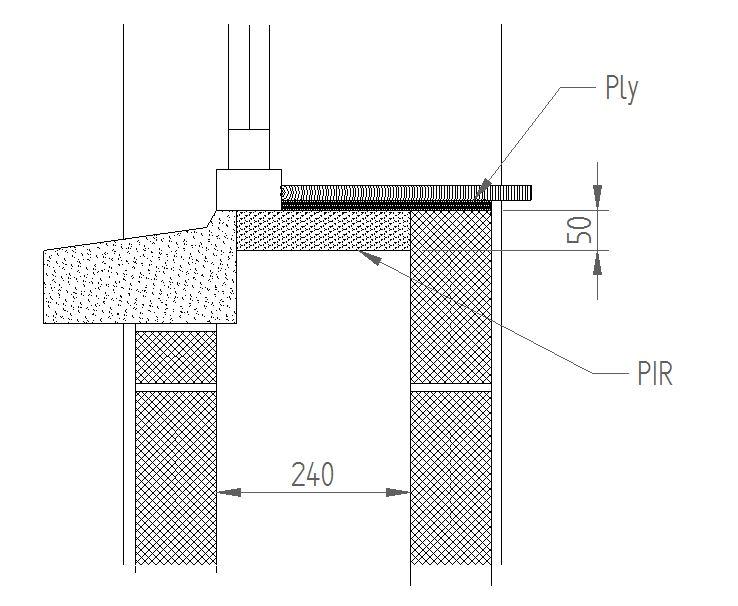
-
Hey folks, What are the thoughts on how much a window frame (with triple glazing) should sit on a concrete cill, with the aim of minimising thermal bridging? Is 25mm of the frame enough to take the weight? We're going for trad block cavity walls, but with a 240mm cavity. Wondering about using concrete cills intended for timber building that have a narrow, circa 25mm, wide strip for the window to sit on. The rest of the frame would overhang the cavity and have the immediate space filled with PIR to minimise thermal bridging. Hope that makes sense! Cheers
-
Ok, that makes sense. I've also been told that fixing to outer skin may breach the DPC, be a potential corrosion corrosion issue, and invalidate the window guarantee. I've also got angled reveals on the inside, and a rather large cavity (240mm). All makes it that little bit more complicated...
-
Hi folks, It appears to be convention for window fixing straps to be fixed to the inside skin of a cavity wall. Is there a reason for this, or more specifically is there a reason why I shouldn't attach to the outer skin? Outer skin will be block with render over it so no aesthetic reason not too. Reason I ask is that I have a 240mm cavity with the windows positioned just inside the cavity nearer the outer skin. Thanks.
-
Thanks ProDave Re your comment about the angle of the south wing, it's more to do with orientating it on the site regarding trees, view etc, rather than some arty architectural feature. I agree it complicates things, though how is the added complexity quantified into additional cost? This I have not yet been able to work out.
-
Thanks!! I've posted floor plans here:
-
Hi folks As I've just joined this forum (though been browsing for a while) guess I should share what i'm up to for critique! Getting close to submitting for building control and finding a builder, so not for making major changes, though all comments welcome. Some background notes: -There are great views to the south, west and north. - The lounge/dinning area are in the north eat will have a vaulted ceiling -The southern single storey area is an annex for a relative (whose house we are doing a replacement dwelling on). South and west views are a requirement for this . -There will be some outbuildings to the east forming a courtyard type of entrance area - Aiming for a high level of insulation, not quite passivhaus, but not too far from it (yes I am concerned about overheating, and how much the stoves will be lit...) Floor plans 31052019.pdf
-
Thanks for the replies folks. This is the floor system that I am planning on using: https://www.creaghconcrete.co.uk/spantherm/construction-detail.html?p=272 My research so far (google) shows people doing a variety of things as above comments, from leaving the soil bare to hardcore to 100mm of concrete. I spoke to someone in our local building control today (erm, suppose I should have just done that in the first place...) who said of the follow options oar acceptable: 1. 100mm hardcore under 150mm void, with periscopic vents 2. DPC, with a few stones sprinkled over keep it down, under 150mm void, with periscopic vents 3. DPC over it, with hardcore up to underside of the spantherm units. ie no void and no periscopic vents needed So I'm currently thinking that 2. is the cheapest option on the basis that periscopic vents will be cheaper than 100mm of hardcore. Does that make sense? Comments on that welcome!
-
Hi Folks If I use a suspended concrete ground floor, how best should the ground below be finished? I know that the the ground needs cleared of topsoil, 150mm void, and periscope ventilators will be required. However, should I put down a layer of blinding, or hardcore topped with blinding, or can I get away with leaving the earth exposed? The area I'm in does not require any radon gas layer, and the stony clay is about 1 to 1.3m deep before bedrock is hit. Thanks, Chris
-
Hi Folks, I'm Chris I'm about to start a self build, currently finalising details drawings for building control and potential builders. I've gained lots of useful info browsing this forum, no doubt i'll have lots of questions to post too. Build will be a cavity block wall construction with 240mm cavity with EPS bead fill. Aiming for something close to passivhause standard. Regards Chris