MJNewton
-
Posts
1347 -
Joined
-
Last visited
-
Days Won
1
Everything posted by MJNewton
-
Between my brother and I we massively over-ordered (due mainly to a change in approach for both jobs midway!) and so I've already shipped a couple of rolls. It was only £12(?) via Parcelforce48 although they were right on the limit for dimensions and so crossed my fingers on both occasions that I wouldn't be pulled up on it! This roll has been opened though so might not go quite as small as when first delivered, but then it might be slightly short. I'll sort out some photos this weekend as I've been meaning to do something about it for a while.
-
I found it was better to match the sealing rings with the pipe as whilst the inner and outer dimensions might be the same the the rib spacing was wver so slightly different. There is also a difference between the sealing rings with the Airflow being a bit 'beefier'. If you want an Airflow offcut message me your address and I'll send a piece over. I've also got a spare 50m roll (or nearly 50m - not sure if I used any) which I need to move on at some point too.
-

Recommended power provision for hob and oven
MJNewton replied to MJNewton's topic in Electrics - Kitchen & Bathroom
Ah, yes, that makes sense. Tails for a future appliance would then of course be something to consider then. I was assuming a larger cable would've also meant a larger MCB from the outset. -
Recommended power provision for hob and oven
MJNewton replied to MJNewton's topic in Electrics - Kitchen & Bathroom
Thinking about this further, I am assuming I would have to run a 10mm tail to the hob (and the oven) given that the MCB would be rated for a 10mm cable and nothing smaller? I haven't wired up a hob or oven for a long time, but would they take a 10mm cable? -
...and grave stones. Just make sure you put the writing on the correct side - on top for high-up shelves, underneath for low...
-
Cold spots bottom of radiators (40c)
MJNewton replied to Benjseb's topic in Air Source Heat Pumps (ASHP)
What's the temperature of the return pipe? If that is also also low then it could be down to low flow, but if not then that'd suggest sludge (causing water not to circulate in the affected part of the radiator). -
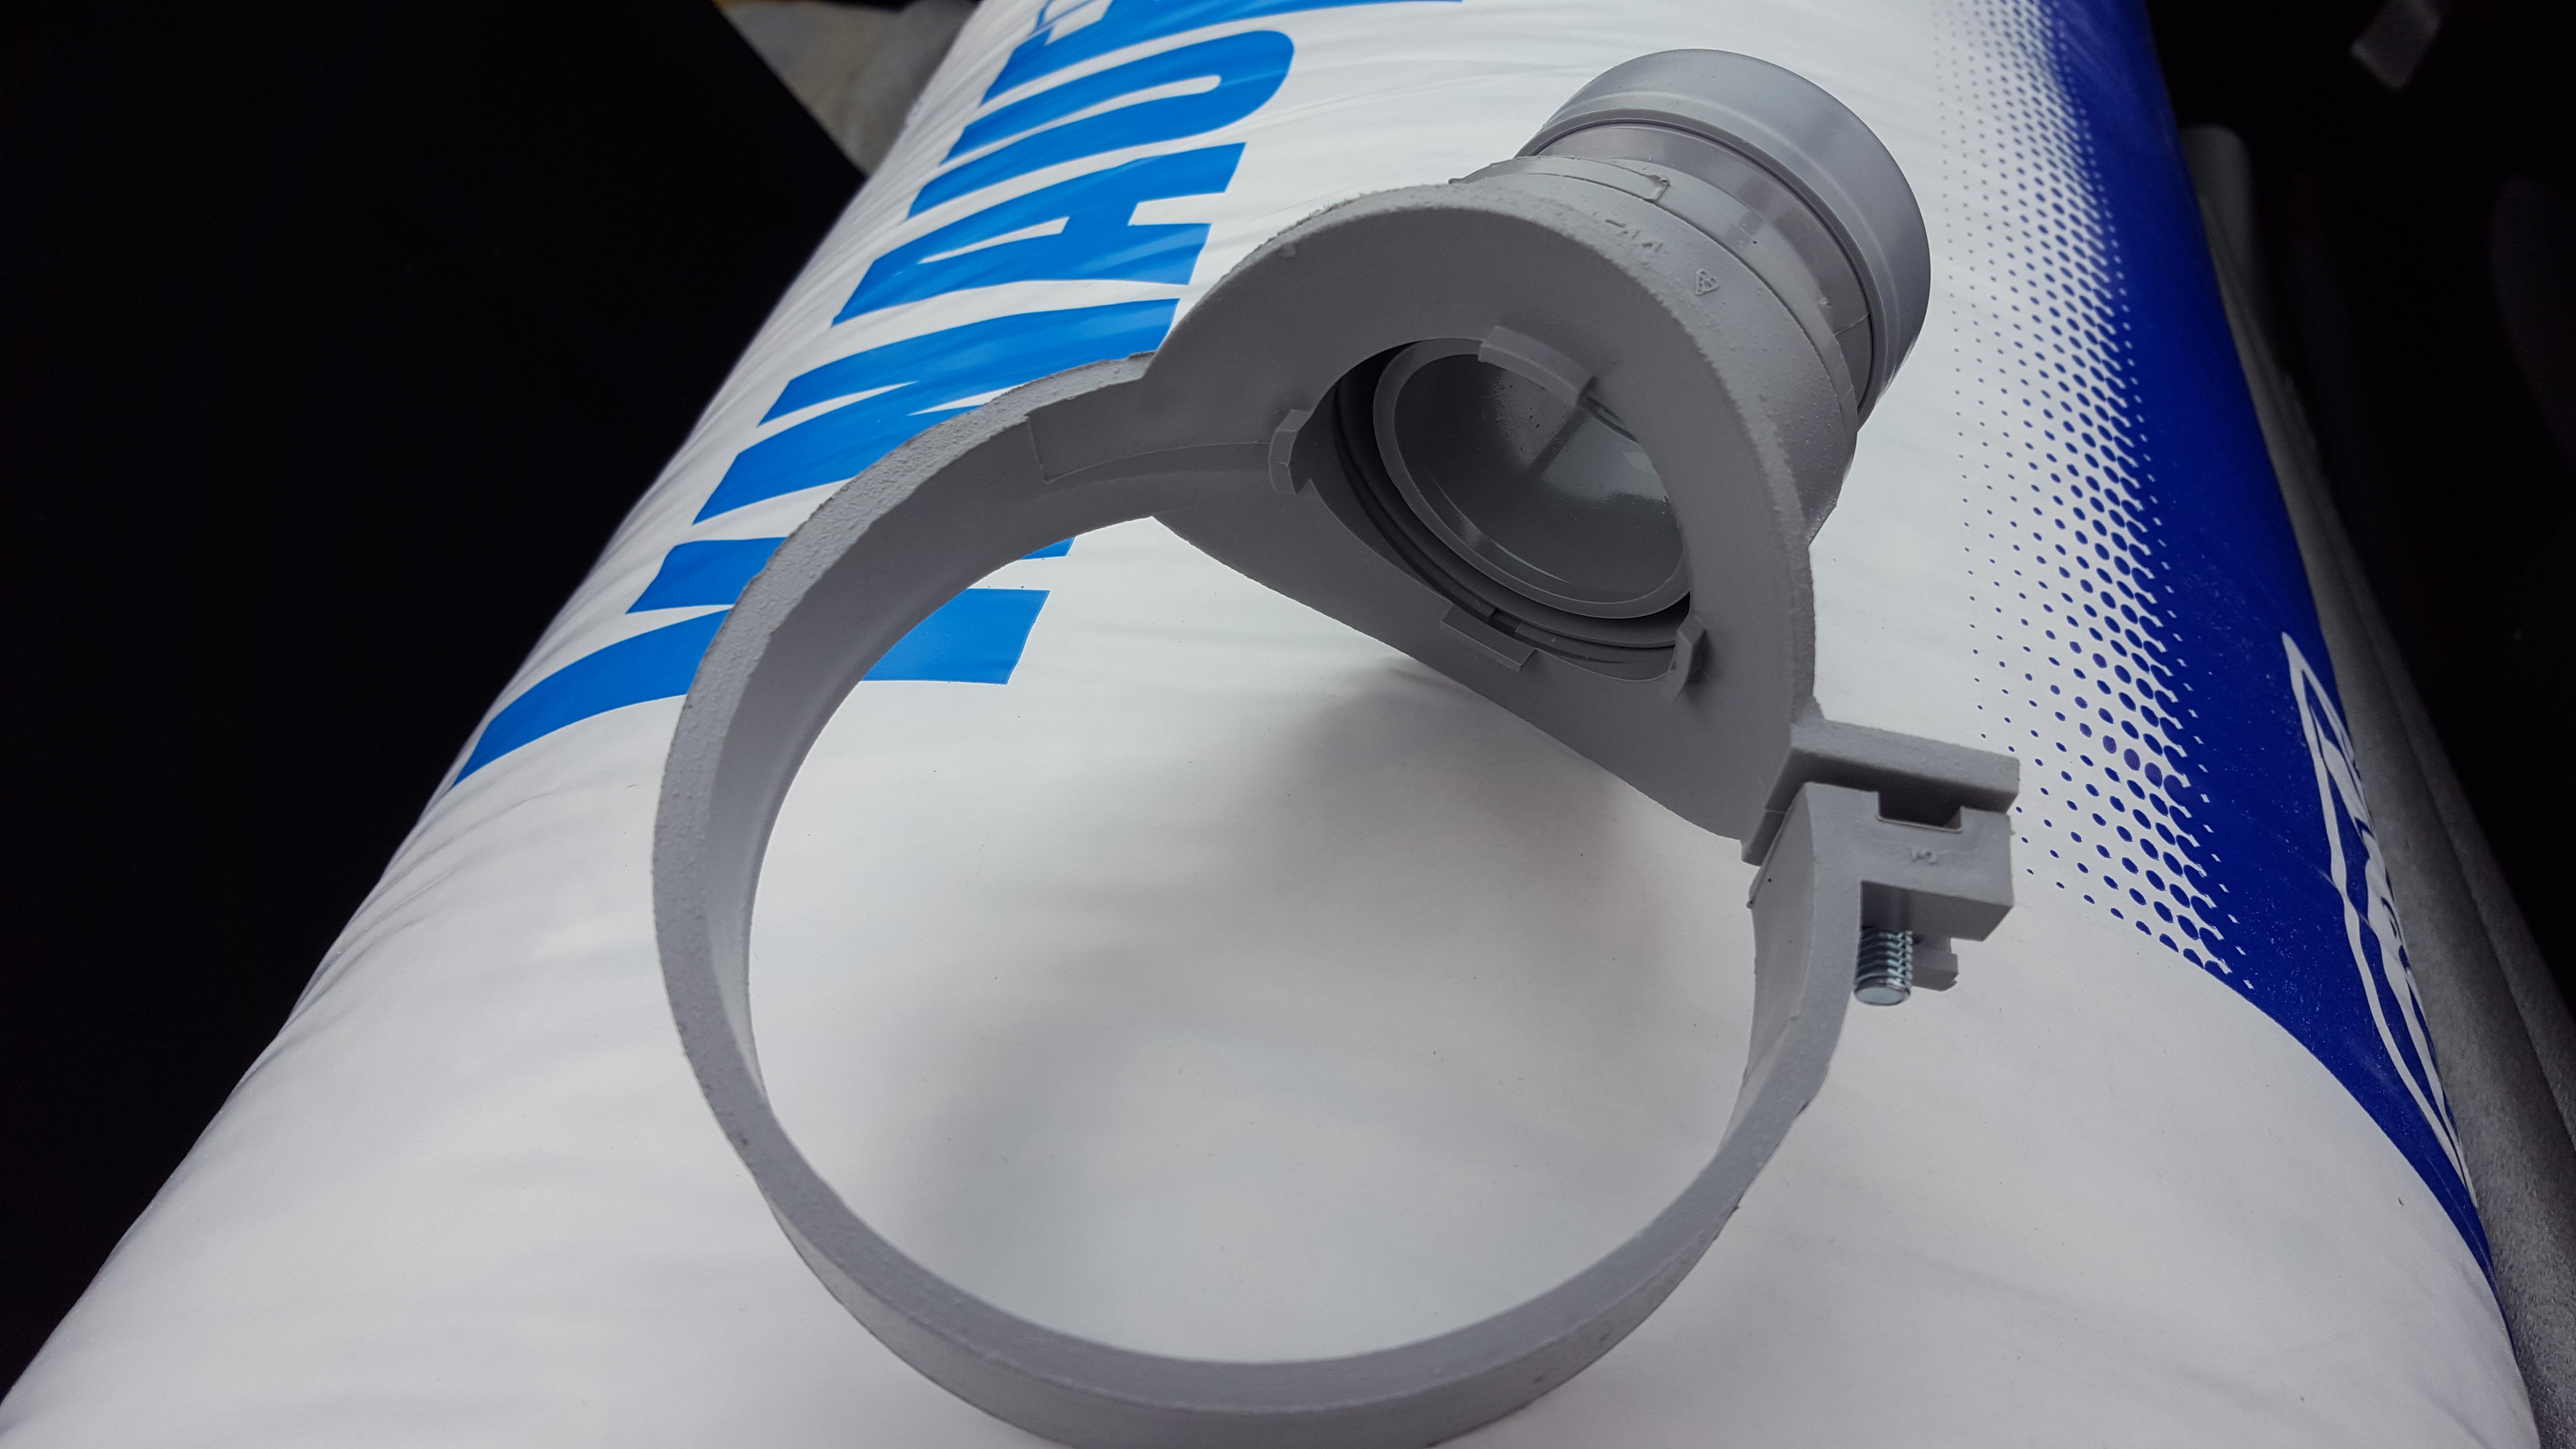
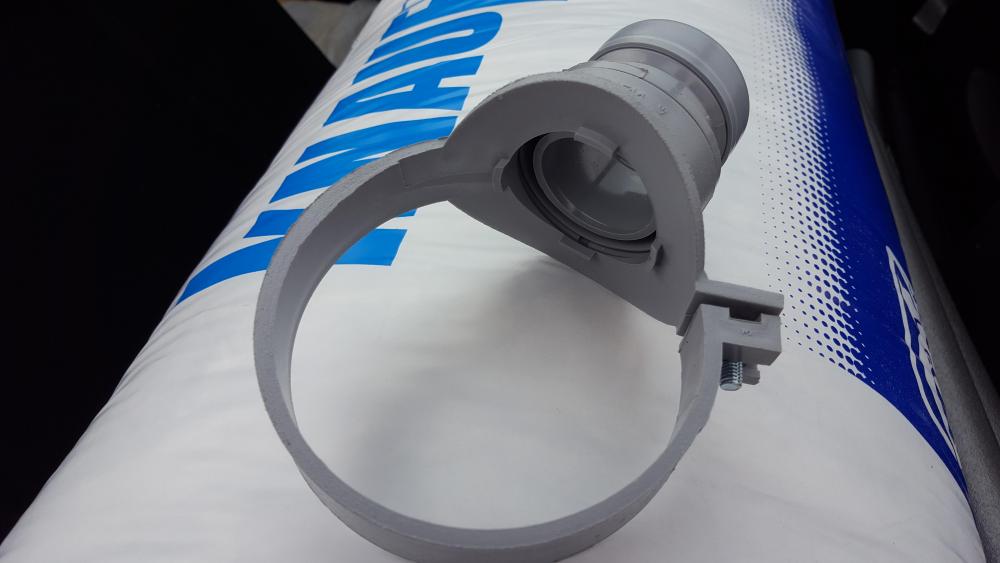
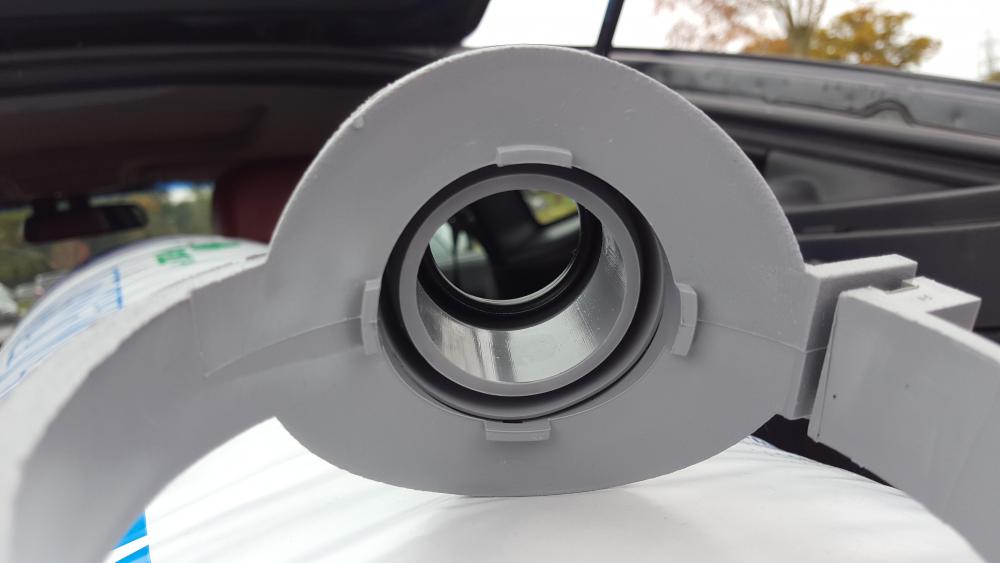
I'm still a bit nervous about this job, mainly due to the limited access to the soil pipe and consequences if I don't get the weld good. I stumbled across the McAlpine mechanical stap boss which seems to get good reviews on the Screwfix site, several of which note a preference over the solvent weld variety. Has anyone used one? I am warming to it given I think it'll be a bit more forgiving than the 'one chance, dont mess it up' solvent weld strap boss option... (For those not familiar with it, this photo is of it with the winged installation tool present which is removed after fitting) I figured I could also add a ring of silicone on that mating face for added reassurance over just the expanding doughnut.
-
Hi Woodman, [Incidentally, this thread would probably sit better in the MVHR forum as it'd get more eyeballs on it there] It is interesting they are specifying different bend radiuses for their different ducting now as that was what I was going to comment on. I have used both Airflow (the red stuff) and Blauberg (green, which I suspect is what BPC are selling under the 'Quiet Vent' branding) and they are very different in performance when it comes to bends. With Airflow you can bend it right back on itself (not that you'd want to) and it keeps its shape however the Blauberg pipe kinks if you go too far with it. The Airflow stuff feels a much higher quality product and I'd suggest paying the premium for it for peace of mind as once it's in the house fabric it ain't coming out again! That sounds like a bit of a bodge, and I think you'd struggle to crush as planned without damaging it. Far better IMHO would be to use the HB+ restrictor rings at the manifold end as whilst they are designed to fit in the HB+ manifold connectors they should, if trimmed down slightly, fit in any other connector between the pipe and the connector. Pricey for what they are but, as you have read, better at restricting flow from a noise perspective. I wouldn't worry too much about specs as I beleive they would take some deep knowledge to meaningfully compare as I can't imagine you can sum up a silencer with a single figure as its performance will vary depending on frequency and any other properties of sound that I don't know anything about. I've got the Blauberg silencer but cannot comment on performance beyond saying I don't get noise from my terminals (I haven't tried it without in all honesty but for £30 for their 600mm one I thought it worthwhile). Don't be afraid of cherry-picking different components from different manufacturers as they all should work together (some notable exception such as manifolds requiring matching connectors). I've got a Titon MVHR, Airflow ducting, Blauberg manifolds, connectors and silencer, Domus ceiling plenums and some others that are homemade (mine was a retrofit so above-ceiling access wasn't always possible), HB+ ceiling vents and HB+ restrictors. I tried to pick whatever I considered to be the 'best' aspects (function and value for money) from each range.
-
Recommended power provision for hob and oven
MJNewton replied to MJNewton's topic in Electrics - Kitchen & Bathroom
I did wonder about that, but was picturing things as if I had a combined hob and oven (a 'cooker'), but I suppose that's not what I have so probably shouldn't! I also wondered that, if leaving diversity aside, if the hob and oven are both turned on running flat out (all rings, both cavities - Christmas dinner sort of thing) until the stats open they'd be drawing 55A which is surely pushing a 6mm2 cable towards sweating a bit. -
The design of our new kitchen for our open-plan extension is slowly maturing and, having decided what induction hob and double built-under oven we want, I would be grateful for opinions on what power supply(/ies) to run to them. The specs are: Hob: AEG IKB64401FB, Total Loading 7350W (/230V = 32A) Oven: AEG DUB331110M, Total Loading 5300W (/230V = 23A) The route from the CU to the hob+oven is pretty straightforward: Up 1m inside an uninsulated stud wall, across 5m inside an uninsulated ceiling and down 1.5m behind uninsulated plasterboard. Taking the IET OSG guidance on diversity for cooking appliances, the total supply requirements would be: First 10A + 30% of remainder = 10 + ( ((32+23)-10) x 0.3) = 10 + 13.5 = 23.5A If my understanding and calculations are correct a single 6mm2 going to a single 45A DP switch (a rare white one!) and dual appliance outlet plate should suffice. This would be adequately protected by a 32A MCB. However, for future proofing (and better/safer? operation) should I put two 6mm2 cables in instead, each with there own 32A MCB? Or perhaps a single 10mm2 with a 40A MCB? Running cable is easy at the moment as the ceiling is down and I have open access to the rear of the CU (which, whilst a bit tight for wiring, does have some spare ways). Note that this open-plan extension is being done under building control and so, with the hob+oven being a new circuit and therefore notifiable, I plan to get an electrician in to do the work (and, more importantly, give me the necessary certificate for sign-off) however I wanted to give some thought myself to what we should do in advance of asking them (whoever that might be).
-
It's off! I'm pleased to report it was quite straightforward in the end and I only required a hammer and my small breaker bar. The suggestion to strike the side of the nail heads where they lay completely flush helped get them moving slightly and then I could hammer in the claw of the breaker and ease them out without too much fuss. Indeed it was the other (supposedly 'easy' I thought!) side with the screws that gave me the most grief with me grazing knuckles and having to work above my head. Thanks again for all the suggestions - it was good to go into this with some options up my sleeve!
-
This pipe is white and so I was making the assumption it was an 'above ground' pipe and thus likely to accept solvent weld. Given what Temp had said though I was still a bit worried, particularly as I could see on another soil pipe in the house it went into a pushfit socket where it entered the floor. However, poking around at the top end of this other soil pipe I could see there was a barcode stuck to the top which I could just about retrieve and it said 'Osma 110mm Solvent Weld Single Socket' so I can breathe a sigh of relief!
-
@woodman I think BPC just recommend stuffing a coarse filter inside your normal vent? Perhaps a 1m2 sheet of G3 filter media cut up and used in a similar way would suffice?
-
Would that concern apply to soil pipe?
-
Thanks everyone; it doesn't sound like my concerns are really concerns afterall. I suppose given that the surface of the soil pipe will be softened then even if the mould lines were going to present a ridge they would just 'bite' into the pipe anyway. I note that whilst the boss adapter (Osma 2S399) will be solvent welded into the strap boss it just has a push-fit connection seal for the incoming 40mm pipe. I was expecting this to be solvent welded also, and perhaps would've preferred this given the joint will eventually be inaccessible. Shouldn't be a problem if properly inserted and supported I suppose. (Good to see it has mould lines too!)
-
For our new kitchen I need to tap into an internal soil stack in an adjacent to provide drainage to the sink and dishwasher. With it being an existing soils stack (therefore being unable to add a proper branch) I am going for a solvent weld strap boss. I am all too conscious of the fact that I've got one shot at this; and just to make life a bit more difficult access is quite difficult. Oh, and it's my first ever solvent weld. I opted to go for a quality make (Osma), that also matched the make of the existing pipe, and was a little surprised when I picked it up this morning to find that the mating surfaces weren't perfectly smooth. In particular there are mould lines that you can hopefully make out at the 3 and 9 o'clock positions in the second picture below: My understanding was that solvent weld isn't an adhesive but rather loosens the polymer chains of the mating surfaces which, when reformed, bind them together as one. Would non-perfectly-smooth surfaces inhibit this, or is the welding action quite significant in terms of how deep this loosening goes? Perhaps there are gap-filling properties also, or would that bring it back into being an adhesive? I did ask the guy on the plumbing counter if it was definitely okay but I could tell halfway through my question that he either didn't have a clue or couldn't care less either way (perhaps both!). I did wonder if I should smooth it out when a stanley blade, but didn't want to potentially cause a problem when one might not already exist! Any comments?
-
Thanks everyone - I'm certainly not short on ideas now! Will start with the simple and progress from there!
-
I bet! Trouble is I'd be going around pulling out nails that don't need pulling out... just because I could.
-
That looks like a beast of a tool; will see how I get on with my 'normal' tools first. Regarding mole grips I never seem to have much joy with them (limited grip). I wondered if maybe my grips are just of poor quality but I seem to recall they are the genuine article. Or could just be user error... It is reassuring to have heard so many suggestions, and not one person (yet!) say that they won't come out (or not without ripping half the surrounding timber out with them!).
-
I do have one but thank you anyway. Will definitely try with a chisel to start things off. Edit: And, yes, I might add blockers just for peace of mind.
-
The instructions/diagrams don't show it being done... Was it the holes that gave you that thought? If so, they are triangular and I think in Simpson-speak that means they're for something else rather than driving a nail through...
-
There's actually two - the other being on the other side. It however is screwed in as, whilst not as good from a strength perspective, there was no room to swing a hammer as it's the last joist in the run so sits around 10cm from the wall running parrallel to it. They went in with a right-angled screwdriver so should come out the same way! Thanks everyone for the suggestions. I'll start with a bit of prying (autocorrect quite rightly suggested praying!) or a chisel, a forked mini wrecking bar, pincers and a claw hammer before either investing in another tool or chanting 'off with their heads!'.
-
I haven't tried anything yet beyond standing underneath it admiring the problem! I've intentionally delayed the job until the weekend to avoid adding another hasty mistake on top of the first! That's a good call about maybe prying the plate itself to help get them moving, even just to give me a bit more purchase on the heads with whatever tools I can lay may hands on.
-
Grrr... As seems to happen all too often for me, I was a bit hasty with the placement of something and now want to move it. In this case it is a Simpson I-Joists hole support like the following: As per this stock photo I have fitted it towards the end of an I-joist to allow me to safely cut a large hole in the webbing (for a 75mm semi-rigid duct to pass through). I now wish to move it a few inches along (haven't cut the hole yet) and hence need to remove the 30mm square twist nails which took some force to get in and I fear will take considerably more to get out! My if-all-else-fails fallback assumption was to grind the heads off (with a Dremel or angle grinder if need be) and leave the shanks in place but I am wondering if I've got any hope of removal without resorting to this. Is this doable?
-
Silestone worktops from DIY Kitchens (or elsewhere?)
MJNewton replied to MJNewton's topic in Kitchen Units & Worktops
Just heard back from Natural Stone Surfaces in Derbyshire as I sent a quote request to them. My layout plan had the DIY Kitchens URL on it, which they spotted, and they advised [...] Edit: I won't paraphrase; here's what they said verbatim: Nice to hear such honesty!