
the windy roost Cabin Foundations and the Amenity block.

Entry posted by Jenki in Cabin Foundations
2594 views
My dual roles for the first 10 days of the June / July trip was to get ready for concreting.
This breaks down into two slab / raft foundations for the Cabins, 1 slab for the amenity block, and some backfilling of the treatment plant, and while I'm at it, concrete for the Polycarbonate Polly tunnel. another blog to follow.
In my opinion, the structural calculations for the slab rafts were well over engineered. the slabs will be ground bearing (rock) foundation and thinner slab, all poured at the same time.
The Radon barrier and timber frame will sit on this, with an insulated floating chipboard floor. I know this will give some thermal bridge on the timber frame, but these are camping cabins not the house. Costs said this was the way forward.
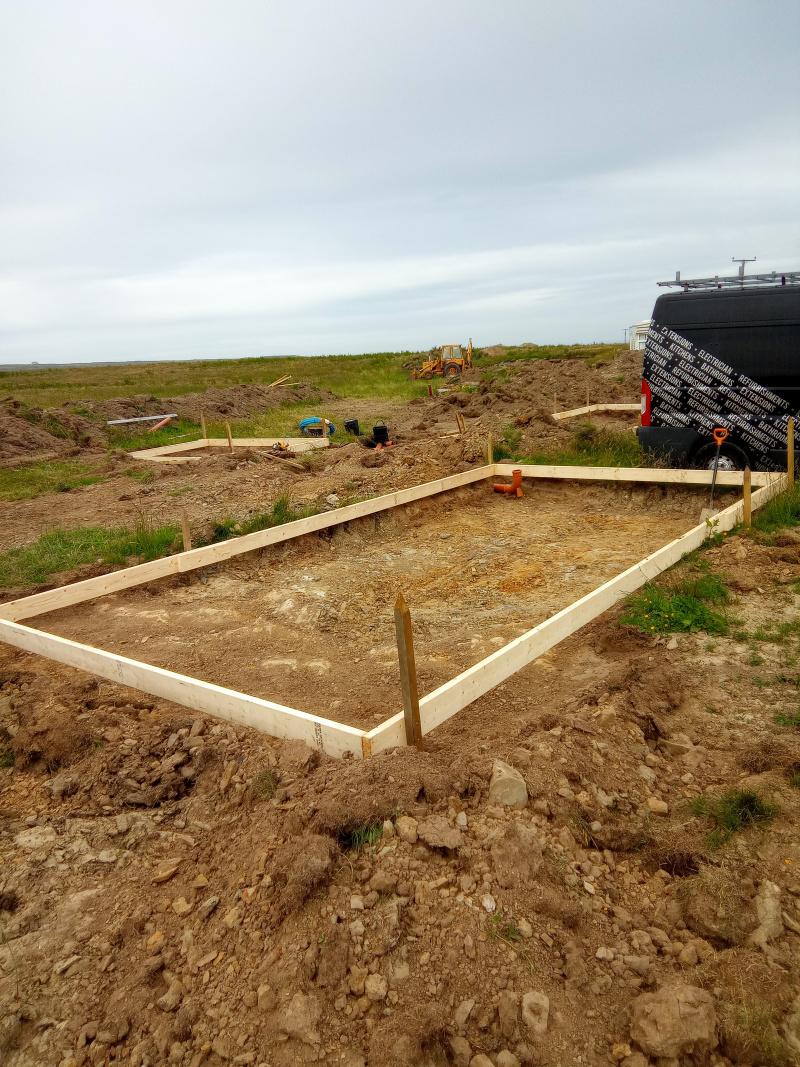
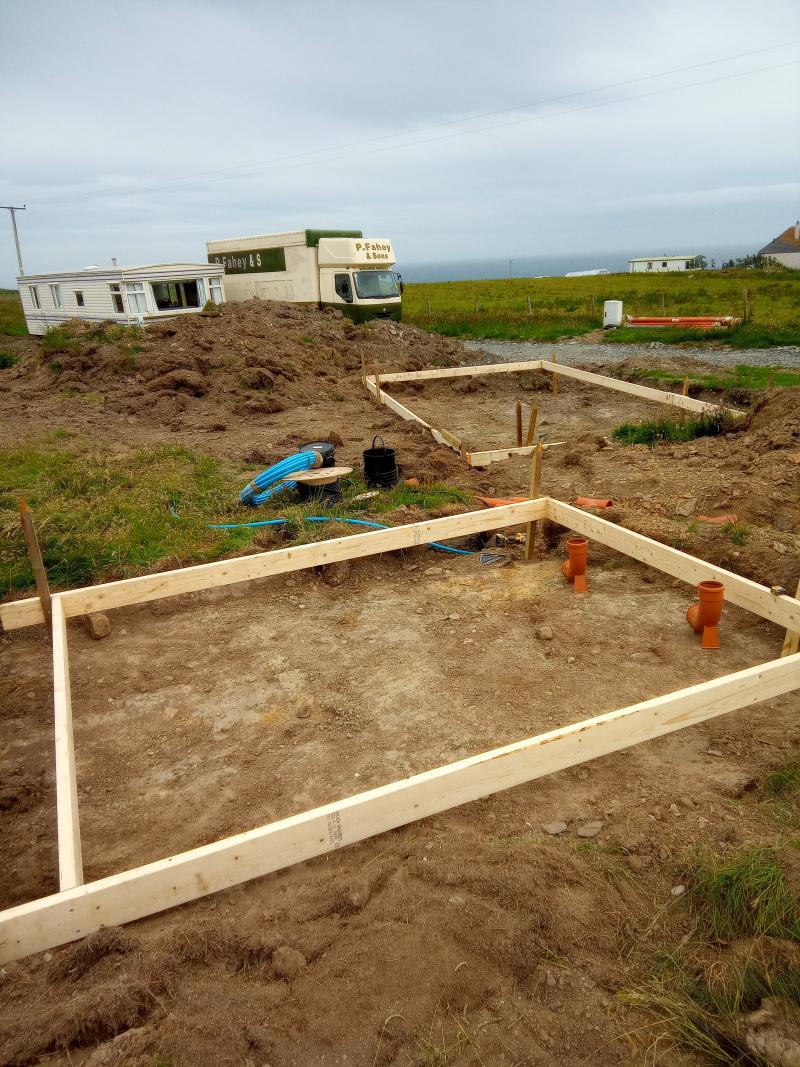
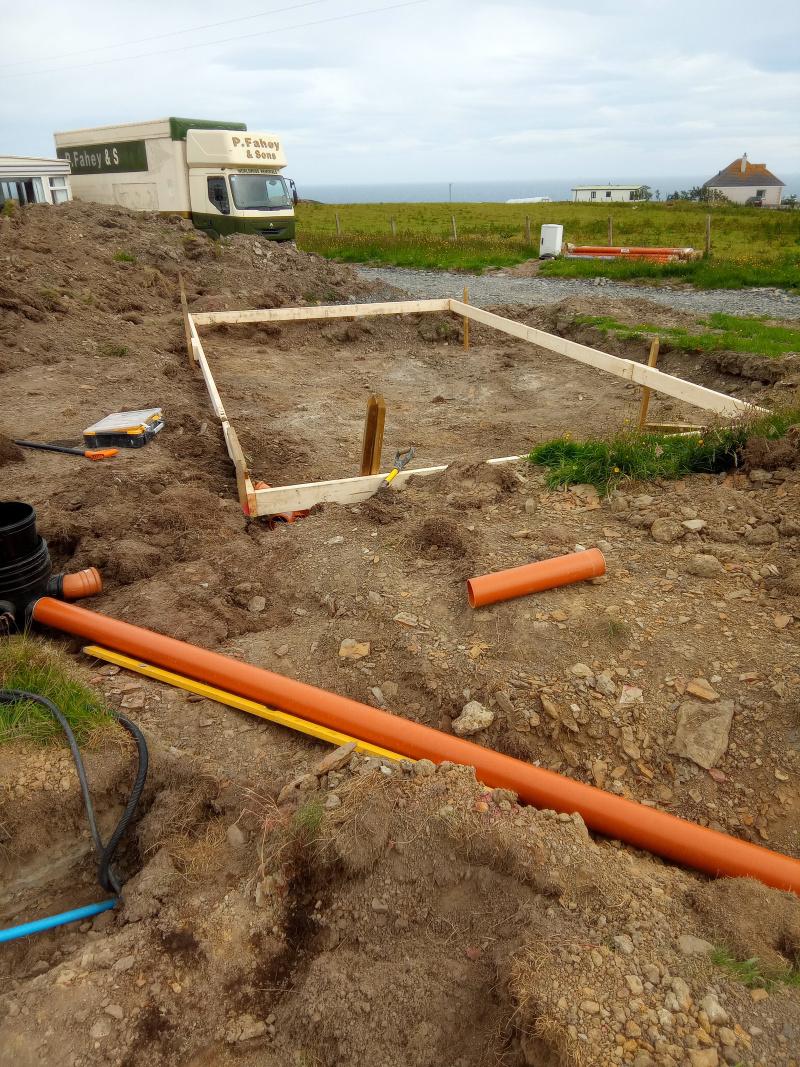
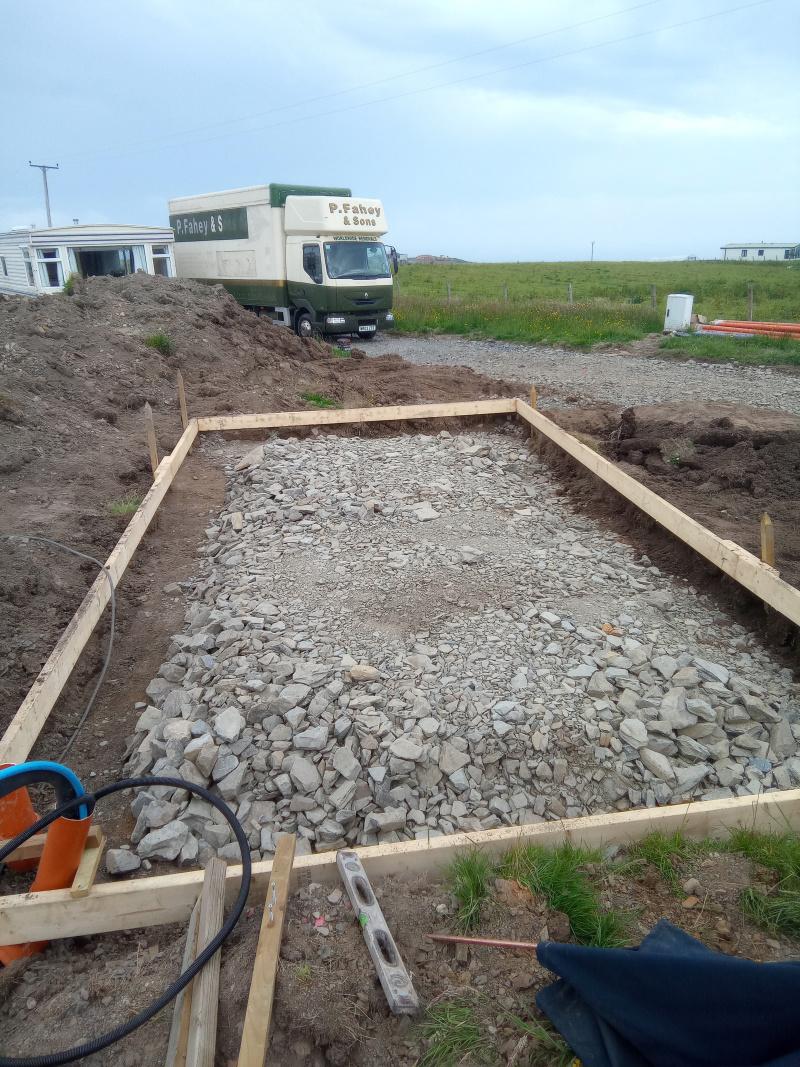
I'd already exposed the rock for the cabins, so BC could see this, and was happy for me to crack on. I framed the the cabins with 6x2 timber, and levelled this formwork.
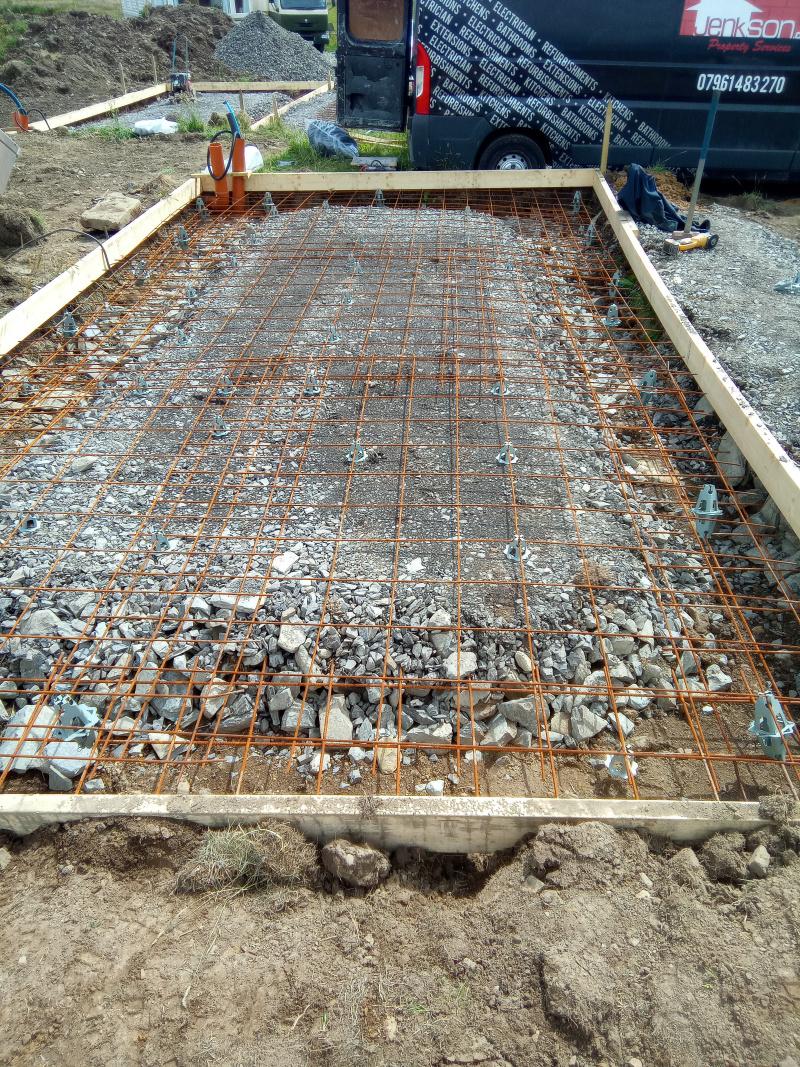
Then used crush and run to raise the central slab area up, to leave me a 100mm thick slab with thickened foundation perimeter. This perimeter varied due to the level of the rock. I used around 6 ton of MOT in each cabin., then A252 around the base of the foundation and A142 across the slab.
At the corners of each slab I ran the WC waste, and also a feed for H&C water, power and internet supplied for the amenity block.
The amenity block was a simple 150mm Slab on compacted hardcore.
With this prep done, my wife, (the now only breadwinner for the next 8 weeks), was due on site, for a baptism of fire.....
To be fair Saturday and Sunday consisted of me and Mandy getting the mesh in place and getting the post support for the extended roof of the cabins dug, tying the mesh, getting the post support brackets ready. and some land clearing/ hole digging for the Poly tunnel.
Monday is concrete day..... The plan was simple. the truck would reverse up to each cabin, drop around 5 Cube in the cabin, whilst I'm levelling, then the remainder would go into the amenity block. we would float this, and then when the truck came back pour the second cabin, finish the amenity block, and whilst waiting for the truck to come back get this floated off. the last load would be the treatment plant (this would be using the loader bucket) and leave a little for the poly tunnel.. easy 15cube, no problem..
It didn't work this way, Mandy, who is game for anything, but being an engineer needs to know what she is doing. She has never laid a slab.. didn't matter, because I was going to do it, no problem. she was there as a go for, and edge trowel-er
(I must point out, I knew that the surface finish wasn't important, as its being covered with insulation and membrane - but)
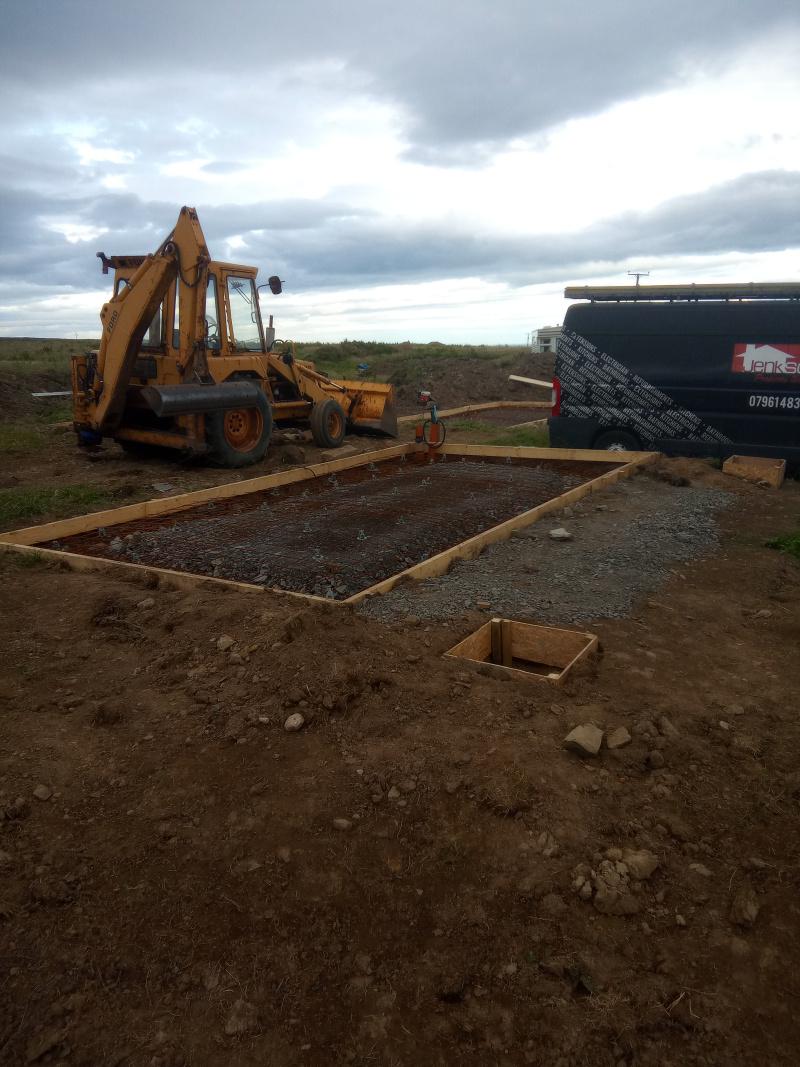
The wagon turned up around 10, after a 30 min trip to site, the day was damp, with slight rain, not overly hot, the driver would not drive on to the earth next to the cabins. So I had to use the loader. (an old Ford 550)
the first half bucket was solid, I could tell by the colour, there was a lot of cement in the mix, I told him to add water, lots of water, but he didn't have "loads" so the best we got as a stiff slump, I loaded as fast as I could, and Mandy was trying her best to rake / shovel this level, and she was doing a great job, but she didn't know what she was doing, and it was hard work.
I thought the concrete was wetter than it was. after about and hour we had the concrete out and some in the amenity block, but it was far from level, and starting to go off. I had to use the loader to level some more, than then used my beams to get it flat.
This was hard, and the bull float wasn't bringing up a lot of cream.....
I asked for a wetter mix for the second drop and asked for 2 hours to get set.
I got the slab flat and fairly good, but not great.
Whilst Mandy was teaching herself to drive the digger, (she wasn't having round 2 with the rake).
Round two was worse, the mix although a little wetter, was setting faster. Mandy put the first few loads into the amenity block and I levelled this, then started on cabin 2, it was a real graft. Again the loader was used to move the setting concrete, there was some concrete left, so this went into the treatment plant pit. With the running around the site, cabin 2 slab was far from finished and I had to resort to putting water on top to help. Not my best day.
I get the slab level., but floating was not producing a smooth mirror like finish.
We also had to set in the post support into the 4 shuttered blocks. and had around 3/4 of a bucket left in the loader. We rounded the day off with setting the posts in the poly tunnel.
We got cleaned up around 18.00. The amenity block and 2 cabins were flat and floated, but not fantastic (hence no photos). the treatment plant had around 1 cube of concrete and the 14 posts were set. 13Cube of concrete, and Mandy politely informed me, she was never concreting again....
Tuesday, we needed to finish off the treatment plant. but couldn't get concrete until late afternoon.
The morning we started on the poly tunnel, but decided that we needed more concrete, so created a shutter to link all the posts with a plinth.
The 3rd Batch of concrete was the worse, we did about 9 loads with the bucket and it was setting again. we left a full bucket for the poly tunnel, levelled the concrete around the treatment plant. (the driver informed me, that I probably had got more than 2 cube, as there was some in the mixer when he loaded mine, so that explains it going off real quick then.
Anyway. we persevered, were still married and talking to each other, and we achieved the goals.....
The future house slab pour will need more people, a different concrete company, and a solution that doesn't need my digger, PUMPS are not common this far north, thinking cap on.
thanks for reading.
Edited by Jenki
-
 2
2
3 Comments
Recommended Comments
Create an account or sign in to comment
You need to be a member in order to leave a comment
Create an account
Sign up for a new account in our community. It's easy!
Register a new accountSign in
Already have an account? Sign in here.
Sign In Now