

MVHR Install

Entry posted by le-cerveau
3521 views
I will write about the install of my MVHR system, as this is something I have done myself (with help). Theo house is being built by my contractor, supervised by my Architect and QS (who is the CDM). As I am remote from the location I can only watch what happens on CCTV. When I was last there the old house was standing and we had disconnected the services. 6 Months later, I have a new house, Weather tight shell, Windows and doors in, sarking and felt on, and tiles and PV being fitted. I am doing the MVHR as I couldn’t find a company to design and install what I wanted so I did it myself. Had a slot in the schedule for me to work and got on with it. Internally the team were completing first fix joinery (all the stud work). This was the two-man team who are always on site and are doing the majority of the work, the company bring in others when required, but the two in the house whilst I was there are my main team.
My design:
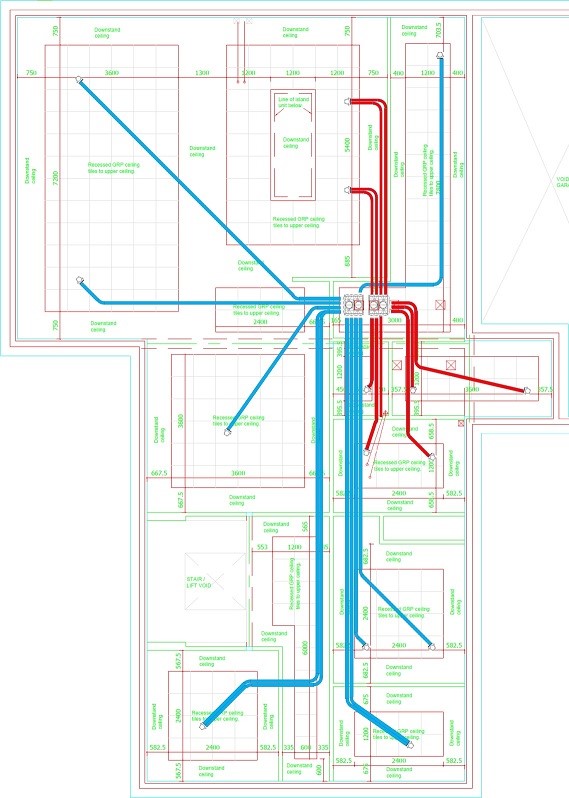

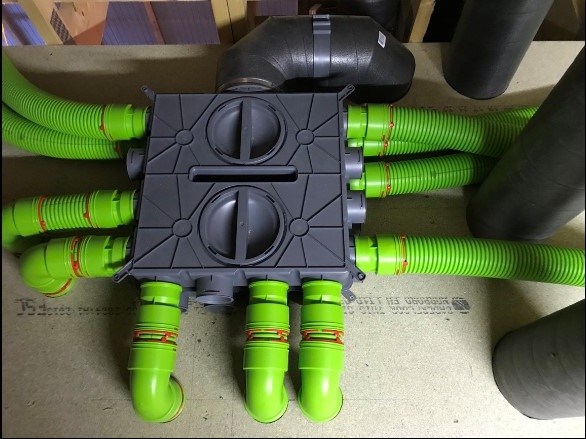
This is my layout as planned, 2 x Brink Renovent 400 Plus units, 4 x Ubbink AE 24 port distribution boxes, 180mm insulated duct and silencers for the main runs and 350m of AE48C duct, 50m of AE34C duct with all the associated connectors and fittings. A total of 36 outlets/terminals….. Suffice to say it is a lot of equipment. It arrived on 8 pallets at around 1100 on the Tuesday morning. I sourced all my equipment from CVC who were/are great, arranging delivery slots, supplying additional equipment quickly, and I still have an outstanding order for the vent terminals and some other bits still to complete.
I arrived on the Monday lunchtime after 6 days of traveling (not all to get there) and had a meeting with the site manager and the first thing we agreed on was to board out the plant room with MDF (as a final finish) so that we could install the equipment and be done with it (rather than approximately place it and then remove awaiting final plastering) This turned out to be one of the best decisions as work could be finalized and other trades could also finish work in there (First fix electrical could fit the 24 way 3 phase CU)… We also got the loft boarded out at this point to enable the first floor runs to be completed.
On Tuesday morning the building team started boarding the plant room, starting on the wall that the MVHR units were to be sited as a priority, this was completed by the end of the day and then started on the attic boards. Once the delivery had arrived and I had checked it I had some initial work to do. First to install the acoustic insulation into the distribution boxes and trim the spigots to the 180mm mark and move 2 of them to the top for the ground floor. I the attached the first 2 silencers to the top mounted distribution boxes (Large jubilee clips (44-217mm) work perfectly). These would then be mounted against the ceiling with the silencers running up into the plant room. (the first floor is 250mm concrete planks and I am having a suspended ceiling to put all the services in).
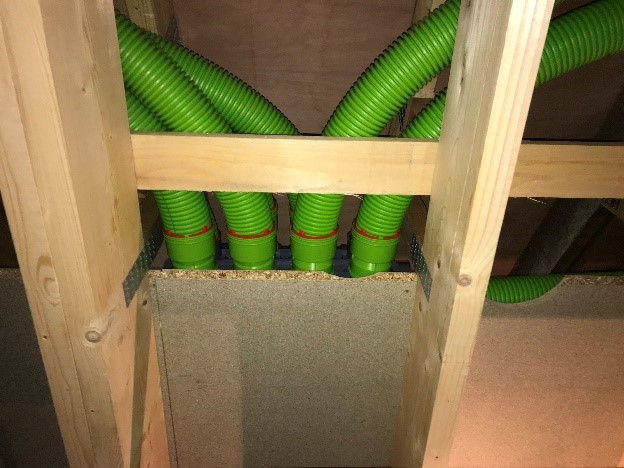
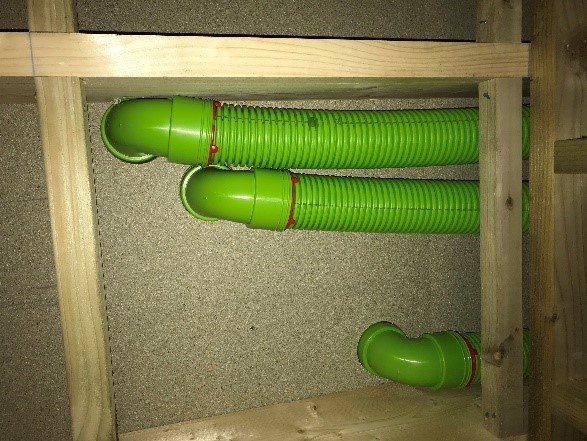
This is where having a builder with all the equipment to hand come in handy. One of the team then worked with me, the manifolds were fixed to the ceiling, simple concrete screws direct into the planks and then we started on the ground floor ducting. (I had pre calculated what ducts from what rolls, but that got altered on the fly when we had longer lengths remaining) The duct was run through the stud work and fixed approximately every 2 meters either with wood screws to the stud work or concrete screws to the ceiling. Rather than buying the Ubbink fixings £15.42 for 10, I used builders band £10.00 for 10m and plumbers felt £10.00 for 20m (you can probably get it cheaper) as the fixings.
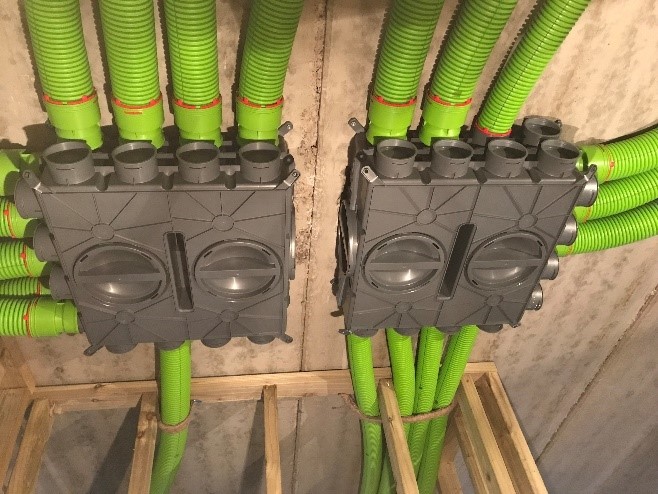
The above shows the 2 ground floor manifolds and you can see how the builders band and felt was used. We got most of the ground floor ducting done in one afternoon. The terminals were left dangling with about 1m to the previous fixing to allow them to be positioned by the plasterers when the fit the suspended ceiling as they will be positioned either in the centre of a ceiling tile or plasterboard (room dependent).
Wednesday started out installing the MVHR units as the main ducts needed to be installed before the attic runs could be done, this also allowed time to continue boarding out the attic. The first unit was positioned on the wall and to support it extra noggins were installed behind the wall, easy when the stud work is still open:
We mounted the second MVHR unit then measured and marked out the penetrations for the ceiling. Then the builders simply took down the ceiling boards, cut them out and put them, back up. The ducts then had a perfectly snug fit through the ceiling. The two silencers going into the attic had to be slightly compressed oval to fit due to a double joist.

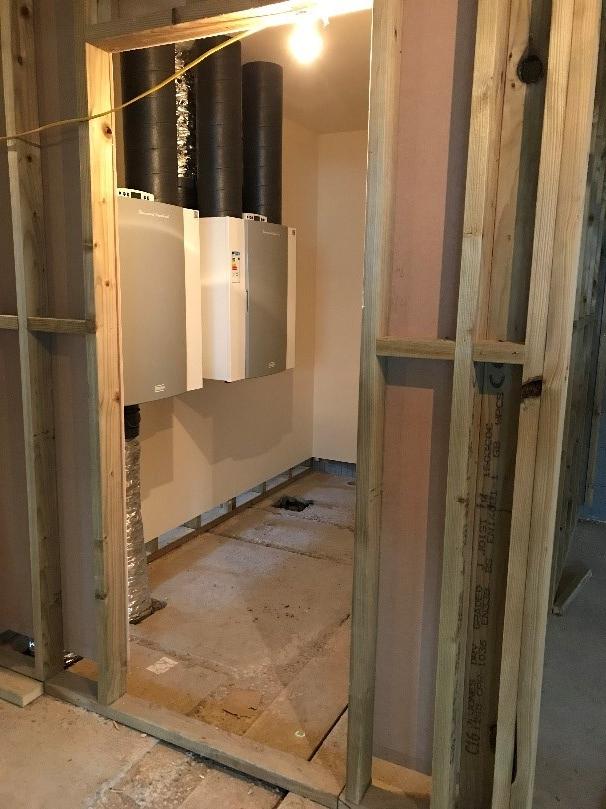
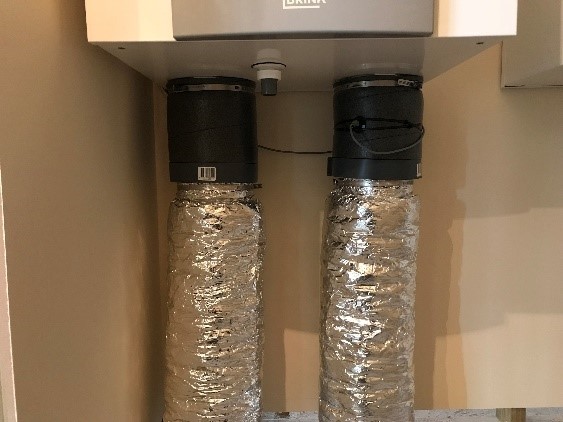
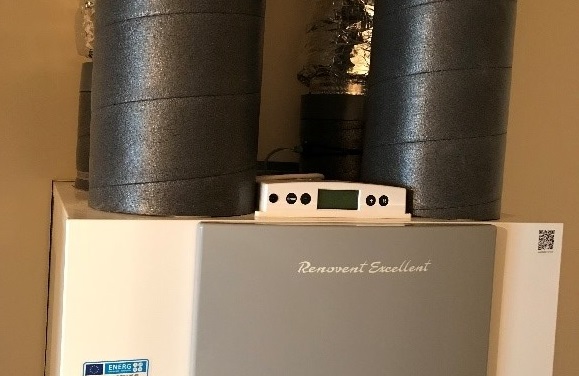
Images of the plant room with the MVHR units fitted. (already painted)
Fitting the attic manifolds was a little more complicated, the supply manifold went as planned
Here you can see the 2 x 90-degree bends attached to the silencer going into the manifold and all the ducts coming off.
The exhaust manifold wouldn’t go in as planned and had to be rotated 90-degrees to fit between the truss webs, fortunately I had plenty of 180mm 90-degree bends for the final connections.
Exhaust from below and side (one duct moved between pictures).
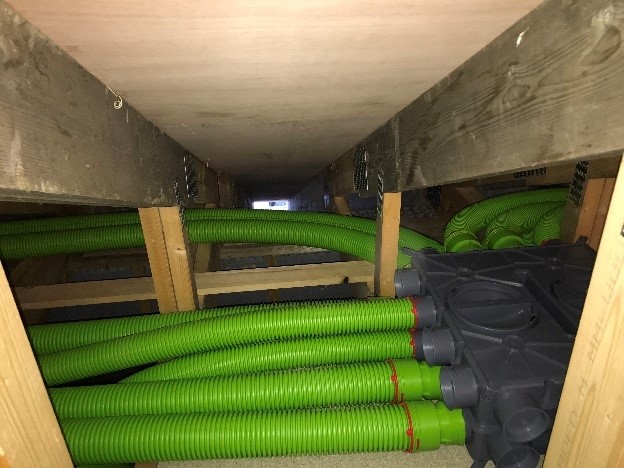
All the exhaust ducts were relatively easy to run (crawling through the webs). 7 of the supply runs had to cross the attic and not wanting ducts in the main storage area, these were turned down to run along the joist space. On the supply manifold you can see 5 of the 90-degree elbows turning then down and below the left 3 (2 from the side and one of the front ) look like this from below:

This was the plan, but on the far side as the came up beyond the truss webs (non-boarded area) I didn’t use the 90-degree bends on the far end just curved them into place.
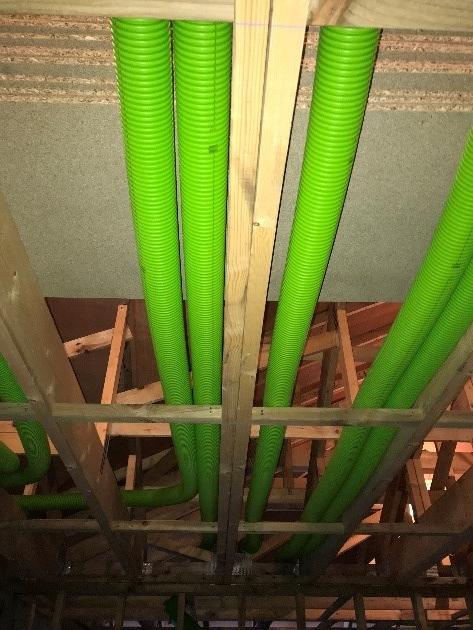
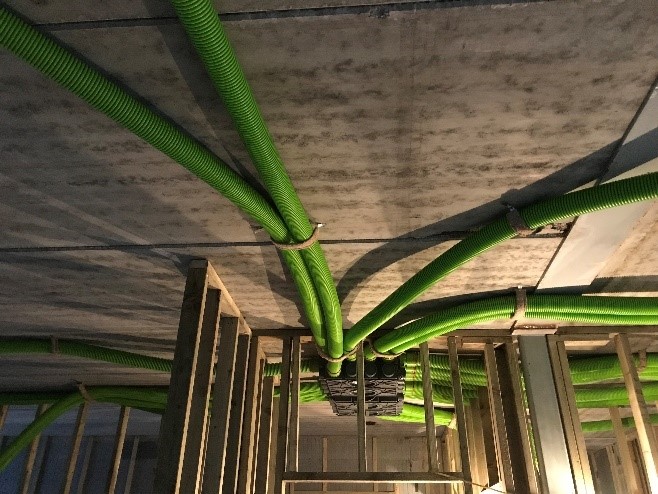
You can see the runs under the attic boards (incomplete) and moving off to the respective locations.
By Thursday we had installed all the ducts and terminals (so 3 days with a builder and all the tools).
We then decided to fix the first-floor terminals into their final positions (just plasterboard for first floor) so either screwing/banding them to rafters, screwing to the attic boards where available, or inserting small offcuts to attach them to.
The decision was made to paint out the plant room so we removed the MVHR units and ducts, bagged the ground floor ducts and the builders sanded and filled all the screws. It was painted on the Friday (advantages of a builder and his contacts).
During the week I realised I needed to order some extra circlips (not easy to get large ones) so I ordered them via CVC and also my RH sensors which were quickly delivered. I installed these into the units (whilst dismounted) not an easy task, very fiddly and not to be recommended on a unit that is already installed. And the sensor heads into a short length of 180mm insulated duct. On the ground floor units we had a short length connecting the silencer to the MVHR unit, but one was not planned for the first floor ones, however as the silencers are flexible and compressible I inserted a short length on top of the House supply and exhaust connectors for this purpose and inserted the sensor there.
Sensors installed in insulated ducting (simply tie wrapped into place)
I then just had to wait for my final delivery.
I am planning to plumb my cisterns into the MVHR (Se the previous blog entry) however since then @Auchlossen has done a similar utilising 75mm ducting so I decided to go down that route (hence the roll of 75mm (AE34C) ducting) I did use it for some runs. I ordered 3 x OsmaSoil 3S094G 82mm Reducer to 50mm Grey 860749 to fit over the 75mm ducting and convert it to 50mm plumbing push fit. The plumber will do the rest as detailed in the previous blog. These fit almost perfectly.
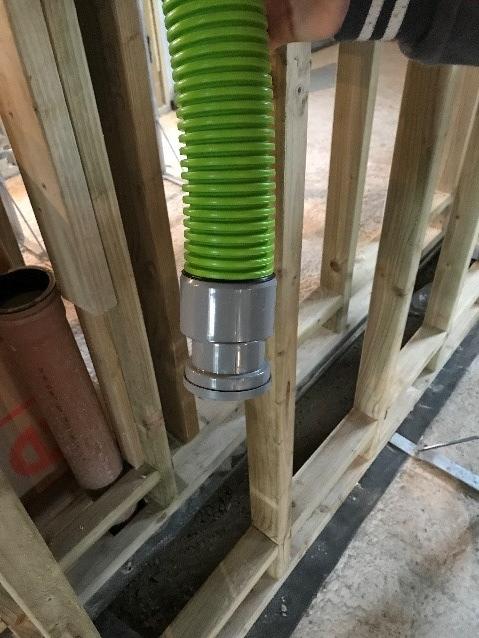
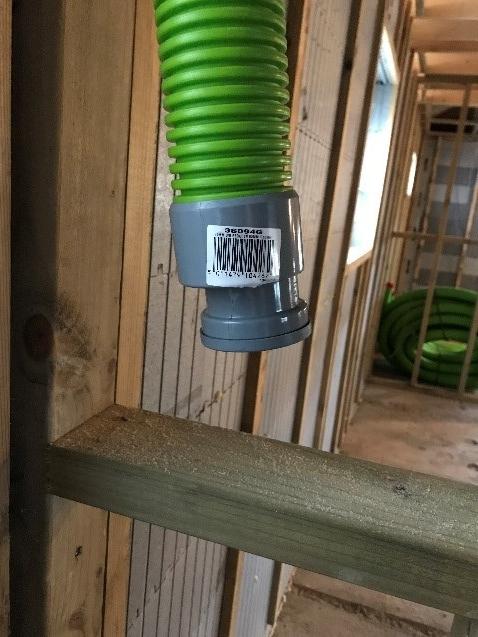
The first picture shoes one pushed up to the seal, the second one shoes one pushed onto the seal. They are very tight with the seal but will push on and make a good airtight fit.
As part of my initial plan I purchased a HB vent terminal for experimentation, just to prove that these systems are interchangeable I fitted an offcut of 92mm (AE48C) duct into the HB terminal, no problem.
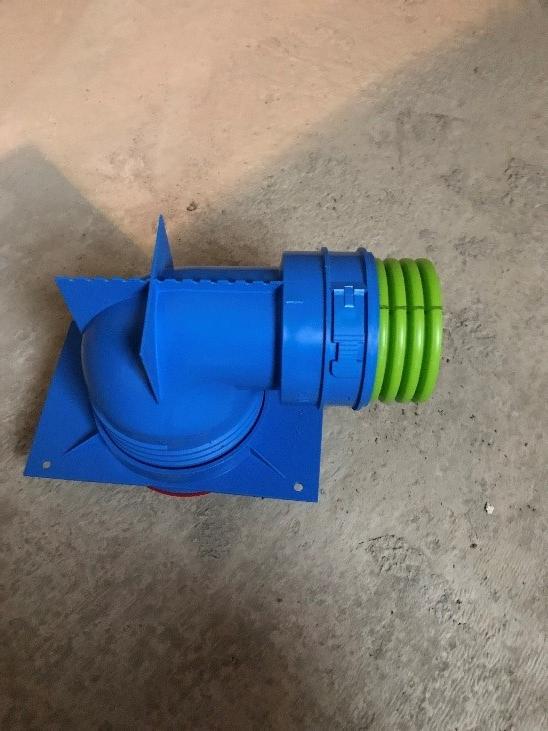
So, when the question comes up can you mix and match, yes (within reason). On issue I see with the HB equipment is I am not sure how easy it is to unclip the terminals once in place as there does not seem to be a way to easily und the locking lugs. On the Ubbink equipment you can unlick them by twisting the red click ring until it disengages and then remove the duct!
The roofers are currently slating the roof and will fit my vent terminals in the appropriate positions with a 500mm length of duct to protrude through the roof insulation. These will then be connected up to the MVHR ducts when a come back to do the final commissioning, fit outlet terminals and balance the system. (next year).
-
 3
3
2 Comments
Recommended Comments
Create an account or sign in to comment
You need to be a member in order to leave a comment
Create an account
Sign up for a new account in our community. It's easy!
Register a new accountSign in
Already have an account? Sign in here.
Sign In Now