


Mr Blobby
-
Posts
616 -
Joined
-
Last visited
Everything posted by Mr Blobby
-
This was my first choice but Northern Ireland is shut down this week and all the merchants are closed. Hopefully somewhere will be open tomorrow. Daft question time. I attach the inhibitor to the filling loop, open the valve and then inject it. So there is enough pressure (>1.5 bar) in the inhibitor can to inject the inhibitor into the pressurised system? Or depressurise it?
-
The good news is that the UFH is finally, sort of, up and running and the heat pump is totally awesome. The bad news is the plumber left the bottle of inhibitor I gave him on the floor. I don't know what bit of "make sure you add this inhibitor and biocide when you fill the system" was not clear, but maybe I made it sound too complicated. Everything here in Northern Ireland is closed for the annual marching and rioting holiday period. The plumber is unlikely to return before August. Obviously the thought of my heat pump rusting away is rather unsettling, but am I being too dramatic? Its only a couple of weeks right? Or should the inhibitor be added as a matter of urgency? If it should be added now then how? Its impossible to get a plumber and I have no plumbing skills at all. The inhibitor is in a bottle, not the injector thingy, and we have no magnetic filter with a useful dosing thingy. I suppose I could maybe drain a manifold. Or just leave it. Whats the worst that can happen?
-
 No, the floor is solid, its hollow core slabs so the only thing that flexes when I jump on it is my ageing knees. Thermally porcelain tiles may help the cooling, but aesthetically I'm not sure if SWMBO will accept pretend wood. I think I need to get her to a tile showroom.
 -
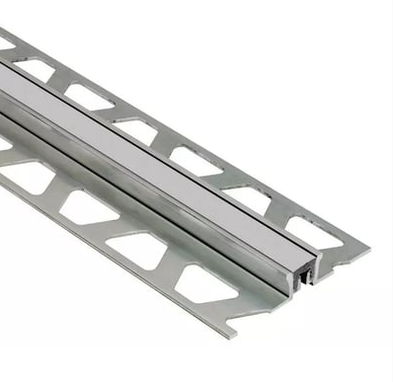
GF tiles have arrived and we are a week away from the tilers coming on site. Tiler says there is no need for expansion joints, he just leaves a gap and fills with silicone and then they are almost invisible. I'm naturally concerned. And I suspect that the only reason to run a bead of silicon is to save money on the expansion strip. Tiles are 120x60 on KORE slab. And its a big area, about 120 m2 total. Unlike screed there are no expansion breaks at door thresholds where I think the expansion strips would probably go. UFH in slab but uniform low stable temps. Do I need expansion gaps and if so then should I insist on proper aluminium (or stainless steel?) expansion joints instead of a line of silicone? What are the best ones to get? The schluter are twice the price of genesis. And how wide, 8mm? And should the floor be primed first? I think a uncoupling mat is probably unnecessary?
-
We put ufh loops on the first floor for exactly this reason. Not yet sure how effective it will be. UFH loops are in screed which is on insulated screed on bison slabs. If we go ahead as planned and install engineered timber on top of the screed then I am concerned that it may be too insulating and defeat the purpose of the FF UFH. (anyone installed porcelain fake timber planks on the FF?) I suggested to the builder to shutter out sections of the insulated screed so that the cooling from the ufh loops would get to the bison slabs to cool the problem rooms below. Like most of my other crazy suggestions this was ignored 😕
-
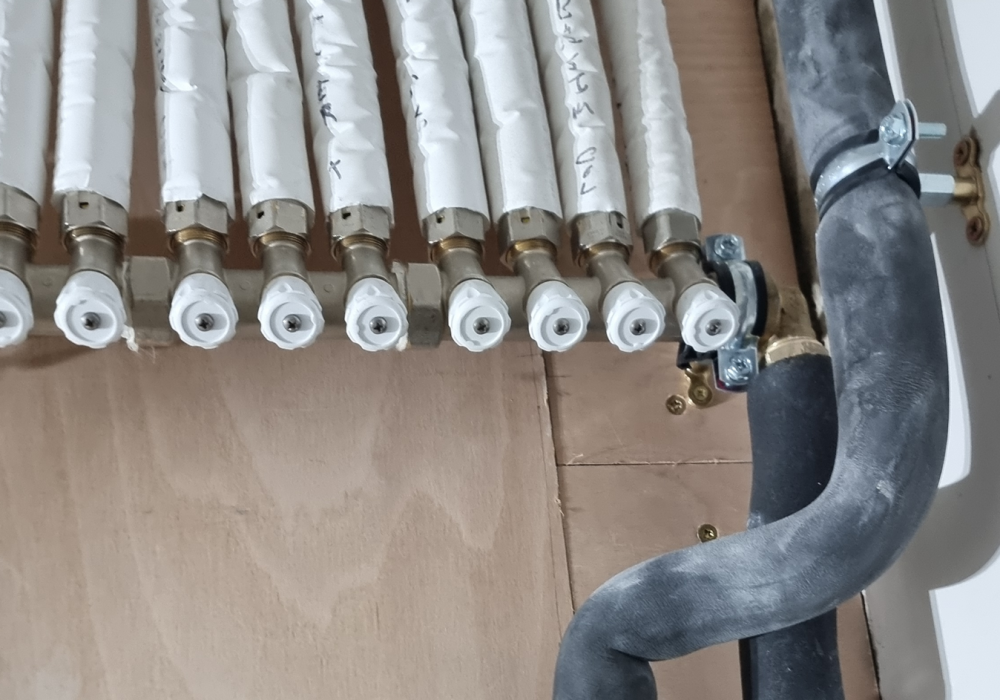
I think I did, TBH. I should have put the specs under people's noses and banged my fist on the table immediately prior to work being done. Lesson learned😖 Here's the cold feed to the kitchen, coming off the end of the manifold instead of the valved outlet. Apart from triggering my OCD and not looking as pretty, I'm going to assume this works ok. Besides, the merchant didn't have another manifold in stock (I could have picked one up quite easily of course). There is a valve in the pipe just under the photo. Manifold is now 1 inch, off a 22mm feed 😕.
-
🤦♀️

-
... the manifolds were first fitted on the wrong (as per the MandE drawings) wall and I got them moved. But they are still in the wrong place so the cold to the kitchen is now going to be doing its own thing 🤦♀️ There's no way the plumber is ever going to read the M and E specs 🤷♂️ (Although in fairness a bunch of stuff changed since the original M and E spec hence I'm to blame for not being too strict after the documents were issued)
-
My thoughts exactly Interesting. Do you leave these permanently in place, or just for commissioning? Do they clip on the UFH pipes below the manifold? Are they accurate enough, and do you have any links to products please.
-
No, no isolators on the other ends that are plumbed so far. Call me cynical, but the way it seems to work is tradesman finds a day he needs to fill. His regular merchant doesn't have the bits in stock, so substitute with whatever is on the shelves. I texted the plumber yesterday and haven't heard back so he probably isn't very happy. But he's going to charge me twice for doing it twice so I don't see the problem. Besides, this isn't a popularity contest, it just needs to be done right. The trades already think I'm a pita so I've nothing to lose 😆
-
Does the diameter of the manifold matter? Maincor do a manifold that connects straight to the mlcp pipes but only the 1 inch manifold has connectors for 20mm mlcp.
-
Ok, so I could have been more specific, but really, specifying a manifold without valves is like specifying a car without wheels. I didn't think I needed to be that specific 😒 The problem is my trades always want to do everything at least cost because that's what they always do. It's just frustrating. Assume nothing 😬 Can valves be inserted here at the junction, or is it entirely new manifolds?
-
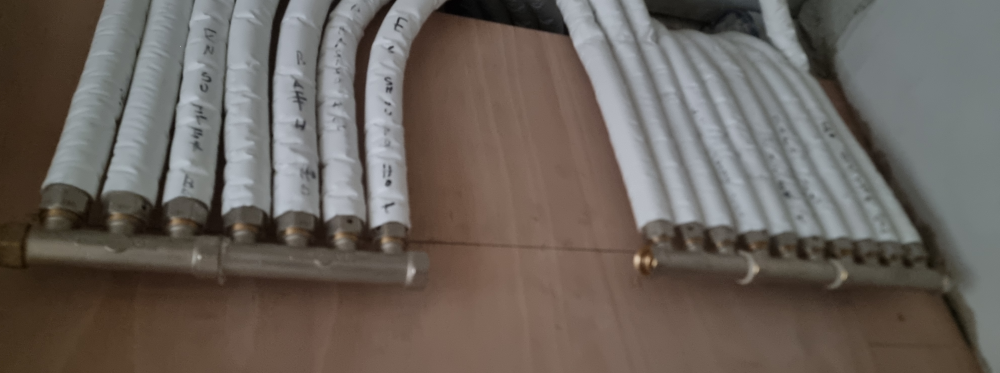
I had assumed my plumbing manifolds would be fitted with individual isolation valves. Assuming my plumber has no intention of fitting valves to these manifolds, then please tell me that (a) it doesn't matter, or (b) an alternative product with valves. Three of our HW (showers and bath) pipes are wider diameter than the rest.
-
Flextron bonded to standing seam versus 'normal' solar panels
Mr Blobby replied to Bancroft's topic in Photovoltaics (PV)
I see you have shiny ridge clamps. We had this also, the roofer had ordered cheaper ridge kit than vmzinc that came in ral 7016 but the coating came off. The roofer agreed to go up on the ridge and shape a peice of roof material to cover the brackets and looks well. -
Flextron bonded to standing seam versus 'normal' solar panels
Mr Blobby replied to Bancroft's topic in Photovoltaics (PV)
I actually powder coated my clamps to be the same colour as the roof 🤪 but not sure it achieved much 🫤 My standing seam is at 400 instead of 600 centres, to reduce canning, something else for you to think about 🤔 -
Flextron bonded to standing seam versus 'normal' solar panels
Mr Blobby replied to Bancroft's topic in Photovoltaics (PV)
Here's ours being installed. @Russdl's look way smarter and low profile, perhaps because of the distance from the ground. You can see the clamps being installed, they have a disk that sits 15mm above the seam. We've had no issue with birds trying to go underneath. I wish I could have fitted three rows of panels on that South facing elevation 😕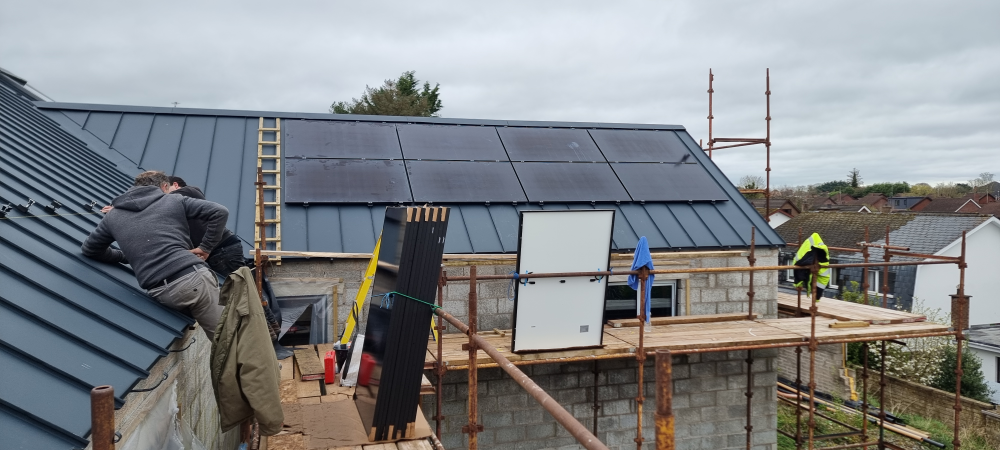
-
Our manifolds have no gauges. Which is a bit disappointing as I would be rather interested to see flow and return temps at the manifold. I can't see any reason not to have temperature guages at the manifolds, am I missing something here? In short, is it a good thing to install some guages at the manifold? I would have thought it would be useful for commissioning, if nothing else.
-
Flextron bonded to standing seam versus 'normal' solar panels
Mr Blobby replied to Bancroft's topic in Photovoltaics (PV)
We looked at stick on panels and then decided against. After the standing seam roof went up we couldn't bring ourselves to cover it with panels on the SW front of the house so installed panels only at the rear, where nobody will ever notice. And some on the flat roof garage to catch some rays in the winter months. For the standing seam roof we used the s-5 railess pvkit. Neat enough for the back but, IMHO, too ugly for the front. -
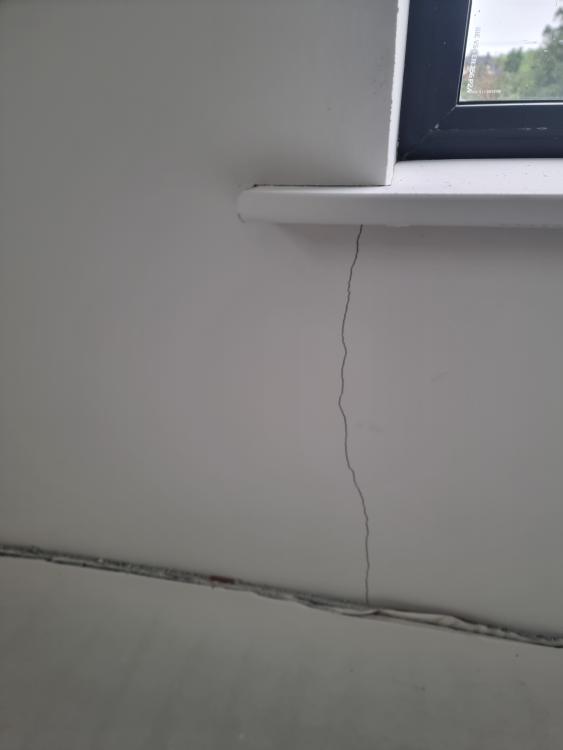
No, dense block. Approx 10 mm mortar under the skim coat. Plastered over the winter, internal temps never went below 10 degrees. Dried out very slowly, no excess heat or dehumidifiers. Took a few months for the cracks to develop, but are not along mortar lines, and given the house is on a Kore slab on hard rock underneath then I don't think this is any subsidence issue.
-
Sorry, forgot to say it's wet plaster, on mortar scratch coat. No plasterboard.
-
All my window openings are like this. Would mesh have reduced the risk of this happening, or is it just inevitable?
-
Openreach told me the same, that they expected the verge (the verge is part of the visibility splay from the junction) to belong to the council. They assured me they would check ownership but were quite sure it didn't belong to my neighbour and I got the impression they wouldn't even notify him of the trench they are about to dig. There is a good chance he'll be very unhappy about it. 😏 My original point to the OP's question is of course that although it is usually possible to get a free connection without registering as a new site with openreach, registering as a new site can be worth the extra dosh if, like me, you wanted options to connect to a new duct instead of the free overhead option. Not for everyone, but it's worked out as the best option for us.
-
Its in the visibility splay in front of their house so not their property. This is the only image I have, showing the pole next to the for sale sign, from which open reach will dig a trench across the driveway in the visibility splay, probably a few feet away from the front wall.

-
We are in the same position, with the fibre available from a pole across the road for free. To a site that we demolished and rebuilt. But I didn't want the fibre coming from a pole the other side of the road. There is a pole on our side of the road (connected to the pole on the opposite side of the road) about 50 yards away that feeds our neighbours houses. I registered on the open reach site and paid the (approx) 300 quid fee as a new site. Engineer came out and offered to lay a trench from the pole on our side of the road along the grass in the visibility splay and across the neighbours drive and up to our boundary for (approx) 400 quid. For me this was a really good and not outrageously expensive solution to get the cable in through a conduit instead of overhead. Open-reach will often fit a pole on your side of the road for free but I preferred the trench dug across the neighbours drive option. We don't speak to that neighbour who is insanely precious about his house and boundary. Open reach haven't dug the trench across his drive yet so this is an added bonus to look forward to.
-
When installing hot and cold manifolds, is it good practice to install a board on the blockwork first, and if so what? Pipes are mlcp into plant room.



