Mr Blobby
-
Posts
616 -
Joined
-
Last visited
Everything posted by Mr Blobby
-

Comment on our landscape design
Mr Blobby replied to Mr Blobby's topic in Landscaping, Decking & Patios
Could be. On Wednesday I'm on site with builder and diggerman for a clean up and to lay the drains. It will be a more down to earth and cost effective conversation I think 😏 -
Comment on our landscape design
Mr Blobby replied to Mr Blobby's topic in Landscaping, Decking & Patios
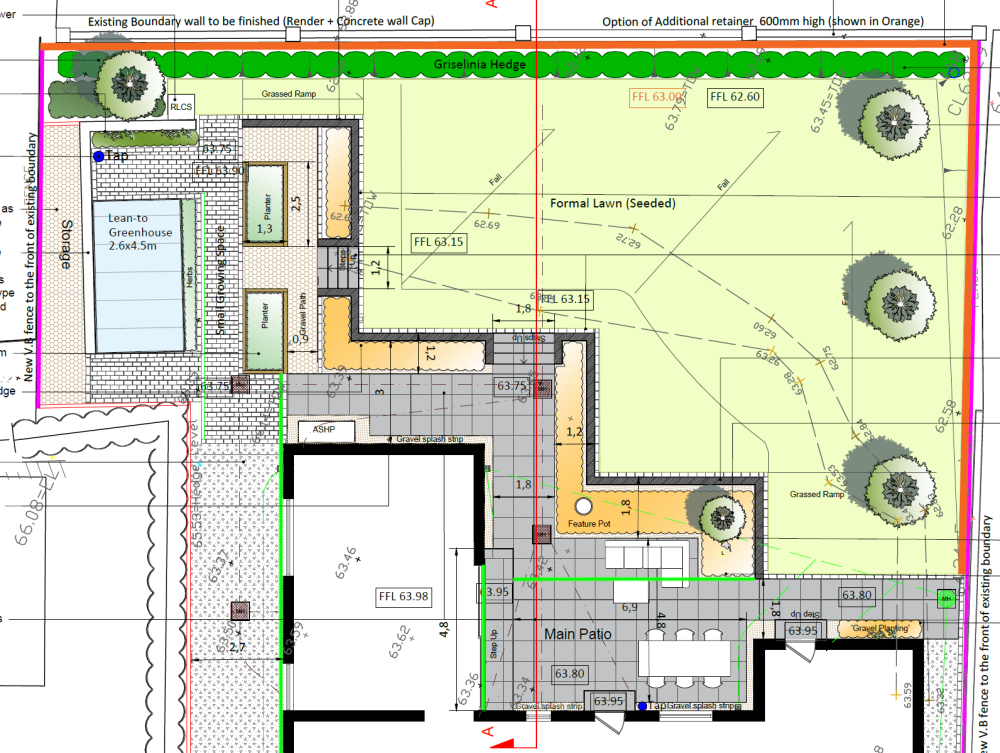
and cost an arm and a leg, its a ridiculous idea 🤦♀️ And we only have about 2m wide access down the side of the house so getting tonnes of material round the back is totally impractical. Exactly this, we also get a sun trap in the far left corner that is in the sun into the evening in the summer. The planters and greenhouse may end up as a bench and a barby. We will be installing a mini pillar with some sockets in that corner, not just for the mower station but also just in case we want some lighting and an occasional beer fridge. -
Comment on our landscape design
Mr Blobby replied to Mr Blobby's topic in Landscaping, Decking & Patios
I like the stepped wall but landscaper is not too enthusiastic. Suggests raising the lawn up by 500mm instead. That would be kerbs as retainers at the rear and side and about 20m x 20m of 500mm fill. I wonder which would be the easiest and cheapest 🤔 -
Comment on our landscape design
Mr Blobby replied to Mr Blobby's topic in Landscaping, Decking & Patios
This wall and drop is where we are stuck. We want to level the lawn so it has only a gentle slope. But we also want to see the lower lawn section but can't have a 1m retaining wall without a fall protection wall at the top. We will either be ditching the wall and just have a bank, or maybe a hybrid 600mm drop and then banking down to a total 1m drop over a 3 metres. We want to try to level off the lawn section as much as possible for kids to play on. Here's a picture from the FF window. It was taken just after midday, with sun from South on right hand side. Its funny how, now the house is built, its obvious that the kitchen window should have been on the back wall facing the garden at the rear, where the plant room is. Plant room should have been at the side of the house where there is no view out. Oh well, too late now. Looking out into the garden was on darling wife's list of priorities but she hasn't noticed this planning blunder yet. I'll not mention it. 😬 Our sewer connection is at the far right corner so we will need to drop a pipe under the lawn, and, I guess, an IC at the patio for a vertical drop, if we have a retaining wall. We have a set aside some budget for landscaping to include a wall if required. What to do 🤔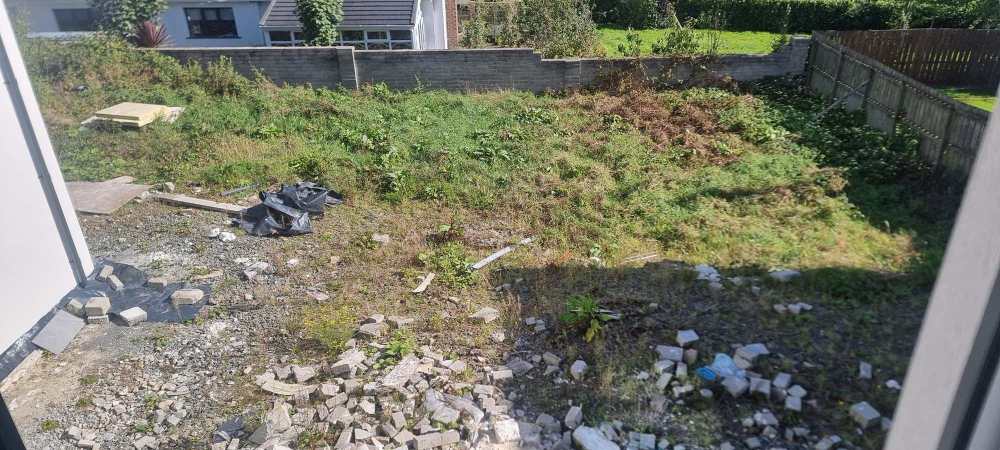
-
All glass absorbs some solar gain so standard 3G is always going to have less solar gain than standard 2G. So 2g with solar glazing makes no sense to me as the solar gain% on 2G with solar glass is probably about the same as 3G but just colder in the winter. If you really want a roof light with low G then the velux passive has 5 panes (now mostly discontinued) of standard glass and so the G factor of just 35%. . For the slider, look at 3G with SKN 176 solar glass. This is what we have on our big kitchen slider and it is amazing. It looks exactly the same as standard glazing but is way cooler. Solar gain factor, as percentage of the heat that gets through is typically: Standard 2G = 65%, Standard 3G = 50% 3G + SKN176 = 35%. New velux with solar glass coating = 29%. 3G all the way, more panes the better, and SKN176/other solar coating where it is needed.
-
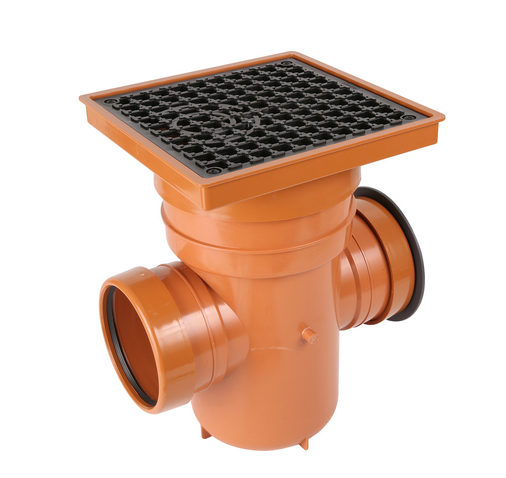
Sorry, I wasn't clear. The waste is through the slab and exits underground. From the cloakroom basin. Builder says we need a gulley trap like this on the patio, one side connecting to the basin waste underground, the other to the manhole. Seems the done thing here in NI. Which is a shame.
-
We've spoken to two landscapers and both are mad about lots of plants and trees and seem deaf to low maintenance. We have a digger on site next week so under pressure to finalise this. Neighbours' houses are to the rear and to the right, so some privacy on the patio would be nice but we are not big gardeners so not too keen on the plants on the patio next to the retaining wall. Retaining wall around patio will be over 600 so we will need to put a rail or build the wall up to 1.1 metre for building regs I think. Digger access is LHS of house, but think it may be useful to leave access for digger instead of all wall. Comments please....
-
Its to connect to the waste from the basin, I'm told its unavoidable. I have seen some stainless steel covers that might be a bit less bad.
-
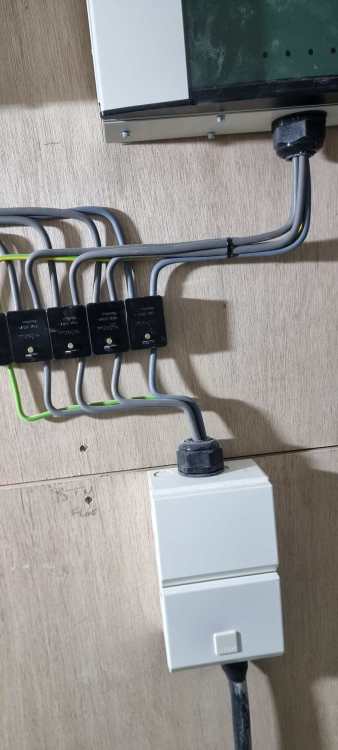
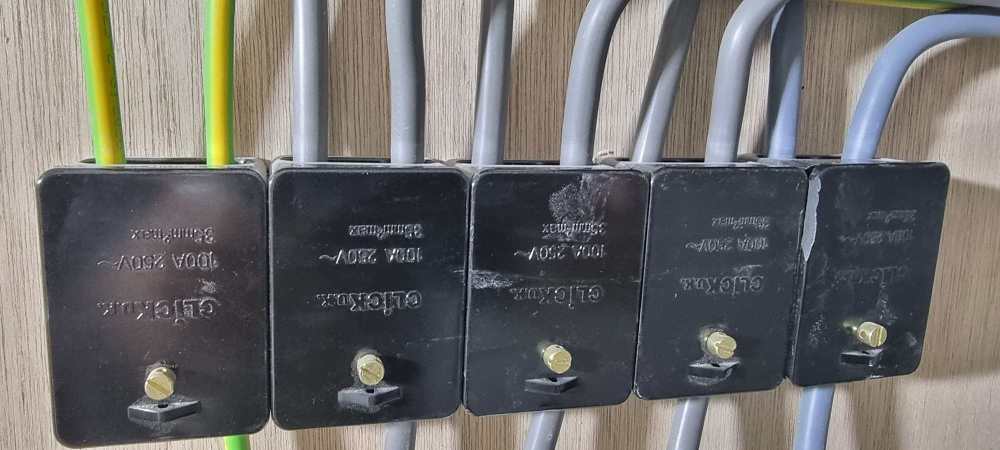
I think I read somewhere that they shouldn't be upside down because there is risk of stuff falling into the top, but afaics the top and bottom are the same. But if they are not directional, then why install them upside down? They've been installed like this for a few months so I'm not losing any sleep over this, it just is, like do many other things, a bit sub optimal. 😏 The layout is generally terrible. There is a second consumer unit to the top left that will run cables down and to the right. 🤦 Drives me mental. Rant over.
-
For some reason the sparks brought the main 3-phase cable down from the ceiling, to the bottom of the plant room then back up to the isolator and Henley blocks and then into the two consumer units. This layout is a bit crap. Bringing the cable in at the bottom wastes loads of space needed for other bits yet to be installed, but what triggers my OCD is that all the henley blocks are upside down. And one cover is broken because the blocks are too close together for the cover to fit. I know that in theory the henley blocks shouldn't be installed like this but is it worth complaining about and telling the sparks to relocate the mains isolator to feed the henley blocks from the top?
-
There must be a prettier option than having this on my patio?
-
New self build design, heat and architect
Mr Blobby replied to Jack757's topic in New House & Self Build Design
Solar gain doesn't heat the air. It heats the floor next to the window. And then that warm floor heats the air. So cooling the floor interrupts that heat transfer. -
Should I ditch the installers and DIY my ASHP?
Mr Blobby replied to jimseng's topic in Air Source Heat Pumps (ASHP)
Our 5 KW panasonic was done between plumber and spark with no zones or buffer tank. Heat pump cost less than 3k. Plumber and spark think I need to have it commissioned but I fail to see why. Panasonic monoblocs are so breathtakingly cheap and simple to install and operate that I wonder how snake oil saleseman still get away with 12k installs. Get a larger UVC, maybe 300 litre. The panasonic UVC is cheaper than most and A rated. Just don't let your plumber screw into it 🤦♀️ -
Yup. No VAT on potatoes. VAT on chips.
-
Your'e telling me 😫 So the filler won't stick to the extender?
-
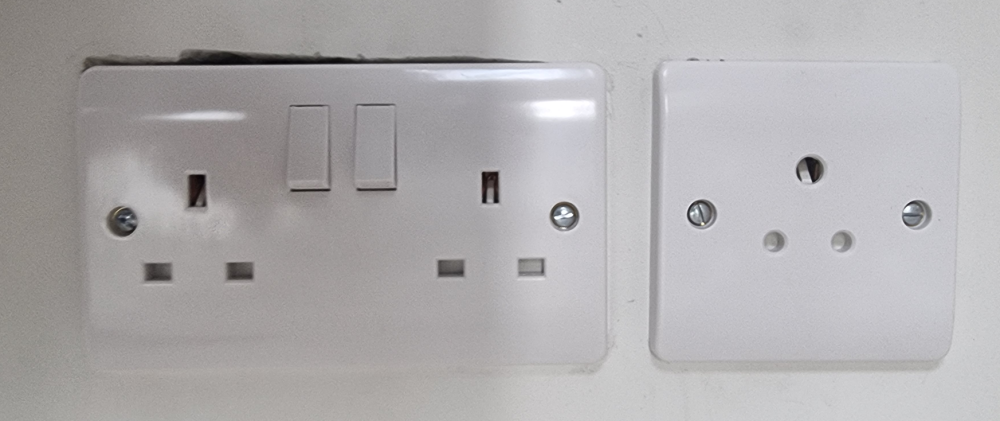
The builder just shrugged and said its to be expected. Really gives me the pip. This particular socket is the worst. I wouldn't mind but prior to plastering I had repeatedly asked if there was any way to insert blanks into the sockets to guarantee a straight edge and was poo-pooed for even suggesting such a thing. The house is now painted, but surely this should have been fixed before painting. Just another job for me to fix between the trades. Where the backbox is deeper than the surface of the plaster, then what's the best way to fill out to a corner? 🤔 Insert a blank of some kind, or just do multi-layers? Even my wife asked if the sparks have a spirit level. They don't. I've levelled up a bunch of sockets but the ones above are beyond fixing. Maybe I'll just start a new thread with a list of all the things that trades torment me with. Every day there's another shocker. Maybe I'm too pessimistic, maybe the builder gets the decorator to sort this and that's why he's not bothered. He's away on his sailing boat on Wednesday (I kid you not) so I better pin him down before then 😬
-
What's the best way to fix this? Time machine? A dozen or so sockets are like this. 😕
-
First floor, underneath windows at front (SW) side are the worst. Diagonally down from corners. Tops of most doors the same. Diagonally upwards.
-
Like this... This is how ours is built. The bricklayers put a strip of PIR about 40mm wide into the blockwork. If I get down the site later I'll get a photo.

-
Assuming the black line is the garage door inside the reveal (as sectional doors are typically installed) then the inner leaf adjacent to the door should be thermally broken with a strip of PIR. This is because the reveal is on the cold side.
-
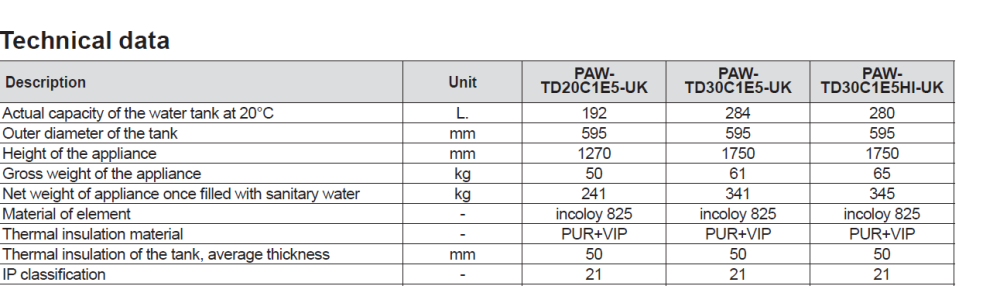
It is A Rated, and it looks like it does have Vacuum insulated panels and PUR. So where inside the cylinder are the vacuum panels and who thinks they are punctured? The tank is not yet filled or heated so I can't do a temperature test to identify heat loss around the penetrations to determine if the VIP are punctured. Plumber has the hump with me ever since I told him to change the manifold 😕 I think its about to get worse. 😬 What now?
-
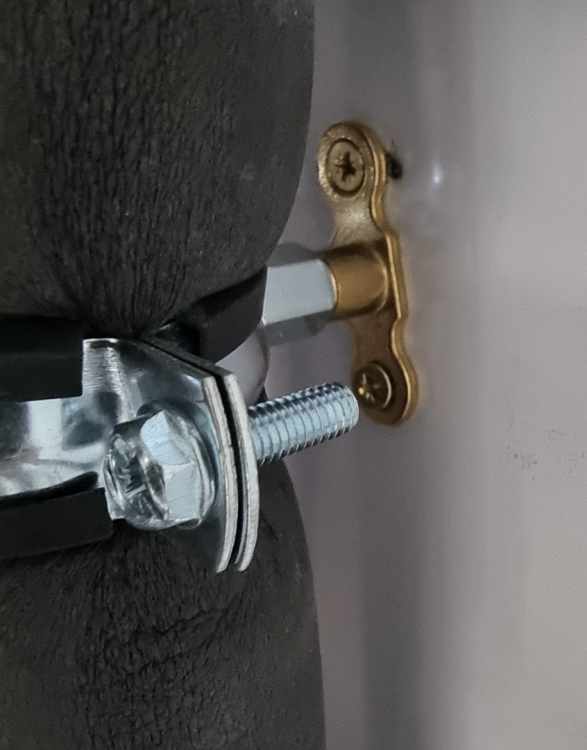
I can lift the screws on the top clamp with my fingernail, so its not doing much
-
Thank you for this. Definitely an oso cylinder. I had never heard of vacuum insulation on a cylinder, so I'll go take a look.
-
Weather Comp + independent zone valve
Mr Blobby replied to Mr Blobby's topic in Air Source Heat Pumps (ASHP)
The heat pump is installed 😀. And its anthracite. And thanks to guidance on here, the single zone, two manifold system is running beautifully. No buffer, no pumps, no mixers, its as simple as can be. These Panasonic units seem incredibly easy to install and set up. I'm struggling to see why it needs to be commissioned by a Panasonic Pro partner. I'm not sure how they are going to add any value. Except for the extended warranty.
-
I was surprised, and rather disappointed to find our plumber had screwed into my lovely Panasonic cylinder to fix pipes. Googling around it seems this is common practice to fix into the cylinder so I'm much calmer now. However, the clips are all loose, suggesting the screws have not threaded onto the external skin of the tank. I have a box or short wide self tappers on site that would probably have been far more effective but its too late now. Any thoughts on this?