Oxbow16
-
Posts
442 -
Joined
-
Last visited
Everything posted by Oxbow16
-
"By hand" using an angle grinder? Thank you if so Or did you mean by hand with chisel and hammer?
-
Angle Grinder - Wattage, Button/Trigger, and Recommendations?
Oxbow16 replied to Oxbow16's topic in Tools & Equipment
Ha ha - yes, apologies. I've been busy getting stuck in and fitting work, life and rain around the job. So far so good thanks and all limbs and peripherals intact. The cut didn't come out great, but not sure how much that was to do with me or the wall itself; which is prone to falling apart a bit at the best of times, and so suffered a bit with the angle grinder. On that subject, I posted another thread for guidance on where to go from here. And in that post you can see my (un?)handy work to date.... Thanks for remembering me and for your interest. -
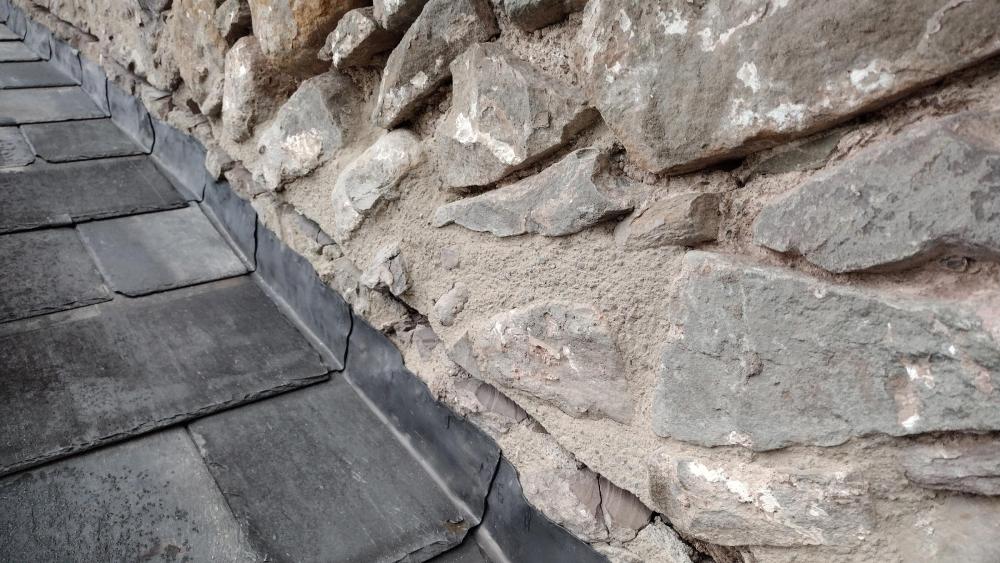
Thank you so much for taking the time to respond with such detailed instruction. I really appreciate it A few points in response first.... - The soaker upstands are 75mm which from everything I read is standard? - Yep, I've used patination oil on the soakers and will do the same on the flashing. I did think best not to use it on the bit in the chase, as I had planned to used lead sealant there and worried about adhesion. I've got some of this to use: https://www.screwfix.com/p/geocel-trade-mate-roofers-seal-black-310ml/32561 I read that sealant would be better than mortar as it is more flexible and not prone to cracking like mortar. - For reference, the roof pitch is 9/12 (around 36.5 degrees) - I'll be keeping my flashing lengths under 1200mm. - My plan was indeed to stop the flashing 10mm short of the slates / leave a 10mm gap at the bottom. - I've been using a leaf blower to clean out the chase, followed by a brush. But I think a last going over with a vacuum cleaner is a good call, so thanks for the tip. As for redoing it... I think the problem I have with that is firstly time and money. I'd have to buy another angle grinder, new discs, and redoing it all will eat into the time needed to do the same on the other side (plus a repair is needed there too so it will take longer). The wall then needs some pointing work, which I'll be doing with lime and want to get done before the colder weather kicks in. And unfortunately I don't move quickly, and have to the the job around work and around wet weather. My second issue is that I'm not convinced a new cut would be any neater. At least not with me doing it Some of the stone in the wall is old red sandstone (I think!) and is naturally prone to breaking easily. The mortar is NHL 3.5 and was done less than a year ago. That too seems reasonably crumbly in places. So I do wonder if a new higher cut would end up more or less the same? I'd guess it would. I don't want to be coming on the forum asking for advice, only to get the advice and not take it... But I wondered if anything in my reply changes your thoughts on redoing it? Or for that matter if anyone else has opinions on whether it is vital to redo it? Is the main issue aesthetics or practical (the flashing doing its job of keeping water out)? Could a compromise be... - Use a little sand/cement mortar to patch up any gaps between the top of the soakers and bottom of the chase, as well as in the bottom of the chase itself. (Question - how long would I need to leave the mortar to cure until I could put in the lead if I do this?) - Put in the flashing. Leave the sealant for now. The wall is quite sheltered and has been less protected for the best part of a year. - When I repoint, use lime mortar and small stones as necessary in any of the larger gaps above the chase. - Finish with sealant once all is dry. Or is there any chance I can make do with what I've done and just crack on, going a bit mental with the sealant in the chase to make sure no water can get in? Sorry for the essay and thanks to anyone reading it or pitching in. Cheers
-
...

-
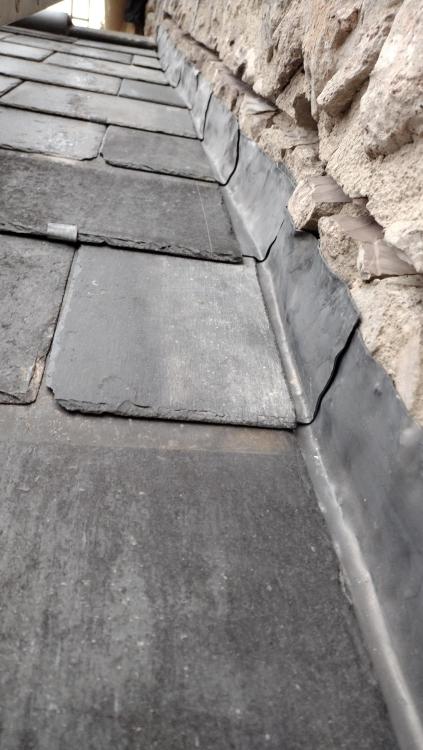
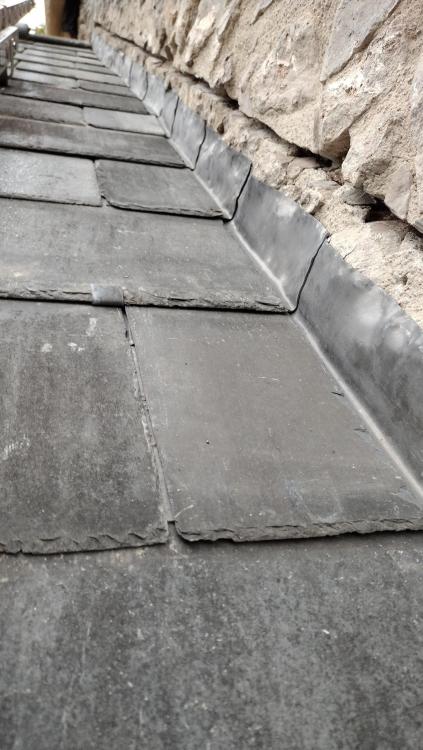
Thanks @Gus Potter Here's some photos as promised.

-
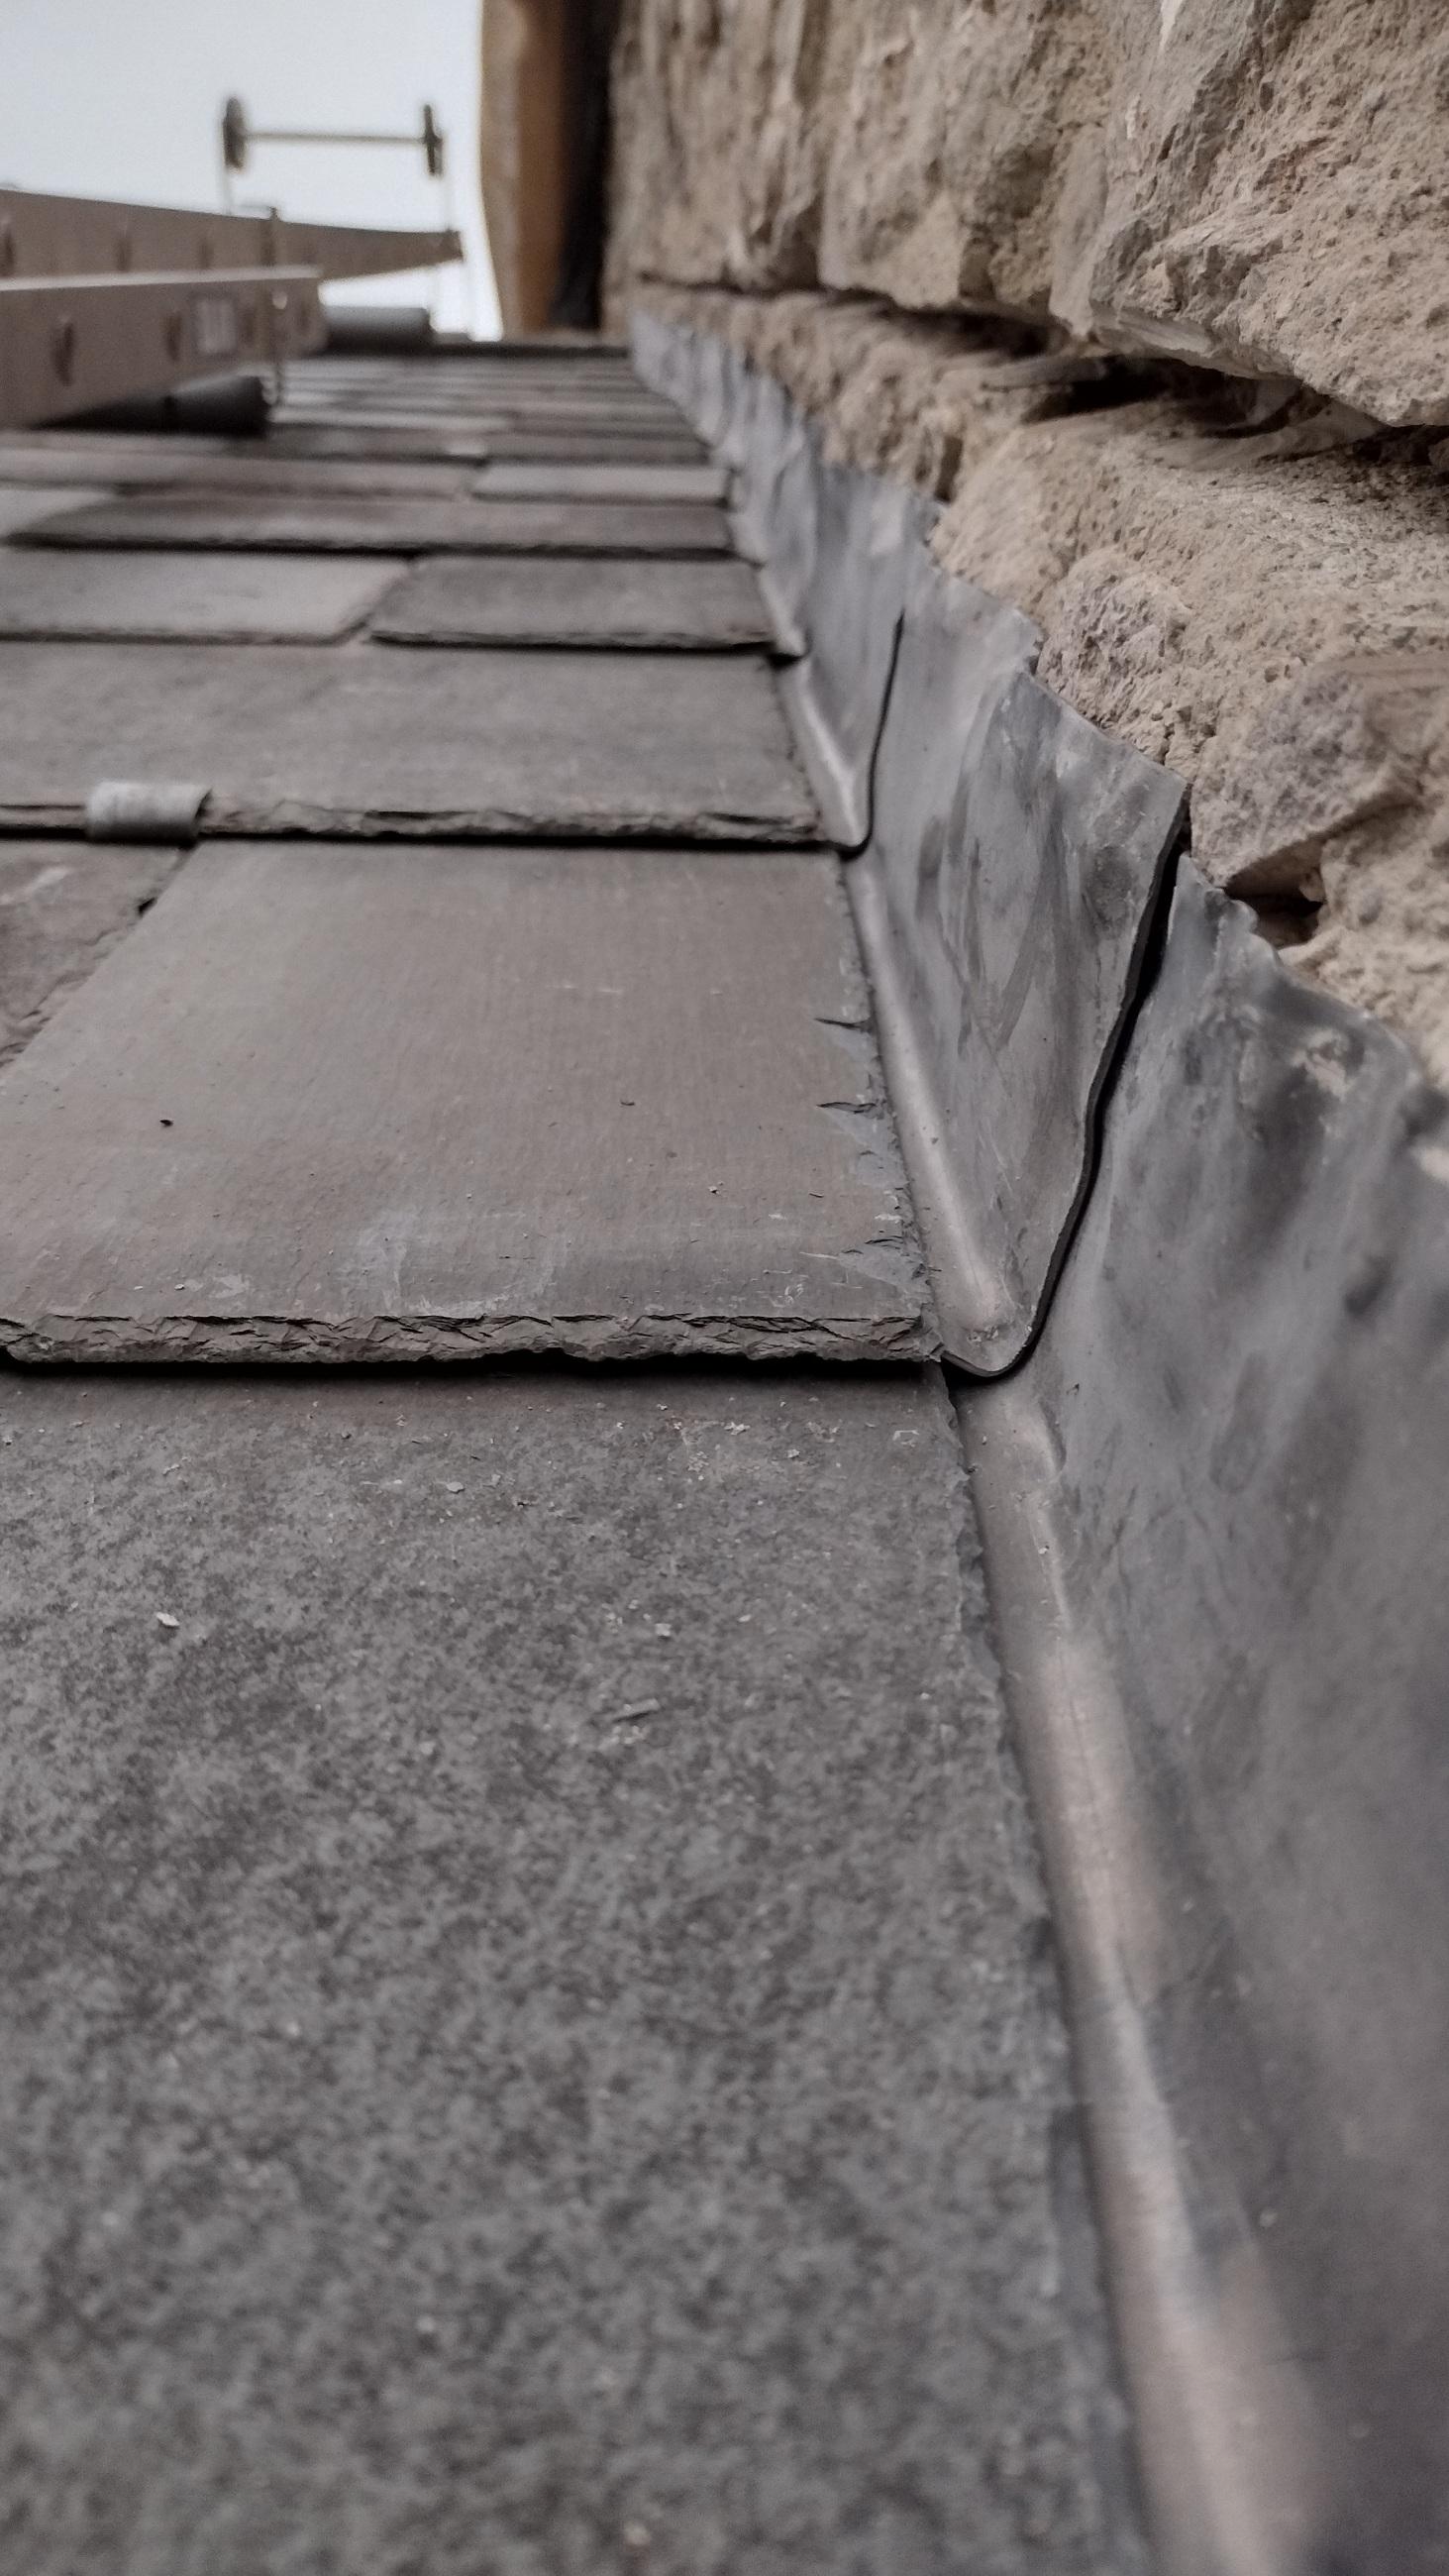
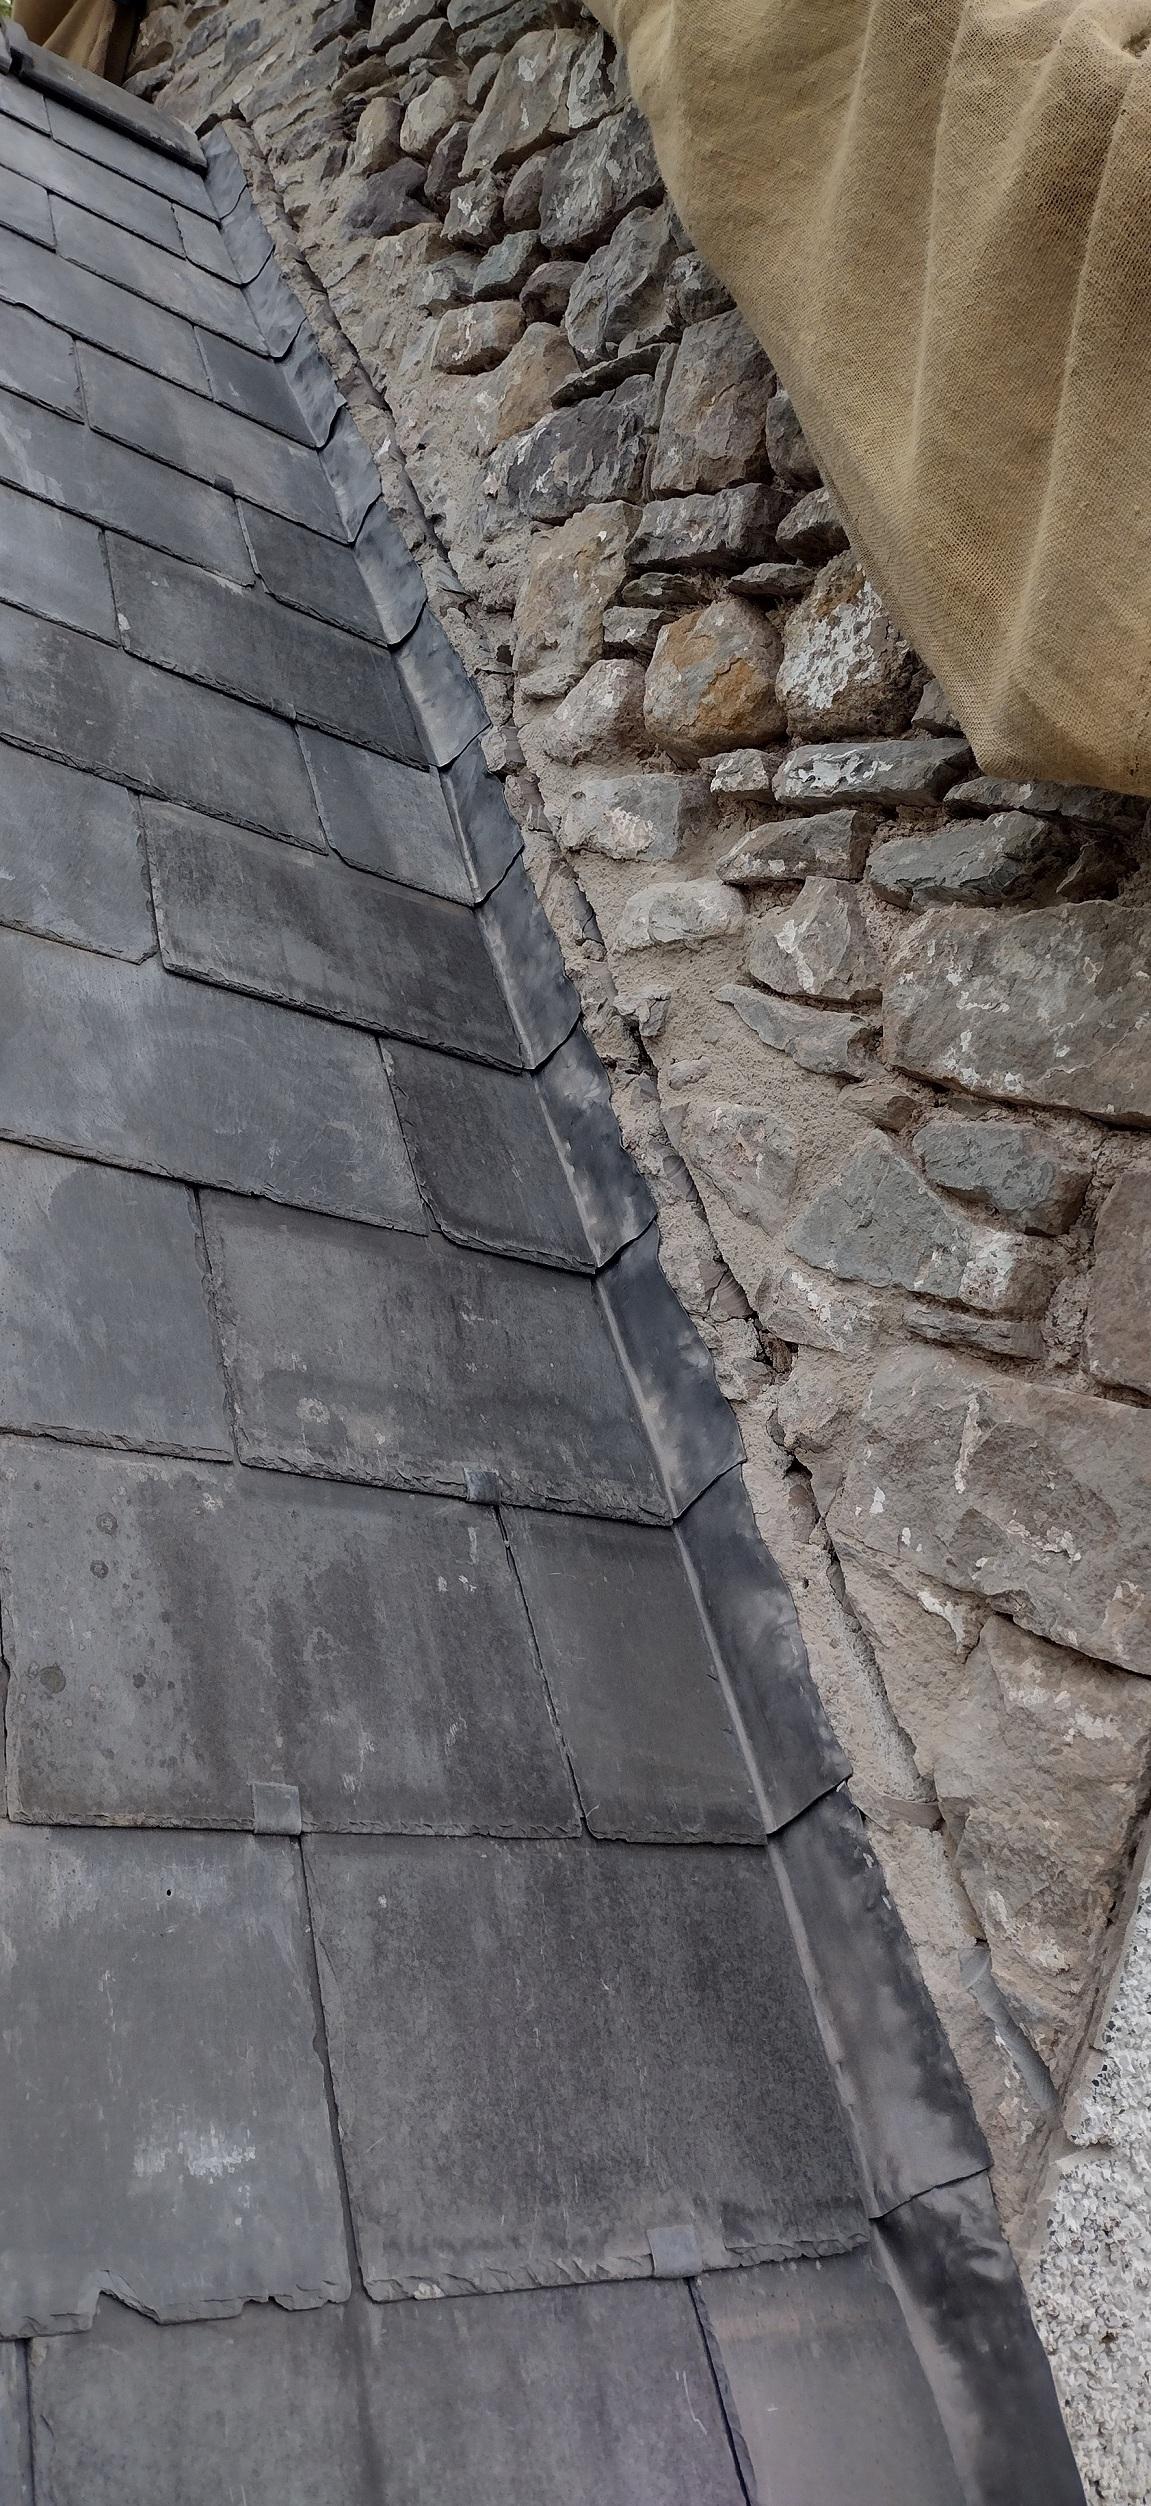
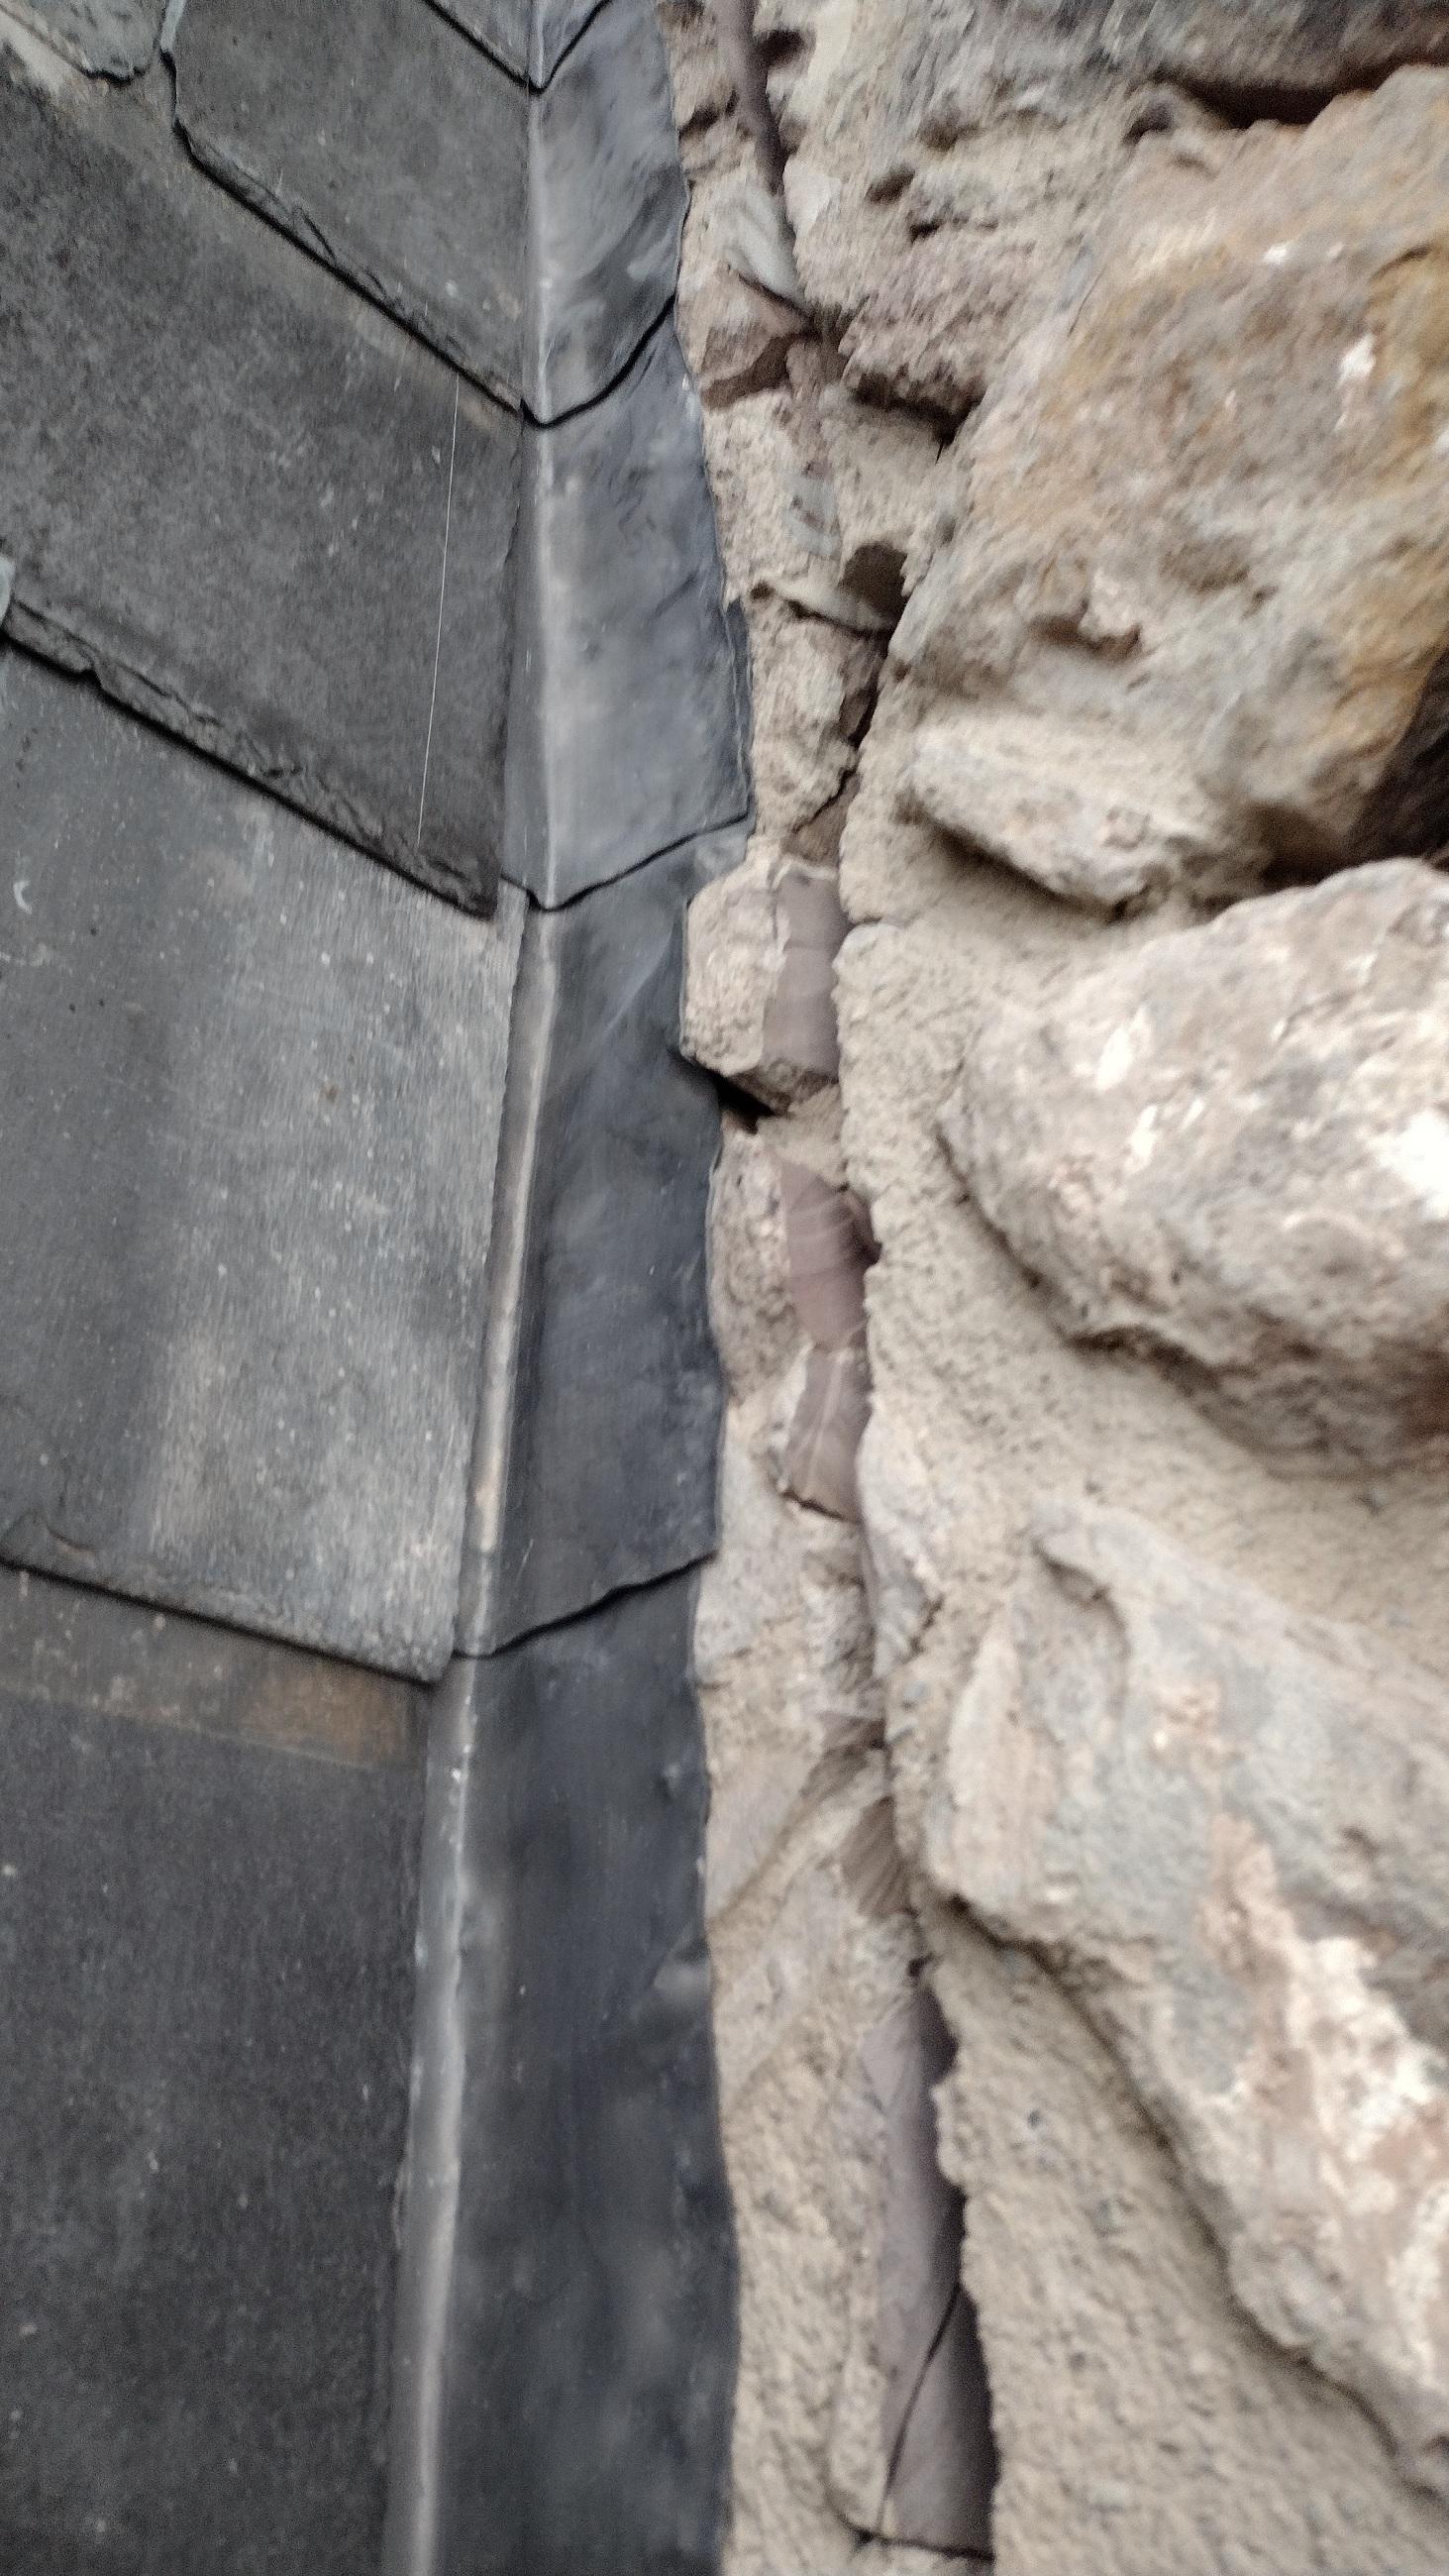
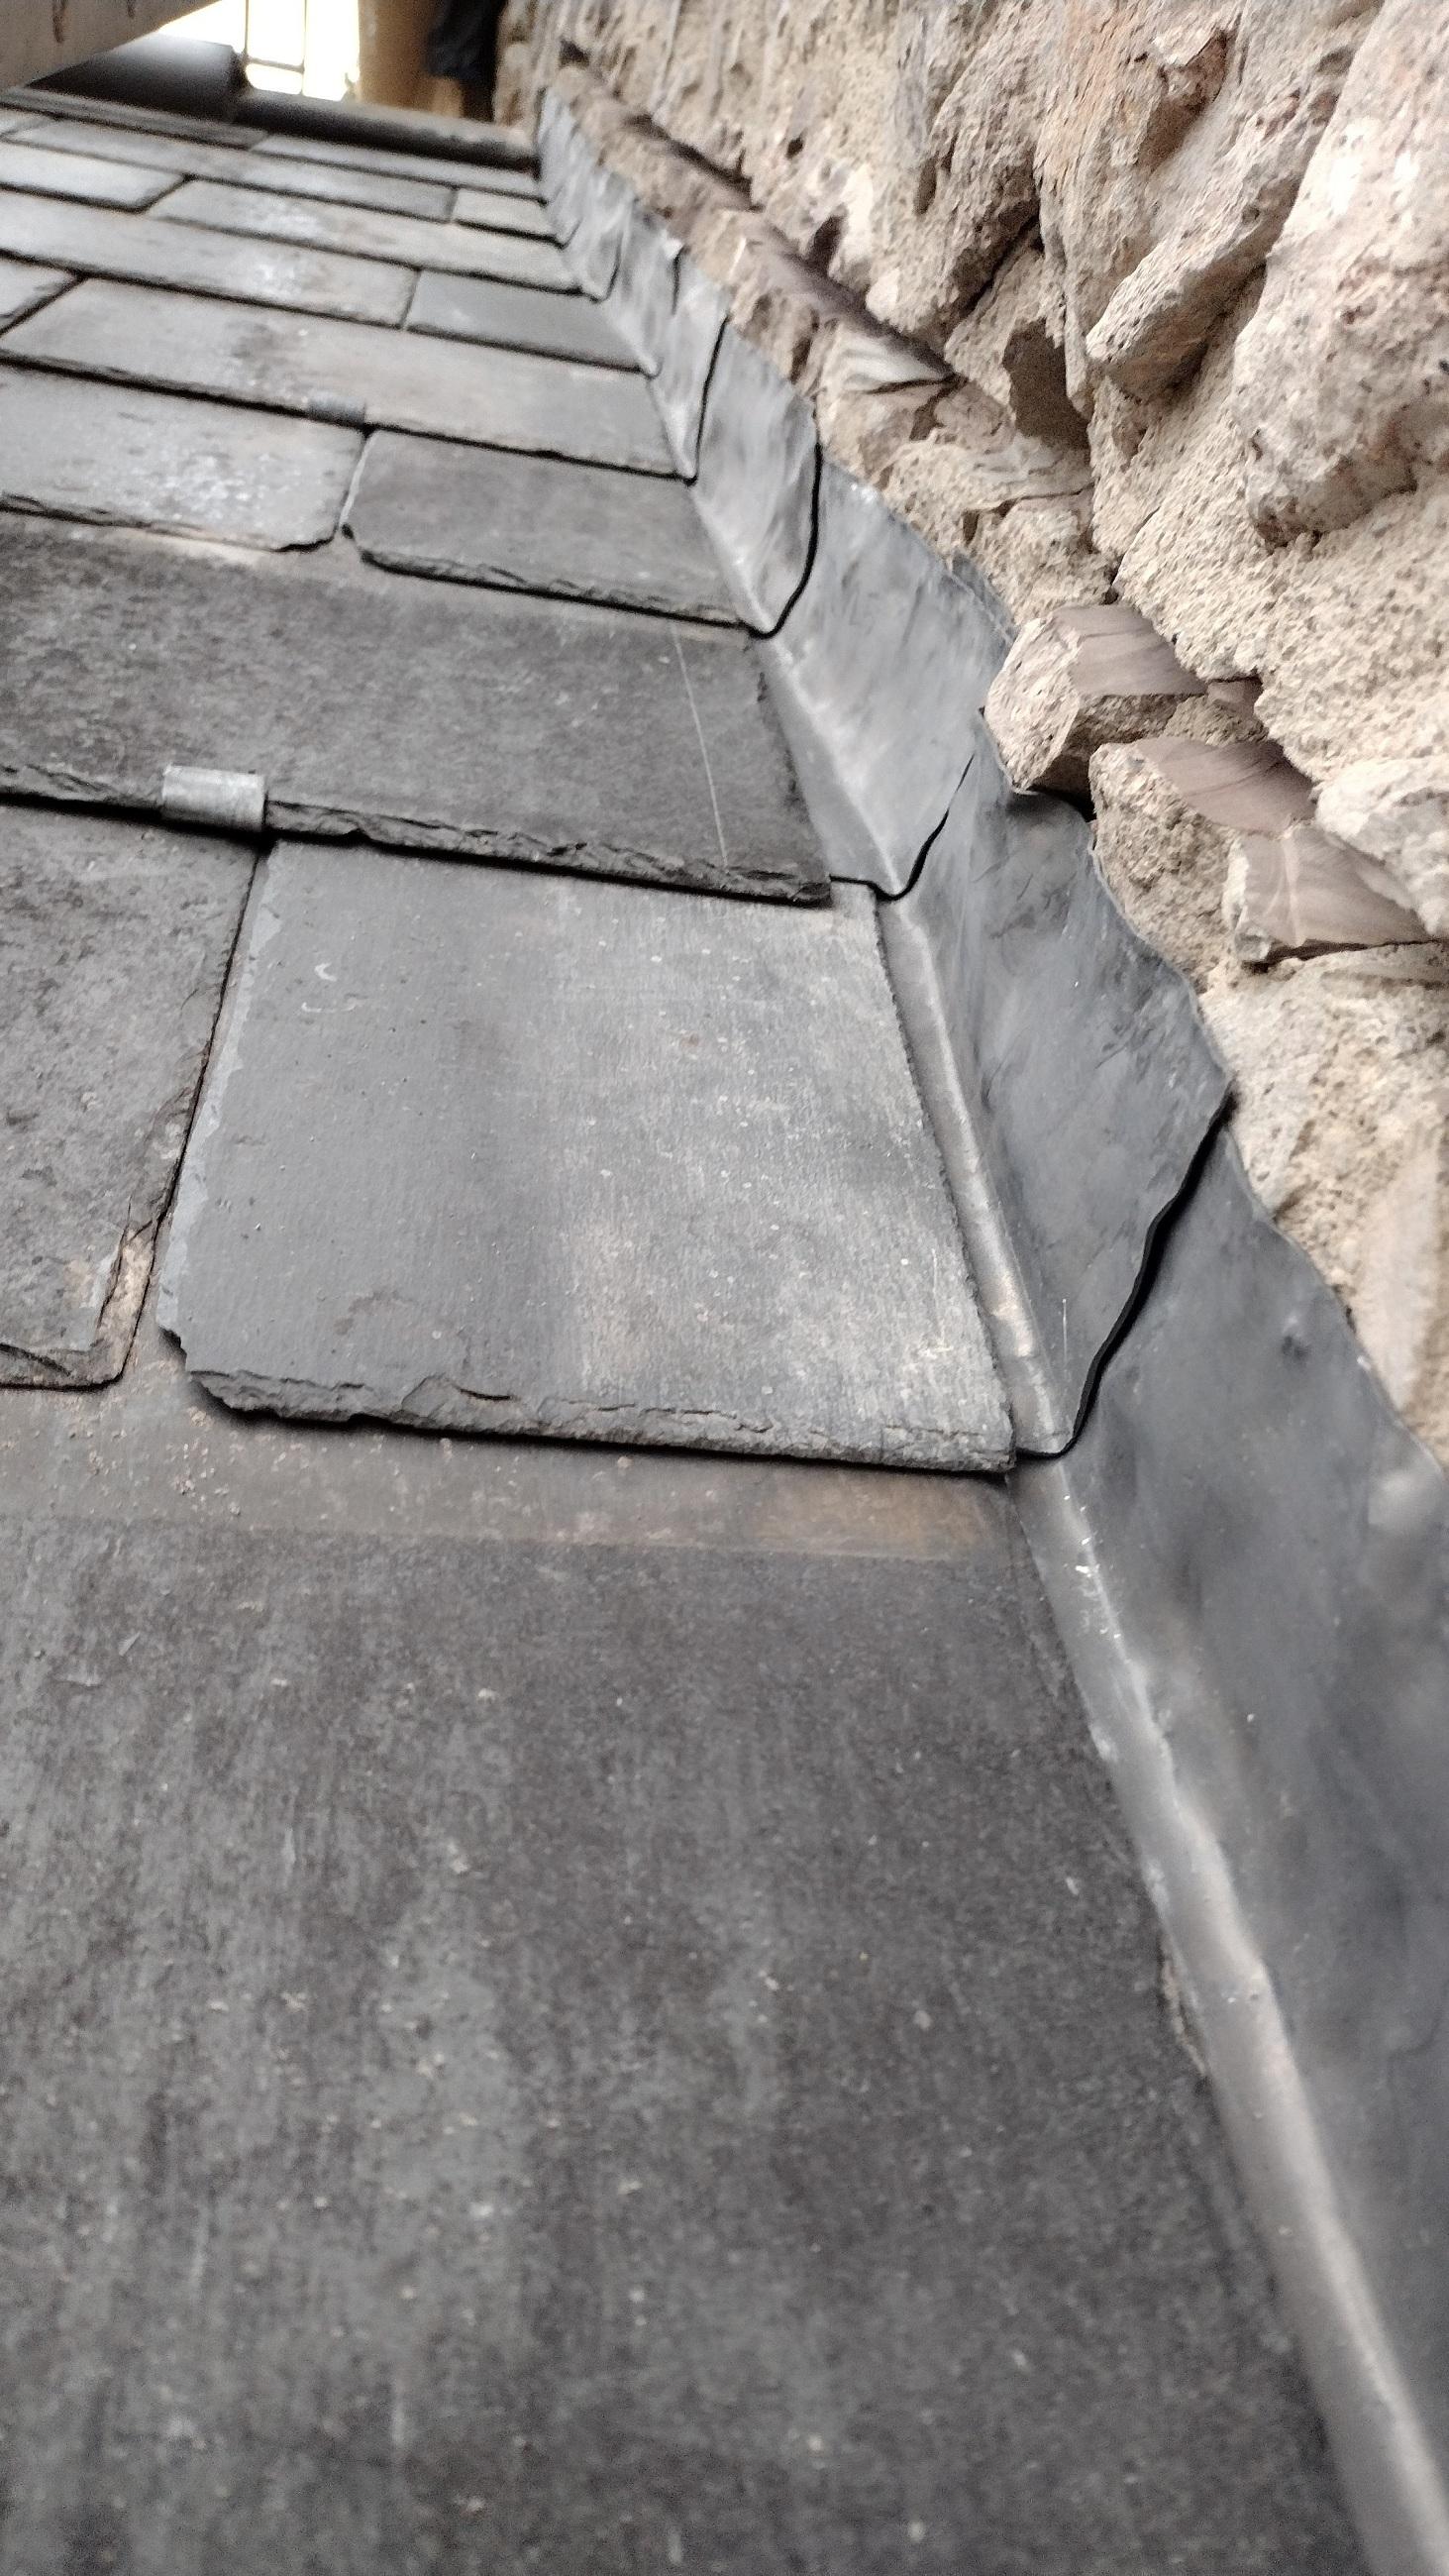
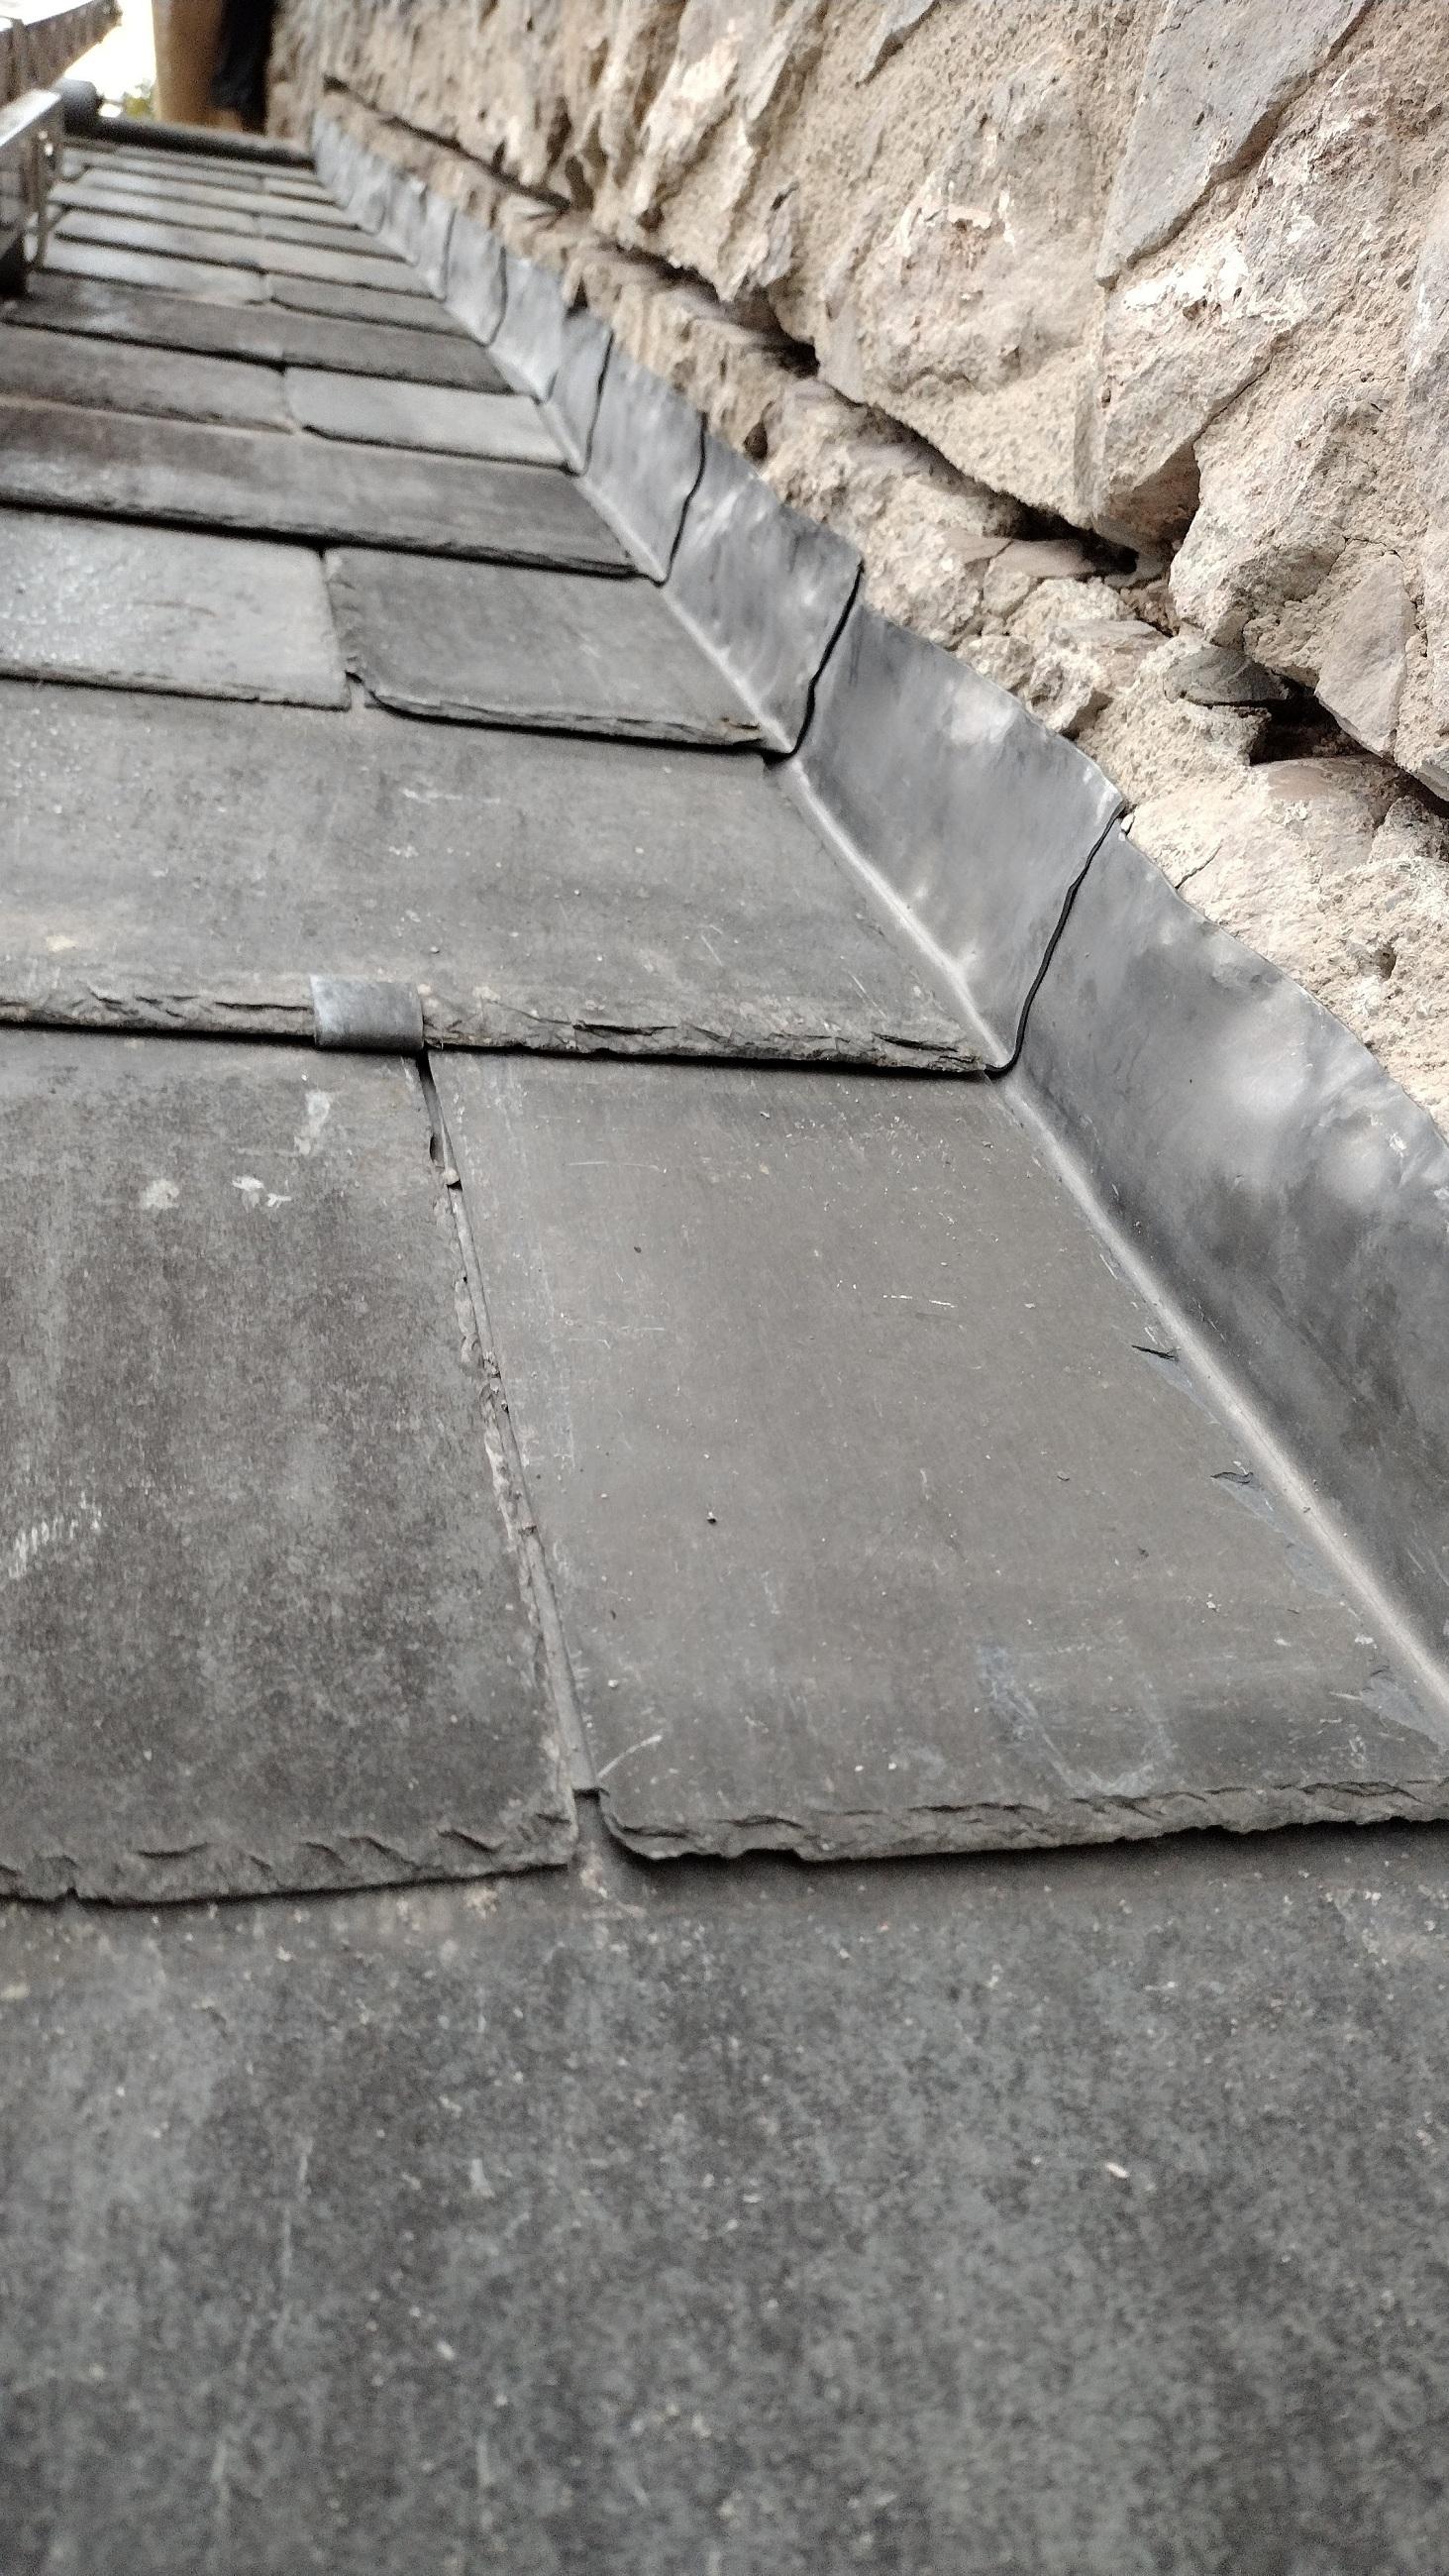
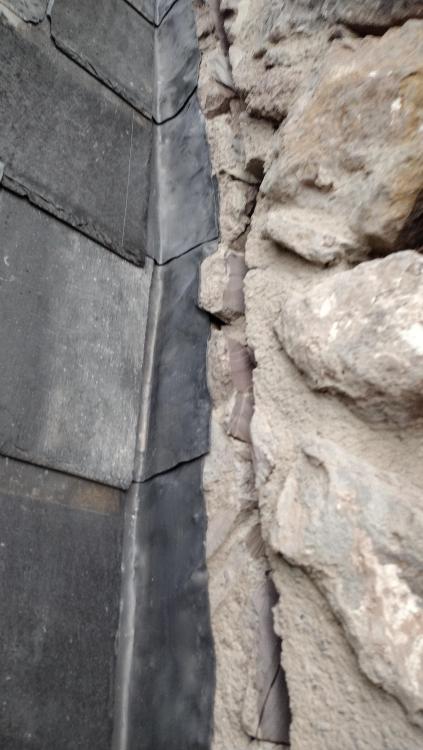
Hi all I've finished installed soakers to my slate roof at a wall abutment, and I've cut the chase above ready for the flashing. The chase isn't mega straight, especially the bottom line This is mostly due to bits of stone and mortar falling away. And partly lack of skill On top of that, the vertical bit of wall that will be behind the flashing undulates and is anything but flat. I've dressed the soaker upstands tight to the wall. Should I do the same with the flashing or does it not need to be dressed so tightly? Also, I was planning to keep the bottom of the flashing about 10mm above the slates. The upstand would then be around 115mm, with 35mm tucked into the chase. Where the chase is lower than 115mm, does it matter? IE - with the lead at 115mm upstand, but the bottom line of the chase only 100mm, there will be a small void behind the lead. Is that ok as is? Or should I look to pack it somehow? I hope this all makes sense! It's been a long day. I'll try and add some photos shortly. Any advice much appreciated. Many thanks
-
I've got the slates off and my battens are only 35mm wide, so I don't think my head nailing idea is a very good one. I'm going to use tingles where the roof cannot be seen from below. Is it usual to use code 3 or 4 for lead tingles? Cheers
-
Actually, I just read that from a thread a few years back, but the link to the hooks no longer worked. Can you remember what they were? I've got an old school one (Tyzack) coming today but will get another if that's no good. What one do you have? Copper nails are quite soft apparently and being easy to remove is one of their additional benefits from what I've read... Mine are galvanised, so we'll see later today how they compare I guess! I've got some more questions if you don't mind please.... - Where I can only access one nail hole in a slate, could I add a second nail at the head of the slate so that it ends up being centre *and* head nailed but on one side only? To stop slate rotating? - Come to think of it, if I centre nail slates at the abutment, the nail will go through the lead soaker beneath. Is this normal/acceptable? In one video I watched, the diagram showed the slates at the abutment being head nailed only. Not sure if that was just the graphic, or whether it is standard to JUST head nail these to avoid making holes in the lead? - In either of the above scenarios, should I also add a hook/tingle as well for belts and braces? If centre and head nail is acceptable, would that be enough without a hook/tingle? I should add that the roof is not all that visible. And it is quite sheltered and well protected from the worse of the weather. Many thanks
-
You've been a fantastic help - thanks a million
-
Damn, I think this hits the nail on the head I'd guess the roof was redone maybe 20-25 years ago. And the few nails I have seen so far look to be galvanised. So if a pro was doing this, how would they approach it? Remove as many slates as needed in the ever increasing triangle to reveal all nail heads? When we had people come and look at the job in the past, they said they would just strip a couple of vertical rows. Although to be fair what people say and what people do doesn't always match!! I will try the ripper. But if that doesn't work - as you suggest it might not - has anyone got any other suggestions?
-
Hi folks Following my recent threads, I've started work today and am removing slates at a wall abutment to put in lead soakers and flashing. Am I missing something obvious or is my only option to use a slate ripper and then use tingles (or hooks) when I put them back on? I had planned to remove two or three vertical rows of slates, and - stupidly perhaps - thought that by starting at the top I could access all nails to remove them without a ripper, and when putting the slates back on re-nail them to the battens. But now I'm up there it seems in order to that I would have to remove the slates in an ever increasing triangle to access all the nails and battens. Am I overlooking something? Or is a ripper (to take off) and tingles/hooks (to put back on) the only option to avoid removing a tonne of slates? Many thanks PS - from what I've read I'd favour using hooks rather than tingles.
-
Just thinking about this again... Presumably because the lead has come down the diagonal wall, when I wrap it round the corner to the other wall it will have to continue to be diagonal down that wall too. Would you then cover that with another small bit of straight/horizontal lead so it's in keeping? And if so, would you chase that bit in? If that makes no sense I'll edit the photo to show what I mean. Ta
-
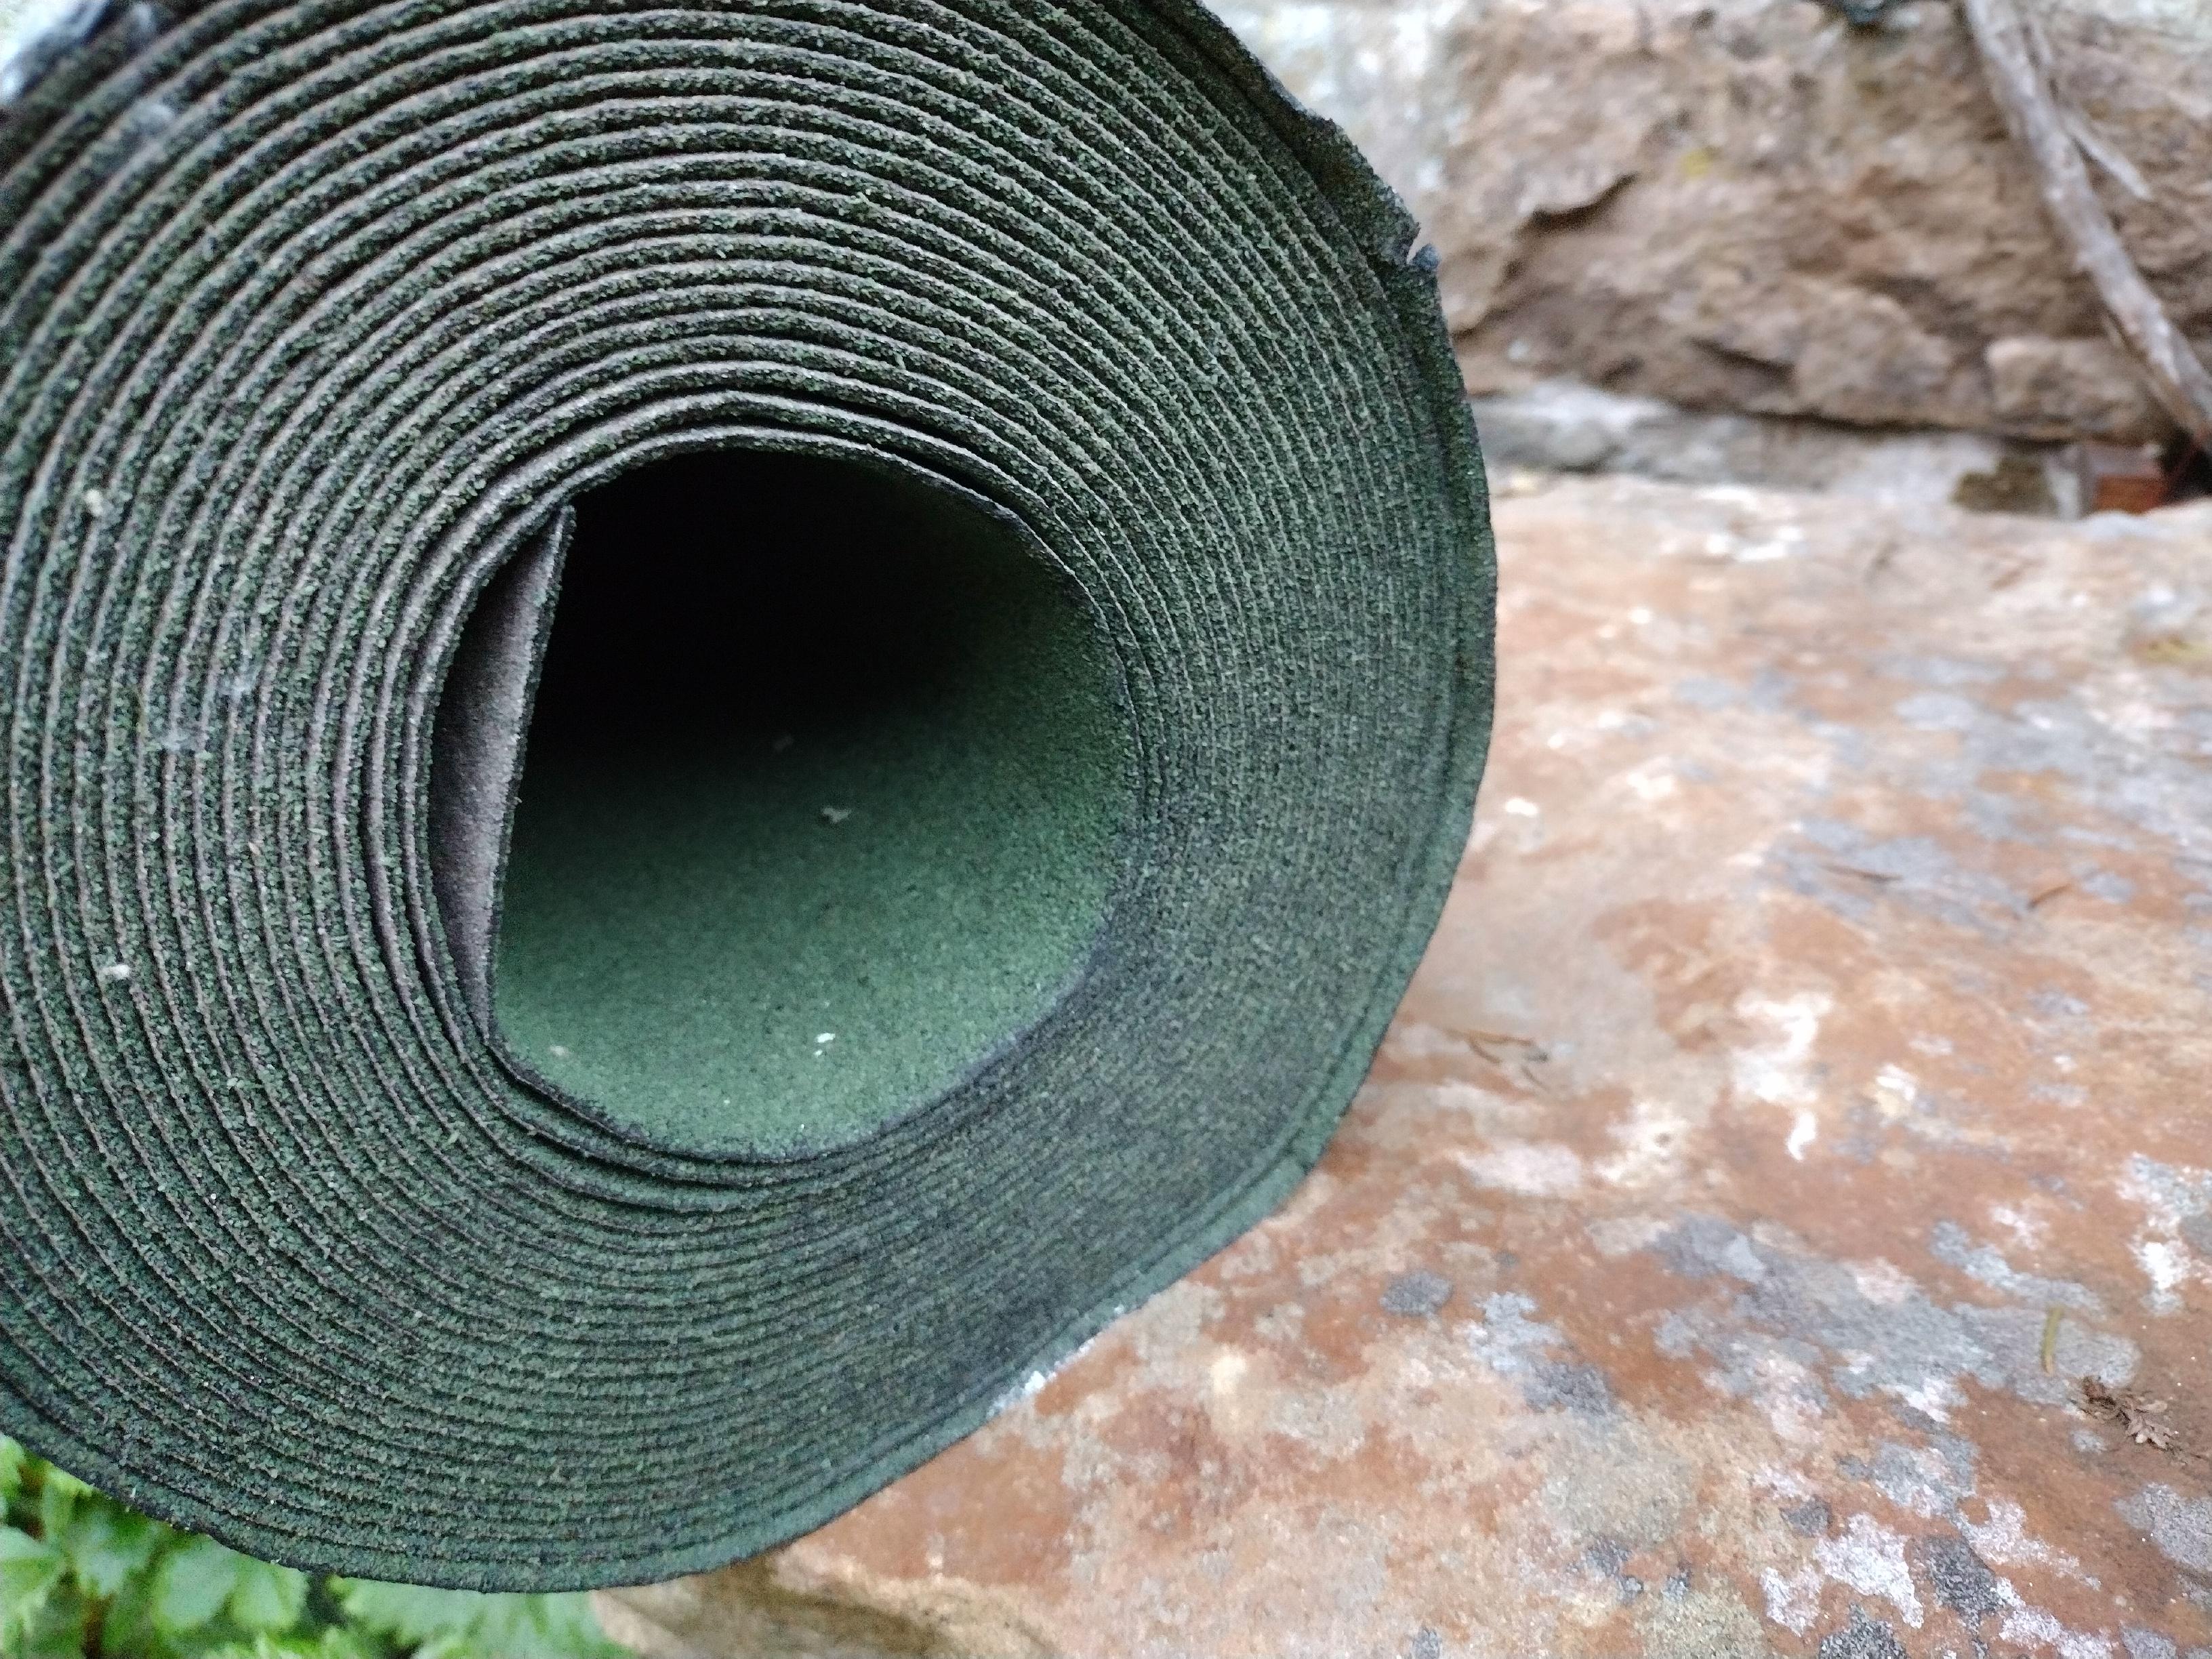
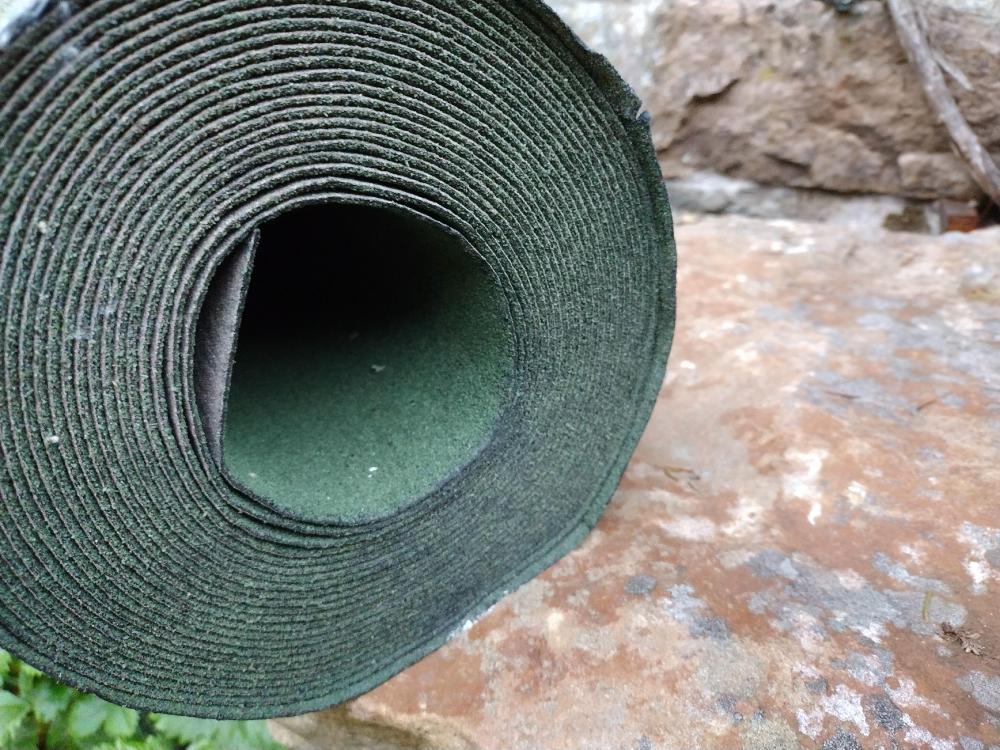
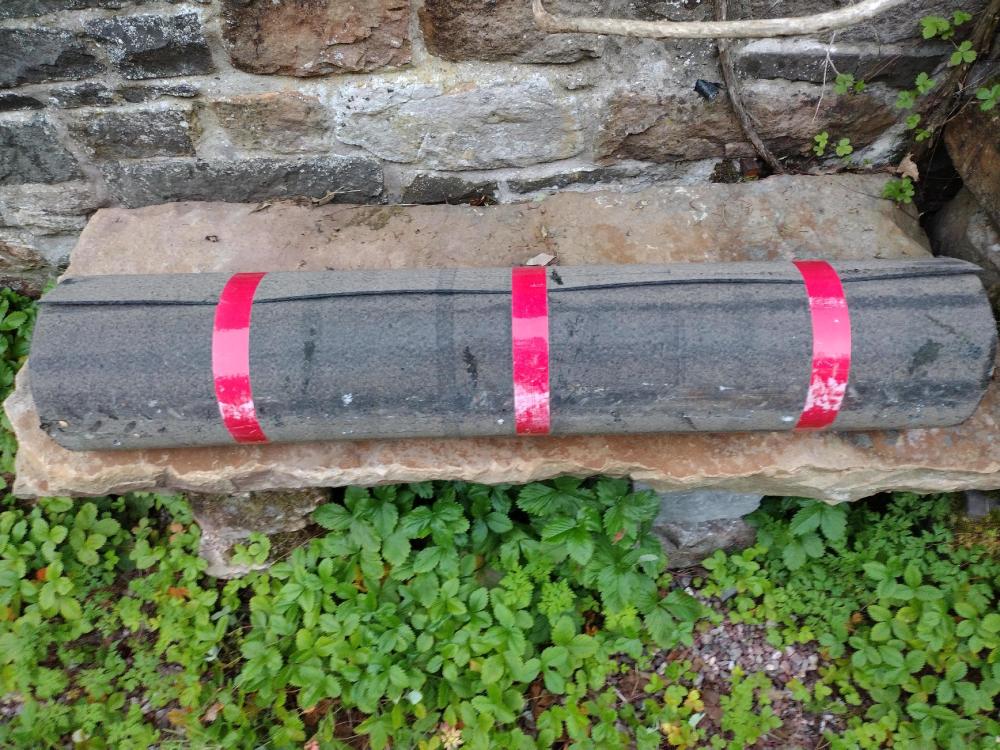
Is 1f roof felt ever green in colour?
Oxbow16 replied to Oxbow16's topic in Roofing, Tiling & Slating
I'm making a repair to the roof where a flue was removed. And putting in lead soakers and flashing at a wall abutment. Thought while the slates were off it wouldn't hurt to renew the felt (and also turn it up the abutment behind the soakers, which is not how it is now). Ta -
Is 1f roof felt ever green in colour?
Oxbow16 replied to Oxbow16's topic in Roofing, Tiling & Slating
I suspected as much, thanks for confirming. Bl00dy builders merchants! -
Is 1f roof felt ever green in colour?
Oxbow16 replied to Oxbow16's topic in Roofing, Tiling & Slating
-
Is 1f roof felt ever green in colour?
Oxbow16 replied to Oxbow16's topic in Roofing, Tiling & Slating
-
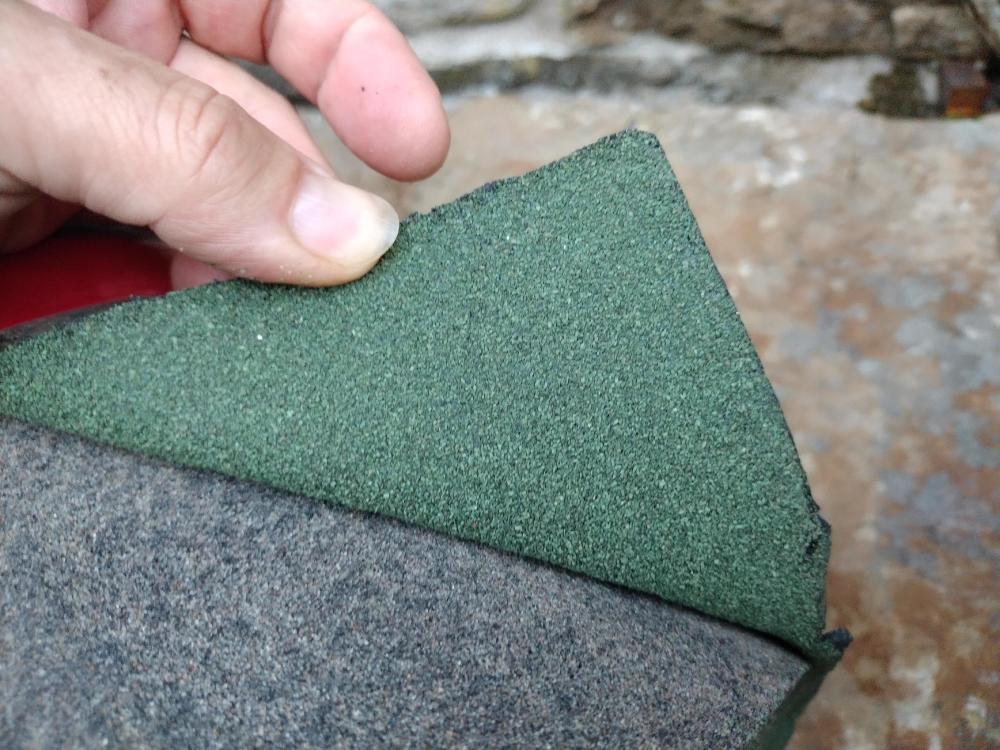
At a risk of getting chucked of the forum for over posting, I'm back again! Delivery for my roof job came while I was at work. Home now and just looking at it and the 1f felt they've delivered is unmarked and green. Don't know if I'm over worrying, but wanted to check it's 1f and I've not been palmed off with shed felt. It's not like any 1f I've seen before, but I've only ever come across it on existing buildings and so don't know if it has changed over the years. It is very heavy and quite sticky, if that helps. Would rather know now than later whether it's wrong! Many thanks
-
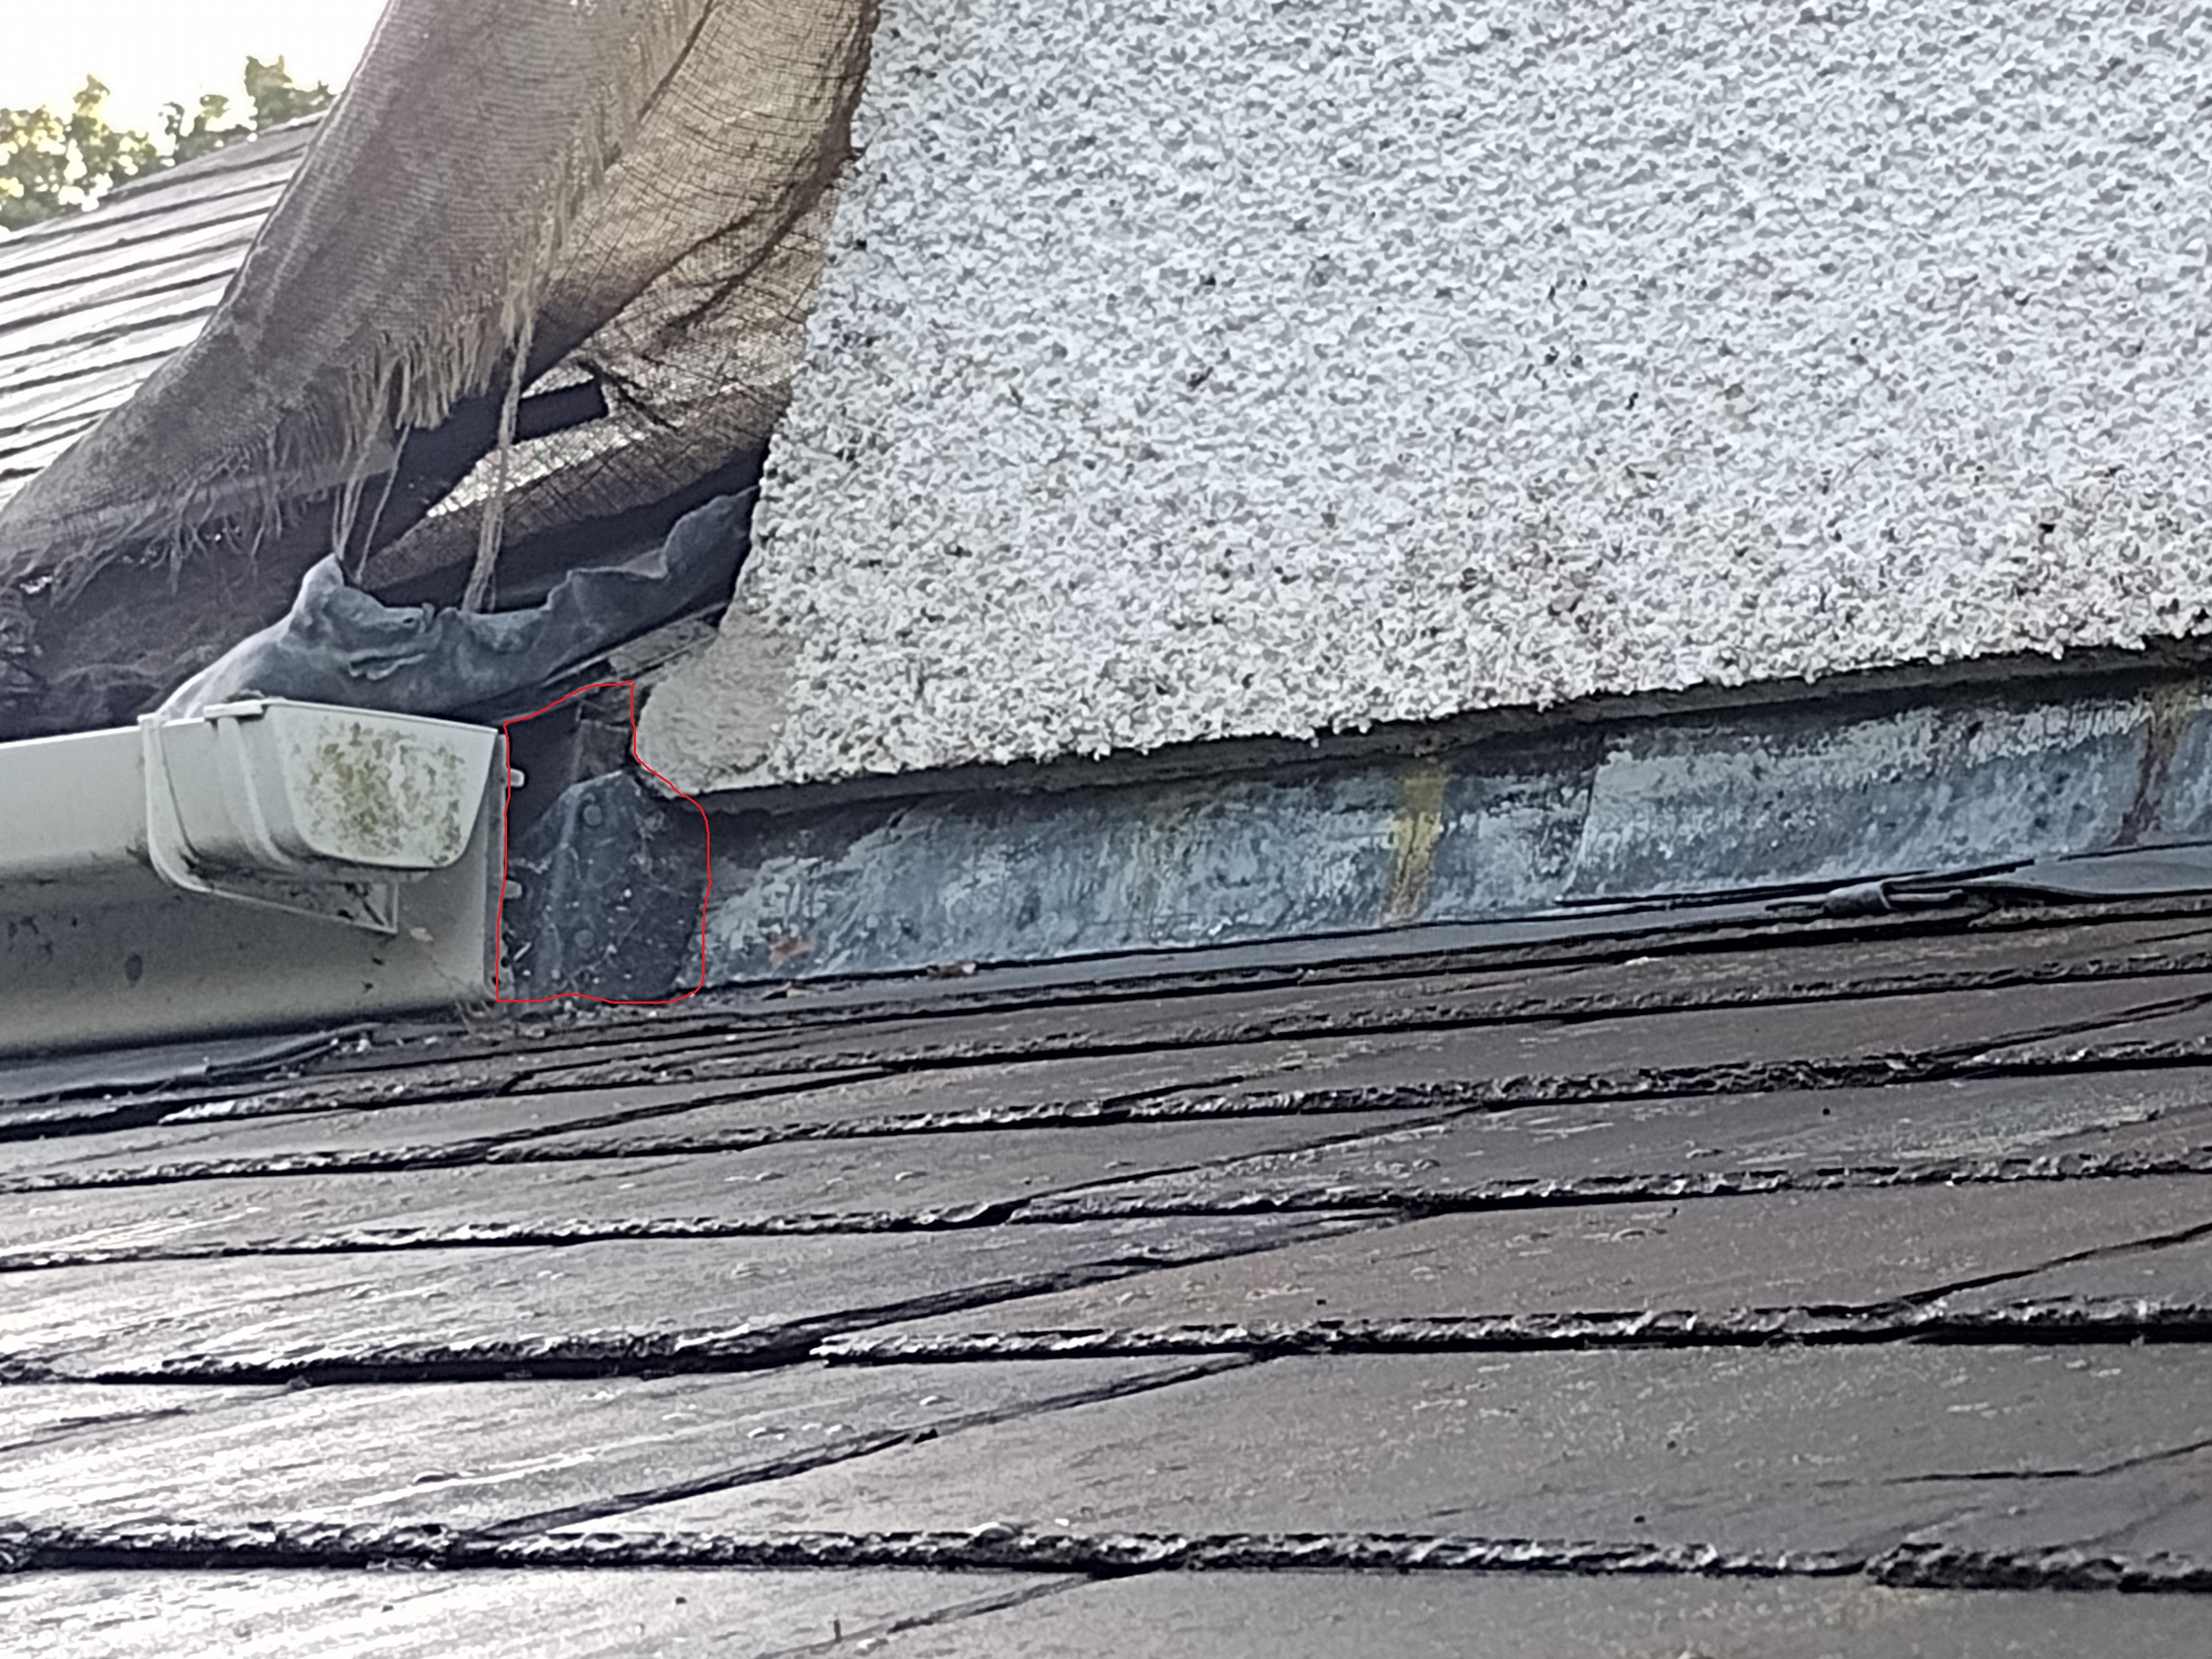
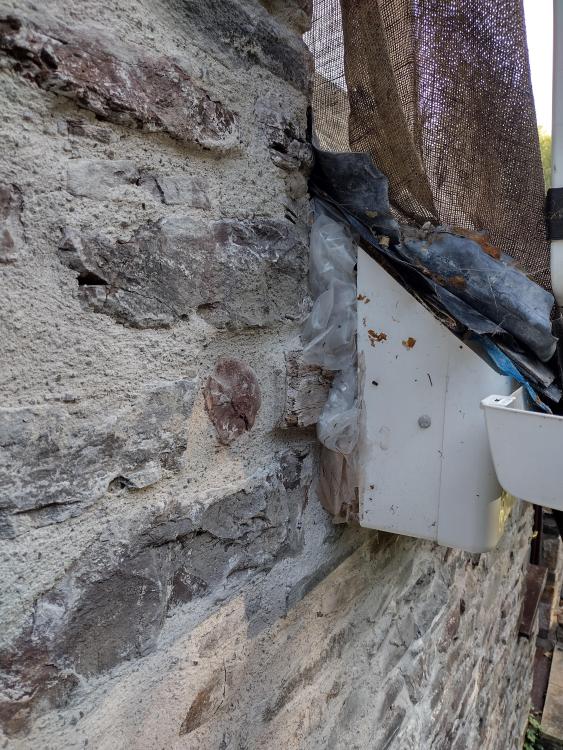
What about the section below the slates, marked in red on the photo? Would you get the relevant uPVC piece and fit to cover? Or use some lead to cover? Ta

-
Sounds like a plan! Thank you very much
-
OK, so do it is the rest of them? 75mm upstand but just with no wall to support it behind? Or would short be better? And what about the flashing? Finish it where the wall ends? Many thanks
-
Many thanks for the reply. From what you've said, I think you've got it right. But it's more the sides I'm not sure about. Maybe I didn't explain things clearly? So I've got some photos... Ignore the plastic, turned up lead, hessian, etc. Hopefully can still get an idea of what's going on even with that cr@p in the way! Cheers
-
Angle Grinder - Wattage, Button/Trigger, and Recommendations?
Oxbow16 replied to Oxbow16's topic in Tools & Equipment
Someone mentioned this morning that in their experience discs usually cut wider than their nominal width, especially if after making the initial slot you go over it again several times. So that's good to hear. An 8-10mm chase would be ideal, so I'll do some practice cuts first using a 6.4mm disc and see what actual width I end up with. If its wider as suggested, then I'm good to go. But I'll get an 8mm disc too in case I need the extra. Regarding fitting on the spindle.... I think I was a bit dumb yesterday. Looking at the mortar raking discs again, while they are 6.4/8mm on the outside at the diamond segments, the inner part of the discs is thinner. So that should be fine... Missed that completely yesterday! Although still curious as to why they specify the low 3mm maximum in the Parkside manual. Think I'll ignore it though Cheers -
Angle Grinder - Wattage, Button/Trigger, and Recommendations?
Oxbow16 replied to Oxbow16's topic in Tools & Equipment
That video is scary, but I think it's fair to say he had it coming! That's what both manuals say to do for thicker discs. For the Parkside thy say anything above 3.2mm, while the Makita says anything above 4mm. That's good to hear. Do you know/remember what the thickest disc you've used in it is? If you - or anyone else - has a Parkside and is able to measure the spindle to see what the thickest disc you can safely get on there would be, that would be a big help. Thanks for all the replies and input, and especially @SteamyTea for the videos -
Angle Grinder - Wattage, Button/Trigger, and Recommendations?
Oxbow16 replied to Oxbow16's topic in Tools & Equipment
Thank you so very much for that. In terms of the manuals, they don't say. The Makita manual just says "Max. wheel thickness" and specifis 6.4mm for all models covered by the manual. The Parkside says "Max. Thickness - 3mm Cutting Disc. 6mm Roughing disc". So presumably a 6mm physically fits the Parkside. As for an 8mm, I'm not sure if it would fit either of them?