Oxbow16
-
Posts
442 -
Joined
-
Last visited
Everything posted by Oxbow16
-
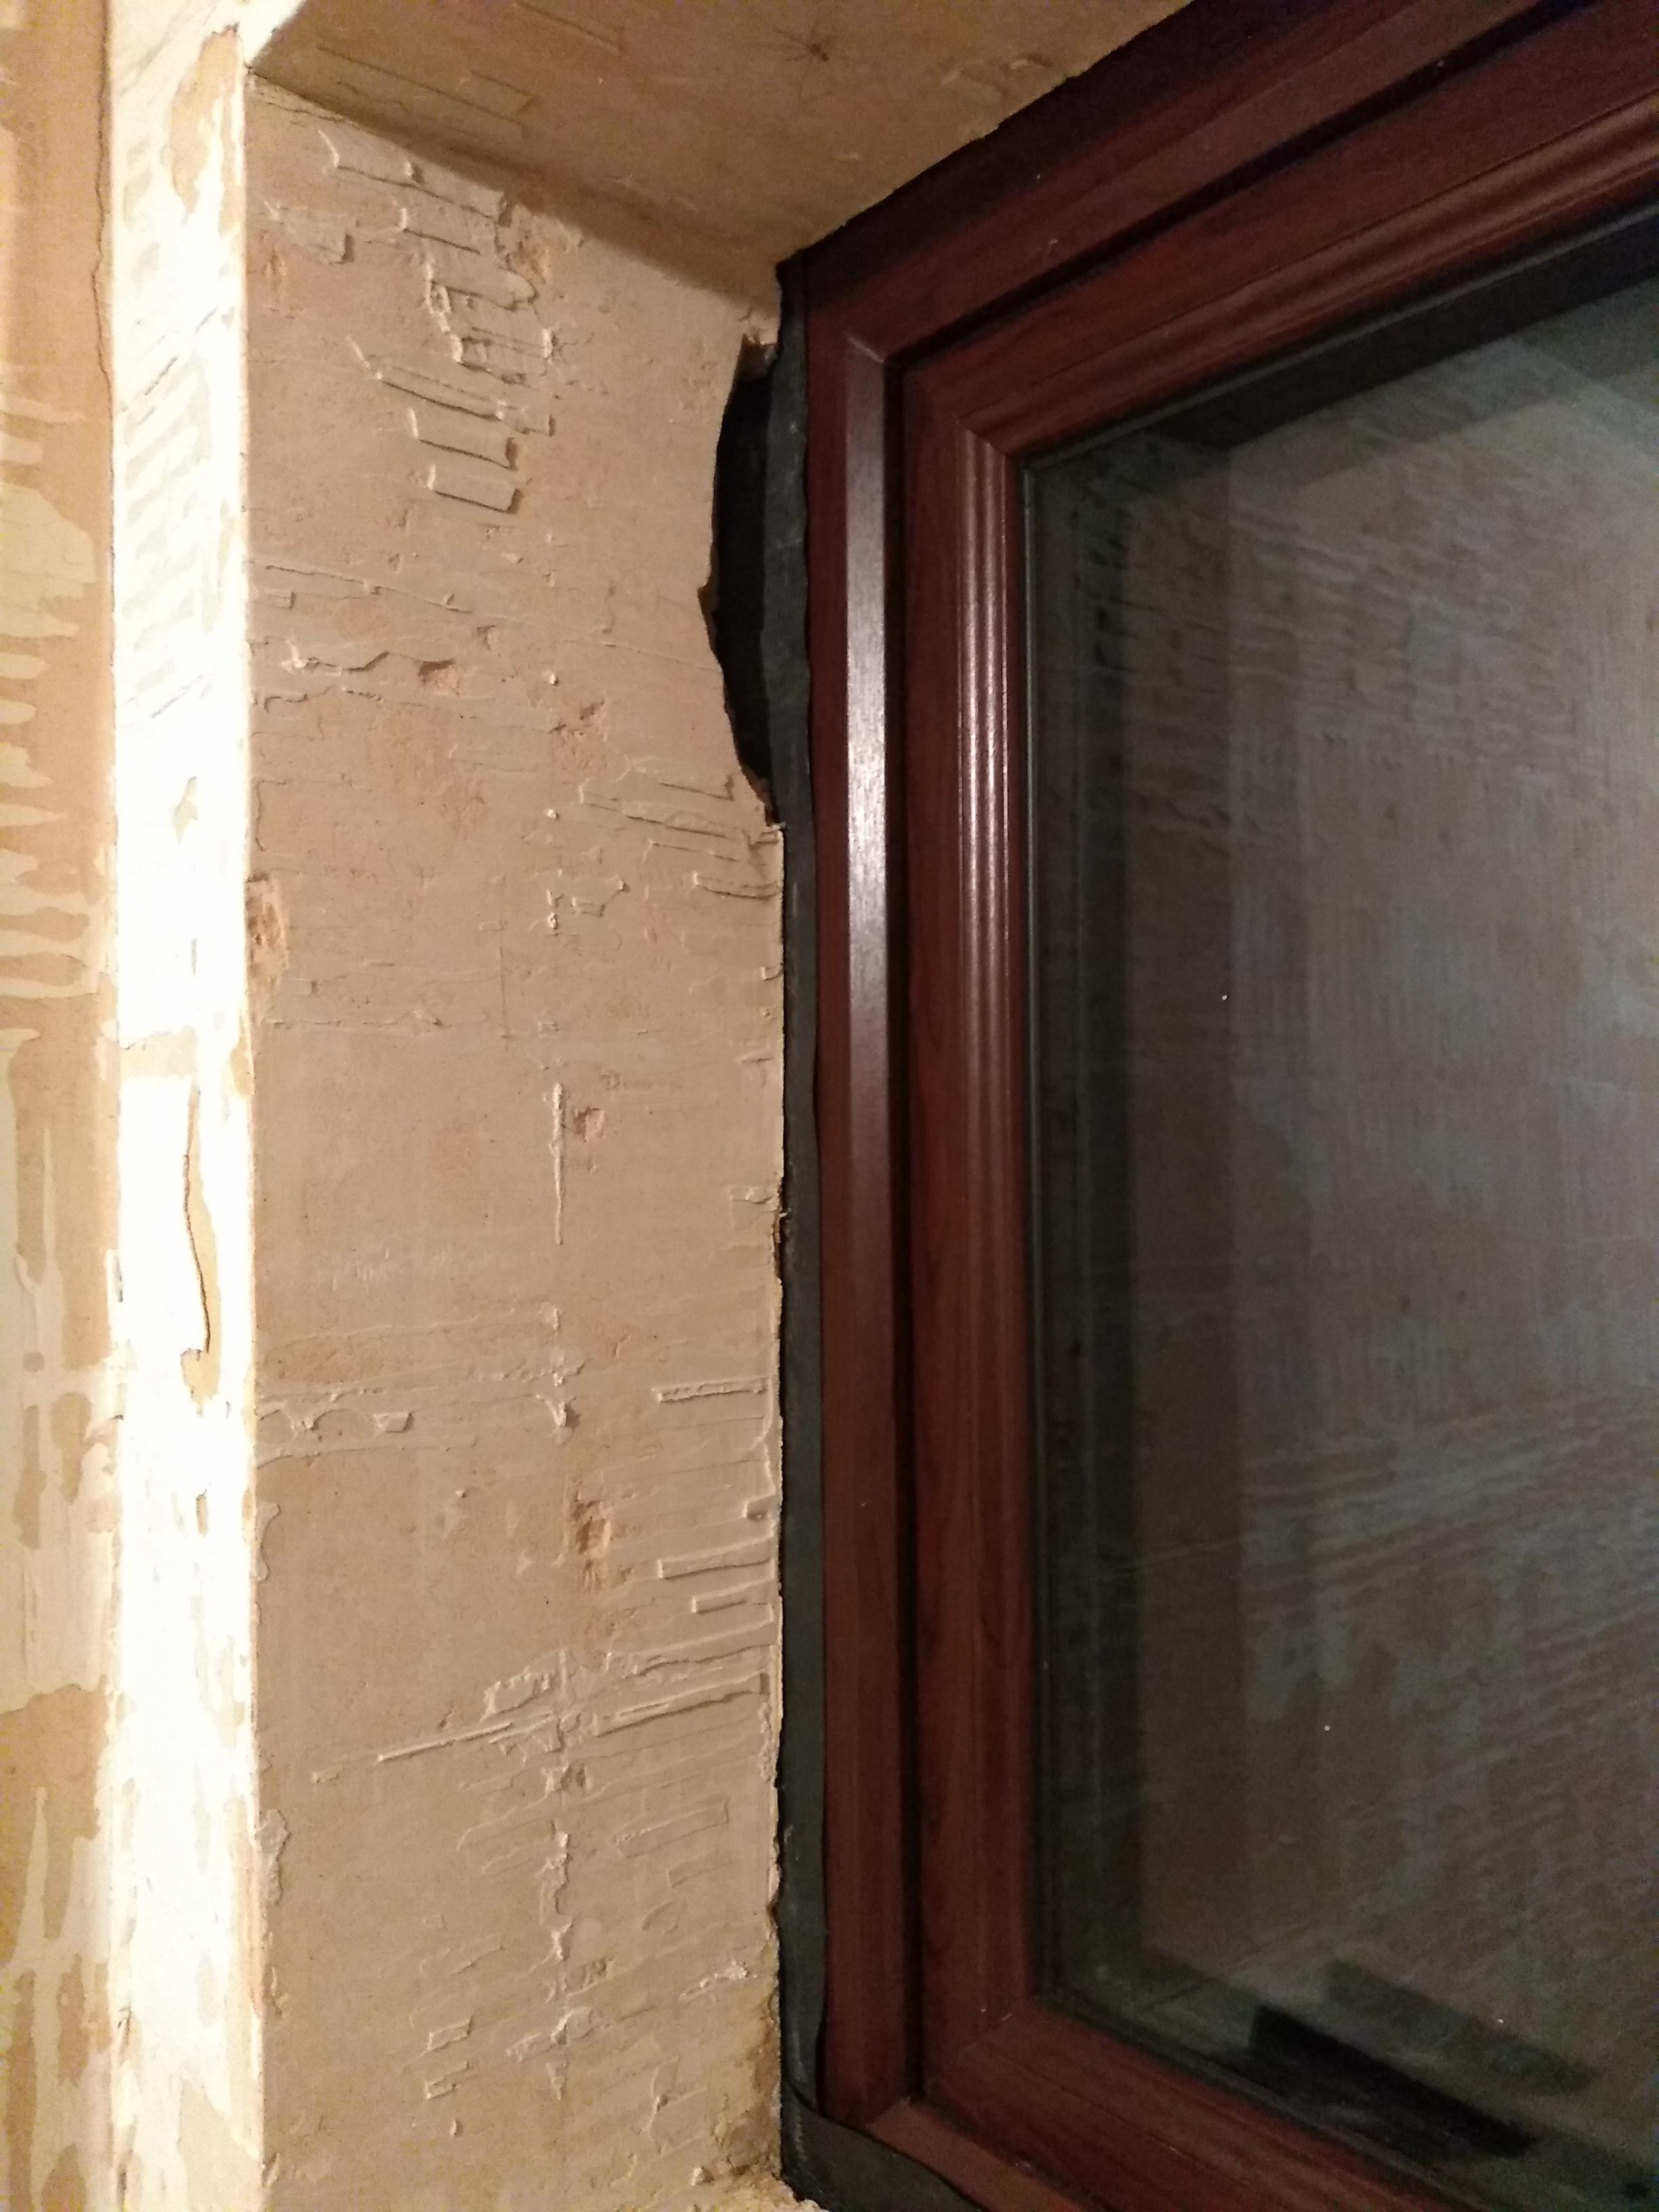
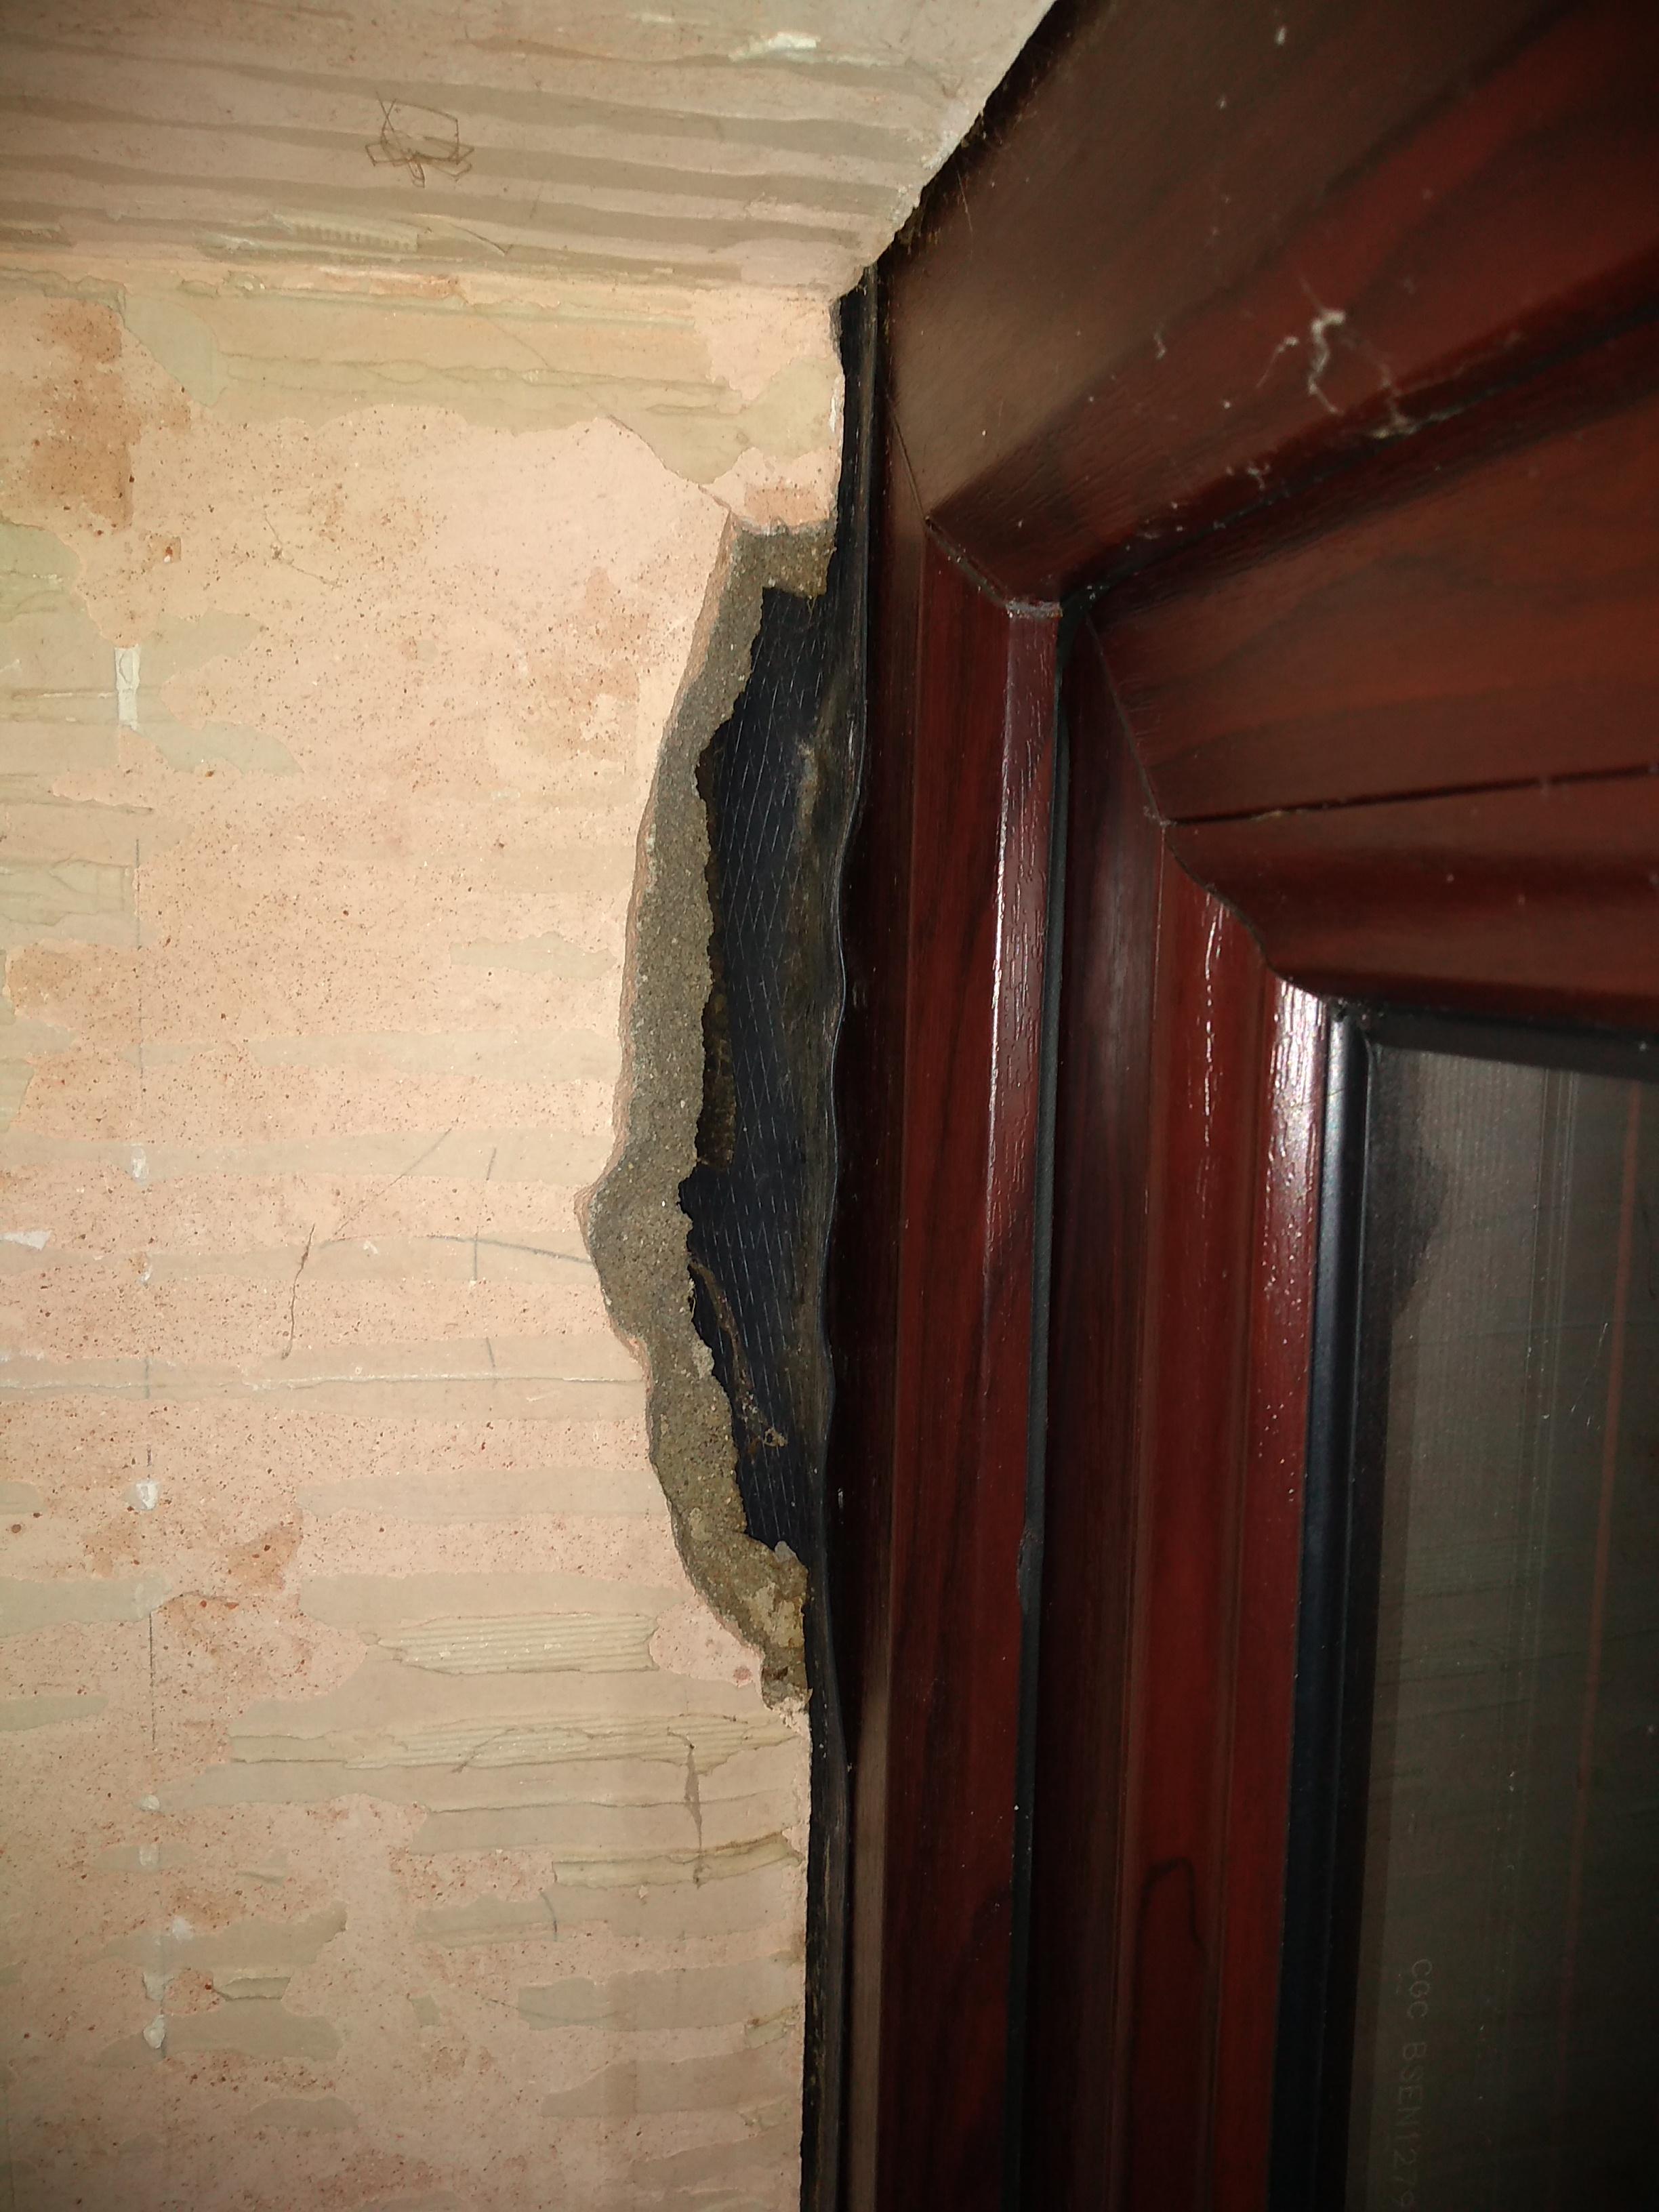
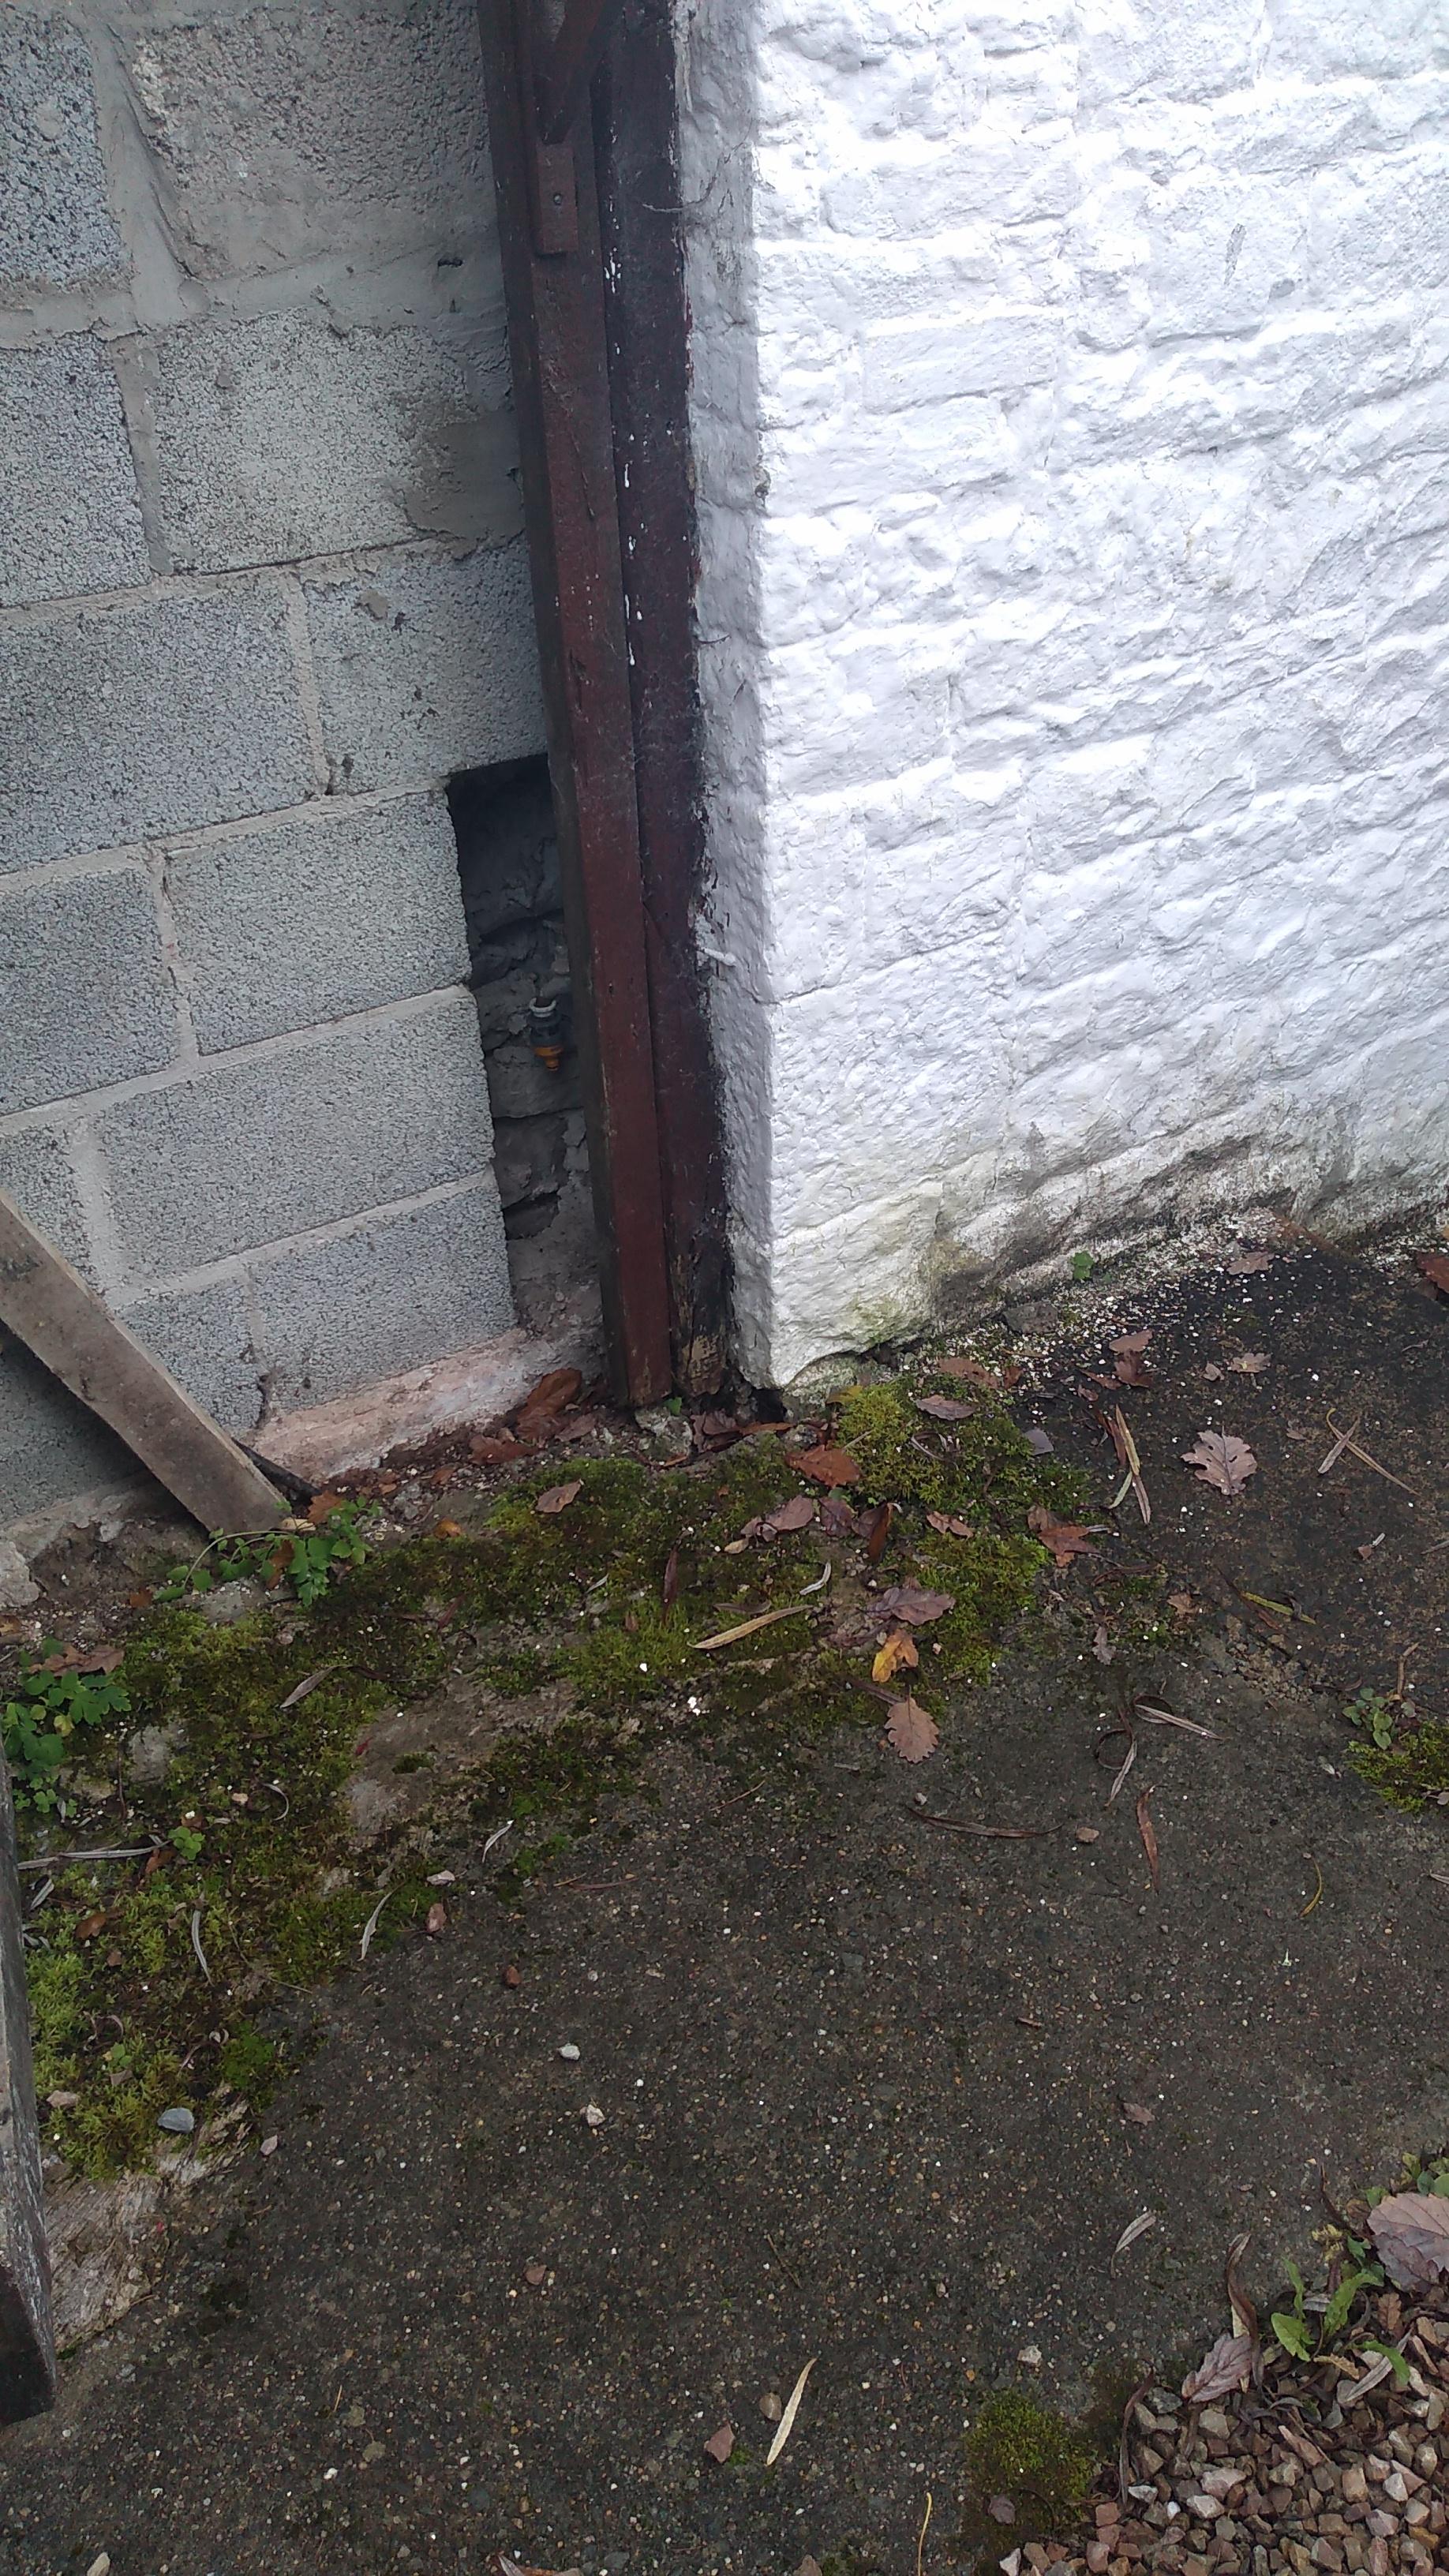
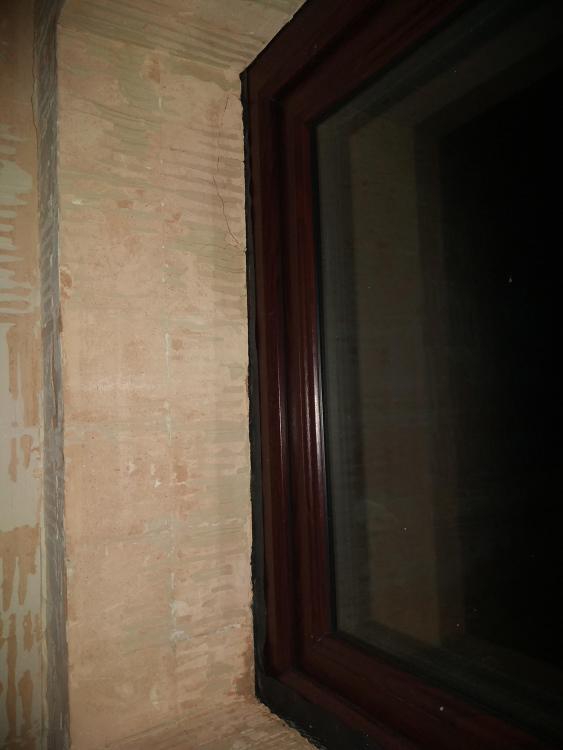
I'm back from work now, and there was some loose wall in the reveal so I've pulled that out and taken another couple of photos which show the DPC deeper into the wall. I thought they might better show what's going on and in turn what I need to do... Cheers

-
Hi The onslaught of plumbing questions continues! Sorry folks... The plumber is coming on Monday and will be draining down to do the bathroom etc. I was considering whacking in some system cleaner before he comes, but would need to get some tomorrow. 1. Is it worth using for such a short time (less than 48 hours)? 2. If so, which one would people recommend for that timescale? 3. I think it's Fernox who say the system should be drained and refilled BEFORE using the cleaner. Is that generally true for all cleaners? I won't be able to do that and can only add it to the system as it is now. Is that ok? 4. I'd prefer to add it via the magnetic cleaner. I've got one of these: https://www.wolseley.co.uk/product/center-(cb)-system-filter-22mm-black/ Are the quick dose etc versions from different manufacturers all compatible, or would I have to buy a specific one for that filter? 5. People sometimes say, half jokingly, that if you have a *really* old banger of a car you shouldn't clean it because the dirt is holding it together A plumber once told me that the same is true of old heating systems, and that system cleaners can potentially cause/expose problems if there's rust inside radiators, dodgy piping behind the scenes, etc. I've googled and not found others saying the same, so wondered what people here think about that? We've on oil, normal boiler (vented system), most of house heating around 20 years old, but some radiators probably much older than that. Many thanks for putting up with me!
-
Thanks for the @Onoff - that guide will be very handy. I'm all done with the frame fixings and no DIY disaster. My partner looked shocked! I was more pleasantly surprised Will give some low expanding foam a blast around the window/wall over the weekend, with all your tips to hand. Does anyone have any thoughts on that before I do? Cheers
-
Thanks for the further replies. @saveasteading -Good point RE the eco credentials and something that does matter to me, so I'll bear that in mind. I do have a reasonably small carbon footprint though day to day, so if the hardwood trumped the soft on other counts then I might just close my eyes, clench my buttocks, and do the wrong think environmentally on this occasion... @Temp - WBB? What does that stand for or should it read WBP? Trouble with that is sourcing it at this stage, and finding someone who can either cut it on site so that I can transport it, or who does delivery. Also, sticking one bit on t'other.... That would depend on whether it resulted in the plumbing work having to be redone due to the small change in height... Something I'd rather avoid if possible... All in all, I think the 18mm will be fine, and probably fine just in it's off the shelf state. I made the thread wondering if all the answers would be a definite "NO!". So I'm feeling sufficiently re-assured now. Cheers for all the help
-
@SteamyTea I'll come back to that when the morning is further away and I've had x more coffees. Perhaps not appropriate given your name, but I think you catch my drift?
-
Hi @MikeSharp01 Thanks for the reply and for sharing your thoughts. The tank is plastic. There are no other signs of active woodworm up there. We did get a company to come and have a look a couple of years ago and they were happy with what they saw. Any holes aside from those in the tank base they said were historic and nowt to worry about. I've kept an eye on things when I've been up there and think the other timbers look fine. On top of that, the roof needs work at some point soon, at which point it will have much better ventilation which would make it less of a haven for any critters. Perhaps the base I'm changing would then be fine too. But seeing as everything is being drained down and it's easy enough to put a new base in, I thought it was worth it. Lifting the tank - no, unfortunately not. On the one side, there is 430mm clearance between the tank top and rafter above, but on the other side that clearance is only 140mm. But RE spreading the weight... Perhaps I gave the wrong info? I'm not sure... But what I meant is that the tank itself *JUST* spans three joists. The board will span 4 joists, possibly 5 (depending on what length I can get up there through the hatch). So does that make things even better or have I missed the point? No evidence of bulge I don't think, but now you come to mention it I'm heading up to take another look! Thanks again
-
Hi I've got some upcoming plumbing work and everything is being drained down for it, so I'm taking the opportunity to replace the boards under the tank in the loft because they have signs of woodworm... I'm hoping to use 18mm ply because it is available at B&Q where they will cut it to size for free, which will save time, hassle, and will mean I can fit it in the car! But is 18mm thick enough? Here's some relevant info: - The existing base is T&G floorboards and they're 20mm - The tank spans three joists - The joists are 150mm x 37mm. Joist centres are average 400mm apart. - There are no walls beneath the tank. The nearest wall is a solid internal wall, which is 500mm away from the tank, to the side. - The tank is 40 gallon / 182L actual (60 / 273 nominal) If 18mm will be enough, it seems B&Q offer two types of ply and I wondered which is best please? https://www.diy.com/departments/hardwood-plywood-board-l-2-44m-w-1-22m-t-18mm/5059340257433_BQ.prd https://www.diy.com/departments/natural-softwood-plywood-board-l-2-44m-w-1-22m-t-18mm/945875_BQ.prd Many thanks for sticking with me through this bathroom refit and all it involves!!! PS - if this is more suited to a different sub forum please move it to where ever is best. Cheers.
-
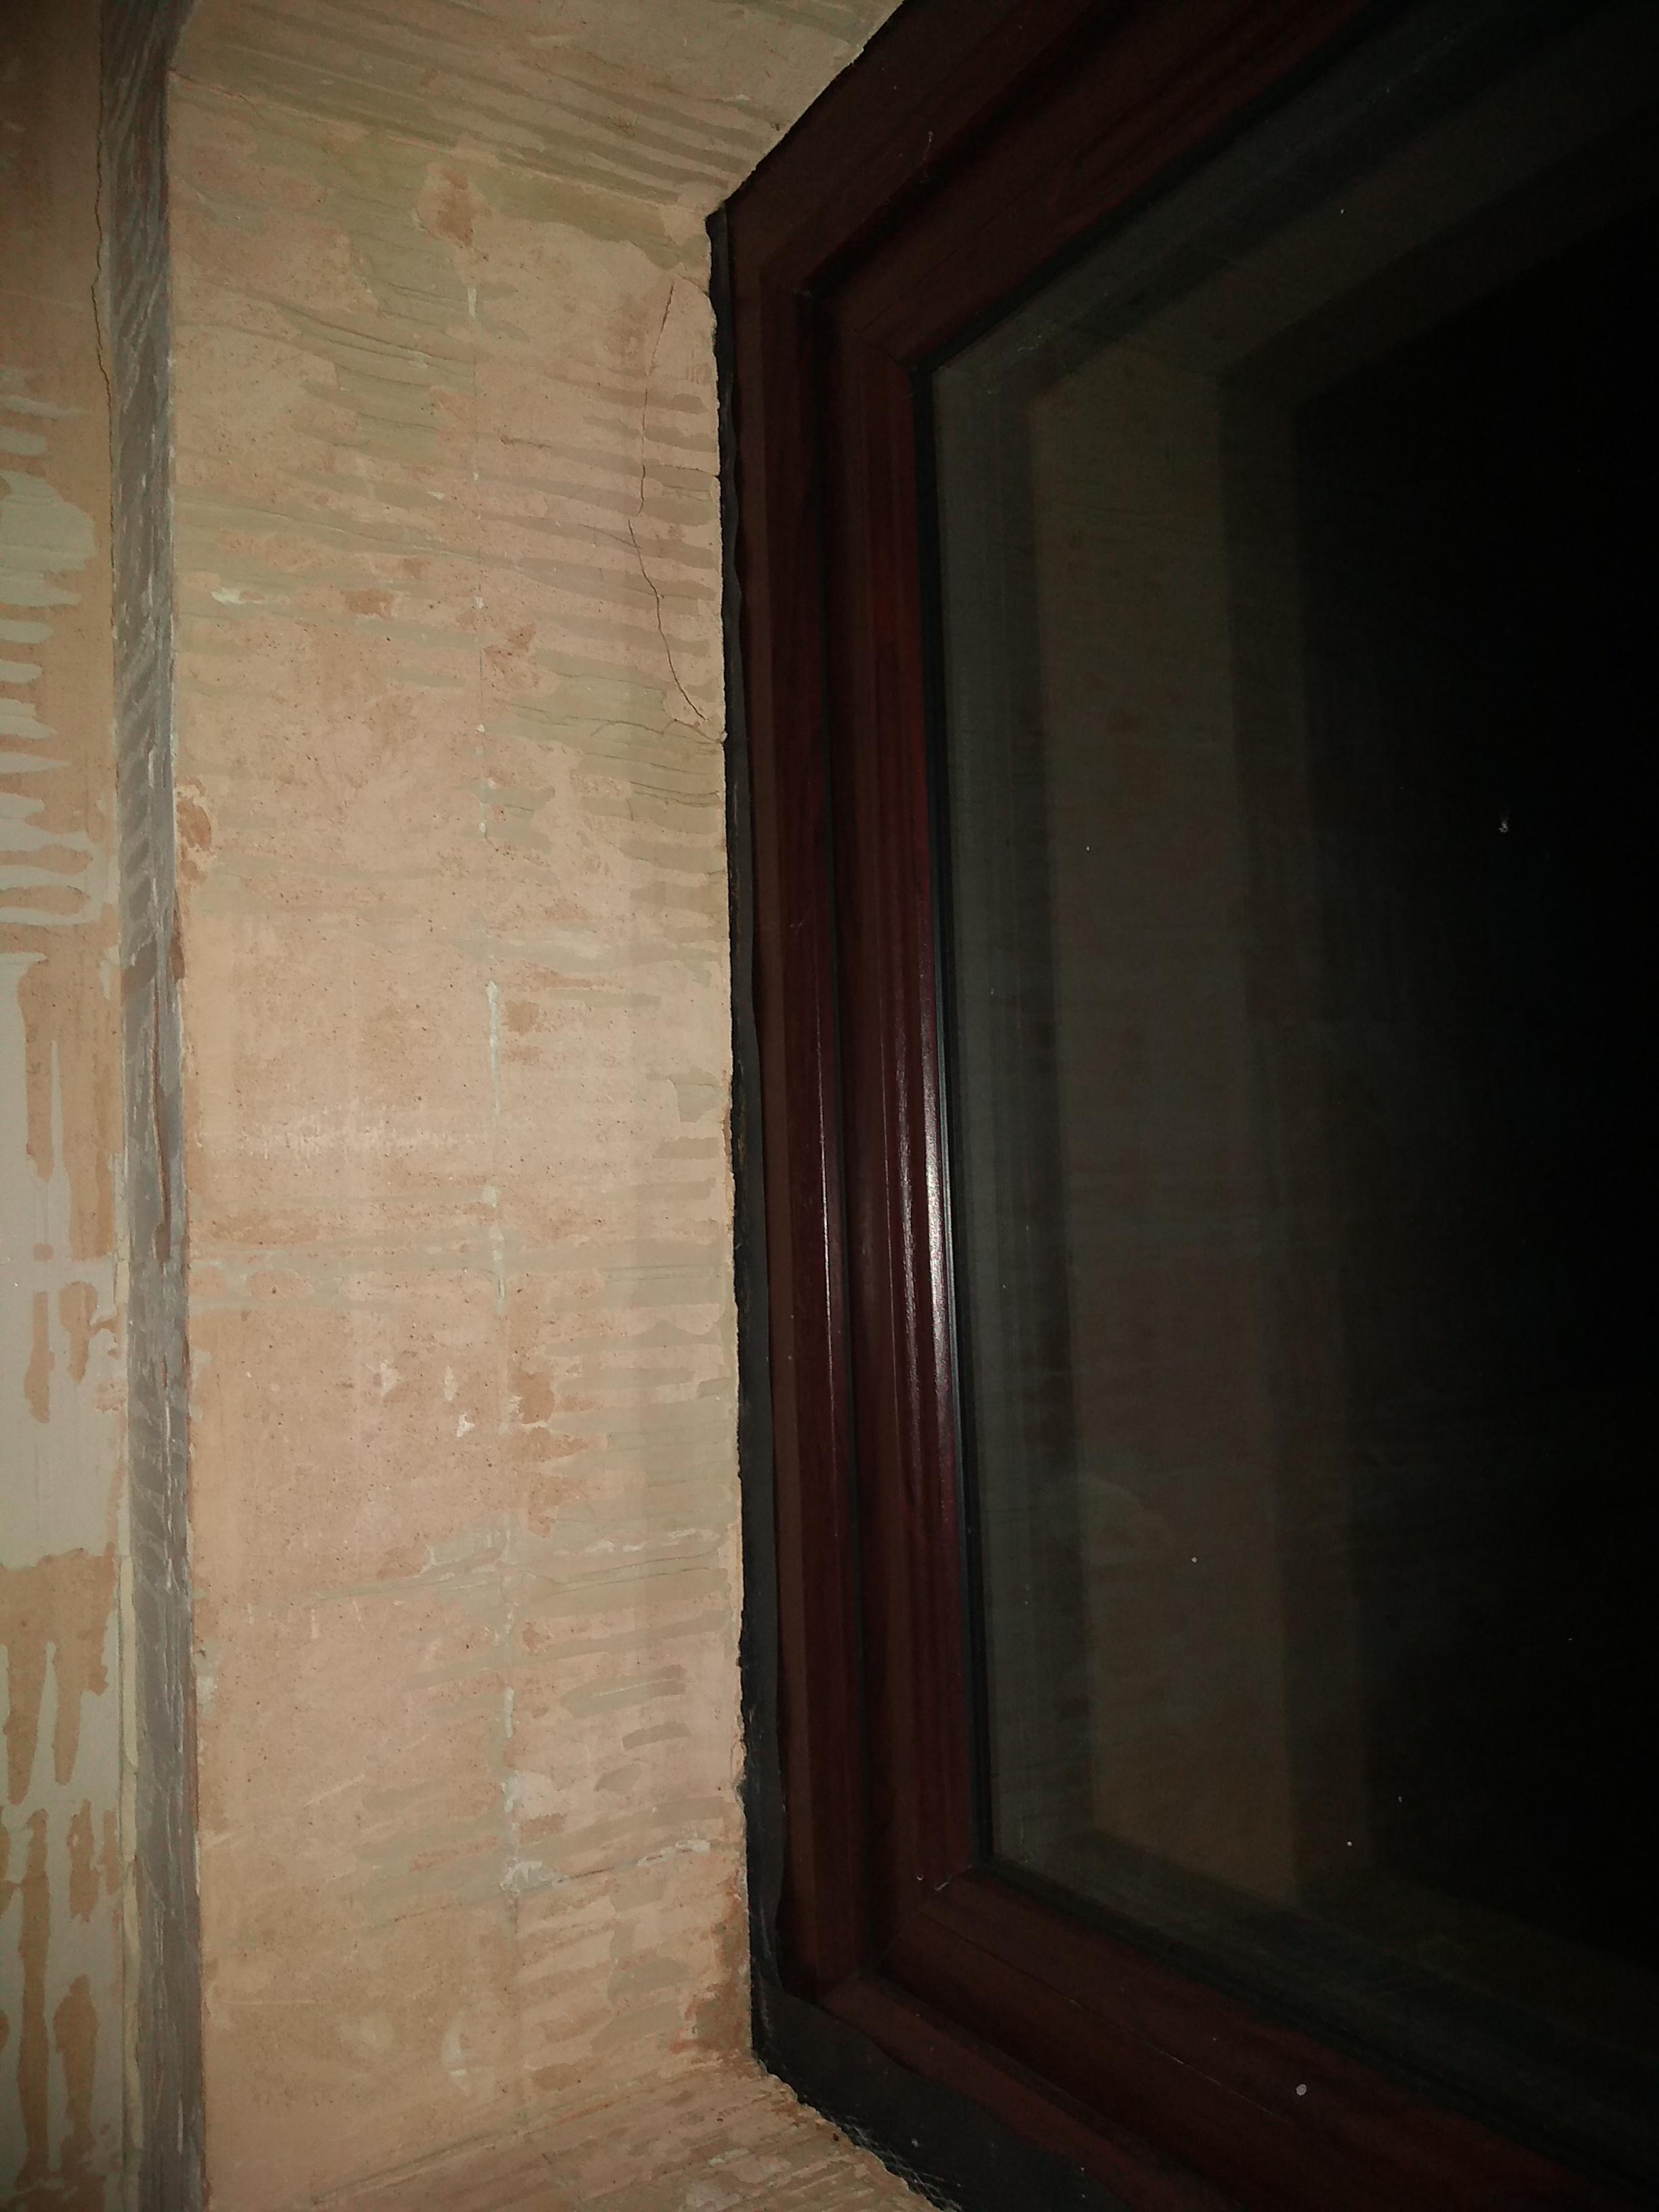
Thanks @Marvin I don't think I'll have trouble putting in enough to fill the window-wall gap, seeing as it is only 5mm wide! Putting in too much is for more likely. So I'll construct some kind of mock up with scrap wood so I can have a trial run first....
-
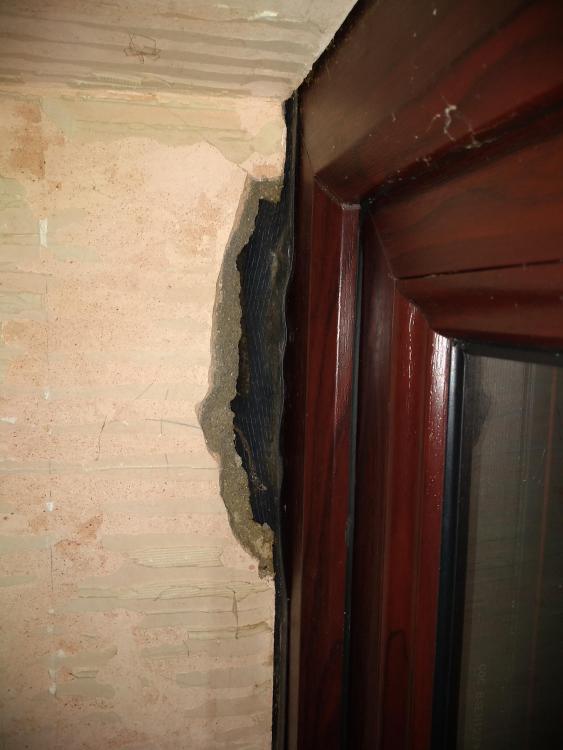
I don't mind being wrong, so long as I know I'm wrong and don't carry on regardless thinking I'm right! So, thanks for putting me straight That's an extremely kind offer and hugely appreciated. But I need to get some other bits form town so I've got them on the shopping list and will get them whilst out. Thanks though - very thoughtful indeed. When it comes to sealing the gaps, what would be the downside of using a frame sealant instead of foam? I've only used expanding foam once, and that was a few years ago. I've heard the horror stories and I'm not always the best at being careful. Frame sealant, caulk, etc, I've had a lot more experience with and am a lot more comfortable using. Would it be a lot worse a choice? Also, you can see that black stuff sticking out in the pics above. Is that some kind of damp membrane? Presumably I cut that back to flush with the window (or a little proud to allow for the tiles). But when filling the gap, should the black stuff be against the frame or the wall? I presume the frame but thought best to check. Many thanks
-
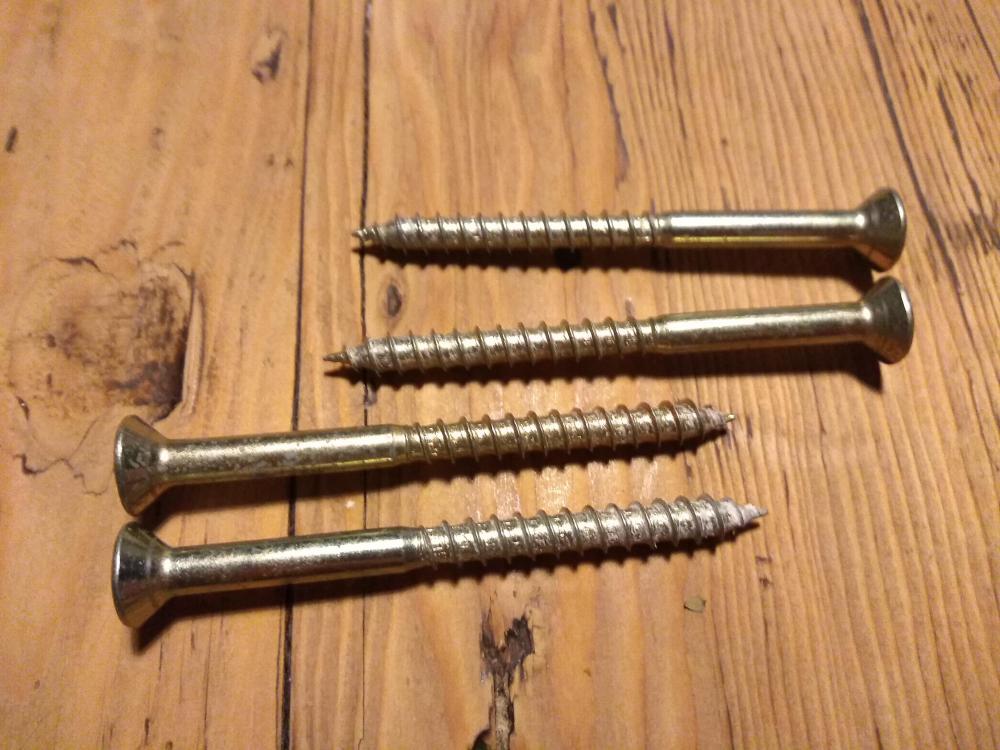
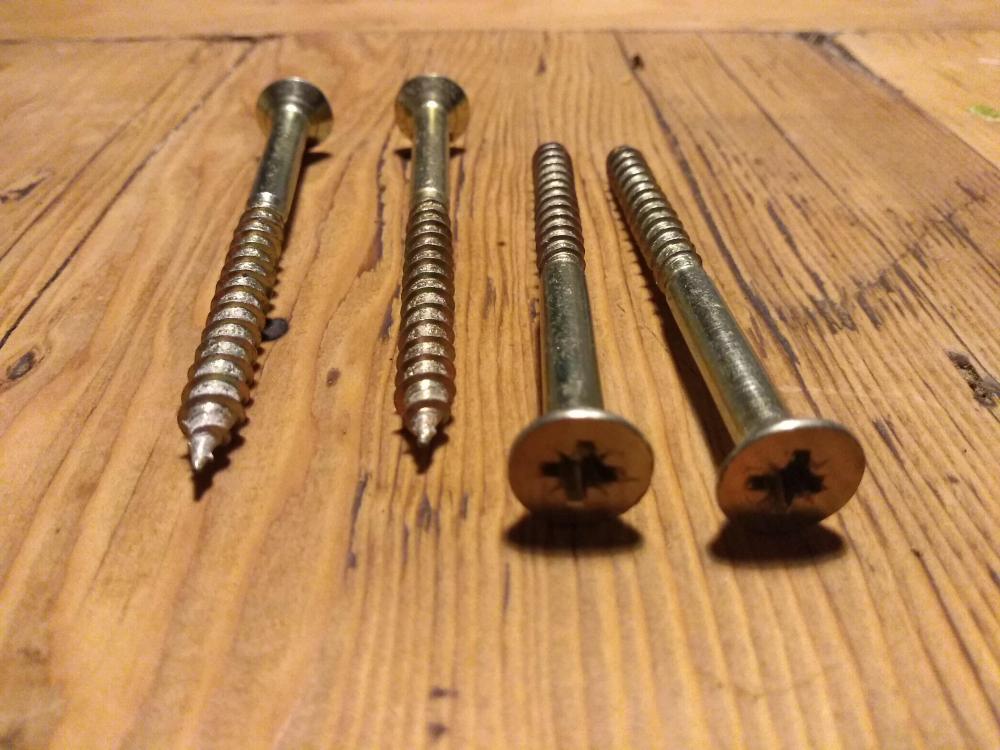
I can indeed see the difference, but then SF also sell these which they say are concrete screws which look similar to mine. At least to my novice eye! https://www.screwfix.com/p/easydrive-countersunk-concrete-screws-6-x-100mm-100-pack/5537r Not that I'm doubting anyone, just thinking allowed. Appreciate the replies, many thanks
-
I've just been having a rummage and I found these... Are they concrete screws? Can you tell from a photo or any other way to tell if not? Sorry to be such a DIY dunce!
-
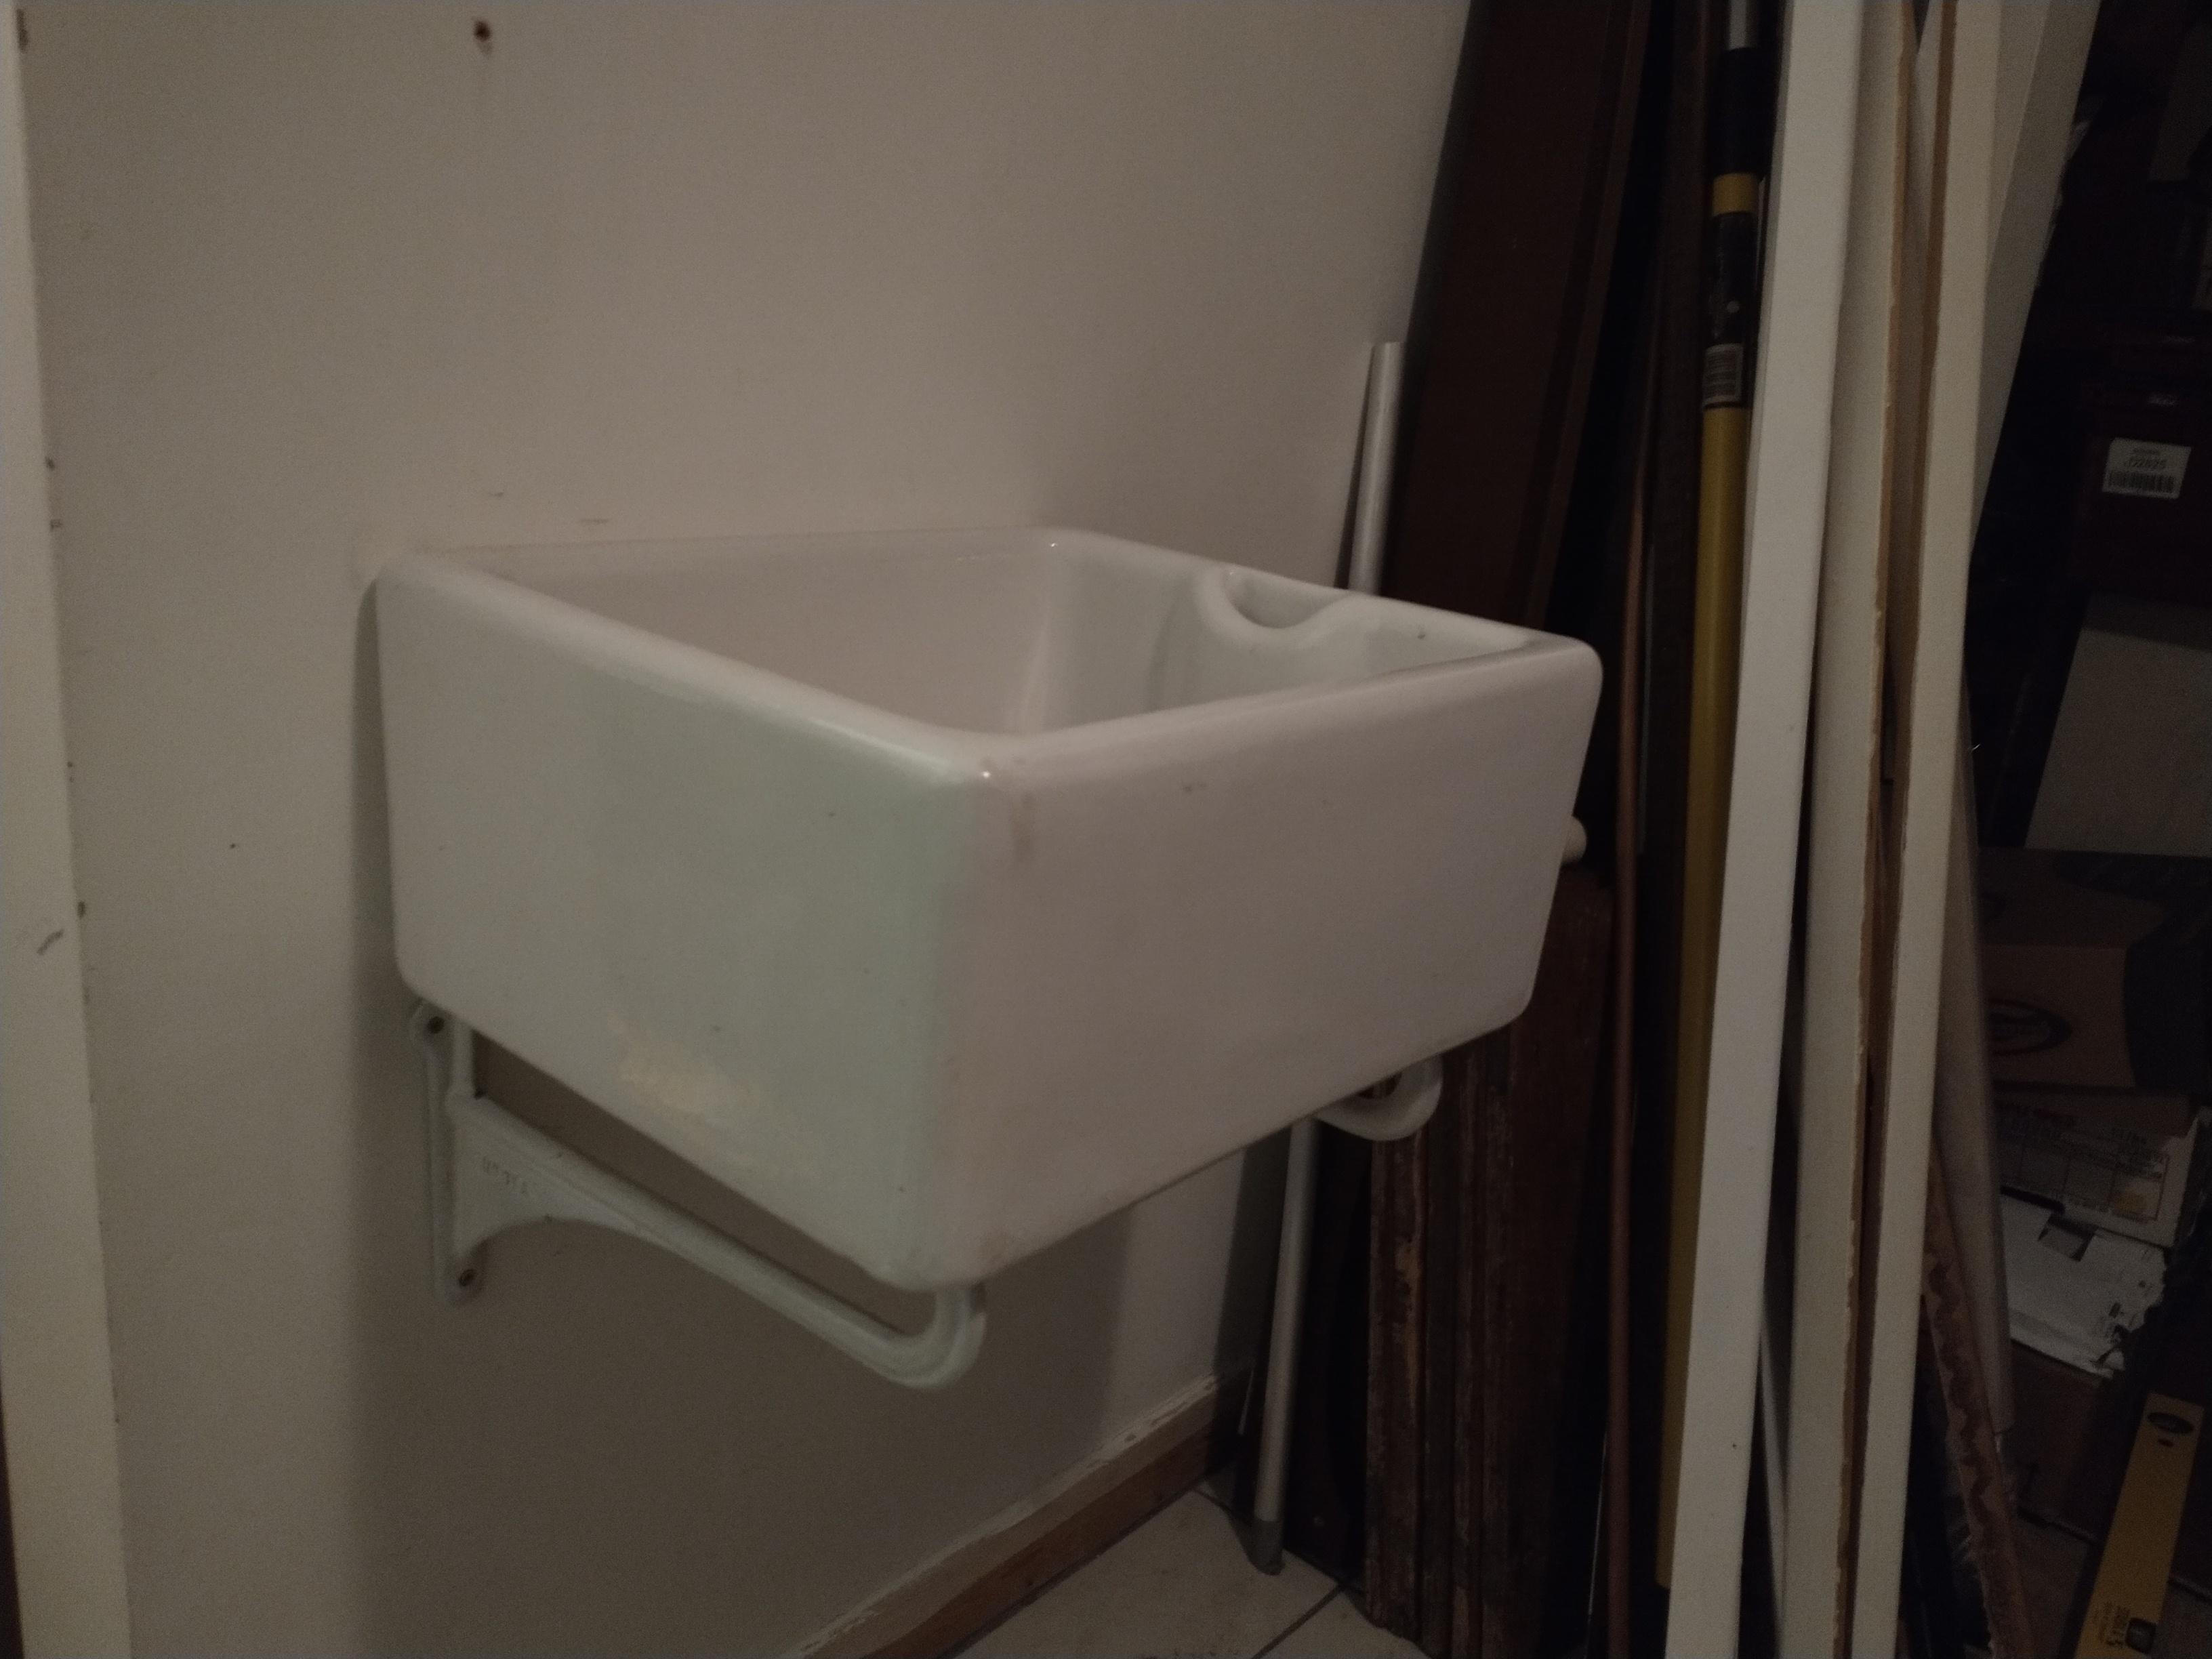
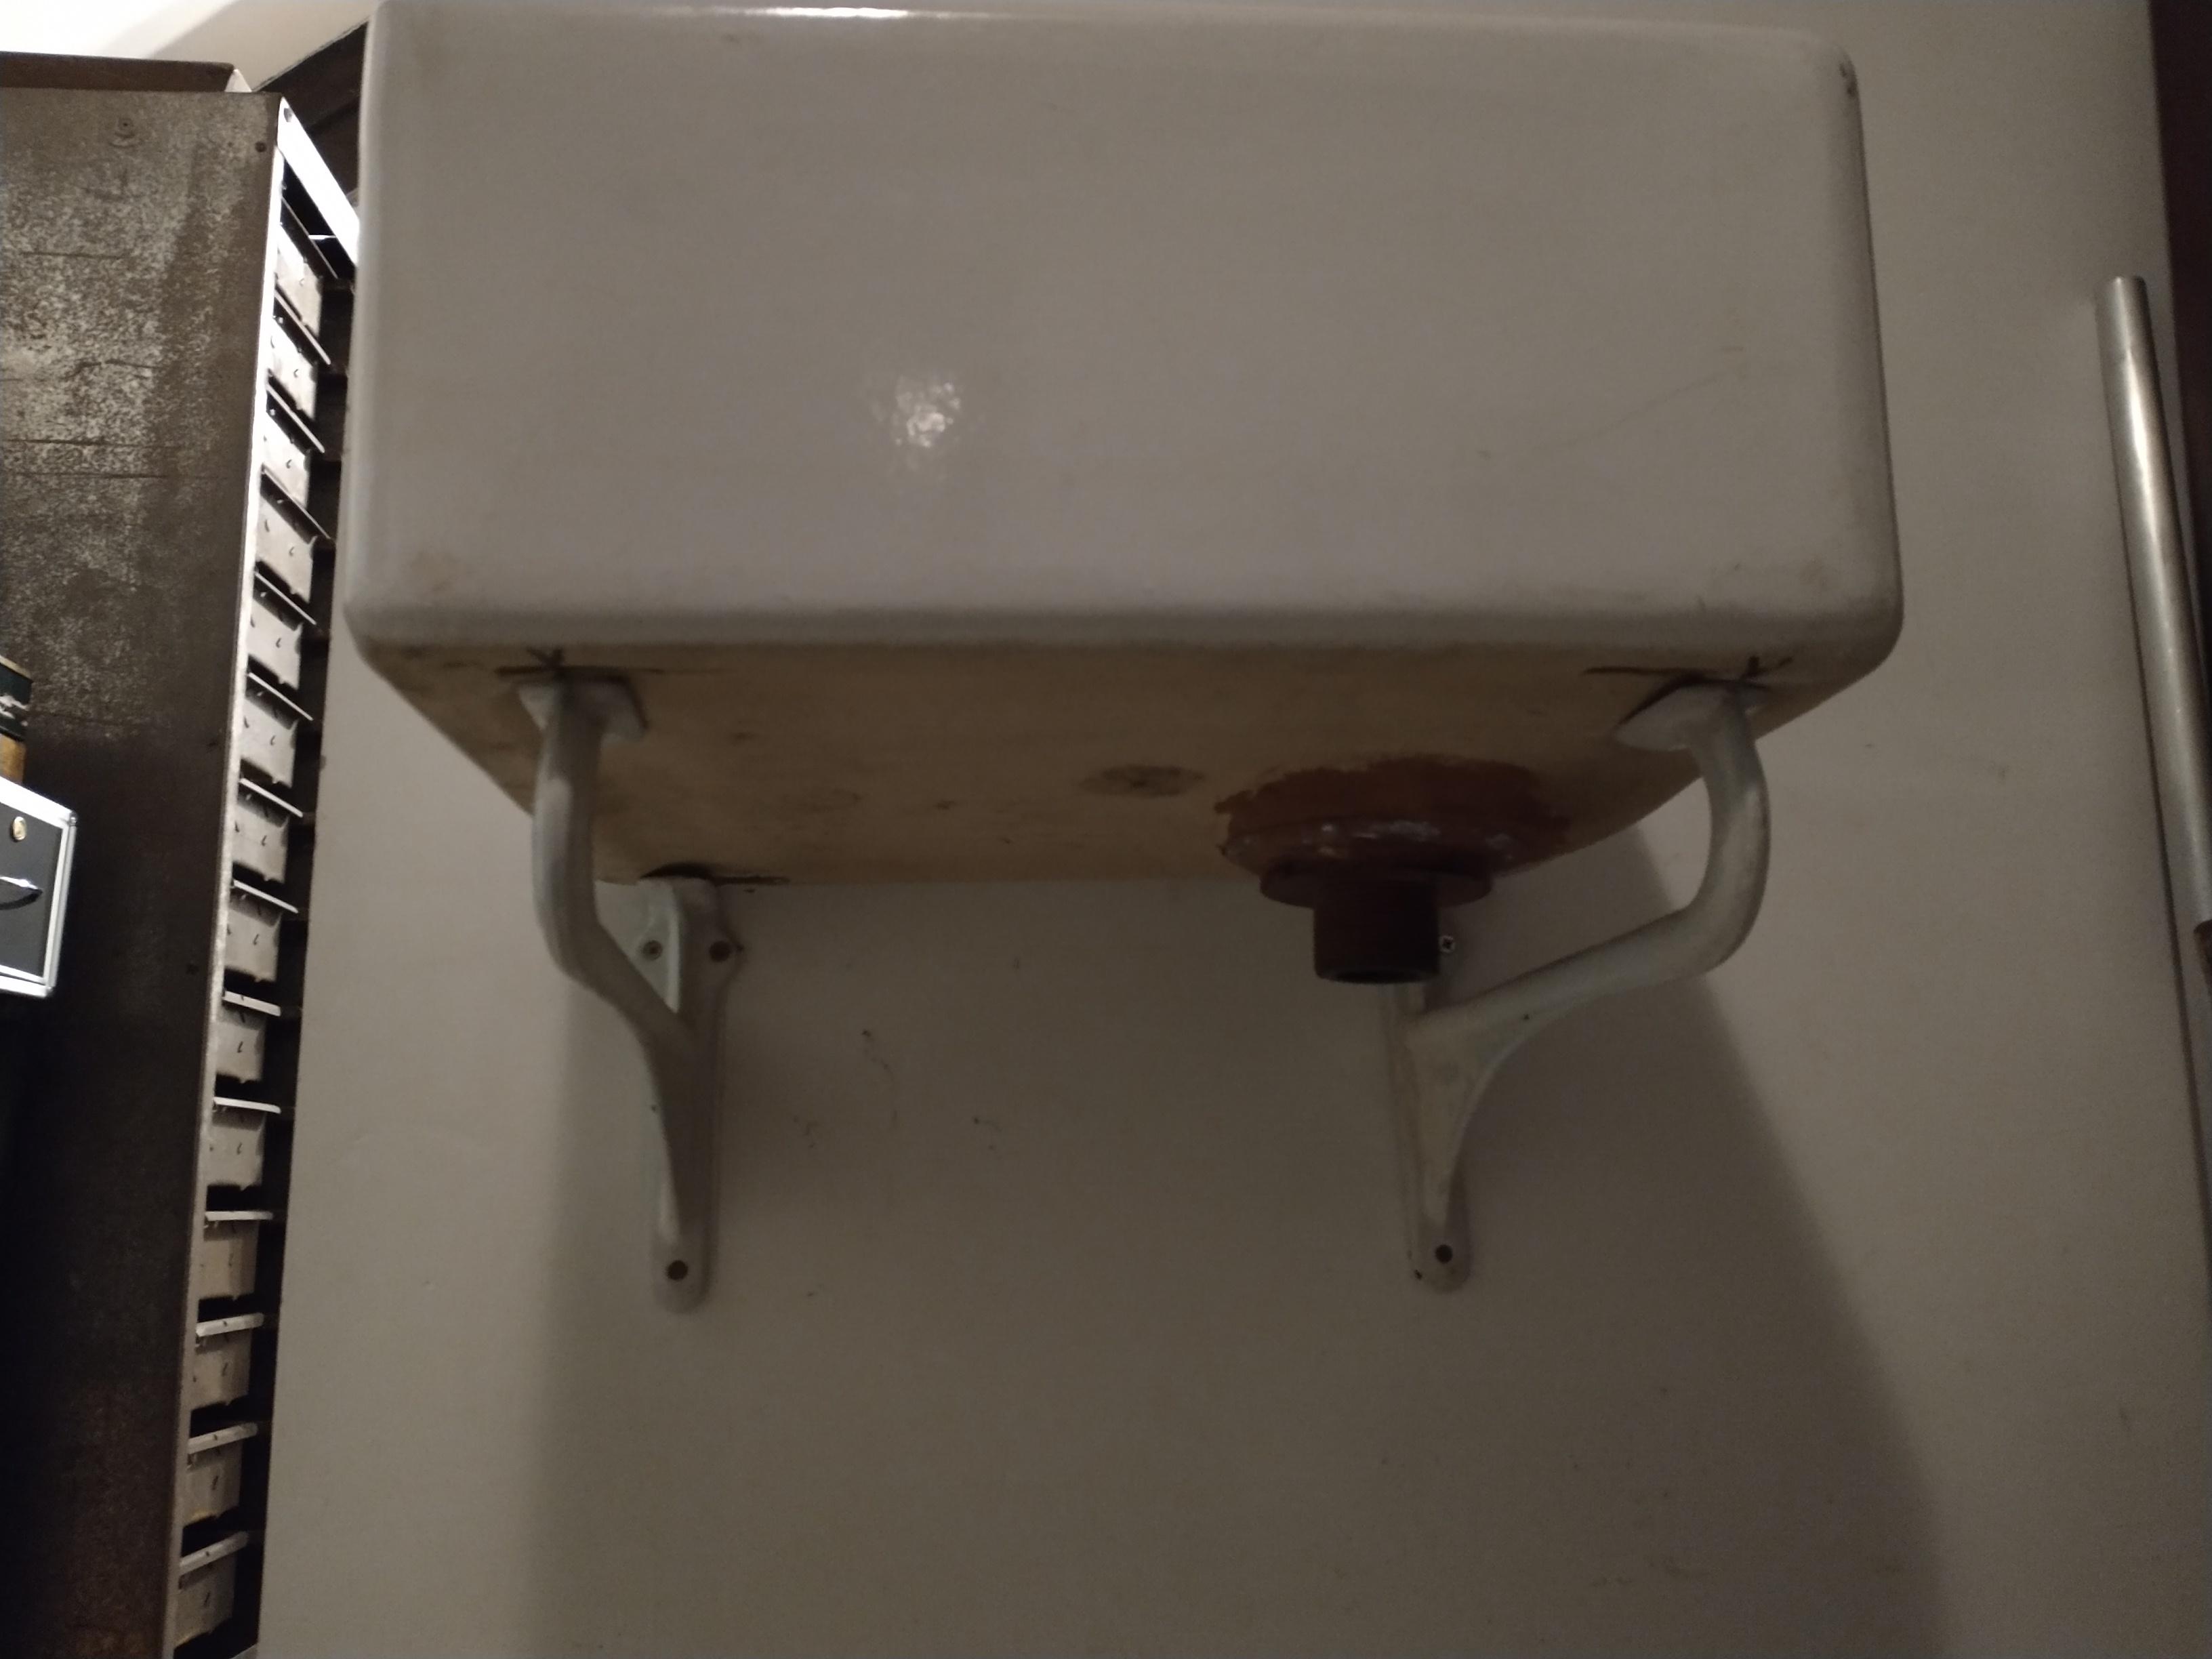
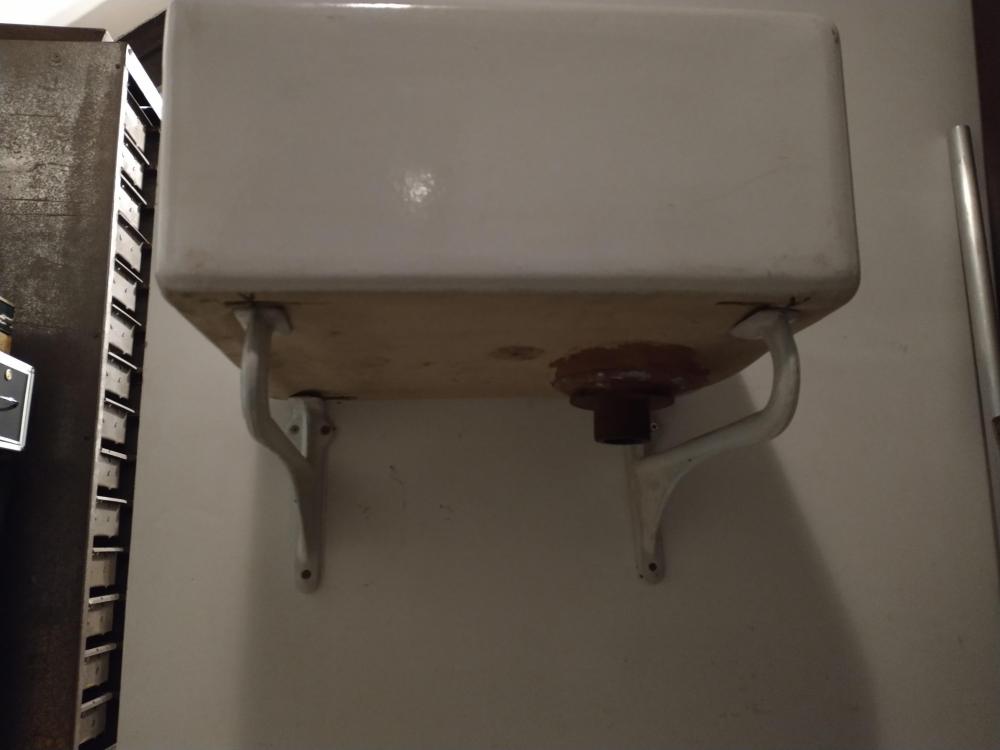
Cheers for all that. I'll hope the block / brick is sound and makes nice neat holes, but if that doesn't happen I'll use the above as a back up. So before we make our final decision... With decent screws and rawl plugs of the correct size and length, do you guys think these brackets would be man enough and safe for such a heavy sink? We will be using it for utility room type things, cleaning veg, etc. And I can only imagine the pain if that were to collapse onto my foot! If we have to we'll revert to plan B which is the cast iron bearers and legs. But we already have these, and we like them, so they will remain plan A if we feel confident they are strong enough. If gluing to the wall or anything else will help make them as strong as possible, then I'm all ears. Many thanks
-
How deep do you have to chase wall for wall mounted bib taps?
Oxbow16 replied to Oxbow16's topic in General Plumbing
Hi Many thanks for the response. Does indeed help and makes me feel more confident that this could work fine. Looking into it a bit more this morning, am I right in saying something like this would be used INSIDE the wall? https://www.screwfix.com/p/flomasta-end-feed-adapting-90-wall-plate-elbow-15mm-x/91665 With the end of the threaded section sitting flush to the wall's surface. And the tap then screws into that? If so: 1. At the pipe end, is a solder or compression joint preferable when chased in? 2. Would you recommended insulating the pipes? Only a length of around 30-40cm of pipe will be chased in per pipe. 3. If using the above elbow, I guess that will dictate the depth of the pipe. But if more depth is needed (say for the insulation), would you normally bend the pipe to create the required offset? Thanks again -
Hi again Second belfast sink related question, but different enough from the first to require a new thread... Our preference is for the sink to be mounted in a corner, and for the pipes to be chased in for wall mounted bib taps. Presumably that means having enough room in the chase for the vertical pipes, 90 degree elbows, and whatever else is needed to connect the pipework to the taps. Does anyone know how much depth is required for this kind of set up? Before choosing taps etc I want to make sure the wall will be suitable. Thanks for all the help, it's so useful having forums to address all the unanswered questions that keep popping up! Cheers
-
Sorry, I should have said. It's a solid wall. I think it is probably block, but not 100%. Cheers
-
Many thanks for the reply. We have considered brackets, along with those cast iron legs and bearers. But the brackets we already have would be our preference. RE concrete screws, does that mean no rawl plugs? I was reading about concrete screws the other day - having never heard of them before - but I learnt that they are no good if there is forward force such as there would be with these brackets (plus shelves, TV wall mounts, etc). Any other thoughts or suggestions most welcomes. Cheers
-
Thanks for the replies and the link too. So for gaps less than 5mm you would use expanding foam rather than sealant or caulk? Just to be clear, in my case the gap is between the reveal and the front face of the frame, NOT between the side of the frame and the side of the wall as per the photos in the other thread. Ta
-
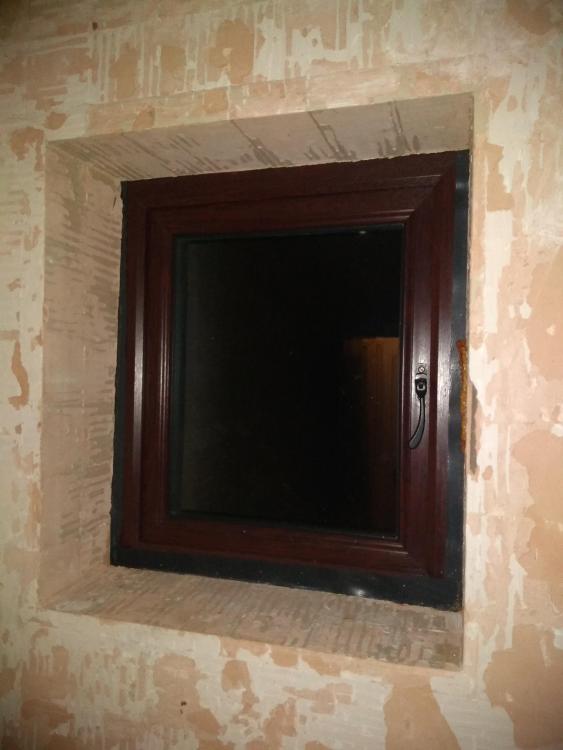
Thanks guys - super quick and super helpful. The gap between window and wall on the inside is quite small actually. I'd say less than 5mm for the most part. So don't think expanding foam will be needed. On the inside we'll be tiling right up to the window on all parts. On the outside = good idea RE the sealant. Actually, it's something I need to go round and do to all the windows when time allows. Not entirely sure they all need it, but can't see it hurting and I'm a belts and braces kinda guy! As for access to the frame, really appreciate the above advice and pics but actually not needed on our window as it is a single openable piece and therefore all accessible. Sorry, I should have said. Here's a couple of rubbish photos. No light in there at the moment so had to use the flash in the dark.
-
Hi Hoping this is a simple one, but wanted to make sure I get it right.... Which is never guaranteed with me There's a small uPVC window in my bathroom which is a little bit loose. The whole window (including frame) has movement within the opening. Some of the other windows in the house have screws going through the frames and into the sides of the walls in the reveal. So I'm presuming I can do the same here to make it solid. Does anyone have any tips as to what screws to use and how to go about it please? Many thanks
-
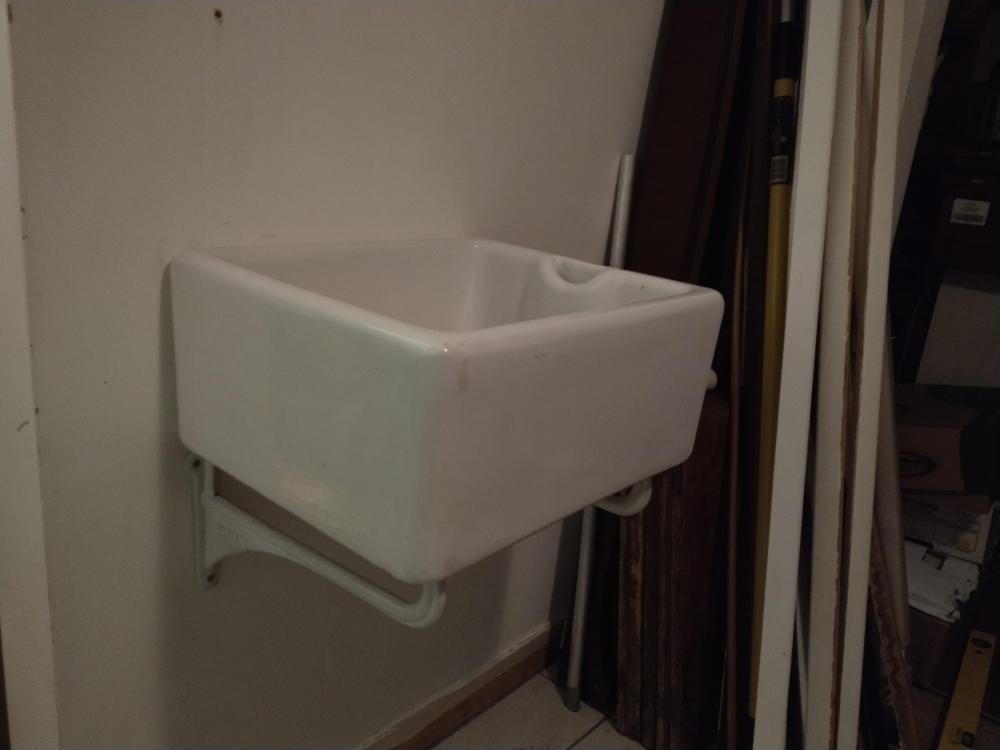
Hi all I've got an old baby belfast sink I want to use and I'd like to mount it on old brackets... I've done a mock installation in another part of the house just to see how secure it feels on the brackets and I'm happy with the result. If I put a lot of downward wait on the front lip of the sink, it doesn't budge at all. And that's using the only cr@p screws I could find in the house which were vaguely fit for purpose! So when the time comes to fit it properly... 1. What screws would you recommend I use? Or is it simply the thicker and longer the better? 2. Is there any kind of adhesive or similar I could put between the bracket lugs and the underside of the sink? Because the sink bottom isn't totally flat, there are gaps. I thought some kind of adhesive would help fill these gaps for a better connection, whilst also giving belts and braces stability. More generally, has anyone ever fitted similar and is there any reason I should be thinking twice about doing this? Cheers
-
Dead leg problem? Outside tap removal, but pipes are underground...
Oxbow16 replied to Oxbow16's topic in General Plumbing
Thanks for that Nick. I'll try then when I get home. I'm not sure I understand what the different requirements would be for rising main vs cold feed, but I'll find out which it is first and then go from there. I'd be very surprised if it comes after either stop cock, but you never know. What this space, as they say! As for risk, glad to hear it would only be miniscule. If it were your house, would you just leave it? Or does that also depend on the result of the above? Cheers -
Dead leg problem? Outside tap removal, but pipes are underground...
Oxbow16 replied to Oxbow16's topic in General Plumbing
Many thanks @TonyT... Much appreciated. We've got two more outside taps, both in better locations, newer, etc. which is why this one never gets used and I wanted to get rid. So it's not particularly handy and we never have reason to use it. Not only is the location awkward, but we also need to do something with that wall at some point, to insulate it better, and tidy it up. When we bought the house the surveyor outlined what he thought needed doing there (I'll have to dig out the report and check). Also, I think it's one of the spots where mice are getting in. The dog certainly likes sniffing around at the spot! Furthermore, the tap and pipe work looks pretty old and knackered, although that's to my untrained eye So from what you've written it seems the dead leg is a potential cause for concern and as suspected I need to either dig to find the source and have it capped there, or keep the tap but run it periodically to remove any stagnant water... Decisions, decisions...! -
Dead leg problem? Outside tap removal, but pipes are underground...
Oxbow16 replied to Oxbow16's topic in General Plumbing
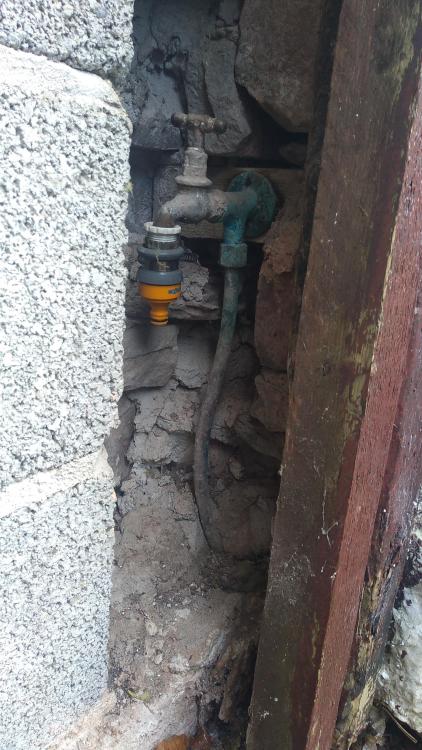
...

-
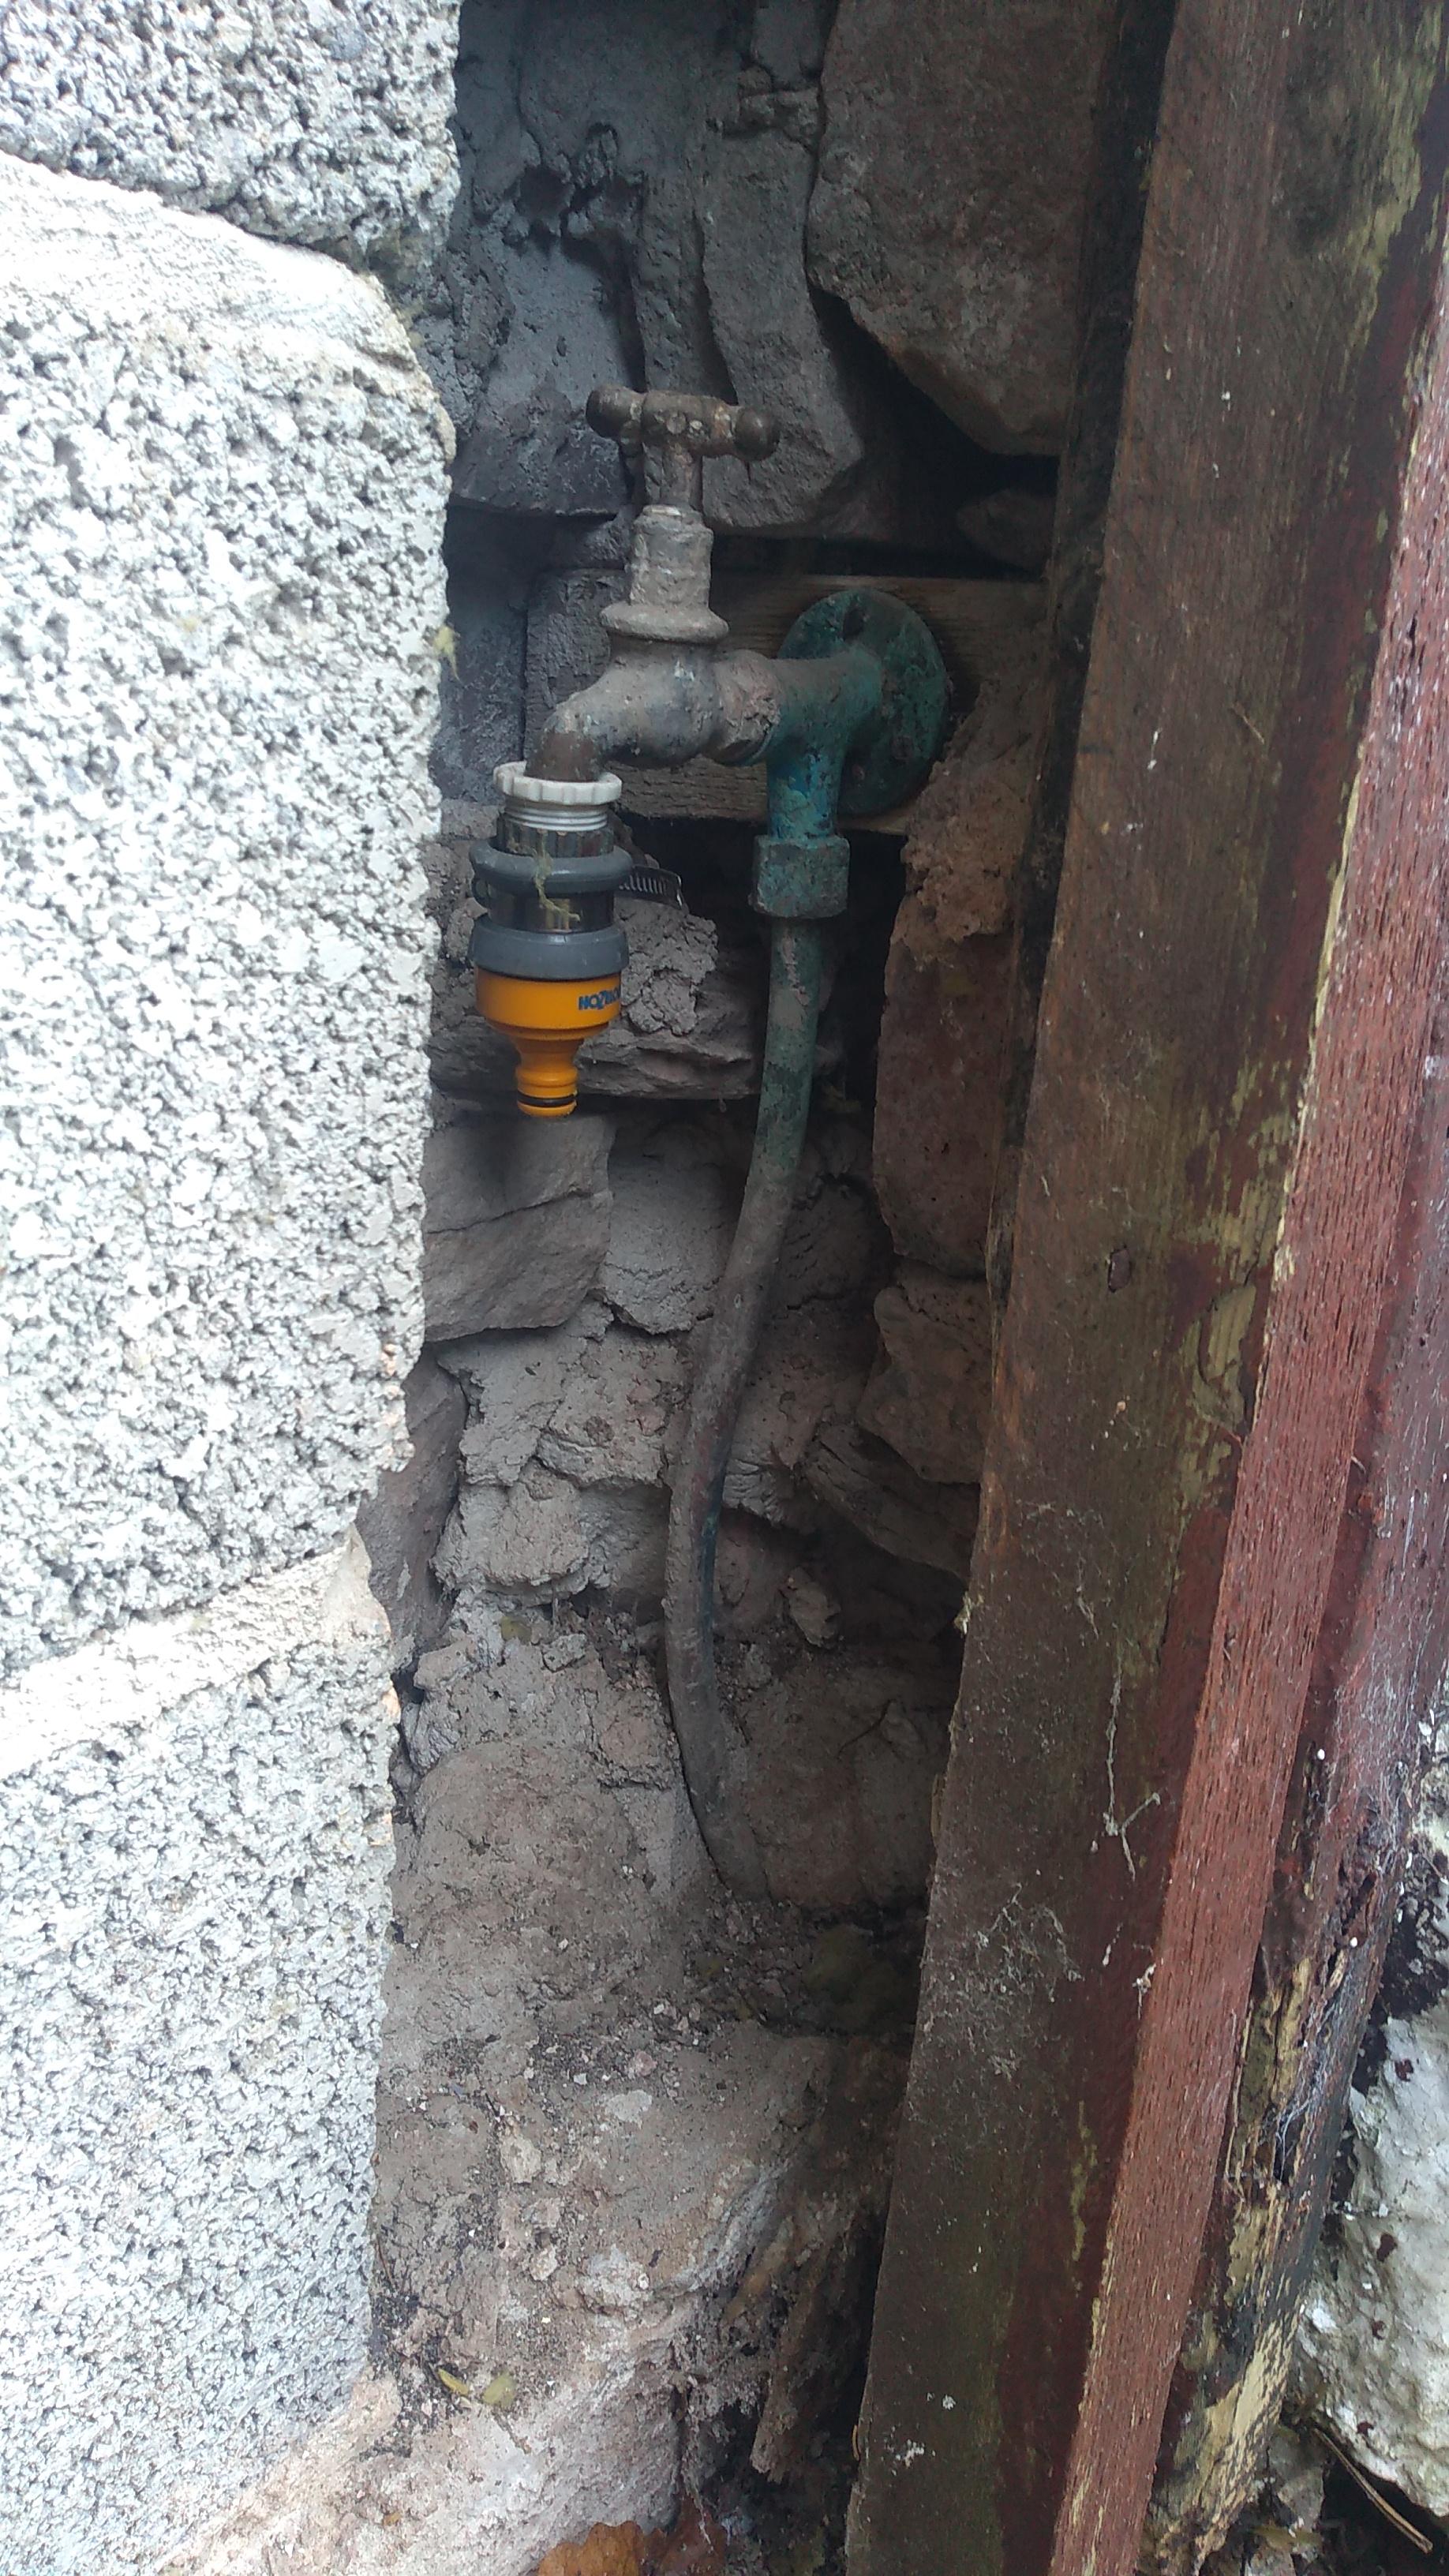
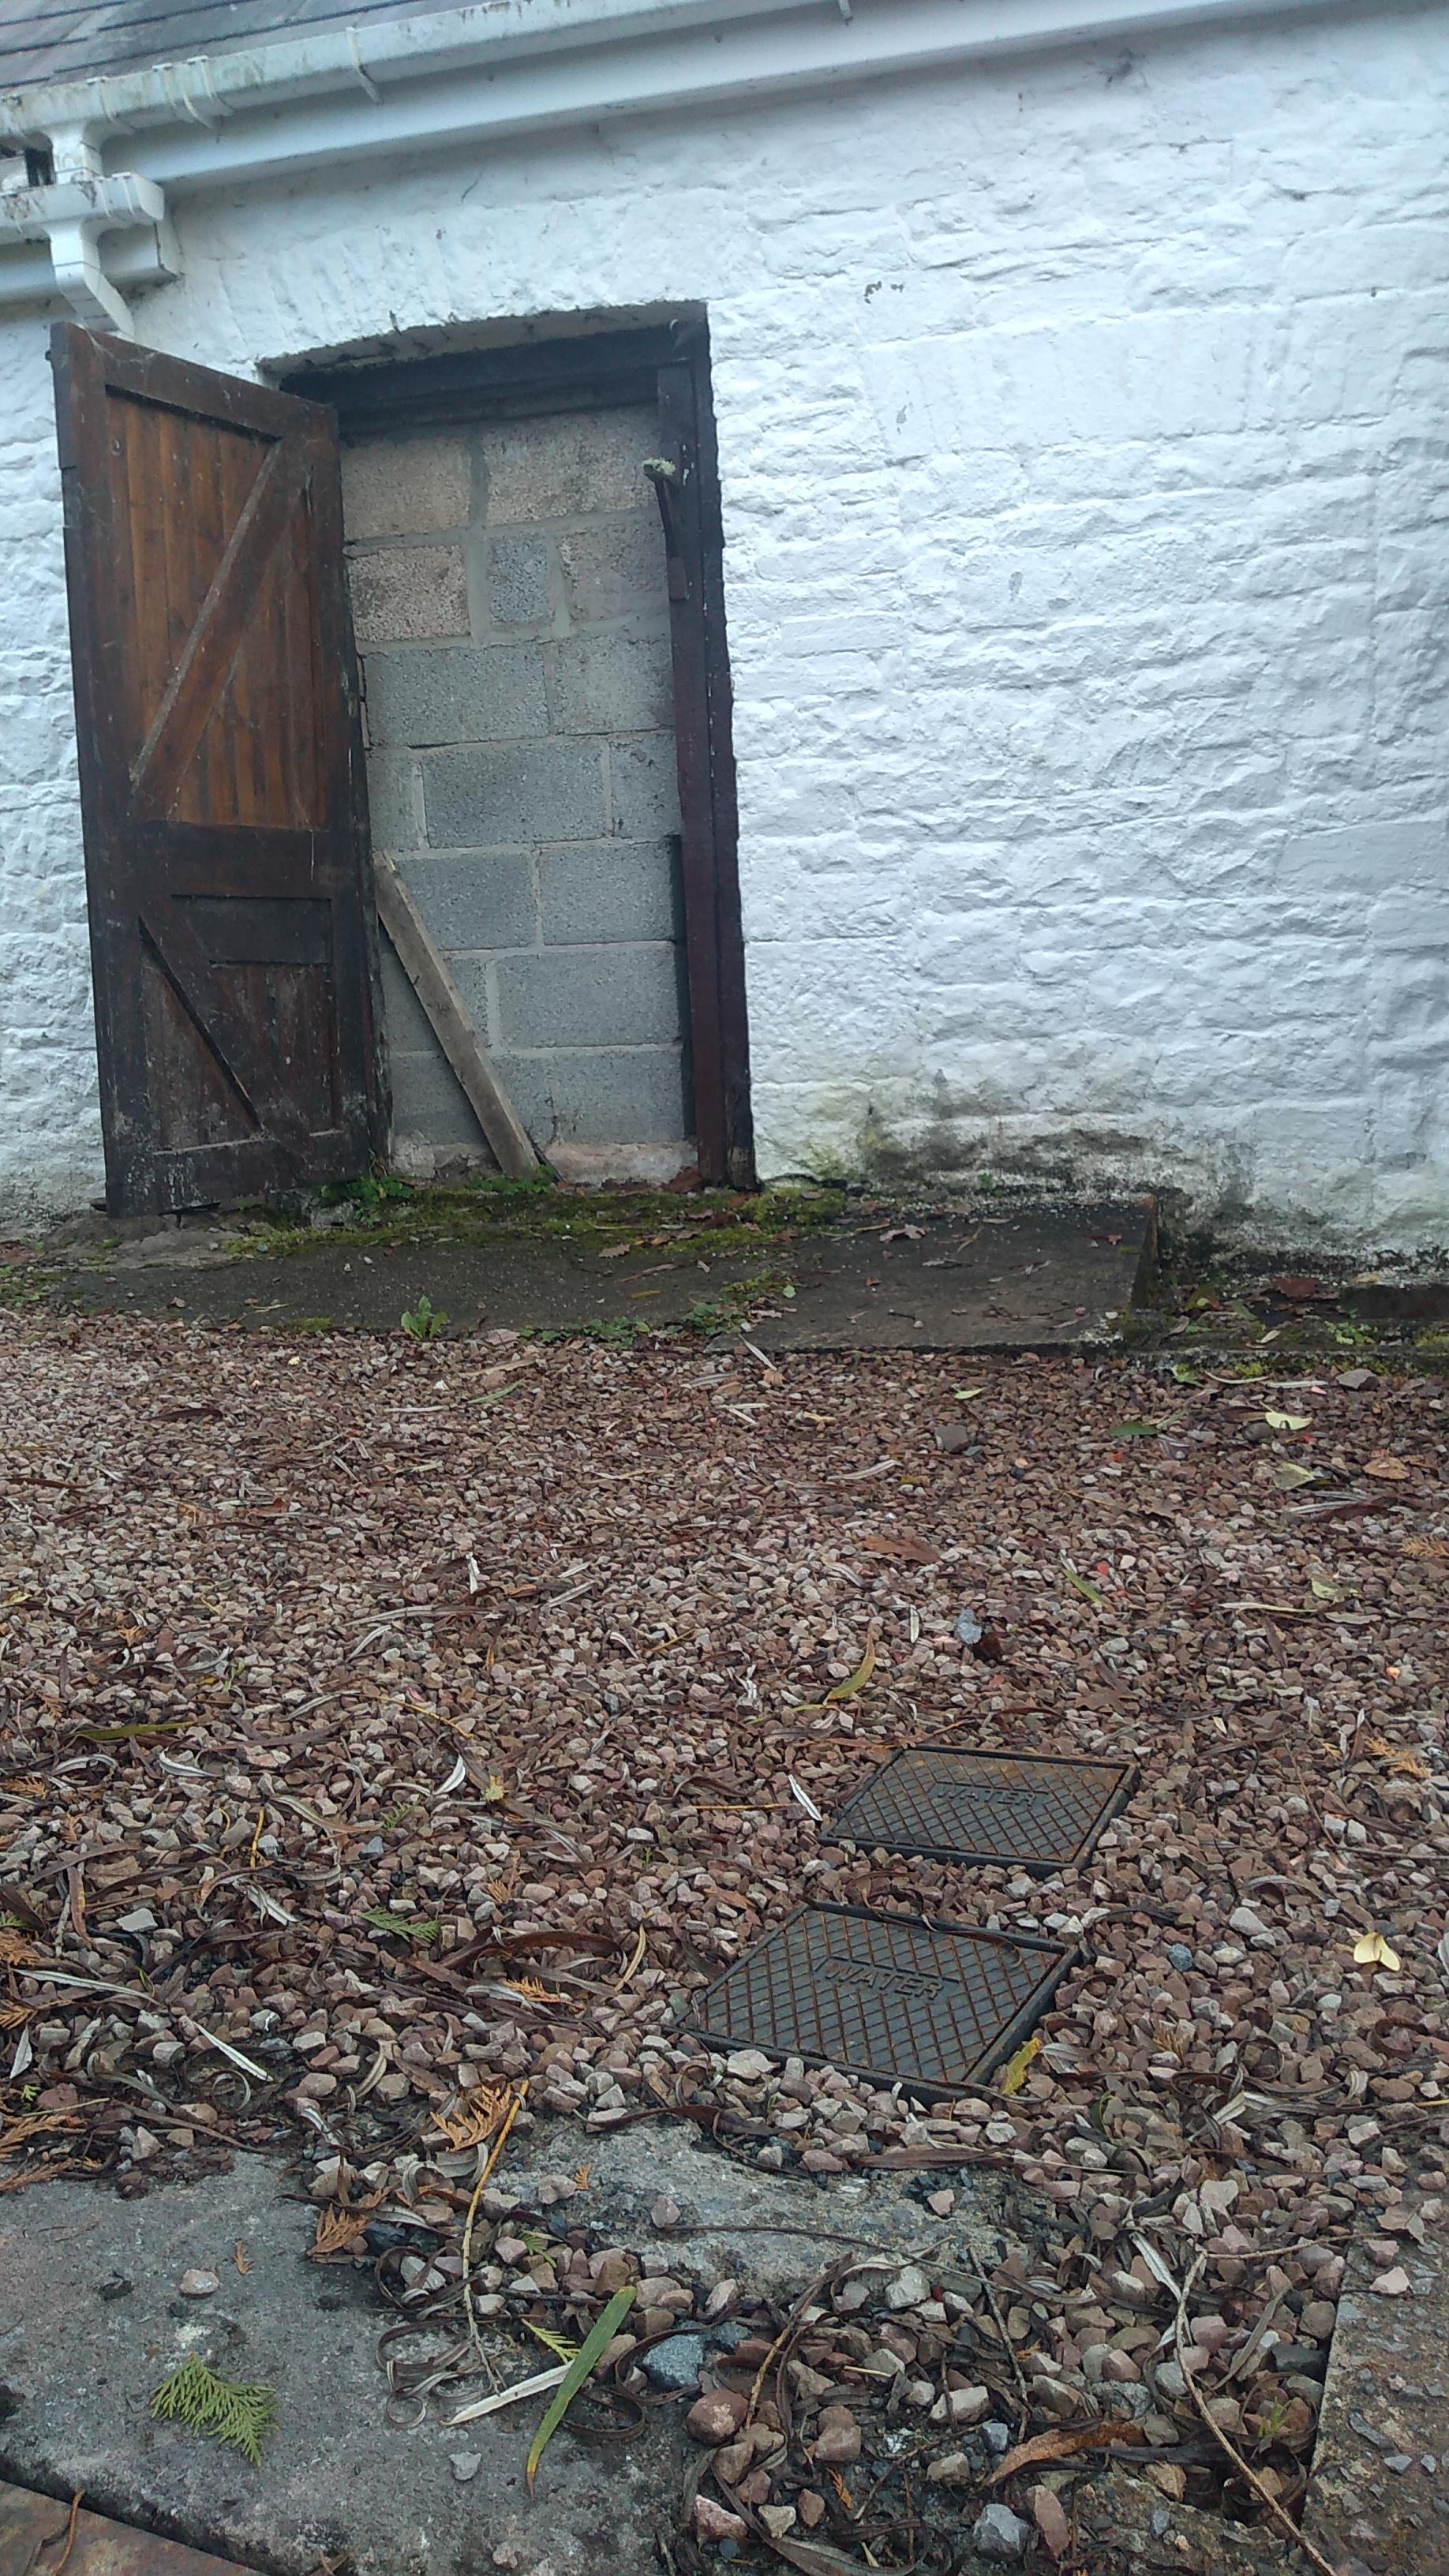
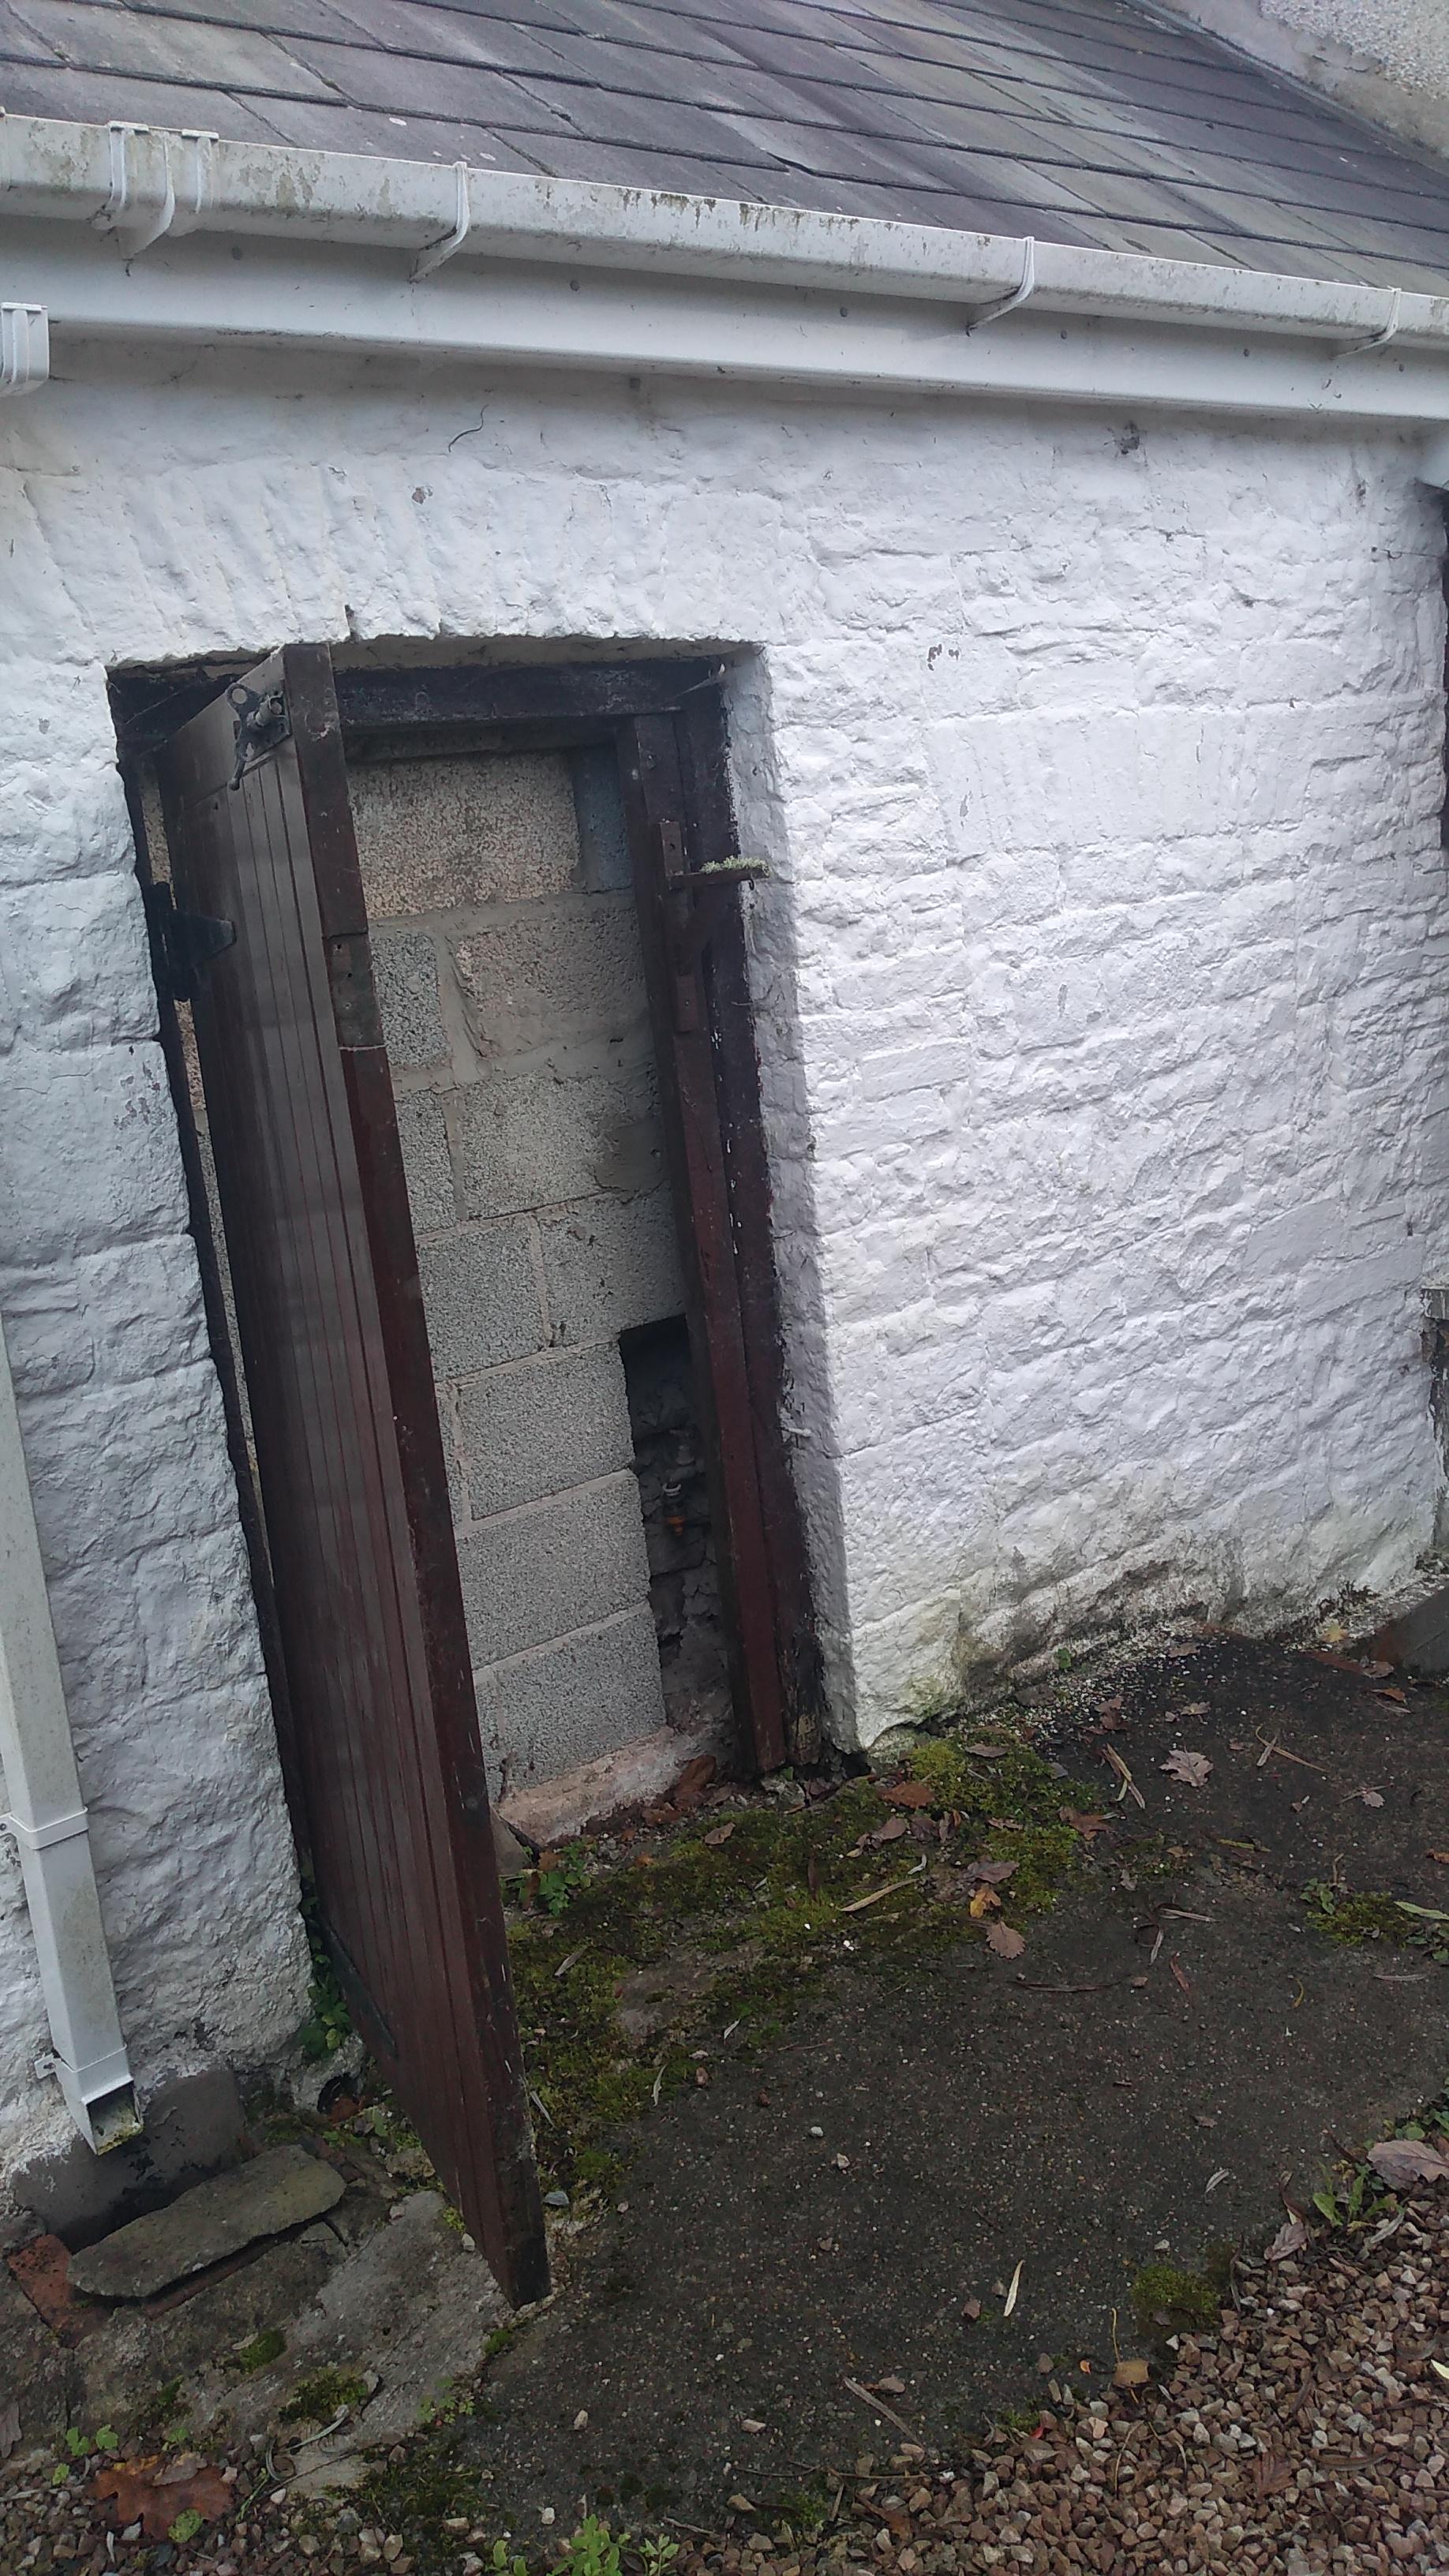
Hi all Got a very old looking outside tap at our house which is not in use. A plumber is visiting soon to do a bathroom refit, and whilst here will remove the tap and cap it off. I asked whether this would cause a problem with a "dead leg" and he said no, but I want to check with you guys here please. The tap is behind a fake door which is just there for aesthetics as it's bricked up behind. I guess the tap itself is a dead leg isn't it? If so, shortening it can only be a good thing, but is it enough? The last photo shows the water meter cover in the ground. So the tap isn't far away from that. There are two stop cocks in the house, neither of which are near the meter or outside tap. One is around 8 metres to the left and the other about 10 metres to the right (both in the middle of the house, not on the outside wall you're looking at). So I've no idea at all where or how the outside tap is connected, if/where it is tee'd off from, etc. Also, a you can see there is a slab of old concrete in front of the door. Plus the oil pipe is underground somewhere between the meter and tap, which would make digging a little more of a pain. Goes without saying that the cheaper and easier option is preferable, but at the end of the day I want it to be right and most importantly I want my drinking water to be safe. To dig or not to dig (cap and forget)... That is the question? Many thanks for any help


-
Screwfix Drill/Impact Driver Twin Pack Bargains - DeWalt vs Makita
Oxbow16 replied to Oxbow16's topic in Tools & Equipment
Hi folks Having asked on another couple of forums, some people elsewhere said you should never buy power tools from places like Toolstation and Screwfix. The logic being that they are always cheaper elsewhere and they tend to be poorly spec'd/priced cheaply to lure people in to a brand loyalty. I've already bought the DeWalt set. Haven't used them yet and am starting to get near to my 30 day return deadline. Following the above, I've had a look and tried to compare offerings from other sites. I had to give up in the end. There are so many different model numbers, and then slight variations to the same numbers... To compare within one brand would need a degree in power tools. To do the same for all competing brands would need a PhD! What I did find is that whilst the Screwfix set seems to be exclusive to SF, the individual tools - DCD778 and DCF787 - are available to buy in a few other shops. Taking the impact driver (DCF787) as an example, the best bare unit I could find was around £70. Which to my mind makes £160 for impact driver, drill, case, charger and two batteries quite a good deal. Does anyone here agree with the above RE buying such tools for SF / TS? If anyone can find or knows of a comparable set for less money, or a better quality set for around the same money, please do let me know. I'd love to hear before the deadline to return is reached. Whilst I am tempted to splash out and go for a more professional better quality and more expensive set (or Milwaukee, etc), I don't think my use would justify it. I do like to buy well and buy once, but these tools might get used solidly for a week or two, then left for a month. Once the house is renovated, they'll only see small DIY jobs around the house, and things like fences, wood shelters, etc. outdoors. But that won't be all the time either. So I didn't go el cheapo, and not super pro either. All ears to any suggestions. Cheers PS - even the DeWalt batteries are hard to compare! Some are block with a yellow button and some the reverse. Is there more to it than just colour? Does that signify different quality ranges or something?