Spinny
-
Posts
978 -
Joined
-
Last visited
-
Days Won
1
Everything posted by Spinny
-
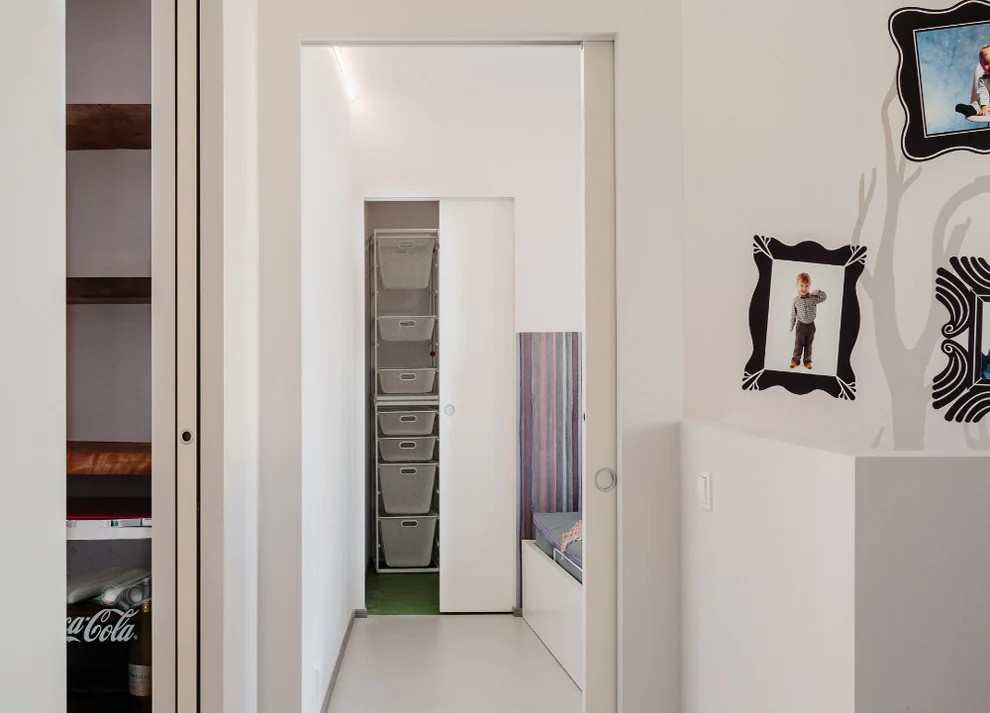
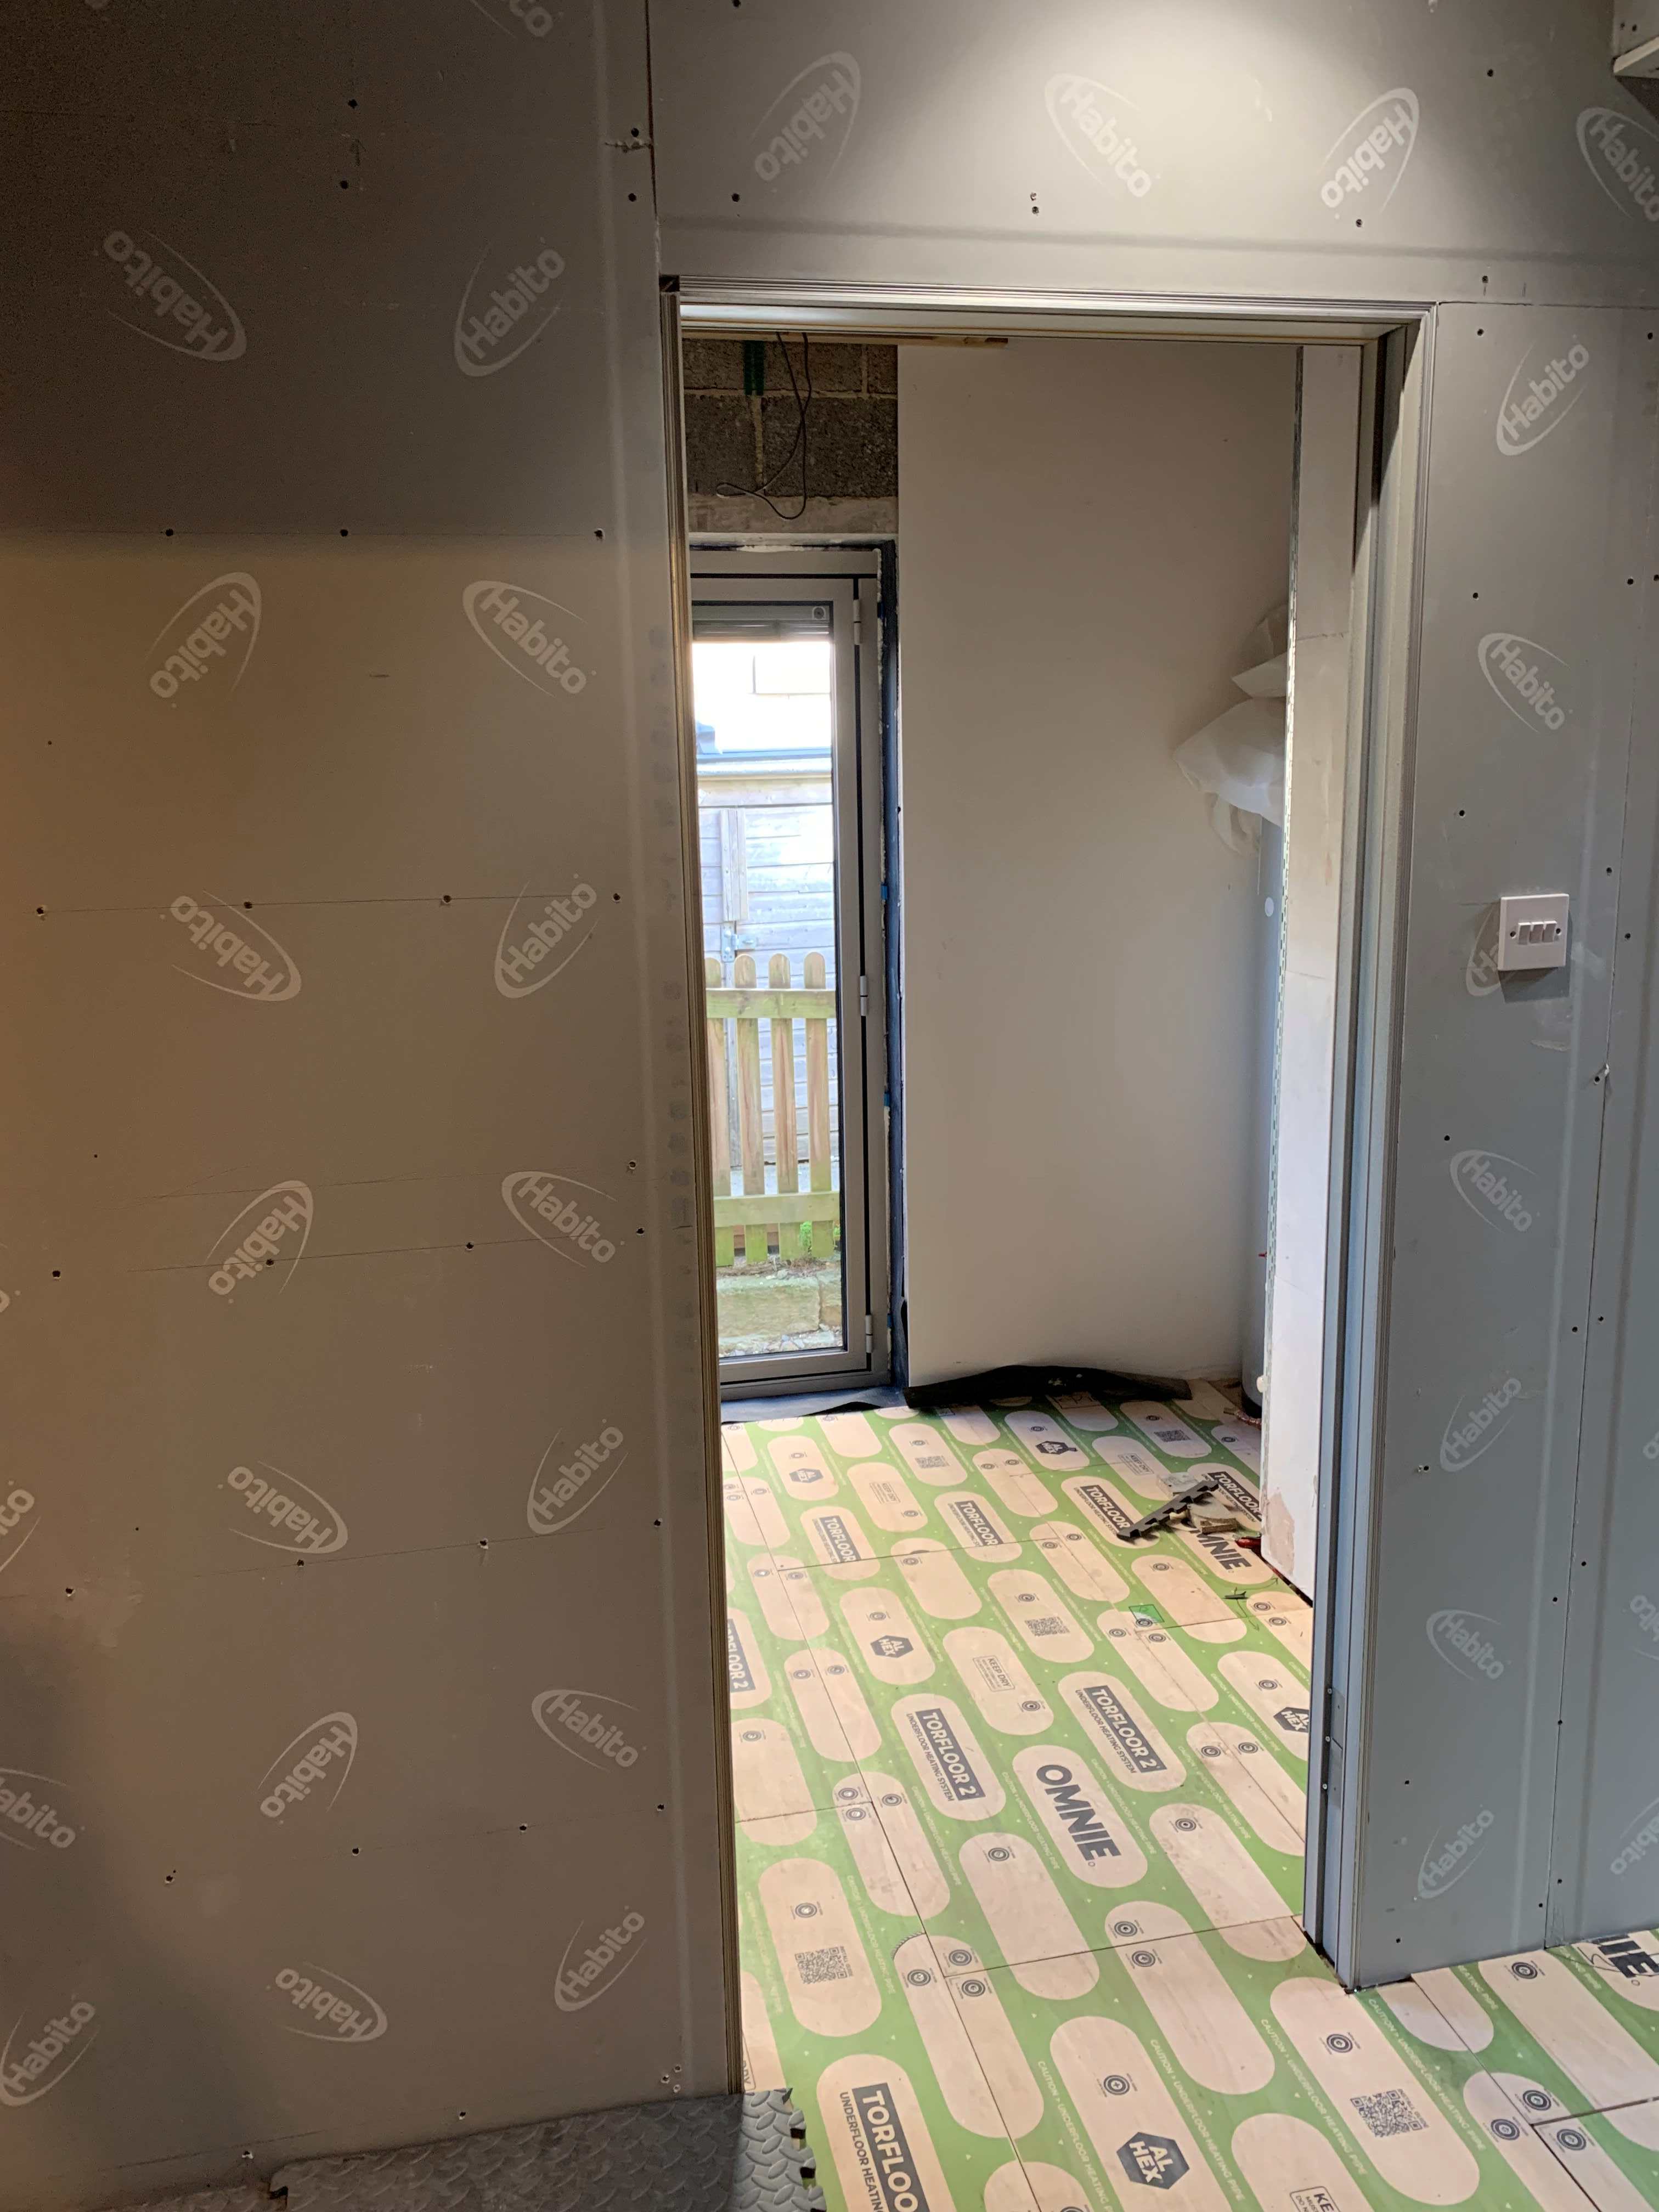
We have an a Elisse pocket door opening installed for our utility room. This was chosen in order to create an opening in the wall without any architrave but with a pocket door - a clean contemporary look. The pocket door metal framework from Eclisse has a plastering bead built in at the corner of the opening to support this look with plastered corners to the opening. It also has suitable roughened areas in the reveal inside the opening to allow plastering right around the corners and up to the slot where the pocket door runs. . However I now discover that this is positioned by Eclisse to support jointing and taping the plasterboard to a finish ! However we want and need to skim plaster onto our plasterboard and hence up to the corner of the pocket door opening. Hence it seems the built in metal plaster bead is not in the correct position to support this as it is level with the plasterboard rather than slighty proud of it by 3mm to support the skim coat. So, how do I solve this ? How much plaster can cover a corner bead when skimming a wall - can the plaster bead be 3mm deep beneath the plaster at the corner ? Or will it just chip and flake off ? Could some special reinforced plaster be used in the corner area and blended into the rest of the wall skim ? Could some small 2-3mm corner bead be fixed/glued onto the eclisse metal frame at the corner ? Anybody with experience of installing pocket doors without architrave ?
-
External Vent Heights...
Spinny replied to Mulberry View's topic in General Self Build & DIY Discussion
Another approach might be to lower the ground level but only in the area of the air vents, such as along a strip adjacent to the building, such as a strip of gravel or planting at a level below the paved area/ramp which then keeps the air bricks above ground. There is some discussion of this approach, albeit in the context of dealing with the requirement for 150mm between ground level and DPC level and drainage, on paving expert here... https://www.pavingexpert.com/dpc01 In the 1930's when our place was built they didn't have telescopic air bricks and our DPC and airbricks are pretty low in the original house, so may have to take this approach for part of our patio. -
Weep vents in rendered block walls
Spinny replied to Lincolnshire Ian's topic in Plastering & Rendering
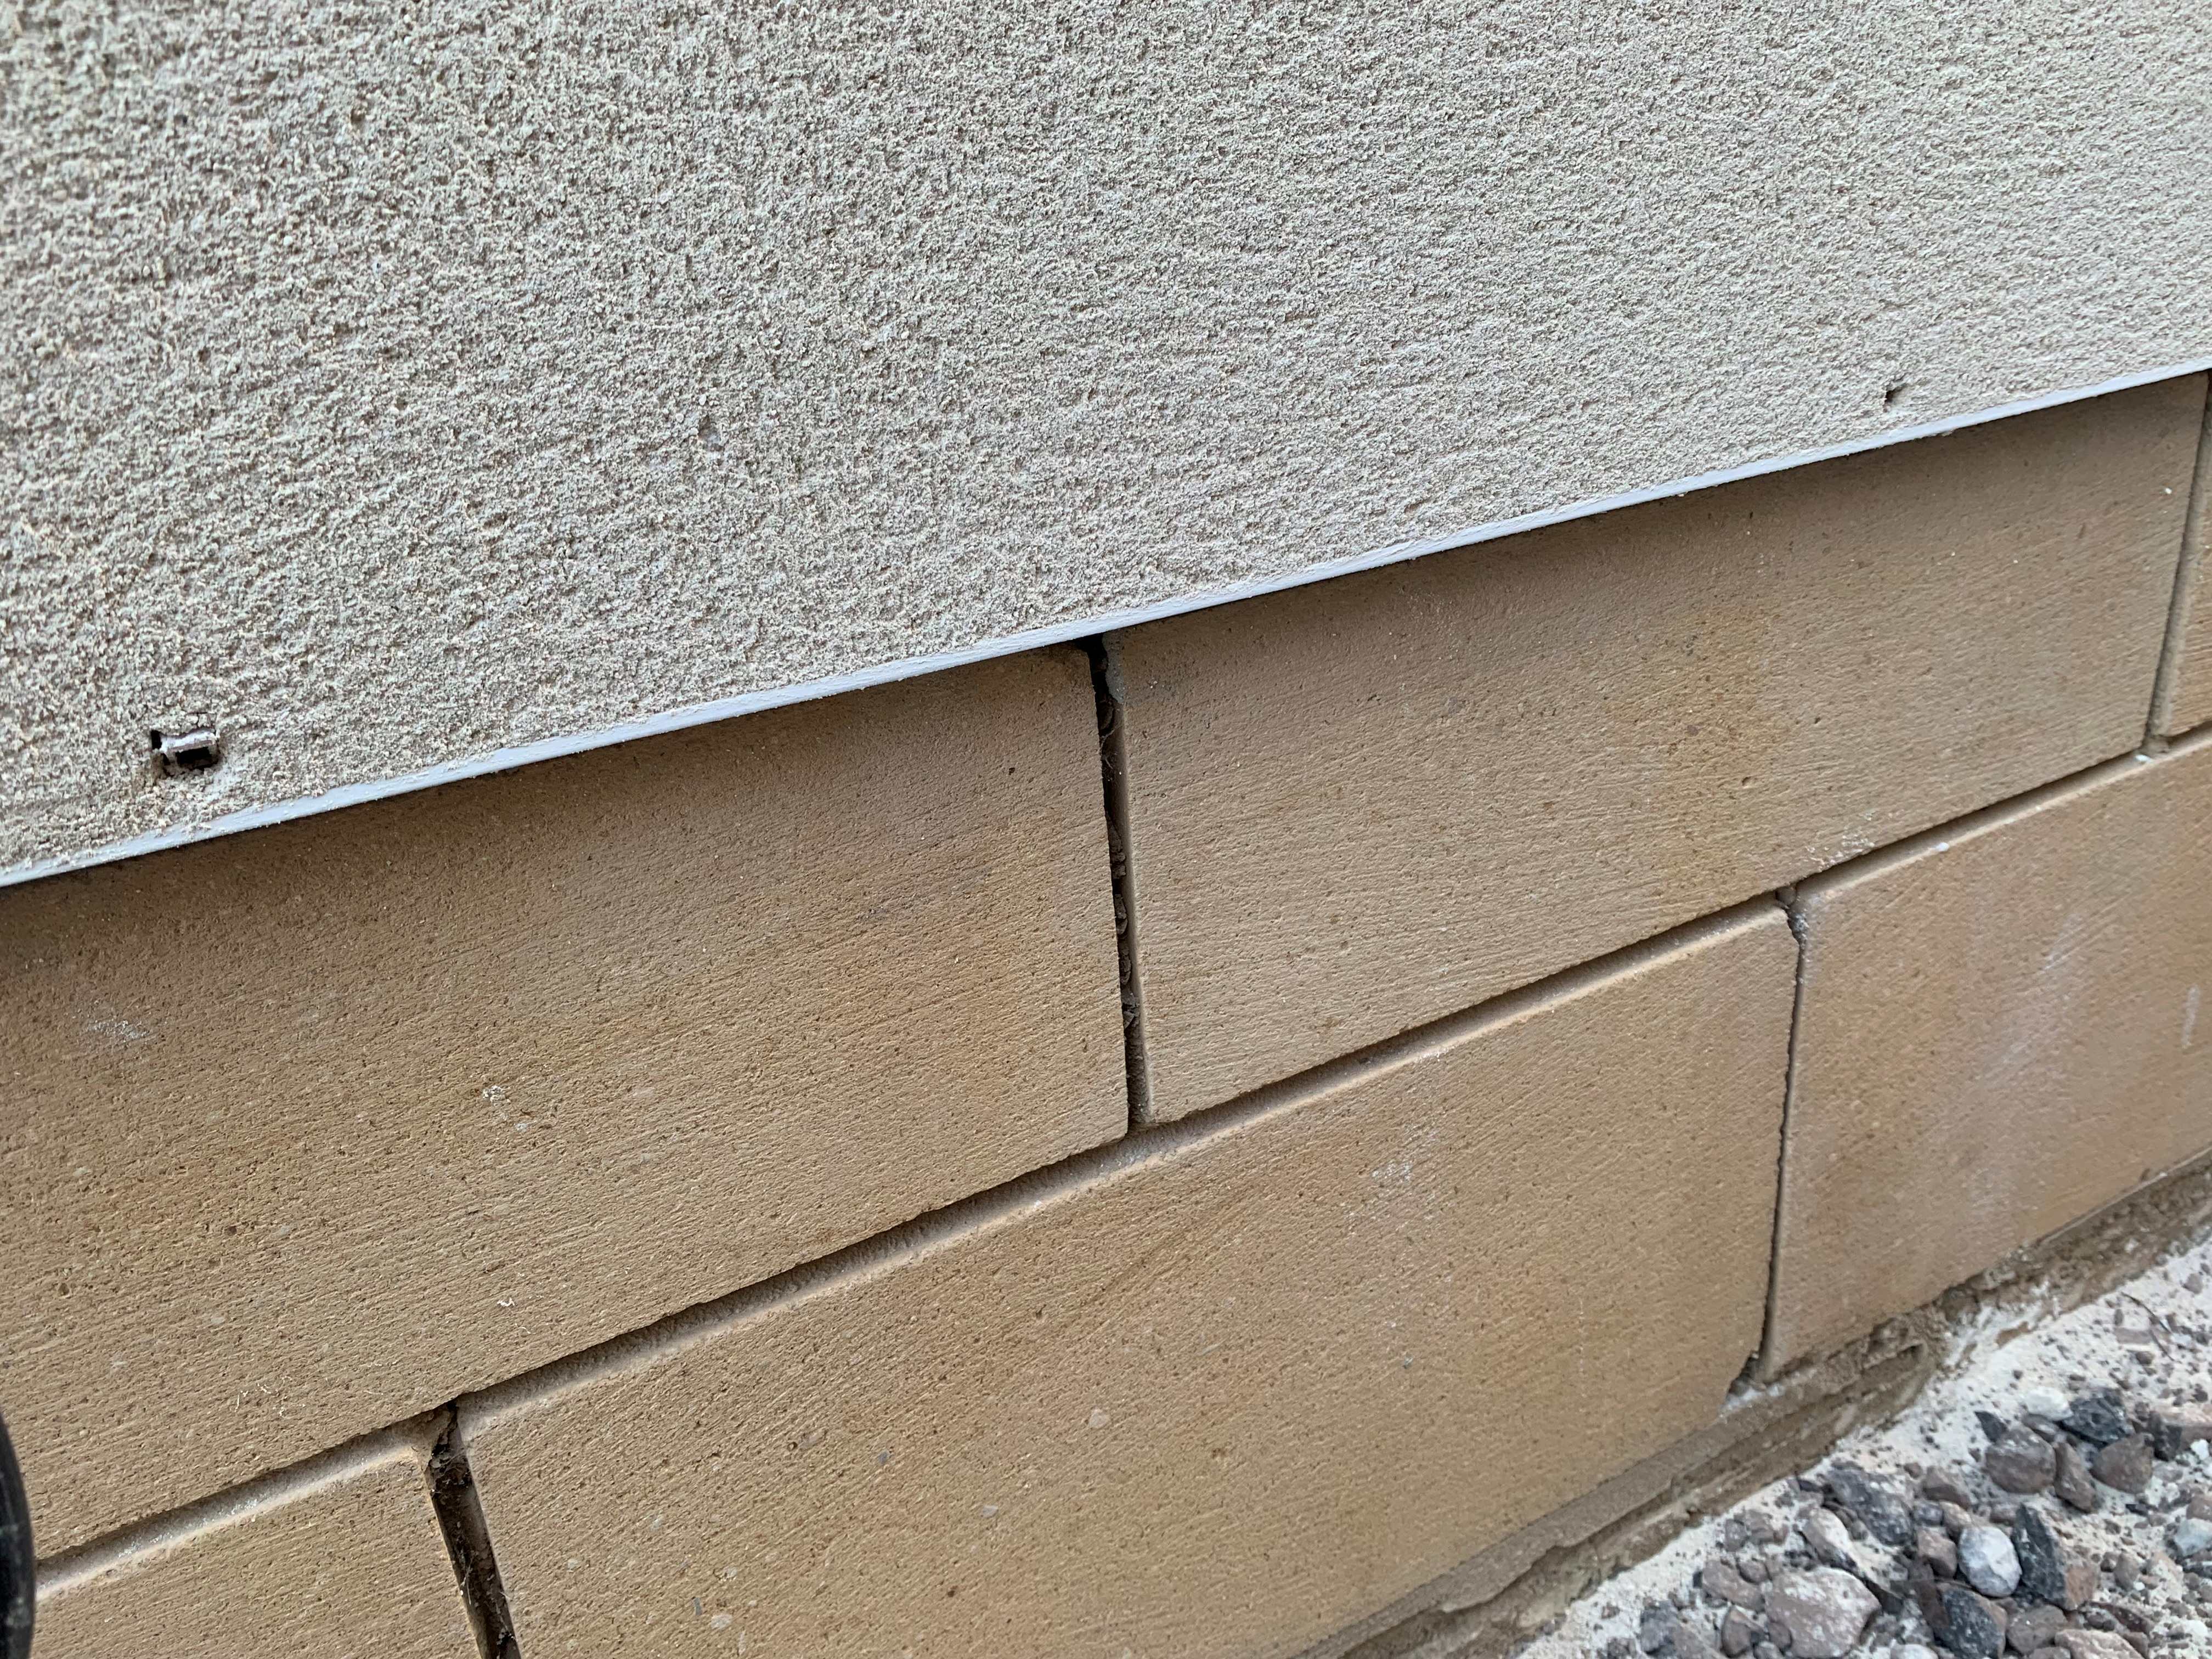
Just been 'rendered' this week. Here is a photo. Renderer cut off the ends to be flush with the render and stuck screw or something in the ends to stop them clogging up. Fortunately the buff colour close enough to our render anyway. Using clear ones is a very good tip though. (With our builder you only got whatever was in stock at the local merchant unless you searched it out and bought it yourself.) I don't imagine anything is ever going to come out of them. Weird things really and must compromise any small insulation benefit from the outer concrete block leaf.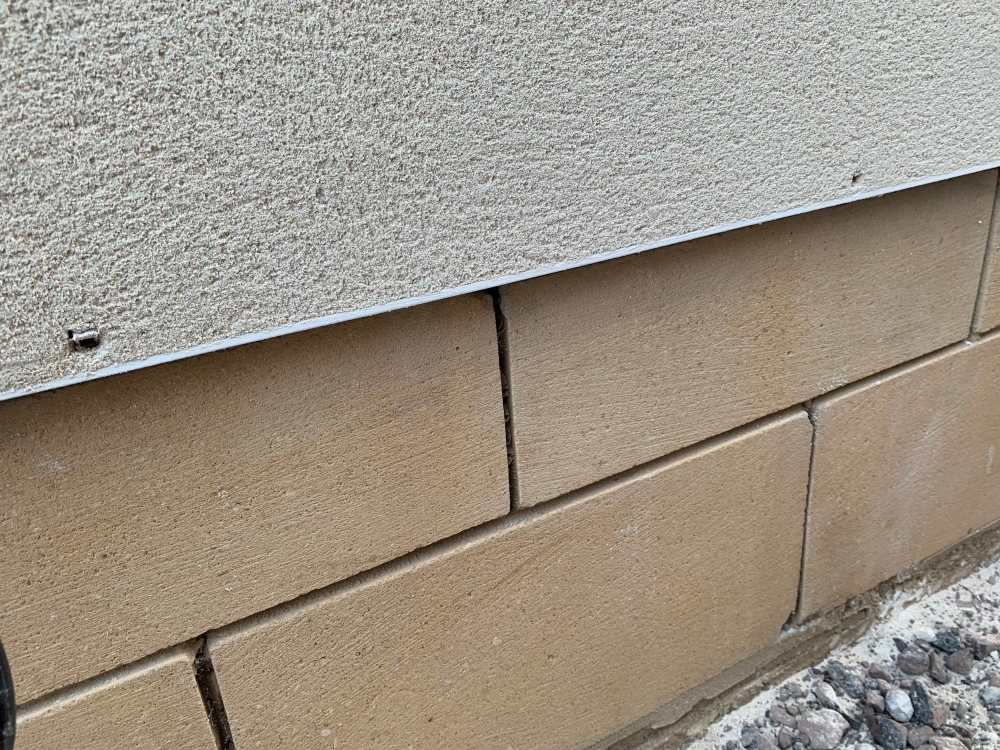
-
PS Are the joists 'at the top' on your sketch done the same way with a span of 9.6m ? I guess the 2.9 wide section top-right could perhaps be joisted at right angles, instead of all joists being 9.6m long. Also maybe consider what apertures/fixings will be going into the ceiling and consider whether the joist positions will be compatible with these e.g. loft hatch/ladder, downlights etc. (My carpenter was good enough to adjust a couple of joists above a kitchen to make room for specific feature downlights). It is only something you learn too late - that the structural drawing should be overlayed with the lighting plan and the room layout to resolve any clashes.
-
When you have fitted the first joist in situ and confirmed that it is the correct length and fits well, one possibility might be: - move that joist across the area as a tester to help establish whether the walls are square i.e. all joists can be made to the same length - take it apart and remove it. Then take it outside and use it as a template to cut and drill the remaining lengths of wood to make up the other joists to the same length (if it is square) (However I am not sure whether it is best to have all joists with identical overlaps and identical bolt positions. It might be arguable that different length/position of overlaps and bolts on different joists would give a more robust structure less likely to fail in the same place across all joists. But I guess your SE would say it is designed so that any one joist will never fail anyway.) PS I am not a carpenter and probably don't know what I am talking about.
-
Our extension slab was about 7.6m by 5.5m and about 120mm thick with a single layer of reinforcing mesh held on concrete mesh men at about 50mmm up. So only half the size of yours and we had no expansion joint. Specified by our structural engineer. It has been down 2.5 years, still not floored over, with the heating pipes operational for 1.5 years. Looks fine with no cracks. Plumber clipped the pipes to the mesh with zip ties. I went around after he had gone cutting off all the zip tie ends he left sticking up.
-
We had the suppliers come and measure up the openings for our doors and windows. They tend to allow 4-6mm tolerance all around the perimeter - doubtless reduces their risk. Beware the laser level. One supplier measured at survey, then measured at fitting and declared our floor level to be 12mm higher than it should be. Wouldn't accept it when I explained that was impossible as the only change was they measured from top of joist the first time, and from top of floor boarding the second, and that was fully allowed for. I bought an old world water level - ultimately showed their measurements were wrong - used over a 9m distance, and comes in handy for finding levels between the inside and outside of a building.
-
Intention is to seed the new lawn rather than turf it. I did this once before about 30 years ago with good results using some good seed. We have a clay soil type, which does show some cracking in very dry conditions but seems quite fertile. There is a big variation in top soil pricing (£50 to £150 per 500L), but I also suspect there is a big variation in 'quality' too. We have the additional difficulty that access to the back garden which needs to be levelled is via a side passage only 800mm wide, and the side passage wall is just now being newly k-rendered and cedral cladded, so we need to avoid damaging this. (The thought of some landscaper's teen labour crashing into stuff with wheelbarrows doesn't bear thinking about). We are also in a suburban road and a lorry load would have to be tipped on the public road and/or else block any use of our driveway. I have bought a few 25L sealed bags of topsoil on offer from Wickes and these are easy to hand carry down the side passage. 20 off 500l bulk bags equivalent would need 400 bags though. Any views on whether this is good stuff or crap ? Honestly not sure how to assess the quality of new topsoil, and if you don't like it after it is delivered you are going to be screwed ?
-
Do you know how level the concrete will be ? Our builders said the slab for our extension would be level to within 6mm, but only had a man hand tamping and floating it. It was only level to within 24mm and the level was 11mm higher than it was supposed to be. We had to change the floor make up in the connecting part of the main house, and the flooring contractor will be using levelling compound across the top of the slab to correct the 24mm variation. You probably have some very good pro's doing yours, but you will still want to check the actual level variation once it is poured and floated, just in case any parts need levelling compound, or different door apertures vary somewhat in level. Just a thought.
-
I have about 200 sqm of our garden to level out for a new lawn. I will need to get some top soil in but am a bit annoyed as we had a landscaper do a bit of work last year and they insisted the old lawn should be scraped off, when I could have just killed it with weedkiller. The result seems to be that they effectively skipped a couple of inches of the existing topsoil with the lawn - effectively costing me £1000's just to replace what they skipped. Doesn't seem right to me. Anyway I am wondering how level is a level garden lawn - we want to achieve something that looks flat and contemporary. Should I be aiming for completely flat, or should it have a slight drainage slope, and will it be noticeable if I put a small slope on it to save on topsoil. It is about 23m long and 8.5m wide. So even a 5mm per metre or 1 in 200 slope would save me 4 inches of topsoil at the far end and about 20 bulk bags of topsoil it seems.
-
Timber or timber effect soffit material
Spinny posted a topic in General Self Build & DIY Discussion
Still waiting on a quote for an oak strip wood soffit for an overhang. Still in two minds about the problem of oak and timber ageing to a grey colour from UV light after a year or two. Therefore also wanting to look at manmade wood effect alternatives that will not change colour and be low maintenance. Any suggestions/suppliers ? Has anyone on here done something similar ? (Slightly wonder if LVT click style planks could be used ?) -
-
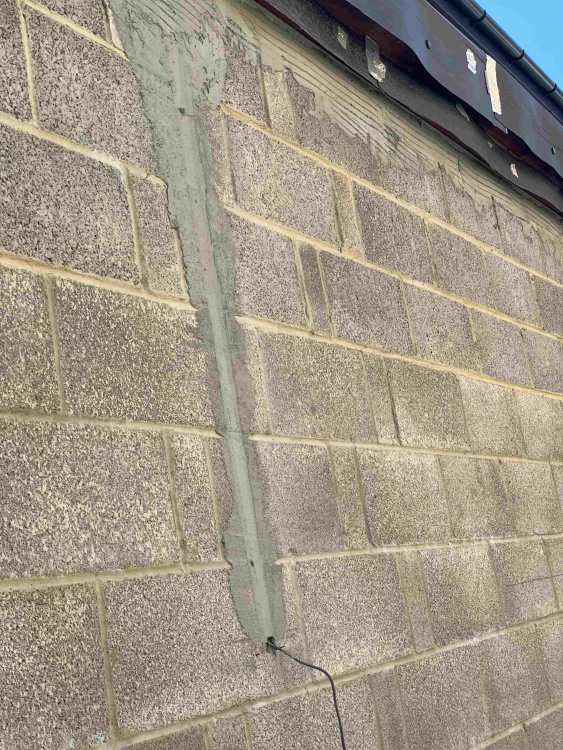
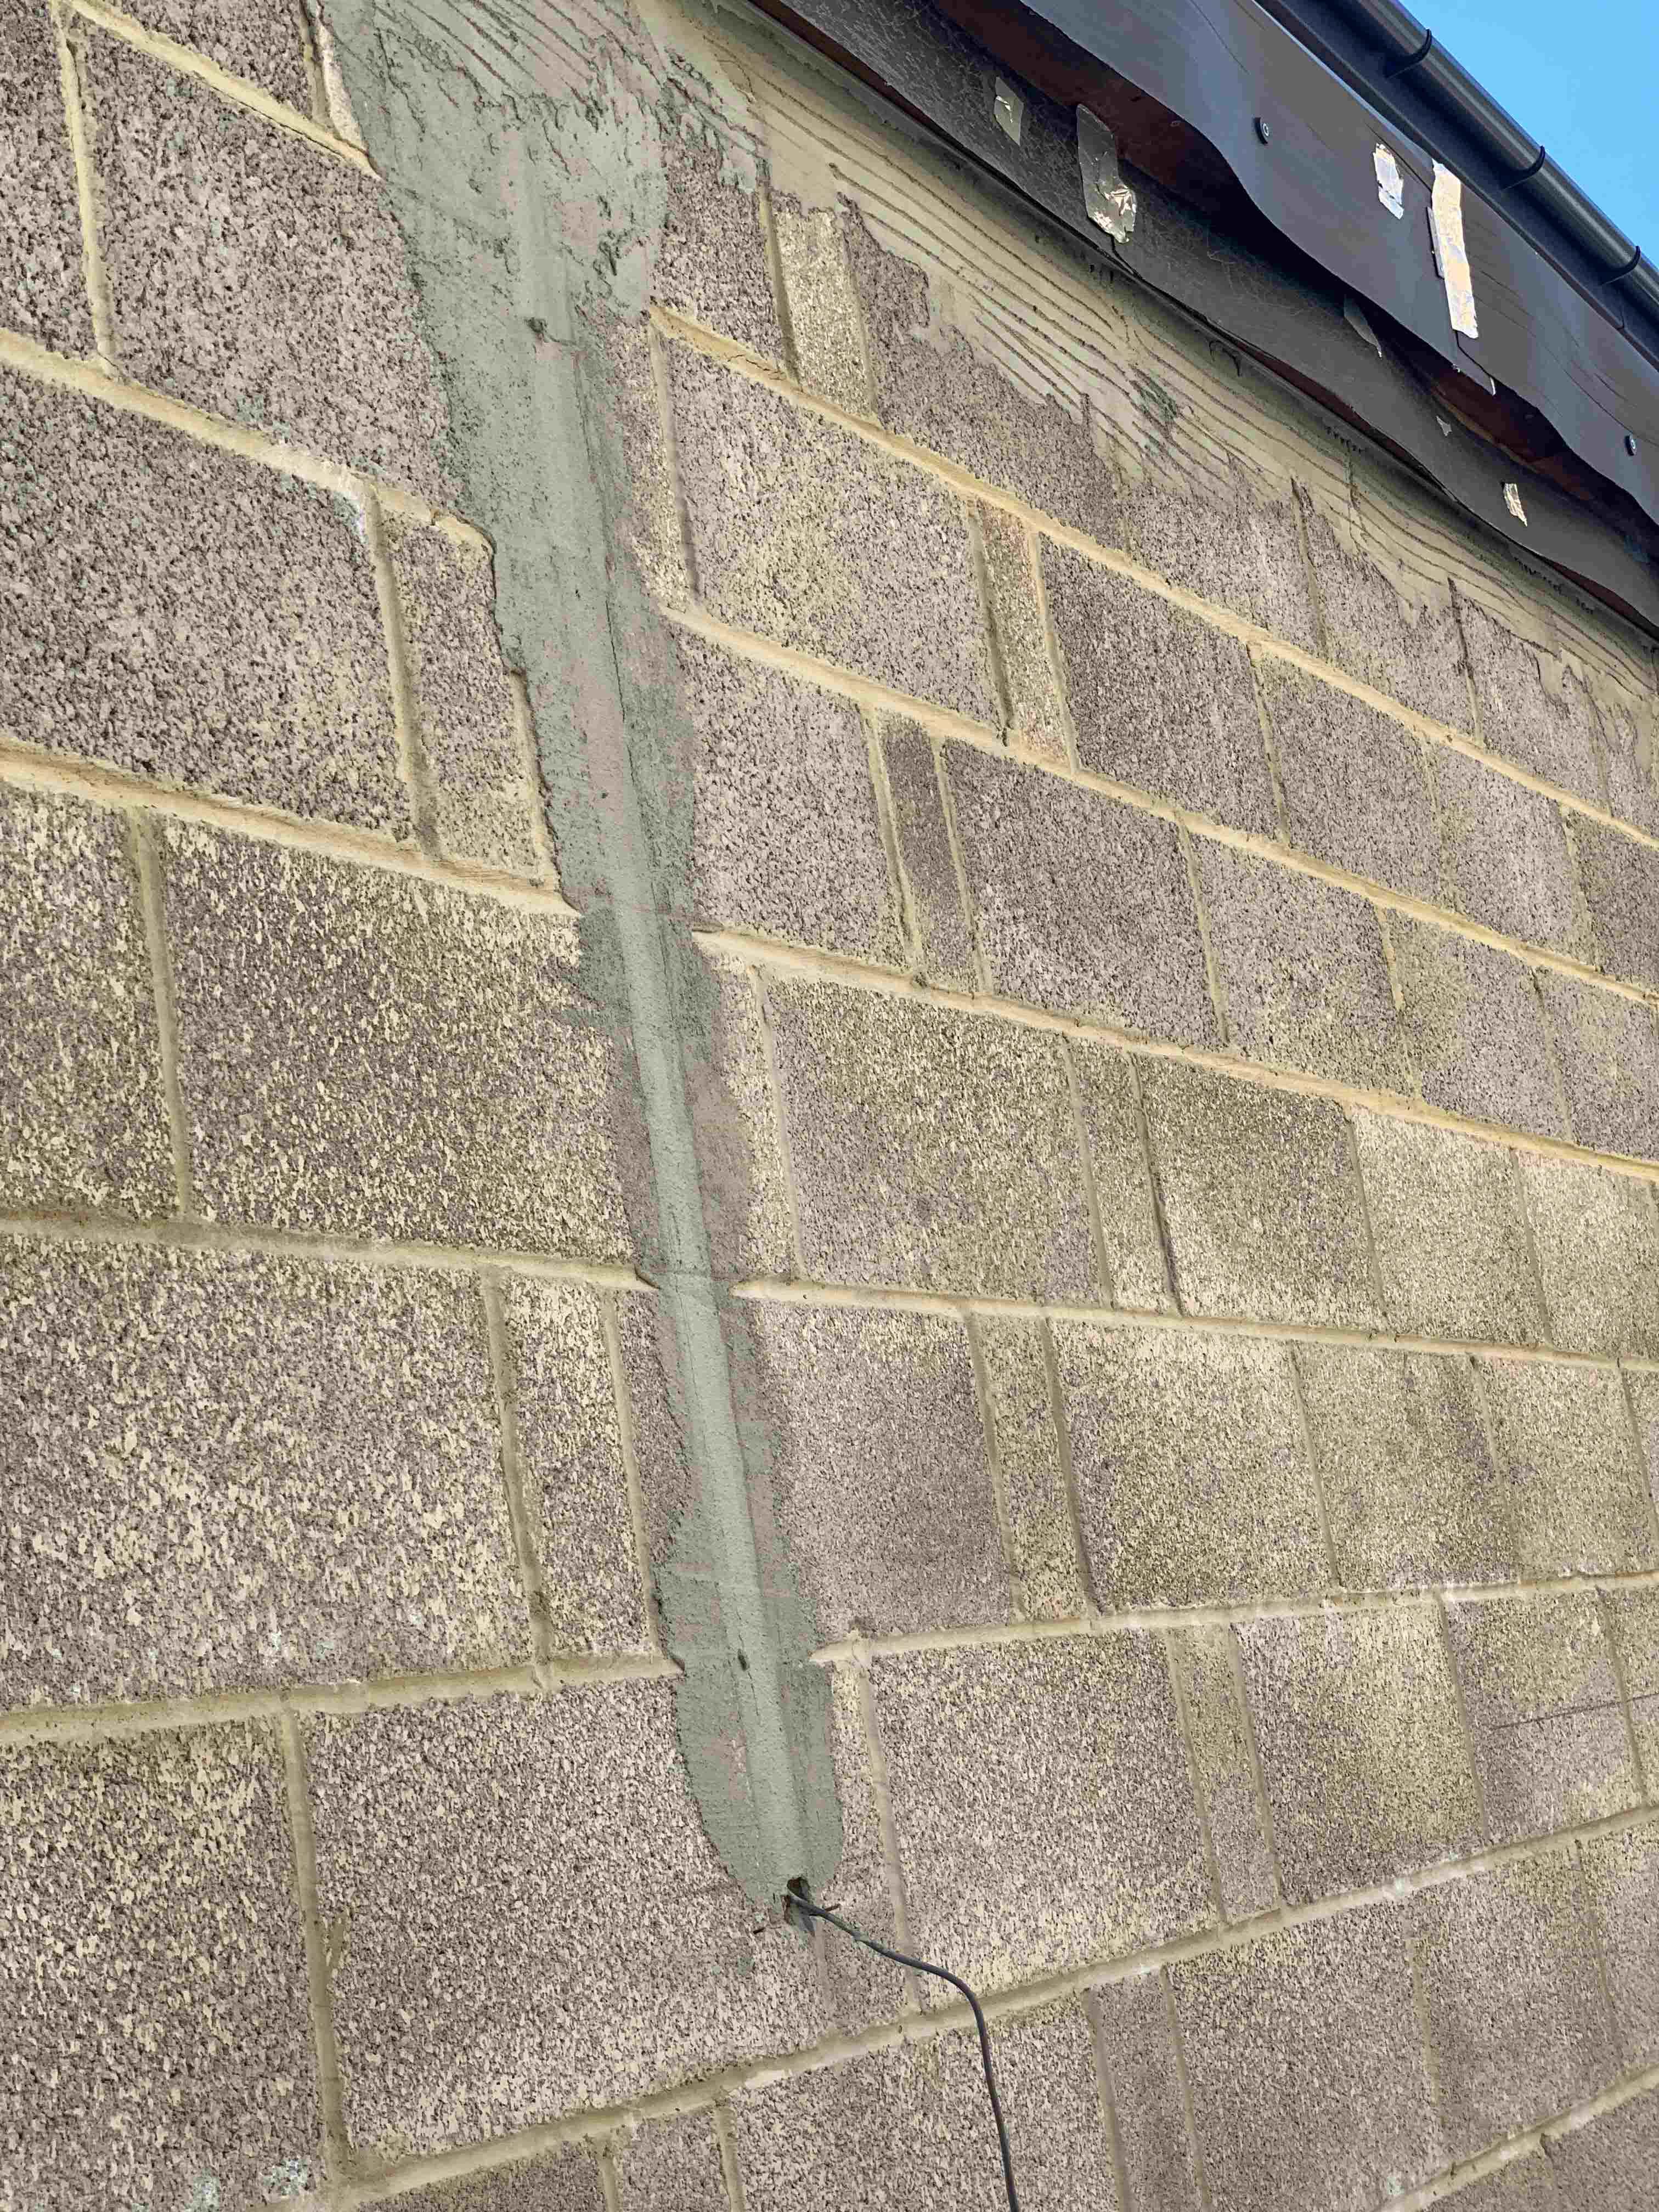
Renderer is here and has kindly routed out the blockwork, put the cable through some channel I had bought and mucked it into the wall to make ready for rendering over. (just thought I'd say what happened rather than leave open ended)
-
Who owns the shared access way, and precisely what gives shared access rights over it ? Are you measuring from the outside of the house wall, or the outside edge of the eaves and gutter ?
-
Personally I'd say have some consideration for your neighbour. Even if you can do something it doesn't mean you should do it. Probably not a popular sentiment these days.
-
Should I use this stuff ? https://www.insulationuk.co.uk/products/tekwarm-reveal-board-high-performance-laminate?variant=43387649261749&utm_medium=cpc&utm_source=google&utm_campaign=*Pmax|Ins.Plasterboard30+&gad_source=1&gbraid=0AAAAAoNNCLQ_tq0b6Prkw491vqllba1g2&gclid=EAIaIQobChMI7_mygKjujAMVrpFQBh2LXgvDEAQYASABEgJc7_D_BwE
-
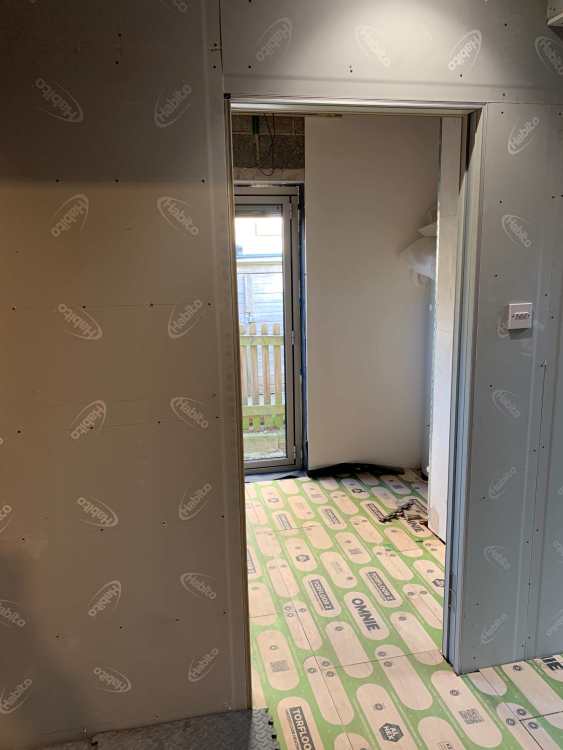
You don't need a concrete floor for u/floor heating of course. That photo I posted above now has underfloor heating. We were going to have a between the joist system but changed to a within the board system from Omnie when the builder cocked up the level of the concrete slab. (Insulation between the joists, 22mm pre routed board with a matching pre routed overboard - about 35mm thick on the joists.)
-
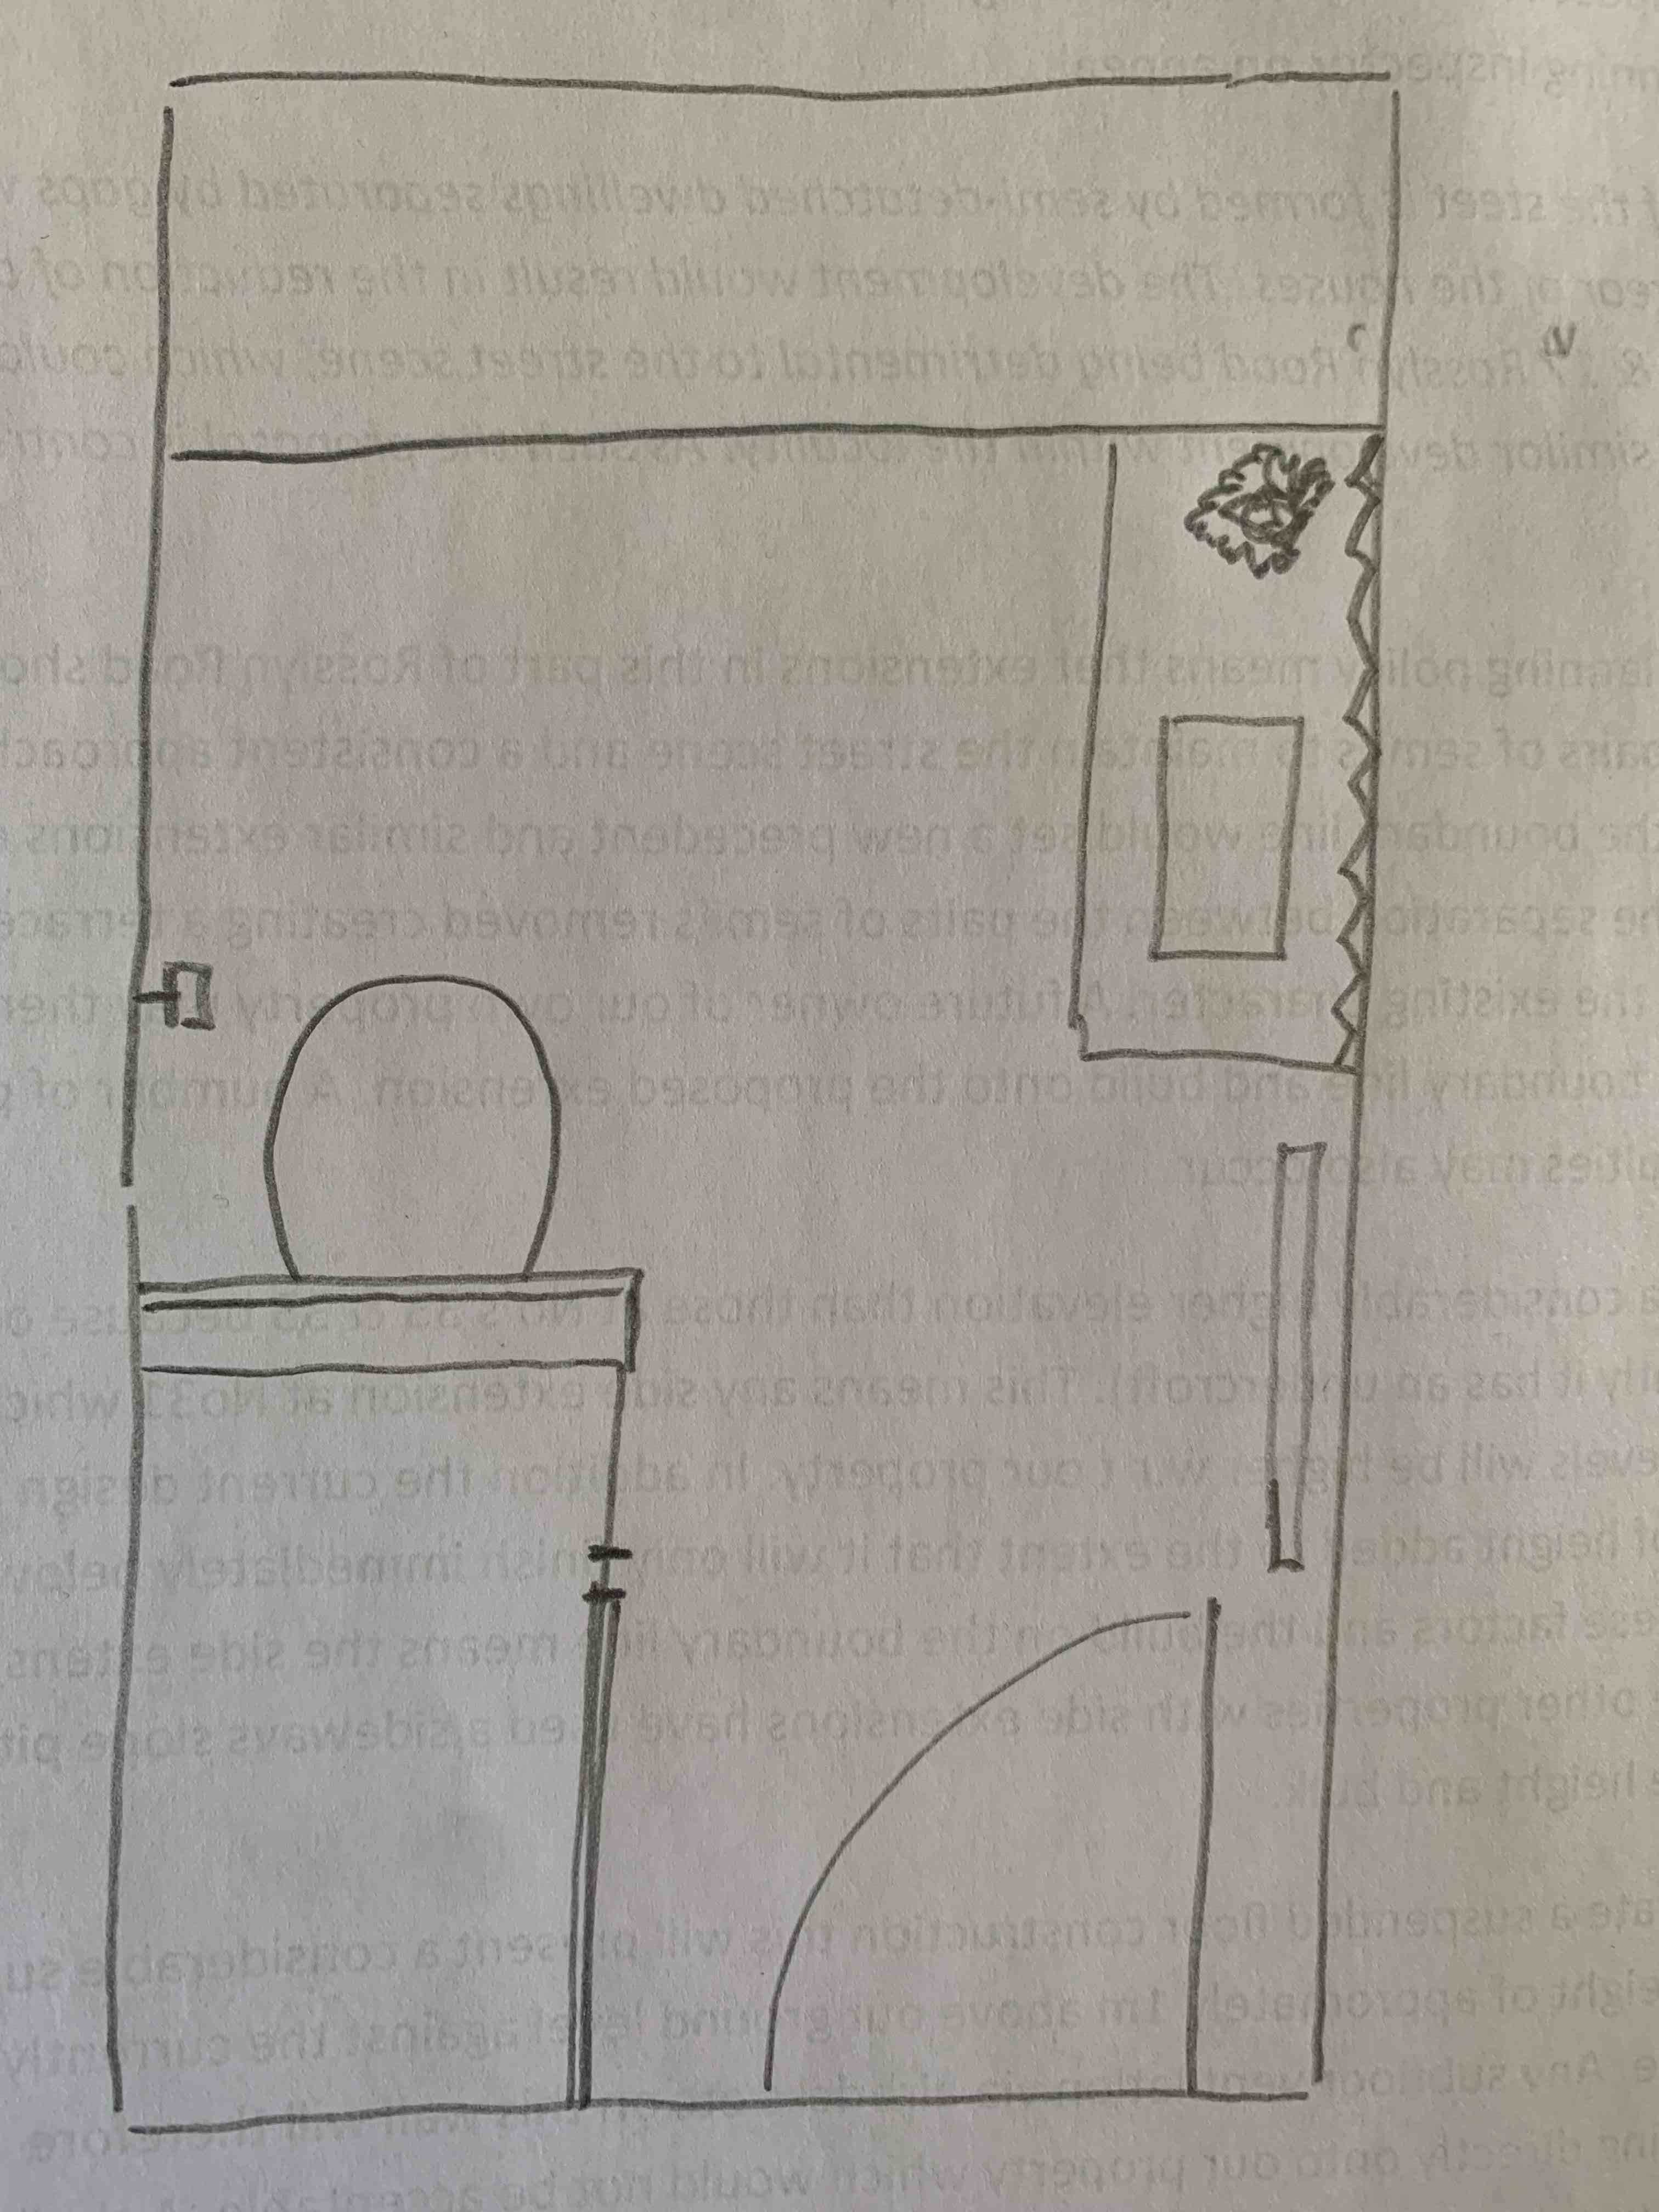
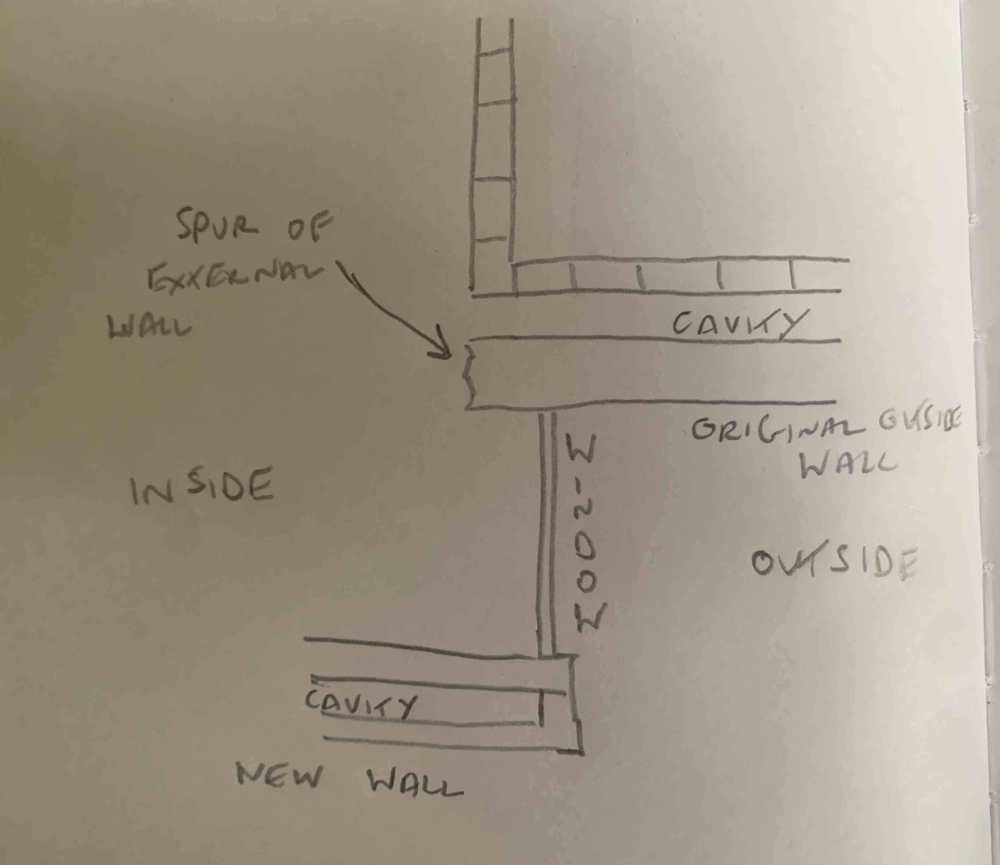
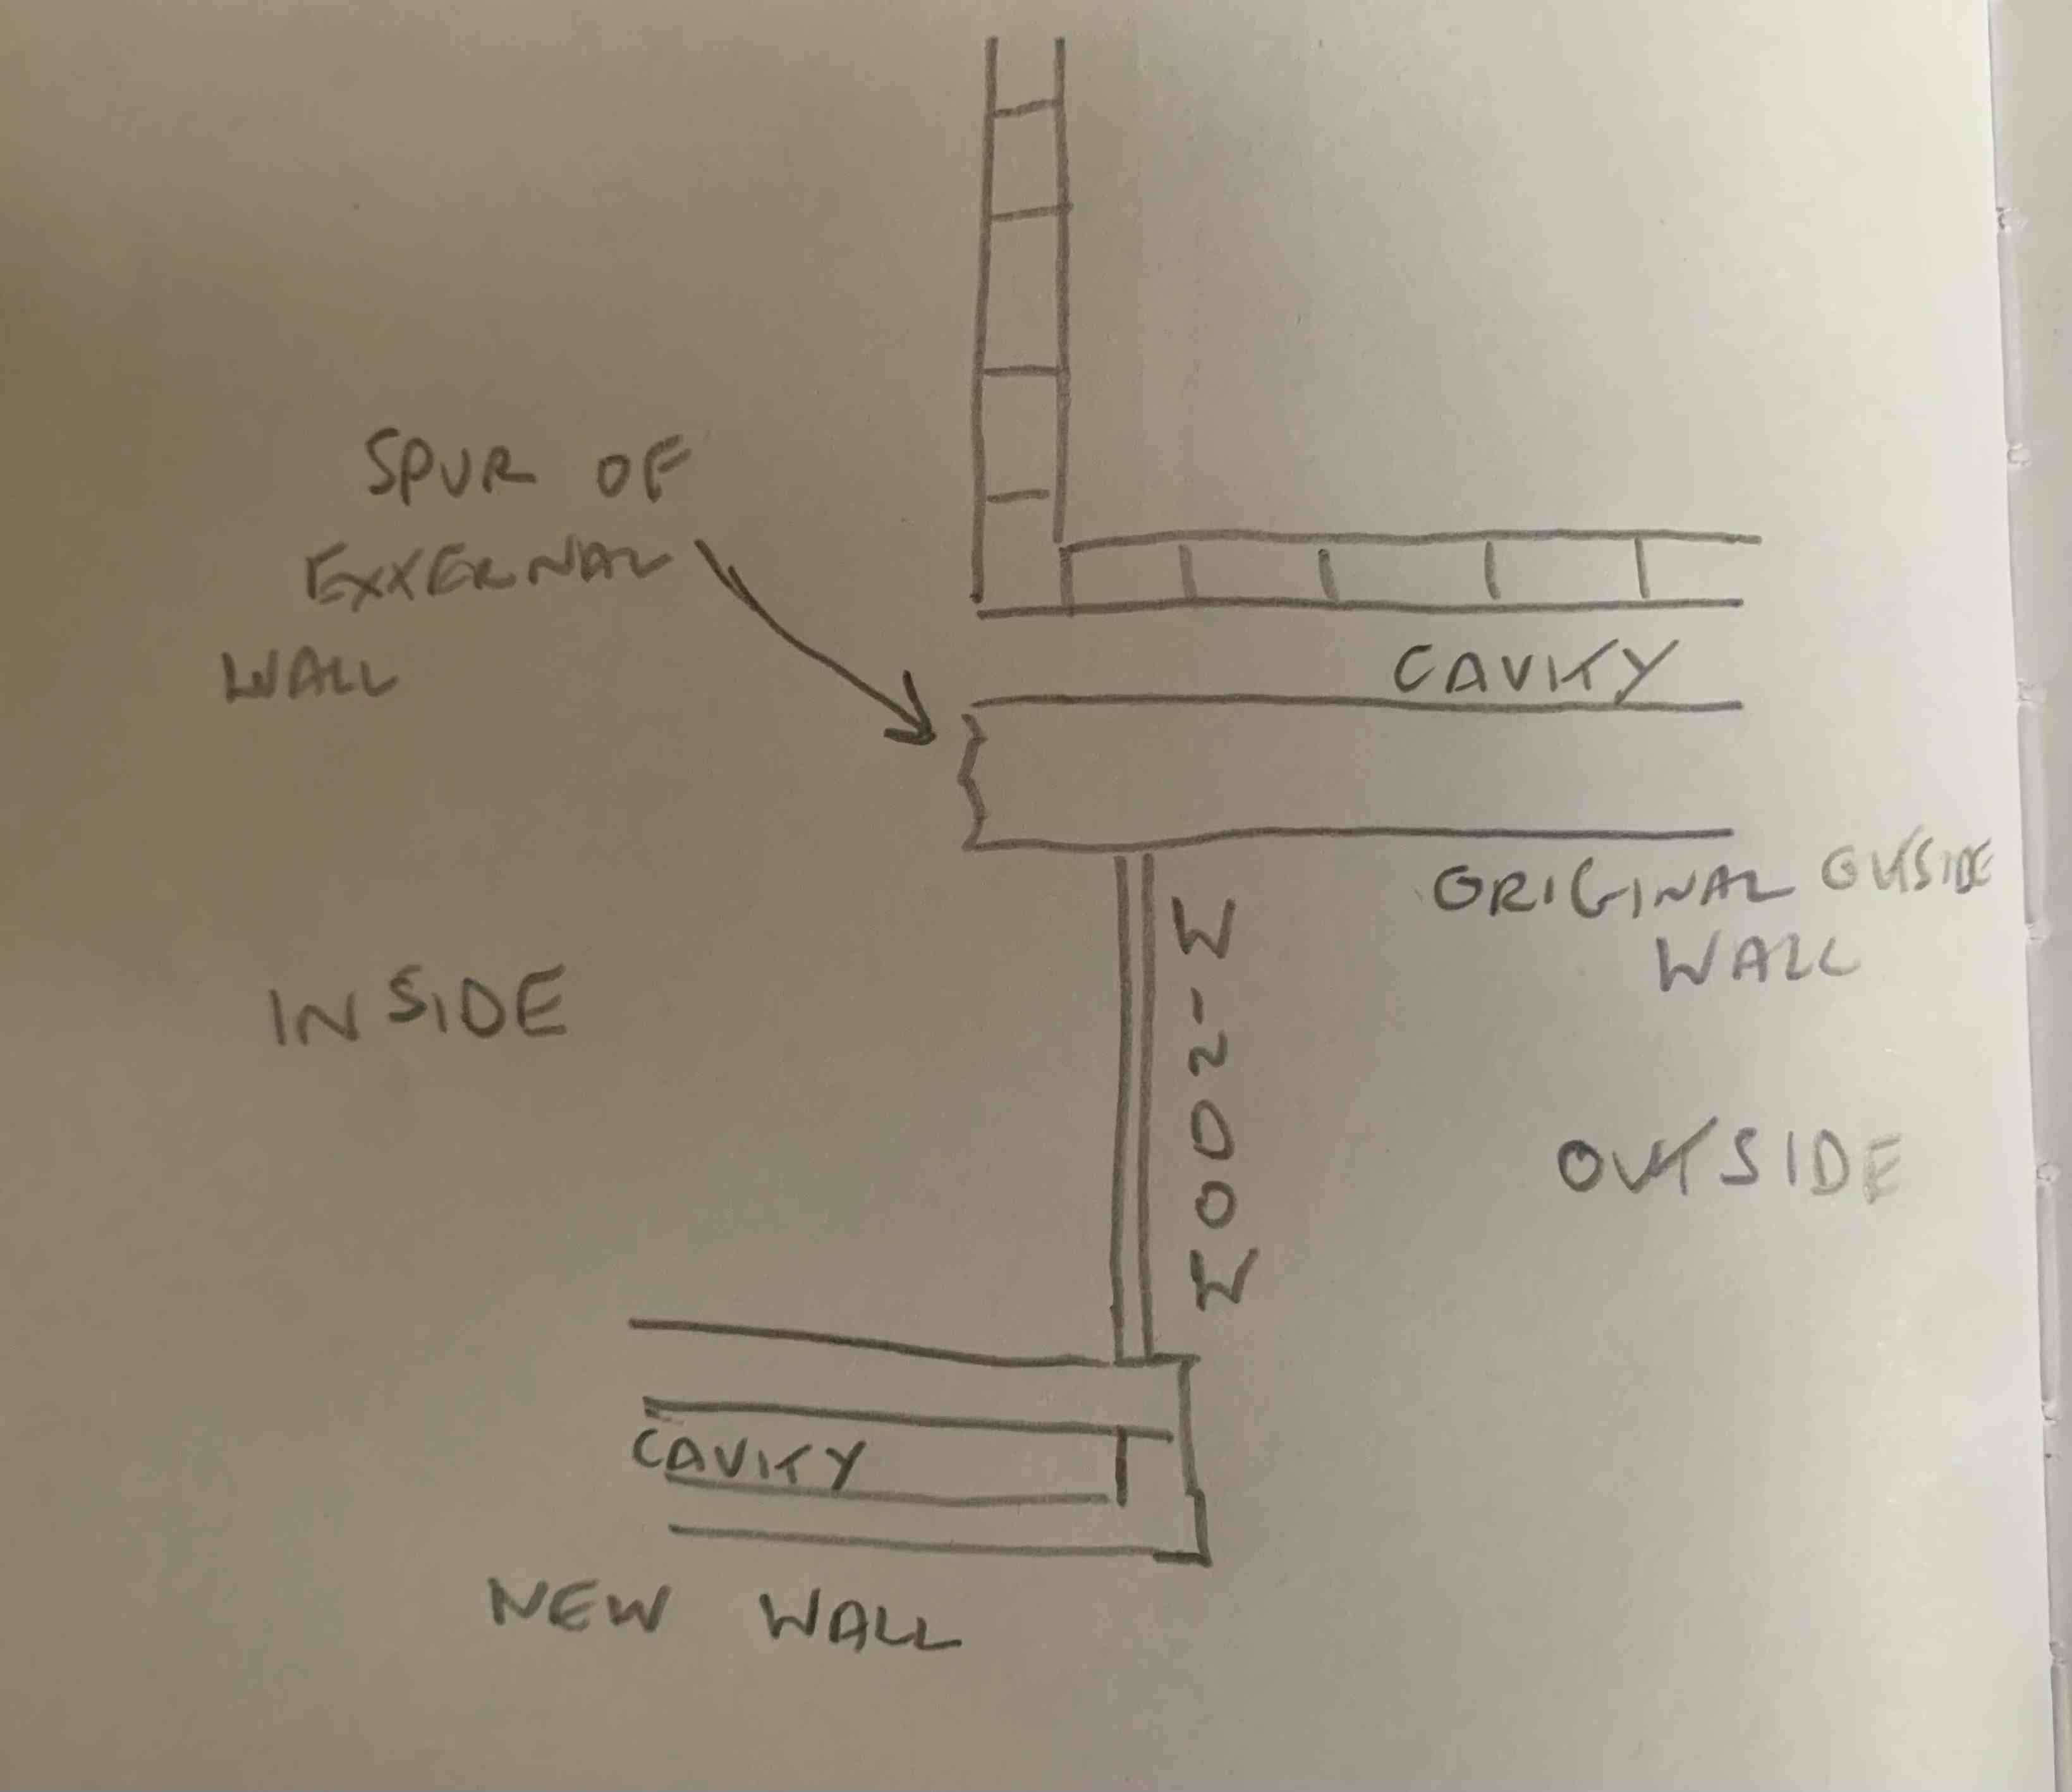
See the sketch. I have the end of an external wall running into the internal area alongside a window. I am wondering what level of insulation to use across the end of the spur of external wall (where the external wall was cut back to create an opening). I can use some insulated plasterboard on the inside of the window reveal, but the end of the spur will be plastered over (wet plaster) with the adjacent brick wall. I guess I need a little bit of insulation between it and the plastering to avoid a possible cold spot in a utility room. Suggestions ? Thin piece of PIR ? Something I could spray it with ? Aerogel matting ?
-
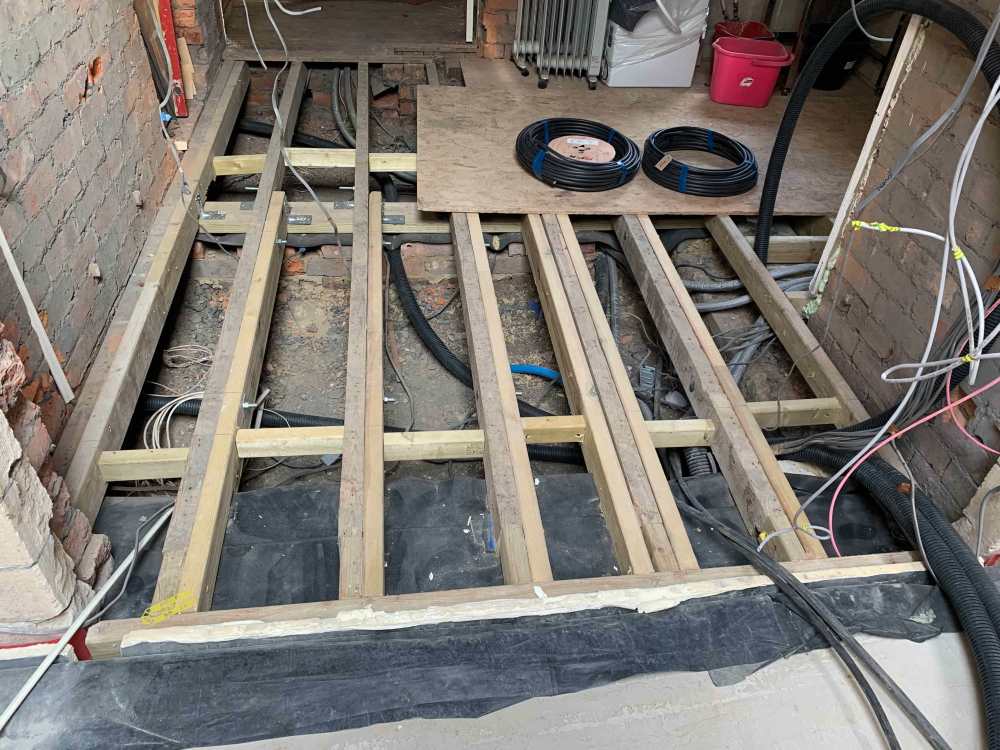
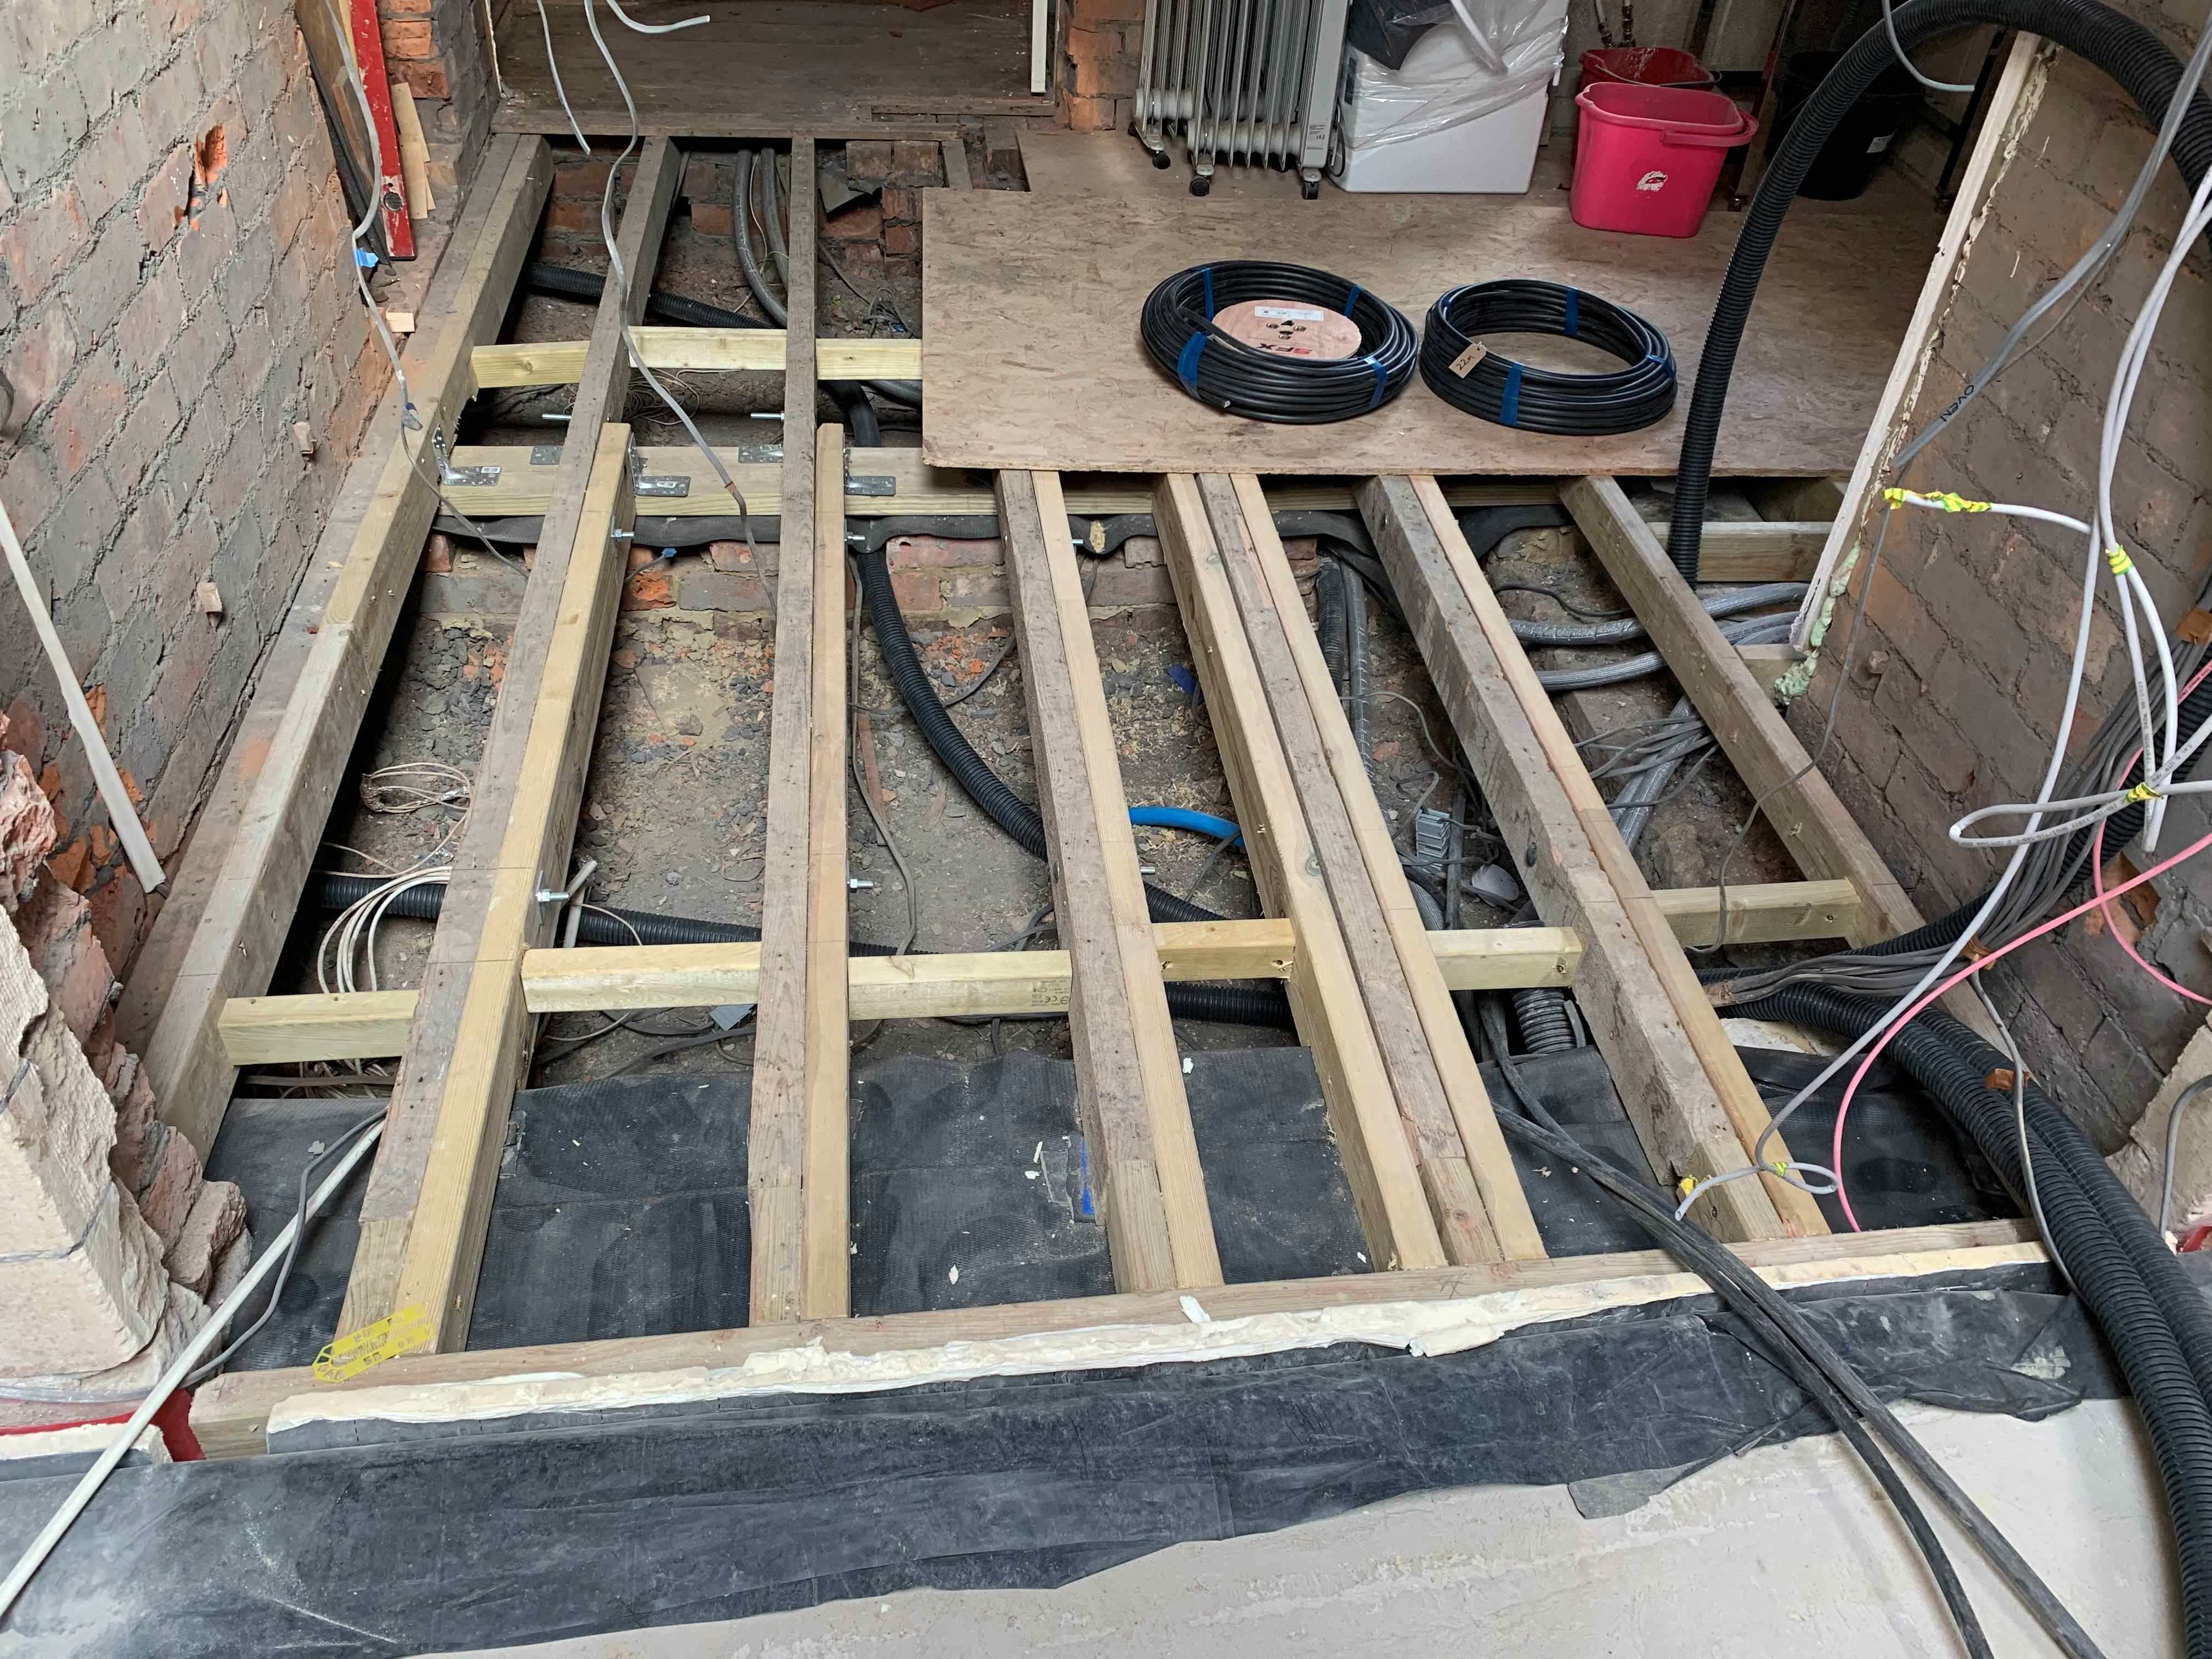
Photo from when ours were done in case it helps. Took them 4 goes and a visit from the structural engineer.
-
With a Talentofill. In our case fed from our shower mixer, so no taps needed at the edge of the bath anywhere. Saves 3 or 4 inches when fitting stuff into 2m by 2m and looks nice and contemporary. If you think about a bath the dimension you care about is the size of the inside 'hole'.
-
Wasn't sure if the render would attack the cable insulation over time ? If clipping to the wall, what clips, plastic ones or the metal wrap around ones ? Does any metal have to be stainless steel to prevent rust (including clip nails) ?
-
@ETC Thanks. You have got me wondering, do you think I should be adding some insulation on the inside as sketched in red in the attached image ?
.thumb.jpg.f992f00dccfd76ae6eef61083cd6b9e9.jpg)
-
Should they not have capping - plastic, metal ? and then render over that ? And presumably fix the outside socket box onto the render afterwards rather than render around it ?
-
Our bathroom is 2m by 2m. We put a narrower 725mm wide door in to the same pattern as the other doors - you would never notice. And don't forget you don't need to have bath taps, we don't.
-
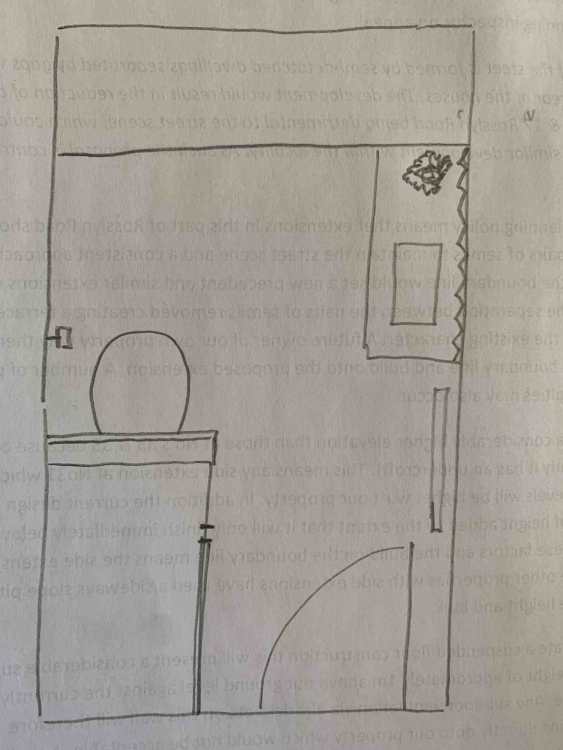
Couldn't you cut a section of the joist out and put a couple of trimmers in hung off the concrete block wall to create a gap for the toilet pipe wherever you need it ? (Or can you not do this with posi joists ?) Not keen on close coupled myself, much prefer the look of back to wall with a hidden cistern. Looking at your layout again, I am not sure it is ideal to have the toilet opposite the basin. The photographed layout above looks better. I tend to prefer the toilet somewhat tucked away as it is not normally a focal point and is a possible source of hygiene risk. Build a half height stud wall out across the end of the shower nearest the window, then turn the toilet through 90 degrees and back it onto this stud wall, conceal the cistern in the stud wall. Then have glass panel from above the stud wall up to the ceiling. ? (Would allow the toilet roll holder to be mounted on the wall then). Then you could push the basin down towards the bath more. (Even connect it to the bath with some cabinetry creating more storage and a longer counter top with a large mirror or mirror and shelves above for ornaments/pot plant ?)


.jpg.0822478d3fe414f609f59da4cbd7cc90.jpg)