zoothorn
-
Posts
4752 -
Joined
-
Last visited
-
Days Won
3
Everything posted by zoothorn
-
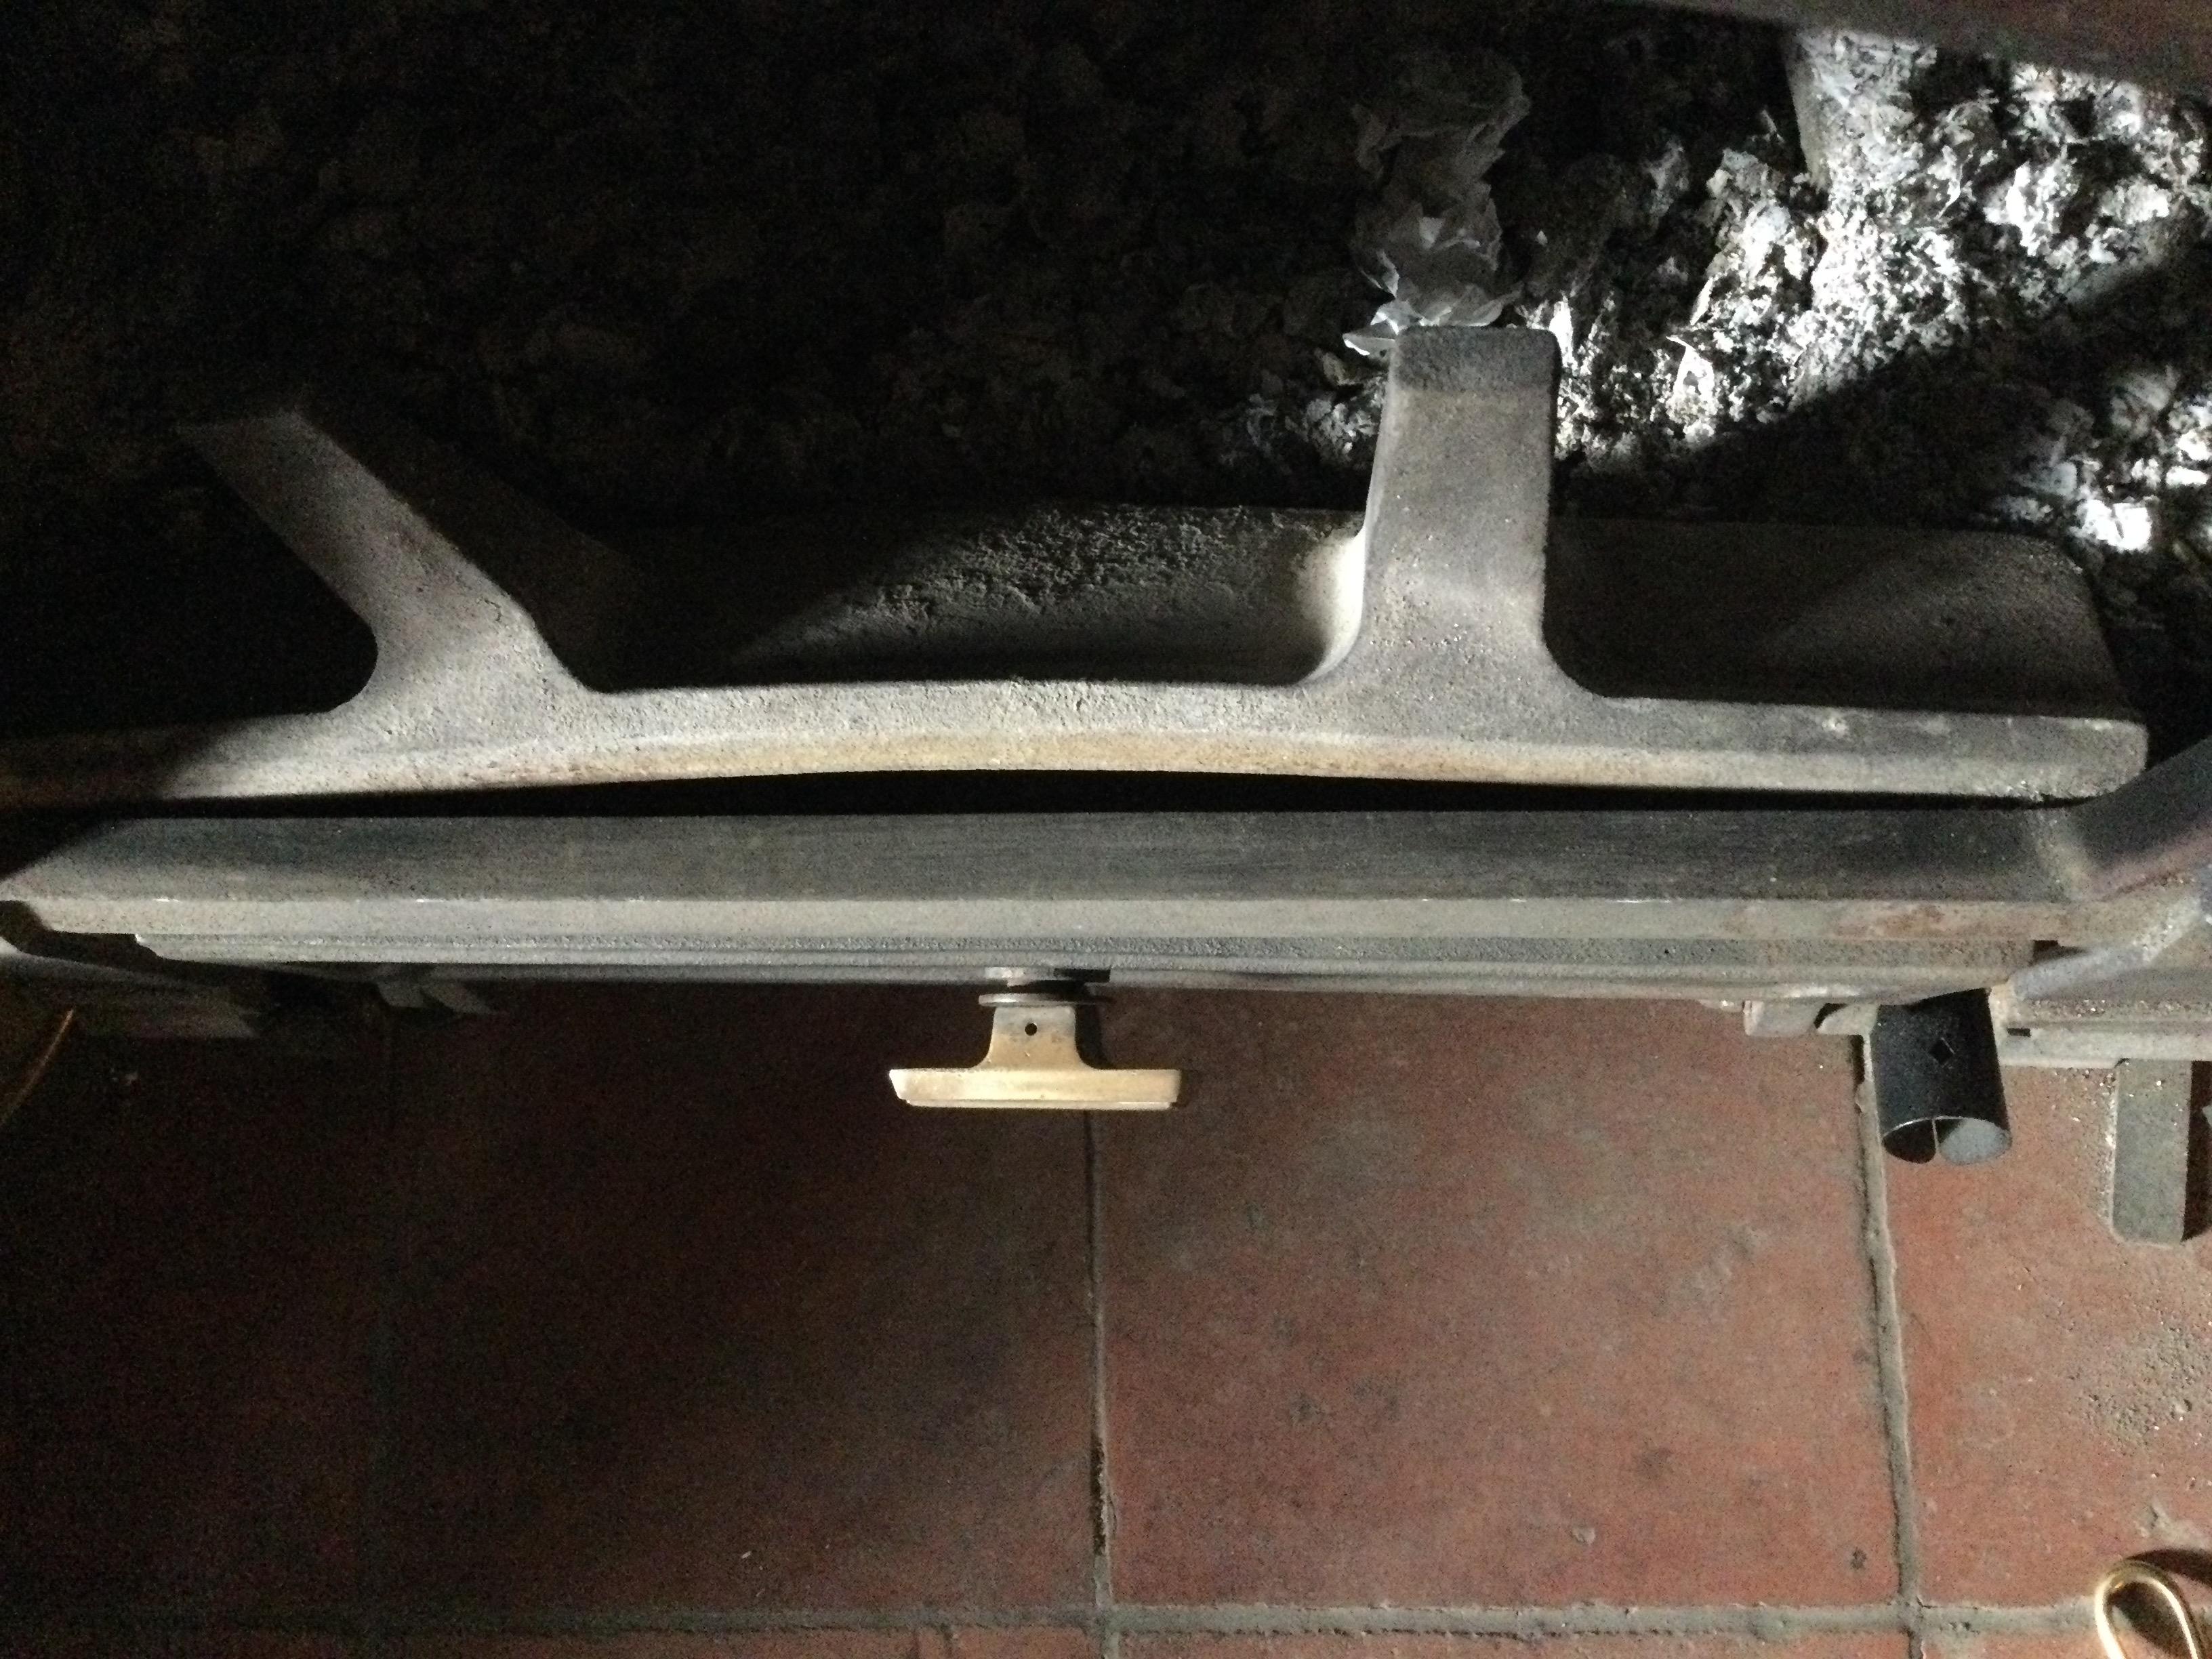
AS Im loathed to start another thread out of embarrassment ( for all my threads mounting up!), if I can ask a few general stove woes questions to you knowledgeable folks-? In my photo, my guard is warped/ bowed inwards. This suggests excessive heat, & I bought this guard to replace the one before ( ebay used stove.. not my best buy) similarly warped. Now having never run it excessively hot, it's a mystery why it's gone like this. But one clue perhaps is thus: once bought i noticed a small casing crack, on front left leg, meaning a small air intake innevitable via here. Also if it had been dropped on this corner ( i think likely reason ), then possible other small gaps in casing underneath too. Yes I shoulda returned it/ refund etc.. but didn't know significance of a small crack, thought I could just fill it & fine ( not possible). Running, it's unable to be 'shut down to minimum' properly via its two controls (it still gallops away with both closed): Im only able to tame it with a flue damper.. even so it still wants to go at a clip tbh. I cant turn it upside down/ airtest it, to find the wee gaps & weld, as it's just too massive a job to do. Could I fill this crack somehow though? Any other ideas about my warped guard? Thanks zh.
-
Hi markc .. yup getting to know all about pita jobs. Cottage full of them. This mortaring today actually fine/ 1 hr done.. spot on with your flingathon. How long before I can put layer 2 on? Leave the whole wknd maybe? Next is a stronger 3:1 'sealer' mix onto the big krispies areas. Tomorrow.
-
Yes everbuild admix a Mini splash plus 1/2 teaspoon frost stuff. 4:1 bit wetter mix to wing it in.. just staying put.
-
Hi Onoff. Should i scour the surfaces sometime/ once its going off whenever that is? I think so my next layer has a key is it..
-
Fired in a test/ seemed poss ok/ whacked it in.. far more mortar than anticipated, but shored up the stones ok w'out foam. Mortar's a good 1.5" deep in places tho. Will need maybe two more goes to get the surfaces out enough to do final render layer. How long for this 1st fairly thick layer to set? Thanks, zoot
-
I like TonyT's style! Well I thought of this.. but Onoff is correct in that if my stones fall ( base big flat one wedged fairly well in, smaller stuff above etc) then Ive really c*cked up hours of work. I was wondering about going underneath, careful as i can trowel some mortar to the base stone. But i might dislodge it. I think foam for surety.. then a TonyT flingathon. Thanks zh
-
Ah got it Temp. Good idea indeed. By god that'll save a few quid over efel parts. if i cut the thing. Which i will have to do now ive ruined the thread/ I guess im resigned to this job sometime. Great help that thanks. Eejet helped!
-
I see what you mean.. i assumed the pin was a smooth affair within the bar bit, then threaded above it: but you mean just go a smaller diameter threaded rod so it can just get into the bar. Tbh no Im not good at metalwork, but worth considering this simple idea.. maybe take stock after this winter. Thanks Temp.
-
Hi CHill. Cutting the tube?! Last resort I guess. Its a costly 3 parts if I do this. I think Im getter off leaving door as it is. I was just attempting door rope replacing.. ended up bodging it dammit. Will have to do with door in place. Thx zh
-
Hi Temp. Trouble is if the pin was wedged in firmer than the force tightening the nut/ washer down... the nut & thread lose. And the pin remains put. I don't know if ever it has been whacked, not by me definitely not... but person before who knows, but I don't see why anyone would need to hit down on this, no reason to, nor via a bump/ accidental knock its too tucked away really. Anyway. Door cannot be removed. So thanks anyway. Zoot
-
I came to the same conclusion just now.. right now i can see the logic a bit more. Thx for helping the eejet out. Right so I put washer on, nut, tightened down ( now knowing pin isnt screwed into bar).. & fouled both the thread & the nut. Ruined. Pin just remained put, the nut sheared the threads up tightening it on. So annoyed! Such an eejet. Such a terrible stove too: don't buy nestor martin/ efel... utter junk: new front guard I bought a few yrs ago, straight when bought looks like this after 3 winters, wont sit in its grooves properly:

-
Ho Roundtuit, Yes I saw this of course.. but the pin is stuck. What I dont get it how if its screwed into the spacer bar thing between the two hinges, can you unscrew it from the bar bit. If you add the spacer & turn nut on how can the pin unscrew from the bar doing this. I must be missing summink. Thx zoot
-
Today if you didn't know is "help the eejet day", & today I can't figure out taking my stove door off. Could you help? I have a manual, door removal on page 6 https://www.harworthheating.co.uk/documents/Technical/Efel %26 Harmony Range/IN1188 Servicing Stanford 80 Harmony 1 and 3 low res.pdf but it makes no sense. What I find is a brass nut on the hinge top, one on the btm. A hinge 'bar' between, like the 1st main pic. Ok the eejet takes top nut off, a bit of rod thread is left. But how this threaded bit ( obviously part of the pin which is screwed into the bar ) is taken out.. is the mystery. It needs just to be removed, I would think, in order for the door to shift sideways... & possibly off. I am utterly stumped though. Maybe someone has a similar door configuration? Thanks, the eejet.
-
Good idea. But its prolly jammed solid/ i think it has tbh. But a cheapo can of foam is an idea. I should have 1st drilled in two pins for each base stone to rest on the far side.. dammit.
-
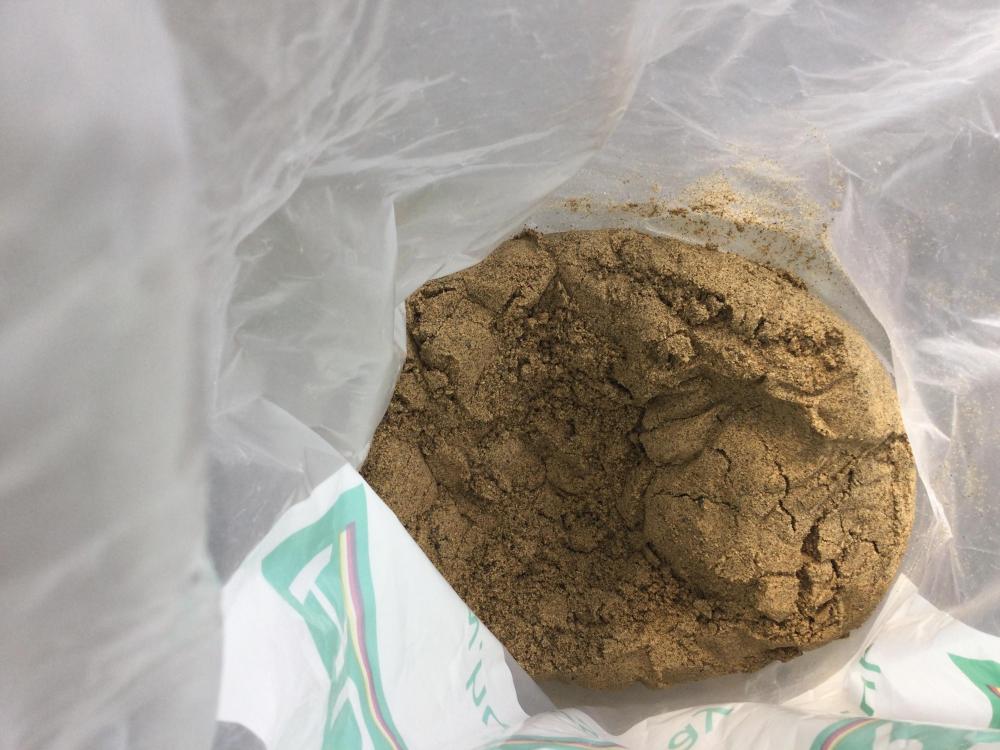
Huge pallaver trying to understand this sharp sand thing. Noone in town knows what it is. They just have 'builders sand' but said 3 types do come in, plasterers, builders, sharp.. call them a,b,c then: but they cant tell b from c, so just sell 'sand'. Both b and c bags look identical, or rather i cannot tell if two are different so if both are c or both b.. I cannot tell. Same with the next place jewsons. No idea what it was. Grit sand... i got even more blank faces. Tried to ask a van chap, no idea either. So ive just bought more 'builders 'sand'. But the person did say "builders say this is a bit coarser/ dont like it" so whether its sharp of what it is I have no idea. Perhaps it is.. but it looks identical to my demerara sugar bag pic. How important it is well how do I know exactly, but, it seems important enough from the replies. Utterly bewildering! So how can i tell if its wrong or right for a mortar gun Onoff I can't possibly know. Thx zoot
-
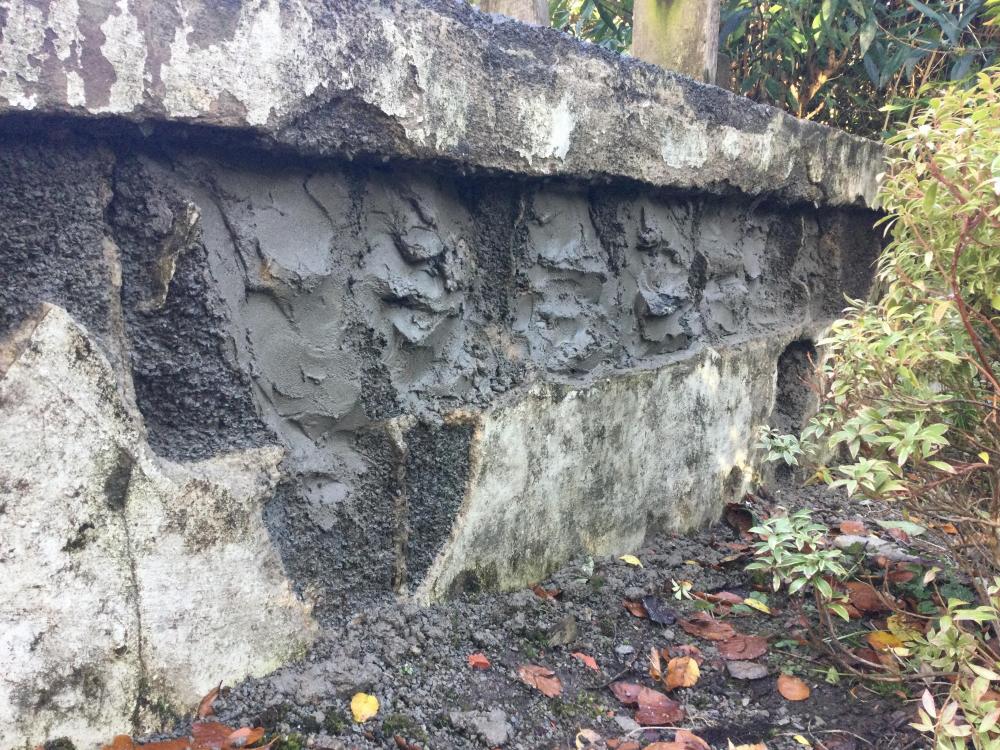
I think the 1st two, weak mix & weather's got at it (perhaps frost too if no protector in the mix?). Why wouldn't people just not use soft sand at all then for render, if a chance it'll weaken it, why not just all shsrp sand? Yes its this trowelling it on & not dislodging any stones is my concern. I think I might have done it wrong tbh, without anything supporting the big lowest flat stone in each cubby hole. Will have to redo with your mesh idea if it goes t*ts up & the base stone falls.. alot of work wasted if so. I might have to just 'fire some in' & pray it sets.. then come back & fire in more. Tmrw's job. There's not a straightforward solution I dont think to spanning/ filling these cavities. Thx zoot
-
Aha.. right this makes sense: the pale pinky render stuff Im hacking off seems weak/ often soft etc, & I see no sharp bits in: so maybe soft sand was incorrectly used. I assume I can readily buy a 25 kg bag of sharp sand then, as i could this soft sand. Will scour the 'sheds' jewson etc. Thanks. Zh
-
As long as you don't send me any of your other sample pots.. Im going with markc/ just use my 'demarara sugar' sand above. I know what ballast is/ easy as its got stones in. Afaict, the difference in sand is only a cosmetic thing-? As this wall side faces my n'bors, not me it only has to be functional. I aint super smoothing or painting it for eg.
-
Ok John cheers, I think I'd better get a manual better brush type then. Thanks over & out.
-
Hang on a tick.. is Grit sand "sharp sand"? I still dont know what ive got here.. its just 'sand' & a bit wet, from a builders yard.
-
So you go for the same dia brush as your flue.. ok, then I think mine might be ok after all. But can you just tell me how you do it, & what type of brush you use? IE what I mean is are you a Drill spinner, or shoving up & waggle by hand sort of fellow? If we are seen with those moisture do-da's out here, we're shamed. It's like whistling on a tuesday in 1341. tarred & feathered, then widdled upon. Zoot.
-
Ah gotcha! Great thanks mark.
-
I generally get mine stuffed pretty full of kindling plus smaller split hardwood, lit & roaring away all vents open, to get it up to 320*F or so in as fast as poss: then close vents, put on my 1st few logs.. repeat as of when/ no vents ever opened. Running I have it 320*F to 350*F as a rule (350*F seems happy & hot (& my 12 o'clock position on my magnetic flue dial suggesting a good temp). Occasionally 375*F, rarely 400*F (which seems very hot/ belting heat a bit ott even for my largish room). Now whether that ( say 325*F running temp) is hot in your book though I don't know. Zh
-
Hi there John. That's encouraging/ my builder eluded to it being 'good type, no need at all to change to steel' tho Id never heard of pummice used in building anything before tbh. Ah ok yes makes obvious sense to get the 'right size'.. but for a 10" flue this might be what tho? So do you use my method, the drill spinny business ? Or shove it up by hand method maybe? Thanks zh
-
Hi chaps, my 8kw stove installed by my experienced builder out here in midwales, after he rebuilt my chimney stack ( dilapitated, damp damage to house end )..1st big job to get done when I moved here 5 yrs ago (gas stove before > out to orange bottles etc). Expecting an extra steel flue job, he said no need bc he saw my (old miners) cottage has a pummice lined chimney, checked condition, happy. Knows these cottages very well out here. Stove has seems happy like so, good draw. But sweeping it.. hmm. Now as it's approx 10" min (my best guess) dia, versus a steel flue at 5", will innevitably cause the brush to have less resistance. I now wonder about the best sweep method for a larger width chinmey. Up until now Ive been using a drill-driver, spinning orange nylon brush (I do feel some resistance, does remove say 1/2 bucket soot collecting in my stove). What I don't know, is if what I remove is adequate, or far too little & perhaps this way isn't sufficient/ not enough chtutzpa ( due to the 10" double-usual-stove-chimney width ) & therefore, perhaps it hasn't been cleaned so well by me over 5 years. I wonder too if I would be better with an additional 5" steel flue liner, any reason to? i'm thinking perhpas from A) a sweeping/ servicing point of view ( ie possibly alot easier to clean these to a good standard each time?)... & B) from a safety point of view: worry that my pummice lined chimney, might have a concerning build up of soot despite my spinning brush efforts to dislodge what I do. Any thoughts appreciated, thanks for reading. Zooter.