


Rishard
-
Posts
177 -
Joined
-
Last visited
Everything posted by Rishard
-
Rigid vs semi rigid ducting?
Rishard replied to SBMS's topic in Mechanical Ventilation with Heat Recovery (MVHR)
@Gone West- not an mvhr question but, What are the bowl looking things you have your lighting cables running into in your voids? Thanks -
@Dudda- thanks for your informative response. There is a lot of very helpful information in there. Am I right in thinking you didn’t use any reinforcement mesh in your floor? Is this also your main slab or is this a 2nd pour over a structural ground bearing slab? Next step is to try find someone comfortable in placing and grinding the slab to this standard. @Ajn- are any of your partitions structural walls or just timber partitions? I think I follow your timber support. Was that for the concrete to be screeded off to give the correct heigh of your ffl? Was your slab running over the top of your internal blockwork? In your shower room, how did you achieve a fall to your drains ? I assume the whole ground floor slab is flat and you had your slot drains set slightly lower? I’ve seen Americans sink a tub into their wet rooms to allow for a trap to be fitted below the ffl height. Was the bathroom shuttered off and poured separately to be worked by hand? Do you have any in-progress or completed pictures?
-
Thanks, the supplier even advised against a screed in this situation as he said it doesn’t hold up particularly well as a finished floor. Seems lengthy to lay a slab, screed and then tiles ect. I gather it may work out more cost effective that way. Small cracks could look fine with an industrial looking polished slab. I’ve never seen any on the slabs I’ve poured in the past which have been no bigger than 50m2 but Sod’s law says it’ll crack if you want it to be seen as a finished floor!
-
I’ve been ‘floating’ the idea of a polished concrete ground floor slab. The build up would be hardcore/insulation/ufh within the slab. Thickness yet to be decided. Has anyone had any success with this? When I speak with my local concrete/screed pump suppliers they said they have stopped offering it as a service due to the concrete cracking due to expansion/contraction. He said it is possible but carries with it the cracking risk, even outside of the usual control joints. Would love to know if anyone has successfully achieved a polished finish with UFH as it seems like a good option for the slab/finished floor.
-
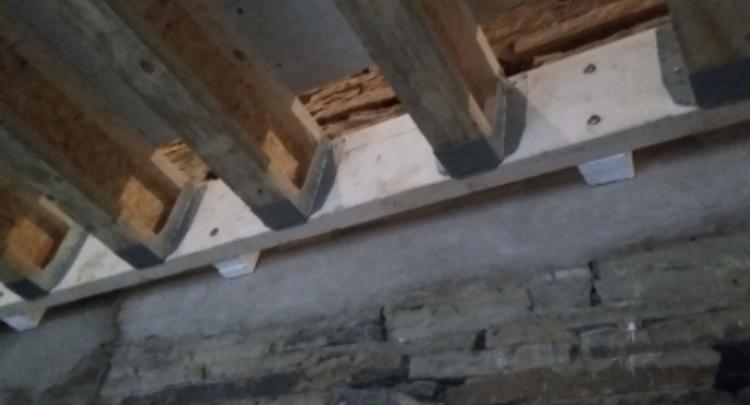
Yes building them in is by far the easiest method. I’ve done both ways much more than masonry hangers. @tonyshouse - is there any issue with the tray separating the masonry both below and above the joist blockwork courses? I guess it’s no different from a dpc in that it sense.
-
The Build - Oak framed car port
Rishard commented on Redoctober's blog entry in Our Journey North of the Border
I really like this! The covered walkway is a nice touch also. I’m planning something similar with a useable storage space above. -
I’m sure I read on hear that one m10 has a shear of 13kn. Your putting plenty in but you could always check with your SE.
-
I use m16 threaded bar resin anchored into the blockwork every other joist spacing. A small chase out of the blockwork would work but as you need to Parge the wall you would need to have your pipes in place. I’m sure I read somewhere about people using airtightness paint in their chases before running cables ect.
-
Finding a few double stud walls and just reading @jamieled’s blog using Ijoists for studs. Thanks
-
Great. Will have a read of your blog to save asking daft questions.
-
The Build - Oak framed car port
Rishard commented on Redoctober's blog entry in Our Journey North of the Border
Hi @Redoctober- just opening this up again as I’m planning something similar for you garage. What is the footprint of this build? Did you use 8” posts too? -
@jamieled- nice! What exactly are as your build method? Raft/trench? Block to dpc? Would love to know more. How complex was your building form too? Cheers.
-
Are these installed now? Wouldn’t have thought it to be a 3 day job. More like 1 day. I assume your past the point of needing advice on this…
-
In regards to this post. Do you know of any members who have built using their own ijoist style stud walls rather than a supplied frame?
-
+1 for oxalic acid. Not very nice, but neither are most cleaning products. Wear good protection. It does bleach the wood so you have to cover the whole area. I sand blast all my oak frame jobs as it gives a much nicer Finnish once the job has been exposed to building site conditions. Oxalic gives instant results but trying to make the whole job look uniform is is the tricky bit. Looking at the amount of steel staining and water marks I would look into a local blaster. Make sure you test a sample before they blast your trusses as I’ve seen some blasters turn oak into driftwood!
-
Is this a permanent stair? For the price of a straight flight of stairs I would just buy something off the shelf. Your 32x269 would be plenty strong enough if your grooving in the treads/risers. The strings want fixing to the walls if your near a wall. Strings would be best out of joinery grade pse.
-
All in the name of progress !
-
I’m in the same boat. Pp to knockdown a semi detached house to rebuild a detached house. Just working on the details around tidying up the neighbours exposed gable and other boundary work as our house is built as part of a garden boundary wall. Look forward to hearing your progress.
-
@TerryE- I would love to see @ProDave panels. I’ve made timber frame cassettes in the past for garden rooms. So quick to produce and progress. Sadly on that last job osb & 4x2 almost doubled in price. Safe to say the customer opted for some changes in the design to use insulated steel panels for the roof to cut costs.
-
@Iceverge- I have done a super quick cost up of the build method above I got to £84m2 before I include the cellulose as I couldn’t find a cost for that . These were not my trade prices but pulled off Google searches so could come down a little bit. I did the same for block / 300mm dritherm 32 / block and got to £49 m2. If I times this by roughly 260m2 for my build then the cost difference is £9100 difference in the 2 methods. And one doesn’t include the insulation. I don’t want to rule it out completely but like all things on the build, cost will always inform my choice. If I was charging out my time then it would certainly be cost effective as you could gain back that cost on working time. Happy to put in the work to reduce my costs. If I had a larger budget I would probably buy a timber frame kit and have it water tight in weeks rather than months. Plus the carbon benefits.
-
Restraint straps are much the same as wall plate straps. 5mm thick steel straps usually with 100mm bend and come in a variety of lengths. These are often part of your floor plan spec. They sit 1/3rd the span of the joist perpendicular to the span. They need solid noggins between the joists to fix the straps to. I cut these in to the joist top and set noggins low so the strap doesn’t foul the flooring. In the past I’ve stood the ledger off the wall at the fixing points with timber to create a void for services to run. I’ve seen it done with compactfoam as an alternative to timber too. Before installing the joists I lay them all out side by side vertically supported at their end points and shuffle them around to get the tops in size order. Even PAR timber can vary by 6mm. Crown the timbers up at this point too.
-
I’ve often fitted ledger boards using resin anchors to the masonry. You can set them in to a lazer for perfect flatness. I then flush up joist tops with the ledger then attach the hangers. Even I joists seem to have some variation in height. Good practice to Parge the wall behind the ledger for airtightness. I’ve not done this part before but I’ve not been air testing my projects. New to passive but fitted plenty of joists/floors. You’ll need restraint straps for structural approval. These often used to be notched in joist tops and sailed into the cavity to be built in with the block. This method is obviously no good for thermal bridging : air tightness or your joist height not matching your block courses but the could be mechanically fix to the inner skin. 400mm spacing is better, 22mm flooring, glue and screw it down and it’ll never squeak, or come up again. I’ve done some at 300mm centres on shallow joists to be sure they won’t flex. Get plenty of noggins in and you’ll have a good stiff structural floor.
-
@TerryE- I appreciate your points. We have had the passive principles in mind from the start. Your recommendations are spot on too. These are 2 crucial details along with several others we plan to use. I have plenty of time still to get my detailing arranged before we start. Most of which we have followed from denby after consultation with bill. After all these discussions I’m keen to push on with phpp. We had planned to have the green building store do this for us however they are very busy for several months. I still feel this would be valuable to do at this stage. I see some people have built without running phpp which was what raised the question.
-
@TerryE- hi terry, thanks for your comment. I’ve read through your blog and admire the approach and results you achieved. Our block/cavity/block is full fill insulation. A technique I’m very familiar with having built this way for years. The masonry approach is a lot cheaper for me being the main mason, my brother being the other. Our labour is technically ‘free’ and blockwork is £10m2 single skin so has a huge sway on design. We plan to attack airtightness with wet plaster much the same as the Denby dale build. Again, we both lime plaster most of our jobs so have no issues there. We are planning 3G windows doors ect and mvhr. We really need to focus on our heating:cooling which has been discussed and also some of these thermal junctions @Iceverge has rightly raised. Our discussions with bill butcher also raised these so we have had some discussion on them. One of our issues with either purchased timber frames/sips/icf systems was the cost. I’m aware of the benefits with all these systems as I believe they do all have their place but for our project it comes to cost. I wonder if a spandrel panel could work from the wall plate upwards to get around some of the thermal bridging issues.
-
@Iceverge- your right, these are the tricky bits. They were raised in our discussions with bill. We did flesh out a few ideas but would be good to iron them all out while I’m at this stage pre building regs ect. For the steel carrying the upper block work above the rear extension we planned to have thermal block work above the steel up to the roofline insulation to reduce thermal bridging downwards. Thoughts? I’m happy to draw out some details. As for the main gable which continues up above the 1.5 story, I haven’t worked out the best solution for this yet, as you say EWI could work. Or timber frame this gable section up to the ridge. I would need to speak with our SE about some of the loading for the ridge though. Hoping to use gluelam for the ridge. Also, the constructions is block/cavity/block based on cost per m2 and other build really reasons. Even as a carpenter by trade I’m choosing blockwork however I can lay block too. Just to complicate things further we’re planning vaulted ceilings with provision for a few ‘on show’ trusses to help with our spans and add character. This makes the gable insulation detail pretty tricky but I’m sure I can find a way. Would love to know if others have worked through any of these details.

