Jump to content
  • entries
    26
  • comments
    247
  • views
    71116

Part 20 - 2nd fix Plumbing / Sanitary Ware


Stones

4029 views


As we approached our move in date, our tiler was unfortunate enough to come down with a bug that was doing the rounds.  He had to take a couple of days off (and I think probably came back before he really should have) but it did have a knock on effect on the plumber, who couldn’t get all the sanitary ware fitted before we moved in.  On the morning of moving in day (and to obtain our Temporary Certificate of occupation) we had one fully working bathroom.  At the end of moving in day we had both working. 


We sourced our basins and toilet pans (Ideal Standard) from Germany.  Doing this saved around £300 (even after delivery was taken into account) compared to the best price I could get in the UK.  Other members of the forum have found that buying from Europe can generate savings however this is dependent on the prevailing exchange rate.


We sourced our bath and shower trays locally, simply because there is no saving to be made by importing from Germany.  I was also concerned about the likelihood of transit damage to the bath and wanted to ensure that a local supplier was responsible for delivery and able to resolve any issues that arose.


Taps, shower valves and concealed cisterns were sourced from:


https://www.plumbingforless.co.uk/


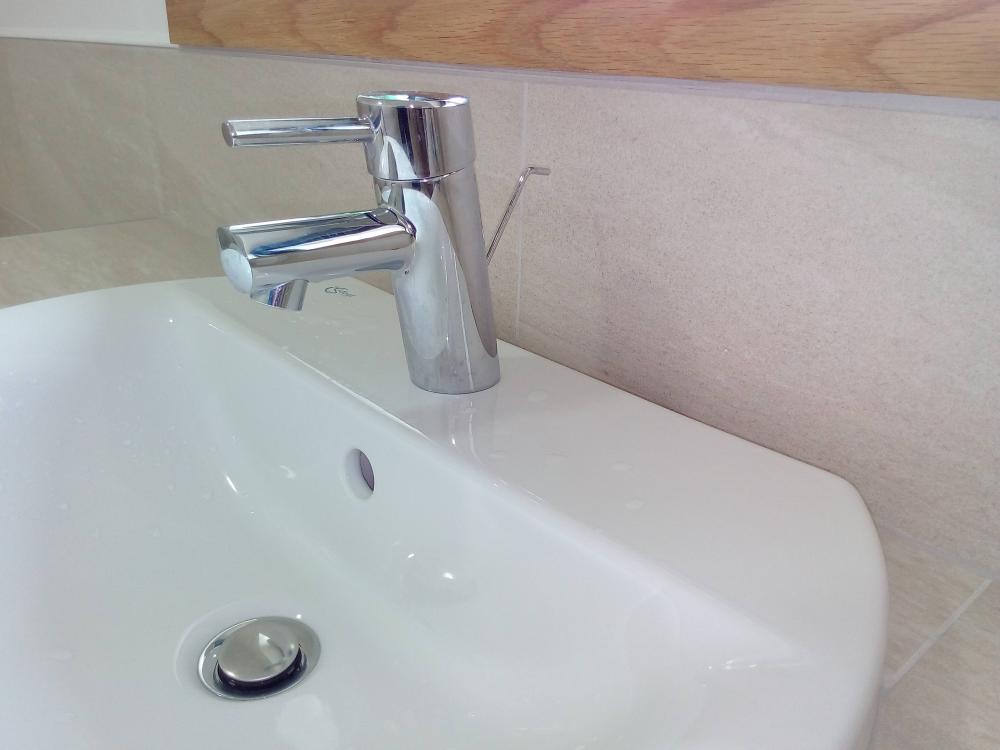
We went with Grohe for the lot.  Generally speaking, we are very happy with them and certainly happy to have a 5 year UK warranty.  The only disappointment is the pop up waste lever on the basin taps. 


594ba6975914c_IMG_20170622_1209581.thumb.jpg.63925eb29046cb0b5a3864d2c296ed7b.jpg


It seems relatively flimsy compared to other taps with pop-up waste that we have had. 


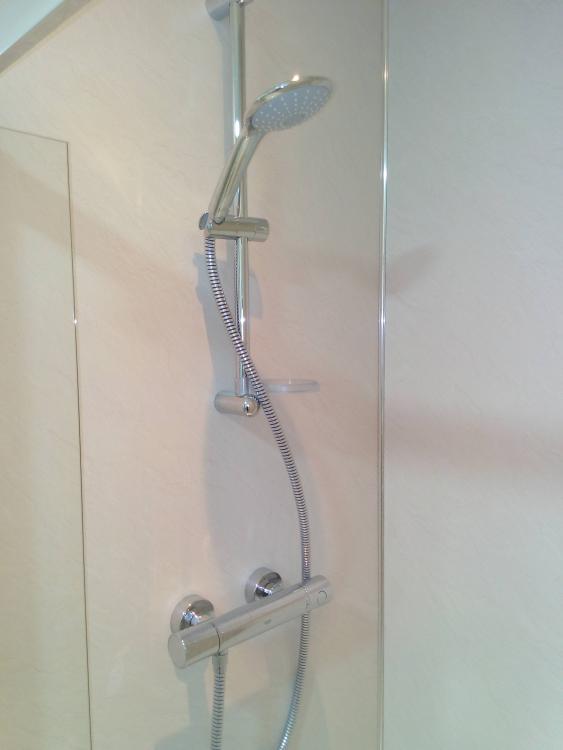
We’re very impressed with the showers, good flow and a large shower head means a very luxurious spray of water. 


594ba6d25db9d_IMG_20170622_1211271.thumb.jpg.37a391678f8ae6d7c9c4ae5003320026.jpg


I’ve measured the flow from the shower at 16 litres per minute.  Whilst this is slightly extravagant it does make for a luxurious feeling shower and is not something I intend restricting – it’s a cost (in terms of DHW) I’m willing to bear.


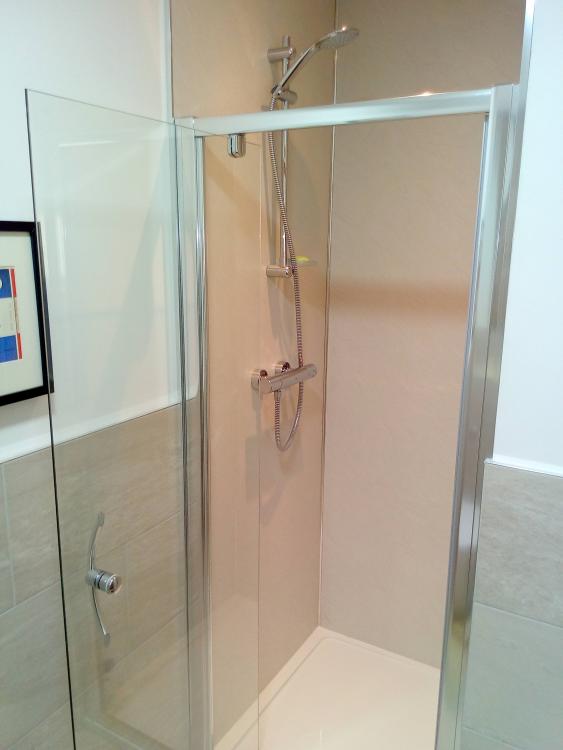
The shower screens were also sourced locally, which turned out to be a very wise decision in view of a fairly significant oversight on my part.  When ordering the shower screens, it never occurred to me to check the height.   Virtually all of the shower screens on display in the showrooms were 1950 or 2000 mm high, and in previous houses we had always had trays which you stepped up to get into.  It was only when the shower room screen had been fitted and I stood next to it that the issue was highlighted.  Being over 2000mm in height, the problem with a 1850mm high shower screen on a low profile tray is self-evident.


594ba71bb6ab1_IMG_20170622_1209031.thumb.jpg.e9785a9ad5ddcebe523ca1c451e5cd06.jpg


Fortunately the master en-suite shower screen door was still in its packaging when I identified the problem.  A quick visit to the plumbers merchants and they agreed to take the unopened screen door back and replace it with a different shower screen.  That screen arrived a couple of weeks later and was subsequently fitted by the Builder. 


594ba478ec486_IMG_20170622_1156301.thumb.jpg.c819ee710aad87c0ebc0b380e00bea10.jpg


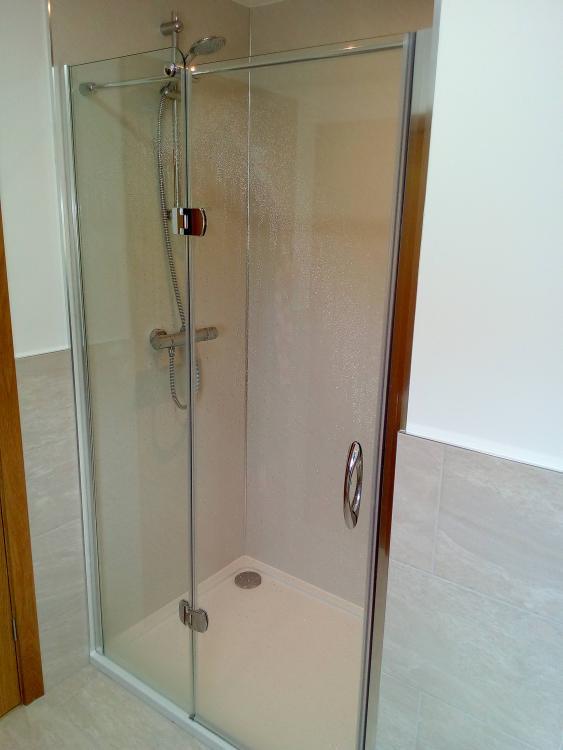
The shower  walls were finished with Multipanel rather than tiles, simply to make cleaning easier.  Picking the right colour / finish of panel was a little challenging, although I think we managed to achieve a pretty good match in the end.


We went with a simple L-shaped aluminium trim to finish the tiles for a sharp clean look.


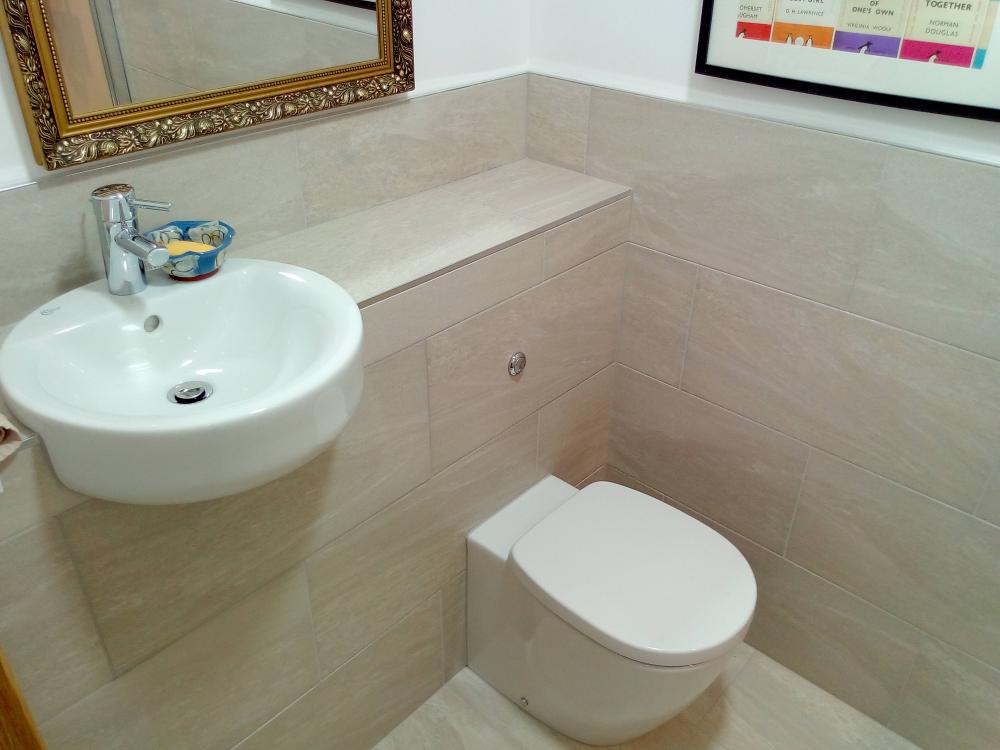
The bulkheads, which conceal the cisterns allowed us to raise the basin height to 1000mm.  There are two removable tiles, one for the basin trap, one for the cistern.  A larger flush plate was an option for the cistern however we preferred something smaller and stuck with the push button supplied with the cistern.  We fitted the flush buttons so that they are behind the raised seat, forcing users to close the toilet before flushing. A couple of reasons for doing this, firstly it prevents any flush spray into the room, and secondly to ensure the toilet seat is left down (this saves a lot of grief) which in turn encourages users (or should I say children) to wash their hands after use.


594ba42f77671_IMG_20170622_1155451.thumb.jpg.149a8530d3b5abf4ed9e3577cacf7c07.jpg


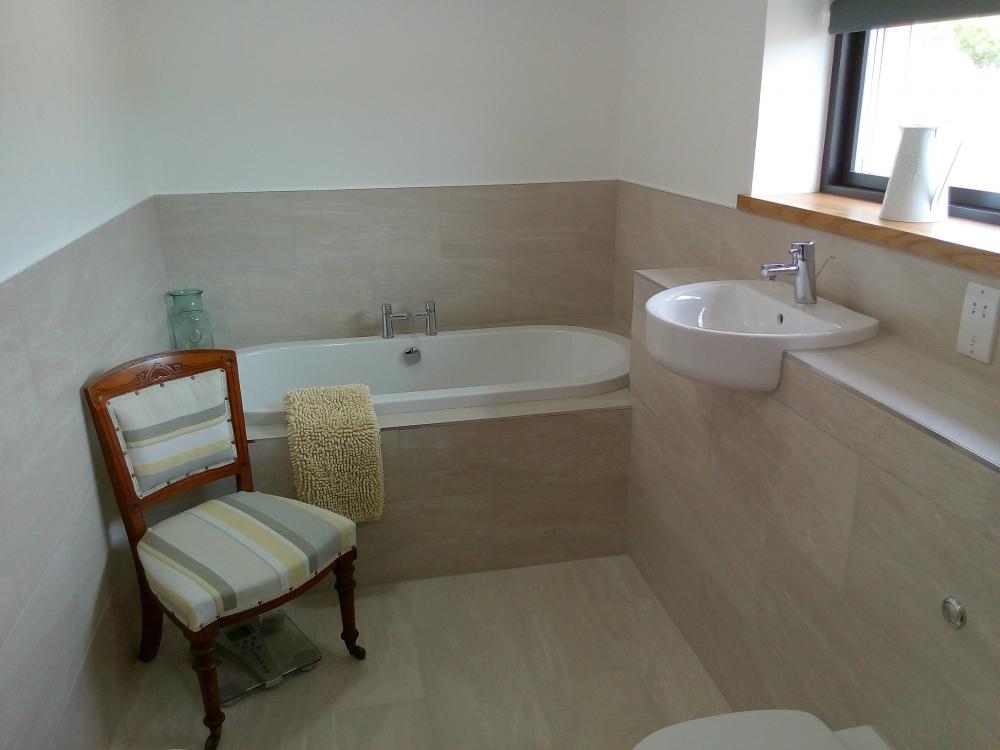
The bath was fitted into a tiled frame, the front panel being removable if we need to get access to the trap.  The taps are connected to copper pipes with long flexi pipes.


594ba4bb78558_IMG_20170622_1157401.thumb.jpg.62281bf1760d6bfc5dff316c4841e9ef.jpg


We’re really pleased with how both the shower room and en-suite have turned out, and both feel it was worth spending a bit extra on porcelain tiles to get a nice finish. 


Next entry: Heating system and DHW


  • Like 2

14 Comments


Recommended Comments

I'm liking it!


Do you have any pics of the bulkhead before it got boarded and tiled? I'm getting ready to do this in one bathroom and not quite worked out the best way to do it - should I have a full 6x2 running across the top or do something different?I want the option of getting in behind to access the wall mounted taps and this won't be possible with a 6x2 across the top. Thanks!

Link to comment

@Stones your sanitary-ware looks just like the Ideal Standard "Space" range we fitted into the flat. We really like it. But when I looked on Megabad I couldn't find it. Could I ask what its called?

Link to comment
4 minutes ago, Barney12 said:

@Stones your sanitary-ware looks just like the Ideal Standard "Space" range we fitted into the flat. We really like it. But when I looked on Megabad I couldn't find it. Could I ask what its called?


Absolutely, it's the Concept Sphere range.  We sourced from Skybad.

  • Like 1
Link to comment

The bathrooms look clean and sharp :) Still unsure about burying the cistern behind the tiles but I think we discussed this and you had a preference for the small flush buttons. 

Will you remove the chair after you've finished standing on it to paint the ceiling ? :D

Link to comment

@Nickfromwales


Yes, purely a personal preference.  If we do need to remove the tile, it is siliconed rather than grouted in place (silicone colour matched to grout) so shouldn't be an issue.


I can't image SWMBO would have been very impressed if I had used that chair for decorating...:ph34r:

  • Like 1
Link to comment

What is going to be connected to the end of the drain? Was it your WHB? if so you should have a separate branch going to your stack and not connected to you WC.


PC260046.thumb.JPG.d619d2c917549639c72beeb03a23ca16.JPG

Edited by Ryan4Healthy Home Movement
Link to comment
5 hours ago, Ryan4Healthy Home Movement said:

What is going to be connected to the end of the drain? Was it your WHB? if so you should have a separate branch going to your stack and not connected to you WC.


PC260046.thumb.JPG.d619d2c917549639c72beeb03a23ca16.JPG

Sorry, but that's rubbish. ;)

The only issue can come from having no air admittance on a vertical soil drop of 1300mm or more. That can put a vacuum defecit on the traps and suck them dry. In that case you simply fit an AAV ( anti vac ) basin trap or, in this case, do nothing as the soil will likely terminate into a vertical stack with a 110mm AAV or be vented to atmosphere. 

As Jason is building to higher spec, it'll be an AAV so the point is irrelevant.

Best to ask first, than assume it's an issue :). This install is actually far better than your proposal as feeding the basin into the larger bore pipe as soon as practicable is best practice without a doubt.

I always find long, small bore waste pipes blocked to death and personally always upsize to at lest one increment, ( 1 1/2" for any long basin run ) on my installs as a minimum discipline. ?


Oh......and we still haven't had an introduction @Ryan4Healthy Home Movement so scribble a few words out in the 'introduce yourself' section for us please ! :)

Link to comment

As @Nickfromwales says, the more usual thing to do in a low energy house is to avoid a stack penetrating through the fabric of the house like the plague, as it acts as a big thermal bridge.


We have an AAV at the highest point inside the house, and the foul drain run is ventilated at the treatment plant.  For those on mains drainage then fitting an external vent, outside the thermal envelope of the house, is the most sensible solution.


The arrangement @Stones has shown is very like the way I arranged our downstairs WC, with the 110mm soil pipe continuing to behind the washbasin, and then having a 40mm waste fitted to it to take both the basin and adjacent utility room waste pipes.

Link to comment

How @Stones has done his bathrooms is exactly (even down to the flush button and siliconed tile access!) how I did our barn conversion. 

BCO was more than happy to sign it off. 

Link to comment

The soil pipe pictured does indeed terminate in a vertical stack, located in a cupboard just out of shot to the right of the cistern. That particular stack is vented to atmosphere, the stack is boxed in and we'll insulated. The shower room has an AAV enclosed behind the cistern bulkhead.

Link to comment

@Nickfromwales i am not 100% sure if my comment was misinterpreted. what I was trying to say that it considered best practice/common with public health engineers to not combine the WHB and WC branch before going to vertical stack (this is why 99% example show it done this way), Please find attached a quick sketch. I appreciate that the non-common way may work for your installation and others (more than one way to skin a cat). 


thanks 


Ryan


Epson_29062017073828.pdf

Link to comment
1 hour ago, Ryan4Healthy Home Movement said:

@Nickfromwales i am not 100% sure if my comment was misinterpreted. what I was trying to say that it considered best practice/common with public health engineers to not combine the WHB and WC branch before going to vertical stack (this is why 99% example show it done this way), Please find attached a quick sketch. I appreciate that the non-common way may work for your installation and others (more than one way to skin a cat). 


thanks 


Ryan


Epson_29062017073828.pdf

Ok. After 23 years of doing this, that's the first time I've heard that TBH.

As your statement is quite specifically suggesting a primary / 'preferred' method of installation it's caught my attention. 

Can you provide a link to the legislation that you have referenced in order to arrive at that conclusion please as it would be beneficial to the many folk who read and reference this forum. One discipline we strive to observe here is the separation of opinion from legislation / regulatory requirement, as one is open for interpretation and the other is to be abided by ( howsoever achieved accordingly ). 

Maybe best to start a new thread on the main forum to keep the blog comments focussed on the blog ;). Could prove to be a good exchange. :)

Thanks. ?

Link to comment

Create an account or sign in to comment

You need to be a member in order to leave a comment

Create an account

Sign up for a new account in our community. It's easy!

Register a new account

Sign in

Already have an account? Sign in here.

Sign In Now
×
×
  • Create New...