Search the Community
Showing results for tags 'floorboards'.
-
Hi, So I can’t find any solid information on this topic. For context, I am wanting tiles floor with underfloor heating from the kitchen into the living/dining room (joining rooms via a door) so basically the whole downstairs. While having a new kitchen installed prior to tiling I was advised to lay some insulation backer boards directly onto the existing floor boards by using flexible tile adhesive and screws with washers. I am now at a stage where I can continue laying the insulation boards through to the living room ready to then continue the process of, electric UFH mats, a self levelling screed and then tiles. My issue is, after laying the boards in the kitchen directly onto the floor boards, the living room has plywood sheets down to which I now am thinking would of been better to lay the insulation boards on to as oppose to directly to floorboards. So what’s the correct way from now? Do I lift the ply in the living room and carry on with the adhesive and boards, or have I messed up already in the kitchen and need to track back. Any help would be greatly appreciated, thanks!
-
- tiles
- underfloor heating
-
(and 3 more)
Tagged with:
-
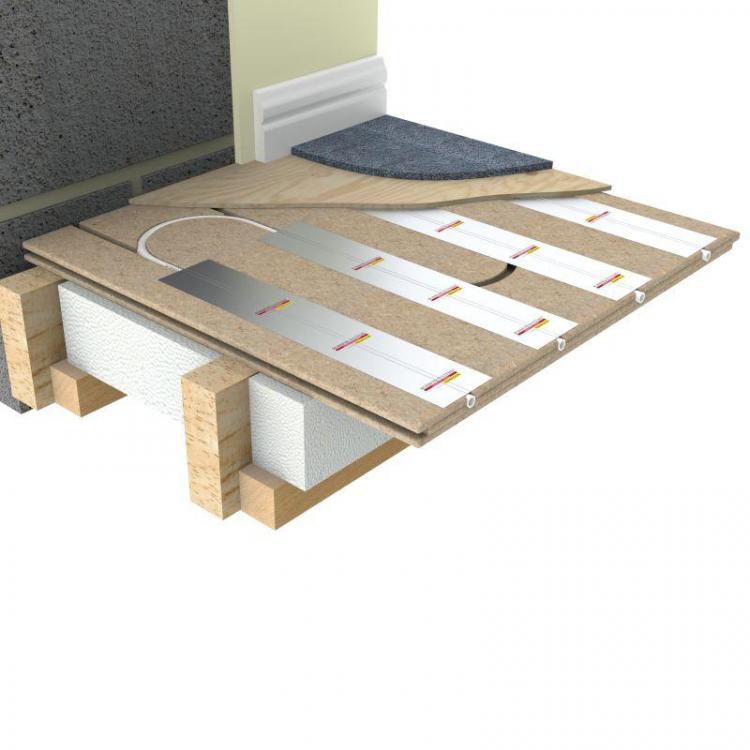
Looking for guidance on mixing floor materials. New house will include a habitable space above the garage that includes a bathroom, kitchen and living space. Headroom is limited so trying to minimise the floor build-up onto the web joists. I've settled on electric UFH for the bathroom (which will also have a towel rail) but need to connect the living area into the ASHP with UFH ( as electric would be too expensive as the primary source of heat. Because of the web joists I understand I cant use the spreader plates under the joists (due to return bends needing to be notched into the joist) and i probably don't have enough headroom to add something on top of the 22mm Caberdeck flooring (glued and screwed to joists). Prowarm (and maybe others) offer a 22mm T&G chipboard floor that is pregrooved for 16mm UFH pipes which seems to offer a hybrid type solution. So my question is could you mix the two flooring systems with Casberdeck under the Bathroom & Kitchen and Prowarm chipboard under the living space? Any advice much appreciated.
-
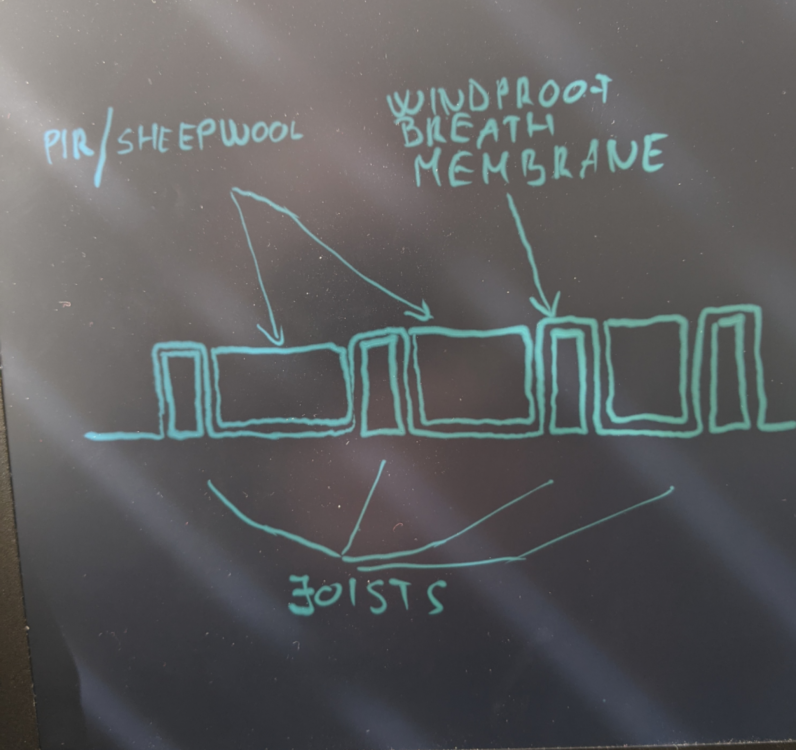
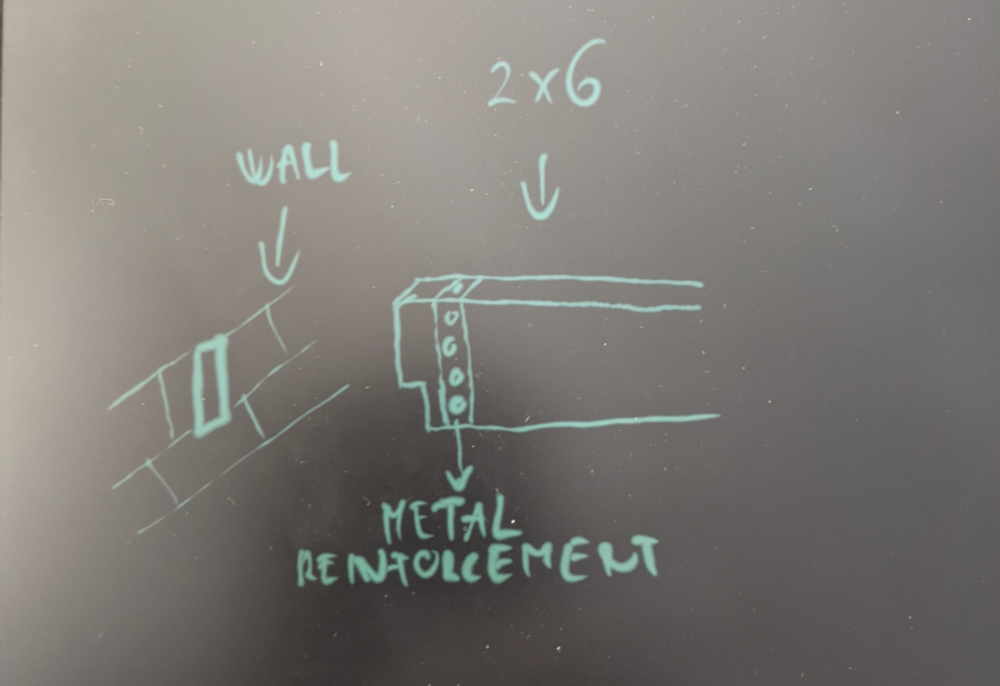
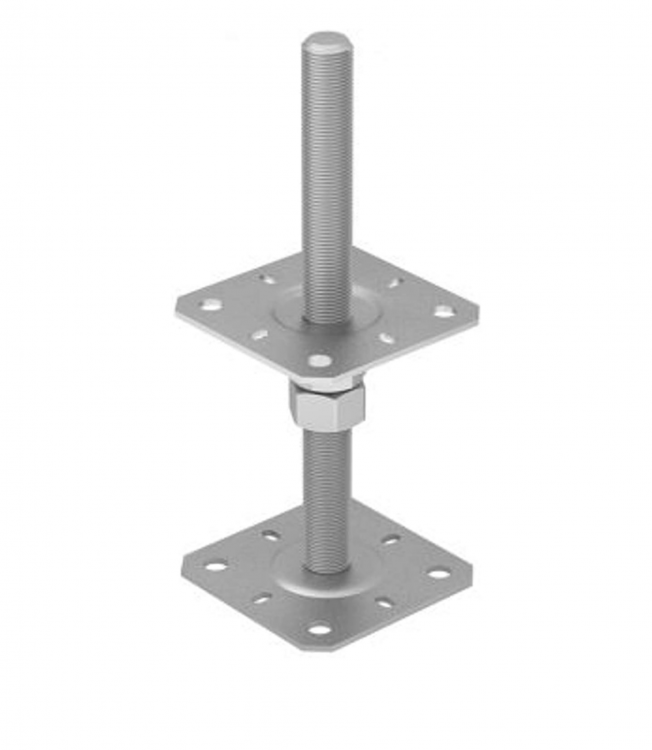
Good morning All! We bought an1960's semi detached house in Stockport a year ago now. I am already insulated the loft area with 200mm rockwool, added OSB boards, make a new cutout and installed a loft ladder. Now we need to upgrade and insulate the ground floor. Ground floor is a suspended timber floor with no insulation at all. Currently there is carpet, 22mm T&G floorboards (most of them have no T&G due it was lifted up by previous owner/builder) on 2x4 joists. Under the joists there is a 300-320mm air gap for ventillation. Roughly 400mm distance between centre of joist. The whole floor area (including kitchen, chimney in the middle and understairs area) is 35m² (7m deep 5m wide) The joists running along 7m front to back. I do not see any wet/dry rot when inspected in a few paces when lifted floorboards and the area under it is fully dry. No sign of wet areas or mould. Since we moved in the floor is a bit springy, and most of thr floorboards are creaking. When we moved in, i was lifted the carpet and removed the nails from few of the 22mmx140mm floorboards and add some screws to stop creaking. What we planning/have in mind: -We want to insulate it. And make additional slepper walls. This is 100% and here comes the things that would be good to do: -Change the 2x4 joists to 2x6 -Add new floorboards to subfloor -Upgrade the groun floo to UFH And now here comes a all my questions: Sleeper walls: I made some research and as far ask I know i need to make a honeycomb structure to do not block wentillation (what is quite obvious) How it need to be done? I mean first make a 100-150mm trench perpendicularly to the joists, fill it with concrete, let it harden, add DPM and then brickwork (class 2 engineering bricks)? As there is no guarantee that the height of the brickwork will be exactly at the bottom of the joists, what do I need to use to fill the gap between the bricks and joists? I have another method in mind as well: Same trench and concrete like above, but instead of brickwork use some adjustable metal joist support like in the picture? Joists: I think it would be beneficial to change it, bcs all of them as old as the house (i think) and I am not sure that it can handle the load of the new floor/UFH/ tiles. Plus it will be a peace of mind that all theese joists are new ones, so i do not need to touch it for a long time. I was make a lot of research on the internet in the last past months, and I don't get straight answers to my questions: Is it a good idea to change the existing 2x4 joists to 2x6 and how should it be done? I mean as i know (but maybe I am wrong) where the joists attached to the wall there is a cut-out in the bricks. Should I make a bigger hole to fit the 2x6 or reduce end of the joist with 2 inches in the deph of the hole in the wall and strengthen the joist after the cut? (See pic#1) Or just replace with the original size? Or it is a wasted time and money and just leave it as it is if there is no dry or wet rot on it Insulation: Which insulation is more beneficial? 100mm PIR, earthwool or sheepwool? I am thinking on PIR or Sheepwool. But there is a lot of different application processes on the internet. Everyone say different how it need to be done. Some of them says a windproof breath membrane MUST be added first and then the PIR or sheepwool insulation. (See PIC) The others says that will make the joist rot on the surface it is covered with it. Others sas the membrane should attached straight under the joists. Others say not any type of membrane needed. Just insulation and floor boards. With the PIR should I need to apply expanding foam between the wall and the insulation. Or (as few of them says) MUST leave 10-15mm gap between the insulation and the wall? Which for my opinion makes the insulation as useful as an ashtray on a motorbike... Do i need to cover the ground with any kind of membrane? If yes which is the one that i need to run with? Floorboards: Which boards to choose? PAR 22x140, chipboard, OSB, plywood, NoMorePly? Some of them says 22mm chipboard become like weetabix after a few years. some of them says 18mm ply is the best and few of them say NoMorePly is the best. And what structure is the best prior to UFH? I have one in my mind which is: Floorboard then pre trenched hard board for the UFH pipes, then a thin layer (1-2mm) of membrane, and the tiles/hardwood floor on the top. In this case how thick the different type of floor boards need to be? Or it is much more better and efficient to install the aluminium plate for the pipes onto the insulation and then ue the floor boards and tiles/hardwood floor? A few details to get a bigger picture: I can not stand that the floor is moving under us as we walking on it and all the contents of the cupboards moving like glassware, flowers pictures etc... The other thing is that if we will have UFH, we would like to have tiles on it. And if the floor is moving I think all of you can imagine the comsequence.... The main thing is that when it will be all done, I don't want/ I can't lift tiles, UFH, floorboard to change/repair insulation/joists/floor boards. But I guess you all think the same. currently have a carpet which we would like to change to tiles or hardwood floor. We still not deceided yet. 3 of us (my wife, our 3 yrs old daughter and myself) living in the house and there is no option for us to move out while the work carried out. I know it will be kind of a pain this way, but this is the only option we have. I would like to do DIY because this way I can save £1200-£1500 on labour only to make the sleeper walls, and/or replace bad/all joists... And i really like to DIY as much as I can. I am already made big built in upboards, decking with roof on it, isulate the loft and boarded, insulate and reroof garage, etc... And i am keen for woodwirking/woodturning. Because of that I am feling quite confident to do it I am plannimg to do it in around 2 weeks excluding the heating. Until the UFH i will put the carpet back temporarily. I think this is doable. Any advice, comment or help is greatly appriciated. And please feel free to correct me if you think something above i wrong. And as I am living here only 10 yrs ago also let me to apologise for any grammar mistakes that I made above. Thank You in advance! Joe
-
- insulation
- floorboards
-
(and 1 more)
Tagged with:
-
Hi All, I have a cupboard on the ground floor of my house, house is a suspended floor which has 50mm EPS between all the joists which helps but it was a bit draughty, not an issue in 90% of the ground floor now as all rooms and hall I laid rolls of underlay all taped and up the walls at the skirting which I then laid a 22mm engineered floor over with glued joints, the kitchen has 9mm ply, screed and tiles so the house is pretty airtight on on the ground floor. Good ventilation exists under the house from the original brick vents. The last remaining draughty area is the cupboard under the stairs, this is no longer a cupboard but rather 2 large drawers and a cupboard as I built a custom storage system into the space. I clearly wasn't thinking it all through because at the time with it wide open and easy access I should have laid ply to seal it all up but rather left it bare boards, the issue now is that with the storage system framework installed it would be difficult/impossible to lay in sheet material, since the drawer and door fronts have gone on last week I have realised just how draughty this cupboard is and the drawers and cupboard and always freezing. Now the frame for the storage system means I have effectively tanked this area and it got me thinking. Do I simply mix up a sand/cement screed and pour it in to a thickness of 10mm to act as a one piece seal? If I did this should I put some DPM so the moisture from the screed doesn't soak the timber too much. I know it would not be recommended method for a floor, but it will never be trafficked. I did contemplate resin but could not cope with the idea of stinking fumes for weeks on end and the constant off-gassing. For the record it would not be easy to seal from the underside of the floor because there are intact dwarf walls to 40% of the underside of this cupboard which would mean breaking through to get access - not keen on that and secondly because joists sit on this wall it would mean loads of custom cuts to make up some sort of sealing system. Thoughts please ladies and gents.


