syne
-
Posts
58 -
Joined
-
Last visited
Everything posted by syne
-
Did the prior owners give you any drawings? Obviously this was done with an intention to convert so it's likely got some kind of drawing somewhere.. I'm assuming the two white lines on the rhs are the current hip. Your likely going to have to: take the hip off and build your gable up, Have a beam, likely a steel from the gable apex to party wall, Continue the roof line to the gable, Build the dormer walls off the steel already in place, Get your stairs in Insulation, vcl, plaster, electrics ectect Not necessarily in that order. Firstly, Though get a tape pencil, A scale ruler measure it all, draw it as is then draw it as you want it - to scale. Send that to an SE and they'll likely send you a drawing with details of beam sizes and requirements
-
I'd say a self build is when you do more than 75% yourself. A true self build means hewing rocks from a cliffside a spinning 110drainage pipe from hand reared sheep .
-
So far: I had to have a SE for the calculation as the BC wouldn't accept my maths - grade c gcse:{ I've had a guy in to weld a post to a beam, and my neighbour gave me a hand with a steel that was bottom heavy on a ladder. I'll also have to have a spark connect a henley block and do the tests for bc. And the biggest expense will be a rendered as a simply cba to do that. 3 floor 7x4m extension and 8x 5garage . Digger came may'23 it's been a long tedious process when you're trying to carve out time around a full time job. But the end is in sight
-
You've made a good looking job of it so hats off. I suppose it's a case of who's going to put the effort/ time to make it good in the end. Imo, it irks when someone takes the easy way out and pushes the problem down stream for someone else to work around later it's not acceptable if your time saved is lesser than the fix to the shortcut. A prime example is footings being way off level, " Ahh it'll do, the brickies can fix that" = just spend a day slicing blocks to get the levels back.
-
So, I've gone with the super duper cheapo euro cell for my extension as I'm running out of money and well, they're cheap. But all the instructions state leave 5mm for expansion on each edge. But if I'm fitting them on the hottest day/week of the year is that 5mm actually necessary? Surely come autumn when they start to contract that five mill will become.. More.. Nothing like overthinking is there..
-
Well that's a bag of.... Paking's wasted. I might go become a professional window bodger, I'd get a gold star me thinks.
-
Just an FYI, acetone may damage upvc. My patio door frame did not respond well, the excess decking stain came off the frame easy but the areas touched by acetone are now different.
-
Too true, I've just started putting my windows in today and those cavity closers at now in the skip pile. 100mm of pir wedged in cavity and windows strapped to the internal leaf. I also used a 25mm pir below a cement board on the internal leaf for ridigity.
-
Sorry, never found out what they were called and no markings on them. i did see a couple of similar designs on modern bricks but the match was always 'off'. Best i can suggest is keep looking on fb marketplace. The reclamation yard in sheffield said hed buy as many as i could get him as he also struggles to get hold of them..
-
Very common on yorkshire housing estates in the 50s/60s im just north of sheffield and my ex council house is made of these. Couldnt find any for about 2 years then came across half a pallet of some similar ones on facebook. My rooftiles are a perfect match and came from Essex which makes me assume/hope that there are other matching bricks in other parts of the country. But i doubt it as bricks tended to be sourced locally back then. The garden wall bricks on the estate were made in kirkheaton which is fairly local. They're an absoute bugger to find matching ones for and i was tempted to go and buy peoples outhouses just to reclaim the bricks. Just keep scouring ebay ect. How many do you need?
-
Help with gf en-suite extension
syne replied to NorfolkingClue's topic in House Extensions & Conservatories
As its so simple, draw your ideas/ plans out and contactca local structrul engineer to do you calcs for lintels, joists, rafter members ect. I would go almost full width of the extention ion on the back(stop 20/30cm short of the downpipe) and come as far out as possible whilst keeping the pitch of the existing roof. If you built yourself.. <£15k + bathroom fittings... -
Before any of that, draw a measured (scale) plan of your house and property. Then get to drawing your extension yourself, imagine walking through it, how the existing rooms will be affected, stairs, landings windows ect. A lot of decisions will be constrained by the existing house (and budget) Do this with the people who will live in the house, get their input. Sketch different layouts ect, consider final finishes and landscaping. Then when you do call in proffesional designers youll have a much better idea of what you do/dont want
-
Anyone done their own building regs plans
syne replied to Professionally nosey's topic in Building Regulations
As said above, After planning is granted theres two paths to take; Building notice- where you'll recieve regular visits from the bco at certain stages of the build to approve whats been done and allow you to continue (or if you request them to visit site) Full plans submission- you provide a full set of plans on how its going to be built and the bco comes to check its been built as drawn. Between the SE and my own drawings i could have done full plans but went down the notice route because i wanted the bcos input on certain things. I will say though that the bco's are not consistant in their opinions, helpfulness or knowledge. I've had five visits and five different bcos. Some were very helpfull suggesting ways to do things and what would be acceptable, one was totally unintrested, and one completly clueless- clearly hadn't looked at the plans and was obsessed with insting on iwi for the garage! But overall a positive experience, suprisingly,likewise for the planners! -
If your building it yourself then whichever construction method your most au fait with, but as your getting a builder in then id say build it as you would an simple house. b Block,150cavity fullfill,block. Then its very simple and any builder can do it. Makes for easy render and easy internals. 45deg pitch will save a fair bit of hassle,Your going to have to build thay gable end up if you dont match the current roofline. Which leaves you a leaf magnet between the gable and the rhs pitched roof...
-
Free CAD software recommendations please?
syne replied to marno17's topic in New House & Self Build Design
Bit late, but if you know any students... the whole of adobe creative suite is free. This includes sixth form students. -
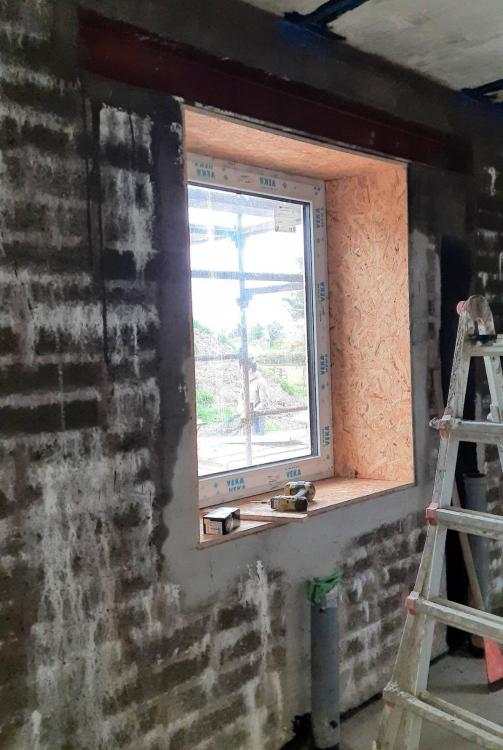
Thanks all, so with an arrangement as above, the window isnt on the osb? Is the osb just to give a soilid fixing for plasterboard? Im planning on setting my windows in the cavity but they're going to have to sit on the outer leaf a little bit; 20mm or so, as the brick work isnt neat or square enough. If i've got this wrong let me know but my plan of work is; Cavity closers, Windows on straps from inner leaf, Compriband on the edges, Ply box that butts up to inner frame, Airtightness tape on frame to ply, +Airtight on ply reveal to walls? Plasterboard the reveals Then later.. Full fill eps beads,plaster Window board, sealant ect..
-
After reading, lots. im still unsure whats a good idea and whats not. My new openings are bare at the moment. Block inner skin, 150mm cavity -full fill eps bead- Block outer skin -to be rendered- Brick window detail on/below sill. Cavity closers still to go in Current windows are set back varying amounts and im looking to replace these later and equalise the setback at the full brick depth. What should i be doing before measuring And ordering? Is there a good way to suppurt windows that are essentially going to be sat above/ within the cavity?
-
Whats a good method of fixing the small length of batterns needed at the bottom of a valley where two gable ends meet. The wall build up is block,180mm cavity, brick gable detail. Theres a corbel on each gable so theres not a rafter in sight for nearly a meter of roof line. Er help!
-
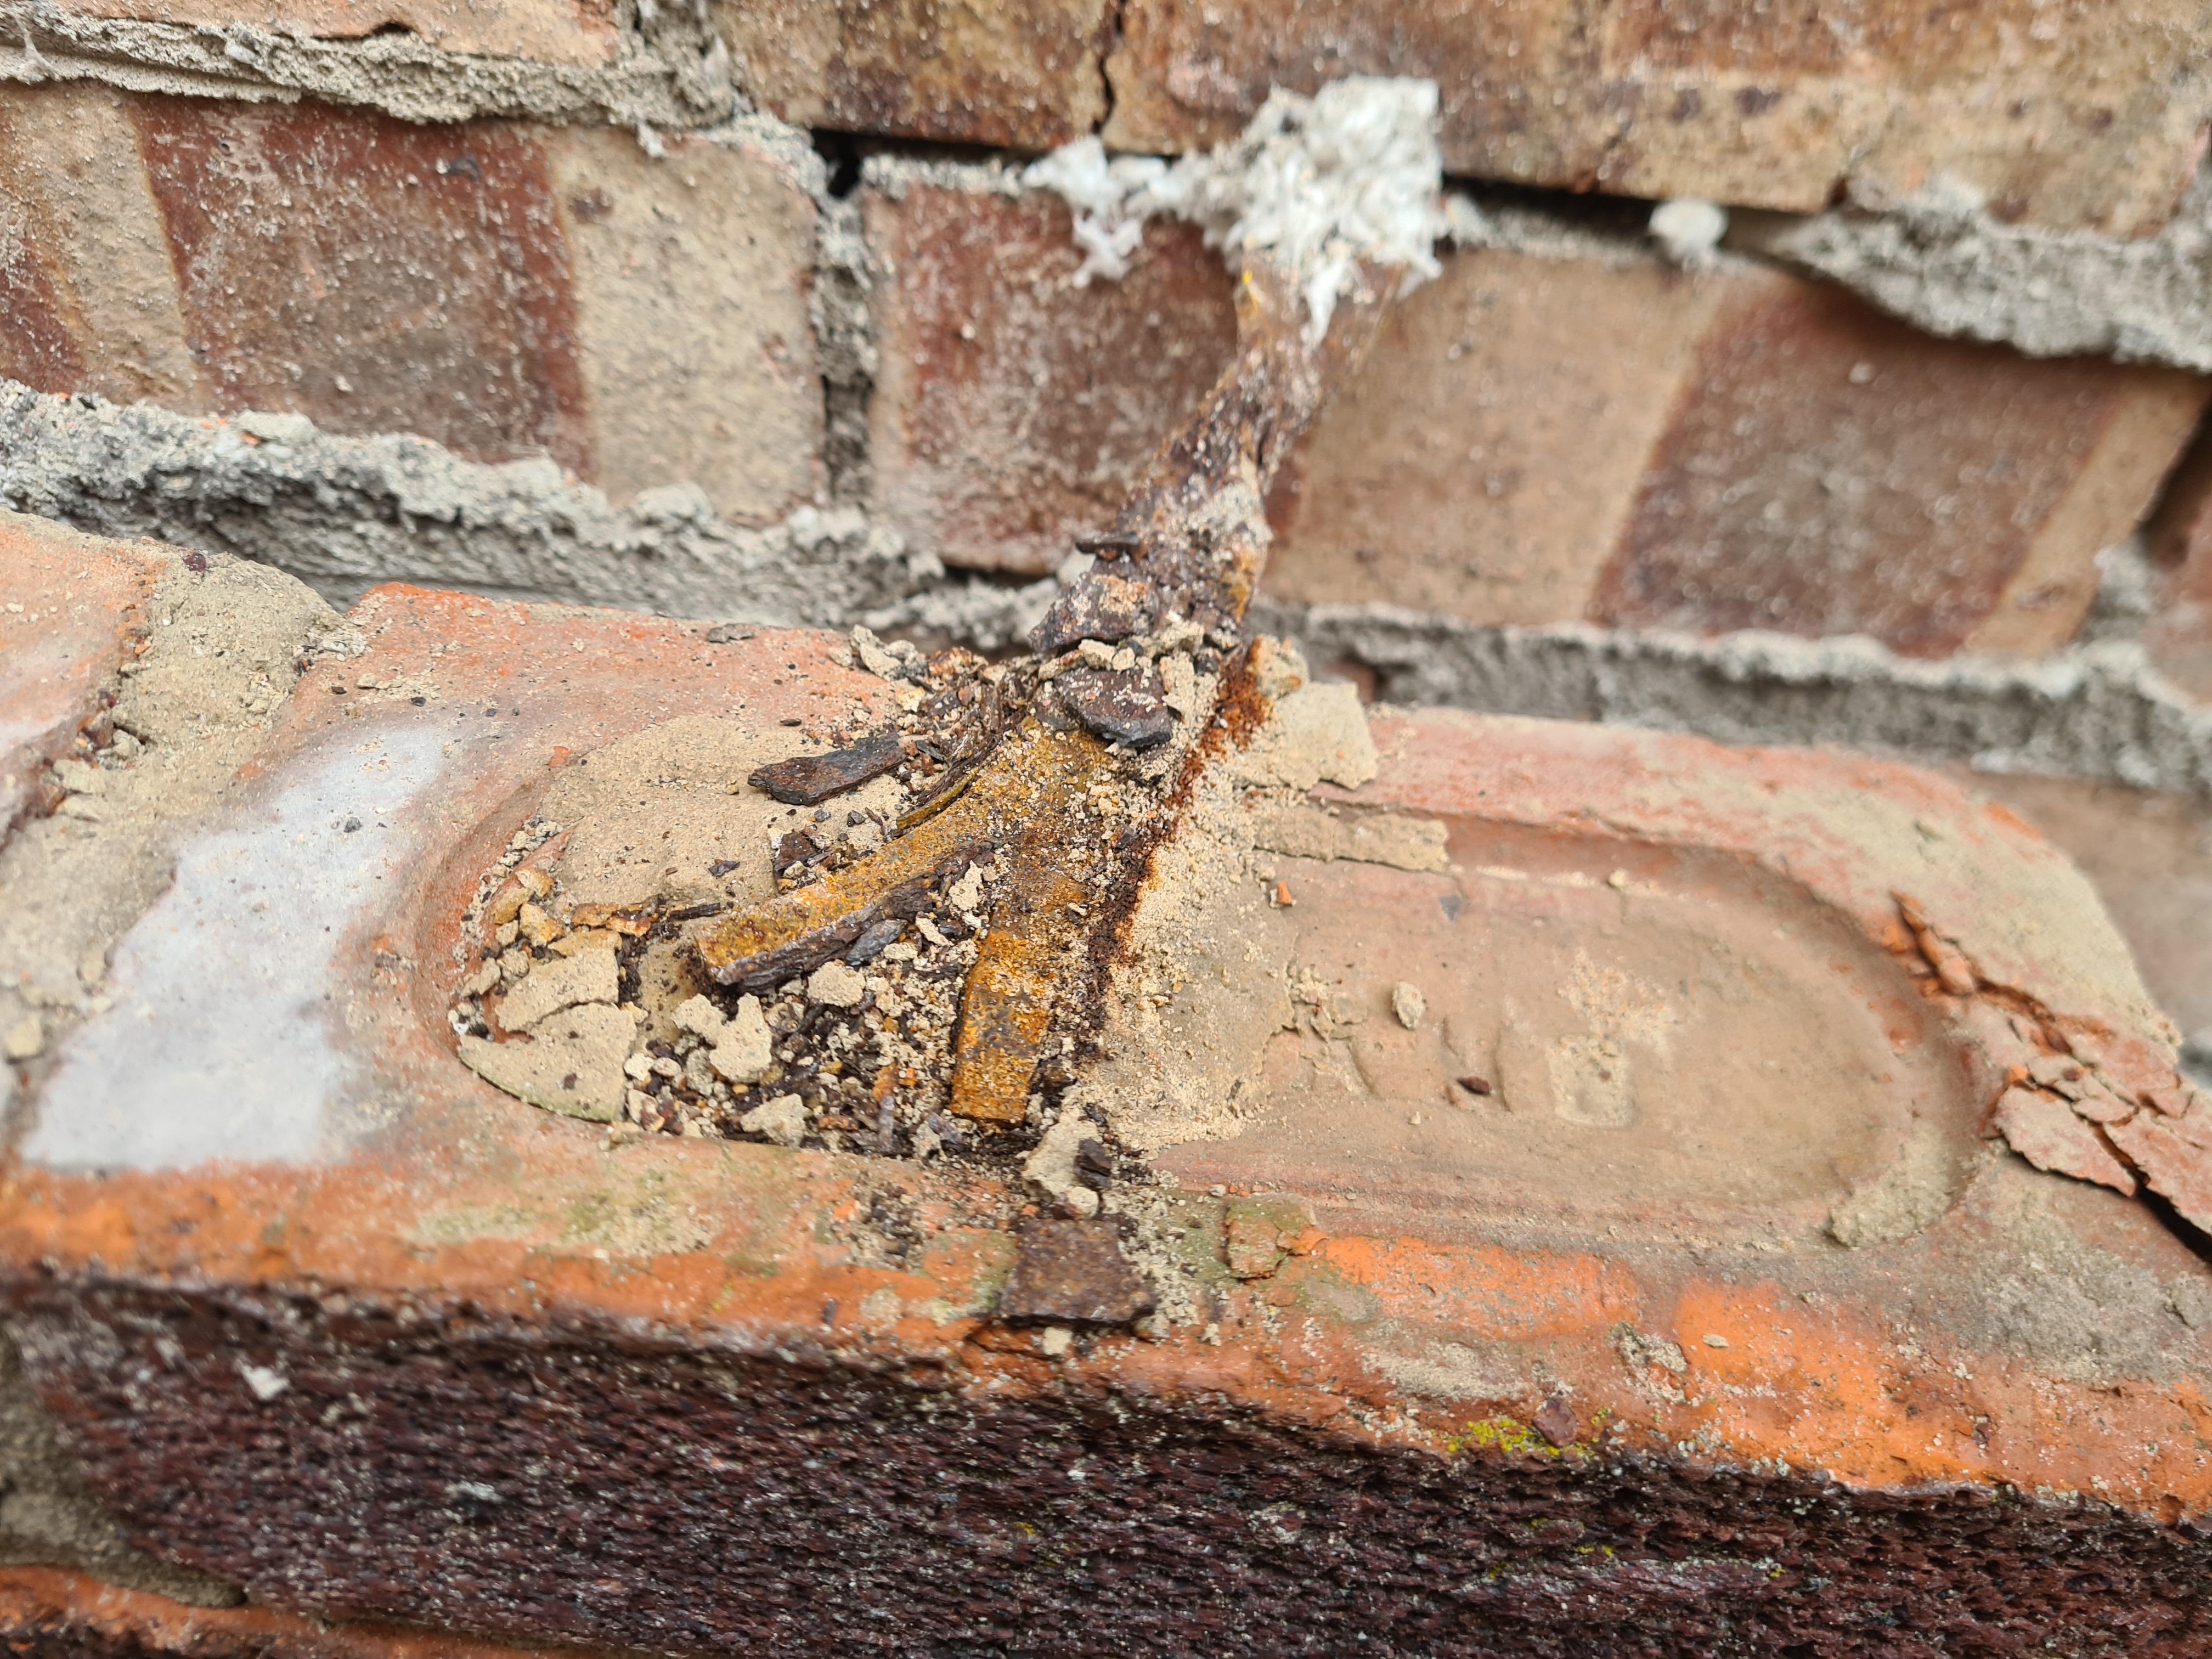
One of the many failed wall ties it's easily doubled in thickness

-
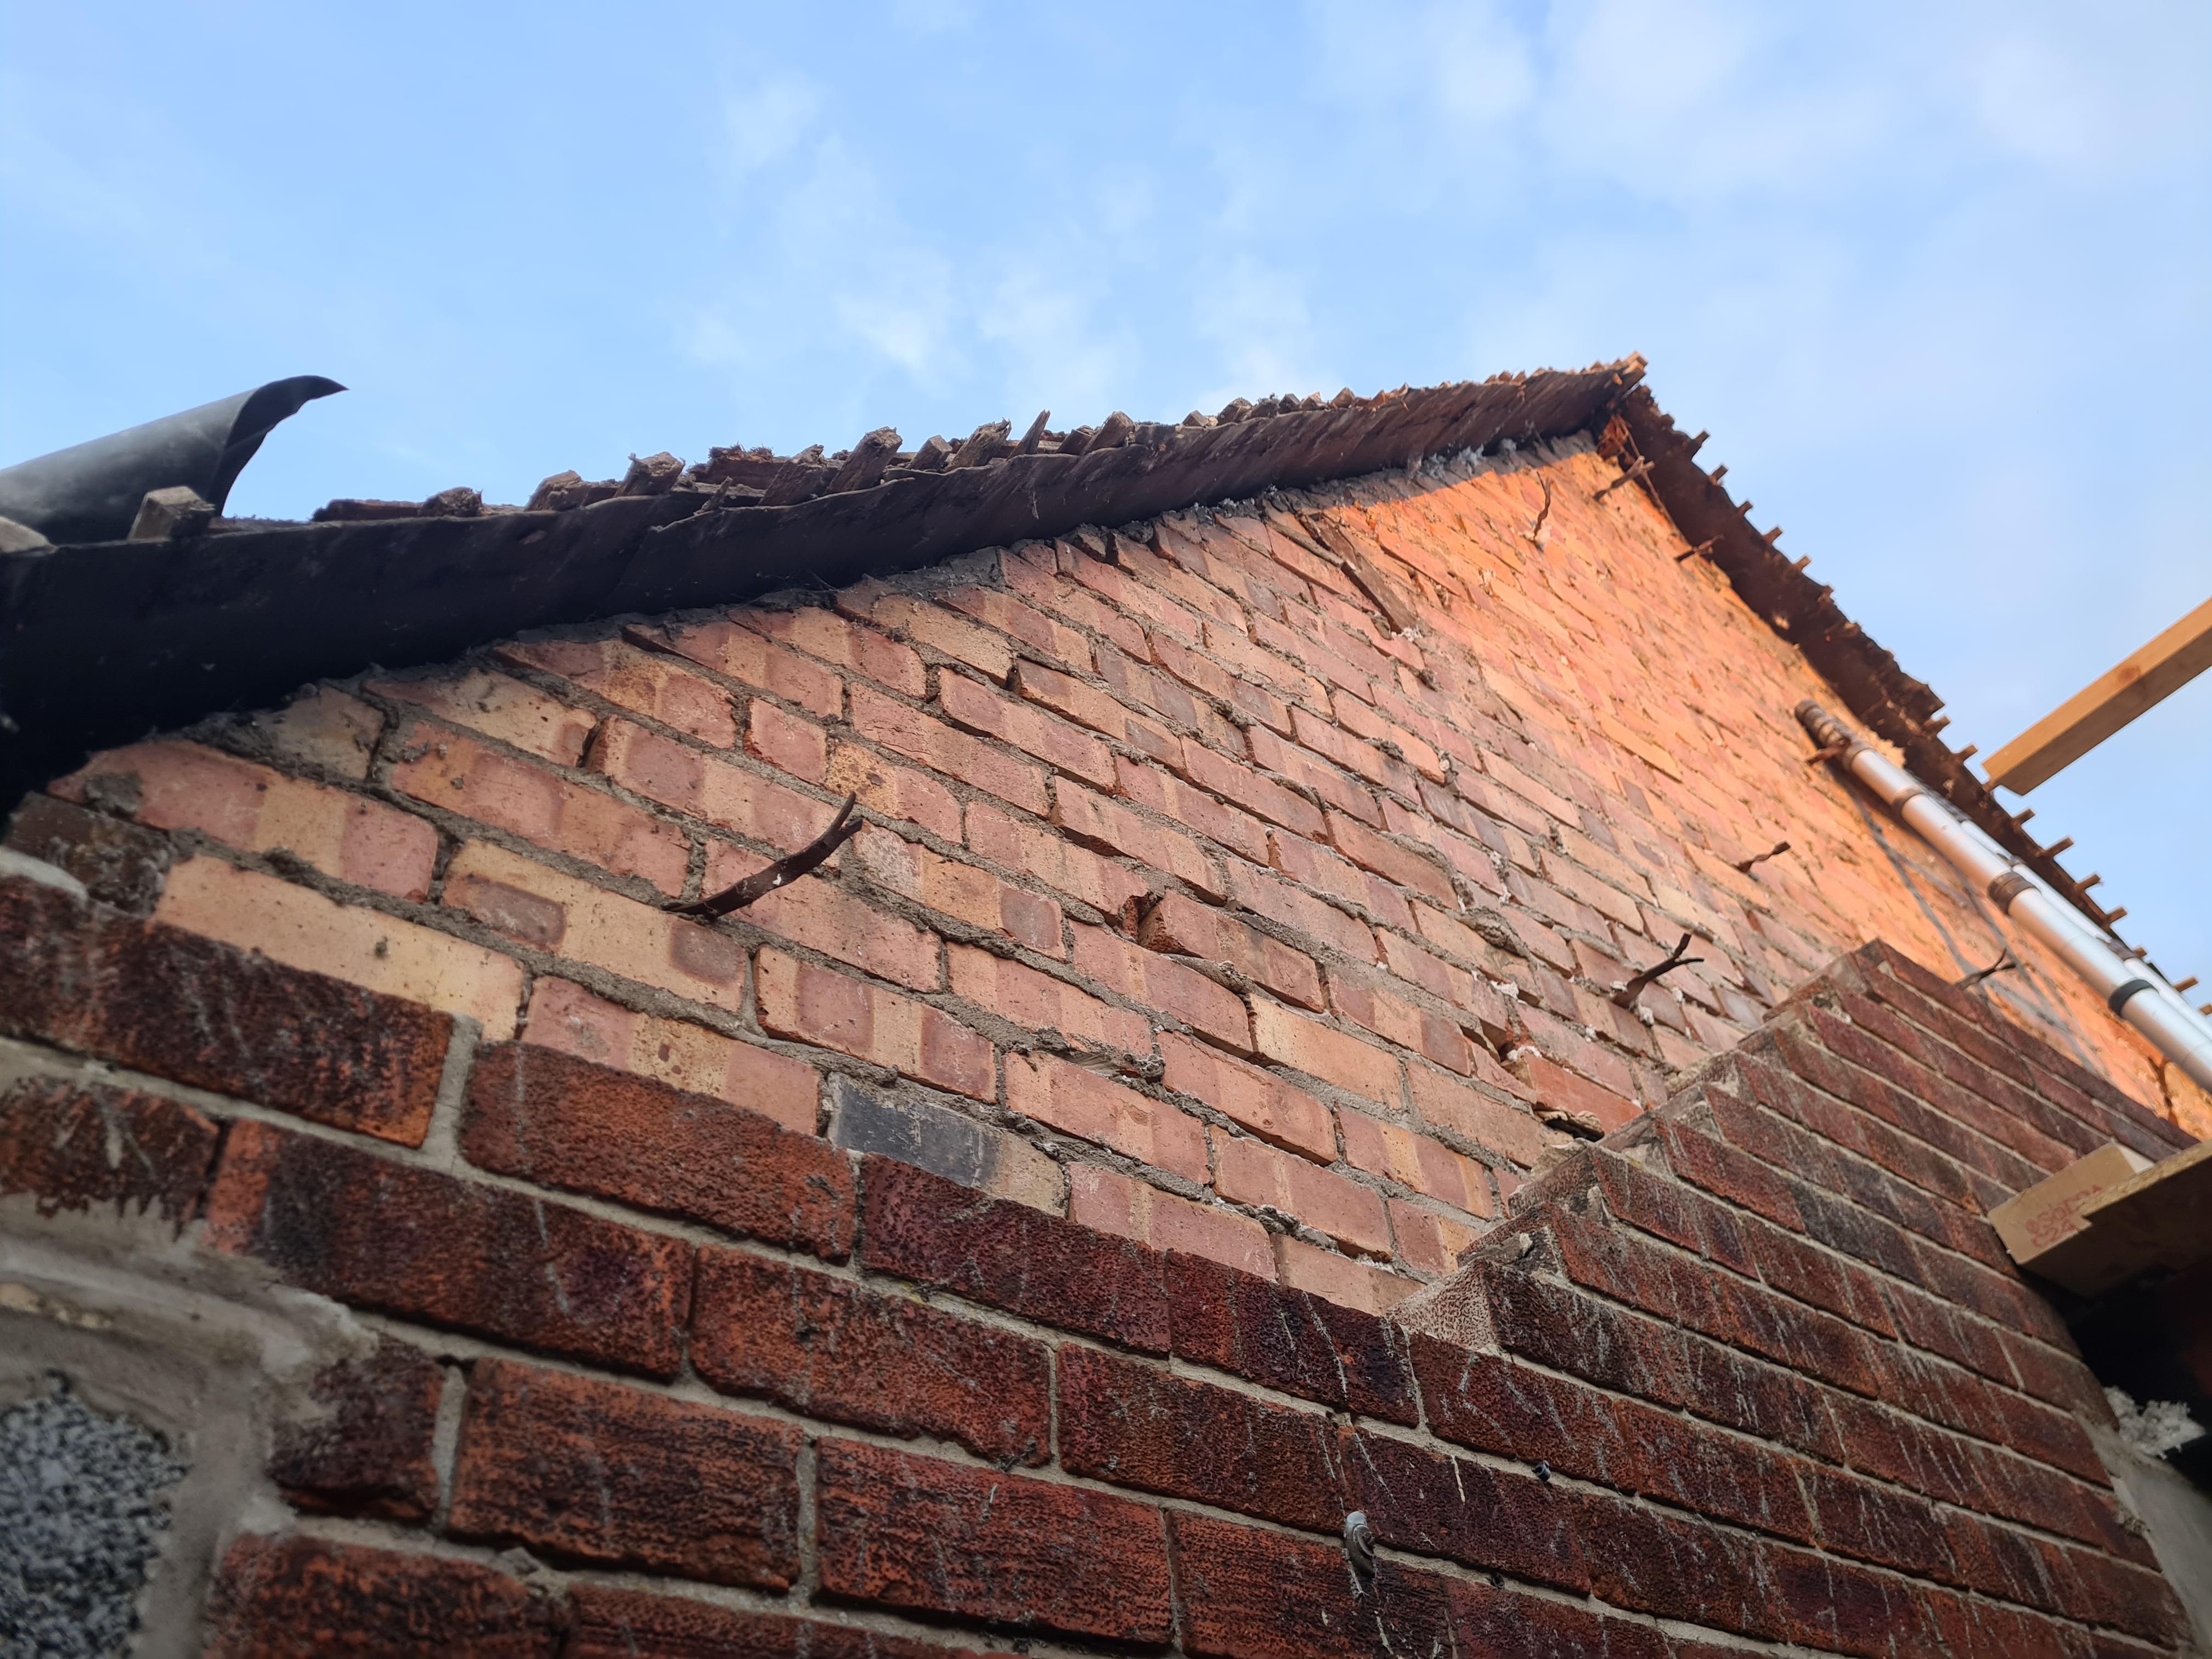
Should anyone be interested... This wasn't half as bad as I'd built it up to be (in my mind) Starting at the top l, the brickwork came down quickly, two afternoons to get to below corbel level. A handy hint, if you want to stop loosening bricks below the course your removing then stop hitting them on the face and take them out front the ends. Rebuilding was pretty quick, I used the screw in wall ties, ant it was much easier to put them before the blockwork than afterwards. Figure out and mark on the wall roughly whereabouts your ties are going, then when it's time to put the block in; offer it up(no mortar bed yet) mark and drill the tie hole15mm above the top of the block, then mortar bed down and lay the block.

-
I'd say it's kinda impossible to know without a, the original designer telling you or, b. removing them and taking a wait an see approach.. If it were my own house... I would add an extra timber of the same dimension on the left and right, form a 'goal post' arrangement with a cross member of decent size to take any potential rafter sag. Cross member needs to be on top of uprights not screwed to sides At the back of the 'cupboard' I'd add a further triangulation uprights. That would form the rear wall. All this is not really about rafter sag but about roof spread. Looking at those rafters tho, they appear to be quite substantial so perhaps all the above would be excessive... but that method is what I'd feel confident with and its still going to give you extra storage. Edit to add, with the uprights being built before the floorboards I would definitely err on the side of caution and not square the room. They are likely part of the roof structure. A SE would be able to calculate properly if they are superfluous I'd still build the cupboard though, as when a roof meets a floor in a room the space is practically useless anyway.
-
This is how I did mine,up to a point. You can get eaves trays, lap vents and a dry ridge kit which will allow the passage of air and consequently allow moisture to vent away. You have essentially two roof types in one, a cold roof in your eaves and a warm roof in your loft space. As long as your eave aren't rammed to the soffits and you ridge has vents you'll probably be fine. The gap above the foil, below the tiles/membrane does have to be continuous to the ridge on each rafter bay though. So if your loft insulation doesn't have air flow to the ridge your going to want some vented tiles to provide an exit for the flow of air.
-
Does anybody know where I can find a comparison table that shows lintels from different manufacturers? eg. What is the ig/Birtley equivalent to a Naylor r6 or a Catnic cg90?
-
Is there any reason I couldn't close the cavities horizontally at 1st floor level? So far my cavities are very clean, I'm very carefully laying blocks and removing any droppings, even hoovered them out. But as I approach the 1st floor I can't clear any thing that does drop. Would a cavity closure be a bad idea? It's getting eps blown in afterwards. Is it a waste of time and effort?
-
Great point about the wind, thank you. I'm hoping the inner skin isn't cracked like the outer so it can stay up. But if it is, i'll definitely build a studwall internally like you suggest.