SimonD
-
Posts
1942 -
Joined
-
Last visited
-
Days Won
10
Everything posted by SimonD
-
Love this. Spot on. Even more of a sh1t show when it was someone else who made the decision assuring you it's no problem! ?
-
Okay, so the laying guidelines from the company you link says this: Secondly, for fine porcelain stoneware polished tiles, it says waterproof treatment required (this is sometimes only required when installed on floor). Here is a link to the document: https://www.marazzitile.co.uk/media/filer_public/e9/5f/e95f3156-f66b-4e26-9ae8-c51edfe8bd14/posa_manutenzione_marazzi.pdf I reckon you need to call the tile company to get their view of it.
-
Have these been cut on site, or were they delivered as long and thin? Is this a porous porcelain and have they been fully sealed before installation? Personally I think there are potentially several problems that might arise from this as even if the tiles are tightly butted together, if not sealed, moisture will get in there.
-
Please recommend an internal door and lining company
SimonD replied to SimonD's topic in Doors & Door Frames
They do look rather nice! -
Please recommend an internal door and lining company
SimonD replied to SimonD's topic in Doors & Door Frames
Well, in my haste, I thought I had. Now, I've just realised what I found was clear glazed not obscure glazed. Now I'm back to the search for just this one door! I'm going to make my linings. -
Yes, mine uses Knauf Aquapanel, but you can just as readily use skimmed plasterboard, or even plywood as the base.
-
Please recommend an internal door and lining company
SimonD replied to SimonD's topic in Doors & Door Frames
Scrub that question, problem now solved. -
I think you might have hit the nail on the head in that it could be down to the glare. I too have to use my hand or wear a cap sometimes and when I got new clear frame glasses, it made it much worse under some lighting. I was looking at the lighting in a local high end bespoke kitchen manufacturer's showroom just the other day and noticed how comfortable all the lighting was for my eyes. I noticed that any lights with potential glare where either hidden, or had shades to reduce glare to the eyes.
-
Ah, I know exactly what you mean now. This is how the bungalow lighting was wired before I demolished most of it. Made it really easy for me to add lights and a bathroom fan while we were temporarily living in the place!
-
I've been looking around online and also with local suppliers for some internal doors - 2040 x 826 - and relevant door linings. I don't know whether it's down to current supply issues, but what I'm finding with this size is that for one specific glazed door, I'm down to choosing either XL Joinery or LDP Doors and with the linings, I'm being told I've got the option of 22mm thick linings because the 28mm linings available are for grooved for 726/838 doors (yes maybe I just need to groove them myself or make my own linings). Jeld-wen only supply this type of door 1981 high and as per discussion with my local rep, they're not accepting bespoke orders right now, or at least not from me! So my main question is whether you can recommend a door supplier and/or manufacturer I can try that isn't necessarily the above two as I'm not 100% convinced of the quality? And also where I might get 28mm thick door linings for 826 doors as it's more expensive for me to buy in finished size timber and make my own linings than buy the sets? Ta!
-
My two pennies, or for whatever worth, is that it is fundamentally a question of ergonomics. For me, I love cooking and spending a lot of time preparing food on a surface that is too low usually results in back, shoulder and neck discomfort, pain and stiffness. Experience I gained from a number of years working in professional kitchens and then domestic kitchens. I would not accept this for the benefit of my own body. I also have to say it's pretty poor and unprofessional of an architect to accept a major mistake, offer to repair that mistake, but then threaten the working relationship if you, as a client, who is paying a lot of coin for the service to suffer if you want it put right. Frankly, it's disgraceful behaviour and tantamount to blackmail.
-
Hmm, interesting, thanks. I have little experience with electrics so assume this is a little bit like using a manifold in plumbing? Can you point me in the direction of more info on this so I can read up on it?
-
For us we just found the wood effect a little plastic and noticably not real - rather it was clear it was vinyl. The Harvey Maria was so apparently real visitors remarked on how nice the wood floor was and asked how we got the aged, washed look to be so authentic. The Karndean floor did stand up to use without any noticable effect but we didn't live with it for long before moving.
-
Having had Karndean flooring installed in our last place, it was a painful process. Plywood screwed down at something like 150mm centres throughout, filled and sanded butt joints and our fitter even used a self-levelling latex as the subfloor was crap. The actual installation of the floor after this was simple as in comparison. I have to also say that we were slightly disappointed by the Karndean and preferred the vinyl we'd previously had from Harvey Maria.
-
Insulating a pebbledash solid wall and damp concerns
SimonD replied to Ben Weston's topic in Heat Insulation
as @Wil says, I'm not sure this is a lending requirement. Air movement is your greatest enemy when it comes to interstitial condensation so an airtightness barrier is your primary concern, which in older properties and masonry walls is typically either a parge coat or full plaster. Lime plaster is an ideal candidate here You'll also need to look at floor to wall and ceiling to wall junctions and detail those appropriately. Plasterboard and battens would not be sufficient on their own. Not necessarily. @nod is referring to the type of render applied to the outside of the EWI, which is typically a thin-coat render of about 8mm. You can apply ewi to the outside of bad existing render, but you may need to level coat so that you don't end up with excessive voids and thus air movement behind the ewi. This can easily be dealt with by using the correct ewi system. Where you mention soft bricks, that may not be too much of a problem as again, if you did end up with a wall full of voids, this would receive a levelling coat prior to applying the ewi. With this suggested buildup you introduce a non-breathable layer on the inside - the insulated plasterboard. If you then fill the cavity with woodfibre, once moisture gets into this area, it's likely to condense against the cold wall, which can lead to problems. You need to either have a breathable buildup internally, like woodfibre/hemp etc. which is then lime plastered, or use a non breathable buildup which has a fully ventilated cavity (top and bottom vents) between the insulation and the wall - it used to be the case that non-breathable iwi was place against the wall without ventilation but this is no longer recommended practise. With iwi you also need to carefully consider cold bridging at all internal walls, ceiling and floor junction, as well as the loss of space to your rooms. With ewi this is less of a problem. At your 'dpc' level, you can overcome damp concerns by using, for instance, eps or xps ewi boards for the first 30-50 cm up the wall followed by a small break and then use woodfibre ewi above there. You can even run this insulation down into the ground and if you have solid floors, the depth of this (e.g. if it extends ca. 60cm below ground) can actually provide you with a small amount of heat mass advantage in the soil below the house. Either way you do it, you really do need to talk to the technical department of a system manufacturer or distributor and get a condensation analysis done. That way you can make an fully informed decision on which system you're going to use and whether you need to remove the existing pebbledash. -
How net zero works in reality
SimonD replied to oldkettle's topic in General Self Build & DIY Discussion
Isn't that the implicit message behind almost all proposed climate change propositions, including net-zero? It's almost all, "we need to find means of generating energy to carry on living the way we are." Very few want to accept that none of it is sustainable, not even net-zero. -
Insulating a pebbledash solid wall and damp concerns
SimonD replied to Ben Weston's topic in Heat Insulation
ooops double post -
Insulating a pebbledash solid wall and damp concerns
SimonD replied to Ben Weston's topic in Heat Insulation
Yes, lots of old wives tales here. If you already have a cementitious render, then the walls can and will dry to the inside of the house if they're allowed to, which means both a hygroscopic and vapour permeable buildup to the inside, including paints. This may be easy for you to do, but may not be. If you are to ewi the pebbledash, you'll probably need to first apply a levelling coat before applying the ewi (unless the ewi system manufacturers confirm it's okay to have the air gaps created by the pebbledash plus the ewi adhesive mortar behind the ewi. The advantage with ewi is that the wall is on the warm side and thus interstitial condensation risk moves outwards whereas with iwi, it moves to the interface between the iwi and outer wall. In the iwi instance, you then need to ensure that you either have a vapour control layer and ventilation cavity between the iwi and exterior wall, or use a breathable insulation material like woodfibre. The other option as you say is to remove the pebbledash and apply ewi to the wall. This is probably the best option rather than lime render and iwi. But again that depends on where you are and if you're in an exposed location? With ewi, you could just run that around the whole building, including your new extension, which could make it more seamless. What you'll really need to do is get a condensation analysis done on each of your options. The cementitious render isn't great for breathability of old walls and there's a different in 'strength' and 'flexibility' between the two. But I would also suggest caution in the selection and application of injected dpc if there isn't any sign of damp. Many buildings cope just fine without a dpc. Just have a careful look at the existing dpc if it has one - if it does it will probably be slate, and if not, have a look at the guidelines produce by SPAB and others as they can guide you in alternative material selection, for example using capillary and vapour permeable insulation materials on most of the walls, but instead using only a vapour permeable materials where there is more moisture risk. -
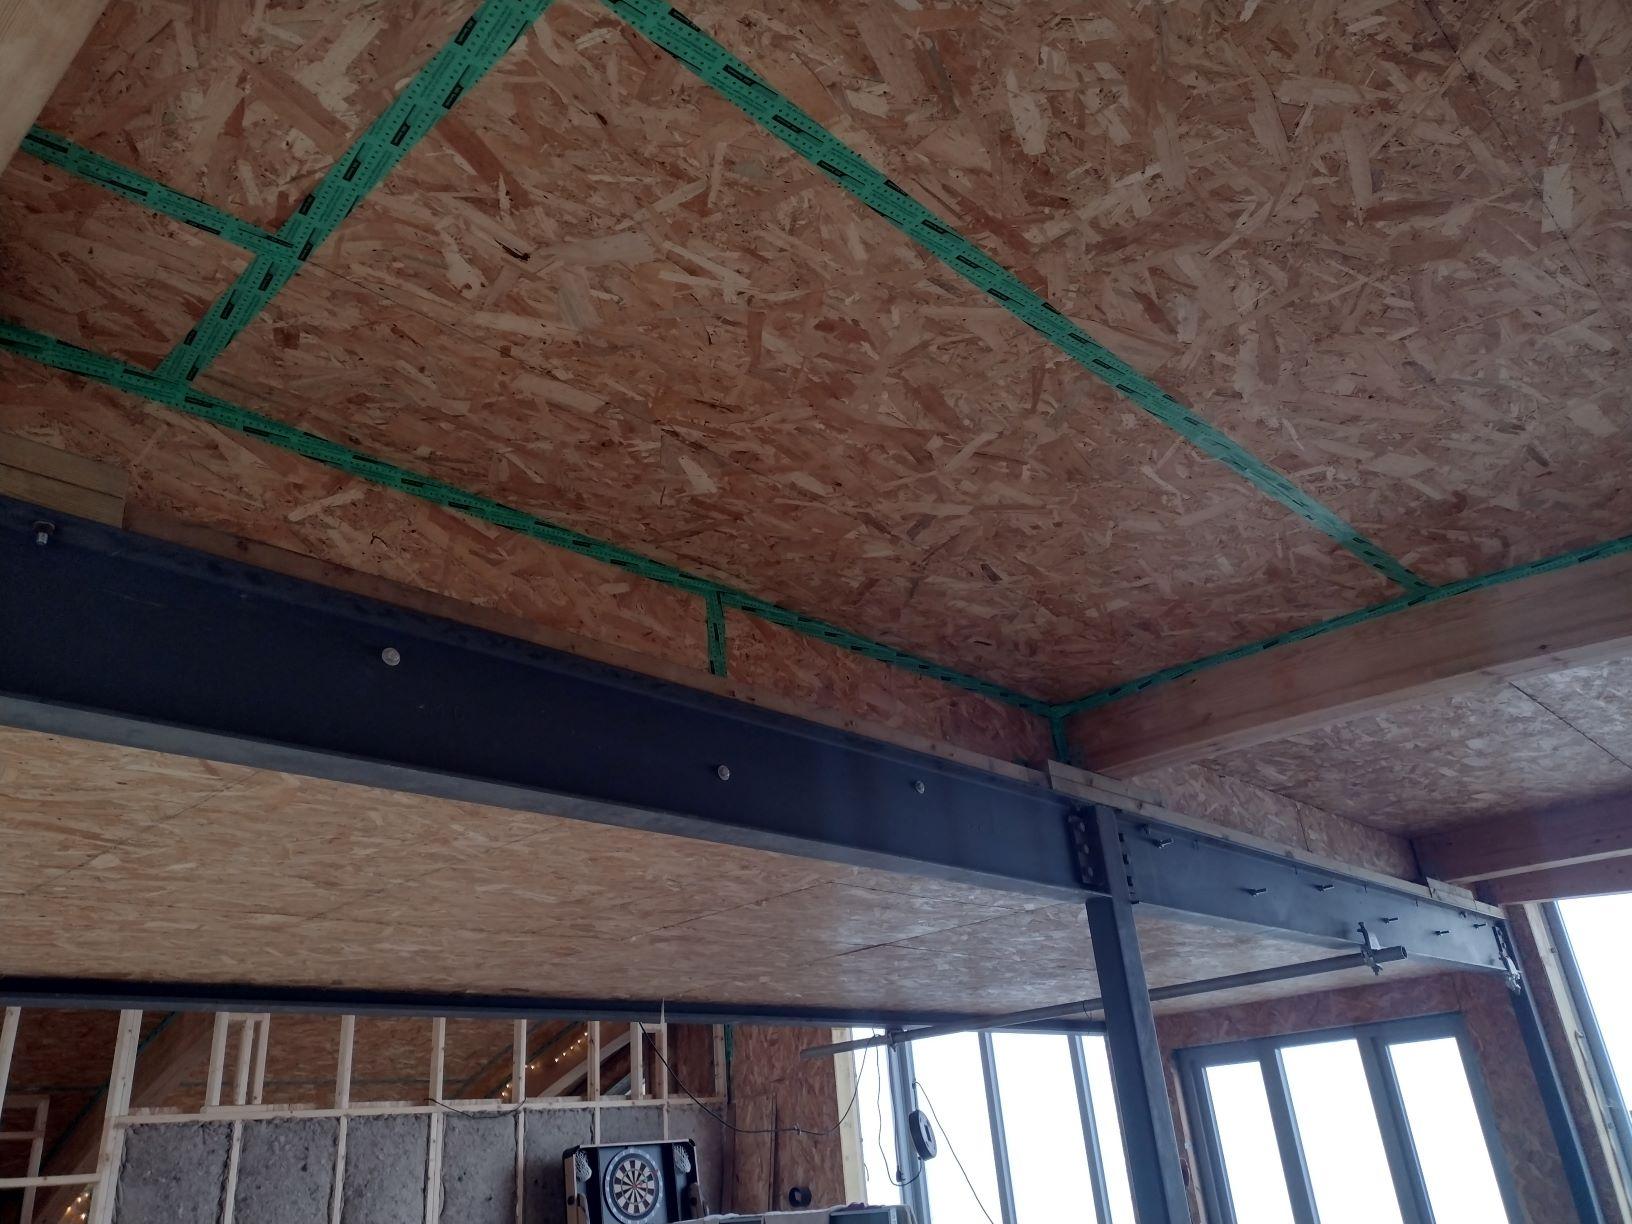
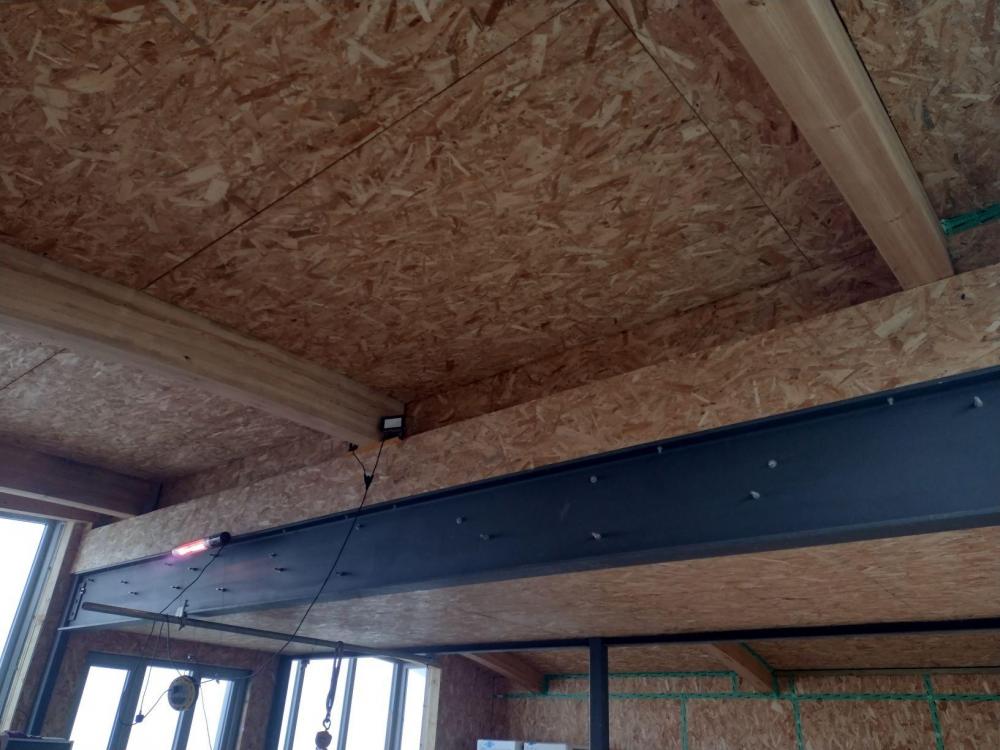
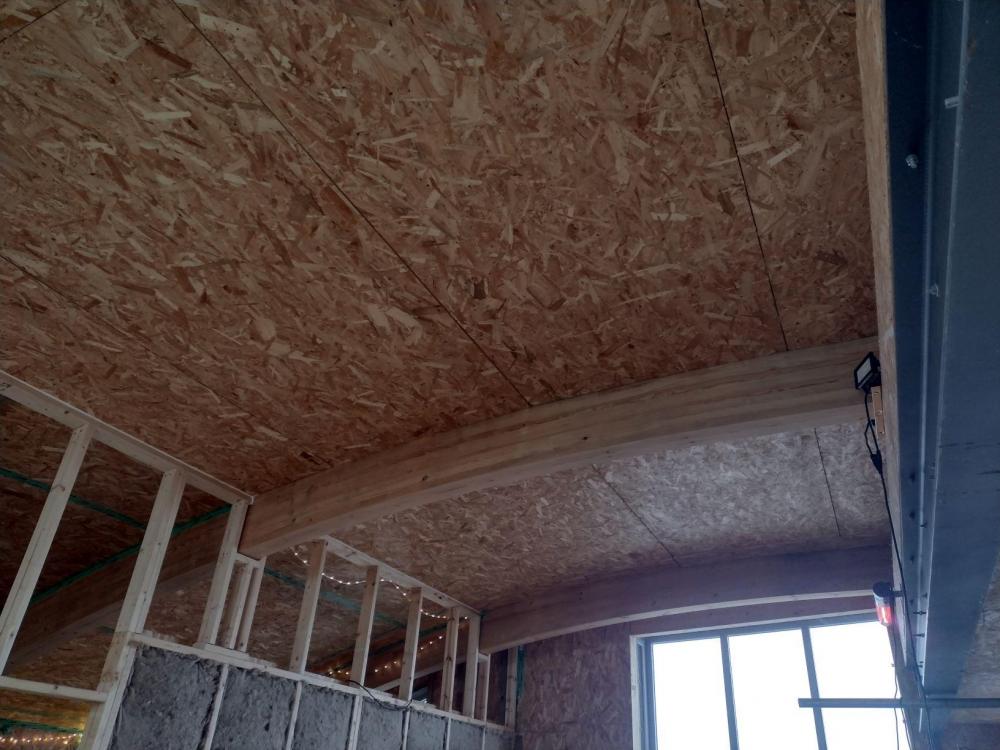
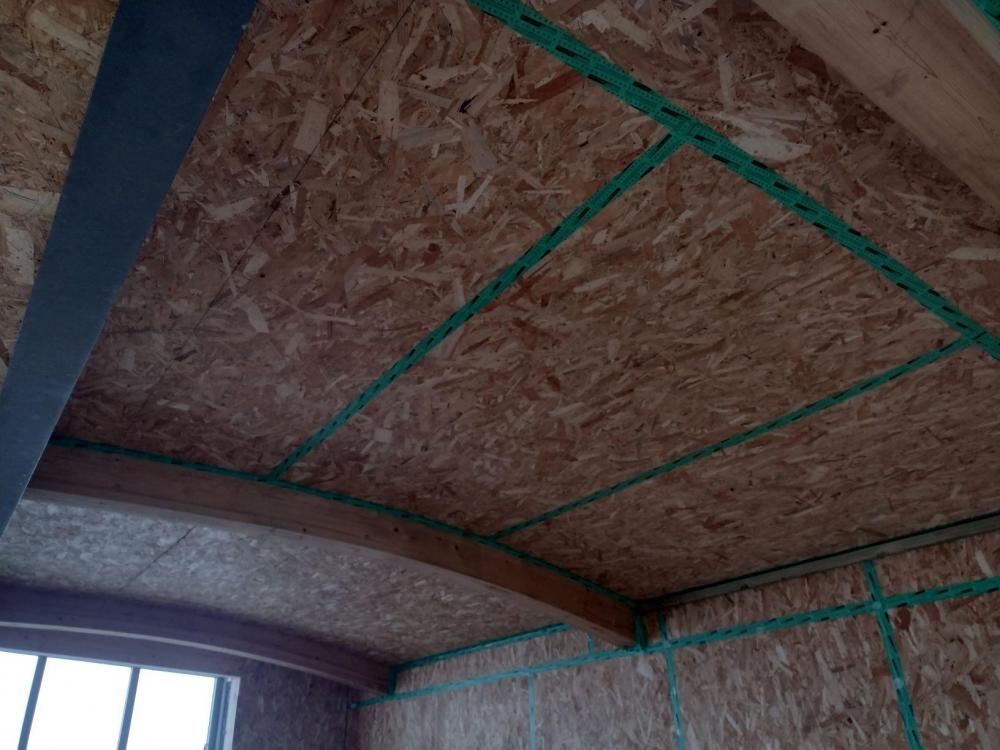
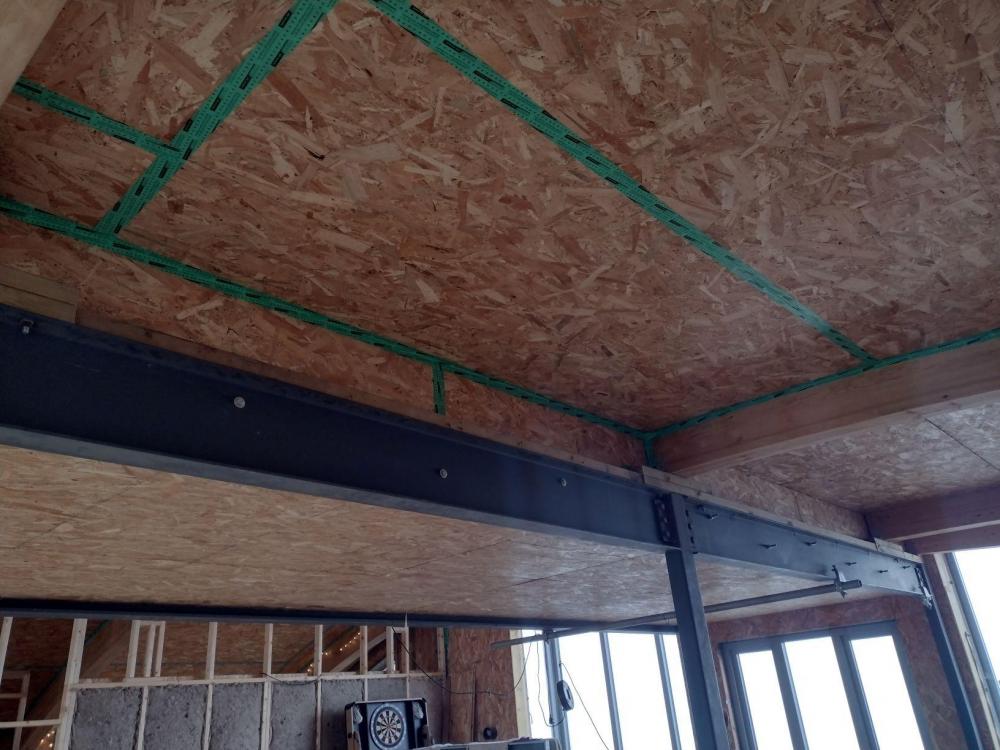
That's exactly what I'm aiming to do. From my reading of lighting design books, it's ambient light that's so important in good lighting design. I also still have the remnants of a medical condition that causes me problems in bright direct light, so when I'm in houses that use lots of downlights, especially led ones, I get headaches. They also seem to create dark areas all over the place if they're not well positioned. In my ceiling space I've got some 'shelves' that I built into the knee walls above the steels that will serve the purpose of flooding indirect light from one direction, those recessed lights or something similar you show would be ideal on the opposite walls, plus, I'm looking to have led concealed strips along the glulam beams where they meet the ceiling. I just need to also decide where and what I need for direct lighting in kitchen/dining and the living area, as well as what would work best in the stairwell and the landing area. The other area I'm struggling with is how bright the indirect lights need to be and have been buying led strips and other lights, including using work lights to test it out. Pics to illustrate the space:
-
That's very helpful, I suppose this way it's always possible to ask for an extra circuit or two to be in place just in case.
-
Yes, good point, our ceiling is at 3.6m
-
Yes, that is what I've found and typically guides me towards just recessed lighting whereas what I'm most concerned about is getting a good desgn for ambient light - every house we've lived in so far has had terrible lighting sadly so we want to avoid this here.
-
I'm currently looking to get the electrician in soon to do the 1st fix electrics but we're really struggling with the lighting design so don't quite know exactly what we want. We have a vague idea but some areas like the huge vaulted curved ceilings, we could actually do with experimenting with various lighting arrangements first. Can anyone recommend a strategy to get the 1st fix largely done that leaves flexibility for finalising lighting design, but won't cause too much frustration with the sparky? Many thanks.
-
How do you organise and keep cables tidy? Tips please
SimonD replied to SimonD's topic in General Self Build & DIY Discussion
With my lot is all about the sockets as otherwise they won't manage! Yes, I'm still searching although hiding everything in the wall like @Bitpipe's spark did is great. Similar to you I've got one design where this is looking tricky. -
How do you organise and keep cables tidy? Tips please
SimonD replied to SimonD's topic in General Self Build & DIY Discussion
LOL. Round us that's their bread and butter. I'm not sure they'll know what's hit them. Service void in the timber frame has already rasied a few questions, especially when I explained the osb is not to be touched by any cutting tool whatsoever. Indeed, that could work better and certainly doesn't involve any additional cost over the current option, actually it's likely to be far more pleasant for everyone involved. The only drawback is the plaster was to serve airtightness duty, so will have to re-look at that.