Onoff
-
Posts
21126 -
Joined
-
Last visited
-
Days Won
206
Everything posted by Onoff
-
It apparently has glycerine etc in it that can cause issues. Pure acetone is best.
-
Literally a hand held bandsaw? Like this: https://m.northerntool.com/shop/tools/product_200437678_200437678
-
Looks to be just the way this one is:
-
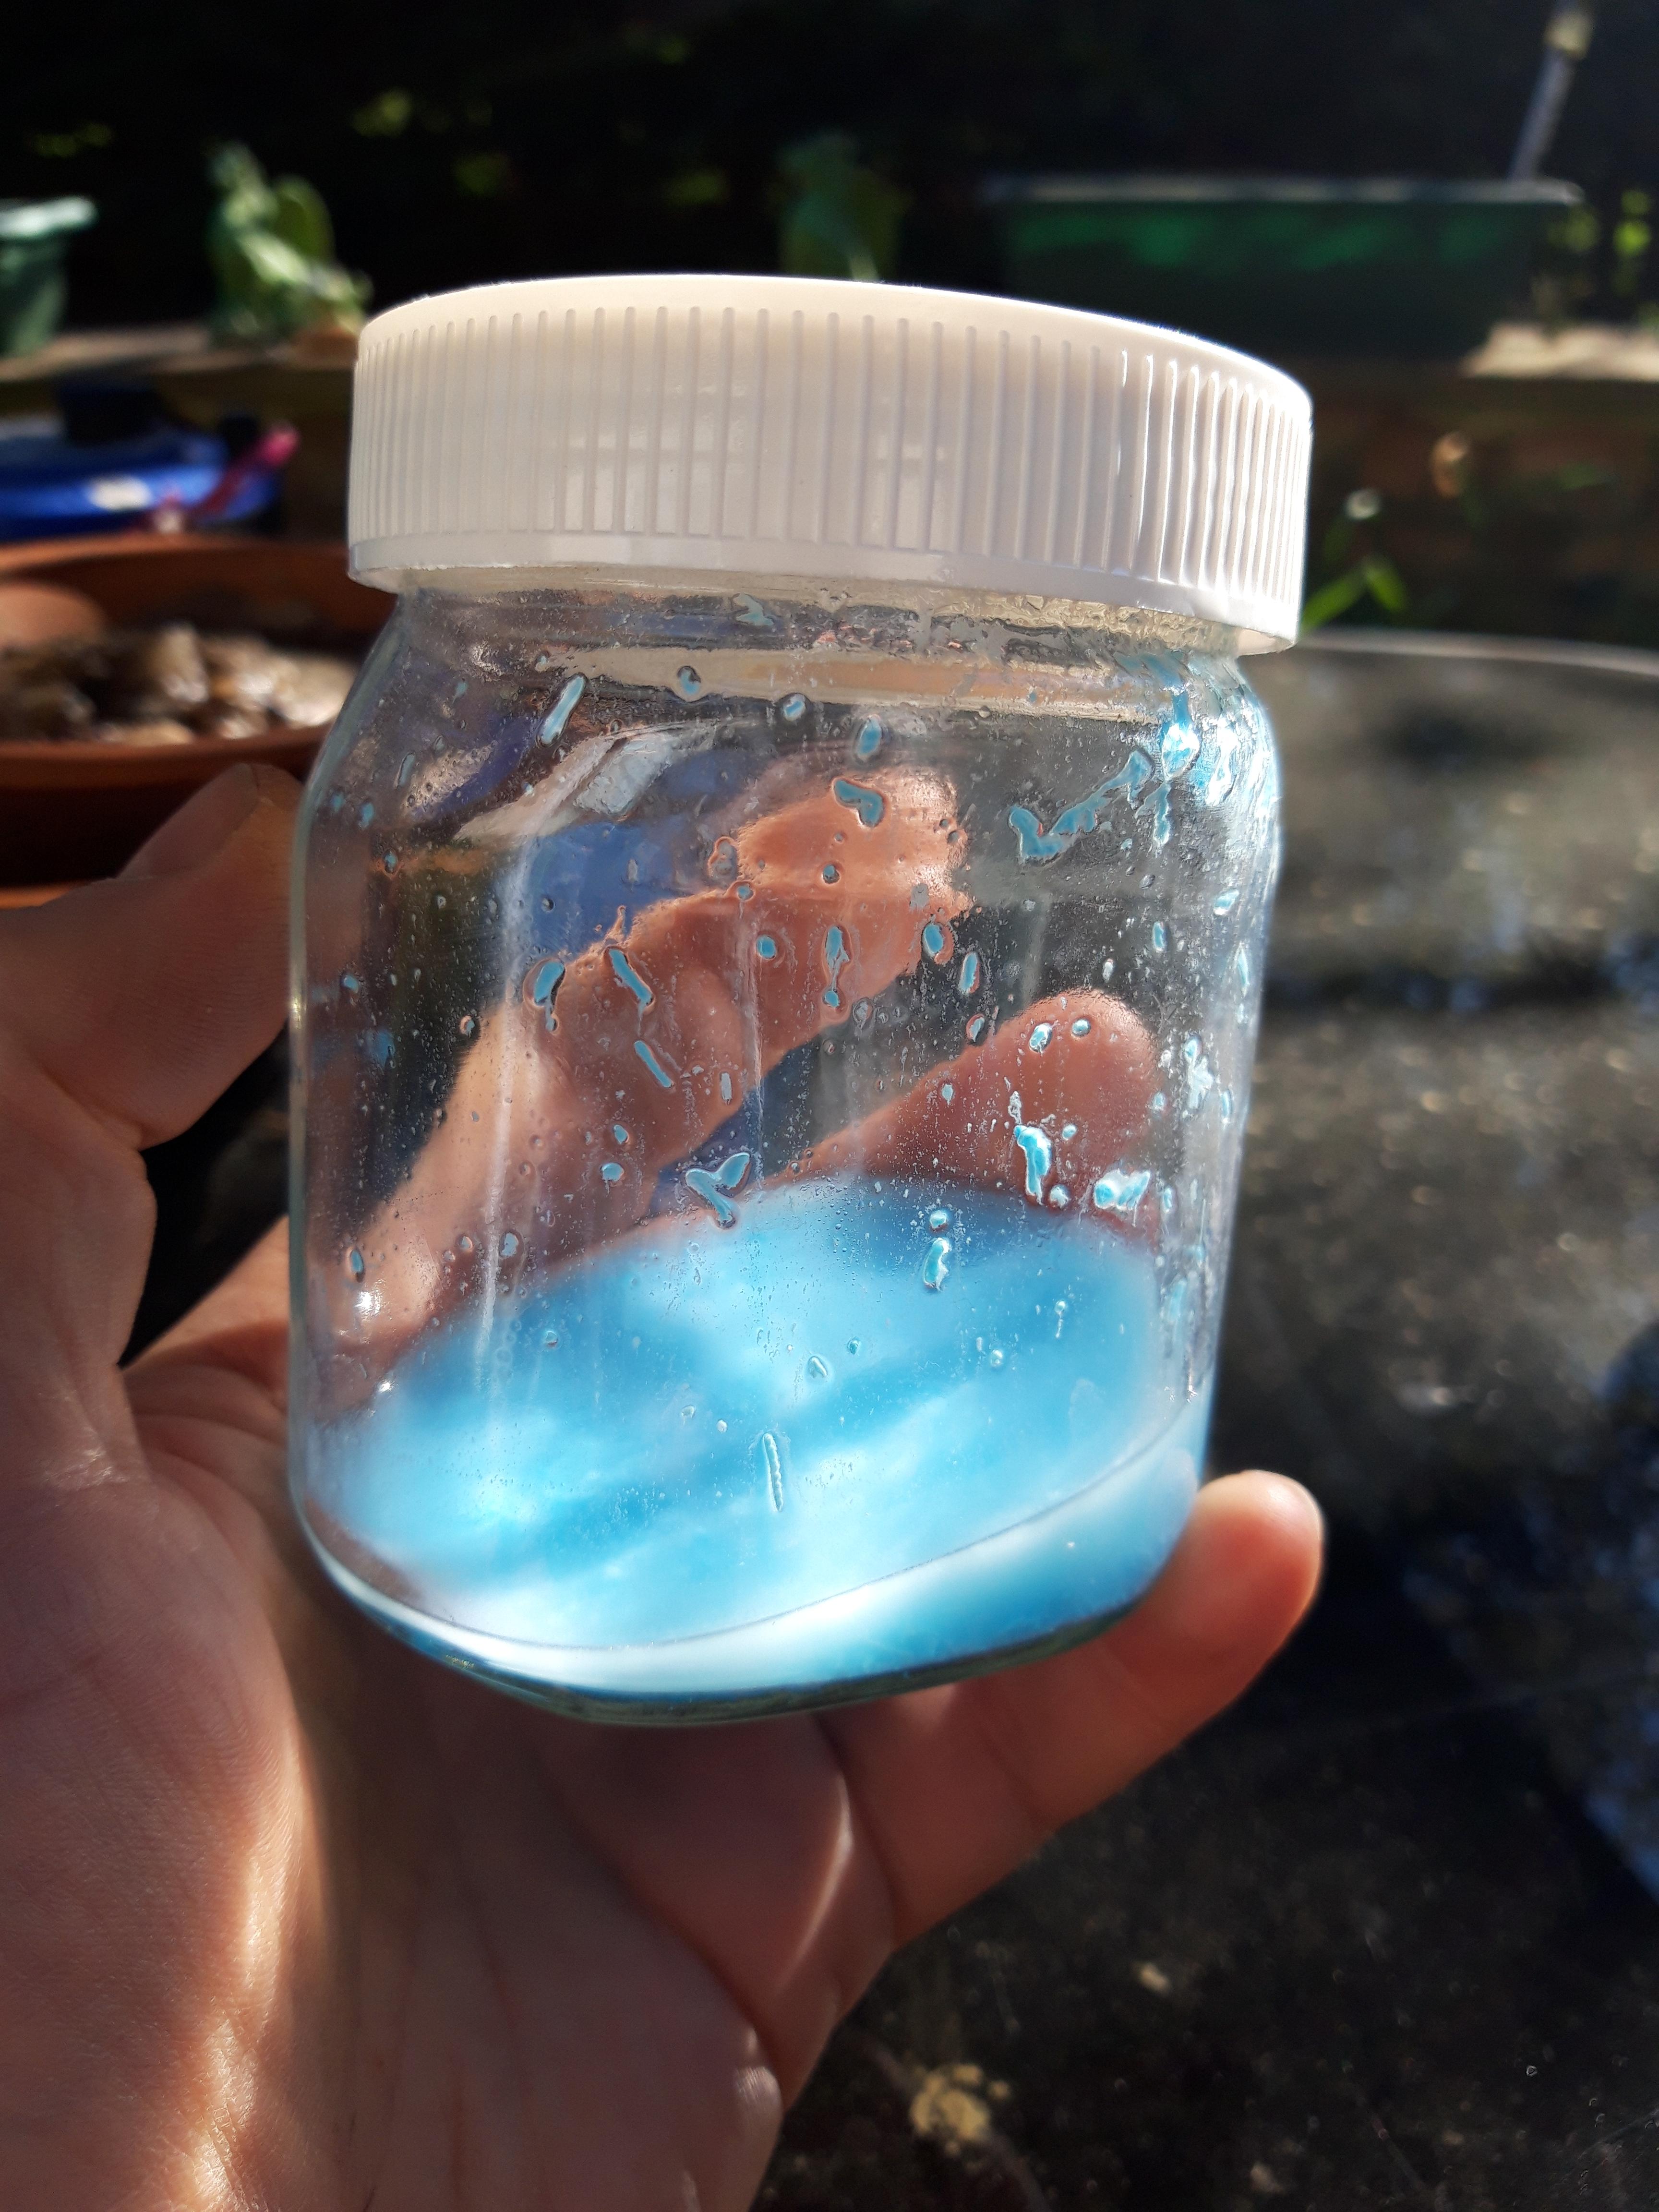
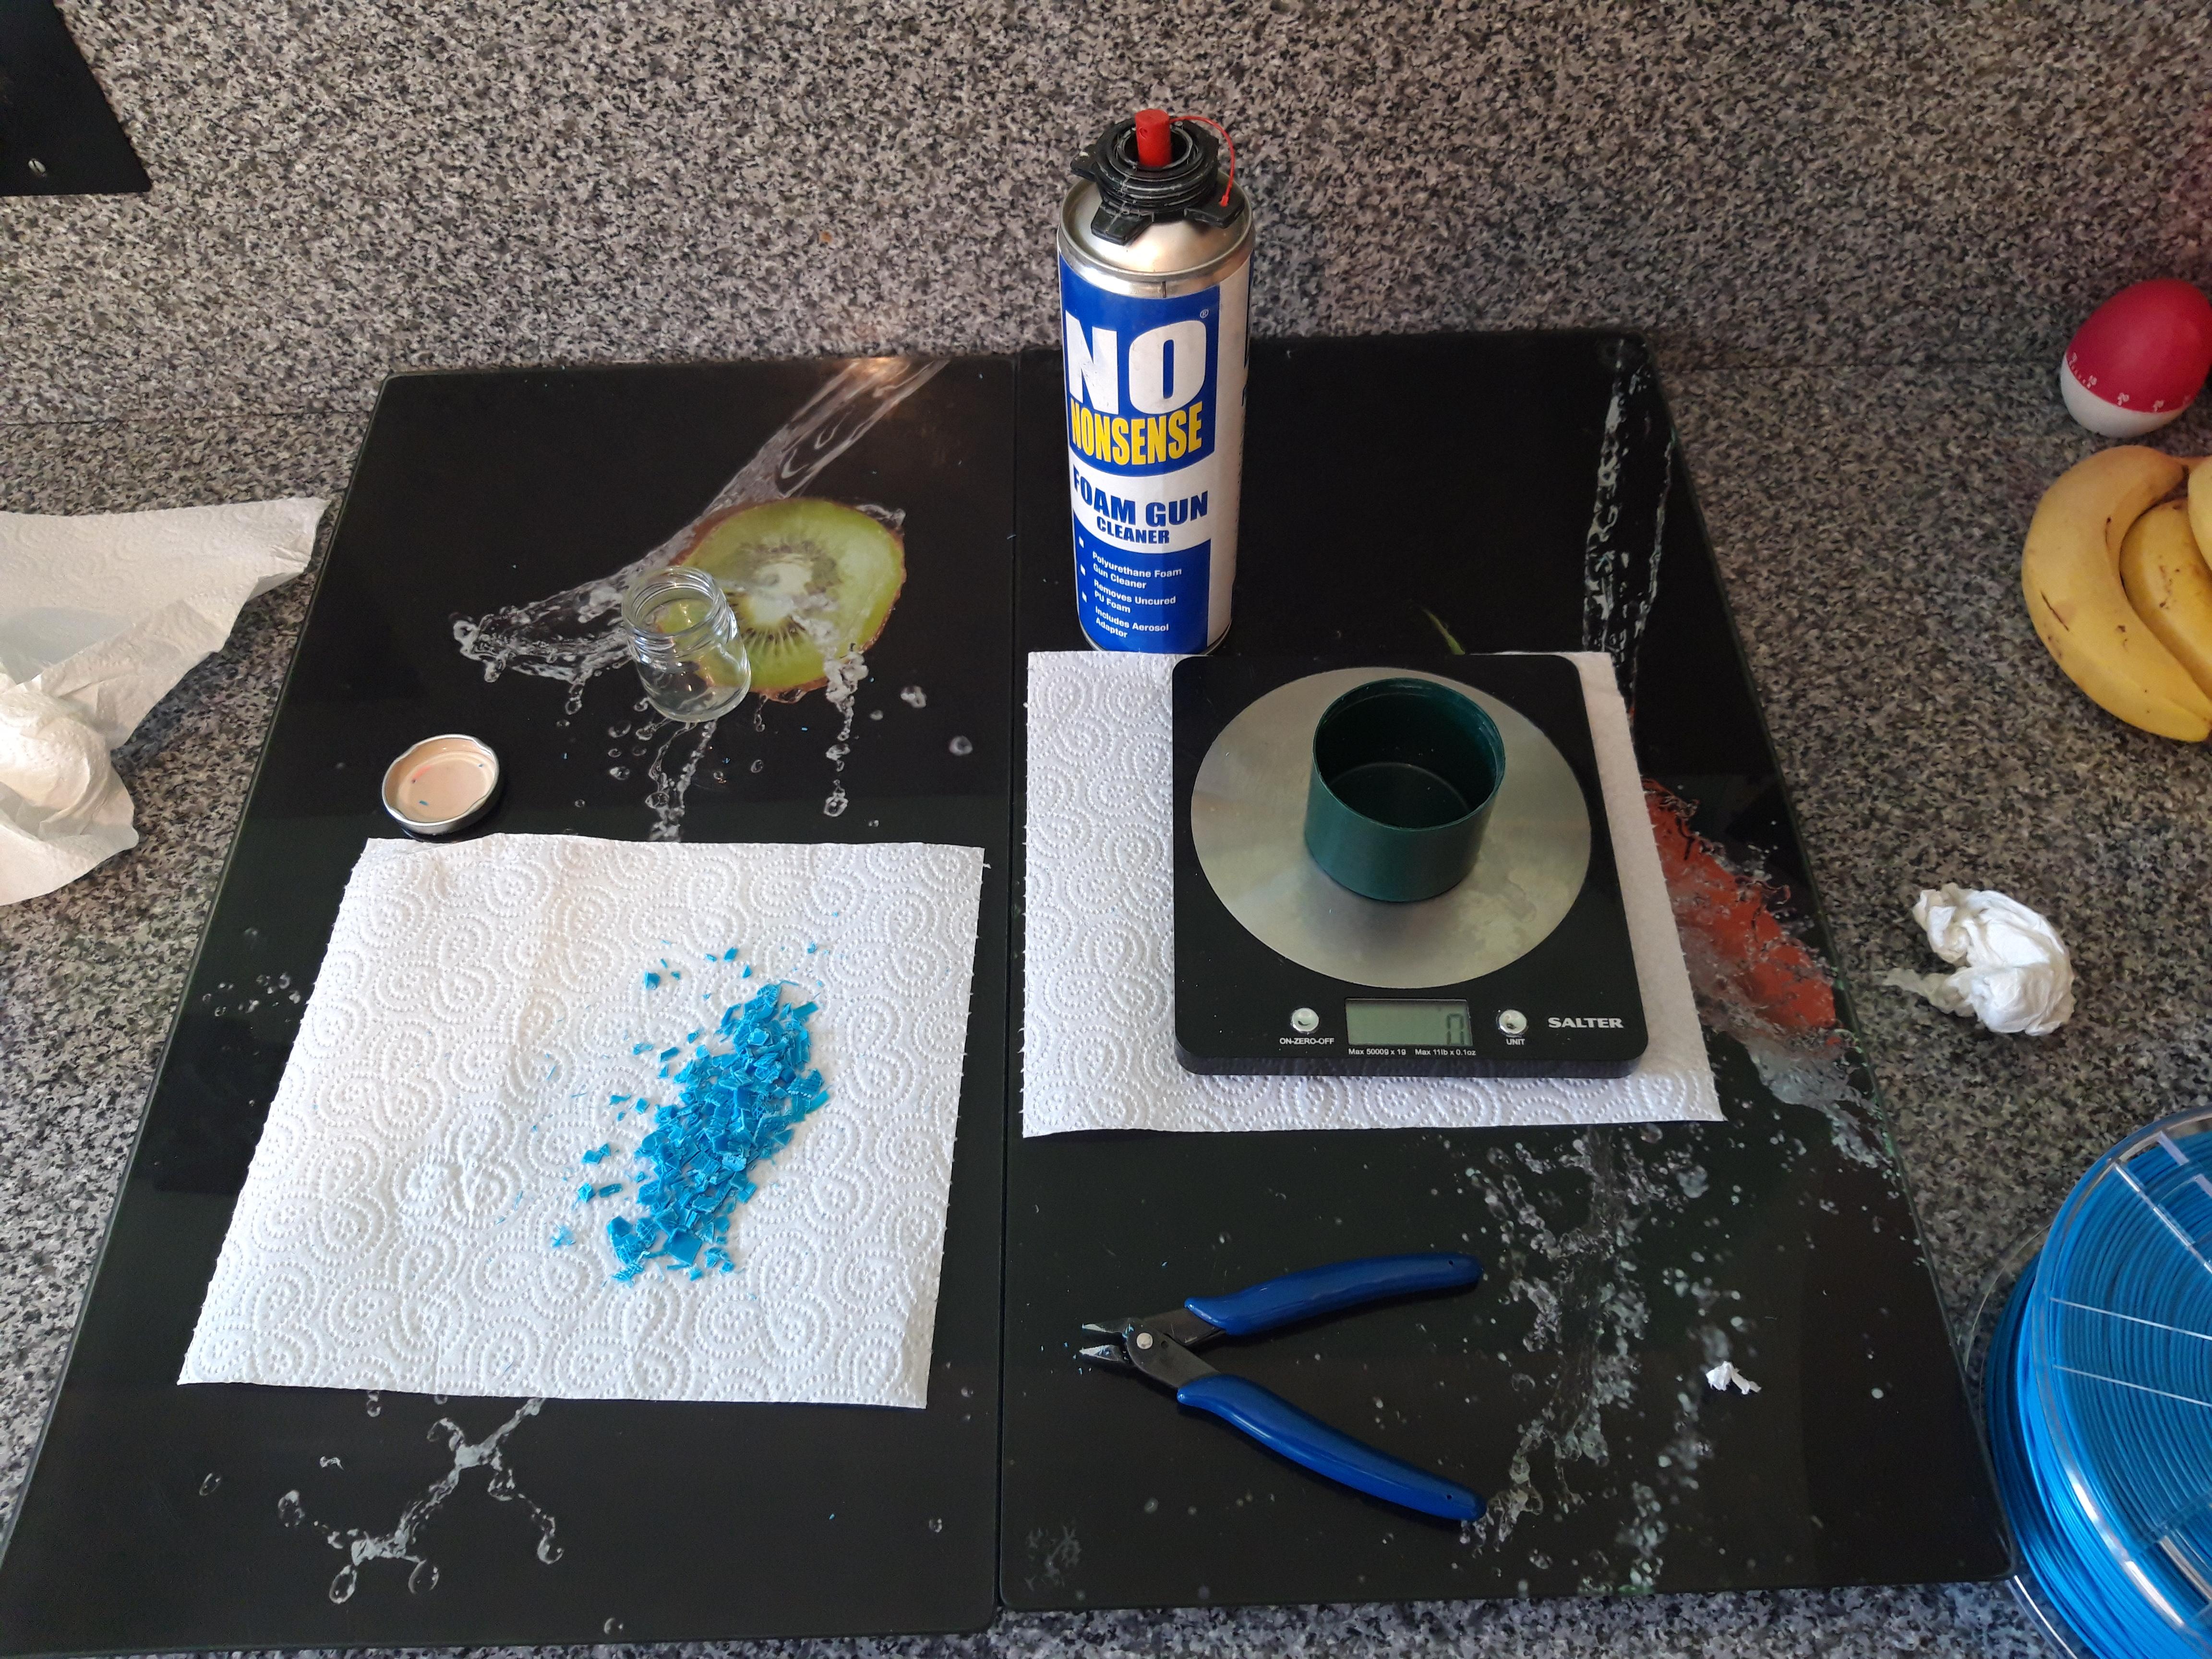
What exactly is ABS slurry? Is it ABS fully dissolved in "acetone" or a bitty liquid for "grip"? Not sure if this foam gun cleaner is pure acetone. What we've seen on YouTube it looks like milk as in made from white filament.

-
That would never work for me but perhaps I misunderstand. OK. Usually he prints with a 0.2mm layer so first layer is 0.3mm i.e 150%. We have a zeroing button here for each axis. Why do you have to start by zeroing? Out of the box it was crap until the bed was properly level but once done never touched it again. As I say, for PLA never used anything to help adhesion. Just trying to make ABS slurry here. No actual acetone so hoping gun cleaner will suffice! Reading that for ABS it's useful to switch the part cooling fan off.

-
Couple of stacking crates. Still a gap where the mains lead comes in. SWMBO won't let us drill holes in the crates! Trying ABS with a raft now. The idea being the raft takes all of the strain.
-
We were just discussing that. We get no adhesion issues at all using PLA. Nothing used either, straight on the glass. - Glass bed here - Clean bed with IPA is the main thing - 50degC bed - 200degC hot end. We've used Anycubic, Flash Forge and Steadytech PLA. - 1st layer 150% of normal layer height unless you're already at the max height for the nozzle - Do 1st layer at 70% speed -50mm/s is generally the speed printed at here.
-
How I showed is pretty much how we do it on hoist and traverse motors or anywhere where you have two opposing functions.
-
I was going to show it cutting wood then realised I had nobody else to film it and anyway one battery is near dead. Shows how it doesn't instantly stop though. Interesting how at the end of the video clip the tool stops after a short while as it knows it isn't seeing full voltage I guess:
-
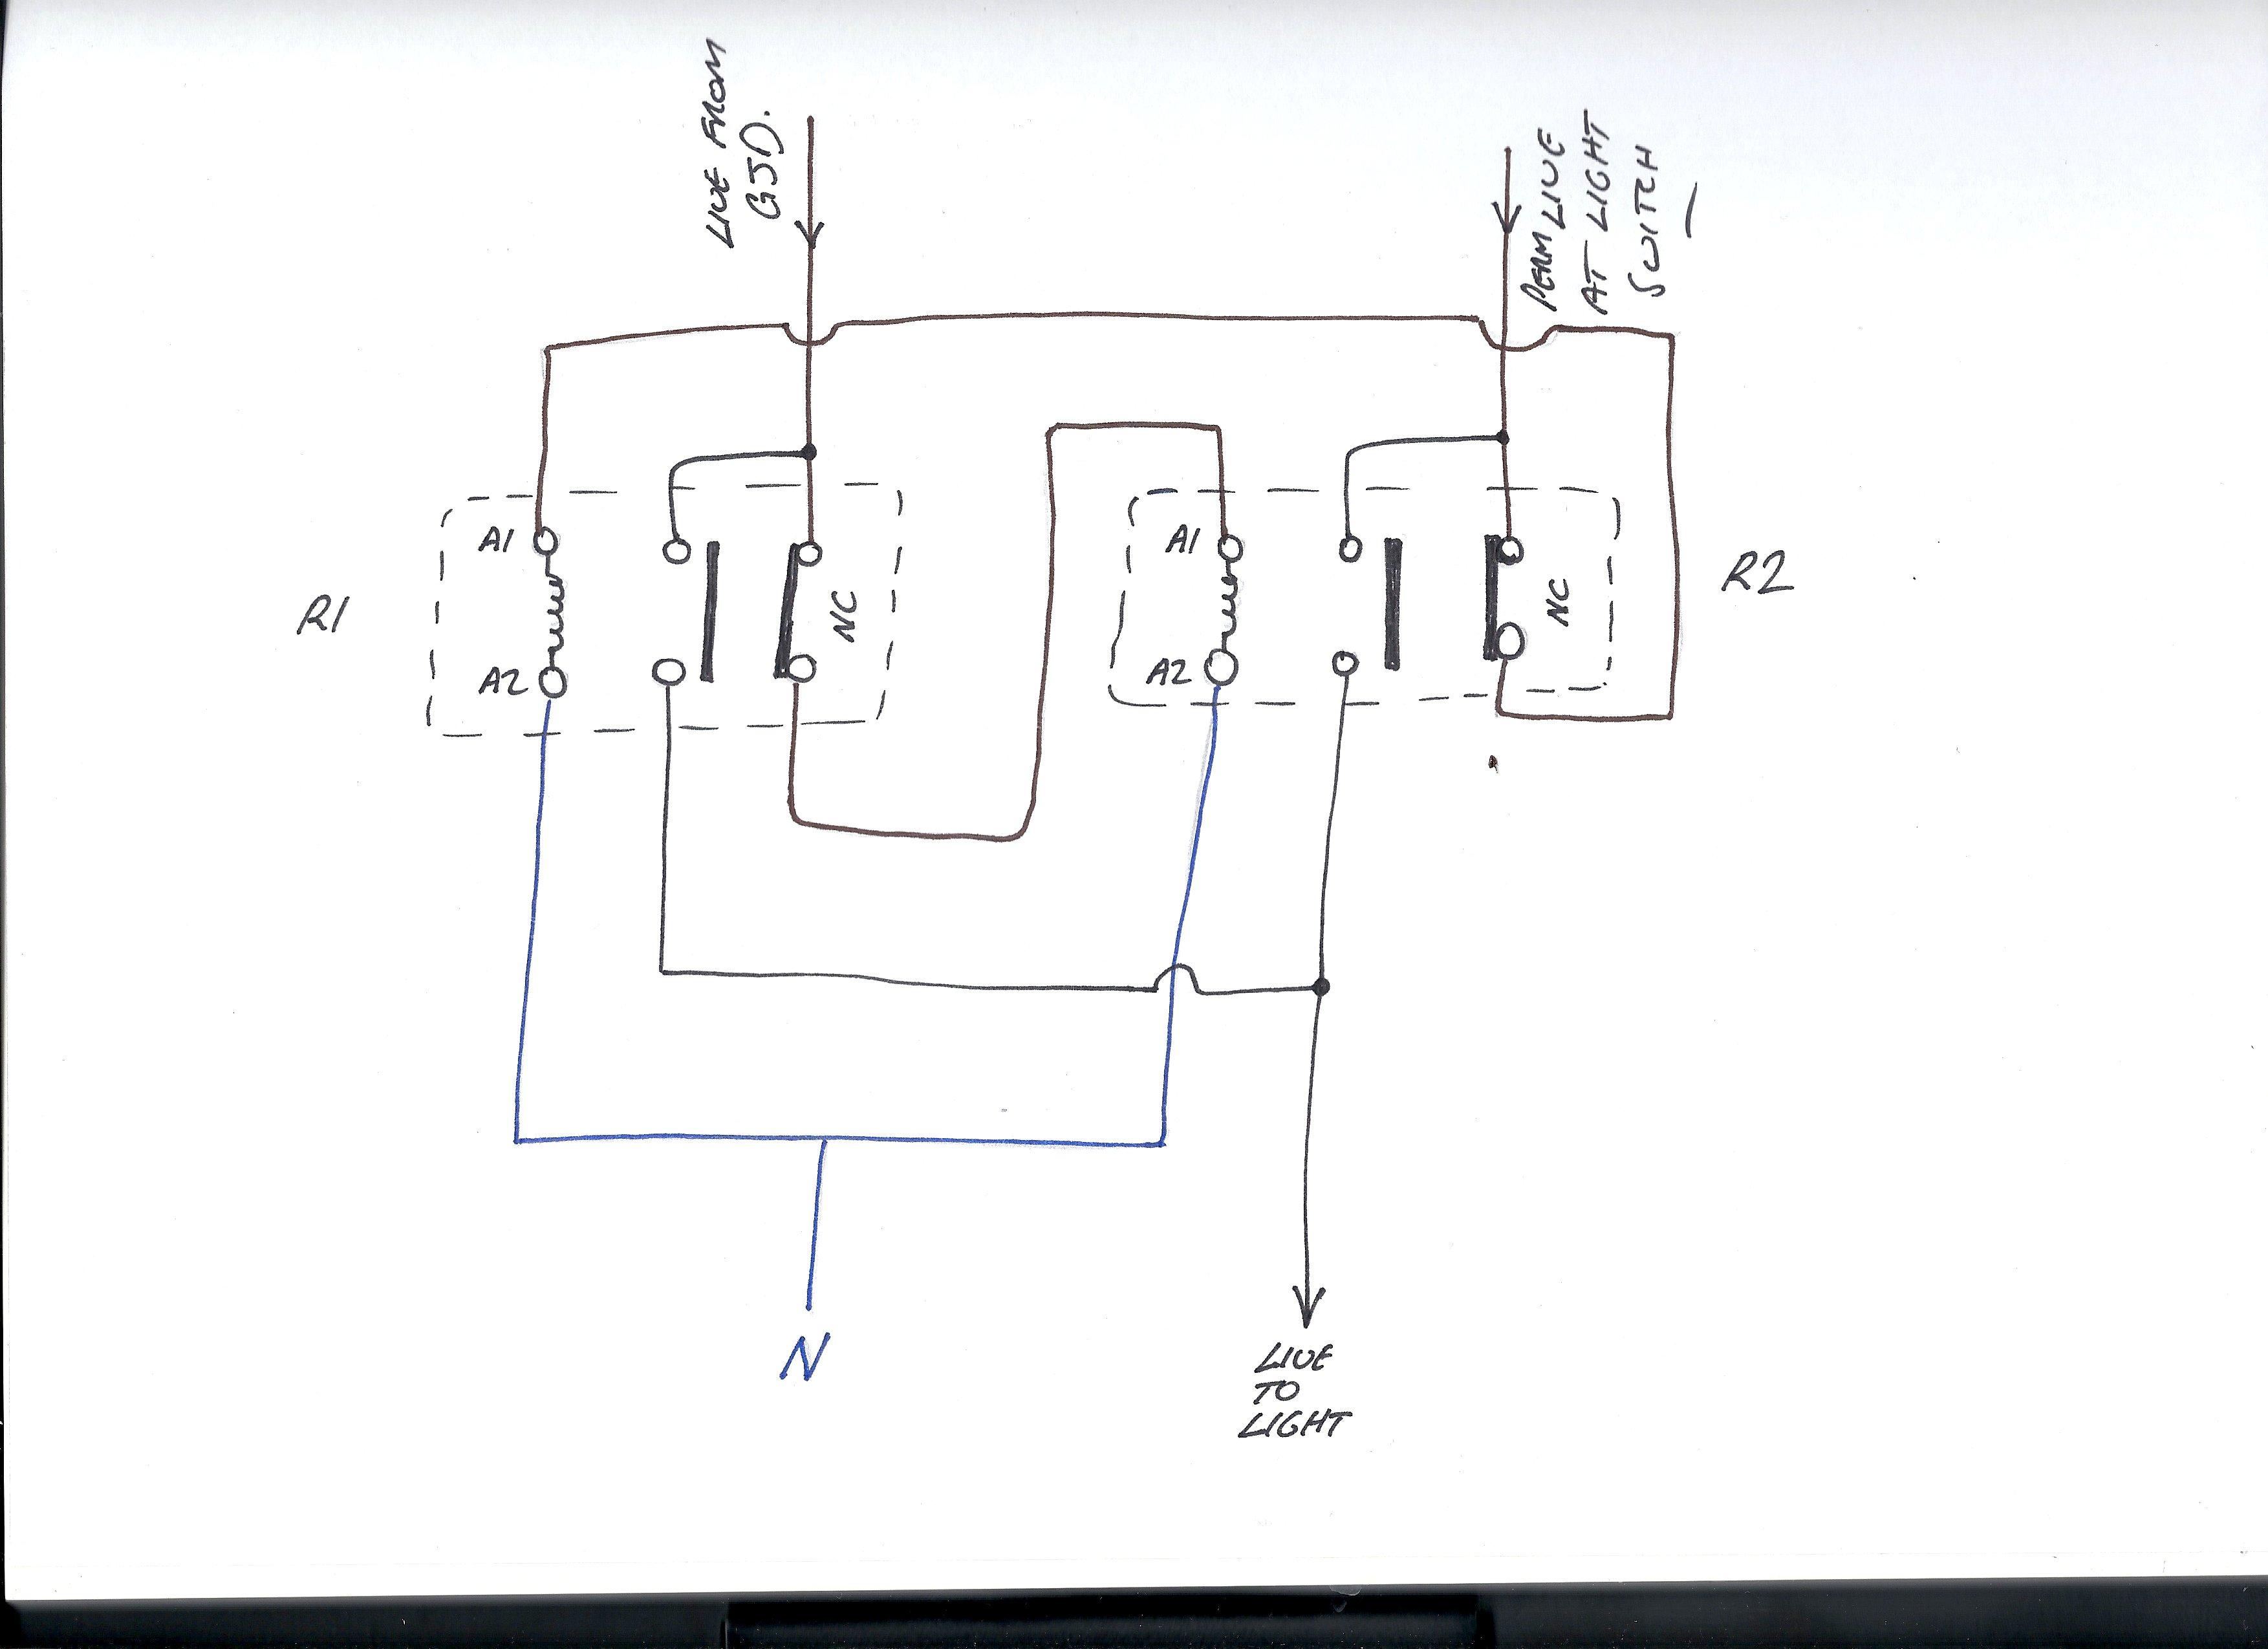
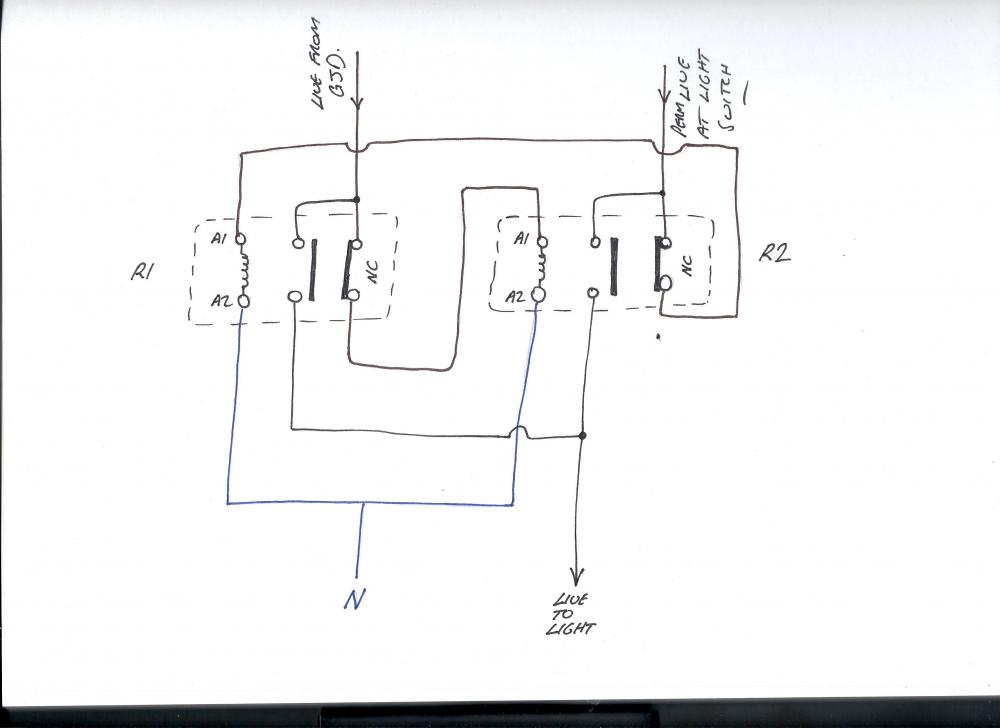
Two relays. Live from say the GJD centre comes in and operates the coil of R2. But BEFORE it can do that is passes through the normally closed contacts of R1. Thus if either relay ever operate they break the live feed to the other
-
You can get mechanically interlocked contactors. Thus you have two side by side but only one can ever operate. You switch one contactor with one of your lives and the other contactor with the other live. Never can the two operate at the same time. You can make your own up with two non interlocked contactors but you need a NC (normally closed) set of contacts on each. Neutral required for the commoned up A2s.
-
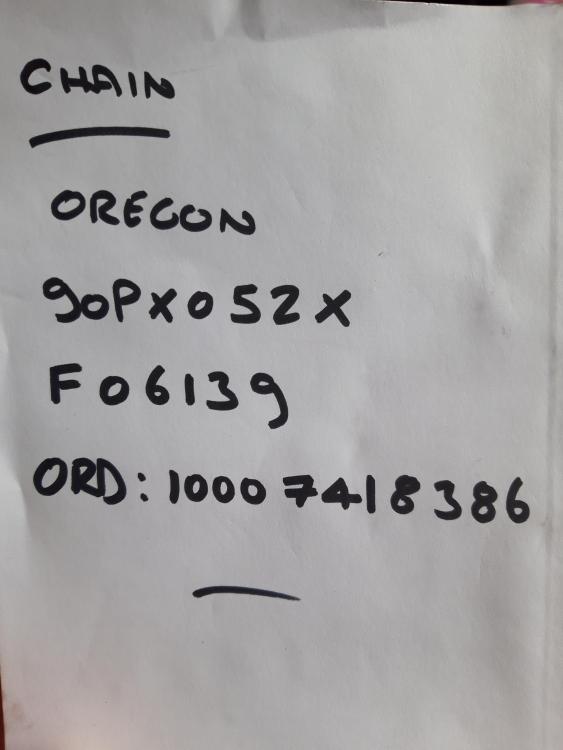
I can assure you it's an Oregon chain. Thrown the bag away now but I've written what was on it on the back of the manual.
-
Its an Oregon chain & bar if that's anything to go by.
-
Doubt he's ever had any formal training. Apprenticed as an agricultural mechanic back in the day at a Massey Ferguson dealer, now nearly 70. Just been around/using them all his life. Seemed to cover a lot of bases.
-
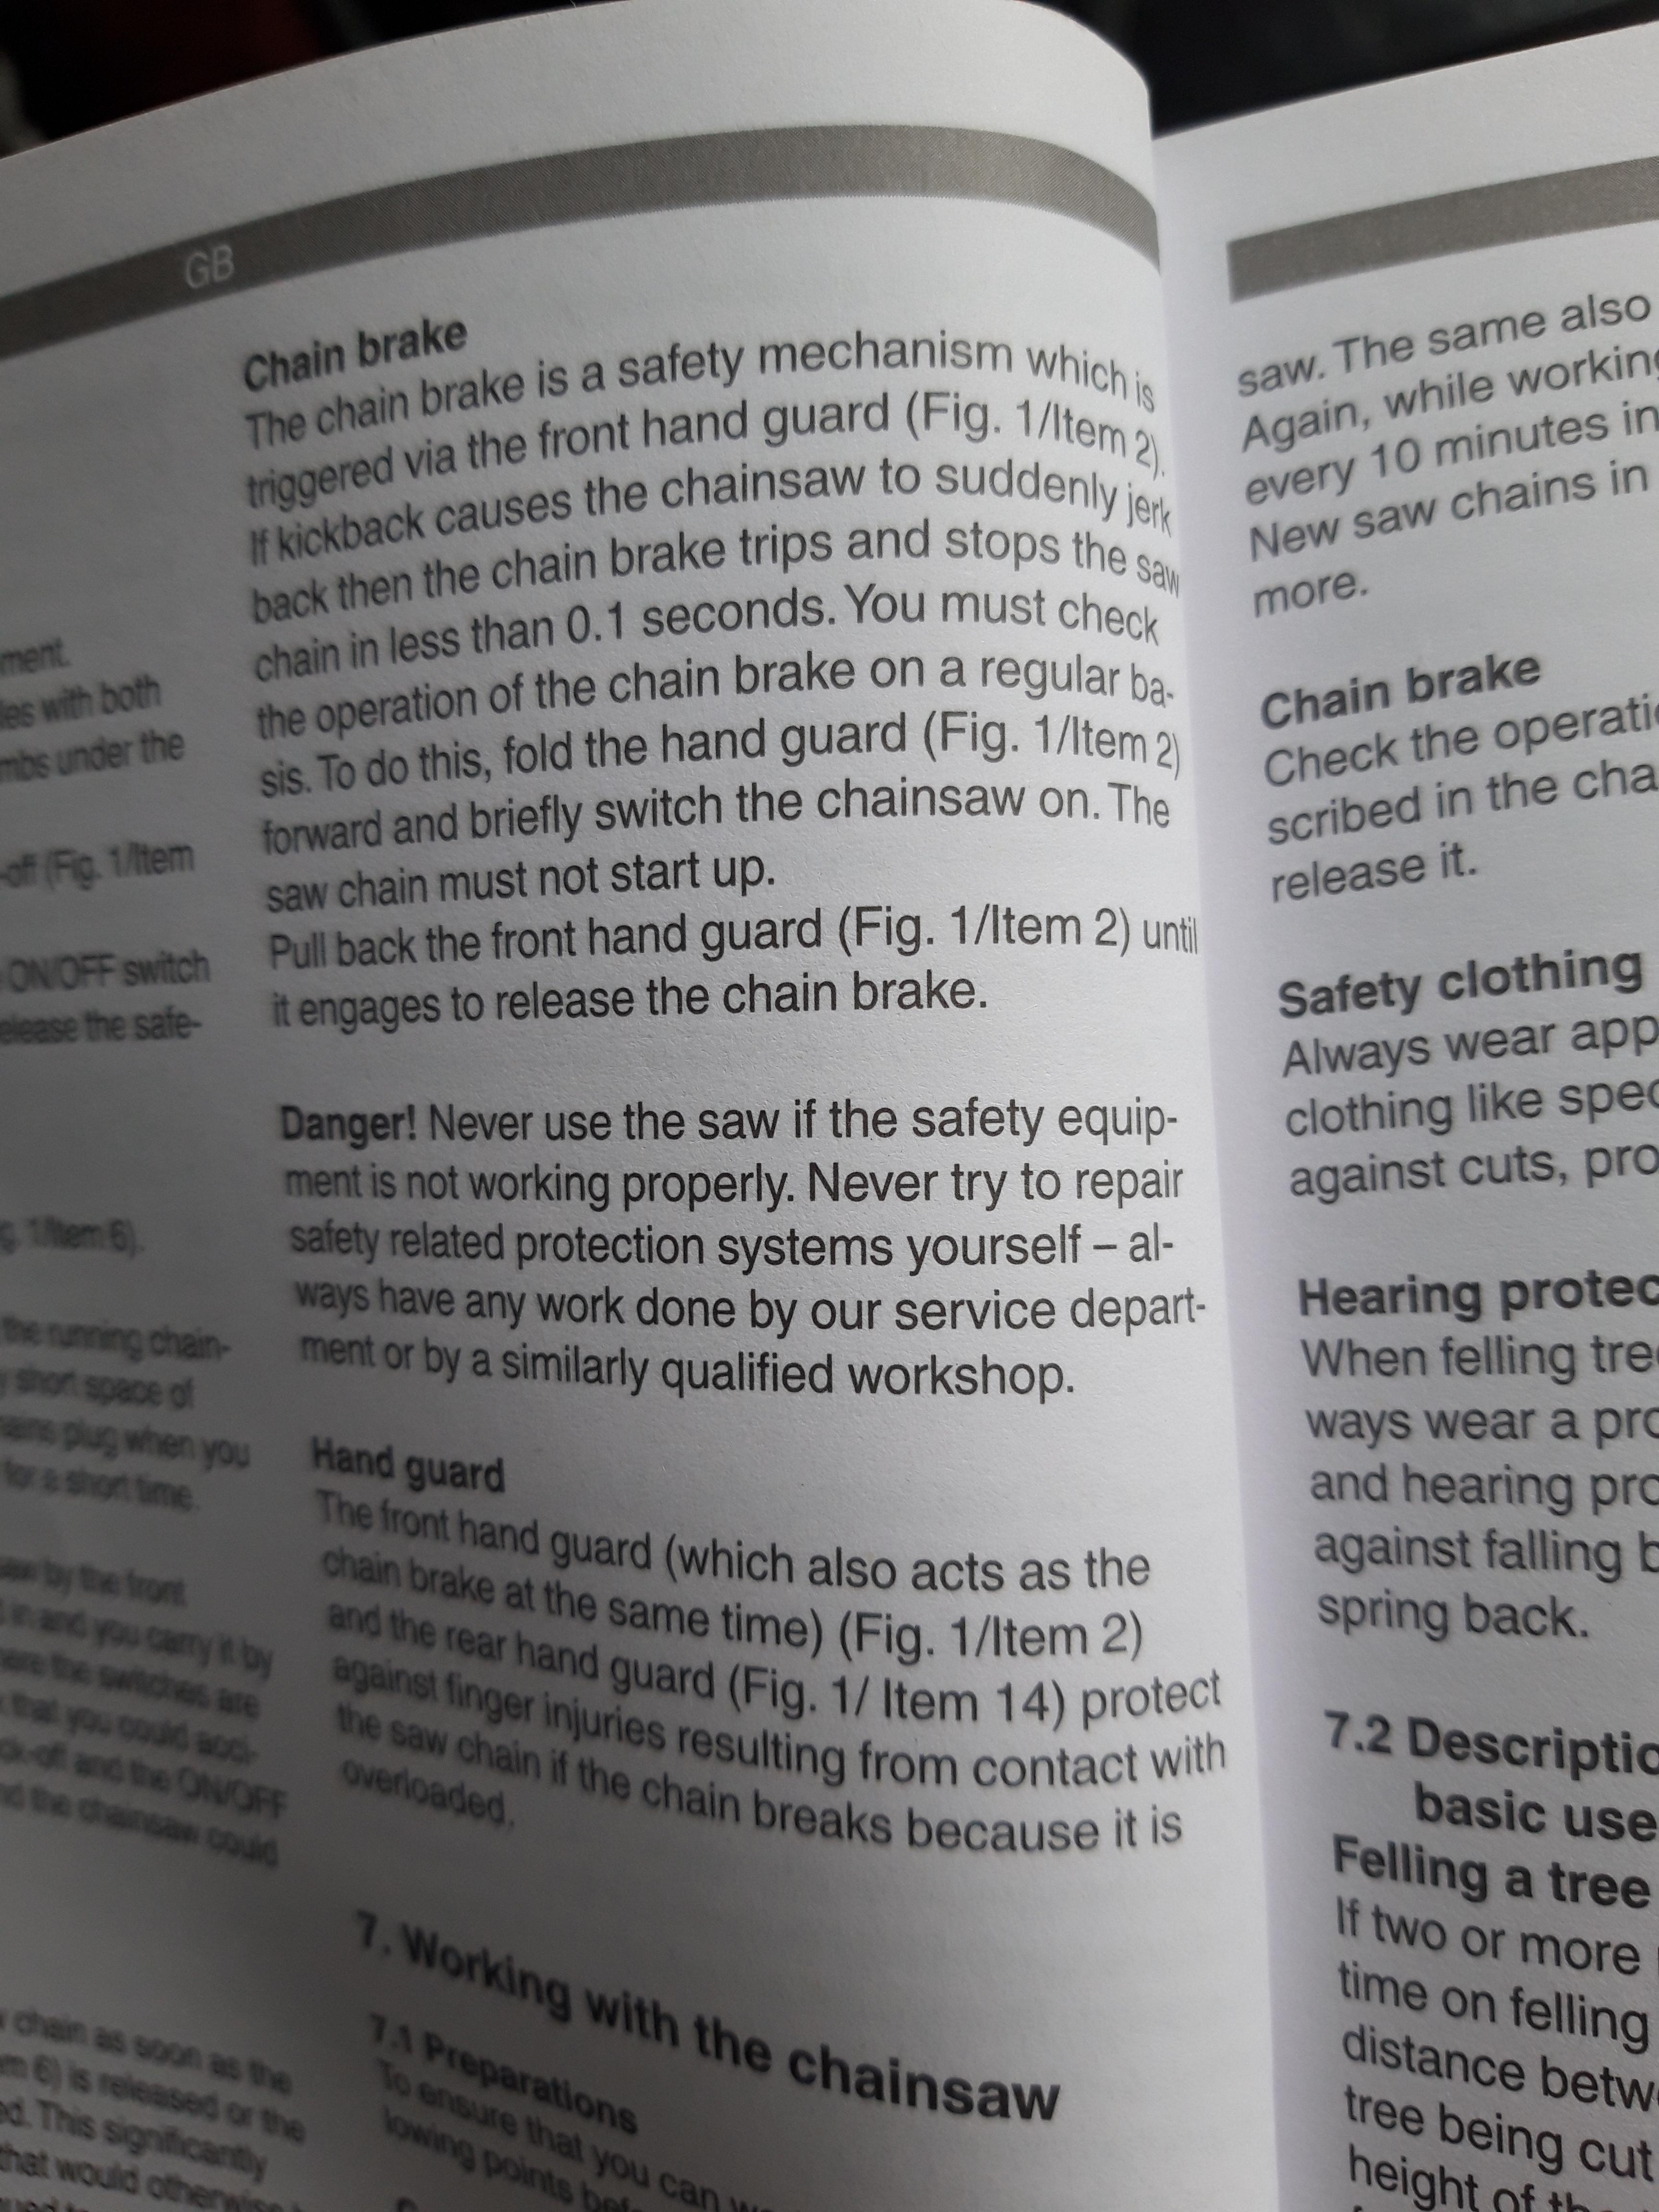
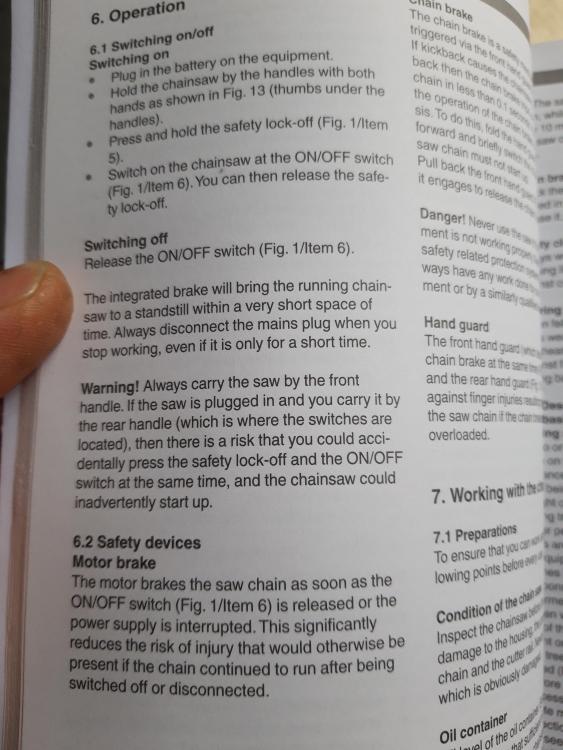
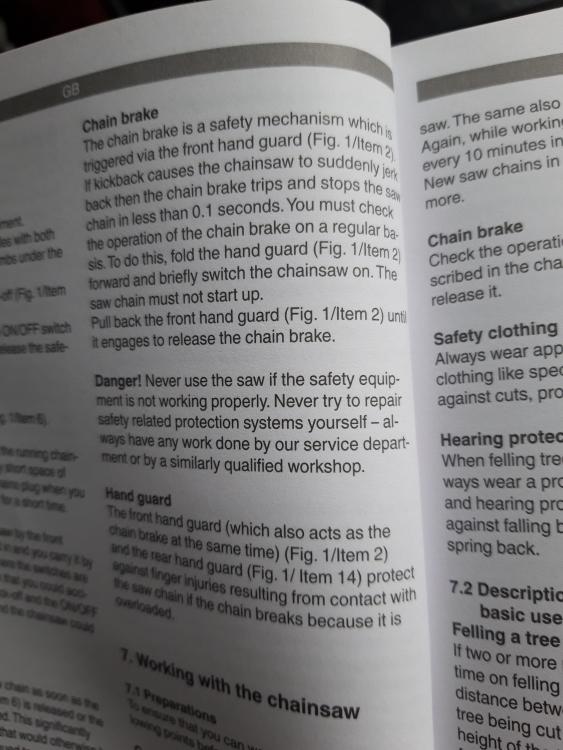
How soon should the chain stop? The hybrid Makita battery powered Einhell 36V jobbie performs far better than I'd expected. 10" dia logs no problem etc. I popped into the BiL and had a chainsaw lesson yesterday at his log pile with him using the tool (close, extended family btw, living in each others pockets so no real social distancing issues). Tbh I'd only popped in to show off the 3D printed battery adapter conversion. I think he was suitably impressed with the grunt/potential leathality of the thing etc so felt obliged to give me some pointers. His smaller Makita aerial job, again 36V stops pretty much the instant you take your finger off the trigger. This Einhell, well it goes on for a bit. The instruction manual is a bit ambiguous. It says first that the integrated brake will stop "within a very short space of time" - it does. Then a litter later that the motor brakes the saw as soon as the ON/OFF switch is released. After that the manual goes on that the chain brake stops the saw in less than 0.1 seconds. That's the front hand guard you knock if the saw bar jerks upwards and that does stop pretty much instantly as they say. It's if you take your finger of the trigger its slower to stop than when the chain brake does it. Maybe I need to video it to show the differences...
-
Does in our house...?
-
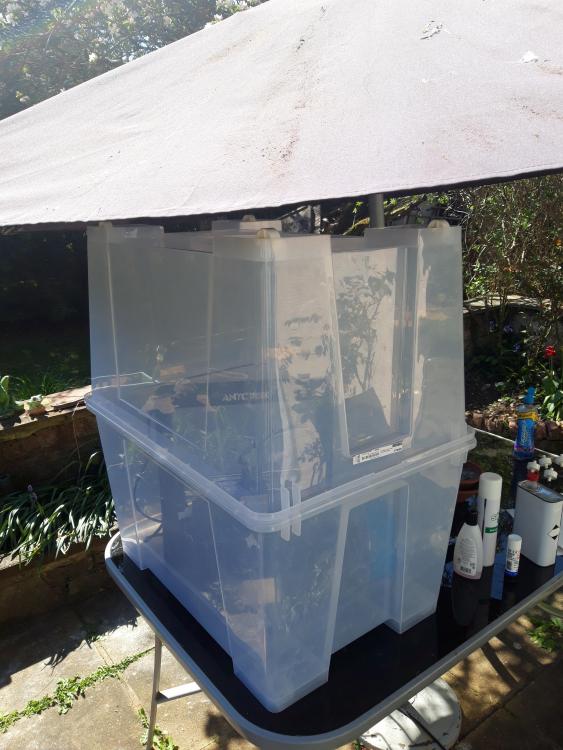
@Temp, ever printed in ABS? My lad tried yesterday afternoon / evening. It's Steadytech ABS PRO which isn't as smelly/ noxious as normal ABS so I'm informed by a regular user. He set up outside on the patio table whilst the day was still hot and printed into the evening. As a nod to keeping everything warm he placed a huge, upturned, clear storage crate over the whole printer. The crate wasn't quite tall enough to touch the table. After approx 21 layers the whole print slid across the bed where it had become unadhered. Also a bit of warping, curvature. I'll ask my regular user contact but I'm reading things like to use hairspray, glue stick, masking tape, ABS slurry on the bed to stop this.
-
Doesn't the "hutting" movement in Scotland make this sort of thing easier? Other than that I'd buy a sloping site and build underground / into the hillside. Get a South facing slope. Dig it by hand over time. Cheaper than the gym. Dig a few extra holes for nosey parkers...
-
?I'll drain it off and get some biodegradable stuff. Have to be mail order I assume at the moment unless either of the garden machinery places is open. Hardly essential tbh, it's enough knowing it all works! As for PPE what's the requirements? It's really quiet compared to a petrol job so are ear defenders required? Saying that I imagine they could protect your ears against a chain breaking and whipping up! I'd never even considered that!
-
????? The Einkita / Makhell hybrid chainsaw only WORKS! It's alright too. No proper oil so I've put 20w50 (for the Capris) in. Video tomorrow / the weekend.
-
My old XP pc has a a mouse and keyboard with the old, round PS2 style connectors (green and purple ports). The pc also has USB ports. 2 on board and 4 on an expansion card. I tried unplugging the PS2 ones then plugging a USB keyboard and USB mouse into USB/PS2 adapters and plugging these into the green & purple PS2 ports. It just booted up with a keyboard error. Then tried plugging the mouse and keyboard into the original, onboard USB ports. Nope. Then tried plugging the mouse and keyboard into the USB expansion card ports. Nope. Then one device in an onboard USB port and the other in a card USB port. Yep! ? I'll try the KVM switch next.
-
I'm after a Makita dual charger. Are the Chinese clone chargers worth a punt / safe? This sort of thing is half the price of the genuine Makita one: https://www.ebay.co.uk/itm/Fast-Rapid-Battery-Charger-for-Makita-DC18RC-Li-ion-LXT-7-2-18V-Double-Twin-Port/254452036281?hash=item3b3e85f2b9:g:9rcAAOSwKsRedcj~
-
All soldered up and tested. The jury's out. Need to try with good batteries. I'll assemble the chainsaw with the blade etc tomorrow and try it: Short video:
-
The 1m copper L gets put in and bent over. Found it easiest to do with a bfo screwdriver with the end ground flat. one leg is 20mm that gets bent and soldered, the other leg 21mm. You MUST get them the right way around! Ready to solder. Just realised I'll have to do this all in situ and risk melting the PLA behind: The "springy" bits that engage with the blades on the Einhell tool were next. Took a stab at bending them over a small drill bit then levering the copper with the same bfo screwdriver: Which is how I unfortunately managed to break the clip that locks the adapter to the Einhell tool (again)! Definitely because of the layer orientation I'm sure. Nothing to do with my heavy handedness.....Going to super glue it and squirt a shot of CT1 down behind.
-
Cutting the copper battery terminals for the adapter was fiddly. The rectangular ones are good. The L shape ones need a little fettling with the needle files: This is the Makita battery side. The leg of the L gets bent over and soldered to the face of the rectangular bit sticking up. That engages with the Makita battery. The other side that engages with the Einhell tool. I'm pointing to the other leg of the copper L. I have to "kink" this leg to make contact with the Einhell tool;s battery connector "blades". The soldering might be fun. I don't want to burn the PLA when I do it. Might print off a sacrificial "former" to hold the pieces for soldering.