Jump to content

Tiling En-suite


This blog post is out of order, I’ve lots of other content yet to post, but thought it important to capture in the moment.


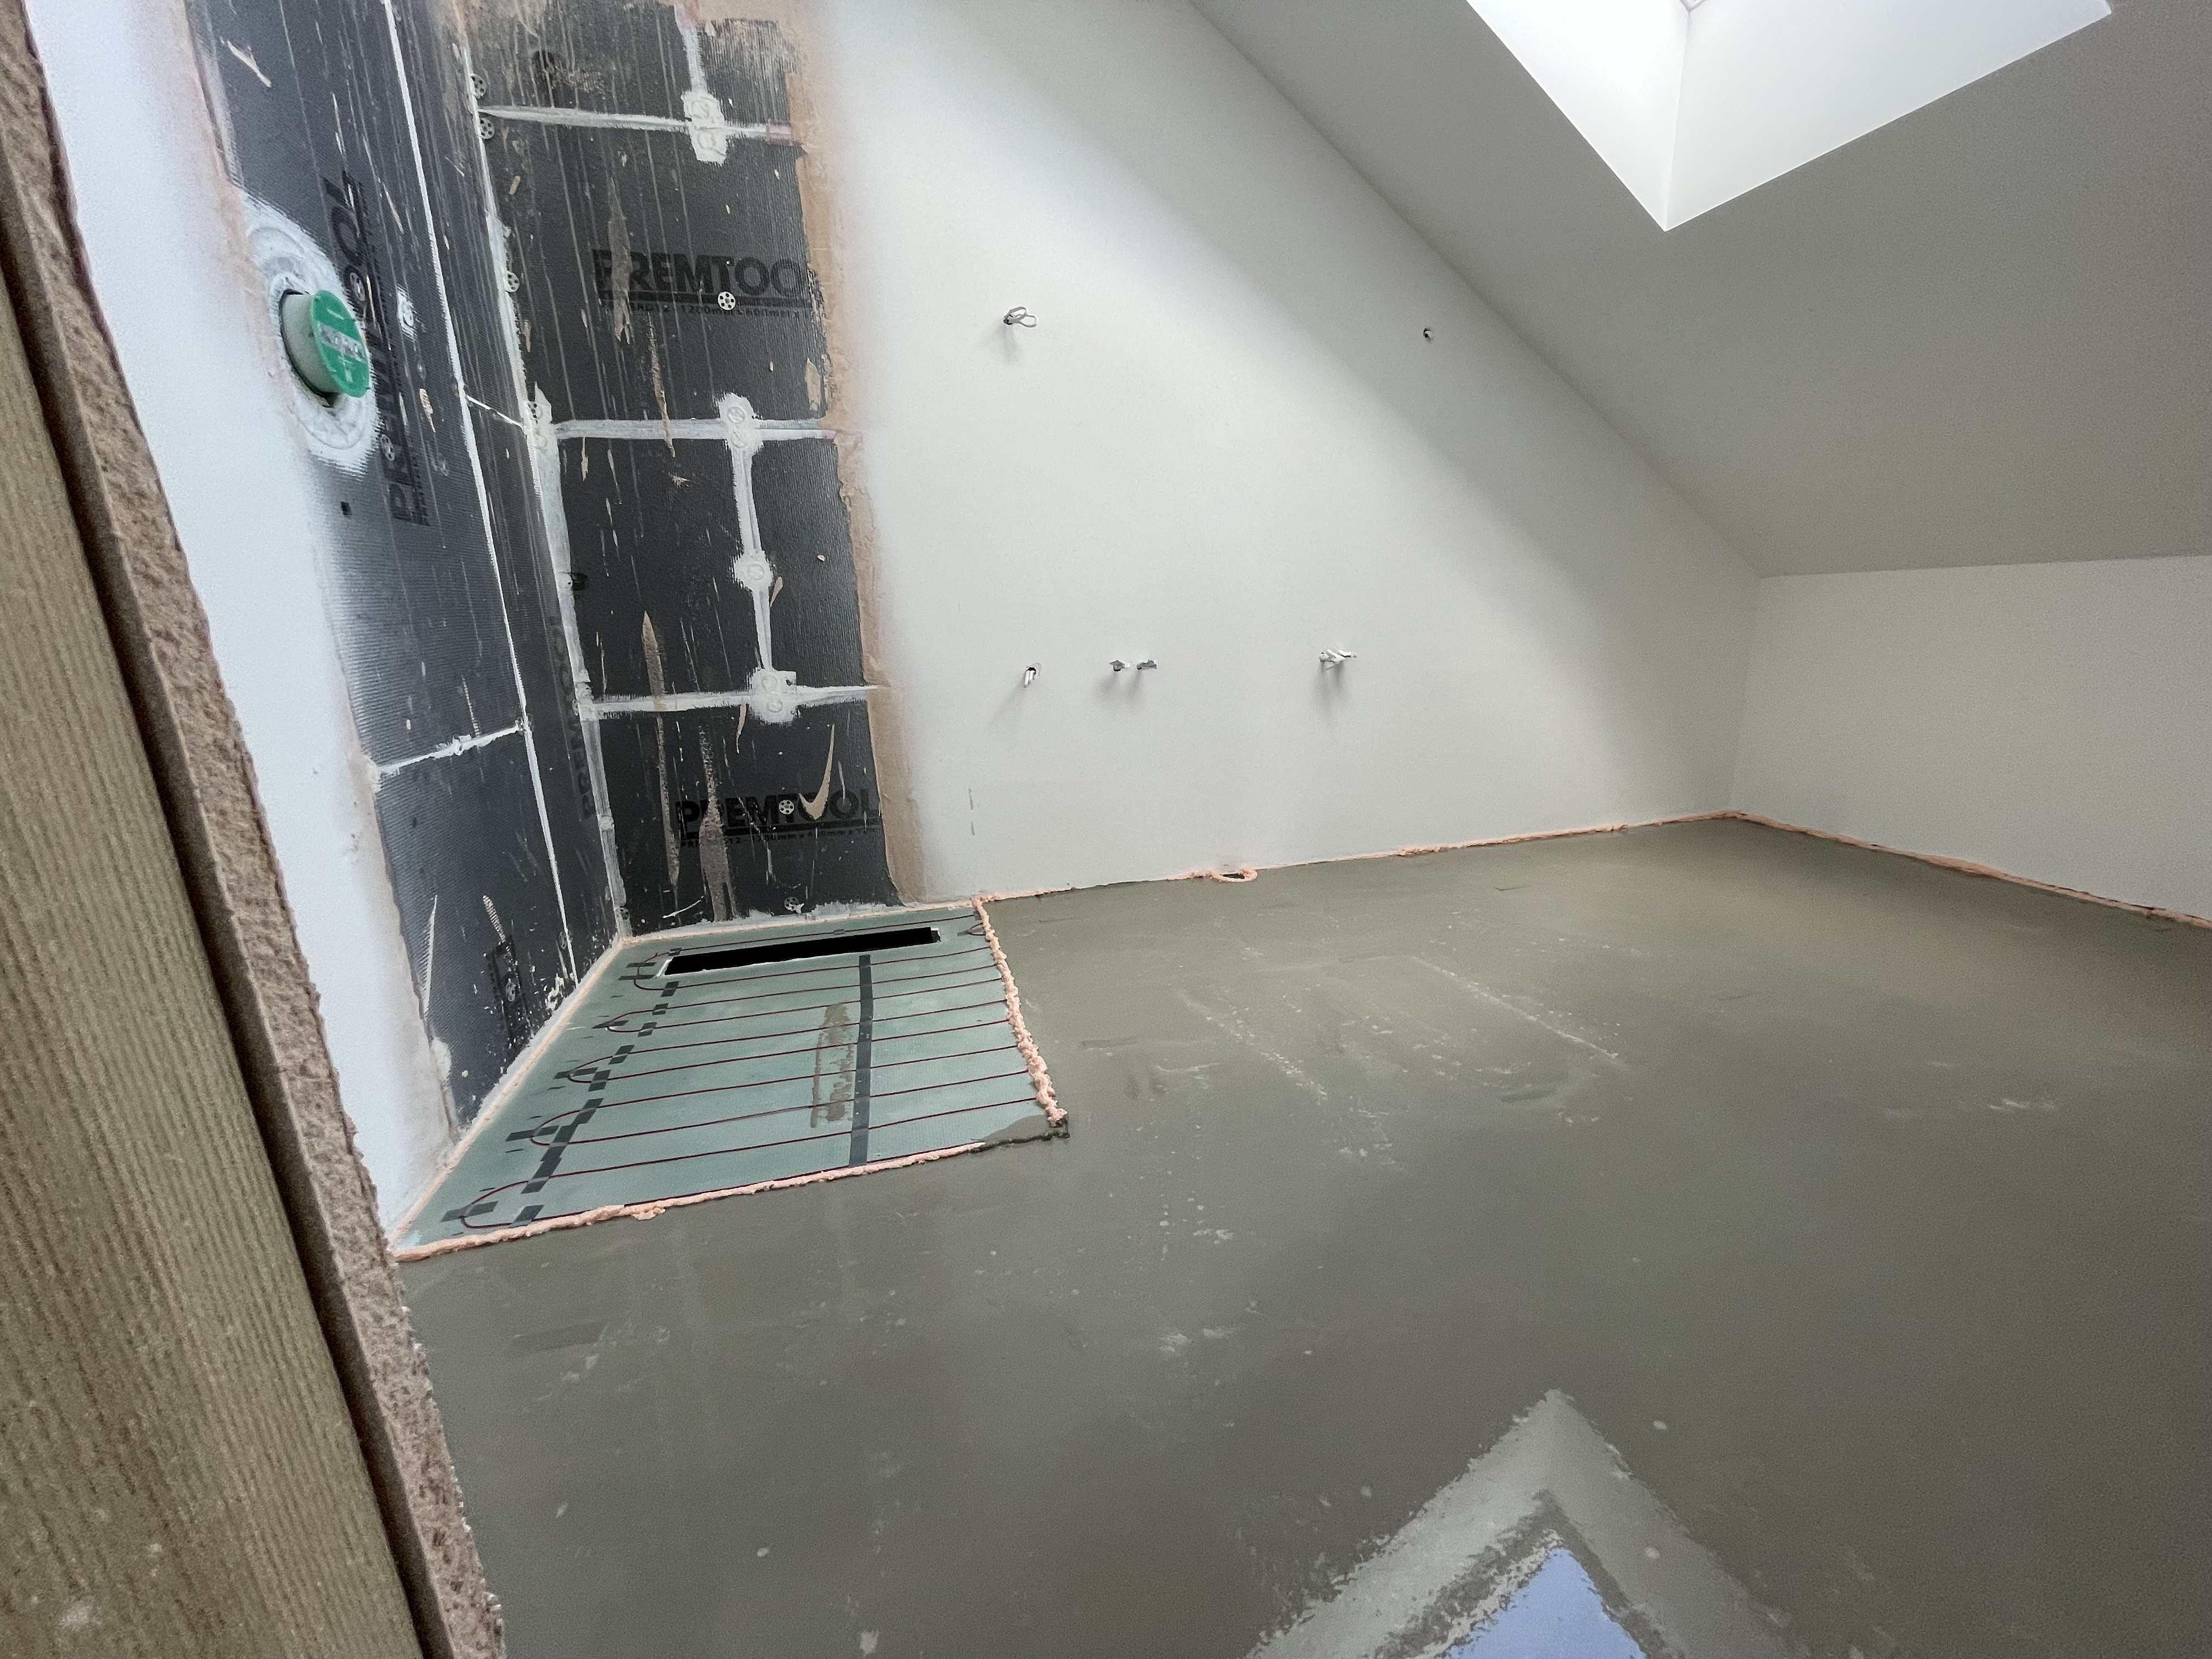
I’ve spent the last few days preparing my en-suite floor for tiling.


 cut out the 22mm p5 chipboard ready for the shower former.

IMG_1298.thumb.jpeg.7dd7ad5890e2de657ab835db6a3a6b5e.jpeg


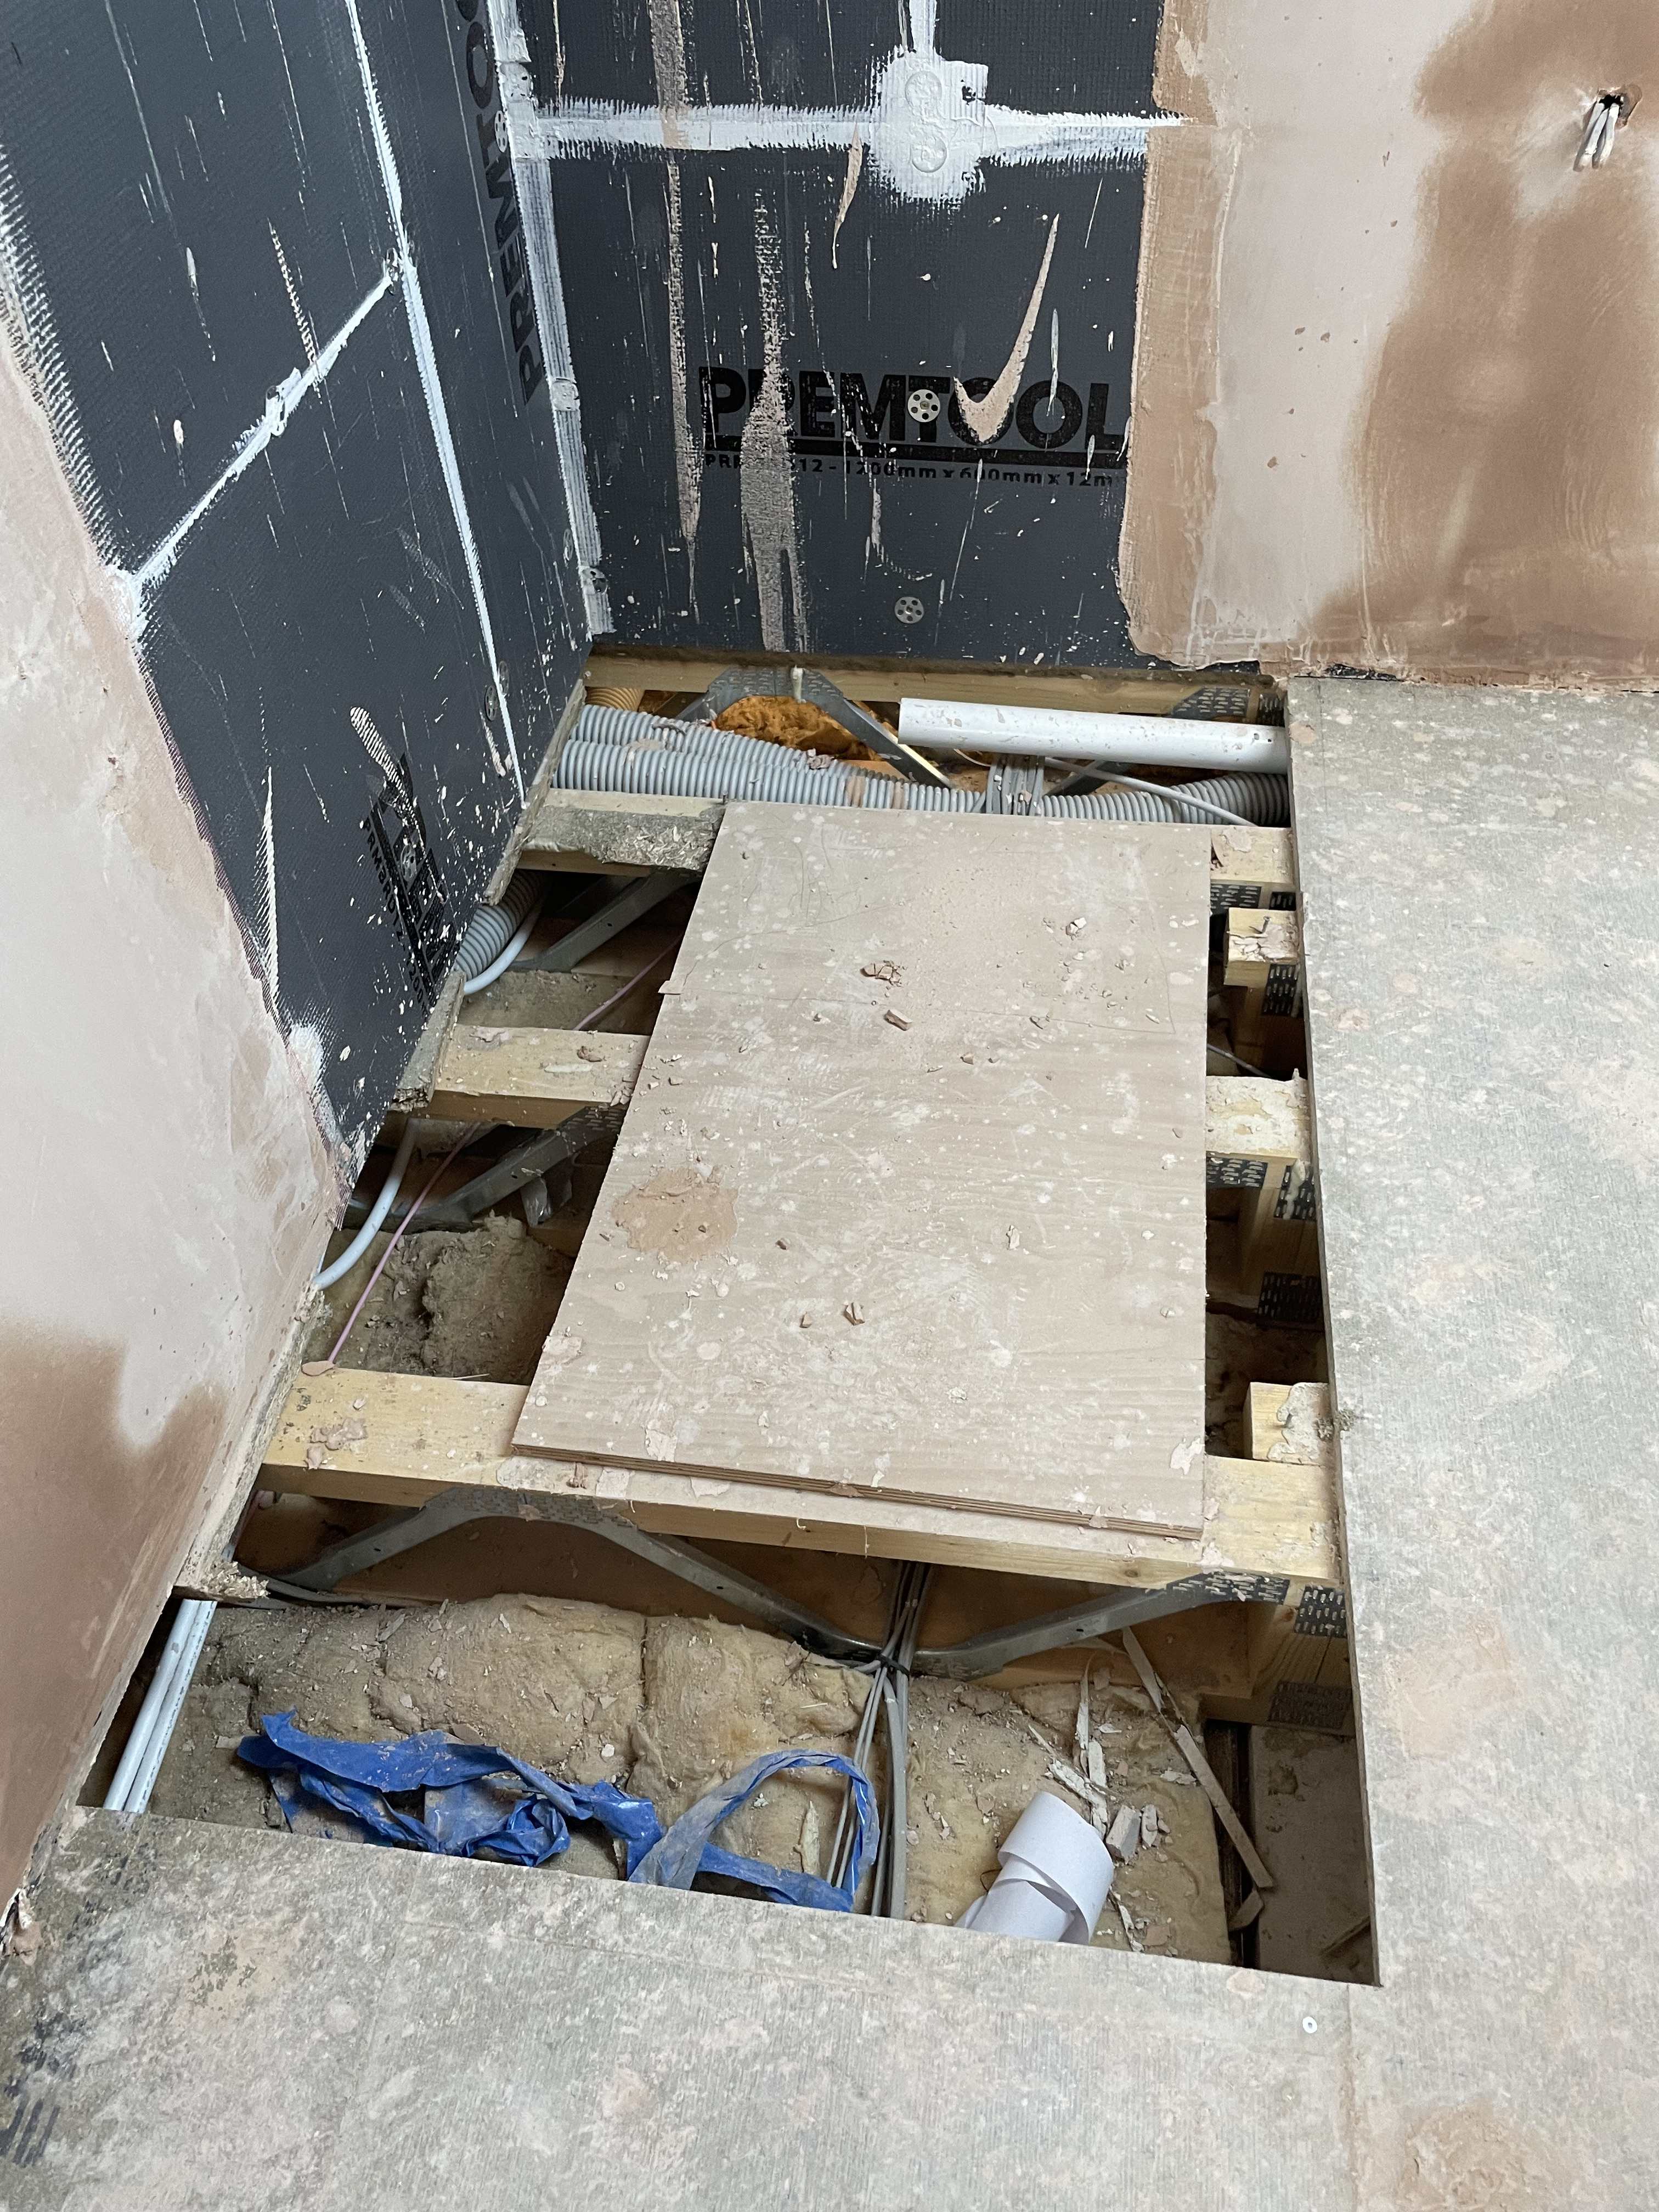
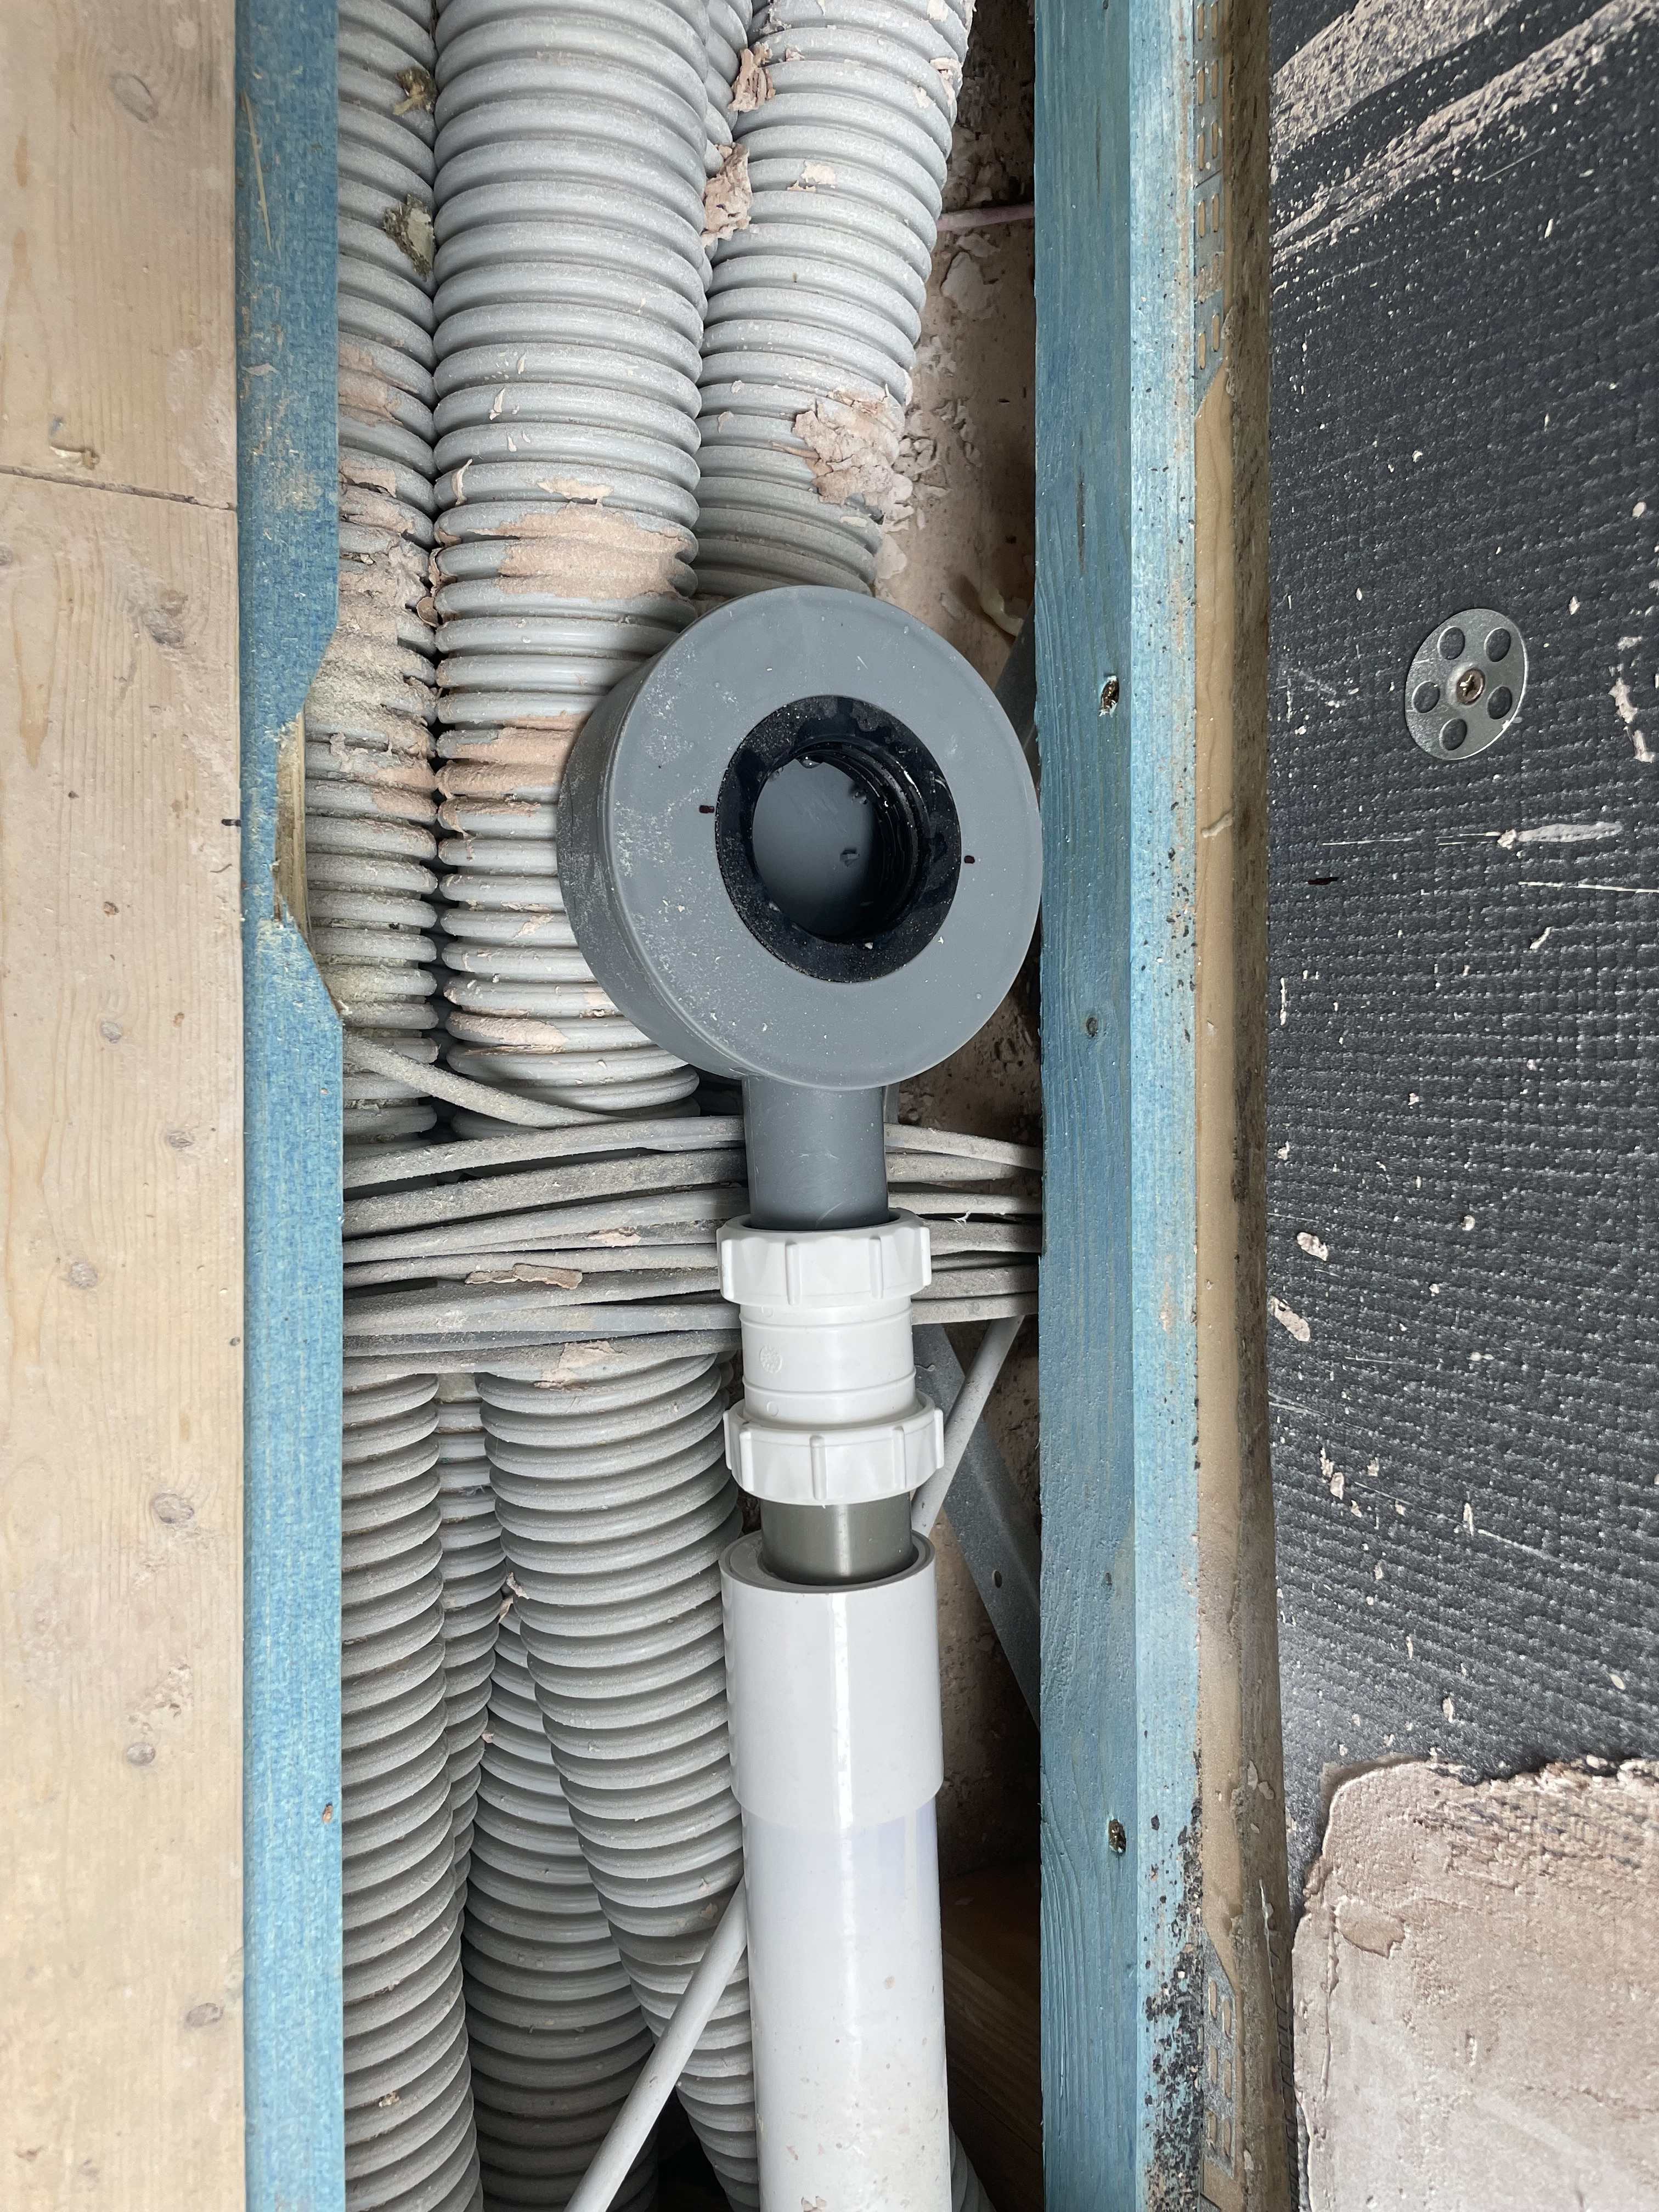
plumb the 40mm shower waste to a 50mm solvent weld pipe, which was a smaller size than the 40mm solvent weld adapter I had. Turns out compression fittings are able to go from 40mm solvent weld (42mm OD) to 40mm OD shower waste.


IMG_1408.thumb.jpeg.33cca541f5c74b7c78611197e28af7d6.jpeg

add batten and 18mm plywood level with the post joists, prime chipboard with SBR.


IMG_1412.thumb.jpeg.896b240134b7c03acb65ae38dff8b93b.jpeg
 

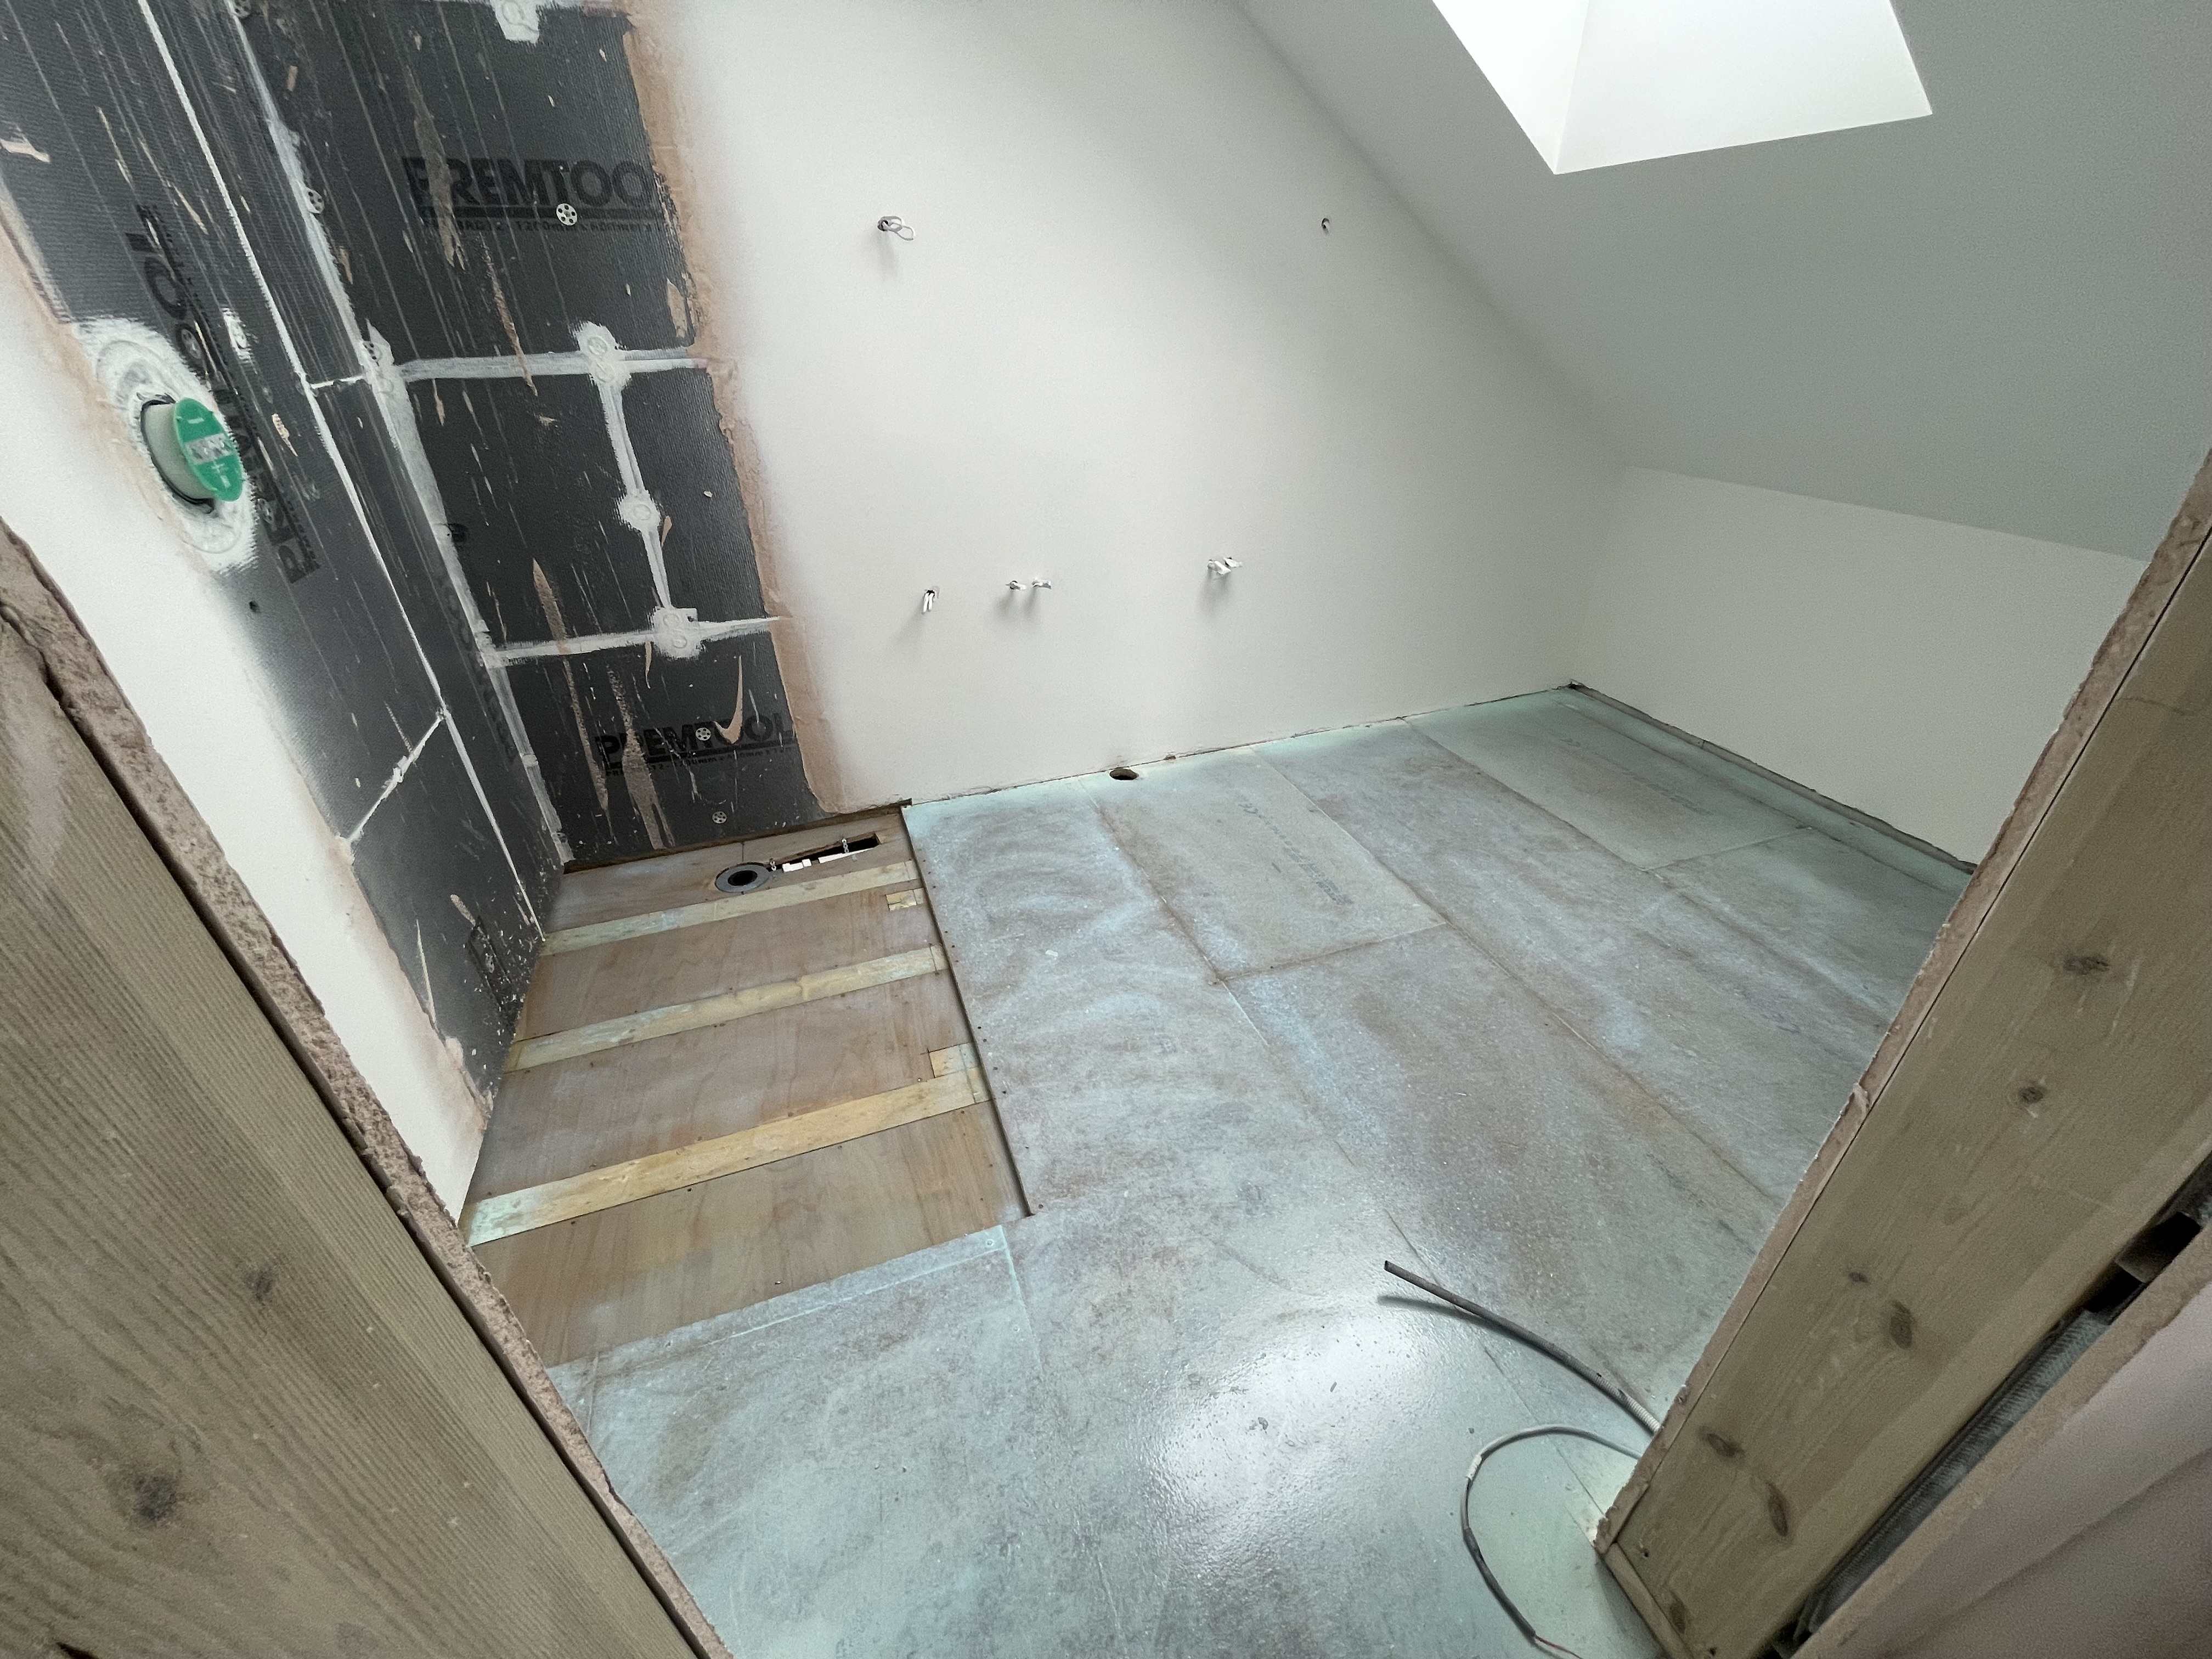
Lay 12mm tile backerboard (could have got away with 10mm, but went 12mm to match the walls, less waste) on tile adhesive, and screwed at 300 centres. Install 22mm lussostone former on top of the ply, on a bed of tile adhesive. Use a CT1 like mastic for between the joints for waterproofing. 


IMG_1413.thumb.jpeg.13a47ba4780bb6ed9e9e16e1496ae5a1.jpeg


Lay electric UFH at 100mm centres, just to take the chill off the tiles, not intended as a means to heat the space. set packers to level, ready for self leveller. Foam gaps.


IMG_1414.thumb.jpeg.bb9af23797409c9b8ea1f062d2d9436c.jpeg
 

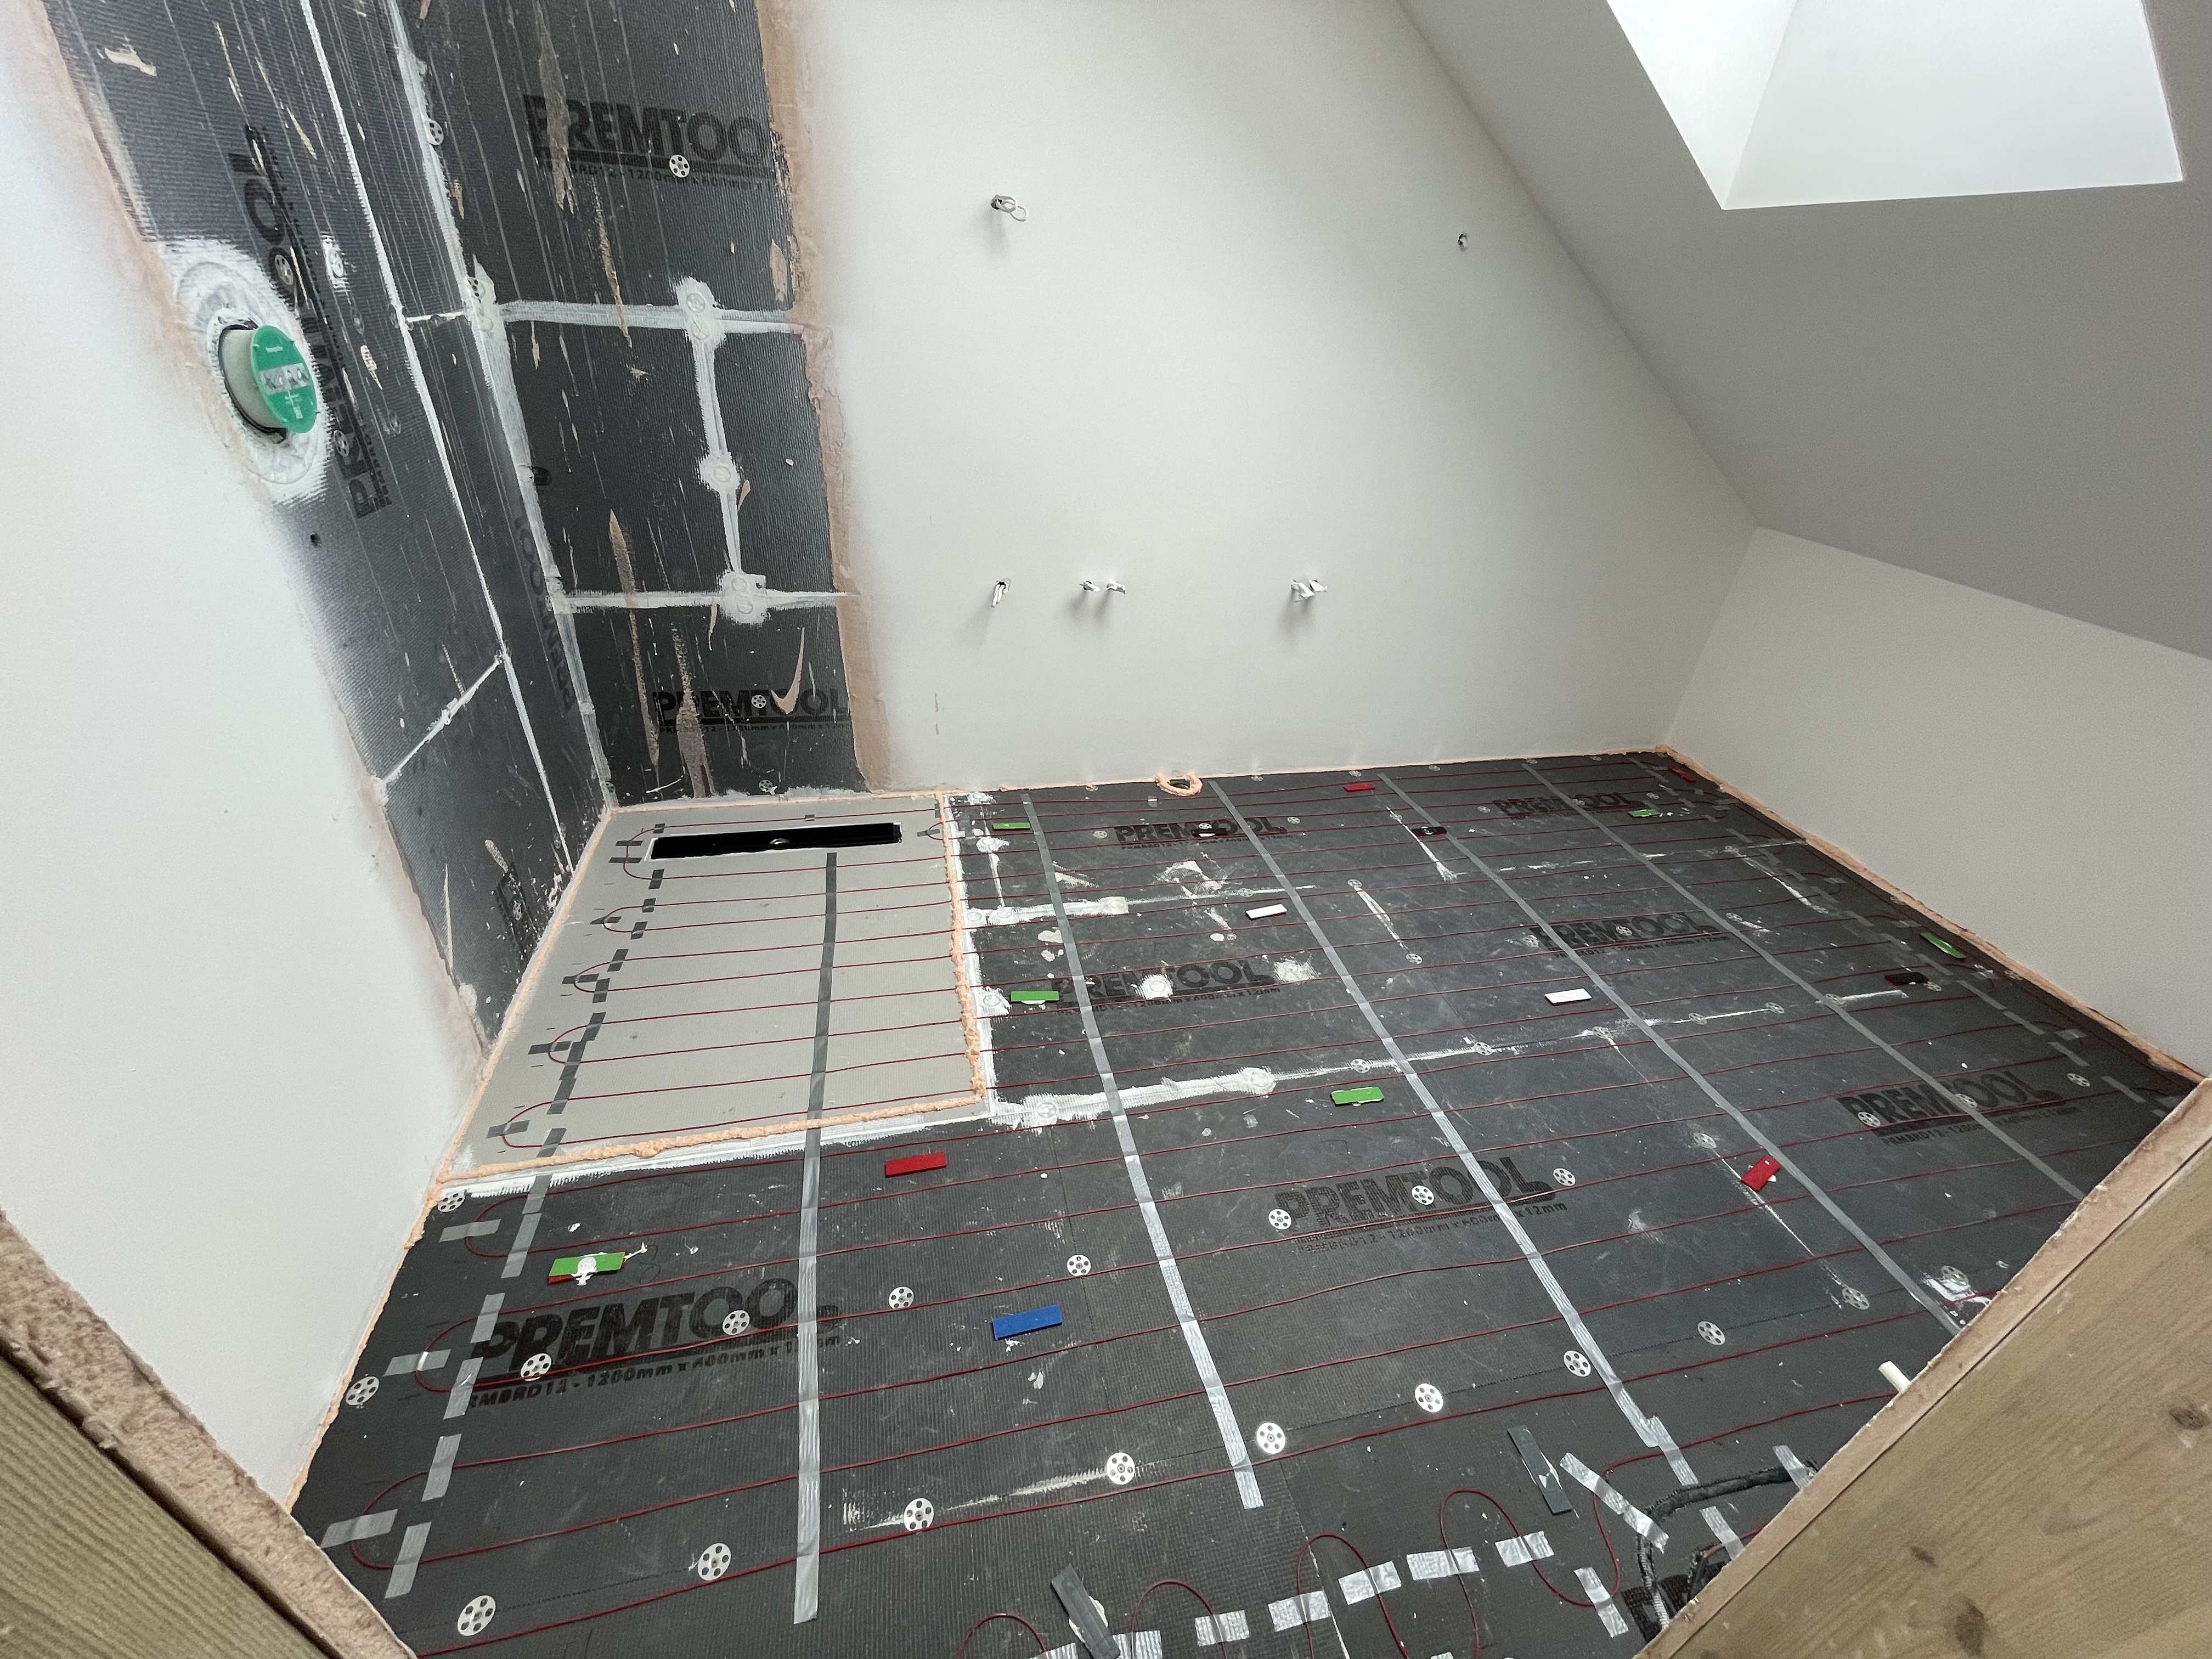
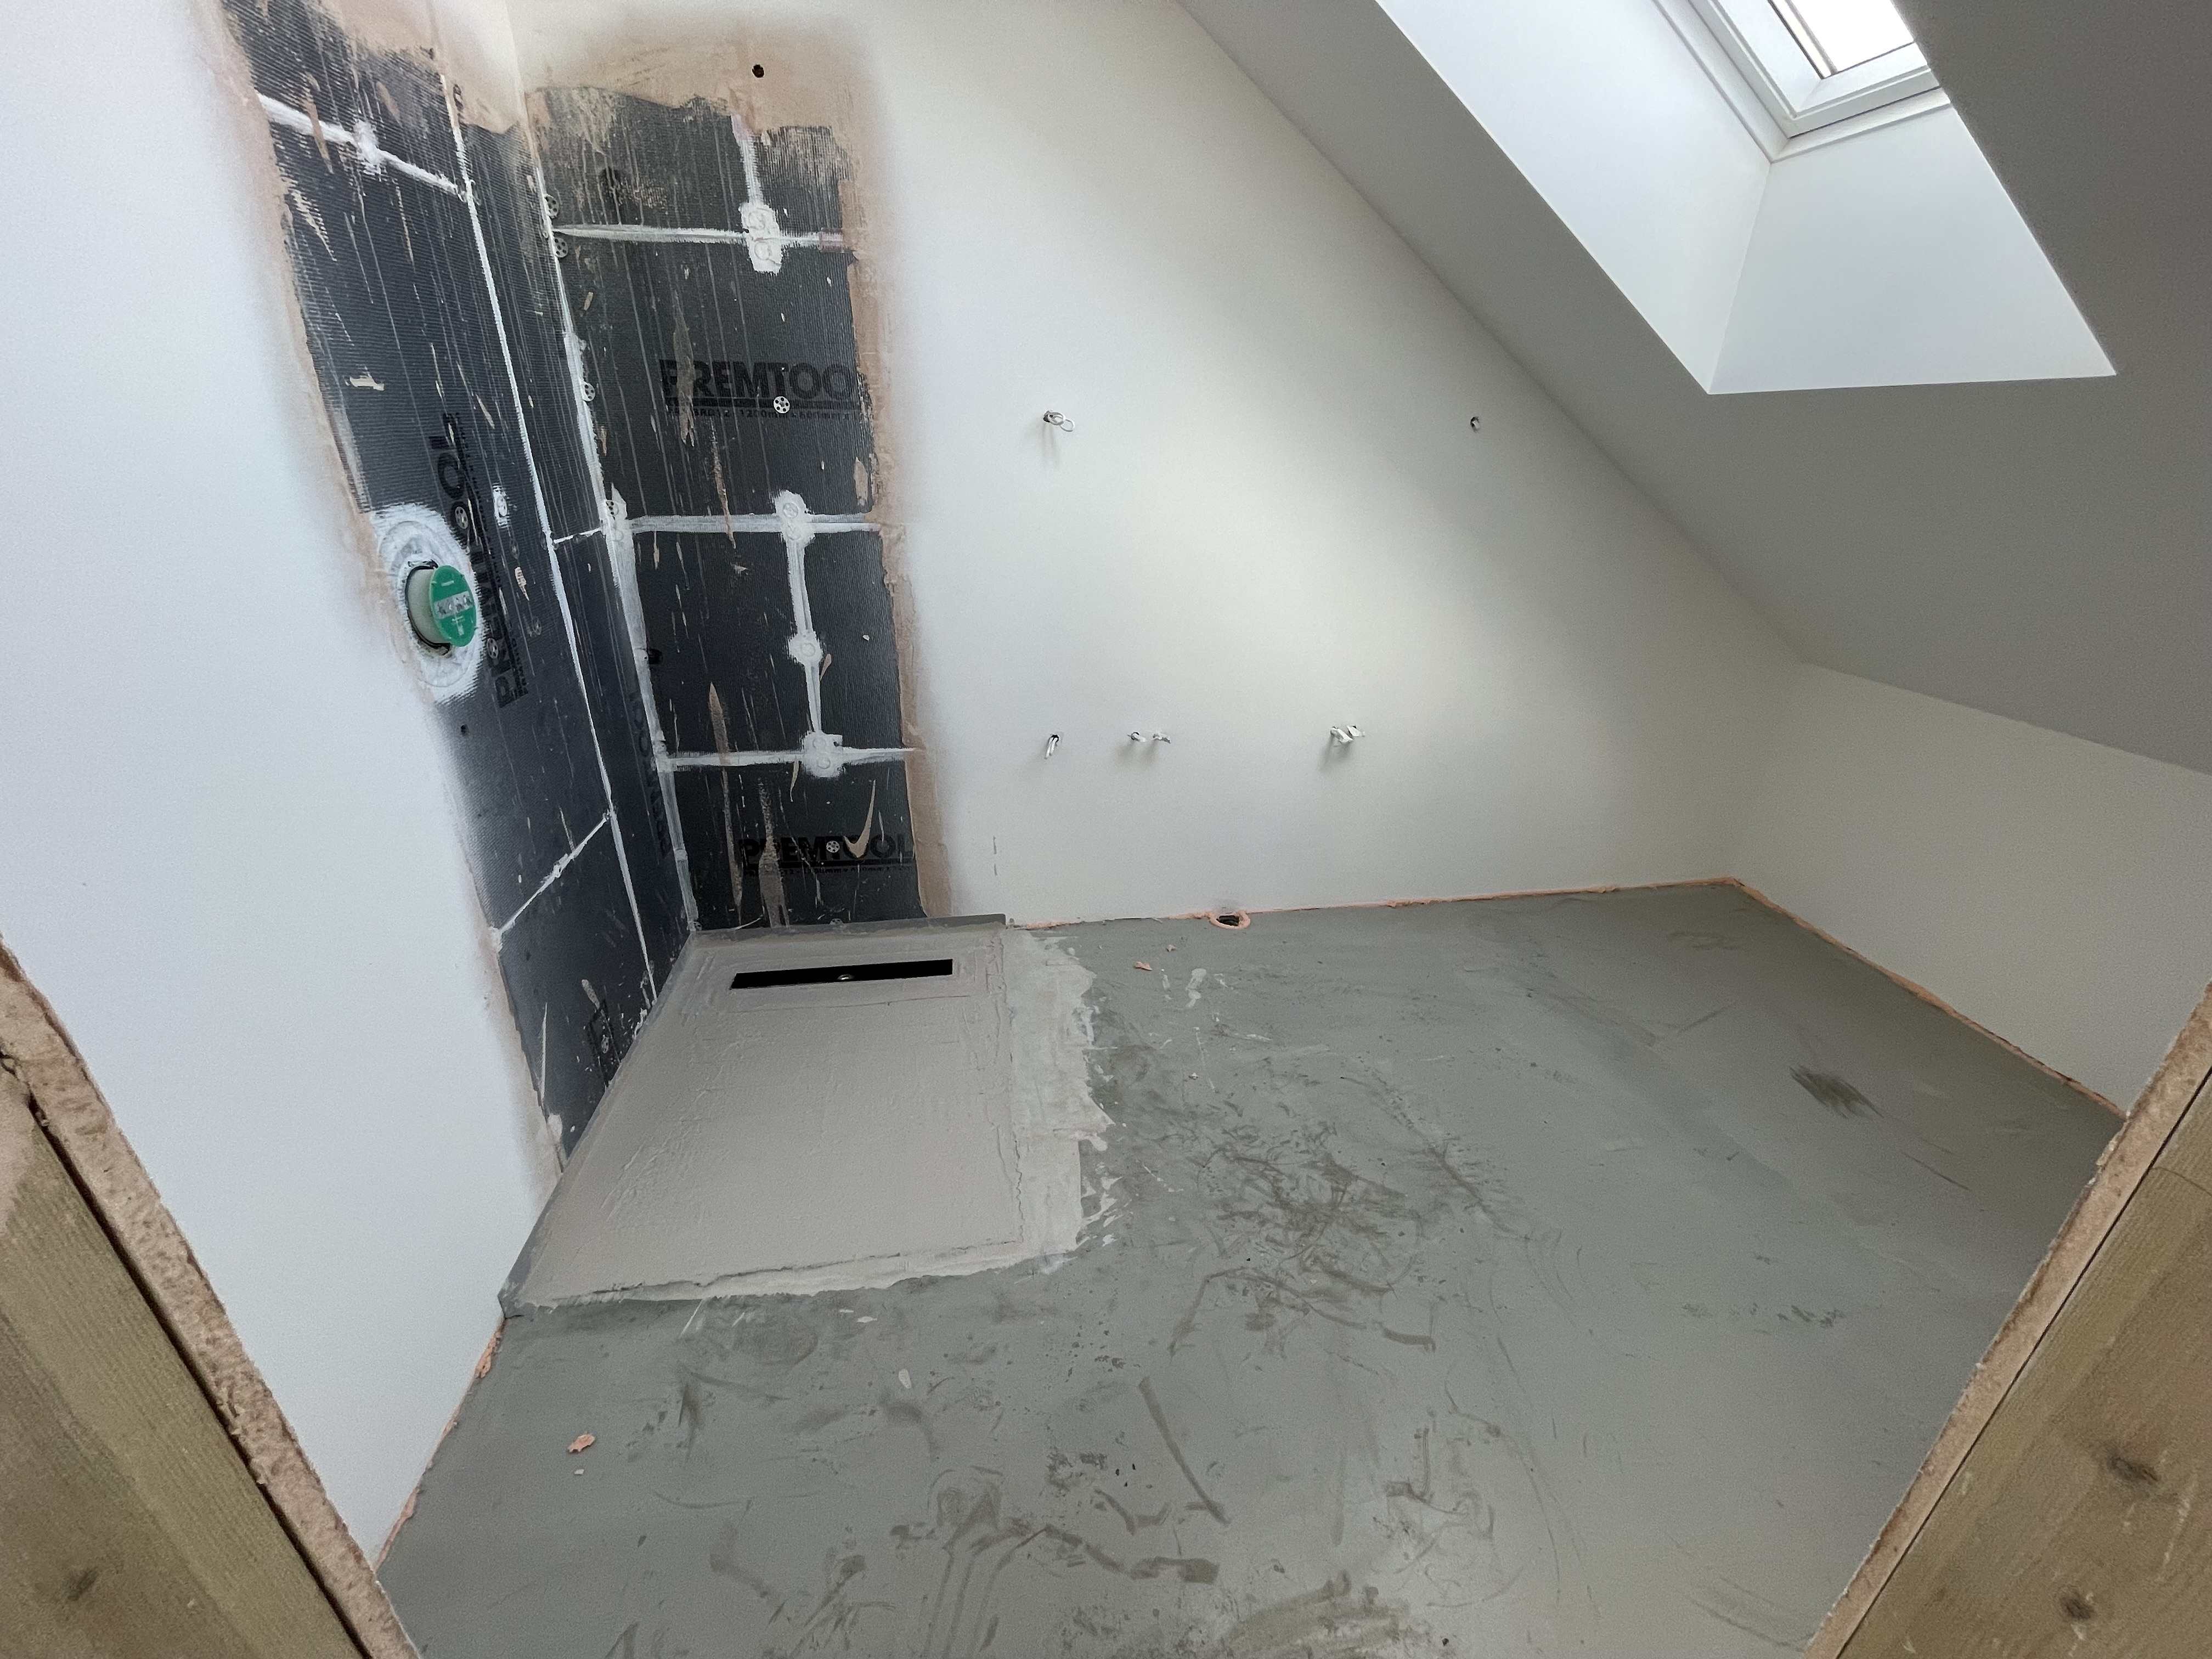
Pour flexible fibre self leveller, trowel to packers, spike roller. (Note, the fibres really gnarl up the roller, need tclean between buckets)


IMG_1415.thumb.jpeg.6f75fd5cc5588e6cc564a6b0a2325148.jpeg


Grout flout tile adhesive over the former to the built in falls. Self leveller would ruin this.


IMG_1422.thumb.jpeg.36346b8873b9d172fa20282932be41db.jpeg


Dry lay marble tiles and cut to falls. I was using an electroplated marble blade in my grinder, meant to reduce chipping, but went blunt real quick and ended up ruining a couple tiles, switched to a turbo blade that was actually pretty good. In the future i wouldn’t use the electroplated blade. 


IMG_1427.thumb.jpeg.e301703d70be4ca88873524db392ba20.jpeg
 

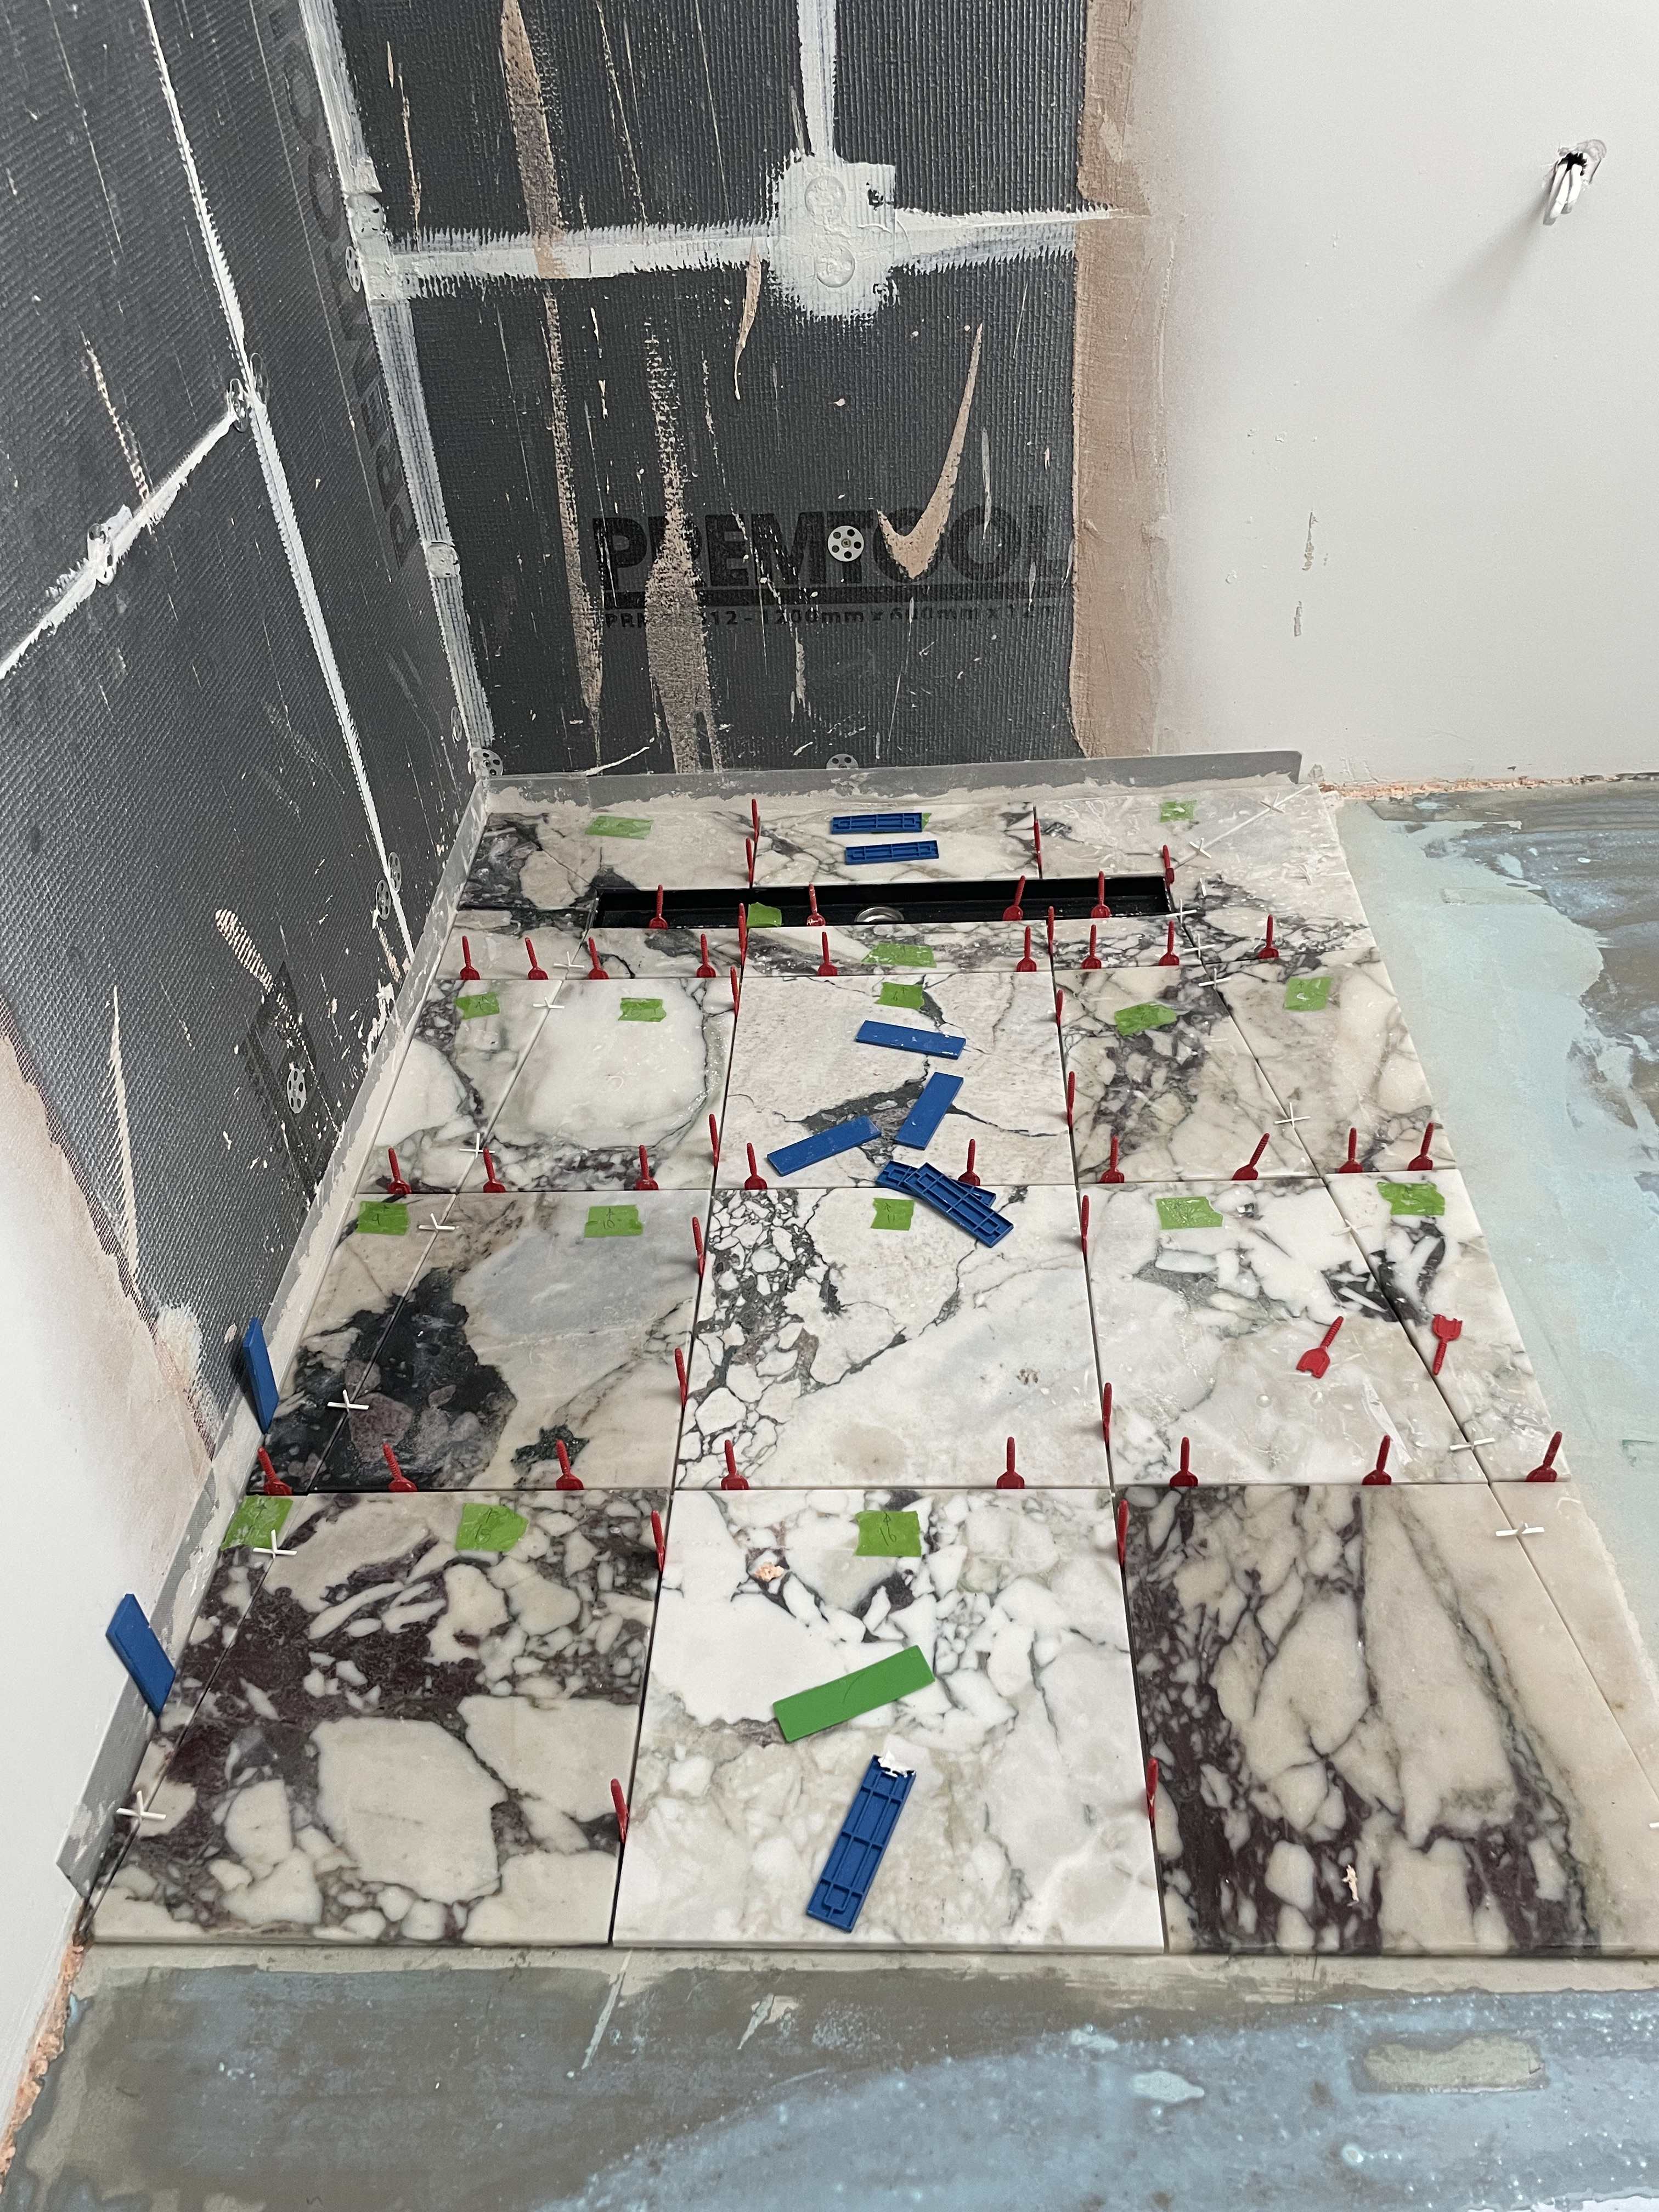
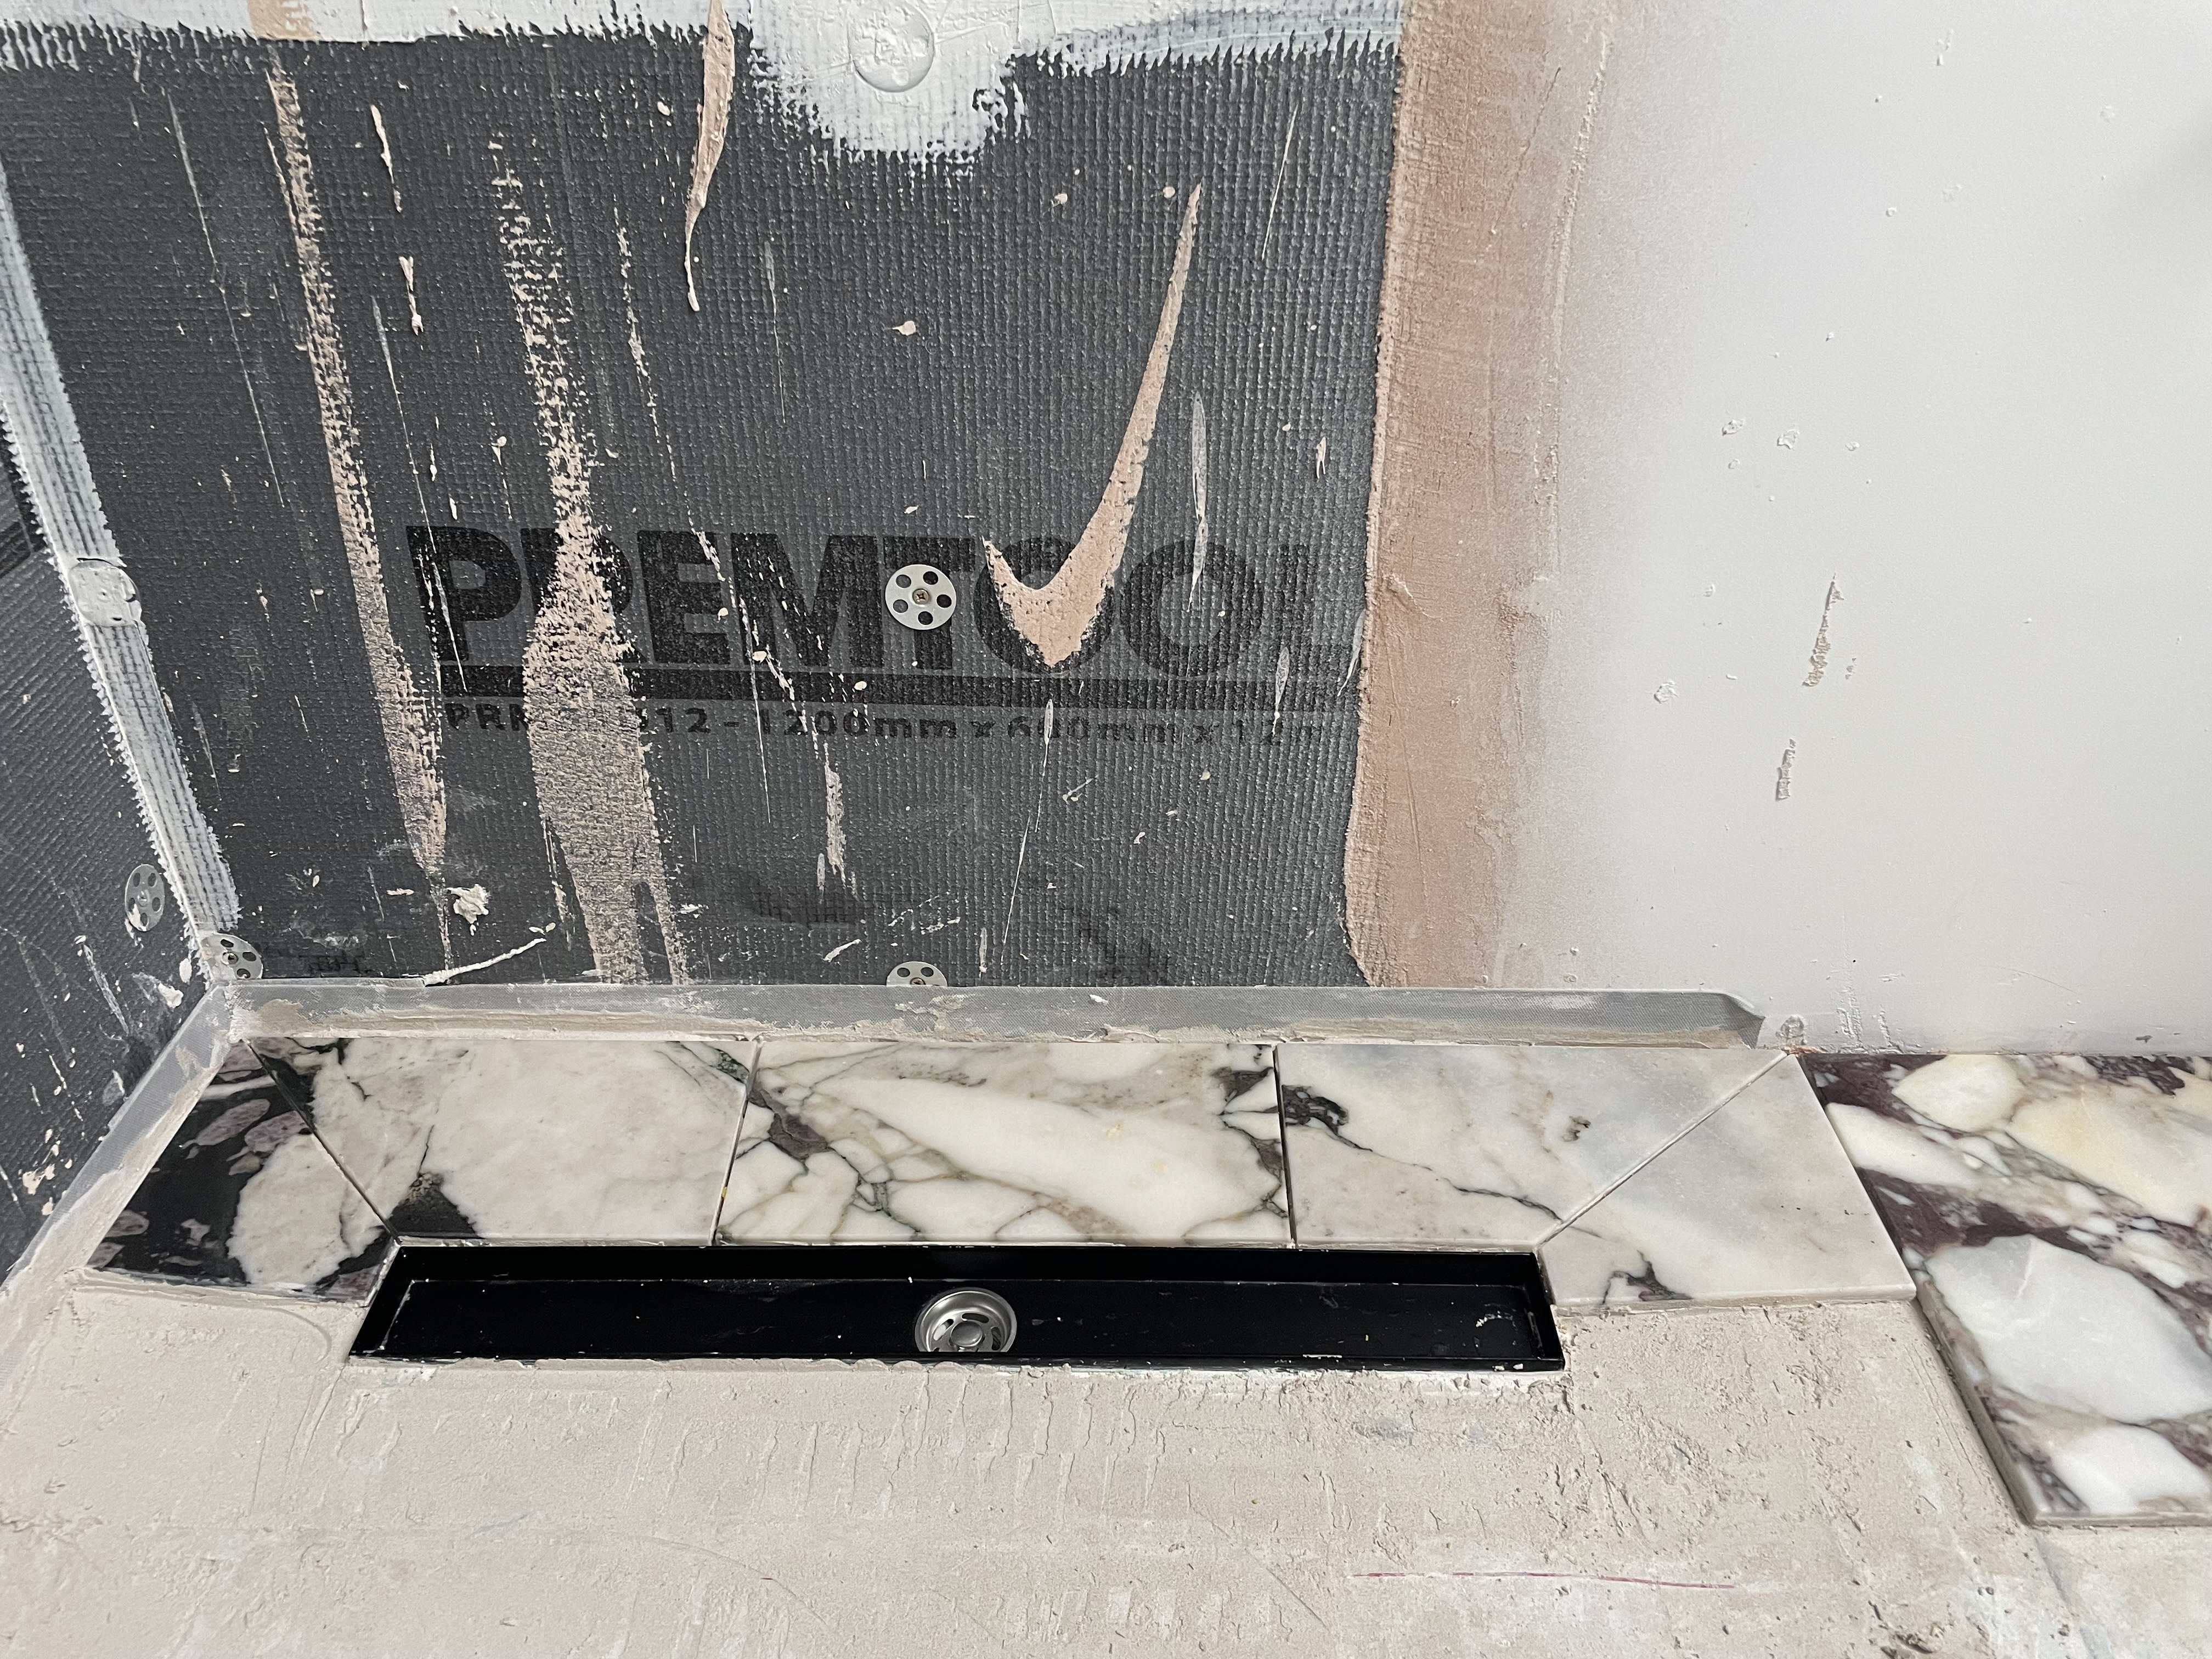
Tonight I’ve just started to tile and really struggled. Because I self levelled the room and not the tray, I built up 7mm up to the edge of the former, but only spread 2mm adhesive over the top wires in the former. That leaves a 5mm deficit, that needs to be made up over the whole former whilst tiling. That’s a lot of adhesive if you add in 3mm adhesive bed going over the rest of the room. 

I laid 3/4 of the former, but I ripped 2/4 back up again, I was using rapid set adhesive and i wasn’t able to get it to a standard I was happy with, joints out of line, excessive lippage. 
 

if I were to do it again (I’ve got 2 more formers to do), i’d sacrifice a dead level room, to reduce build up at the edge of the former. The former is designed with built in falls, and by building up, I’ve destroyed this. I could have also gone 2-3mm lower with the self leveller and still achieved a level floor, given 3mm adhesive would still be applied over the top of the bare UFH in places.


what a nightmare!


IMG_1429.thumb.jpeg.2d317a1aef8e1e1d8d8d488800d27e0a.jpeg


Edited by LiamJones

  • Like 3

6 Comments


Recommended Comments

Nickfromwales

Posted

@LiamJones


"if I were to do it again (I’ve got 2 more formers to do), I'd sacrifice a dead level room, to reduce build up at the edge of the former. The former is designed with built in falls, and by building up, I’ve destroyed this. I could have also gone 2-3mm lower with the self leveller and still achieved a level floor, given 3mm adhesive would still be applied over the top of the bare UFH in places.


what a nightmare!".....


First off, a bloody commendable effort mate, just dust yourself down and get ready for the next one.


Firstly, don't use rapid set adhesive you mad bar steward!! Standard set is your friend for intricate stuff like this.


Secondly, my thought as to where this went wrong (imho) after it was all going so right :) is as follows.


When you set the former into place on the woodwork you missed one vital step, and that was to put a 6mm (or x mm) layer of plywood down first to raise the former to meet your (predicted) top of SLC, that simple mate. On the next one, work this out to the mm and fit either ply or insulated backer board / whatever works, and then the world will seem a happy place and the tiling will be a doddle ;)


I fit the UTH wire with the suggested tape etc, but it then go around after, painstakingly, and mitre bond the wire flat to the floor everywhere it doesn't want to lay absolutely flat, and then you can put prob half the SLC down.


Lesson learned for the next one, third ones a charm 👍

  • Like 2
Nickfromwales

Posted

Oh, and get some tanking solution on top of that tanking strip!!!!

  • Like 1
LiamJones

Posted

Hey @Nickfromwalesthanks for the comment last night, gave me some confidence and motivation to go at it again today, armed with a bag of STANDARD set adhesive 🤣. I had been using rapid, because the tile supplier recommended rapid to prevent the adhesive being sucked into the natural stone and discolouring. But, id rather a good tile job, than worrying about discolouring. 
 

Mixed the bag up in 3rds. My confidence really took a knock after smashing whole bags of rapid set downstairs for the limestone floor!

IMG_1435.thumb.jpeg.0bb7fa64f1630652283ae6a54ab05aea.jpeg


and what a difference that made, gave me so much time to lay and adjust, getting it all perfect! And ended up doing significantly more.


IMG_1431.thumb.jpeg.c52c4e024ff467cf226bf3dd5bc4454b.jpeg
 

but yes, next time I’ll set the former to the height of the SLC minus 2mm for UFH cable, not the height of the tile backer board! 
 

the SLC has made the rest of the room a doddle to tile! So I forgive it for making my former a nightmare. Could probably have got away without the levelling clips, but they’re a nice safety net.


IMG_1432.thumb.jpeg.37863cb2b398d5508335a55b0f3b47b8.jpeg

  • Like 2
Nickfromwales

Posted

5 minutes ago, LiamJones said:

I had been using rapid, because the tile supplier recommended rapid to prevent the adhesive being sucked into the natural stone and discolouring. But, id rather a good tile job, than worrying about discolouring. 

Just not going to happen with white adhesive tbh, so thank them for that "golden nugget" of 'advice'....


6 minutes ago, LiamJones said:

and what a difference that made, gave me so much time to lay and adjust, getting it all perfect! And ended up doing significantly more.

Yup, stops the sweat and panic, just chaos trying to do that in rapid.


7 minutes ago, LiamJones said:

gave me some confidence and motivation to go at it again today

Crack on son, that's looking a top job. @nod is hiring lol :) 

Nickfromwales

Posted

Mask the wall and get it tanked at the right side of the shower area, where you have paint over plaster. ;) 

nod

Posted

17 minutes ago, LiamJones said:

Hey @Nickfromwalesthanks for the comment last night, gave me some confidence and motivation to go at it again today, armed with a bag of STANDARD set adhesive 🤣. I had been using rapid, because the tile supplier recommended rapid to prevent the adhesive being sucked into the natural stone and discolouring. But, id rather a good tile job, than worrying about discolouring. 
 

Mixed the bag up in 3rds. My confidence really took a knock after smashing whole bags of rapid set downstairs for the limestone floor!

IMG_1435.thumb.jpeg.0bb7fa64f1630652283ae6a54ab05aea.jpeg


and what a difference that made, gave me so much time to lay and adjust, getting it all perfect! And ended up doing significantly more.


IMG_1431.thumb.jpeg.c52c4e024ff467cf226bf3dd5bc4454b.jpeg
 

but yes, next time I’ll set the former to the height of the SLC minus 2mm for UFH cable, not the height of the tile backer board! 
 

the SLC has made the rest of the room a doddle to tile! So I forgive it for making my former a nightmare. Could probably have got away without the levelling clips, but they’re a nice safety net.


IMG_1432.thumb.jpeg.37863cb2b398d5508335a55b0f3b47b8.jpeg

Don’t listen to tile suppliers They only sell the stuff 

Create an account or sign in to comment

You need to be a member in order to leave a comment

Create an account

Sign up for a new account in our community. It's easy!

Register a new account

Sign in

Already have an account? Sign in here.

Sign In Now
×
×
  • Create New...