


Annker
-
Posts
231 -
Joined
-
Last visited
-
Days Won
1
Recent Profile Visitors
2354 profile views


.jpg.c21f3ac78c9b7efd90cbdcb312744dc5.thumb.jpg.7adcad4c0e384f5ecd7d56b0618df6e5.jpg)
Annker's Achievements

Regular Member (4/5)
50
Reputation
-
Ah, good to hear. You have the very same set up as myself.
-
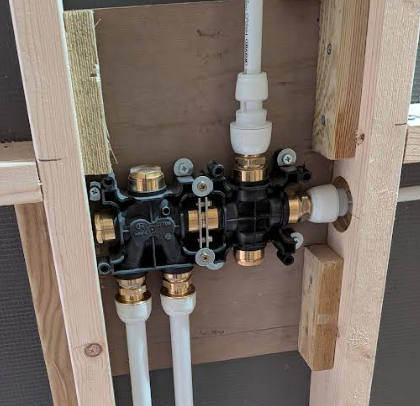
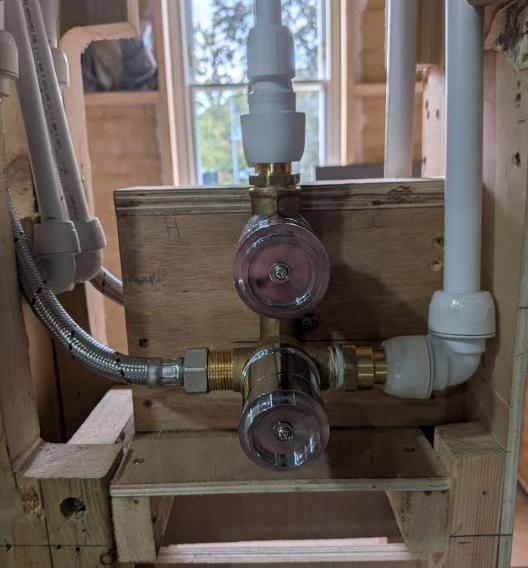
Yeah I'm not 100% sure. Both my AI's reckon fitting a male tapered into to female parallel is commonly done and acceptable practice, below may be nonsense but this is what it spat out when asked: "The R-into-Rp arrangement is genuinely standard — that part is correct. A tapered male (BSPT/R) screwing into a parallel female (BSPP/Rp), sealed with PTFE or a thread sealant, is explicitly permitted under BS 21 / ISO 7-1 and is honestly the most common pressure-tight joint in UK domestic plumbing — most valves, boilers, and radiator tails are connected exactly this way. So mechanically, there's nothing wrong with that combination in general." Admittably the instructions for the valve specifically said not to use tapered threads, however it also made a few contradictory statements. In the end I could thread male tapered fittings entirely into the female parallel ports without any friction or stress; with the addition of Lock tight 55 these joints have passed 5.5 Bar wet pressure test and current not weeping. and will hopefully remain that way. I always have in my head that the leak risk will be less where fewer joints are used, so yes these Hep2o couplers are tapered, but they get made straight onto Hep2o pipework so it's six of one......
-
Below is my piping arrangement. All bathrooms systems have been wet pressure tested and seems dry and holding pressure.
-
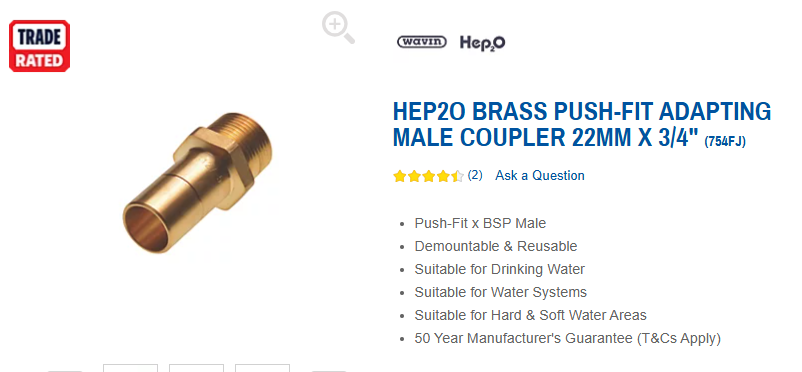
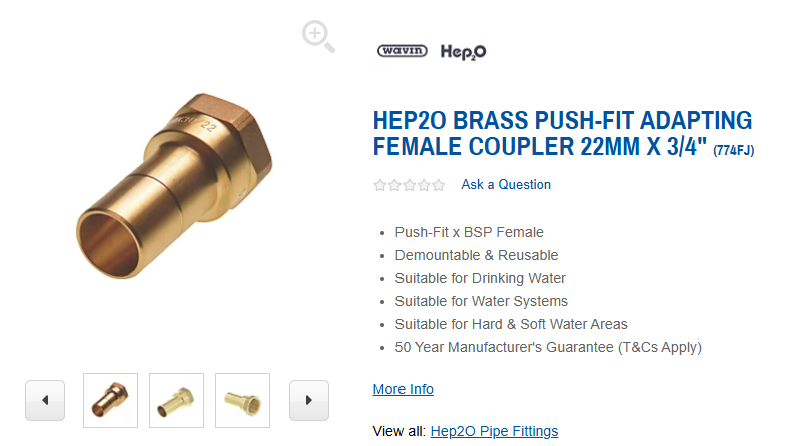
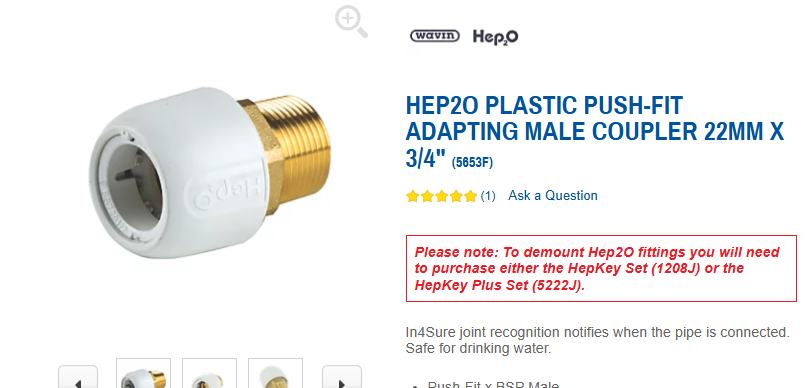
Thanks @Nickfromwales and @SimonD for your replies. So I had done a bit of research before you replied and what I gathered is that there are no hard and fast rules when it comes to mixing thread types, and valve manufacturers don't seem to follow any strict protocol either! Basically the only certainly I could find was that fitting that you find on flexi type fittings, female 1/2" BSPP with rubber washer, shouldn't need any thread sealer, as Nicks says just watch that you don't over tighten and strip the washer. What I found useful is that the best thing to do firstly, is dry thread fittings together to see what works. I found that the tapered fittings I wanted to use, threaded into the female BSPP ports on the valve just fine, and certainly were not going to stress the port. In that instance wrapping them in Locktight 55 made a great seal. My supply pipework is Hep2o so I wanted to adapt to that from the valve ports with as few fittings as possible. These male and female couplers facilitated that so were my choice of fitting. It was an effort to confirm the thread type on these fittings, I couldn't find it published anywhere by Hep2o, so I had to determine it myself in hand. The males are BSPT but the female are BSSP, apparently that is typical of these type of fittings.
-
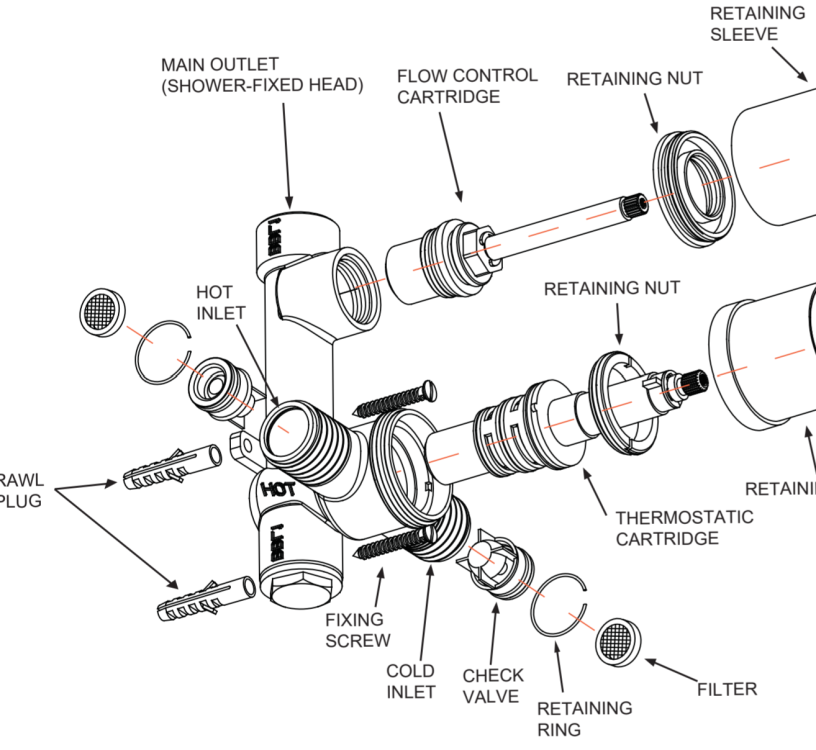
I have been driven up the wall trying to figure out how to connect pipework to a Crosswater Fusion concealed shower valve. To my mind the installation instructions contradict themselves and I'd appreciate to hear a more qualified interpretation than my own (I'm a Carpenter not a Engineer of any description) The valve has: G 3/4" (BSPP) female shower head port. There is no seat for a rubber seal to sit in this port (and none show on the diagram) G 3/4" (BSPP) male H&C inlet ports. Rubber edged gauze washer/filter are required to be installed on the ports The instruction specifically state: Make all pipe connections using a proprietary thread sealer Do not use tapered threaded adaptors My understanding is that a female port (where a rubber seal and seat for that seal is absent) requires the mating male to be tapered thread (BSPT) and wrapped with thread sealer to make the joint; and where the male ports have a rubber edge filter provides the seal then using thread sealer (Locktight 55 cord for example) may hinder making the joint. If that understanding is correct then the instruction are surely contradictory?
-
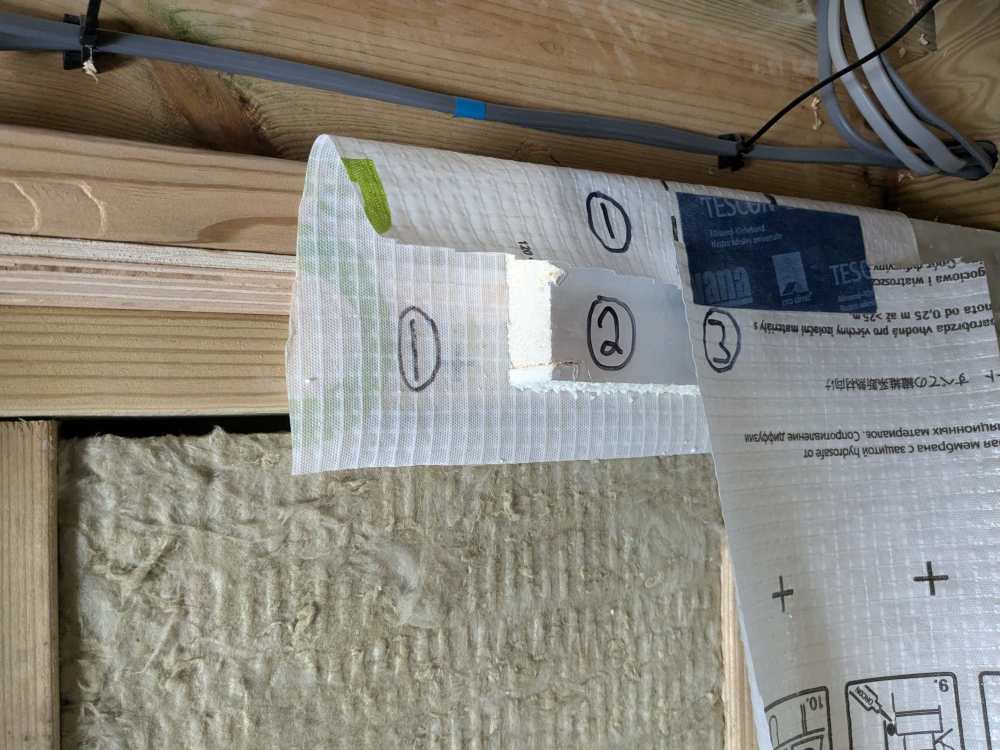
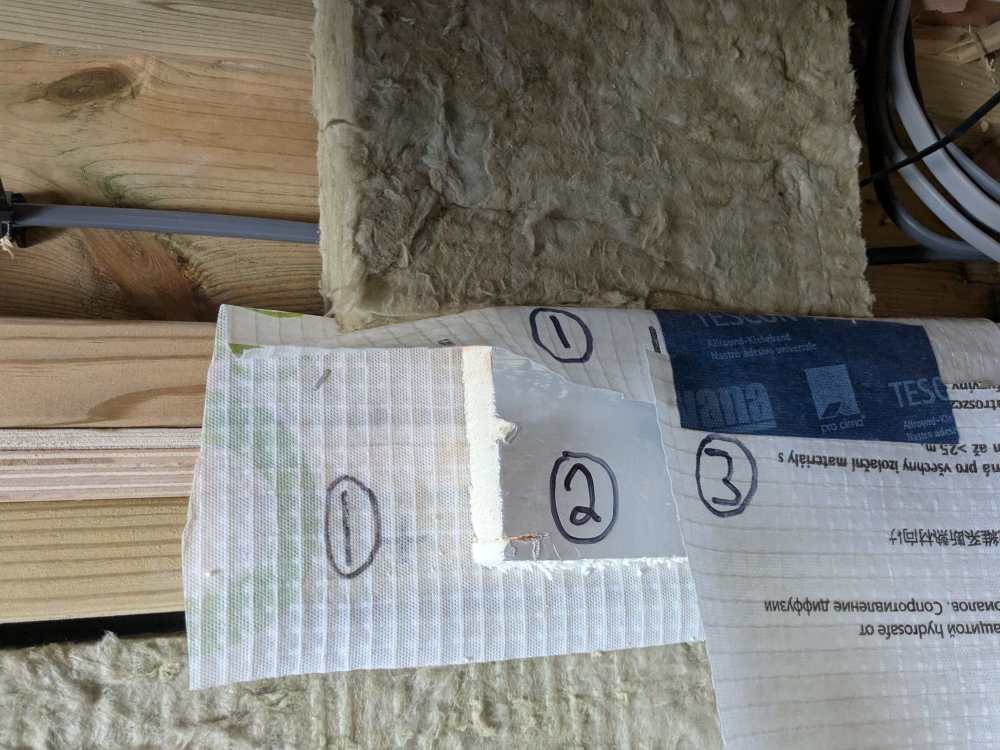
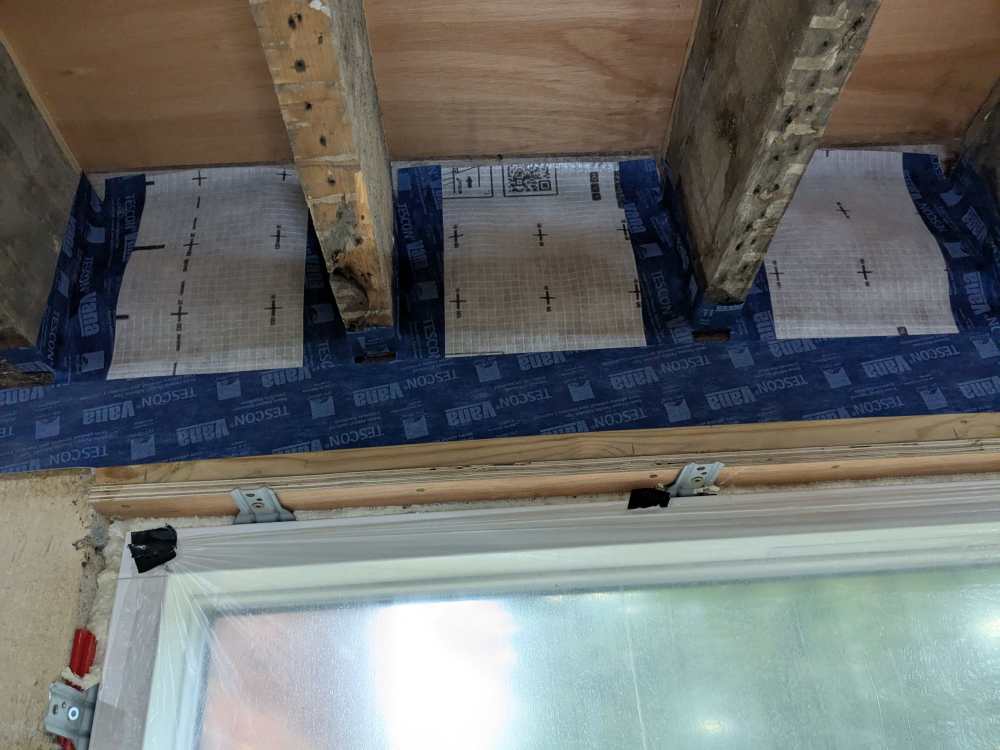
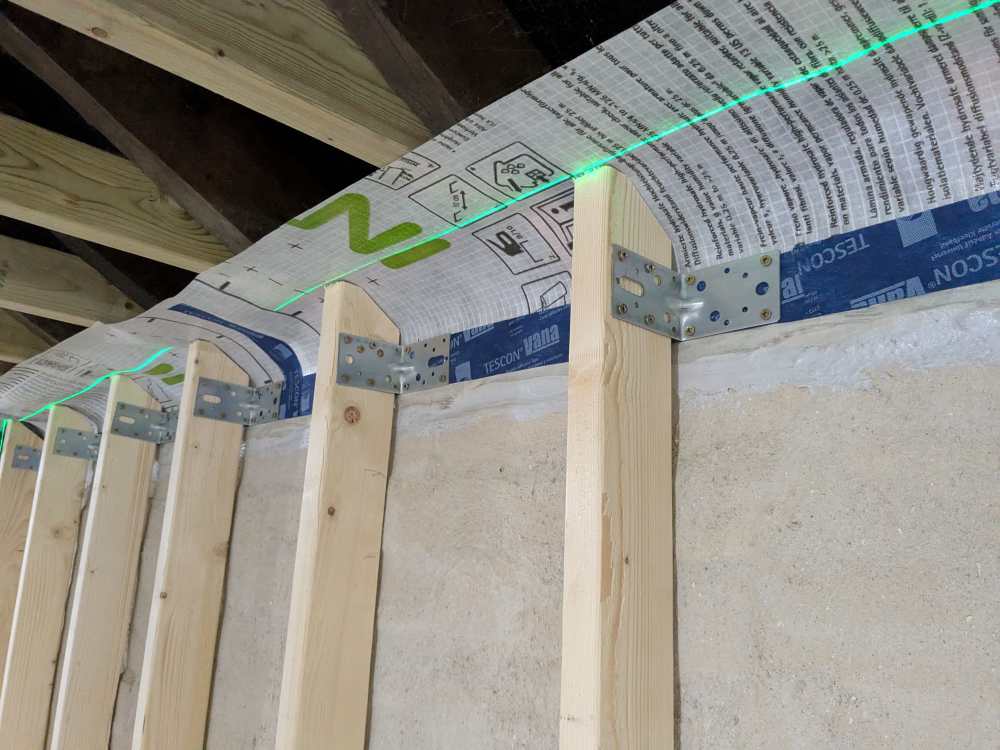
So the time has arrived to overcome this problematic detail. The solution below while not ideal aims to at least compartmentalise any shortcomings and keep the wall stud buildups safe from condensation risk: Detail is as follows below and as per attached photos of the mock up : Staple a ~200mm wide perimeter strip of intello AVCL along the top plate of the studded walls Install overboard insulation (60mm PIR board) Install main intello AVCL sheet over PIR board and tape it to intello perimeter strip. Apply air tight paint to junctions/corners within joist voids and pockets Install Rockwool batt within joist voids and pockets Appreciate any critique of my detail. Its a bit of a work around but should be easy to implement and perform reasonably well.
-
Fine tuning my IWI Solid wall (Warm Batten) design
Annker replied to Annker's topic in Heat Insulation
Will do and thanks again for all your input. Received great advice from yourself and other here, and confident I have a good understanding of the principles at work. -
Fine tuning my IWI Solid wall (Warm Batten) design
Annker replied to Annker's topic in Heat Insulation
-
Fine tuning my IWI Solid wall (Warm Batten) design
Annker replied to Annker's topic in Heat Insulation
-
Fine tuning my IWI Solid wall (Warm Batten) design
Annker replied to Annker's topic in Heat Insulation
-
Fine tuning my IWI Solid wall (Warm Batten) design
Annker replied to Annker's topic in Heat Insulation
-
Fine tuning my IWI Solid wall (Warm Batten) design
Annker replied to Annker's topic in Heat Insulation
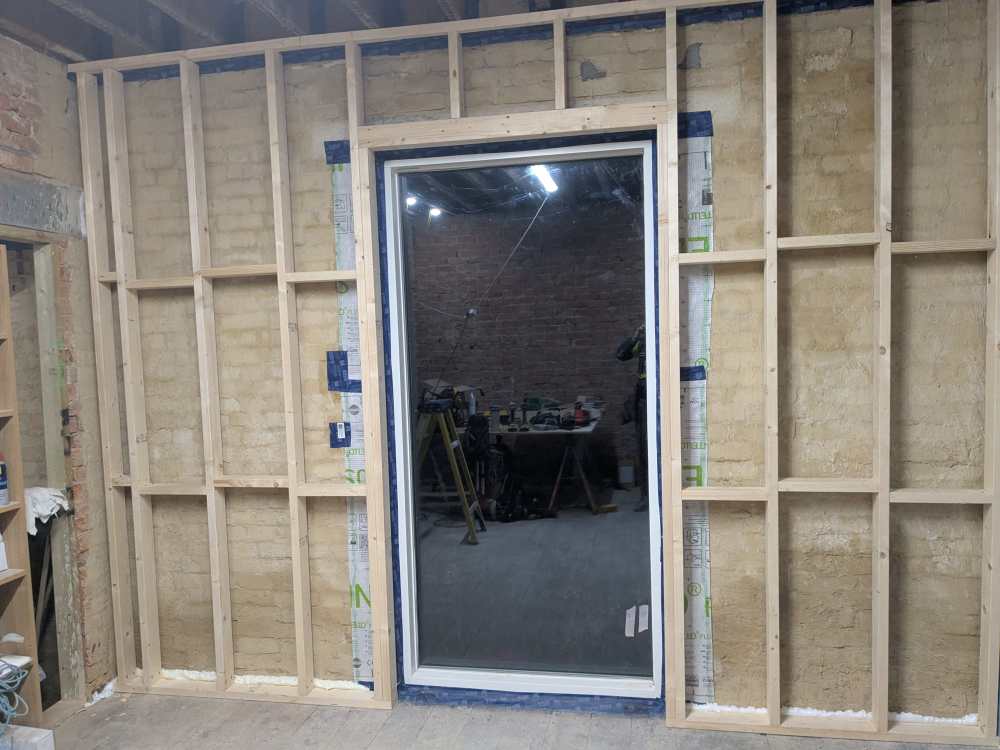
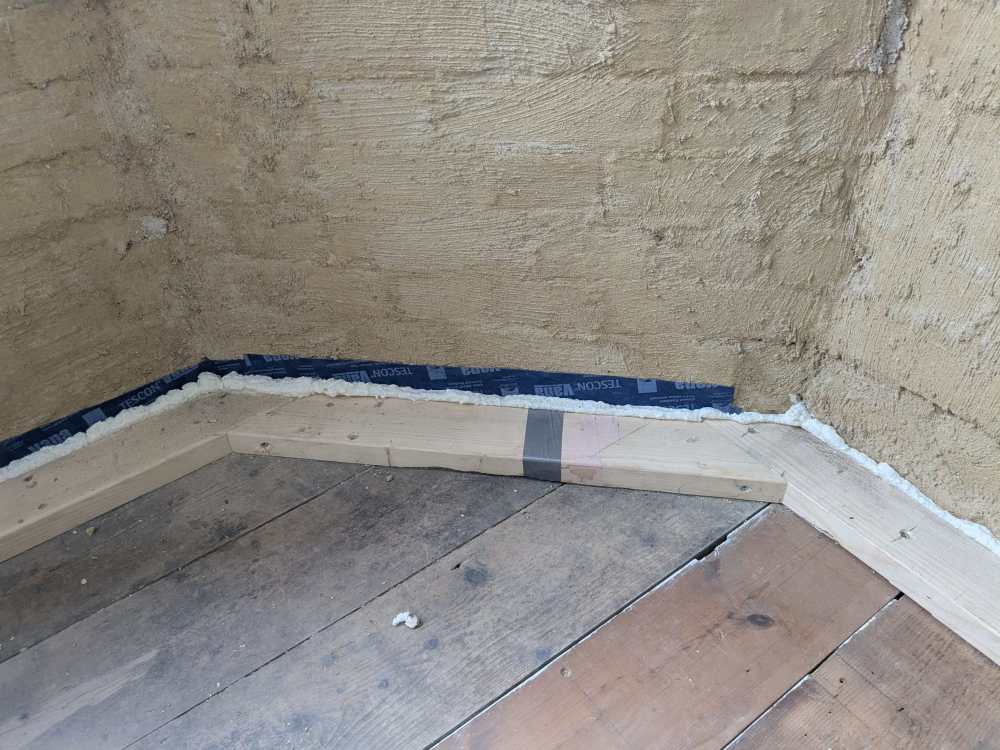
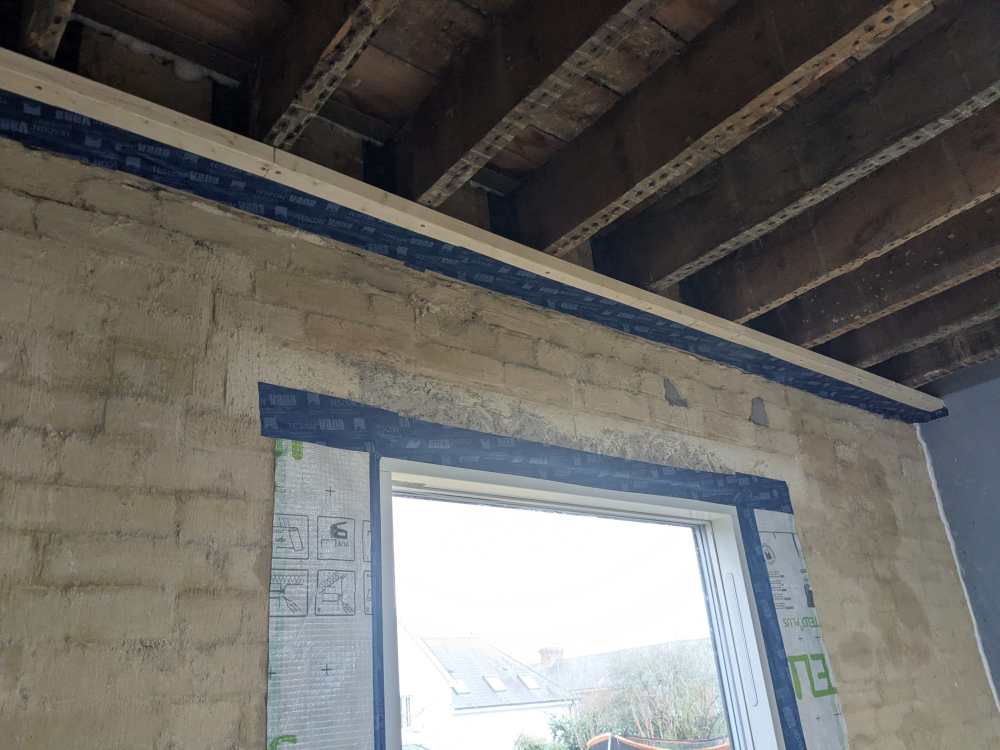
Thought I'd do a photo dump of some the onsite installation of the details discussed and generously advised on by some of the member here. Just some notes of interest if you are doing a similar job: Lime parge coat. Absolutely brilliant base before doing anything. Fast to apply, inexpensive and It has sealed up the walls greatly. What I have also noticed is the complete lack of any insects, mold or any living organism on the walls, I'm assumed this is due to the dryness and alkaline nature of lime. Pro clima Tescon tape. Not convinced how well this tape will stay adhere to masonry over decades, stick better to timber and best to membranes so assemble it around joist ends accordingly. And get the primer as it greatly increases the bond. Airtightness of studded walls units: I build the wall studs in situ, and before I installed the individual studs I ensured that the floor/ceiling to sole/head plate junctions were airtight. I used a combo of Illbruck FM330 and tapes. I think having a compartilization model in mind is useful so if there are any individual air leaks into the build-up they wont aggregated from wall to wall, cellar to 1st floor, etc. Insulation will be Rockwool as recommended by @Iceverge I also considered using a glass mineral wool, probably also suitable and less expensive but I have better confidence that RW will sag less in the fullness of time -
Yes, typically they all quote D50 and some then quote a few other common DT's. But regardless I compared all against D50
-
Thanks John, that makes sense.
-
Hi Gus, To my mind this is not the issue, as I am comparing one cast iron radiator section against another. I called CIRC and as expected they can't give a specific reason why their section is upwards of 25% more efficient than all others, but they can say that no customer has raised this issue before. Is it just my experience or do the majority of building product suppliers in the UK seem clueless about their products. Anyway, as you also suggest I think if I use CIRC it is wise to oversize. My AI assistant summarises as such: Bottom line: With an ASHP, the risk profile is asymmetric. Undersized radiators force higher flow temperatures and reduce efficiency. Oversized radiators allow lower flow temperatures and improve efficiency. If you must err, err on the side of larger. Sizing to Paladin/Carron figures while buying from CIRC is a sensible, low-risk strategy. Worst case: you've got slightly more efficient heating and spent a bit more on radiators. Best case: you've sized correctly.


