DannyT
-
Posts
117 -
Joined
-
Last visited
-
Days Won
2
Everything posted by DannyT
-
Some good suggestions here. Hadn’t really thought about solar panels but well worth an extra couple stored in the garage when buying 36 anyway. Naturally there will be some spares left over from slates, bathroom tiles, flooring etc. I think the stuff that would have a bigger visual impact if had to change them. If fitting MVHR I suppose it’s worth buying extra filters at time of purchase rather than 5 years down the line. Obviously the list could be large but dedicating a space in the house that you just built way bigger than you needed (nearly always) shouldn’t be a problem and extra spend would be tiny in relation to overall budget. Its all another reason for me not to go fancy on smart switches, wireless stuff etc, great while it works but when it doesn’t and needs replacing, nightmare. A light switch should be just that. The only thing that should be remote is your TV 😂
-
You put them in one of the 3 spare bedrooms that nobody uses.
-
When buying your door furniture, led ceiling lights, light switches etc, do you buy extra for breakages down the line? Just thinking about situations where you only bought enough door handles to get the interior done but you have a breakage 3 years in. Your door handles are nowhere to be found again so end up changing them all. Is this something people do?
-
Neighbours want to scaffold in my courtyard
DannyT replied to DannyT's topic in General Self Build & DIY Discussion
UPDATE……. so after emailing and posting the letters by hand, the builders truck arrived at the neighbours yesterday. This morning I was doing some work outside and the neighbour called by and said the builders aren’t starting Tuesday now. They (neighbours) put a halt to it to clear up what’s going on. Said builder said he would deal with communications, they didn’t know what was involved with access or PWA. Didn’t want any bother so it’s paused until further notice. It was the first amicable conversation about it. So the builder is available for work now if anyone is interested 😁 In the meantime I’ve painted the fence, walls have a had a coat of brilliant white, jet washed and pointed slabs and oiled furniture. looks lovely for any future photos 👍🏻 Thank you -
Neighbours want to scaffold in my courtyard
DannyT replied to DannyT's topic in General Self Build & DIY Discussion
Thank you all for your contributions. We have sent 2 separate letters. First one for the PWA and second one for access, trespass, legal action etc. We will see what happens on Tuesday when they arrive. Got so much going on at moment with work, Scotland plot, holidays, it just really wasn’t needed now. Myself and partner discussed it a few months ago saying that when we get notification, despite not wanting it built, we will be amicable and let them have access with conditions but the way it’s all been gone about. One working days notice on work comencing and been spoken to way I was is not how I expected it. I’ll go and enjoy a 3 day weekend now before battle 👍🏻 -
Neighbours want to scaffold in my courtyard
DannyT replied to DannyT's topic in General Self Build & DIY Discussion
I tried to start the conversation with them and they didn’t want to know. I was eyeballed by the owner just asking simple questions about what’s taking place and when speaking with the builder. They said nothing. She pulled him away, he was ready to start. ( how dare me ask questions) I didn’t bite but friendly and less formal is out the window already 👍🏻 -
Neighbours want to scaffold in my courtyard
DannyT replied to DannyT's topic in General Self Build & DIY Discussion
Thanks for the replies up to now. Very helpful. I called home insurance legal team and they got back to me within the hour. Ive drafted up a letter about the partywall agreement because the legal advisor believes this extension build falls within the act. Also any access without prior consent or within agreement of my terms (scaffold license) will be classed as trespass (including cantilever scaffold) and I’m to contact them back immediately so they can issue a trespass notice. Very helpful for a small additional fee on the home insurance. Party wall draft below. I’ll sort scaffold terms later. Dear occupier …………………………….. Party Wall Act 1996 – Notice Regarding Proposed Building Works I am writing in relation to the building works currently being undertaken, or proposed, at your property. Under the Party Wall etc. Act 1996, where excavation works are planned within 3 metres of a neighbouring property, and to a depth equal to or greater than the foundations of that neighbouring property, a written notice must be served at least one month prior to the commencement of such works. I would therefore be grateful if you could confirm whether any excavation works associated with your project fall within this requirement. If so, please ensure that the appropriate formal notice is served in accordance with the Act. For clarity, if the proposed excavations do not extend deeper than the foundations of the neighbouring property, and do not otherwise fall within the scope of the Act, then such works may proceed without the need for formal notification under the legislation. I trust you will understand the importance of complying with the relevant statutory requirements and I look forward to your confirmation. I have included the relevant extract from the party act. you can find the act in full with here. https://www.gov.uk/government/publications/preventing-and-resolving-disputes-in-relation-to-party-walls/the-party-wall-etc-act-1996-explanatory-booklet#part-1-party-wall-etc-act-1996 Yours sincerely, …………………………….. -
Neighbours want to scaffold in my courtyard
DannyT replied to DannyT's topic in General Self Build & DIY Discussion
So just a quick one here before I start work. Im going to send the builder and neighbour a letter. I will ask them for a cross section of foundations to confirm if they are to be deeper than mine. If so they need to comply with the party wall act as they are less than 3m from my house. I will also grant permission to erect scaffold on the following basis. 1. Only support tubes are to be placed on my property. On the ground only, not on walls and not blocking my access. 2. Permission for a 4 board scaffold. 1 metre. 3. Nothing is to make contact with the house. 4. Netting is to be used. 5. No other access is permitted, no ladders, no material loading, etc from my side. 6. No access before 8.30am. Mon-sat. (Our bedroom window is next to it) 7. Any damage caused to property/ courtyard will be paid for. 8. This permission for scaffold access is for 4 Months from 1st of June - 1st October 9. Compensation of £400 will be payable before any scaffold is erected for complete Loss of our only private outdoor space over the summer. Does this sound reasonable? -
Neighbours want to scaffold in my courtyard
DannyT replied to DannyT's topic in General Self Build & DIY Discussion
The new extension wall will be build up against the fence that forms the boundary. I will be keeping a close on measurements and projections as it goes up. The foundations will be 2.5 metres from mine. Ive got a courtyard between the 2 properties that will now become penned in between Mine and the neighbours new 2 storey extension. I think I’ll give the home insurance legal team a call to discuss. 👍🏻
-
Neighbours want to scaffold in my courtyard
DannyT replied to DannyT's topic in General Self Build & DIY Discussion
They can point overhand for first 21 course behind the fence but after that they will need access onto my side. I think I’m going to request a scaffold license to be put in place, but on my terms. I don’t want scaffold up for 6 months, etc. If they don’t agree to the terms then no access will be granted. I am actually a reasonable person to people who show a bit back. Thanks. So over sailing could be trespass. Im not a T*#T but when i get spoken to like one, I dont mind making life awkward 👍🏻 -
Neighbours want to scaffold in my courtyard
DannyT replied to DannyT's topic in General Self Build & DIY Discussion
If its not legal to cantilever without permission, I feel like half been compliant to try keep the peace by saying I want compensation for losing my outside space (only have the courtyard) for the summer. Just don’t feel like been overly compliant the way I was spoken too. -
Neighbours want to scaffold in my courtyard
DannyT replied to DannyT's topic in General Self Build & DIY Discussion
This is for a property in England 👍🏻 -
Neighbours got permission to build a full height extension. We objected as it was right on our boundary. Anyway, nothing of it for 18 months. Today I came home and a builder stopped me and said we be starting work next Tuesday. Said he will require access for scaffold etc. Told him it would have been nice for more notice but without my permission first in writing he won’t be scaffolding anything. His response was “we will just cantilever over your property then and won’t need permission” Surely this isn’t legal? Even a cantilever scaffold would need permission? 1st lift would be 7ft above our courtyard. I was going to be alright about it until he said don’t need permission and neighbour death stared me whilst I was trying to discuss the matter amicably.
-
-
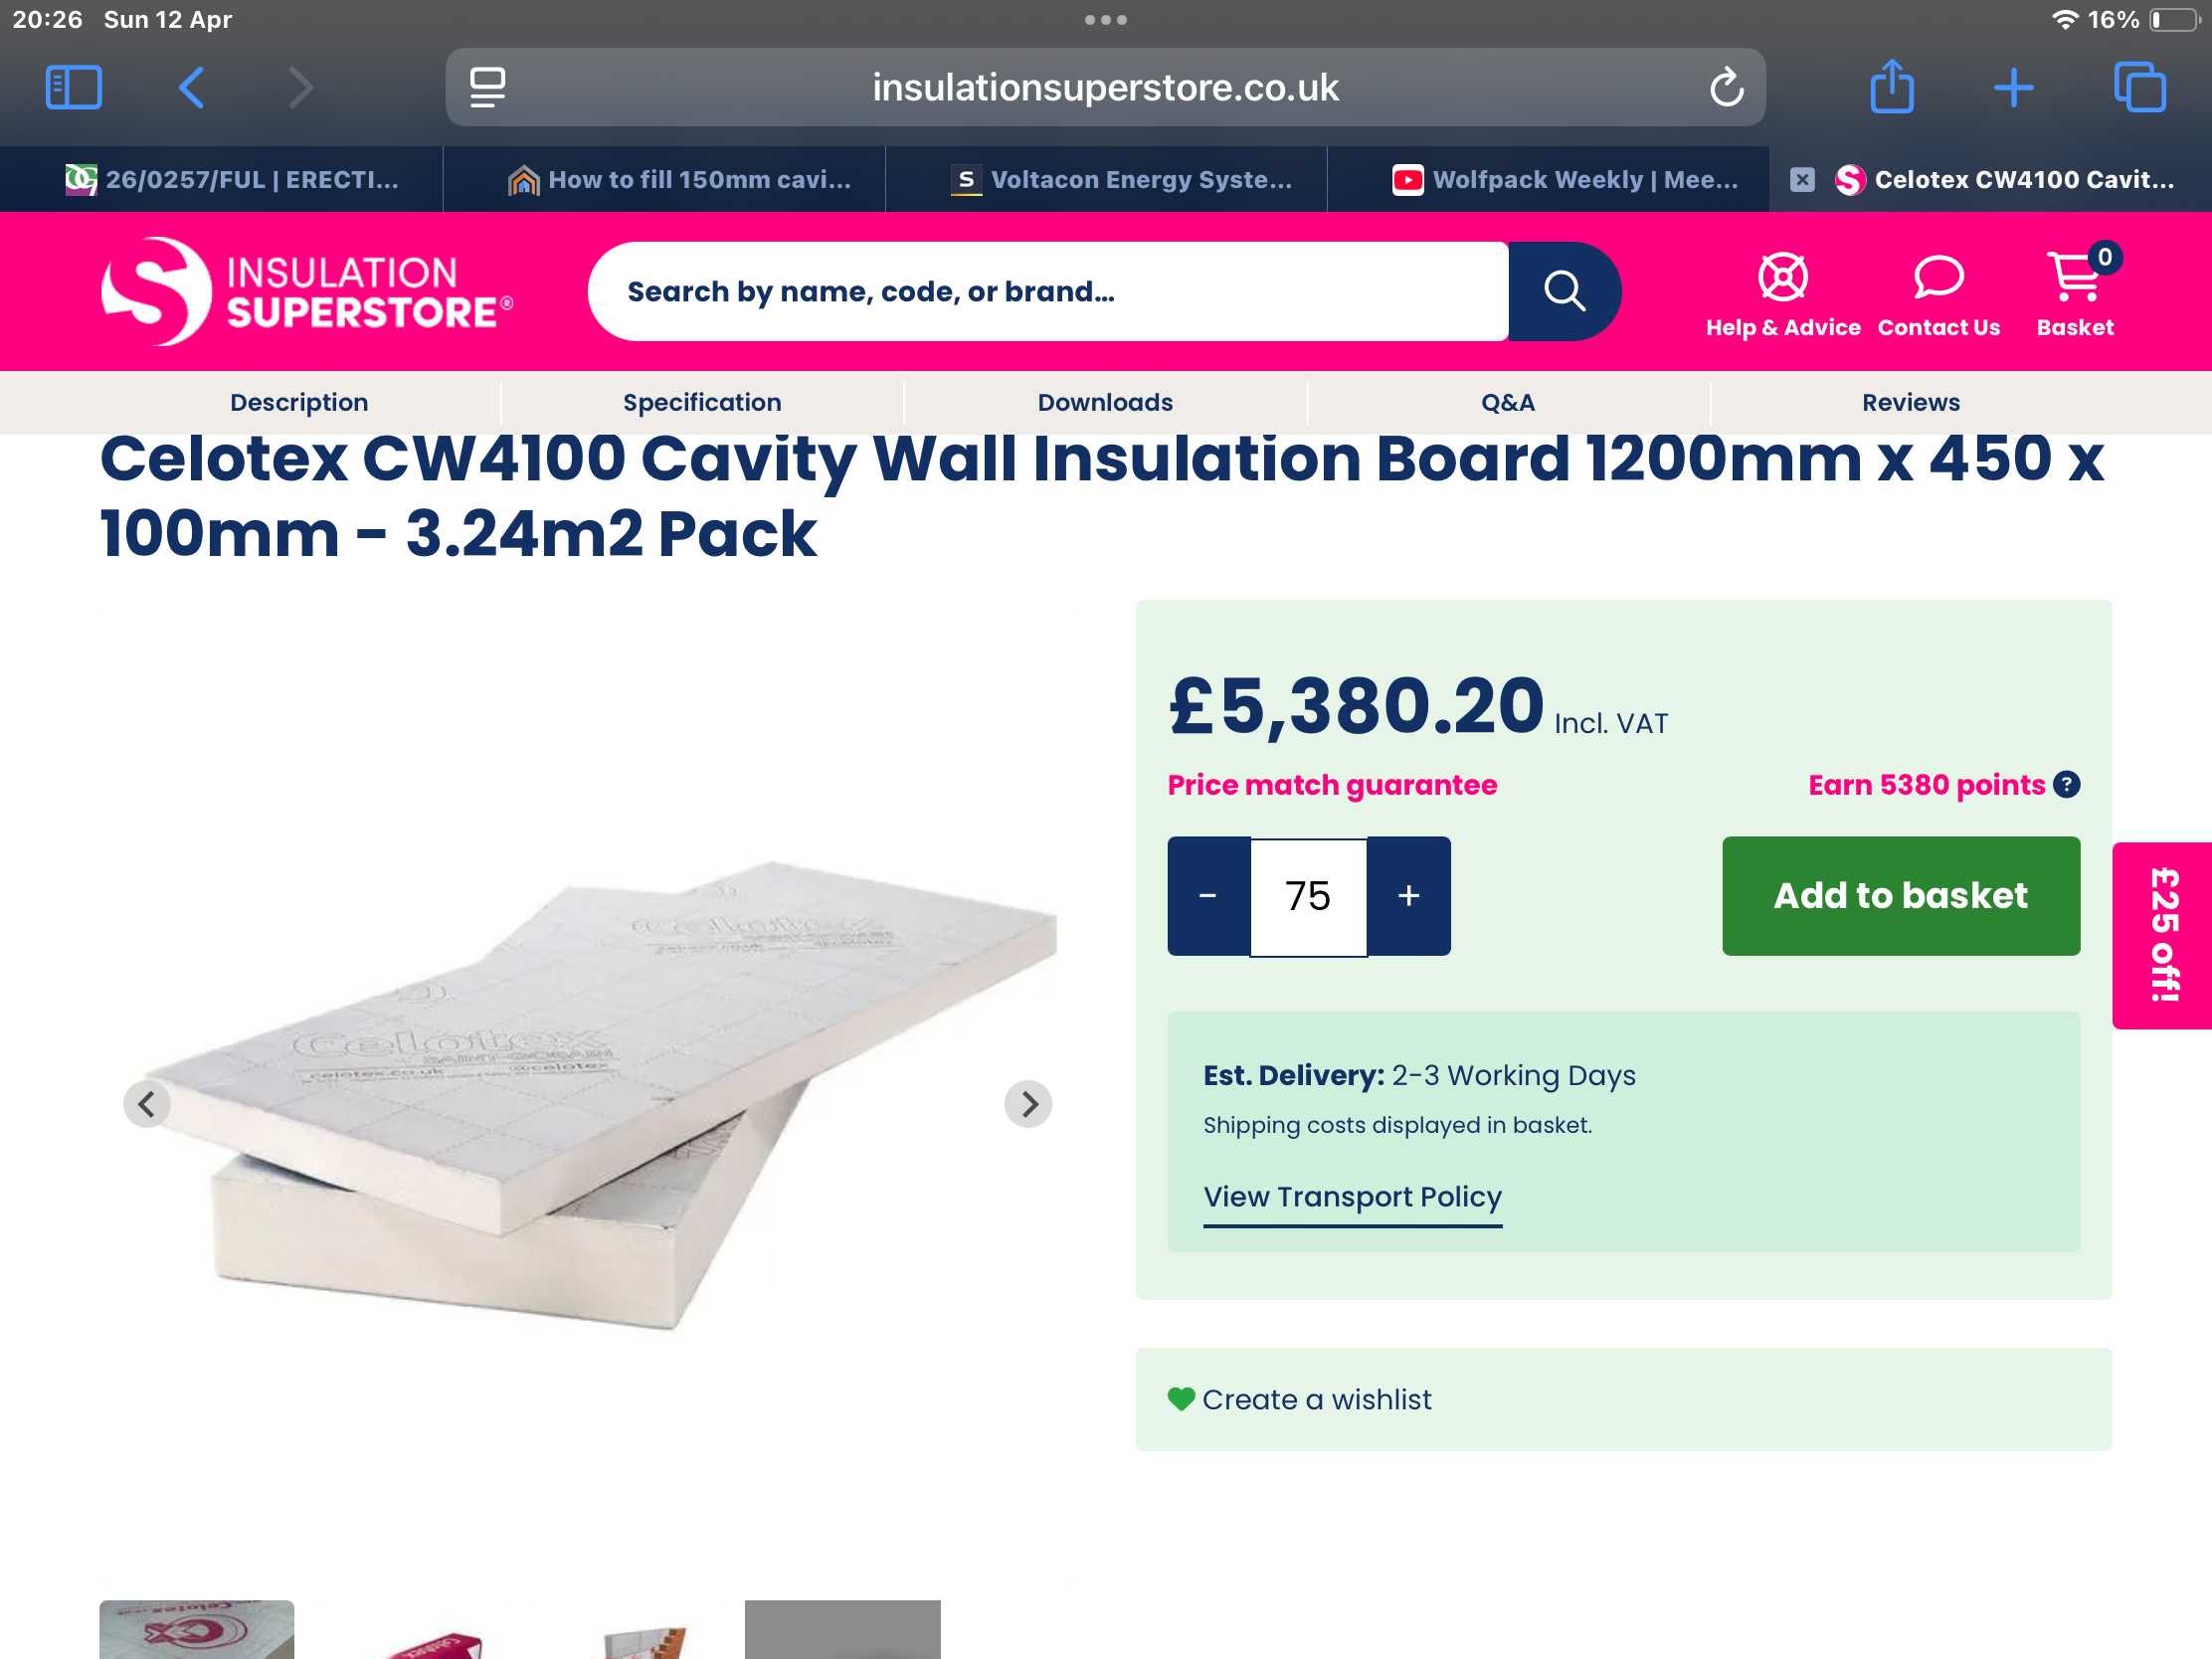
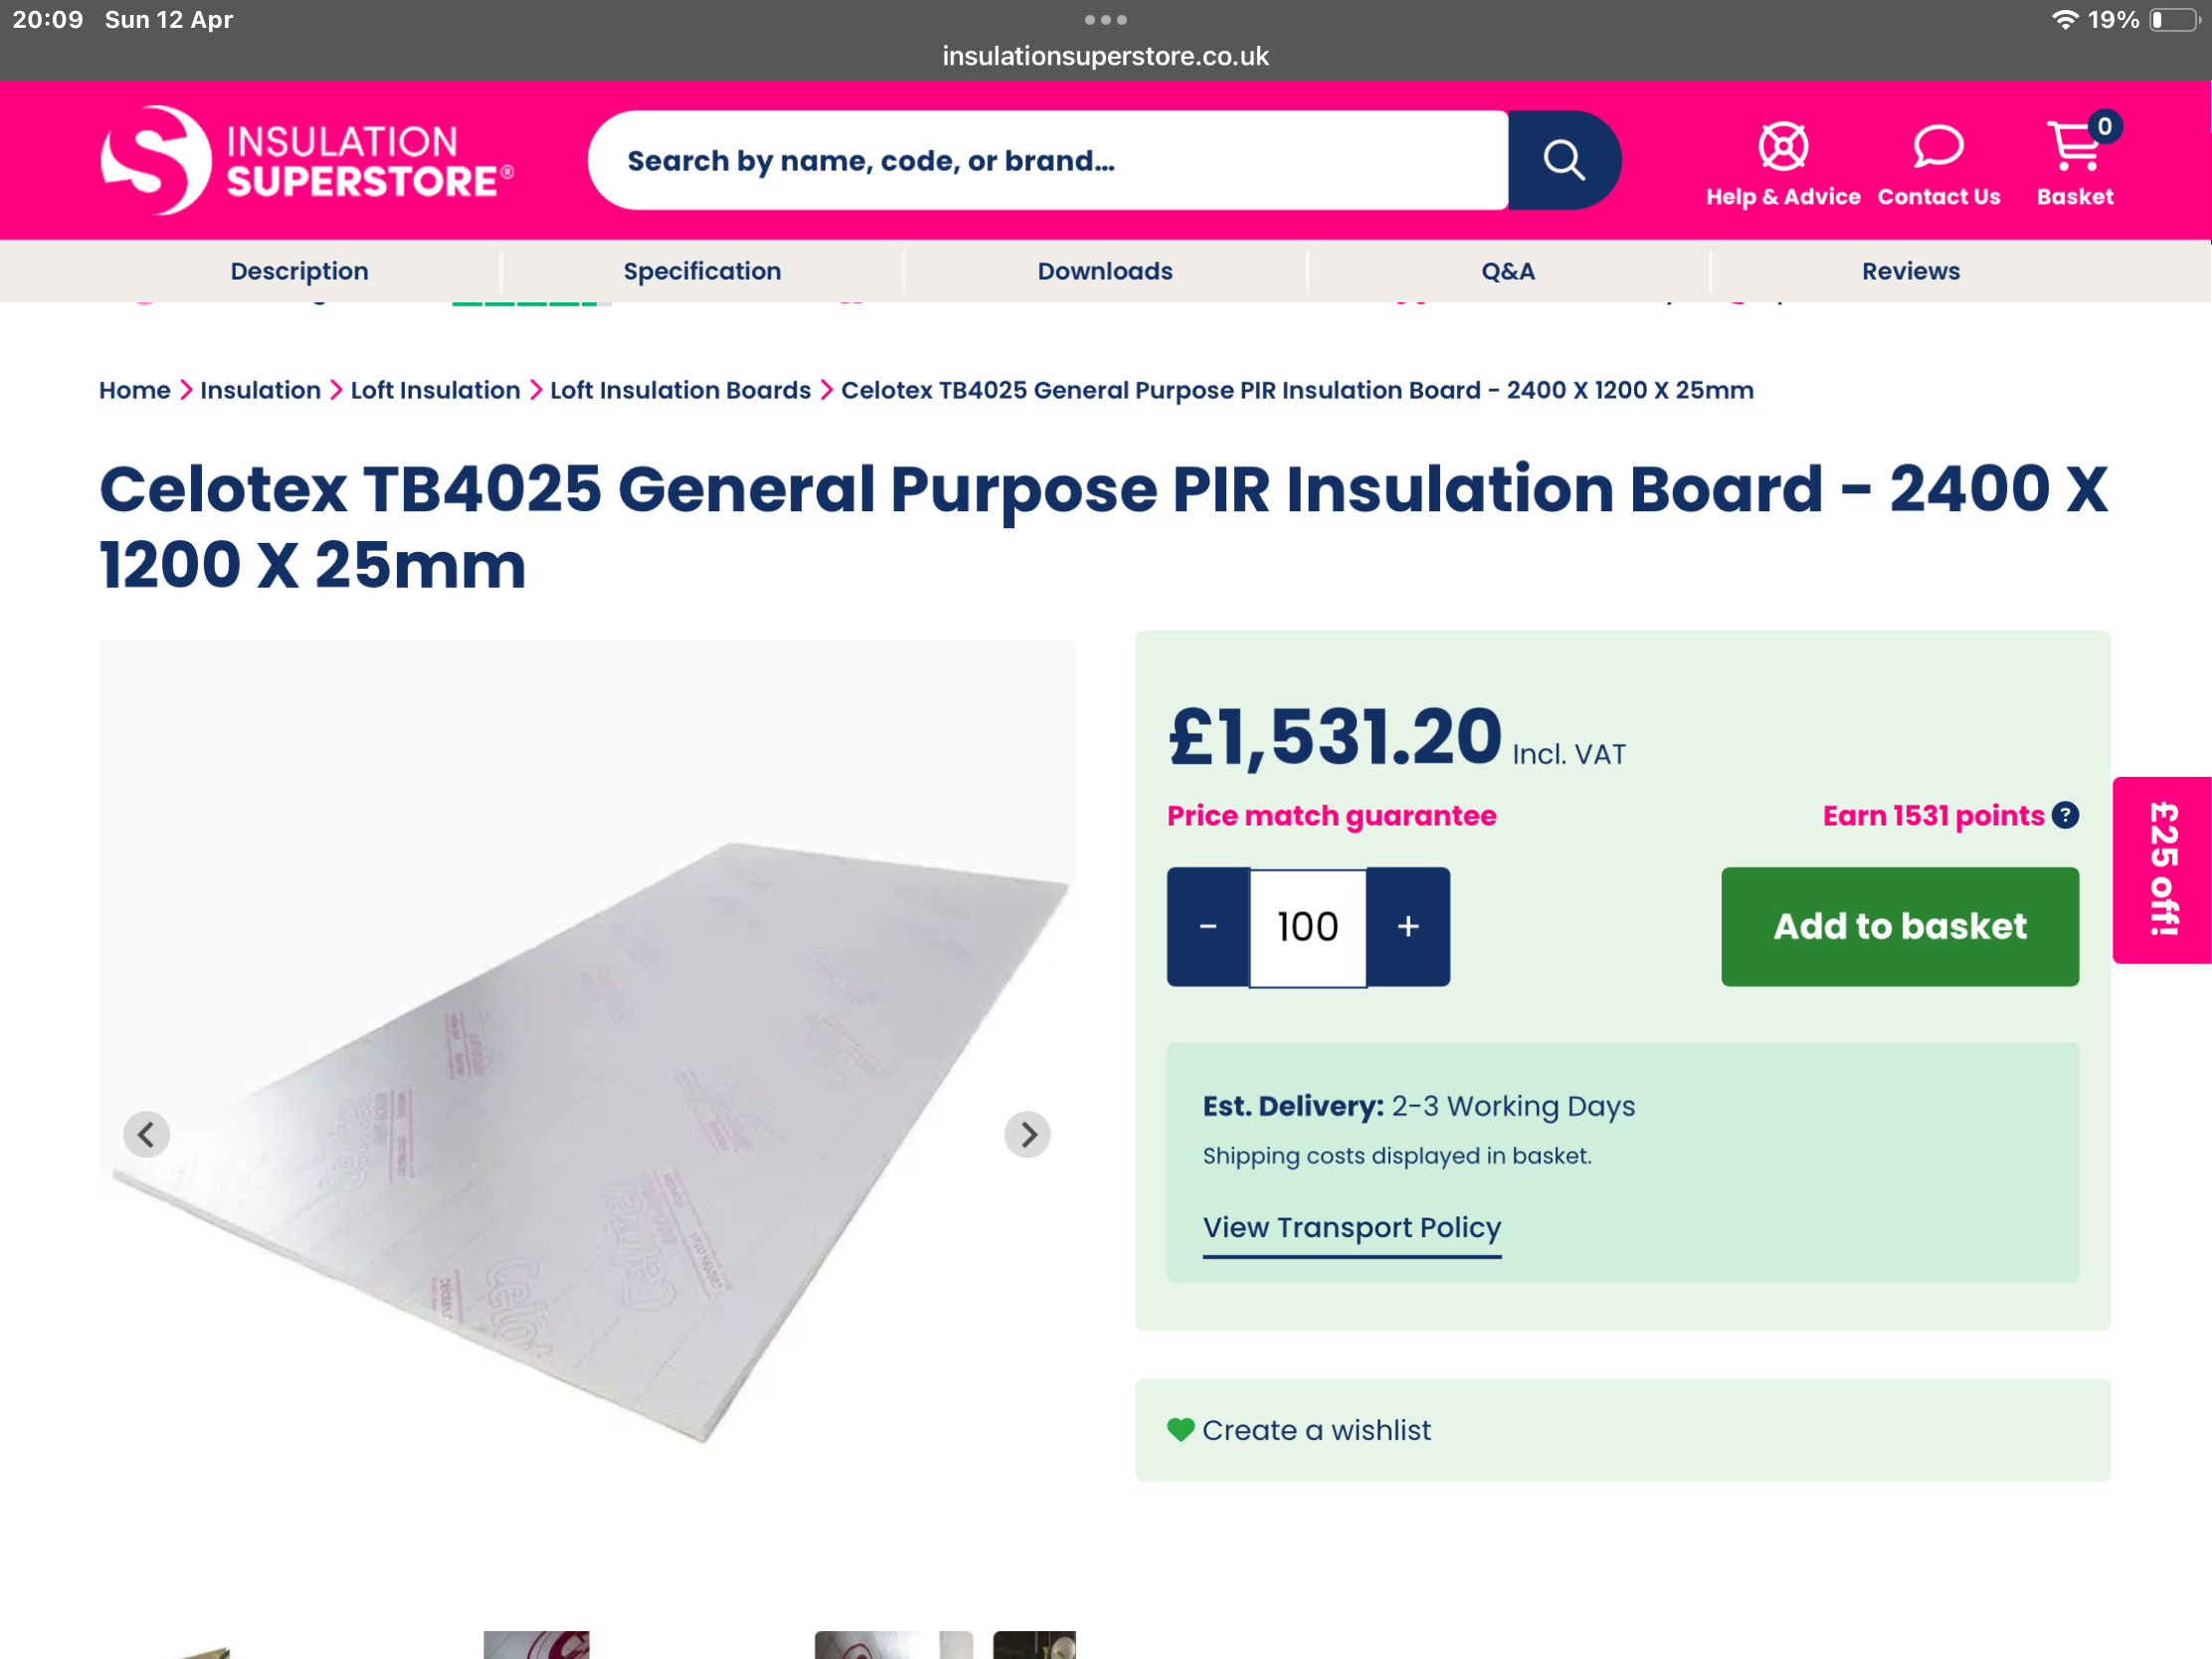
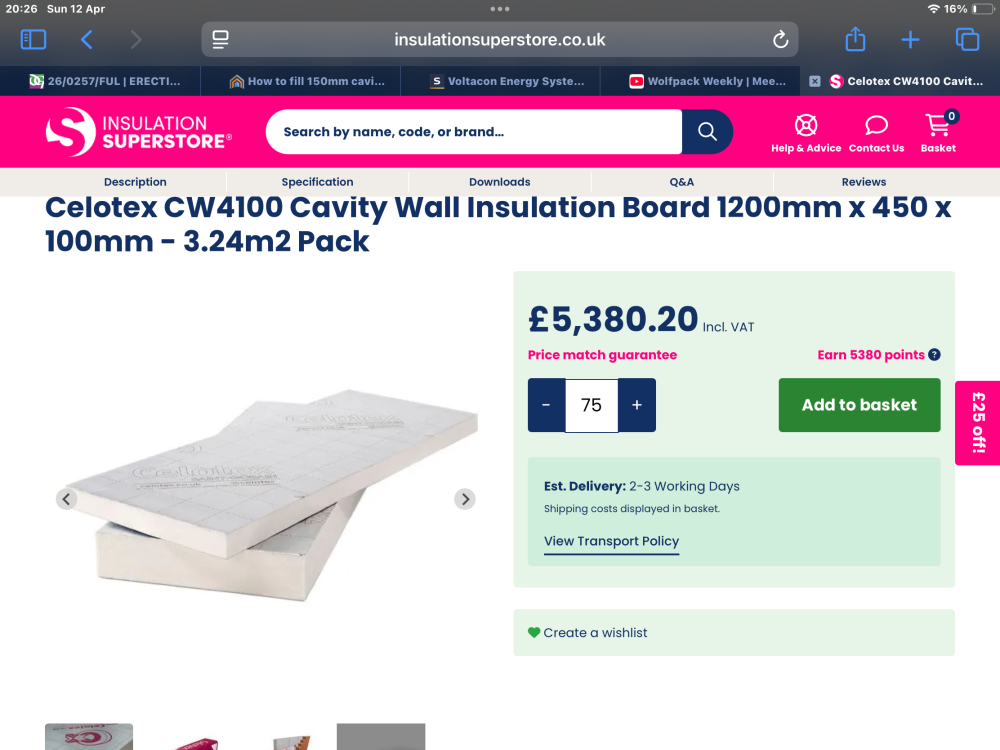
Battens on top of PIR. If you have ever built traditional with dot and dab and taken off a electrical socket, you will feel the draft running behind the plaster board. 100 boards of 25mm 250m2, more than enough for what I need £1500. 150mm dri therm 32, 250m2 £6000 100mm cavity PIR 250m2 £5400 I’ll say it again though. I build houses everyday and there is no way I’d have PIR in the cavity. I’d rather pay the extra and have 150mm fulfill, 25mm PIR internal and batten service void. 1% extra on the whole budget but much better results.


-
Not worried about the payback period. And for what I get that’s better than the insulation itself is surface I can tape and seal. You can’t get that with plasterboard dabbed onto thermo blocks.
-
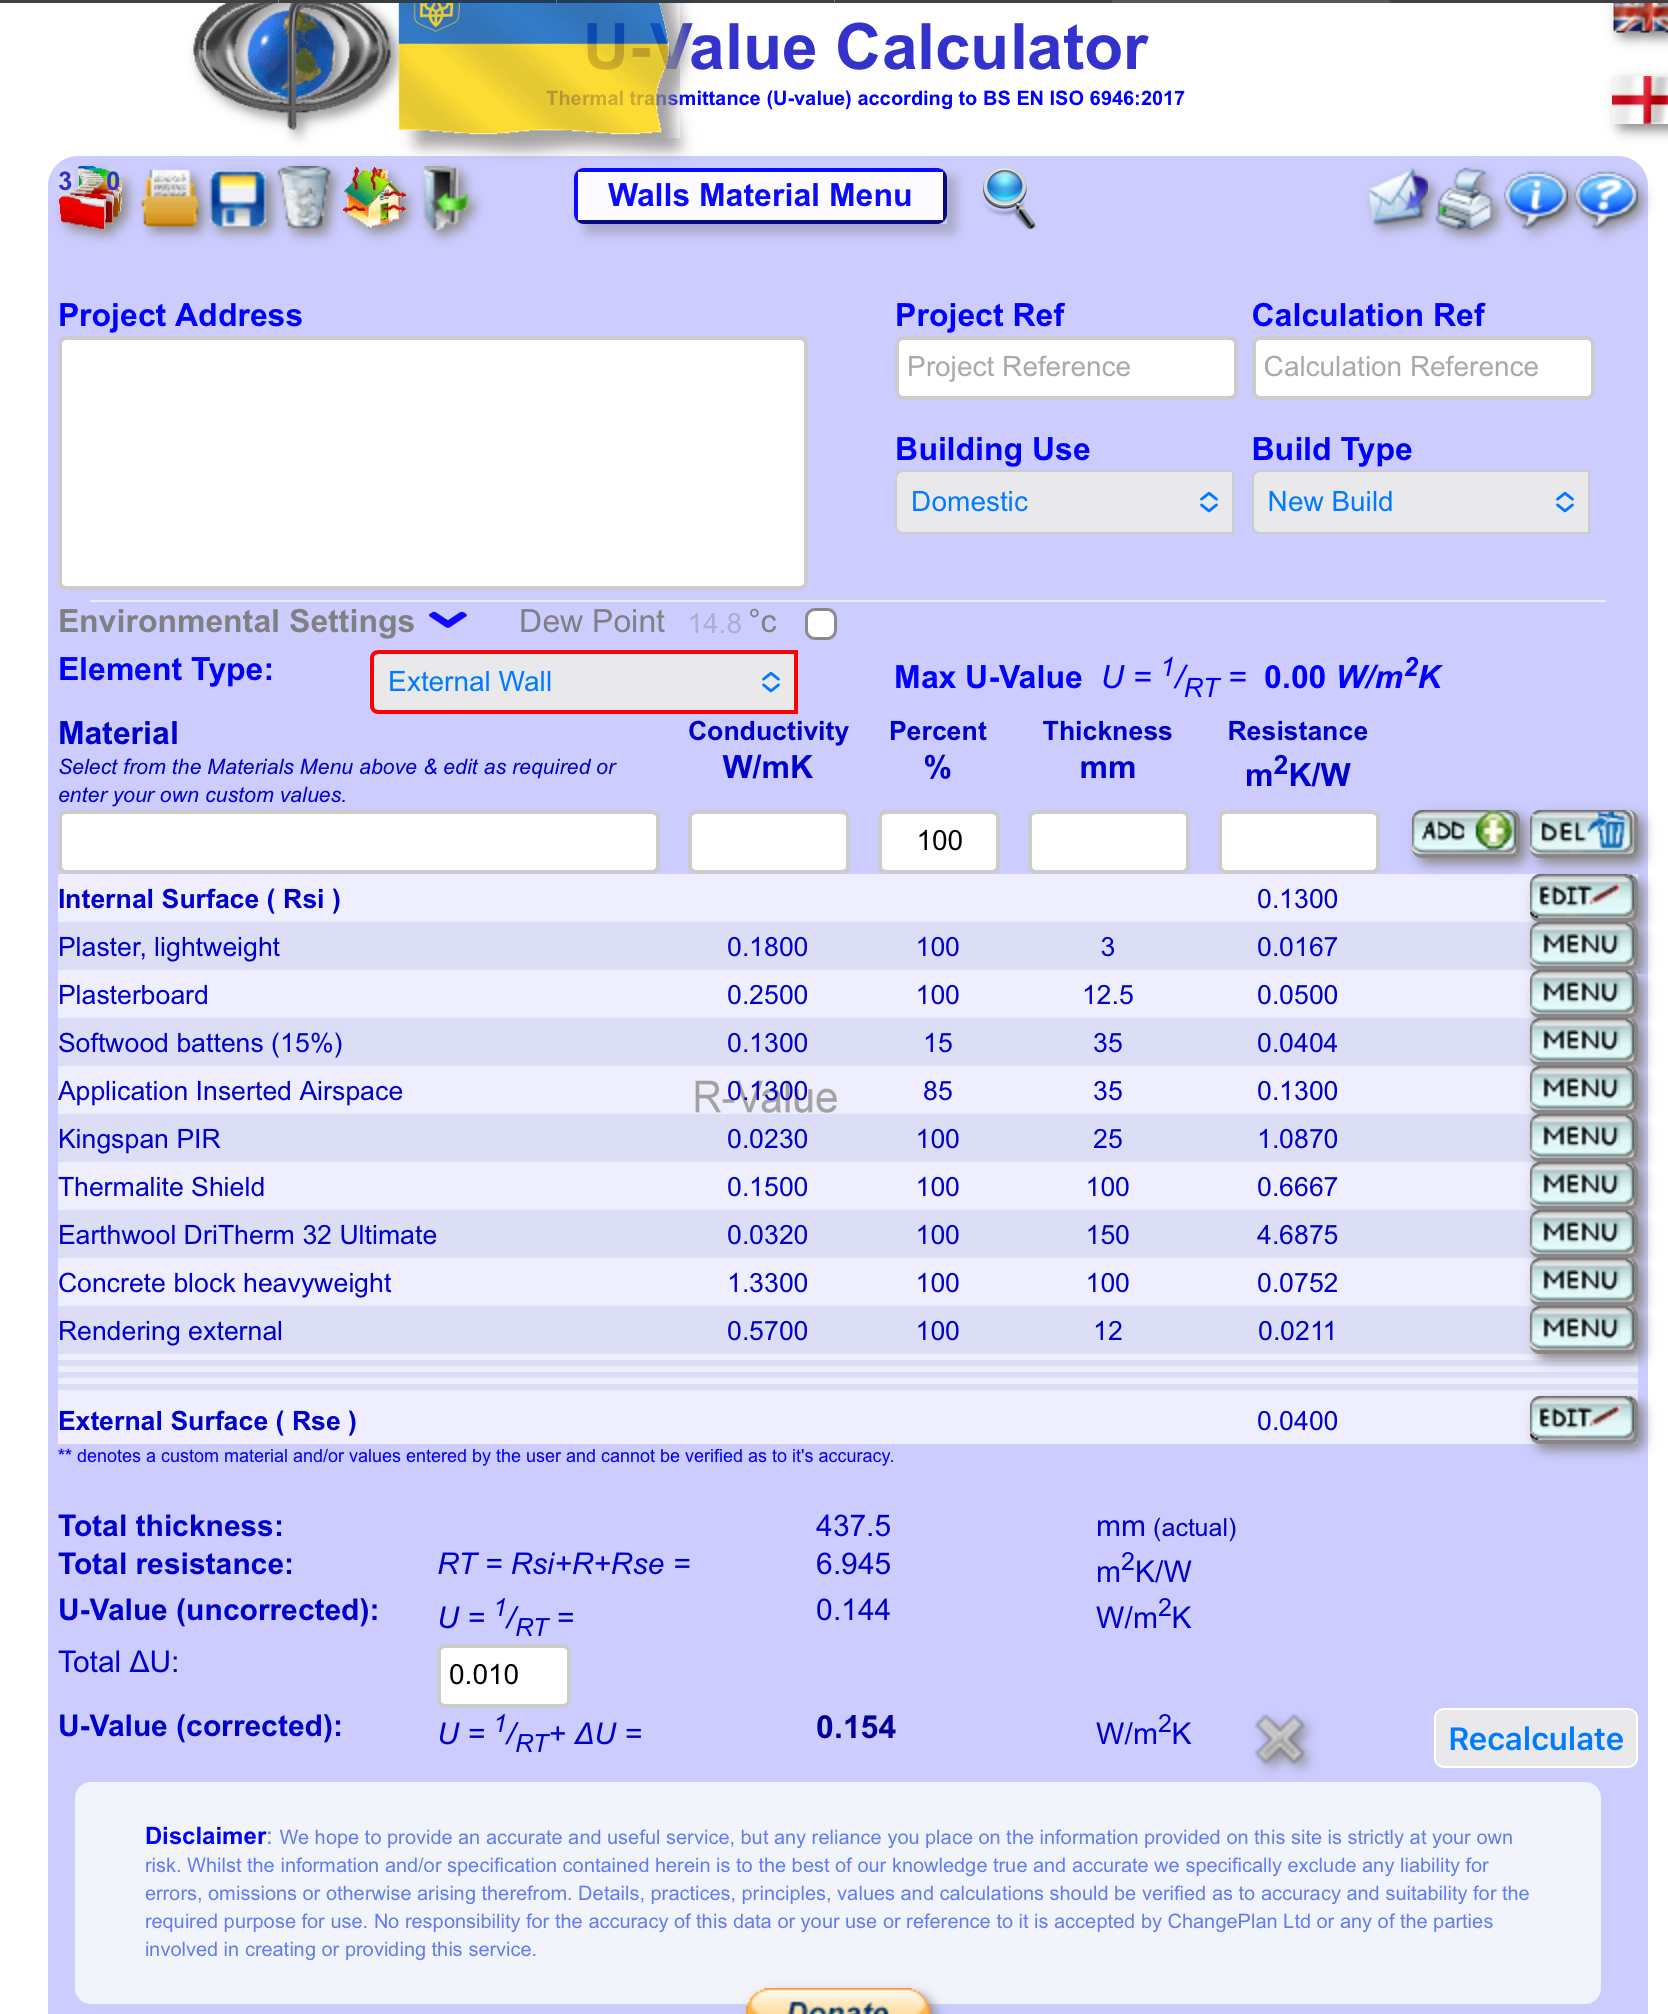
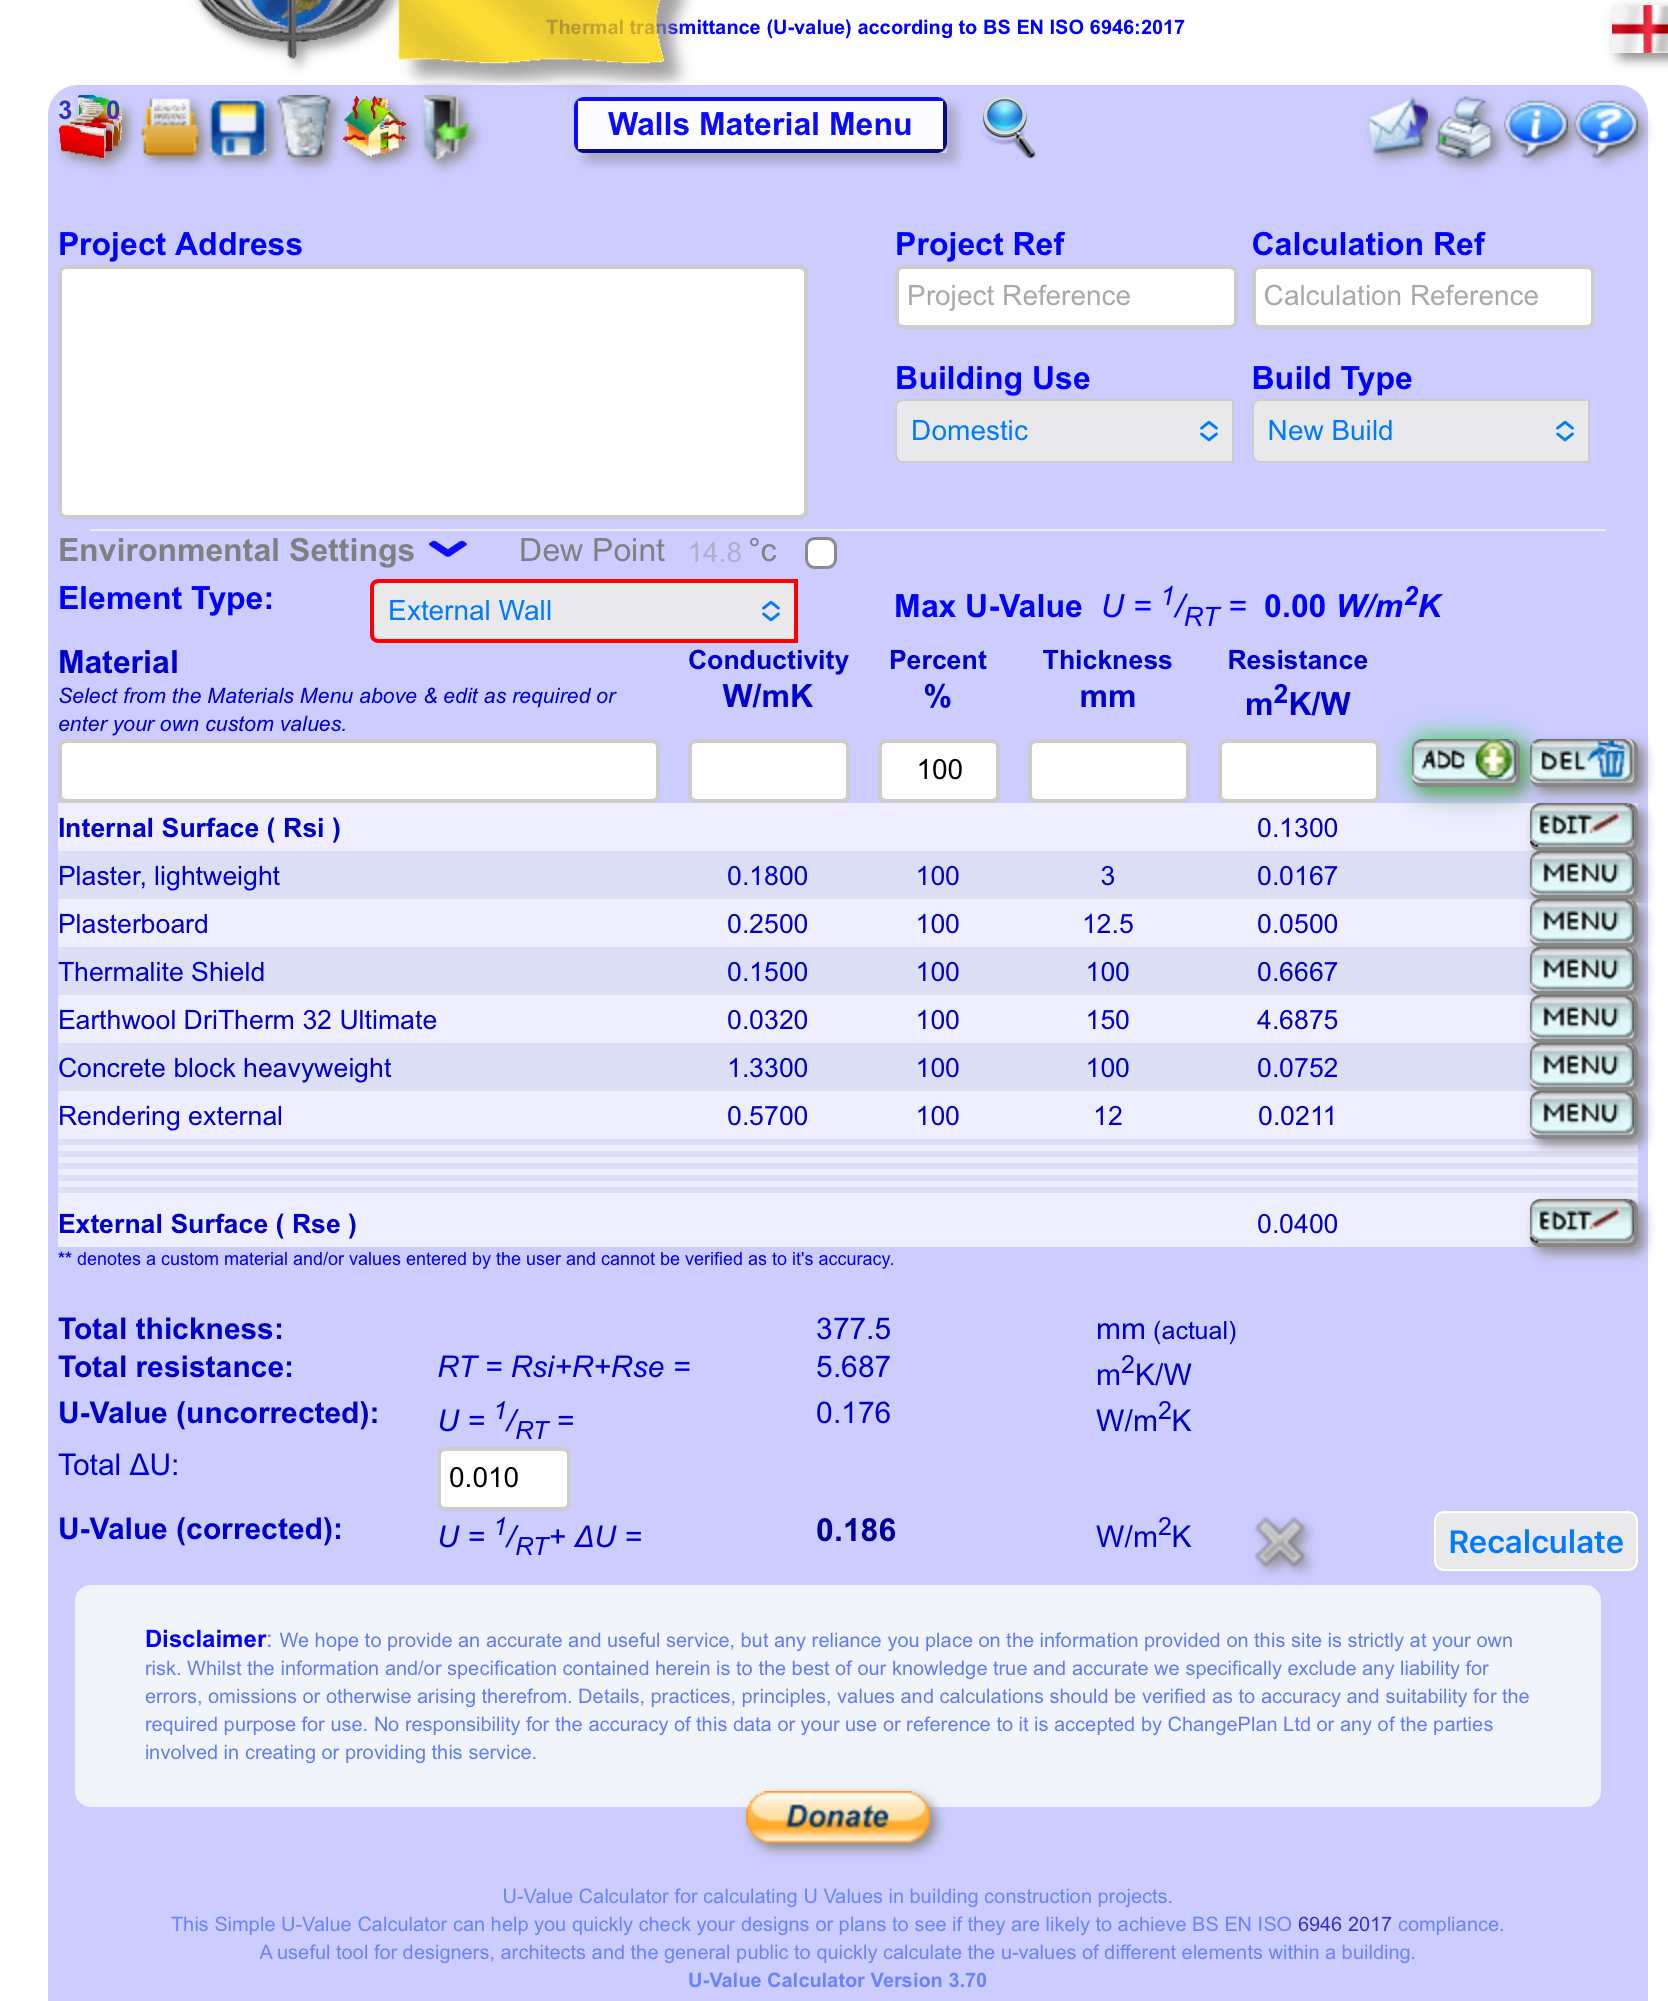
So I’m going a different route because our situation. we purchased with concrete strip foundations already in place and can only go to a max 350mm overall to allow for required bearing on concrete. Having the 150mm full fill with Dritherm 32 but on the inside we are lining the walls and ceilings with 25mm PIR and taped for air tightness with a service void. That should achieve around 0.15. Just the 150mm full fill is a tad over 0.18


-
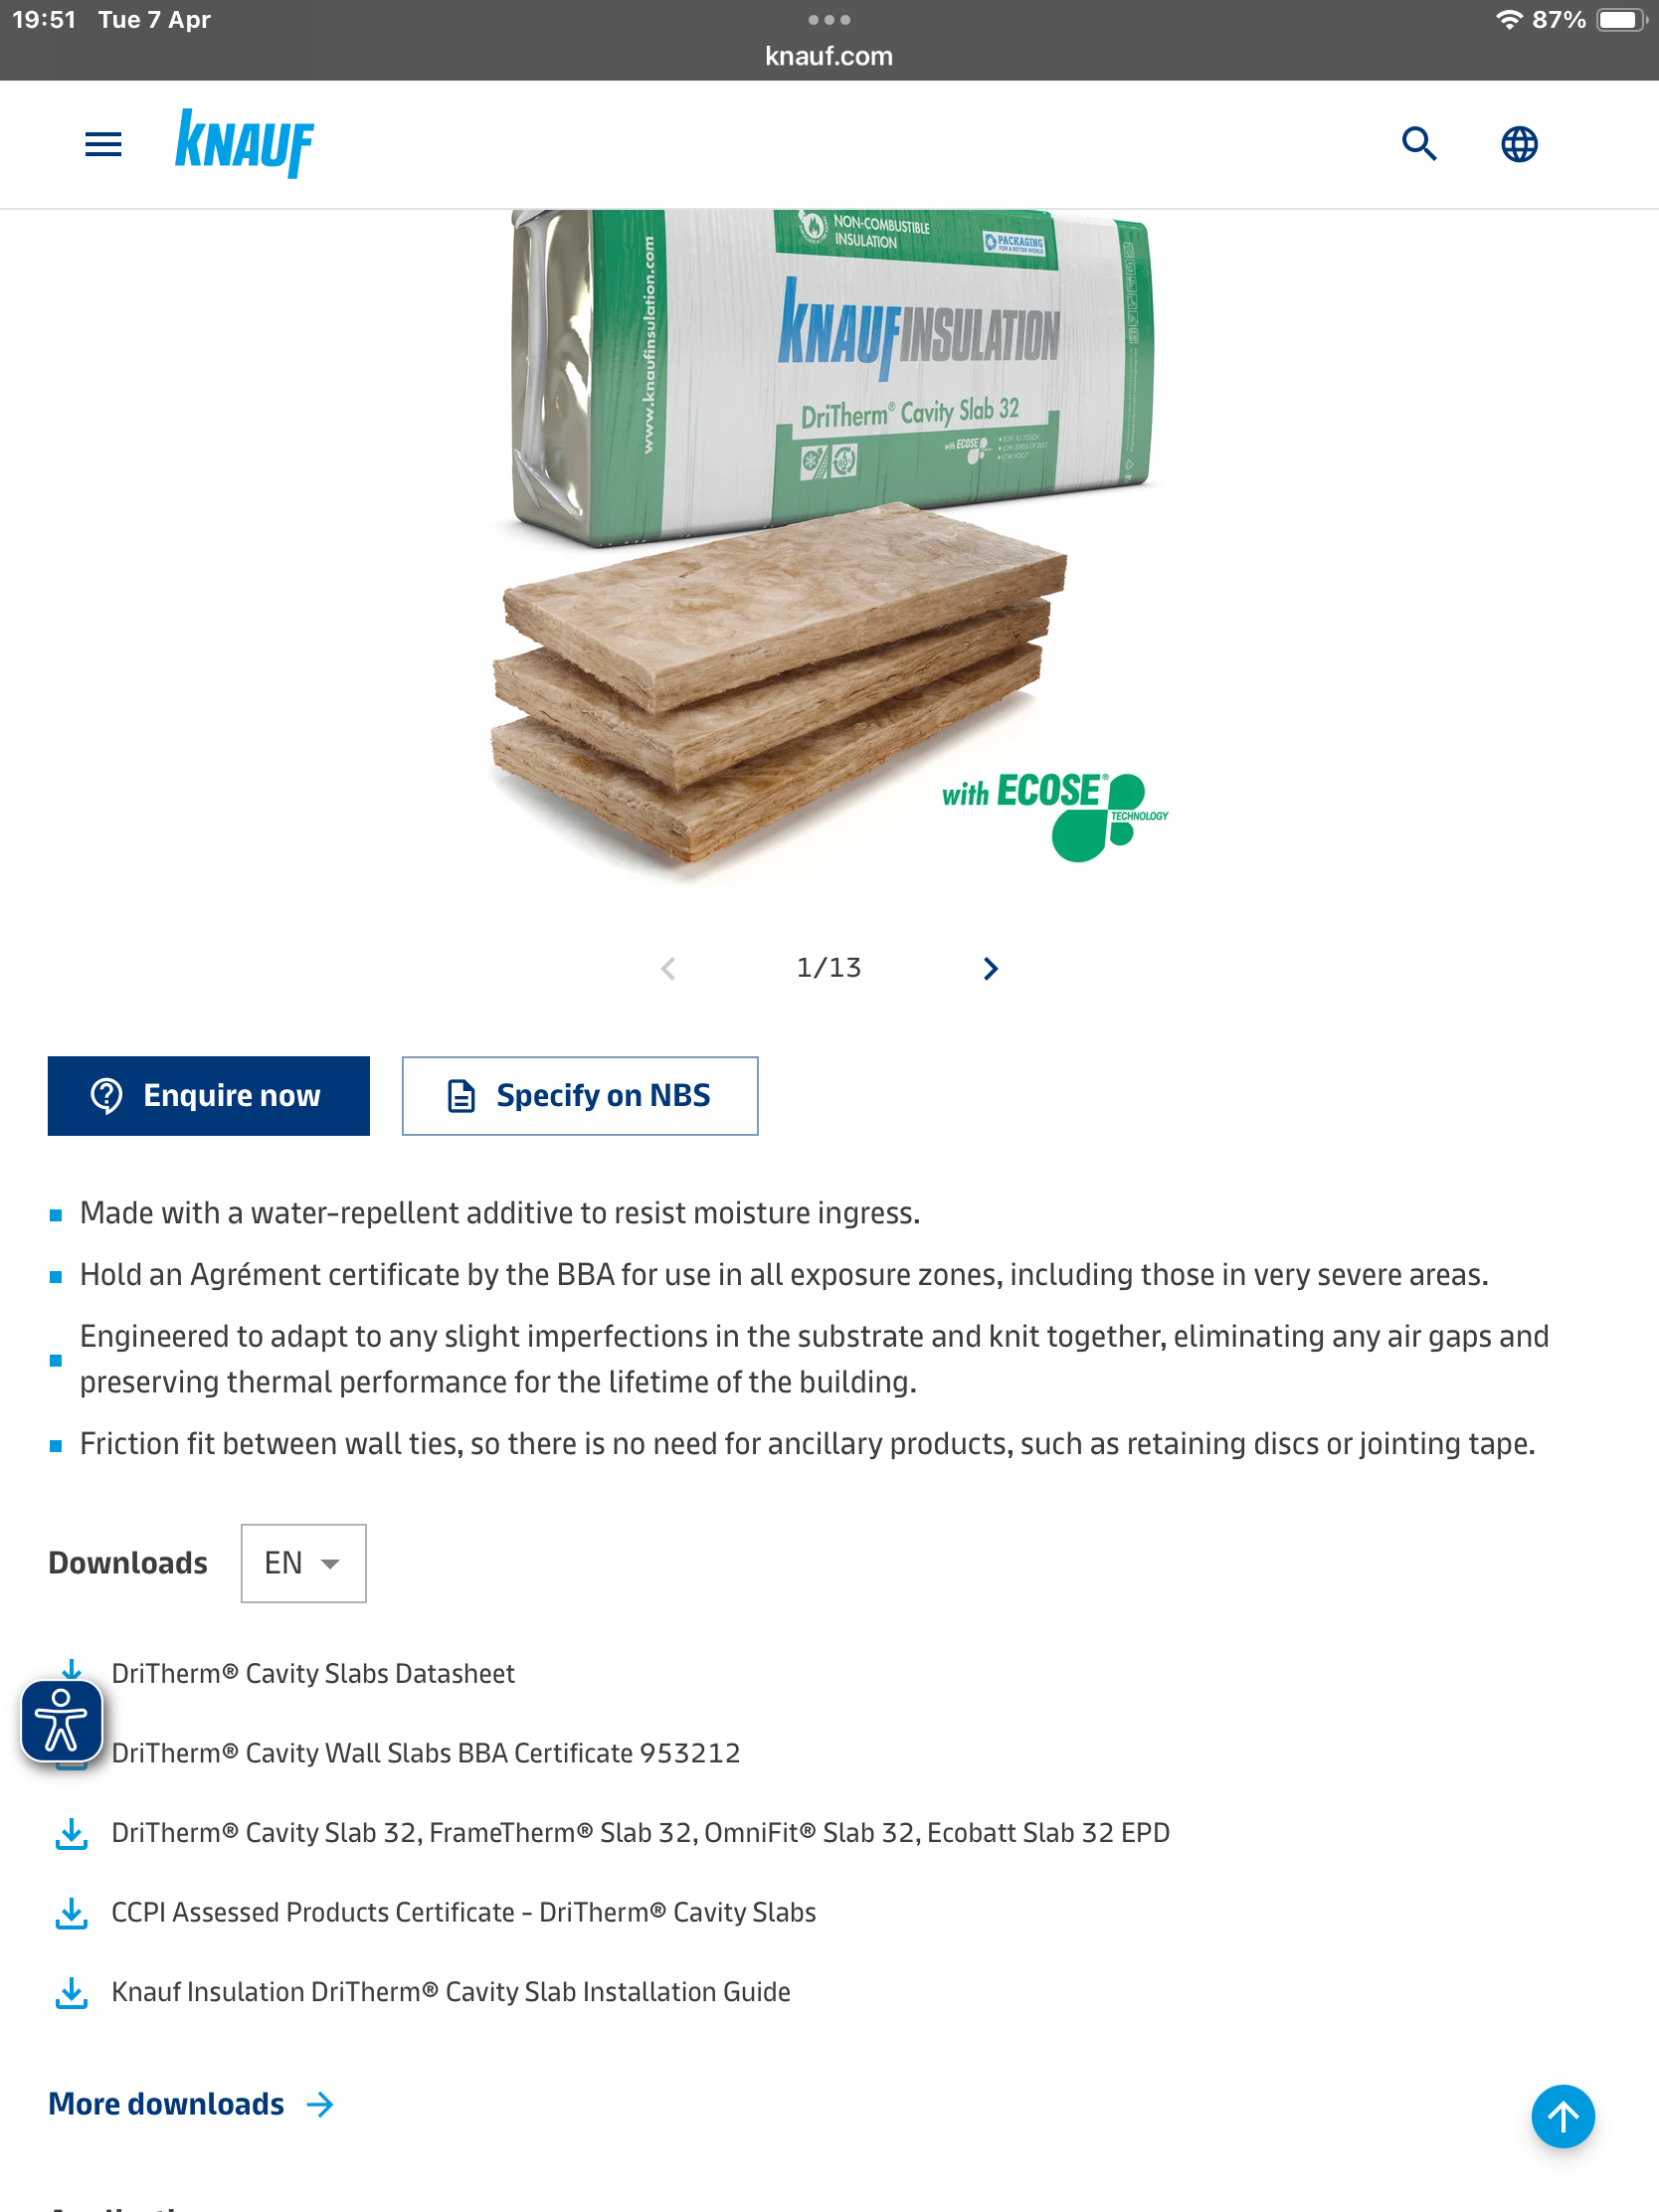
Yes. The BBA certificate is for all exposure zones.

-
I’m a bricklayer. Just had planning approved for south Scotland. Was told rigid boards (PIR) is the standard with 50mm air gap. I sent a email over to building control about having Dritherm 32 fulfill along with the BAA certification. They replied saying I can go ahead with it as long as installed to manufacturers standards. There was no way I would do PIR. Even on my own build taking all the time in the world it would be a nightmare to install. Looks great on a drawing but it just don’t happen in real life and when the bricklayers not getting paid much to take the time you end up with a right mess as shown in photos above. It repels moisture too so won’t get through the cavity, even in exposed locations like mine.
-
Planning permission has been granted 👍😁
-
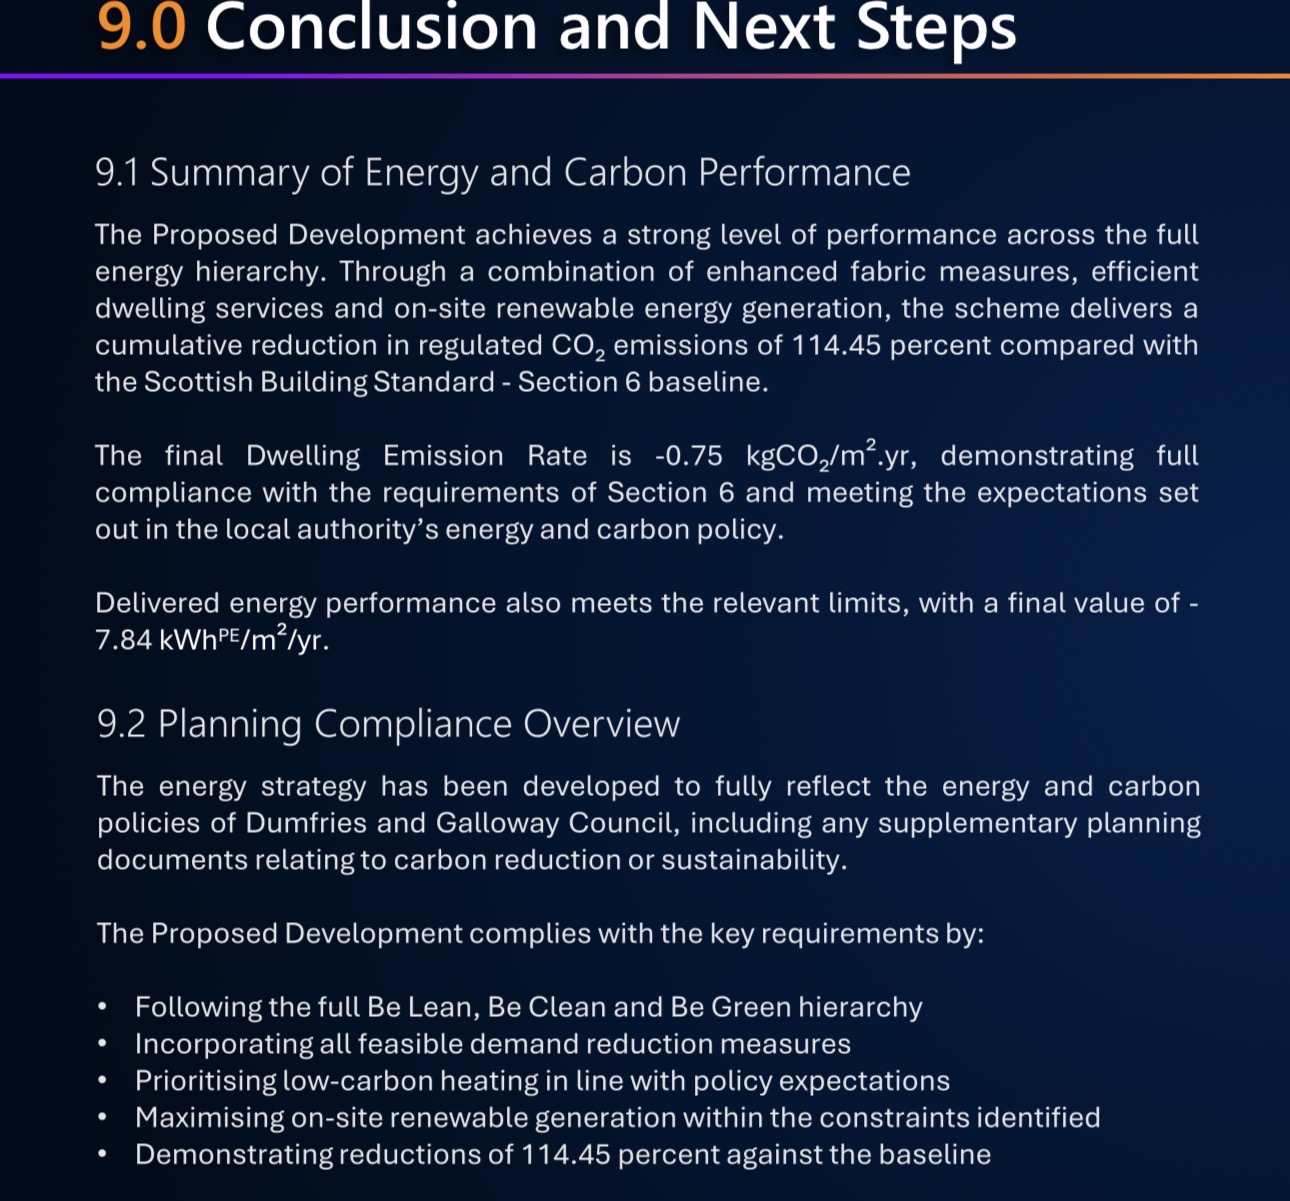
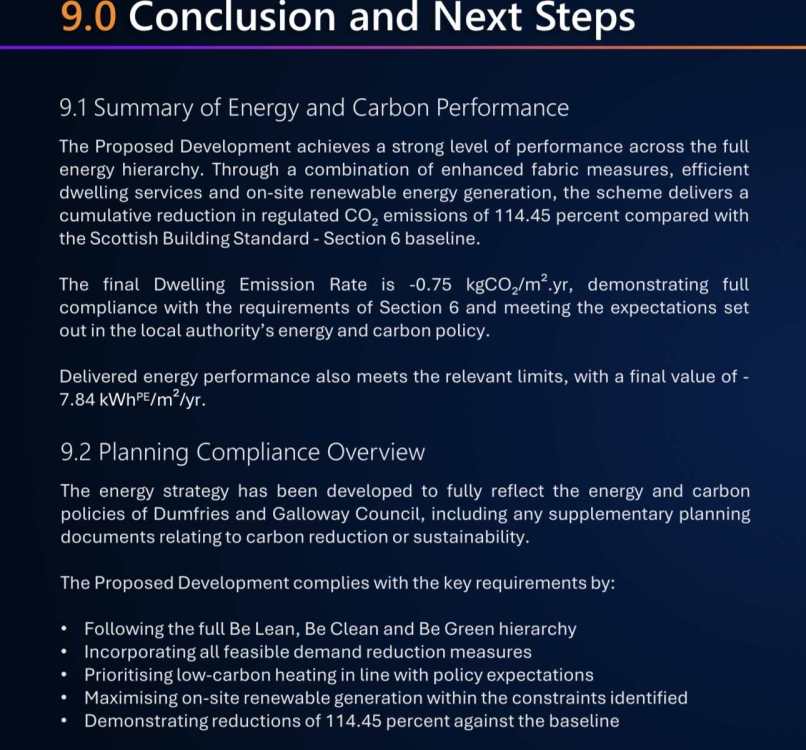
Just to come back to this. The planning officer did want the energy statement at planning stage by a registered assessor to make sure the building will meet criteria before giving it the go ahead. I went ahead and instructed Energy Digest to do the statement, SAP and overheating report. Yes it cost a bit but it’s done now and ready for the building warrant stage. SAP came in at 111 A+ Co2 reductions below.
-
I’ve contacted a few companies today and prices of around £500 are coming in. quote from planning officer ‘’I am just reaching out at this time to ask if an Energy Statement could be submitted to supplement the plans, please? This is a requirement of all new buildings as per LDP2 Policy OP1, part f). I have attached the template for convenience if that could be filled in, and submitted in due course.” quote from architect “As you will read, he is looking for an Energy Statement in order to process the application further. The statement has to be provided by a registered assessor.” Dumfries and Galloway template that PO sent. It asks for assessors registration number. This indicates to me they want this information at the application stage now. Energy-Statement-template.docx
-
Our application is in for the new house design. Planning have emailed to say it’s all ready to wrap up apart from requiring a energy statement from a registered assessor. Does anyone have any recommendations? I have most of the figures from the heat loss spread sheet off buildhub but obviously I’m not registered 🙈 Thank you in advance 👍🏻
-
Anyone interested in 200mm cavity wall ties, some for sale in the market place on here 😉 Ive had to reduce down to a 150mm cavity due to foundations already been in so can’t build any closer to edge of concrete to pass building control. disappointed but I’ll ad 25mm PIR to the inside to gain a little back.
-
I’m assuming the membrane will be air and vapour permeable to allow vapour out and air in to flow between the gaps in the sarking board? Thats a different membrane to the standard “breathable” type and more than likely expensive. Sorry if gone off topic a bit but just thinking out loud 😁