junglejim
-
Posts
266 -
Joined
-
Last visited
Everything posted by junglejim
-
Thanks @JohnMo any recommendations on where to source manifolds for this in uk? I can find lots of ufh manifolds but struggling with domestic water distribution. Thanks
-
I’m currently planning my hot and cold water layout. I like the idea of the ‘home run’ setup with pex runs from a central manifold. Its a lot of pipe though and I’m thinking a smart spring might be to zone the house and run zones from the manifold then tee off from the zone to the appliances. my logic for home run is that we’re doing timber frame build and I don’t want joints in inaccessible locations. The home run setup doesn’t seem so common in the uk as it does in Europe so wondering what folks think? thanks
-
Thanks that’s really interesting. I’ll take a look.
-
Thanks. Building is 15x10m with upstarts in roof space so total floor area approx 300m2 so not massive. That’s really interesting to know what you’re using in Scotland.
-
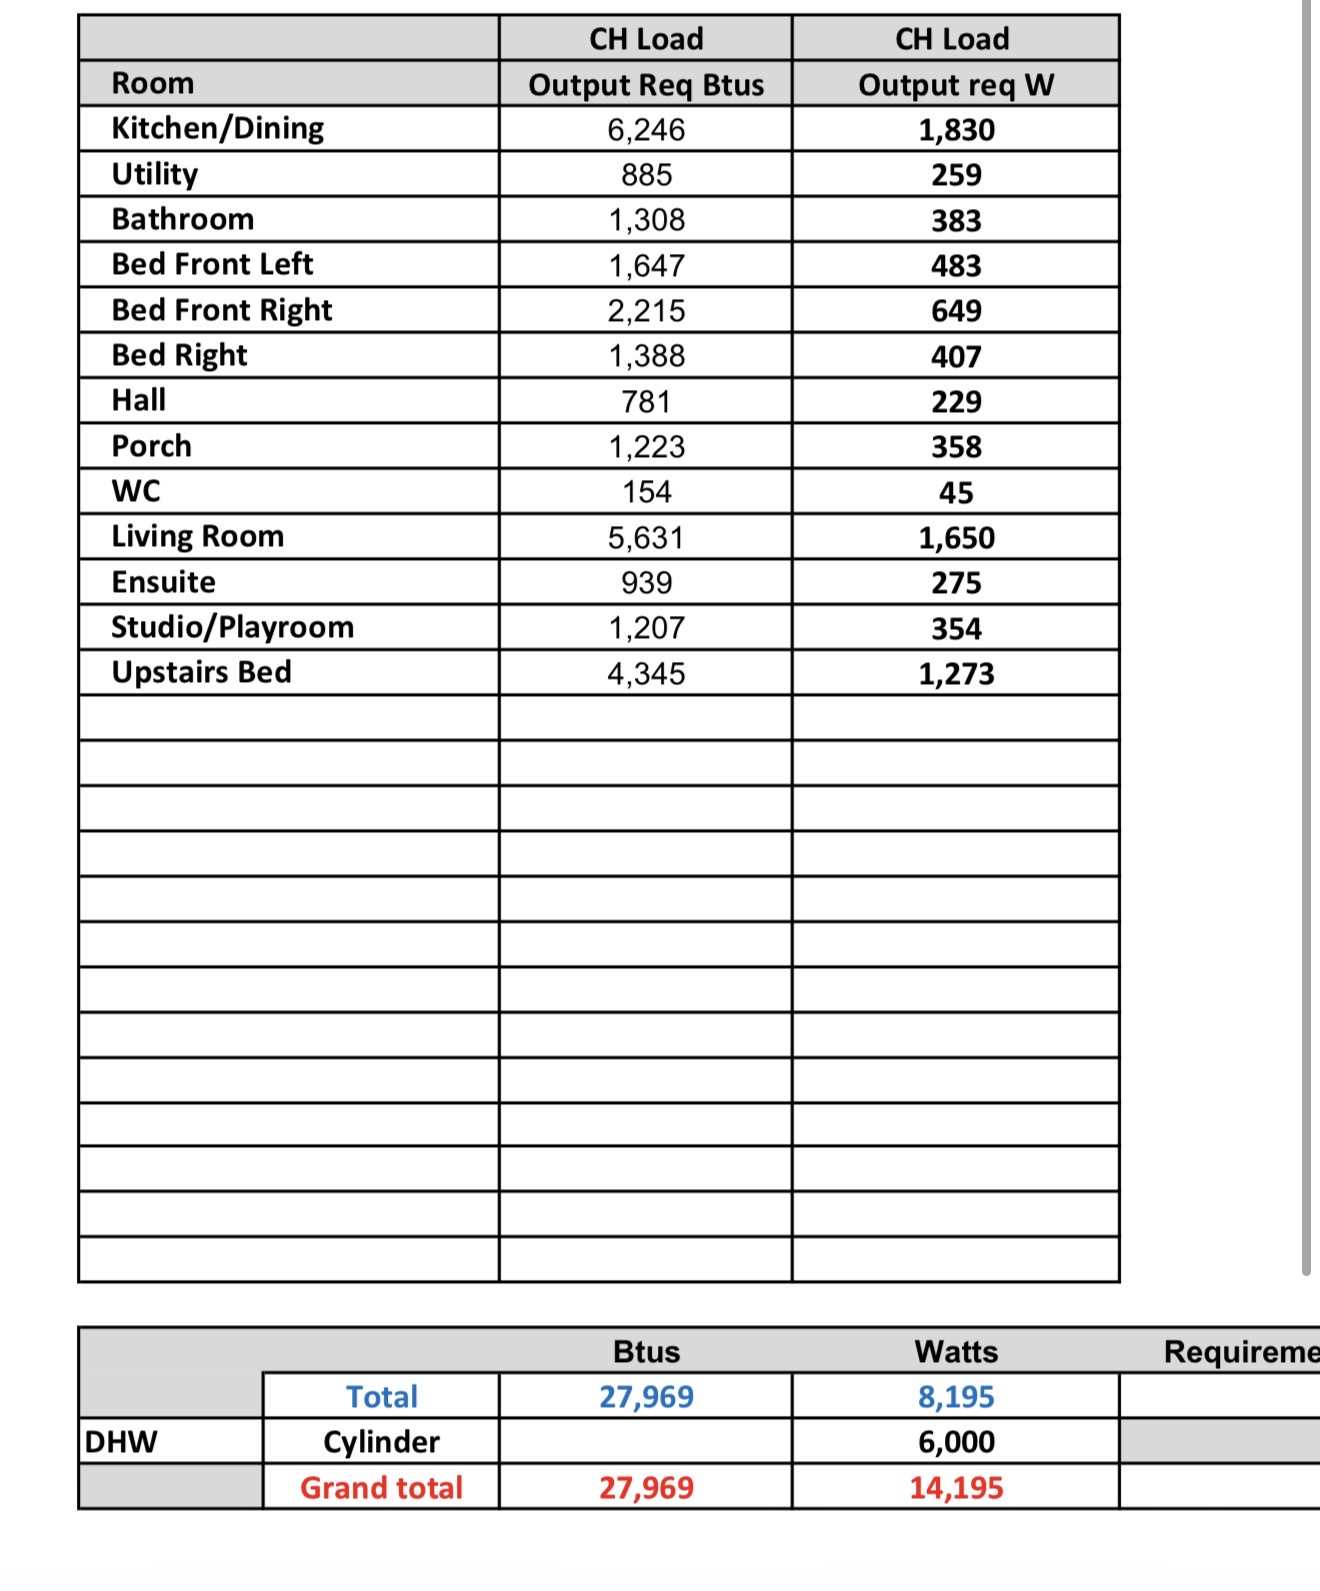
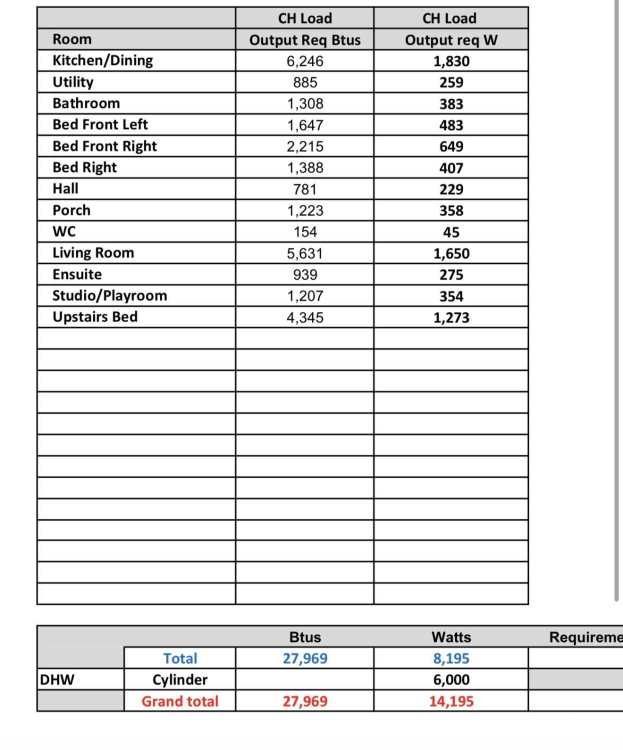
Thanks for all the help. Clearly have a lot of homework to do! I was hoping the plumbing company would help with this. Here’s the heat calcs they’ve run but I’m not sure they have factored in the efficiency of the build and other aspects such as MVHR. Im not sure where to start in terms of doing calcs myself so any help really appreciated. ps. Location is Guernsey so no extremes in temperature.
-
I’m trying to get my head around heating design. We are building close to passive house timber frame. I have ufh downstairs and want provision for radiators upstairs. I’d like the ashp to part heat dhw if possible so presumably unvented indirect cylinder. A plumbing company locally have shared suggested design but is generic and what I’ve read is that low loss headers are not best with passive house. Any advice welcome as Would like to meet with them to talk through. Thanks Proposed ASHP Layout - Charmaine.pdf
-
Thanks. Does it matter how much overlap there is. The battens are about 60mm off the floor so could tuck underneath and tape the overlap without lifting the battens.
-
On most walls there’s enough space to lap up underneath by about 7cm without removing battens. But presumably would still need taping regardless so not sure if there’s any advantage to that.
-
Yes prefabbed. Came like that with vertical battens
-
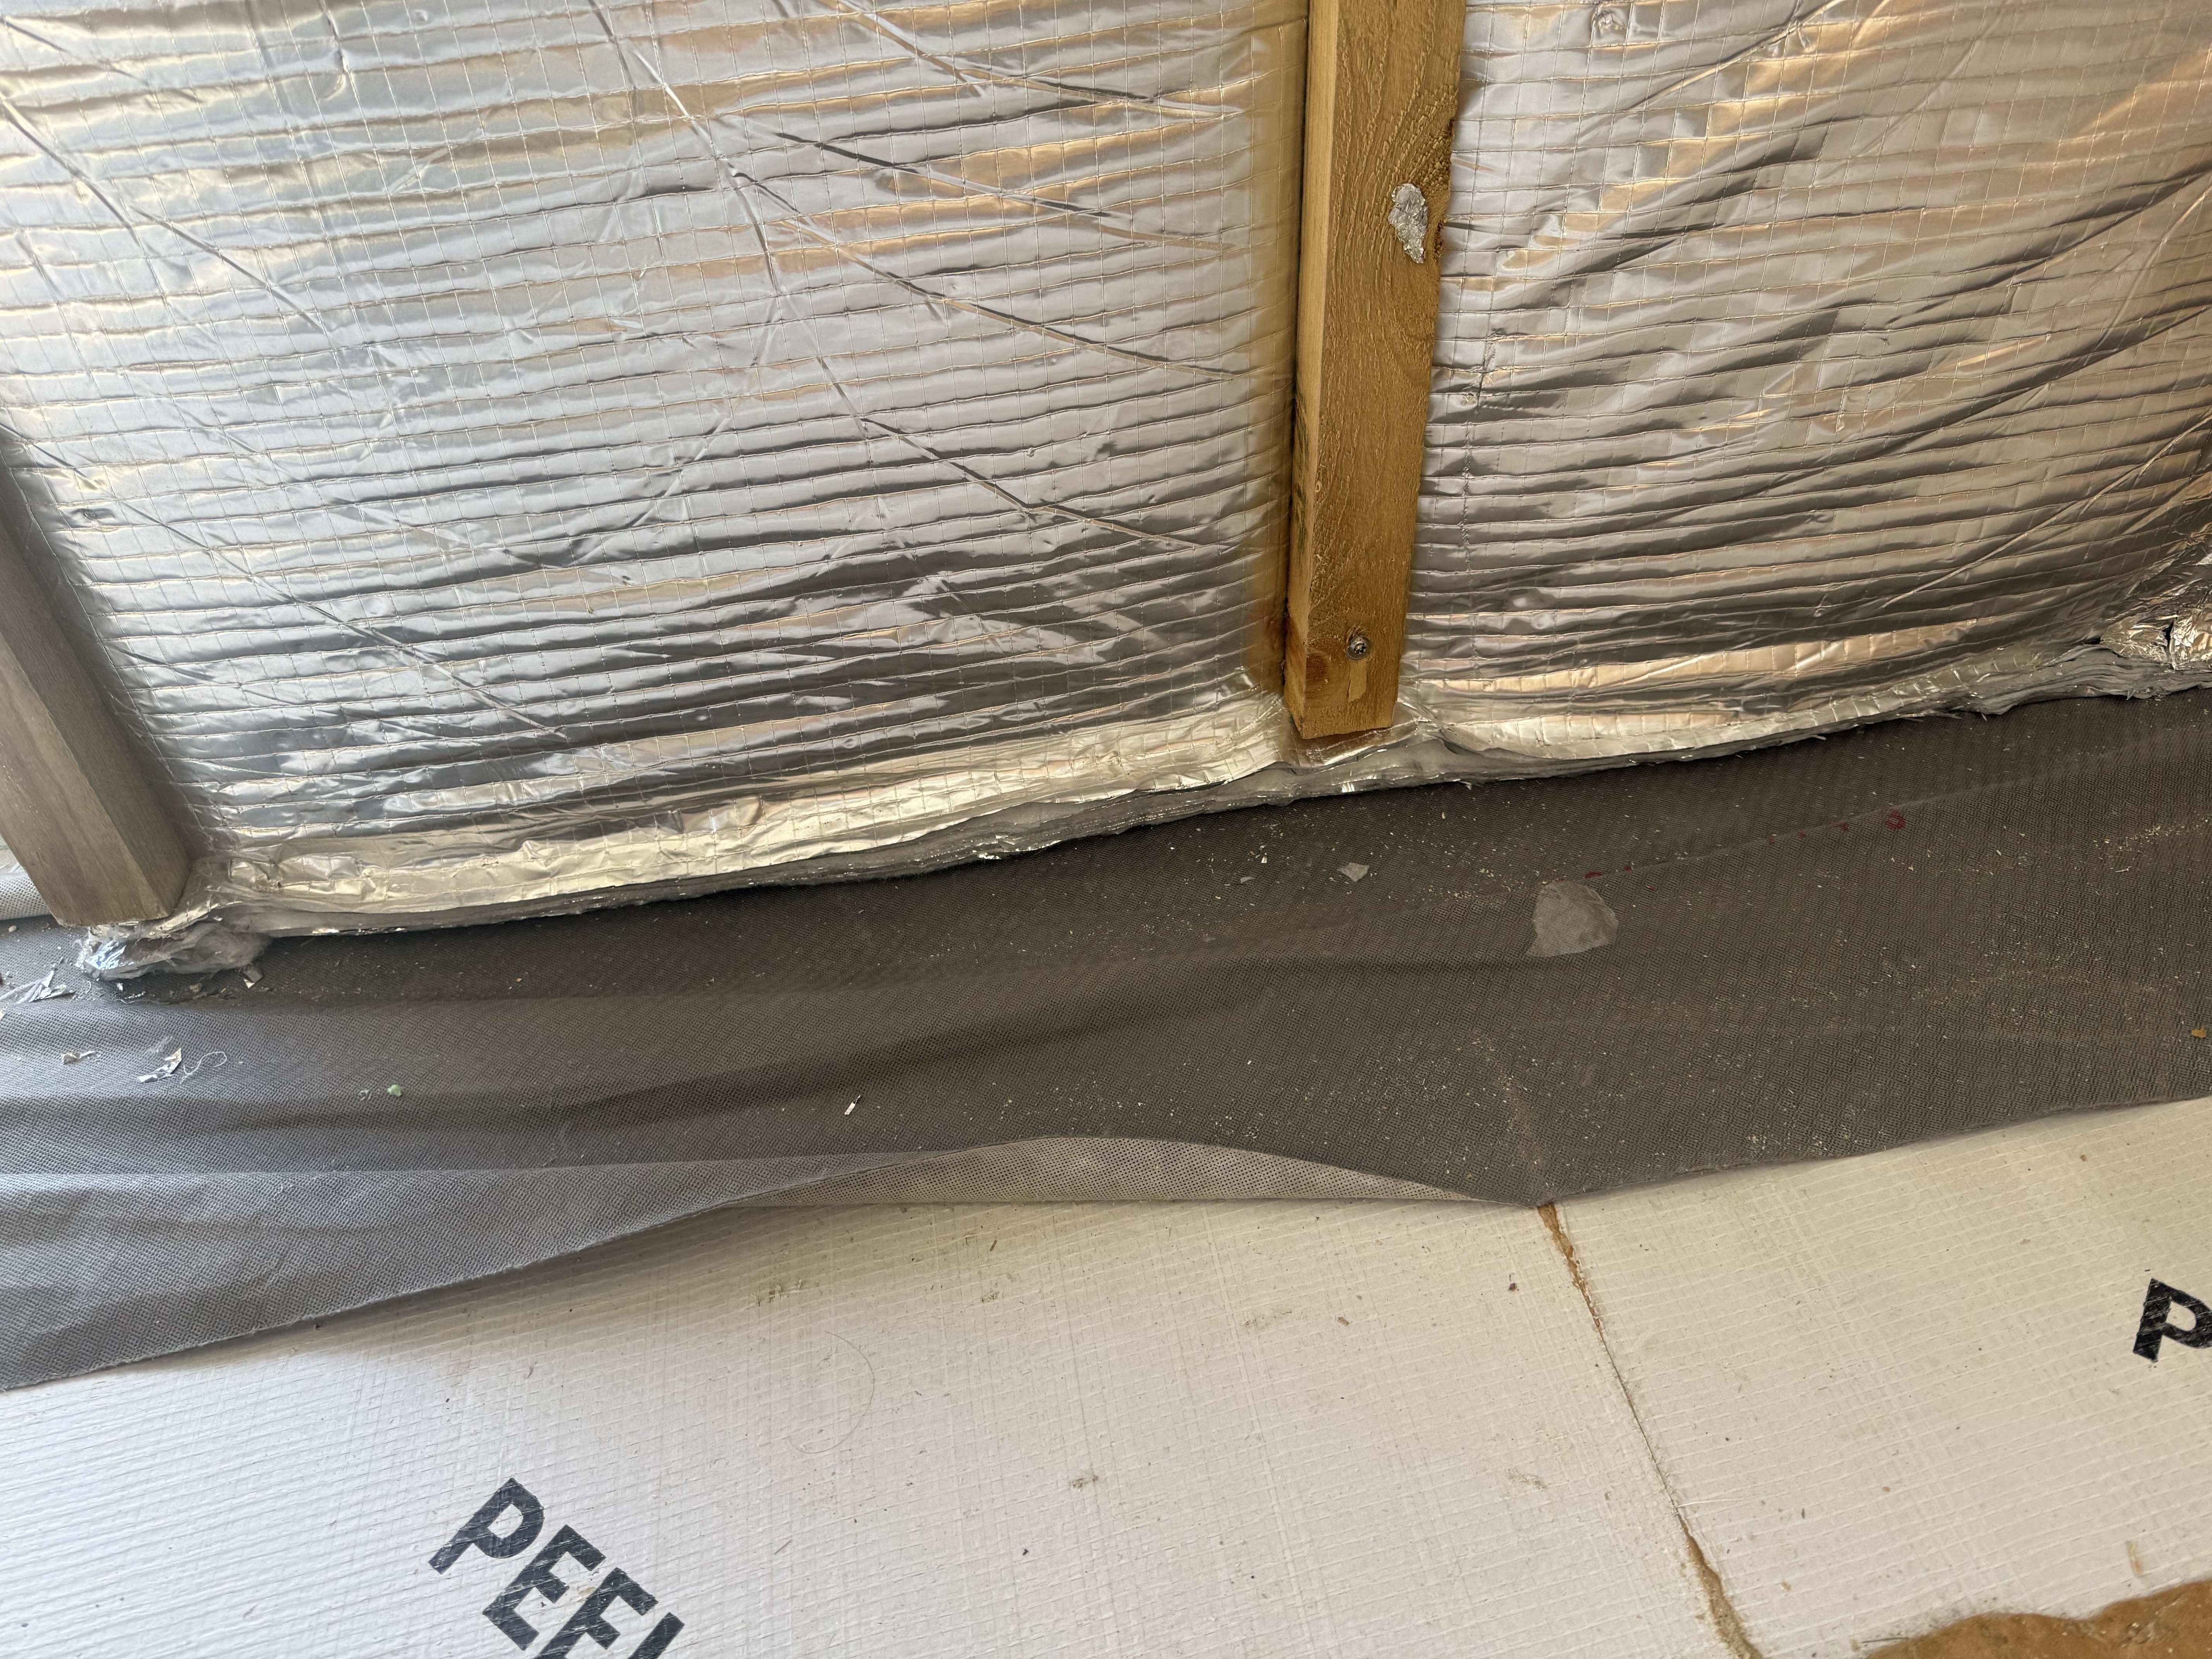
Just working out best way to tape this junction. The vcl is lapped around the cassette from bottom floor to top. Should I trim and lap under the ybs and then tape or just tape direct to the ybs as it is… seems like there’s no gain in folding and extra work. any thoughts? Thanks

-
No I have PIR between studs then ybs super quilt over the top and battened in place
-
Yes good point… I was planning on lapping up under the ybs superquilt and taping together so would need to do that before adding horizontal batten presumably.
-
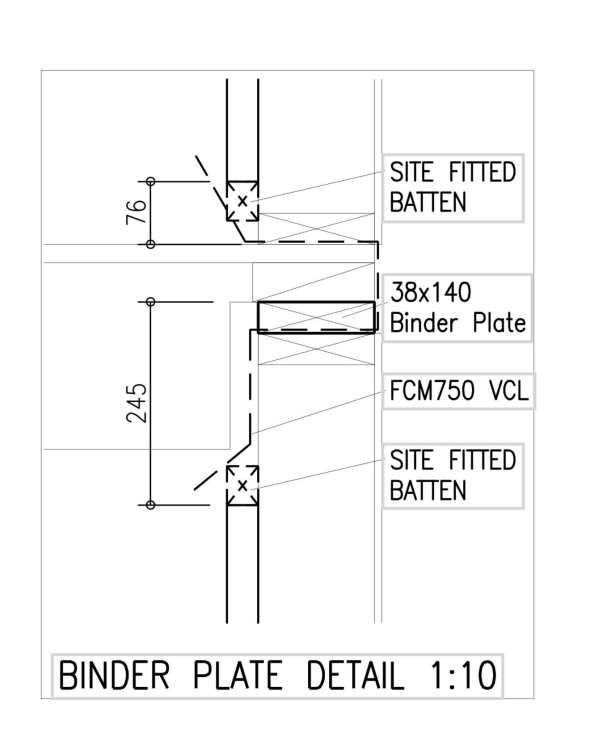
Yes cross section of ground floor to first floor junction
-
Thanks that’s helpful…. Another job the TF sub contractor was supposed to have done but didn’t 🙄
-
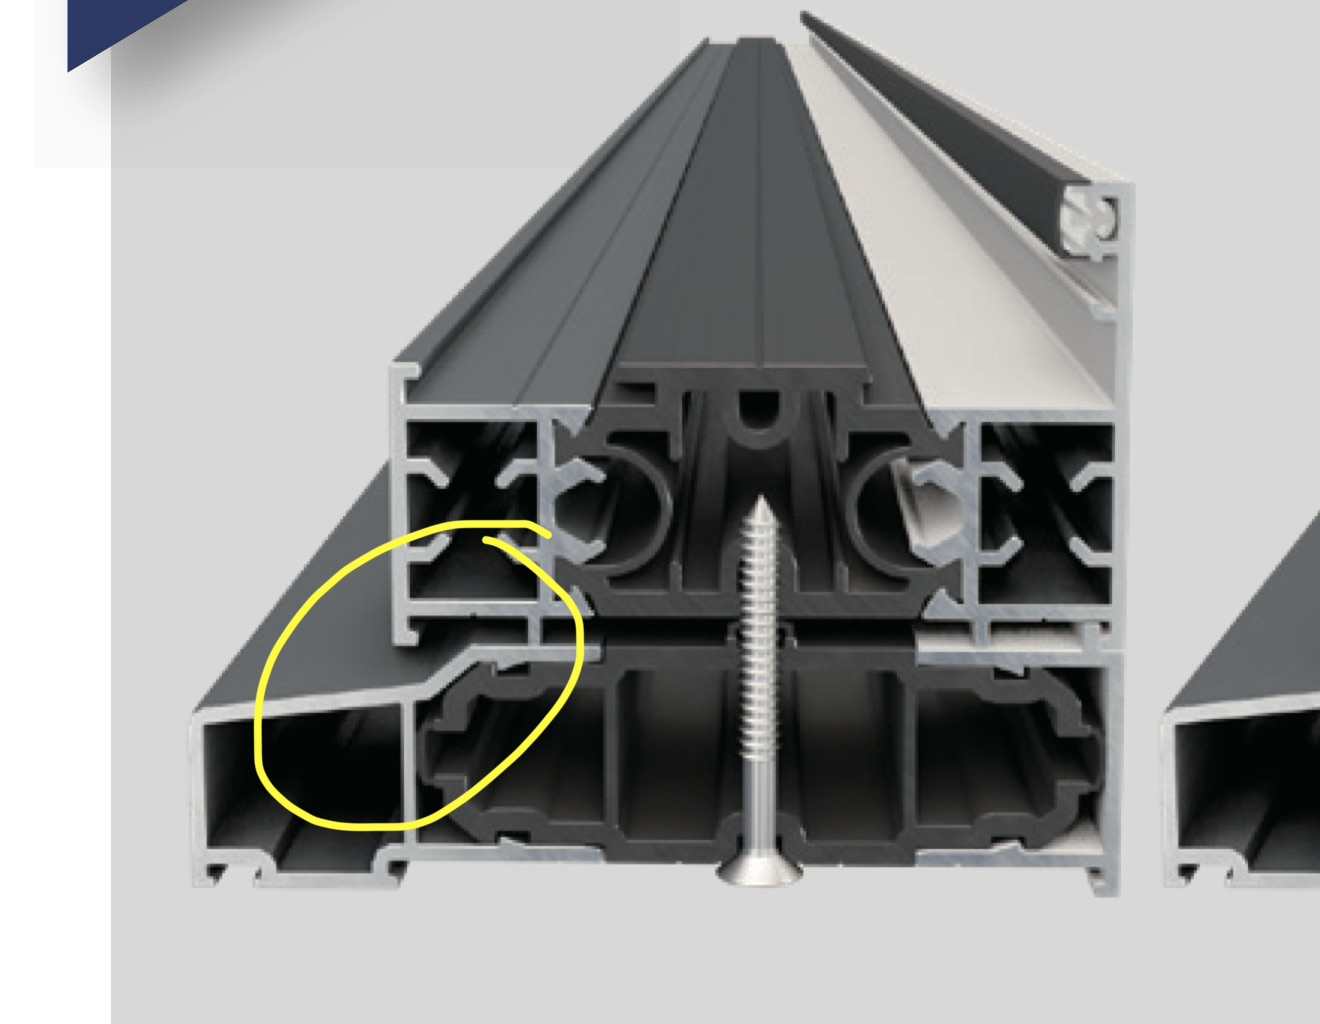
I’m looking at this detail in the drawings and noticed the ‘site fitted batten’ I can’t see this but also wonder if it’s necessary as looks horizontal which would surely block the service cavity created by the vertical battens. Given it’s in the eaves I may not need the service cavity. What’s not shown in the drawing is the ybs super quilt under the vertical battens. I’m probably missing something obvious 🙄 Sorry I haven’t got any actual photos as not on site at the moment.
-
Thanks. Would you suggest using both or can the bend supports double up as protection?
-
Looking at where the ufh comes through the screed to the manifold. Any tips on protecting? I’ve seen these used; https://www.vpsunderfloorheating.co.uk/product/ufh-90-degree-pipe-support-bend/ but don’t know if I’m better off with some ducting and if so any suggestions? Thanks
-
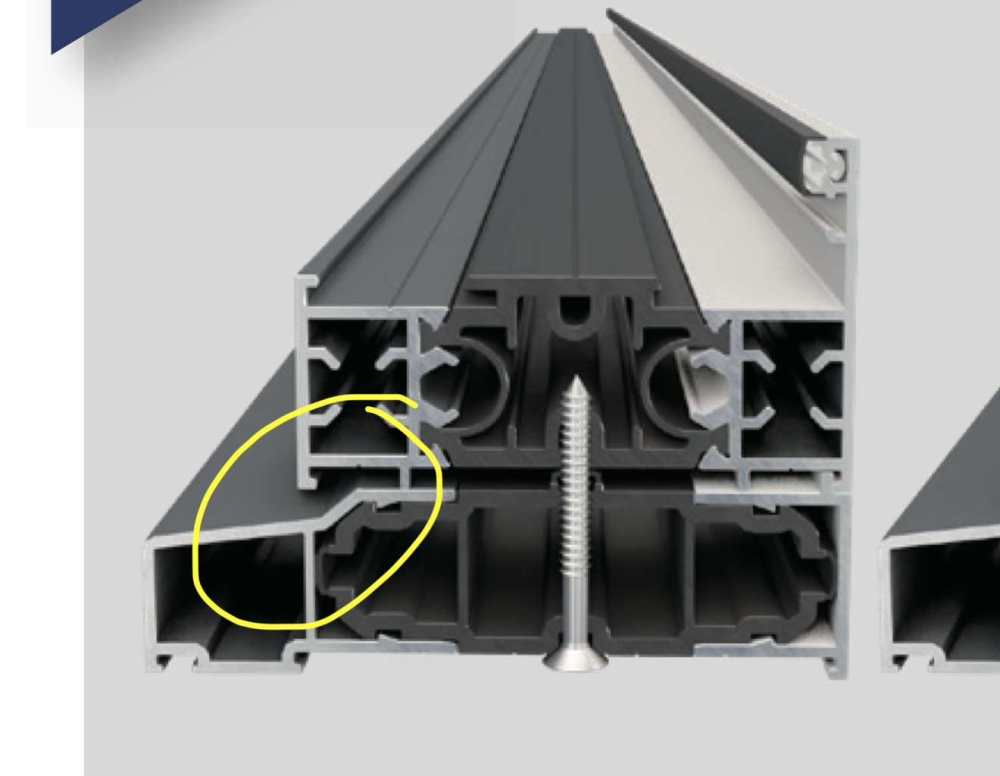
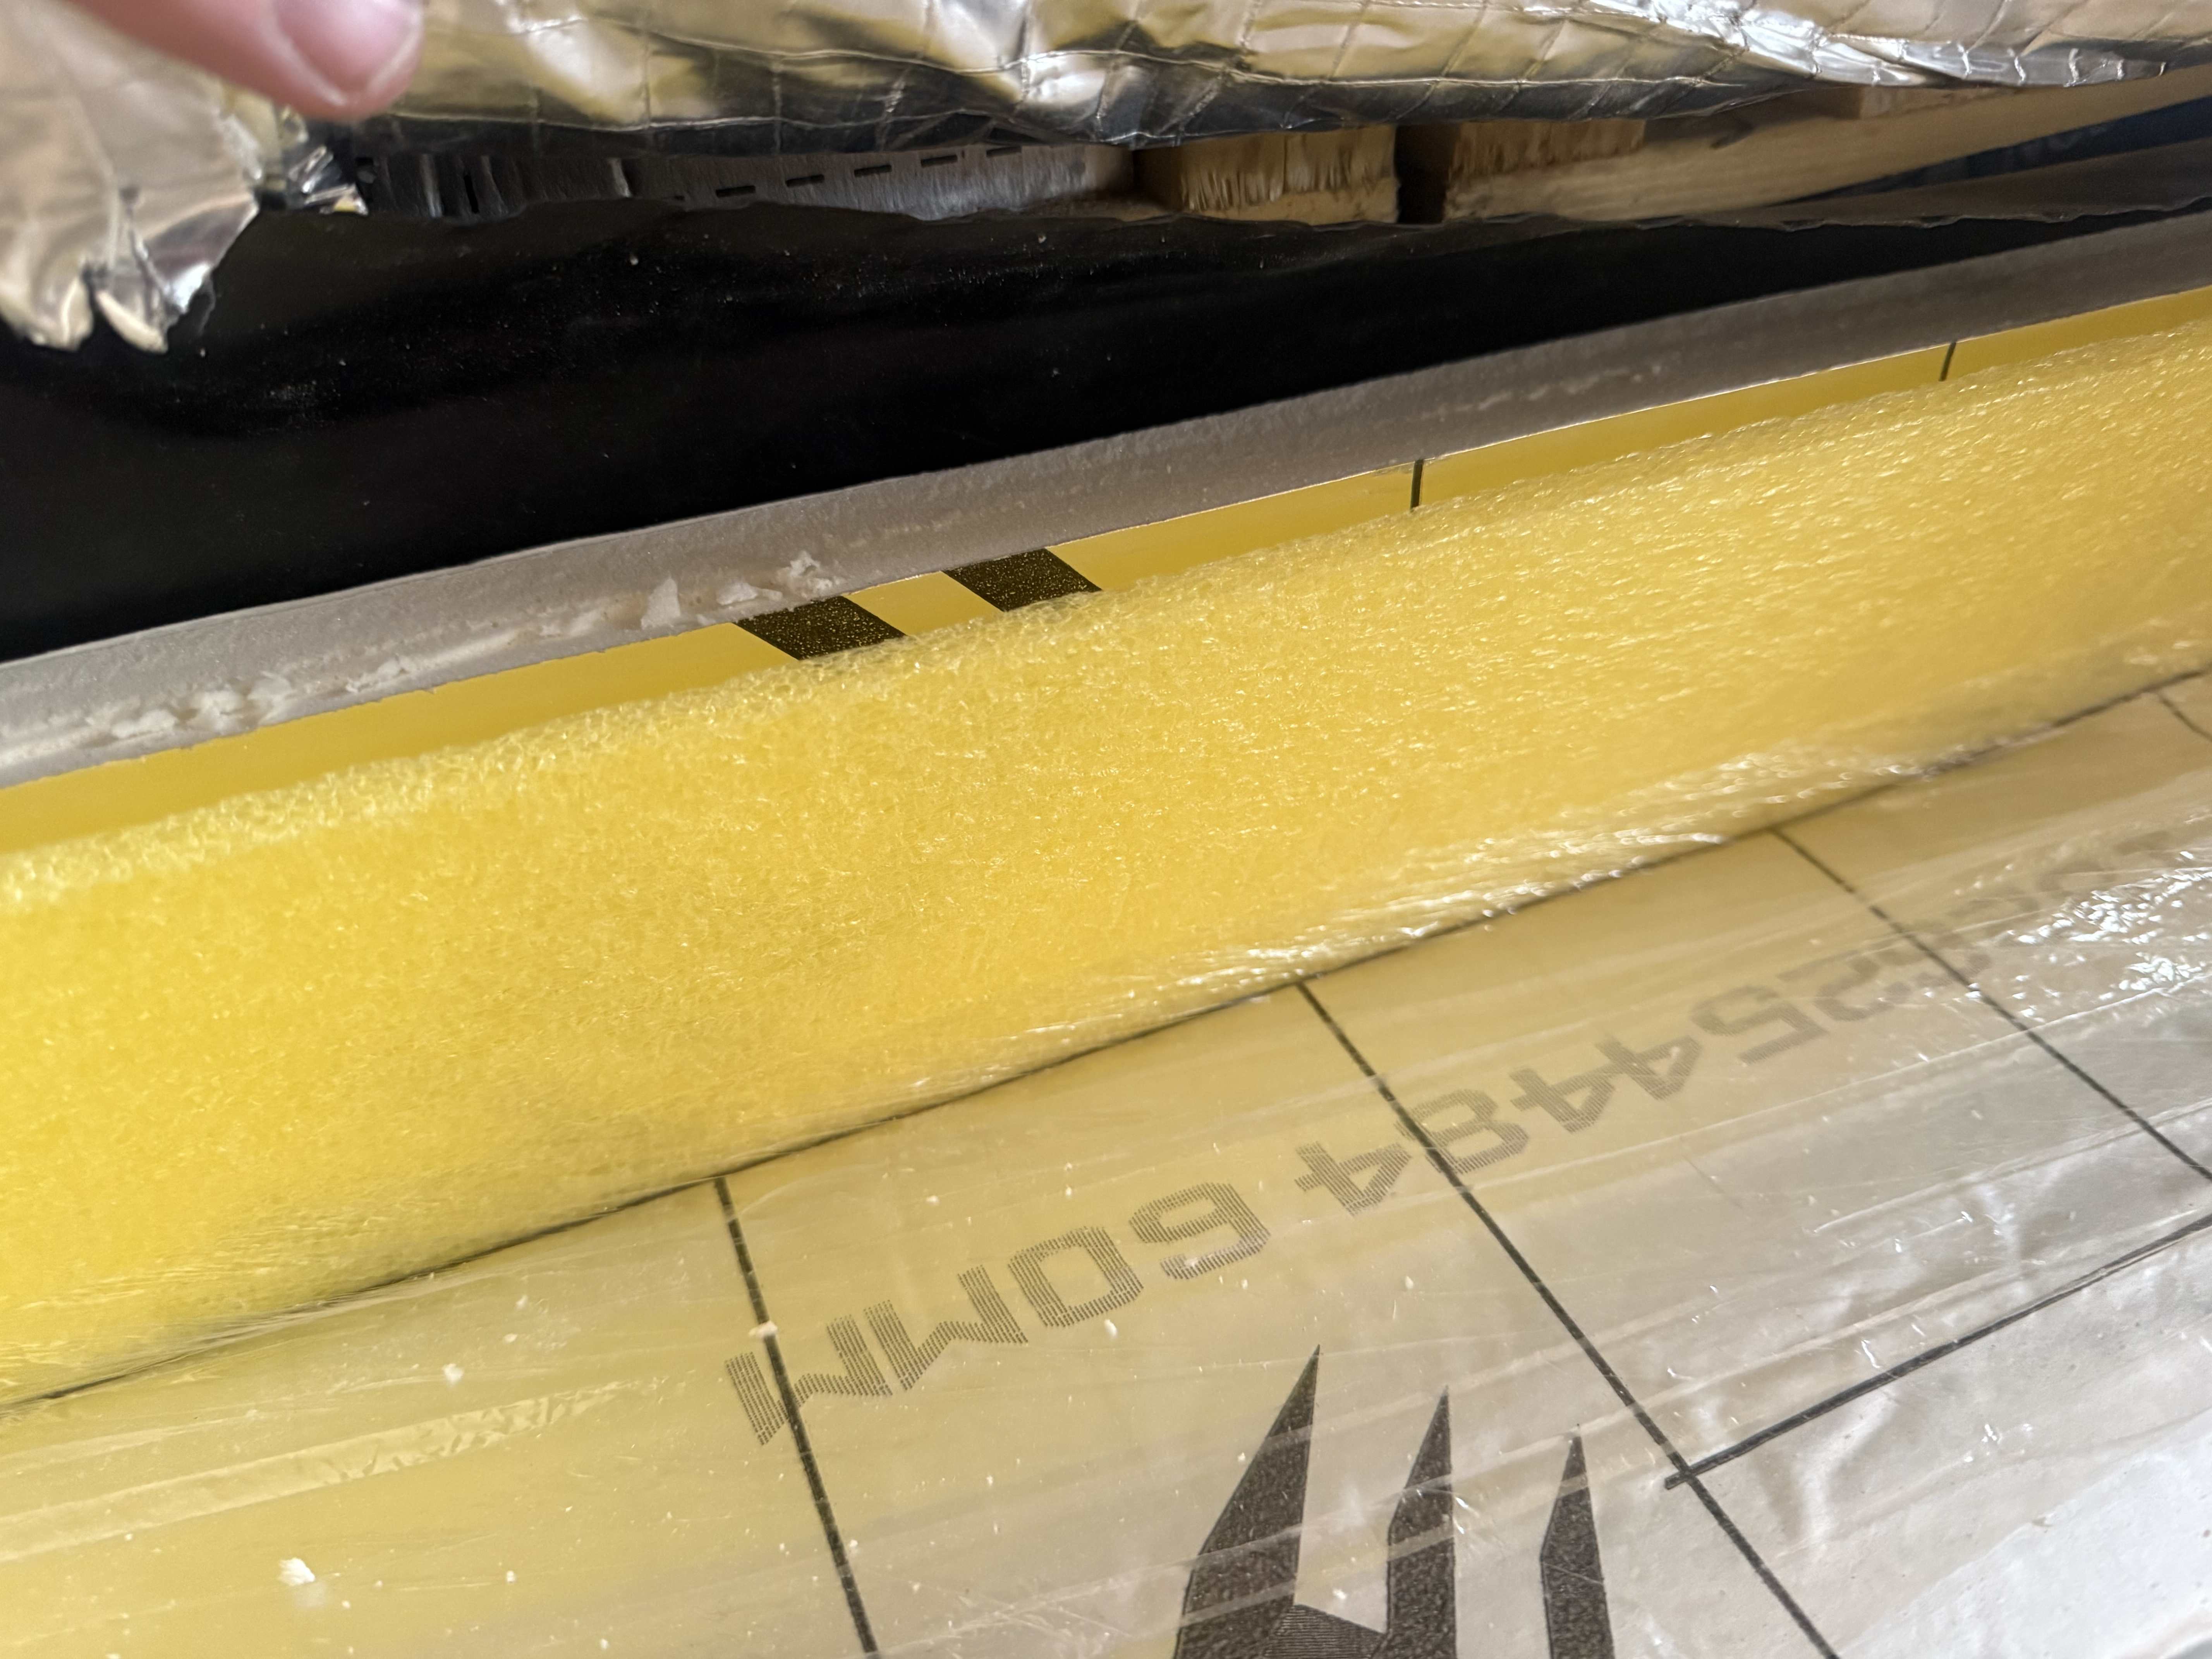
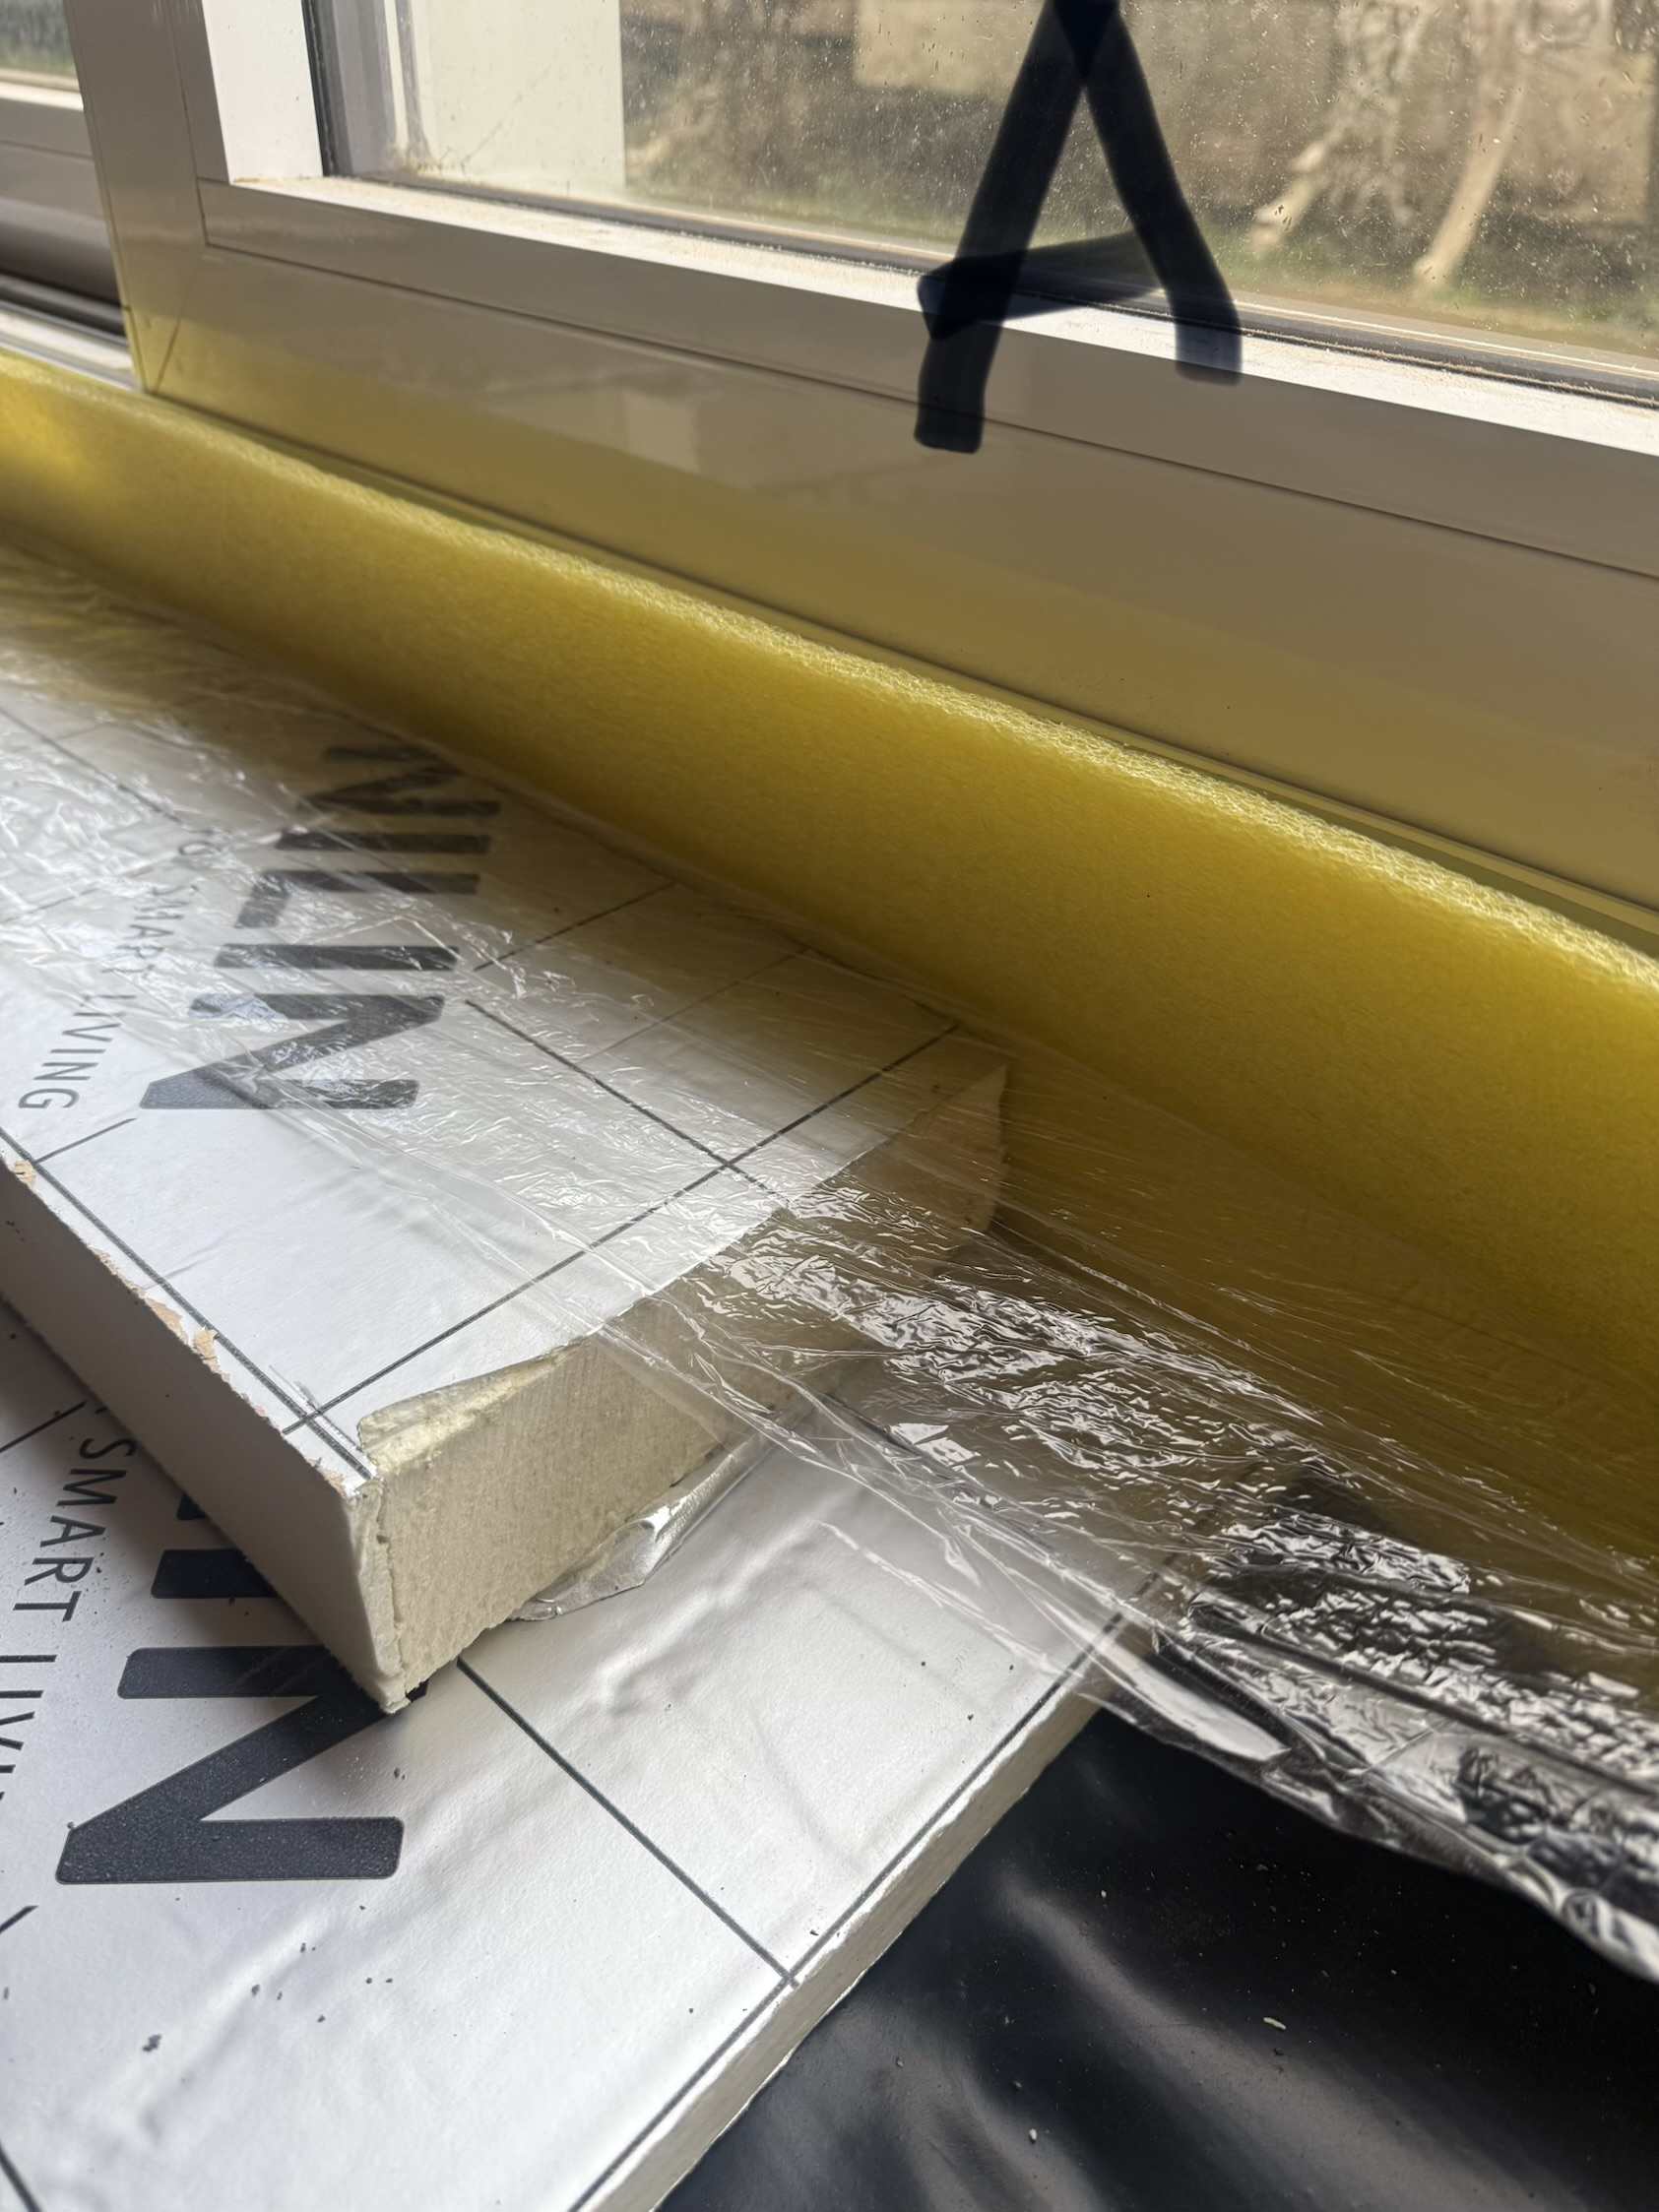
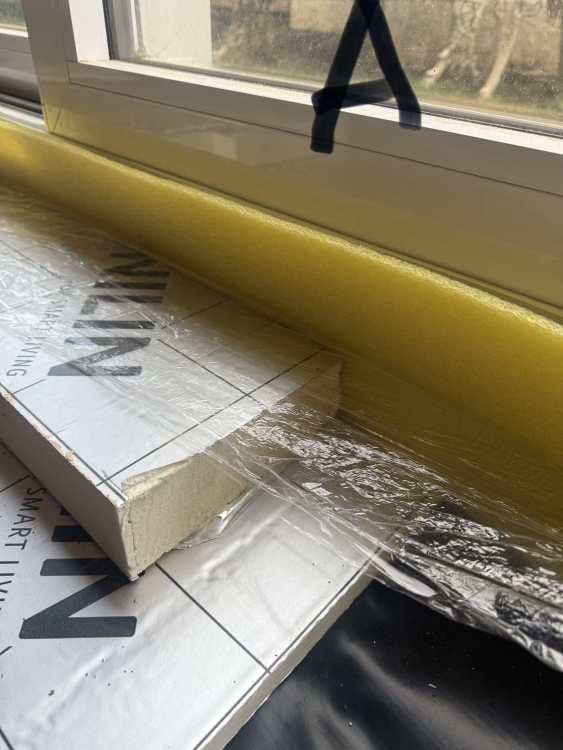
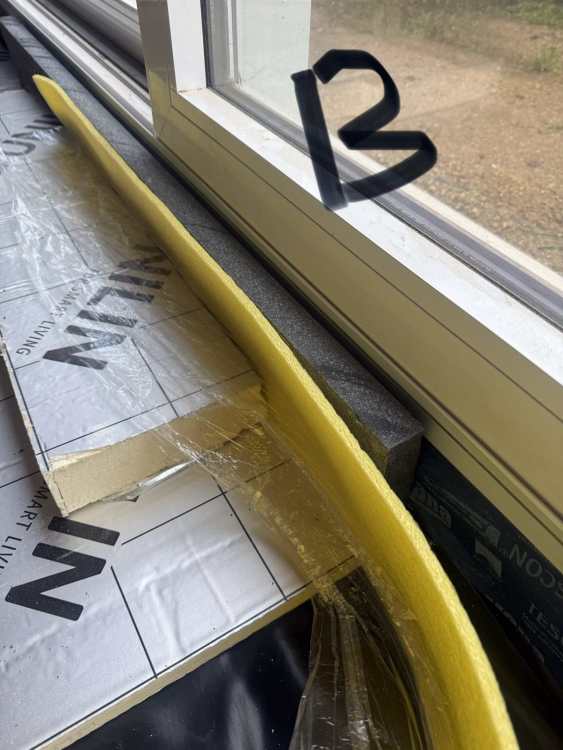
Thanks. Really helpful. Can I ask why put the yellow behind the upstand when on the other edges it goes in front? I thought it was to decouple screed from insulation etc? Attached is how the other external edges are done where there isn’t a door.

-
Thanks Nick. My logic was because the bottom of the screed is pretty much level with the bottom of the frame so not particularly well thermally protected from the concrete upstand. At the usual wall edges I have a 30mm pir upstand so seems to make sense to extend continue that in front of doors but given its a threshold figured it needs to be load bearing as pir would likely damage. My understanding was that screed needs to go up to the yellow edge strip hence putting that inside the grey foam. Perhaps an alternative is to use pir upstand as per external wall edges but trimmed so that screed can still go over the top but at half depth (3cm) but I’d worry this might be too thin and vulnerable to cracking.
-
Not sure the best way to approach this so advice appreciated. option A: The standard approach as per guidance from screed company is to put the foam edge strip on the door edge and screed right up to it. As per picture A. In my mind that’s potentially a cold bridge point so… option B: I was thinking about putting structural foam perimeter (grey) along the door edge and then the foam strip (photo B) the down side is that the slab will finish inside of the structural foam so the foam won’t have any compression from the slab and the flooring will overlap it. Potentially it’s not very tight and may need trimming down which will be tricky in situ but gives the edge of the slab extra insulation Any advice appreciated
-
Sounds like good logic… but Ufh is only ground floor and fed by the ashp so my understanding was that the ashp would be doing the pumping without need for additional pumps at the manifold. Are there other complaints that will cause significant noise? It’s a timber stud wall so will add acoustic insulation too.
-
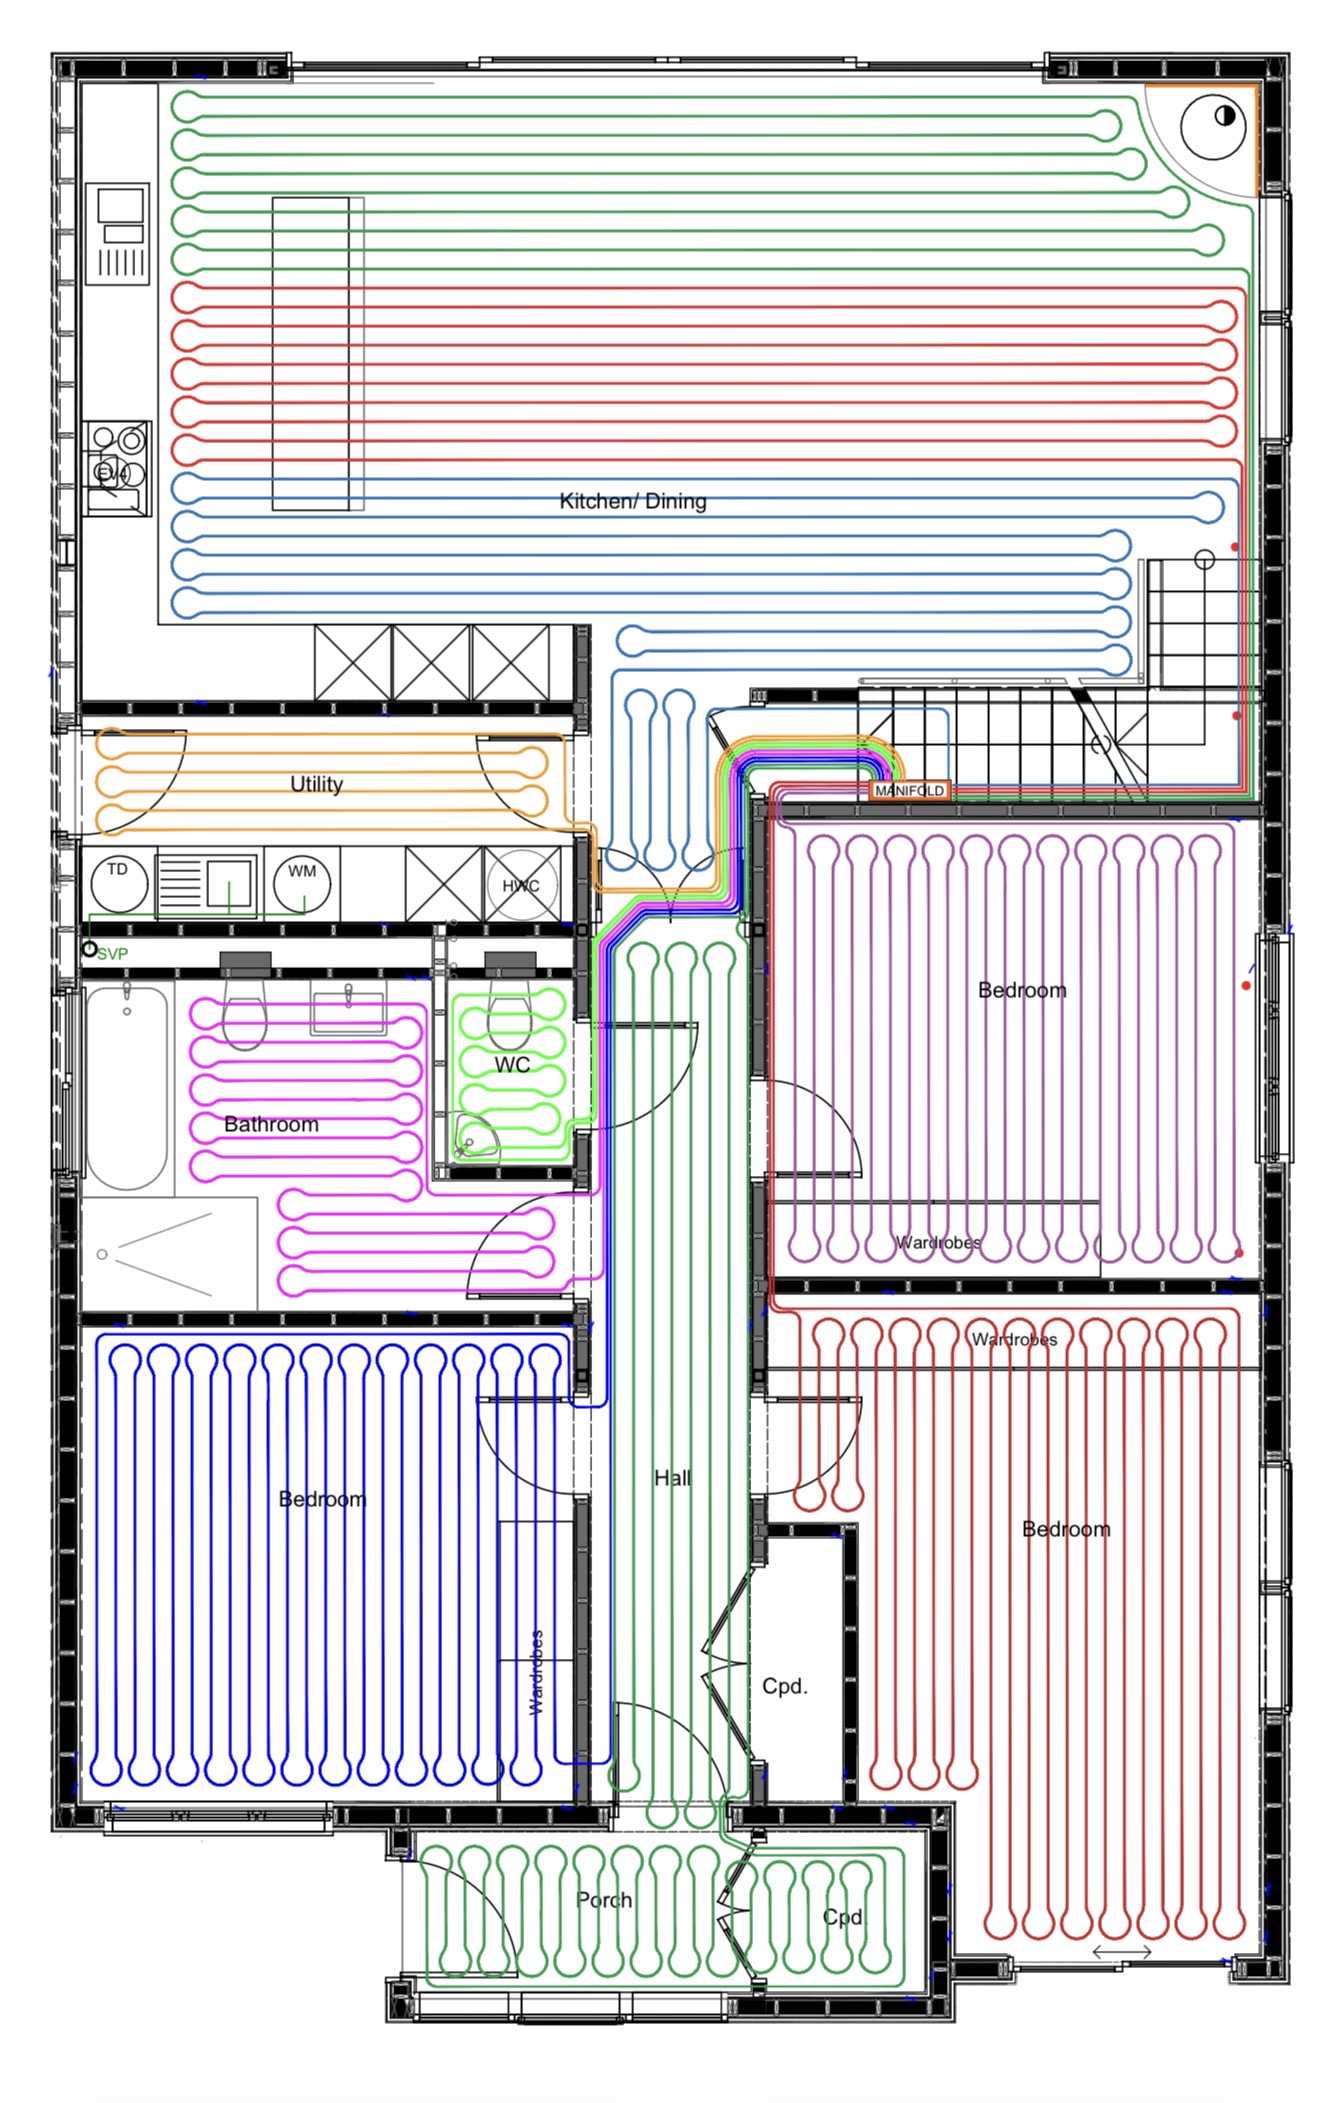
@Nickfromwales @BotusBuild @ProDavethanks for the comments really appreciate that and a few things for me to think about. CC are 150mm Manifold: is under stairs. Curious why not there and if you have any other suggestions? Also interested in advantage of going through doorways instead of through stud? Bearing in mind ufh pipe level is above the sole plate here. i can see the logic of removing or reducing the hall loop but presumably that would give me an area with inconsistent temperature/control as essentially following the heat call from the rooms. Given its low temperatures run off ashp this may not be a problem. Just seen pro Dave’s comment… makes sense. re the wood burner… slight bone of contention between me and my wife! But… will be externally fed and aiming for something with good heat retention to provide slow release heat. glad I asked the question as would have likely blindly followed the plan. I’ll go back on Monday with some questions.
-
Week 15 - UFH, screed, and render base coat
junglejim commented on Benpointer's blog entry in Contemporary build in north Dorset
Just curious how you sealed penetrations where ufh went through the stud… presumably run through a sleeve and then expanding foam? -
I’m getting close to being ready to install ufh. A local company has completed a design but I’m wondering whether I should go back and request a spiral layout? The ufh will be run off ashp, the screed is liquid (ecoscreed) and build is timber frame and aiming for good airtightness etc. i could be overthinking so looking for advice before going back to the company on Monday. Thanks

-
Thank you that’s helpful. Are you pointing to the groove in the window frame? One theory I have is that it’s getting in through the joint between frame and cill as circles in attached. Adding sealant where you suggest could be a solution.