lookseehear
-
Posts
166 -
Joined
-
Last visited
Everything posted by lookseehear
-
@JCB400 how did you get on with these?
-
I've seen a few mentions of the OV10 https://www.roofingventilation.co.uk/Over-Fascia-Vent-10mm-x-1m-Harcon-OV10 vents going over the felt support tray to get ventilation into the counter-batten space when using full fill mineral wool between the rafters and a low resistance membrane. I've just seen this product from Klober which seems to do the same job - anyone used this? https://klober.co.uk/roof-ventilation/eaves-roof-ventilation/p/eaves-closer
-
Has anyone got experience with Hyline aluminium sliders?
lookseehear replied to lookseehear's topic in Windows & Glazing
For some reason I wasn't notified of these replies so only just coming back to this topic. Do you know of other manufacturers that will include a structural beam between the sliders and the glazed gable? We're looking for something like this (sent from the supplier) but ideally all supplied and installed by the same supplier rather than getting the structural beam specced and installed separately:
-
I was looking for a quote for Sunflex SF80 sliders and a glazed gable above, but the supplier suggested going with Hyline Hy50 instead because they will do the sliders and glazed gable with an integrated structural top beam to avoid having to install a separate structural element which I'd need to do with the Sunflex. I searched but came up blank - anyone been quoted on them or had experience with them?
-
The best price I could find for two big solar veluxes recently was roofingoutlet.co.uk (when factoring in the flashing kit and vapour control membrane). They came direct from Velux though.
-
Glass balustrade fixing to Glulam beam
lookseehear replied to BotusBuild's topic in Windows & Glazing
How do you know that the fixings and the beam will pass the 25mm deflection test at 0.36kn/metre at 1100mm? I assume this needs a calc from an engineer or the beam to be specced for this purpose? -
This makes sense, but there's no 'courses' like there would be with brick/block, although actually looking at the picture of the crack, the mortar lines aren't as misaligned as they could be. How deep does this need to be to be effective? This house has been knocked around quite a lot in the past I think. It'd be very hard to establish beyond guesswork I think. Thanks for this - I'll look into it.
-
Our SE isn't interested in specifying this - any tips for finding one that will? Am I looking for someone who specialises in old houses or should any local SE be able to assist? I'm nervous about someone over-specifying in this situation because I genuinely believe it hasn't significantly moved in the 5 years we've been here. When I said plastering I meant lime plastering (lime putty hemp mix from Ty Mawr) rather than gypsum. I've also been plugging any bigger holes with a premixed lime putty mortar and stones as I've been going. In this case is there any risk of encouraging more spreading by filling the gap? I get the bars from your picture - they look like they're effectively chased into slots then secured with resin? How deep are they chased in? Is the plate similar to what @ProDave is suggesting? flat to the front of the house and tied into threaded bar embedded deep into the stonework? When you say 'well away from the gap' I'm not sure how that would work - for it to pull against anything it would need to go something like this wouldn't it?
-
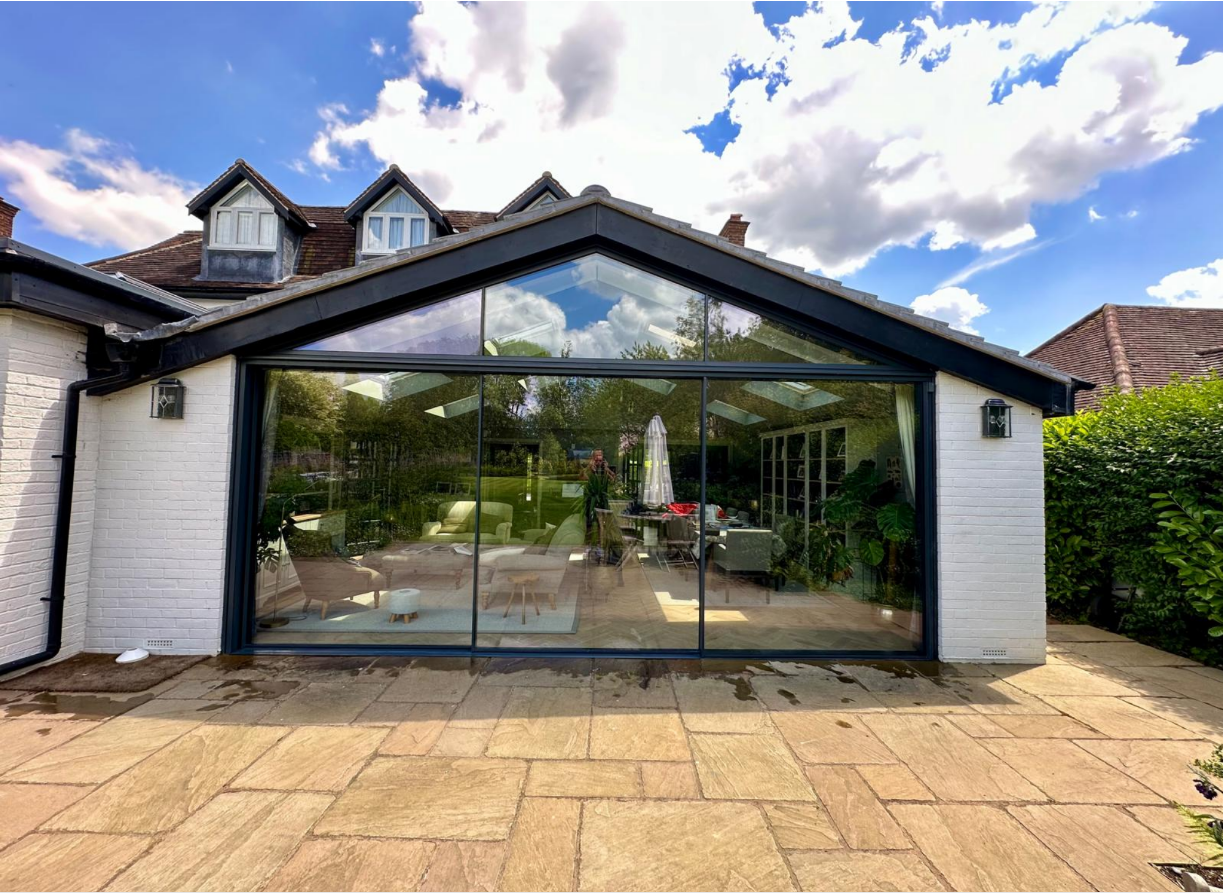
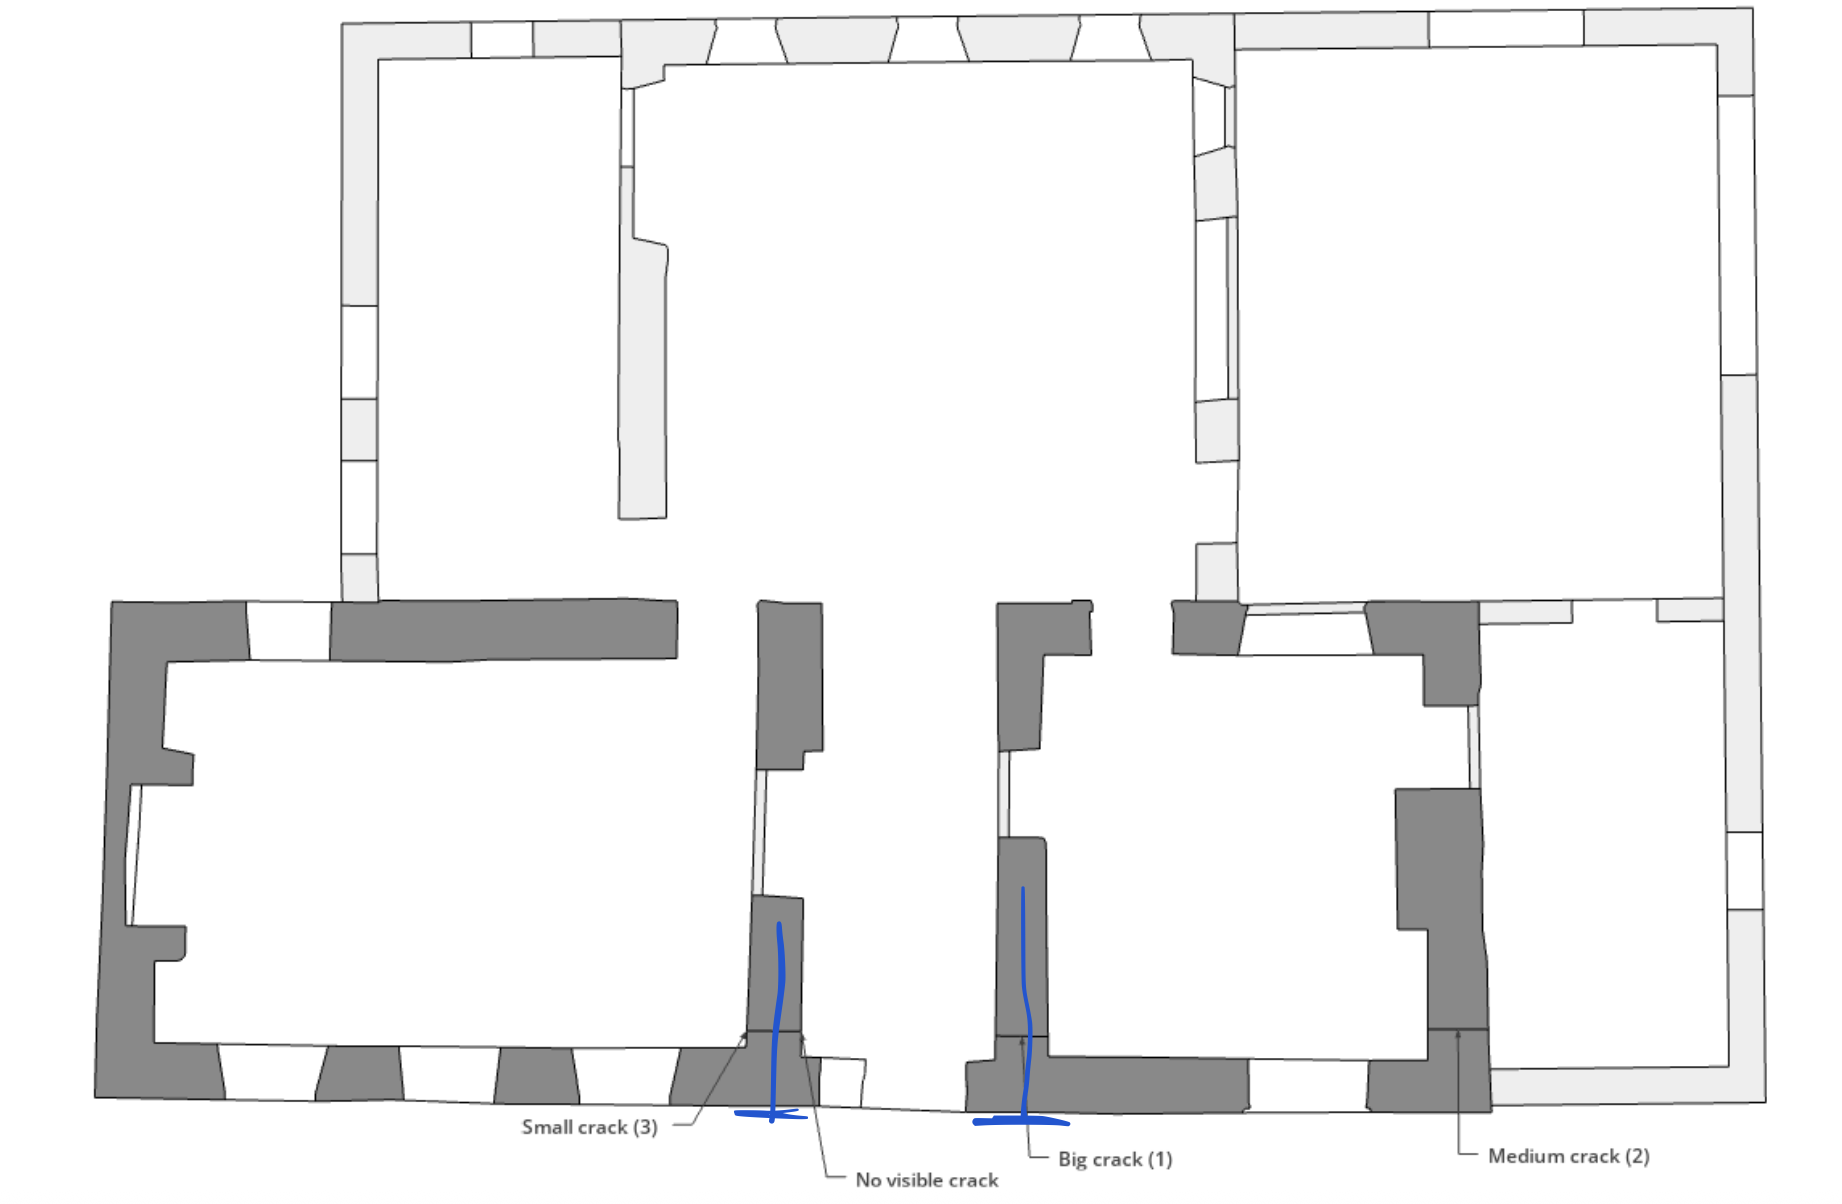
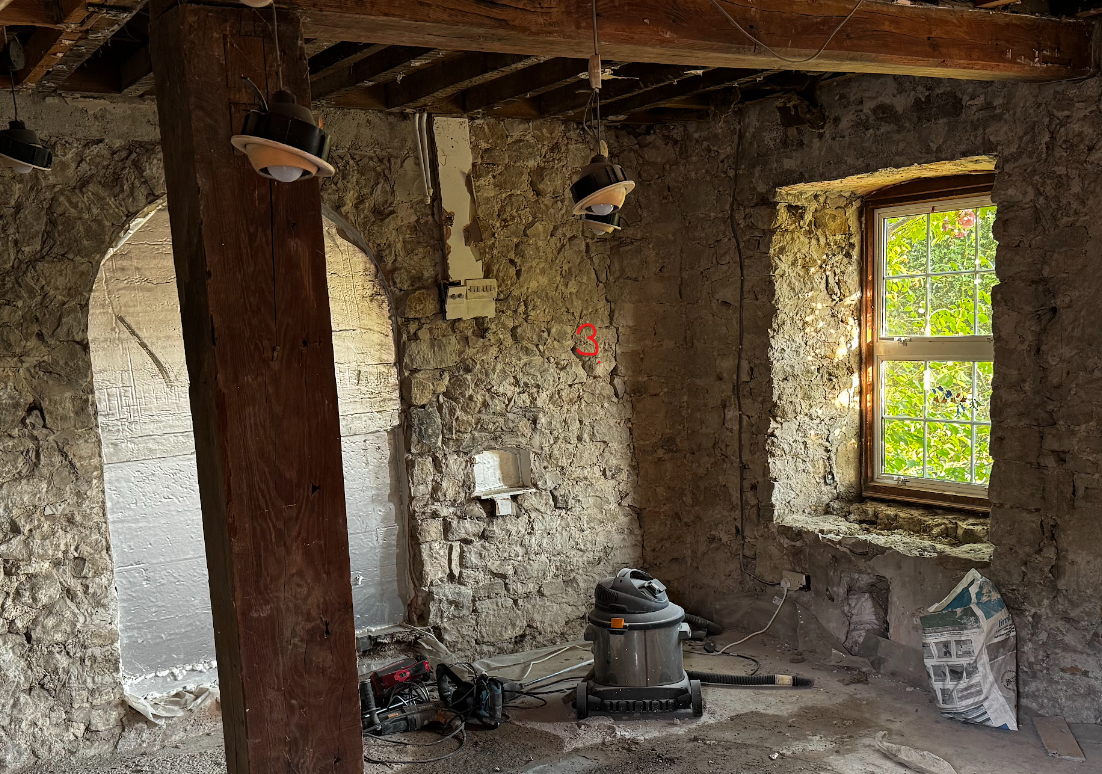
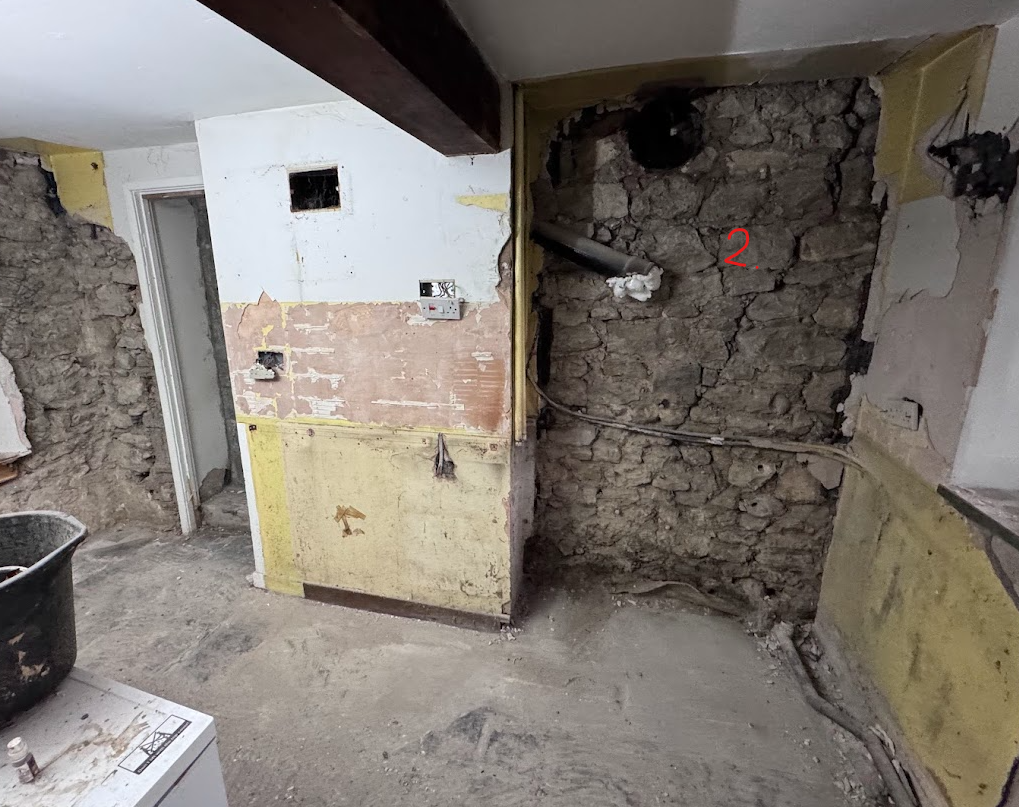
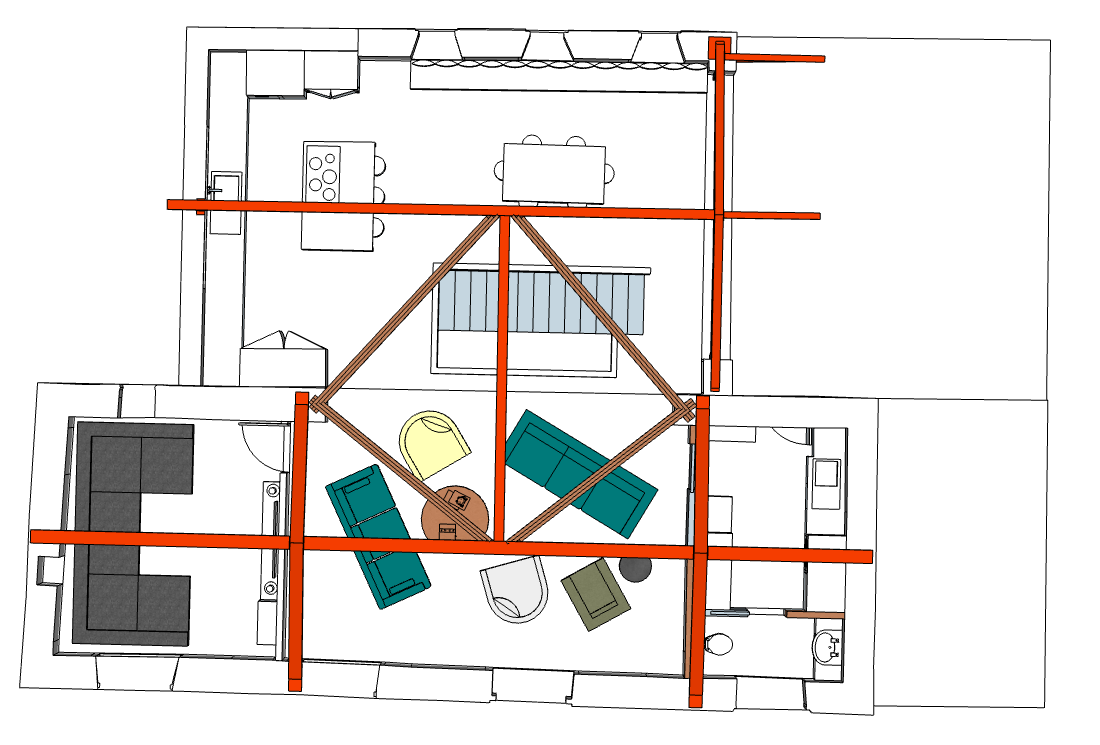
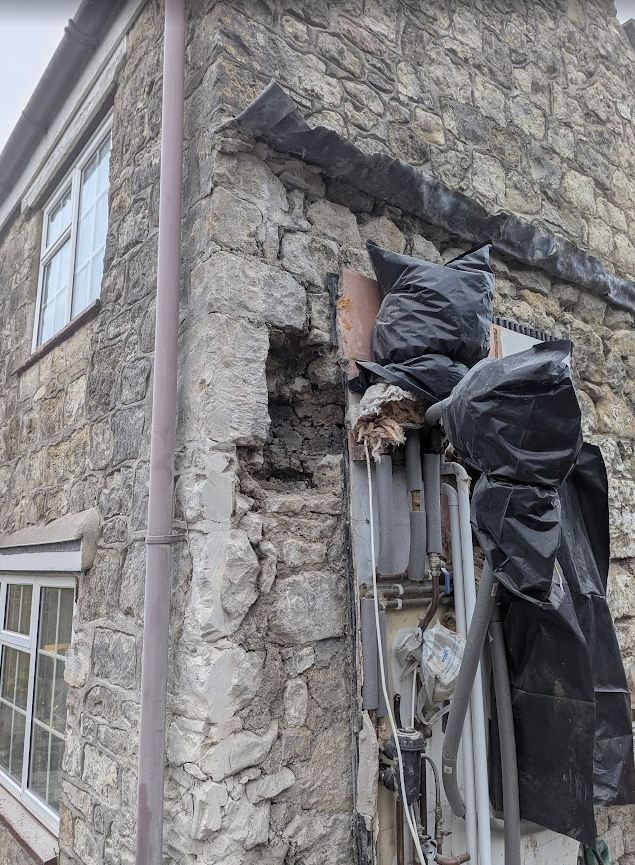
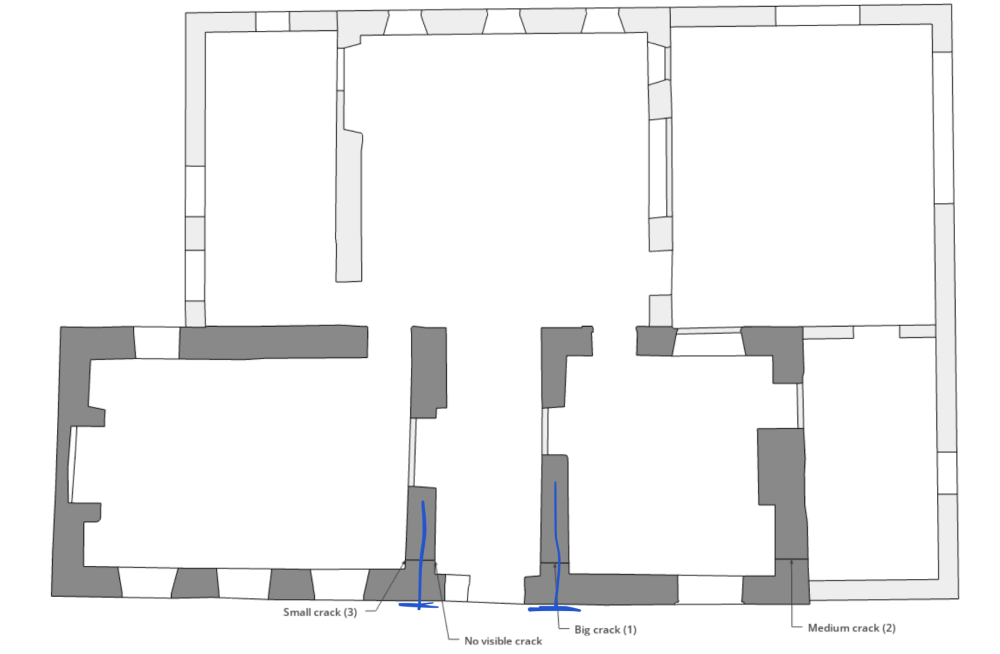
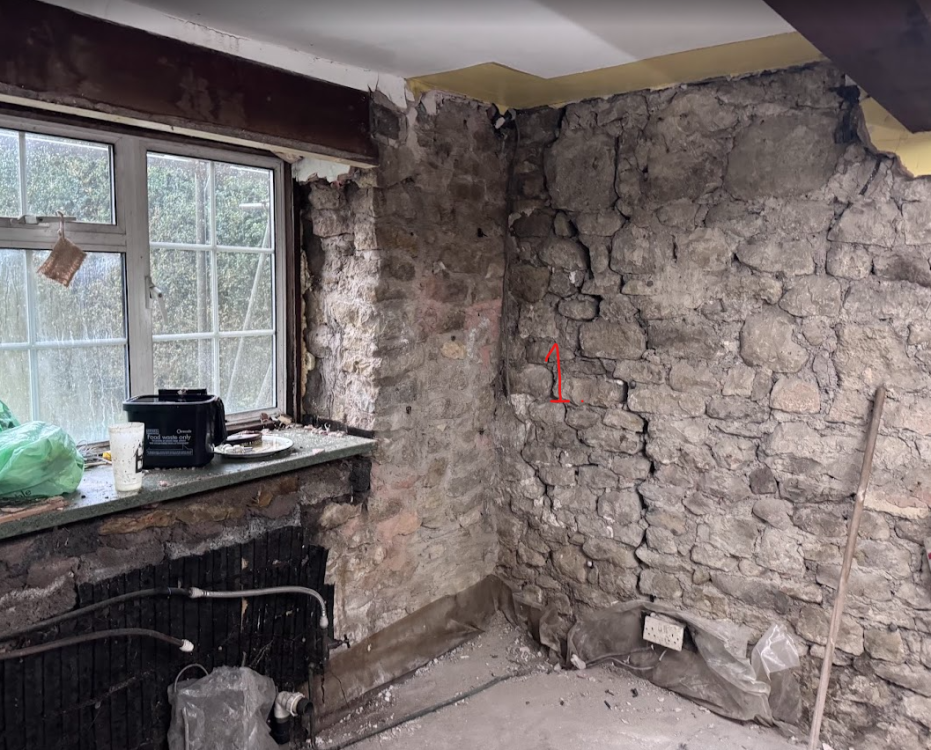
We've recently moved out of our renovation/retrofit and that's meant more of the old fabric could be removed. We took the old kitchen out which had been there 30+ years and there's a significant crack in the stone wall behind where some cabinets and tiles were located. the most concerning aspect of this is that there's a similar but less significant crack in the wall opposite which would indicate that it's the front wall of the house that's leaning outwards, and before I plastered I noticed another even smaller crack on another similar wall. Hopefully the pictures below help to illustrate the problem. I've numbered the cracks 1 - the big one, 2 - the one opposite in the same room, 3 - the smallest one. Old walls are dark gray, newer walls are light gray which are a mix of 1970s concrete block cavity walls and new cavity walls. I've also put an arrow to 'no visible crack' which I've included a photo below. This plaster has been there a long time - probably 40-50 years I'd have thought and it hasn't cracked or shown movement. Here's a picture looking at the corner of the house before we constructed the new extension which is the outside of crack 2. Nothing significant from outside and that corner is now abutted by a deep foundation and new cavity wall. Upstairs the new roof is supported on a series of steel (upside down) V frames with a steel ridge, so any 'spreading' forces should be limited. after discussing with the builder, we asked the SE about whether it would be a good idea to cast in place a reinforced concrete 'ring' beam along the front of the house to resist the wall from leaning out any more. The SE said it wouldn't harm, but also wouldn't be drawn on whether we should or shouldn't do it, so that's our current plan. It doesn't feel to me like this crack has moved much in the recent past, but I'm also aware we're doing significant structural work here. Is there a common solution for holding together old buildings like this? Thank you in advance.


-
Timber frame infill over cavity wall/steel lintels
lookseehear replied to lookseehear's topic in General Construction Issues
Aiming for ~100mm of Knauf Omnifit above it. I'm fully filling the rafters with 150mm Omnifit and I'm hoping it will be not too tricky to get around the ridges and junctions. -
Timber frame infill over cavity wall/steel lintels
lookseehear replied to lookseehear's topic in General Construction Issues
Padstones both sides, but on the left there's another column of blocks because the opening was the wrong size initially. -
So this means that if you had an ASHP on one phase pulling in 8kW and a battery on another phase exporting at 8kW, you'd effectively be saving at the current per kWh rate because they'd offset, but if you export for an hour, then run your ASHP for an hour you'd export at the export rate (eg 15p) and import at the current rate (which could be 28-30p/kWh). Unless the system is tuned to import to the battery when electricity is cheap, then export to match usage during peak hours you would be losing out financially.
-
OK I think I'm understanding the metering aspect, with import and export netting off, but does that play well with time of use tariffs? If I am exporting from the battery in the evening, but drawing from the grid during the day to run heating, those things won't surely net off in the same way that running the ASHP from the battery would do? We're a bit limited on the size of our solar array because only one aspect makes sense and it's low pitch (30 degrees) which means that the max we can squeeze in would be 5-6kW peak. I was hoping to put in a large battery with scope to increase capacity in the future so that during the winter we're minimising running the ASHP off peak rates (eg using Octopus Cosy to top up the battery).
-
Timber frame infill over cavity wall/steel lintels
lookseehear replied to lookseehear's topic in General Construction Issues
Thanks - I like this idea. I assume I'd need to get the SE to confirm it's OK before we start drilling holes in the top flange, or am I OK if the holes are small and not drilled in the web? -
We're moving our electricity supply and National Grid said they only put in three phase in this situation. I initially was quite pleased about this - it felt future proof. I'm now looking at solar and battery combinations, and installers seem less experienced with three phase systems and the cost seems higher. There's the benefit of being guaranteed ~12kW export balanced across the three phases. We're also planning to put in an ASHP and I assume that we would now need to put in a three phase ASHP to spread the load over the phases, and again there looks like there's less choice and potentially more cost involved. It feels like going three phase has added cost and complexity at this point. Is it possible to run it all off one phase or push National Grid to put single phase in? It feels like an own goal with three phase to not have the heat pump and battery on the same phase, but then the system will be out of balance. Am I missing something or does it all have to be three phase to play nicely together.
-
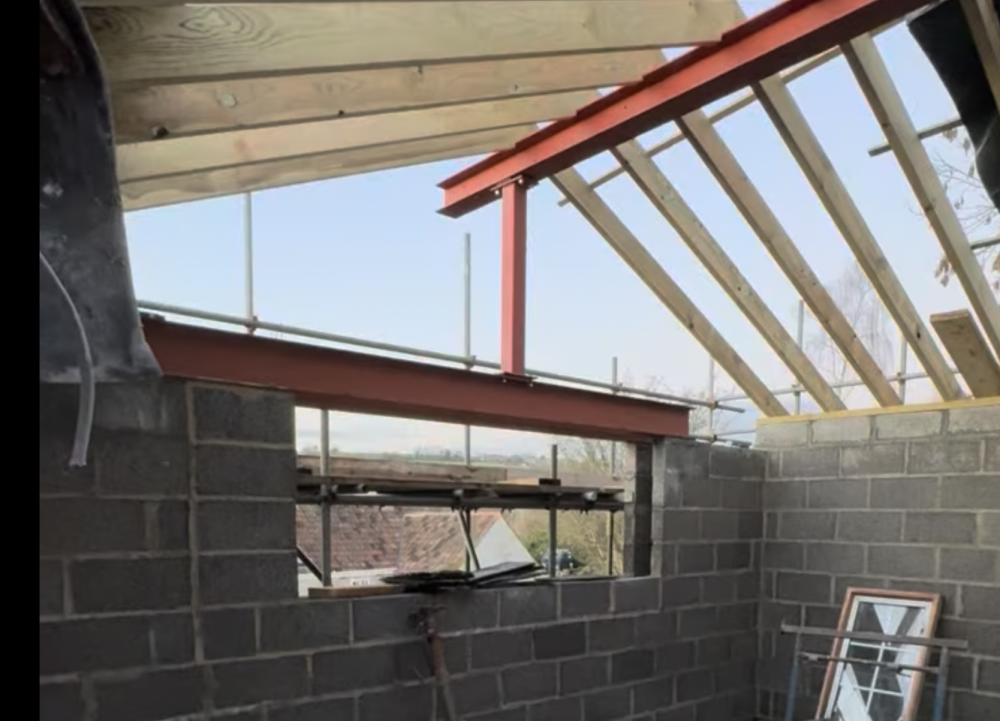
Looking for some assistance with a detail: Need to infill above this window on gable end (lintels are steel beams on inner and outer leaves). The builder doesn't want to use masonry because it won't tie into the steel and he thinks it's just going to end up unsafe. He suggested timber frame, but I guess it would need to be strapped down, which is again problematic over the window. If we go with a timber frame, do you think straps either side of the steel would be sufficient? Timber frame just on the outer leaf? or on both? Any alternative ideas?
-
Any love for CCT (i.e. changeable white) LED strips?
lookseehear replied to Alan Ambrose's topic in Lighting
I’m looking at using ‘dim to warm’ bulbs which get warmer as they get dimmer, meaning you can get controllable white temperature but without from a regular dimmer switch. my current plan is to put zigbee dimmer controllers behind retractable push button switches so that they function as regular dimmable lights but with the option to create scenes as well. -
What did you do here in the end?
-
Couldn’t you have your tilt fillet a bit back from the fascia so that it’s taking the weight of the slate?
-
Not sure if you've solved this yet but I don't think having a tilting fillet stops you doing over-fascia ventilation. See the below from LABC.
-
You're right I'm probably looking at this the wrong way round. I'm likely being swayed by the fact our current EV only has a 24kWh battery and needs charging often and sometimes during the day, whereas most newer EVs have bigger batteries and can be charged overnight almost all of the time. There are definitely times during the day where someone would want to 'top up' an EV with a larger battery, for example just before a long trip where you want to have max range to start with. The issue with using the car battery to buffer the house demand or grid is unnecessary battery cycling - no one will want their car battery devalued or degraded. But I agree that having an 80-100 kWh battery sat on the driveway seems a bit of a waste if you can set it to better use.
-
It's really hard to tell whether these things will happen at the same time. Low overnight rates is a product of low demand vs peak hours, but I don't know how much more the adoption needs to increase until it becomes relatively higher demand and therefore has a cost impact to the consumer. The good thing is demand is predictable and relatively stable (and growing) which I think will contribute to keeping prices lower. Solar's problems are that it's seasonal and unpredictable and peak generation is rarely when consumers want to use it. Without the demand from consumers, it's more likely to be that we see a lot more 'free' energy during the sunnier seasons to balance the load, which will likely have a greater impact on the feed in rates because you can only buy something for 15p and sell it for nothing to a certain point. My guess is that feed in rates will drop before overnight rates increase, but who knows. I'm not proposing to dump all the power from the battery into the car, but I'm thinking that with some moderate sun it would make sense to supplement solar production with a battery for a short charge during the day.
-
My understanding (happy to be corrected) is that if I have a fully charged 10kWh battery and a 5kW inverter, I can only draw 5kW from the battery. This would mean that if I plug in my car to the 7kW charging point, I would have to 'buy' 2kW from my electricity supplier rather than use what I have in the battery. Another scenario is that it's full sunshine and the panels are generating 5kW and I plug the car in, I can't do 5kW from the panels and 2kW from the battery without a bigger inverter. I believe the panels and battery are DC, but the inverter is required to convert to AC for use in the house or for selling back to the grid.
-
Maybe I need to look more at tariffs. My assumption in the future is that export rates will reduce as more people get solar, because they'll all peak at the same time and at that time the generation will greatly exceed energy requirements. Other than being future proof, why look for a system which doesn't require internet? I imagine internet is only for some smart features, not for basic functionality? the one who offered 3 or 5 said the 5 would be a 'small additional cost' and the 8kW one didn't mention but I assume would get consent as part of the install. In the event we want to charge during the day (and if we have 2 EVs that might be more of a common occurrence), it would make sense to use stored energy in the battery wouldn't it? If I have a 3kW inverter and charge at 7kW I need to import 4kW from the grid at peak rates. Sorry if I've misunderstood. Not sure I agree - charge at 7-8p/kWh, get ~3miles/kWh efficiency means ~2-3p/mile plus 3p new tax still makes it probably half the price per mile of a petrol or diesel. Things will change though over time. Personally I hope someone manages to reform the UK energy market to enable cheaper electricity from renewable sources.
-
I've had a couple of quotes for solar + battery + associated hardware and have three options on the table. We're looking at a 5kW array and probably a 10kWh battery. The options are SolarEdge or Libbi from one installer, or GivEnergy from another. The main difference that I can see is the first installer is offering a 3kW or 5kW inverter whereas the GivEnergy is 8kW. We have a small EV but we'll likely get a bigger one when all the work is done, so I'm leaning towards the GivEnergy. We're also expecting to put in a 10-12kW heat pump as part of our renovation and a >200l UVC. We're on Intelligent Octopus Go at the moment with a SyncEnergy 7kW charger, which I'd rather not replace but would do if it meant managing the whole system was easier. I'm not really sure how I'm meant to choose between these three options. Are there any obvious good or bad choices here? Ideally I'd like a system that can manage import/export, dump excess solar into EV/DHW and be as future proof as possible.