Jump to content

Crofter

Members
  • Posts

    3458
  • Joined

  • Last visited

  • Days Won

    10

Blog Entries posted by Crofter

  1. Crofter
    With the 2019 season now here, I've spent the last couple of weekends doing a bit of tarting up around the outside of the wee house. Little things that you don't think really matter, but the end result looks far more 'finished'.
    I was never very sure how to complete the gable ends of the house- whether to box them in or not- but eventually decided to kill two birds with one stone and use the space for a log store. I think it looks pretty good, and it's tempting to do the same on every side of the house, although those elevations do see a lot more wind and rain.
    My current obsession with processing my log pile is all down to a fantastic book I was given: 'Norwegian Wood- chopping, stacking, and drying wood the Scandinavian way'. Highly recommended, and an absorbing read even if you never intend to ever light a fire.
     
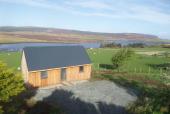
    The other bit of work has been to create a gravel path around the side of the house, and so properly edge the gravel area underneath the house. The only downside of all this work is that it makes the lumpy lawn look even worse than it did before
     

  2. Crofter
    Firstly, for all you lot waiting with baited breath for my next blog update, my apologies! Since the house was opened up for guests I've needed a bit of time to switch off from what was a very full time project for the last few years.
    When we first opened to guests the house was missing its decking. I had gone through various ideas for the design of this, and in the end decided that less was more, and made it a fairly minimal affair, just somewhere to allow access to the big sliding door and give space to sit and enjoy a cuppa or glass of whatever, whilst looking out over the views to the loch and the sunsets.
    Due to the big change in height, I decided to make the seating integral and do dual duty as part of the step down as well. This has worked pretty well, I think, with the advantage of dropping the height of the decking and preventing the handrail from obscuring the view from inside the house.
    There's still some tidying up to do- paths around the house, and some cladding trim to finish off the decking itself- but it's a big improvement on how the place looked a few weeks ago.

  3. Crofter
    So the roof is now totally finished- was a beast of a job and having finished the ridge I felt as though I had been riding a particularly fat horse all week. Physically tough doing it without help and using just a ladder, but I'm impressed with the corrugated steel and would happily use it in future. I would seriously consider it for wall cladding as well, as it was much quicker and not any more expensive compared to my larch.
     
    I had made a start on the larch wall cladding a few months back, fixing the first layer of boards on the gables. I'm now comfortably past the half way point with the cladding, with only the seaward walk not yet started.
    It's been a process of trial and error to find ways of getting each board in place ensuring that it more or less plumb and with equal gaps either side. Part of this learning process has been judging what kind of tolerance to work to. The boards are highly variable, from less than 95mm width to over 100mm, sometimes tapering at one or both ends, and often with a bit of a curve to them. So my first idea of using a long spirit level and a wooden block as a spacer wasn't going to work.
     
    The first layer was done quite carefully with markings on the battens; temporary nails on these marks located each board whilst I used the coil nailer to fix it in place. For the top layer, I didn't want to use that method as it would leave nail holes in visible parts of the cladding. So the best method for fixing the long boards of the gables seems to be to put small marker nails on the reverse side of each board, spaced to match the gap that is being covered. It's obviously a lot of prep time, but I can do that inside the house during bad weather (it is February in Skye after all), and then when the weather allows I can literally just shove the boards up against the wall and they will be in the right place.
     
    Unfortunately my progress is now going to be rapidly curtailed as I become the stay at home Dad- SWMBO has gone back to work, so my day now revolves around the couple of hours nap time that let me sprint down to the house site, baby monitor in my pocket, and feverishly nail some boards on.
     
    Next project: self build baby pen...

  4. Crofter
    It's been a long journey, but our little cottage is finally up and running as a holiday house. First guests just checked out and left us with some very kind words having thoroughly enjoyed their stay.
    Of course it's not exactly 'finished' but it's certainly usable. I'd have liked to have had a few extra days to tidy things up, but all the essentials are in place.
    There's decking still be be built out the front, I'm hoping to get this done in a gap between changeovers soon.
     
    I must say it feels pretty good to get to this point.With over three years of very hard work behind us, and a lot of faith that it would all be worth it, we are finally seeing money coming in. And having had to down tools I am going to have this curious thing called 'free time' again... although I'm sure I'll manage to fill it all

  5. Crofter
    One final push today saw all the furniture and curtains put in place- a big group effort with much input from the in-laws. I'm very fortunate to have a MiL who is an ace seamstress and who has a bit of a thing about Harris Tweed.
    To say I'm chuffed is a bit of an understatement. It's been over four years since the concept of this project first appeared, and three years since work began in earnest. Today we finally saw the culmination of all that effort as the building site was transformed into a home. It's exactly what I imagined: cosy, welcoming, stylish.
    We'll be listing it on the booking websites tomorrow (most likely a combination of AirBnB and Booking.com) so that will give me the impetus needed to tackle the lengthy snagging list and major outstanding jobs, most of which are on the outside.
    Some of the cladding details (corners and window reveals) aren't finished yet, the soffets need to be completed, and the biggest job of all is the decking. There's also the creature comforts of WiFi and TV to sort out. I know people come to Skye to get away from it all, but I bet the first thing they will ask for is a WiFi password
     
    Once again, huge thanks to everyone in the BuildHub community who has held my hand throughout this whole project. It's a lot smaller than many other builds, but it's been exceptionally hands on with me personally tackling almost every trade, from drafting the plans to building the kit; I even got an excuse to do some digger driving a couple of weeks ago.


  6. Crofter
    It's starting to feel like the finish line is in sight now. Since my last entry, I've largely finished the interior including all the flooring, the doors, most of the kitchen, the windowsills, and the huge and daunting task of the bathroom (big thanks to @Nickfromwales for answering my hundreds of questions on that one!). I got a plumber in to install my UVC (sorry Nick, forgot to get a photo of that).
     I've also done a bit more of the cladding, but the exterior work has been on the back burner.
     
    I've also gone back to work full time since my last blog post, which is why everything has slowed down so much. Still managing to get a bit done in the evenings and at weekends.
     
    You'll notice some furniture has appeared, some of this was given to me by a neighour and was very handy for storing all my tools etc; the bed and sofa were in storage with family and eventually I exhausted their goodwill and had to take delivery of them! The shower has had a couple of test runs, and SWMBO reports that it is very nice indeed.
     
    The plan is to be open for business in April, which should be tight but doable. I expect that at that stage I'll still have some outside jobs left to finish but the inside is only a few days away from completion now.
     
    Sorry for the crappy image quality- will have to do a bit better when the time comes to do the proper marketing shots


  7. Crofter
    Just a quick update seeing as I had the camera on me. As always, not as much progress as I would have liked- I was away from the build for a lot of August, but it's good to come back to it refreshed.
    The painting is finally finished (that seemed to take an age), the WC is temporarily installed, and the woodburner is up and running- I'll do a separate entry for that, at some point.
    The overhead beams are now sanded back and sealed with Osmo Polyx oil- I'll use the same stuff on the windowsills. The trickiest part of doing the beams has been installing the spotlights, with some very careful drilling to feed the wiring through from above. These beams are tied into the rafters so any mistakes would just have to be filled as best I could, and serve as a reminder forever more.
    Today's task was to start on the flooring, which is carbonised strand woven bamboo. I am bonding this down so, again, little room for error. I decided that rather than start at one wall, I would mark a straight line up the middle of the floor, through the big connecting door, and then screw down a batten. This becomes my starting line and ensures that the flooring will tie up as it moves from bedroom to living room. I wa worried that if I'd started at the wall, then when the two sections of floor met up at the doorway I could find myself a few mm out. I have no idea if what I'm doing is common practise but it seems to make sense to me!
    I didn't get as far as bonding down anything yet today, as the floor turned out to be a lot dirtier than I realised, and I've spent all day on my knees with a sander removing blobs of paint and plaster. A few quid spent on some dust sheets would have been a good investment... oh well, I'll know for next time


  8. Crofter
    Since the last update, the interior of the cottage has come on leaps and bounds. The rather unusual partitions and ceilings were all framed up and then plasterboarded. I was sensible enough to enlist help with some vaulted ceilings, having learnt the hard way that a 9.5mm board balanced on your head is quite liable to snap in half.
     
    I had originally planned to simply tape and fill, but at short notice heard that a plasterer was up on the island and available for work (his original contract had been delayed). So it was a mad rush to finish all those fiddly little window reveals etc and then watch the amazing transformation as the whole interior received a full plaster skim. It's made an enormous difference to the feel of the building, turning it from the untidy patchwork of plasterboard to a lovely smooth dusky pink uniformity. You can now truly get a feel for how the space works- and the feeling is good!
     
    My electrician was a little less pleased than I was, because we hadn't quite finished all of the wiring yet, but it was nothing that some educated guesswork and some poking around with a bit of bent fencewire couldn't resolve. I did put one hole in the wrong place, and was pleasantly surprised to find that polyfilla does actually work, creating a perfect seamless repair. I'd only ever used it on plasterboard surfaces previously, and you just can't quite hide the edge between filler and paper.
     
    Next step was to get on with painting- it seems to make sense to do this before installing flooring, kitchen, doors etc. The new plaster is fairly gobbling up my contract white paint, but I'm sure it'll only take a few more coats before I can switch to the final finish. The worst part so far has been the section of wall which will have the woodburner flue running in front of it. This is boarded with cement fibre board and the plaster has taken on a noticeably darker tone, which the paint has not entirely managed to hide.
     
    It feels as though the end is very much in sight, but of course the remaining interior work- paint, tiles, floor, skirting, doors, kitchen, bathroom, plumbing- is a huge amount of work, and then there is the outside jobs that have yet to be completed.
     
    One last piece of progress has been my electrical connection. Originally I had been quoted around £2000 for this, and the work had proceeded up to the point where the cable would enter the house, but no final connection was made. A few months later I was told that my quote had expired, and I received a partial refund to reflect the outstanding work. Fast forward a few more months, and when I tried to get the remaining work done, I was once again quoted the full £2000. It turned out that they hadn't updated their records and thought that no work had been carried out yet. There followed several emails and phonecalls to various different people, but this morning I received a revised quote which, in their words, had 'come down quite a bit'. Indeed it had- it was now for under £300, as expected. So, that was time well spent. If in doubt, always query the bill!


  9. Crofter
    How long can it take to build a timber partition wall? One that is only 16ft long, in a straight line, no curves, no fancy materials.
     
    This one has taken me well over a week, which has become a little frustrating. The reason is partly due to the complex shape, and partly due to my design having changed significantly just before I started the wall. Having switched to a more open plan layout, the wall now has multiple different ceiling heights all tying into it which led to a lot of head scratching. I ended up knocking up a detailed model on Google Sketchup, whh was time well spent as before that I just couldn't visualise how to go about it.
     
    With two doorways, a partial and a fully vaulted ceiling, the resulting edifice has 15 sides, and plenty of angles. Great to finally see the back of it. Fortunately I have had a little help with this one.
     
    By contrast, the next partition, a simple rectangle with one door in it, took me a morning.


  10. Crofter
    I had the offer of some help from a neighbour so decided to crack on with the roof sheets. These are corrugated sheets 4x1m and in the thicker 0.7mm spec, so fairly heavy and awkward things to handle. I did get the first sheet up and fixed by myself but am not daft enough to turn down an offer of help when it appears!
     
    When I bought the roofing, I had recently read @ProDave's less than glowing review of Jewsons' plastic headed roofing screws, so made a point of asking what would be supplied. The guy at the BM was adamant that everybody these days prefers the plastic headed stuff, quicker to install, no caps to come loose, just a question of getting the right bit to drive them in with. He even did a straw poll of the people in the shop at the time...
     
    Anyway, how do the screws work in real life? They certainly do not self drive, not by a long shot. And so far I have stripped the heads off two of them, although in both cases I was able to back the screw off and remove it using pliers. So it seems you need a decent hole punched in the  sheet, which slows down installation somewhat.
     
    Getting the sheets up on the roof wasn't too hard once I figured out a method- I built a 'stretcher' to hold each sheet, and this is then run up a pair of wooden guide rails onto the roof. Doing the last sheet will be a bit tricky as we will have to pull the 'stretcher' out from under it, instead of moving the sheet to the side as we have been doing so far.
     
    In other news, the hole for the flue is now made- a bit daunting cutting a whopping great hole in the roof!  I'll write another blog post about that as part of the stove installation,

  11. Crofter
    I was about to write 'time flies by with too little progress to show for it' and then realised that was exactly what I said last time! Anyway, since the last update, I have battened out the walls and fitted the first layer of larch cladding on the gables. There was a fair bit of head scratching and working out how the detailing around the windows etc was going to work out before I could get on with the battens. The larch also had to be treated with preservative oil- this will be an ongoing task but it should help keep the wood from looking faded and neglected (even though I gather that look is fashionable for some reason).
    Another overly time consuming task has been the detailing around the fascia and soffit boards. These things are very easy to draw up on Sketchup but in real life it is much harder to ensure that things are square and level. What I have ended up doing is making up the four barge boards and fitting these, then running string lines between them. I have no idea if this is normal practice but it at least ensures that these highly visible parts of the roof line are symmetrical and match up with each other.
    On the roof, the battens are ready for the arrival of the corrugated steel sheeting- unfortunately I wasted time chasing some tantalising prices from suppliers further south, which fell down due to delivery costs, and when I eventually ordered from my local BM I was into the Christmas shut down period.
     
    Inside the house, I am absolutely delighted to be able to say that ALL of the insulation is complete now. I have 150mm rockwool between rafters and studs, and 50mm of Kingspan over the studs, with 100mm over the rafters. Today's job is to take advantage of the howling gale outside to identify any leakage paths and finish the foaming up between the boards. A tedious task but one that should help me achieve a high airtightness level. The vapour barrier will then go on top to provide the final airtight layer.
     
    I have also taken delivery of my stove- a Burley Springdale 3kw model. This is the third woodburner that I have bought (I installed one ine ach of my previous two houses) and it is a real step up in terms of design and built quality. The stove is 100% room sealed, with a single intake that draws from an external duct. The firebox is fully lined in vermiculite blocks, even on the top and bottom, to ensure the hottest and therefore most efficient burn possible. Finally, a stainless steel mesh at the top of the stove acts as a soot catcher to burn off any particulates. It's an impressive piece of kit and I can't wait to get it fired up.


  12. Crofter
    Time seems to be flying past with not enough progress to show for it. Anyway, a brief update.
     
    I got my 8ft wide triple glazed door (all 240kg of it) installed singlehandedly, showing just what you can do with a bit of patience and some levers, packers, and a bottle jack. Perhaps the reason progress is slowing down is that I find myself standing admiring the view out to the loch too often.
     
    Nearing the end of the chipboard flooring installation, I discovered maybe the first properly silly mistake I have made so far- the long edge of the boards are not supported and this is giving a slight creak, all along the front of the house. Of course they are glued and screwed down so they are nto coming up again. I will have to go in from underneath and fit battens to stiffen everything up. What a pain. At least on the back wall of the house I was aware of the problem and have added battens *before* laying the chipboard.
     
    The drainage run is now done, This involves five different penetrations through the floor buildup: kitchen, utility, basin, WC, shower. The kitchen can get away with a single drain point because the different appliances will connect up somewhere behind, within, or below the kitchen units. As luck would have it, the main hookup point where everything comes together is just underneath the eventual position of the WC, and this is where the ground level is highest, leaving me with some very unergonomic working conditions. Fortunately I was able to do the bulk of the work from above, before laying the final pieces of flooring.
     
    The other progress has been on insulation. A few weeks back, a lorry from 'Seconds and Co' turned up, with my £1000 of insulation aboard. I couldn't believe they had sent their own lorry all the way here- how on earth do they stay in business? The driver told me they get the boards for free as the 'first couple of miles' of the production run has too many flaws for Kingspan to bother selling it. Sure enough a small number of the boards have flaws- one has a big void in the middle (you can tap the paper like a drum skin) and a couple of others are distinctly too thin, but otherwise it is just superficial damage, and nothing that cannot be cured with a little expanding foam post installation.
     
    My insulation involves rockwool between rafters and studs, and PIR boards on the inside. This helps prevent cold bridging and also works well for vapour control purposes. Today I installed the final piece of overhead rockwool, hurrah. Very glad to see the back of that particular job. The boards are awkward to work with, especially alone, but not as unpleasant as the rockwool.
     
    Finally, this Friday I am taking delivery of my larch cladding- a thousand metres of 100x20mm locally grown larch. I designed the building on the premise that I would need to buy standard lengths of 2.4 or 4.8m, and this is what set the ridge height: 4.8m from the lowest point of the building to the barge board. Whilst this worked on paper, I did always think it looked just a bit 'top heavy' and a few extra inches of cladding would have let me slim down the barge boards and give a neater appearance, whilst still avoiding any joins. So imagine my delight when the sawmill phoned and said "Those 16ft boards you ordered, well the planks have actually come in at 4.95m, do you want us to trim them down for you." My answer, of course, was an emphatic No!
  13. Crofter
    After a few weeks away from the build, I've been back at work and in the last few days everything is seeming much closer to completion. All three windows and the back door are all in place now (not yet foamed up etc)- just the big beast patio door still to go, which weighs about a quarter of a tonne, so that one will need a bit of a squad.
    Fitting the back door has made a huge difference to how the house feels- I can keep the sheep out now
     
    The other jobs I've been doing are laying the flooring and installing the first insulation. The floor buildup uses JJI engineered joists, with a 9mm OSB 'sub floor' resting on the lower flange, supporting 250mm of glasswool insulation, with 22mm tongue and groove chipboard flooring on top. Around the perimeter 50mm PIR prevents thermal bridging between the chipboard and the timber frame, so this has to be installed first.
     
    Laying the sub-floor stopped when I ran out of OSB- I had used some of the sheets as temporary boards over the window openings- so next up is finishing the floor, and then installing that big patio door. If anybody happens to be on holiday in Skye just now, and fancies a bit of manual work, look me up

  14. Crofter
    I'm going to jump right to the current status on site and at some point will go back and fill in the gaps.
    A summary of major jobs completed to date:
    - access created
    - water and electricity on site
    - septic tank and 'Puraflo' secondary treatment/filtration system installed and signed off by BCO
    - footprint of house laid with membrane and chips
    - concrete footings and piers poured
    - Douglas Fir ring beam installed
    - JJI joists installed on hangers
    - All four walls of the frame built and sheathed lying flat, and now lifted and fixed into place
    - Ridge beam built and installed
    - Windows delivered and now stored inside building
    - Rafters cut and installed
     
    When you list it like that, it's no wonder I feel like I deserve a cuppa now!
     
    So what's left to do? The pressing thing is to get wind and watertight whilst we continue to have good weather. This means installing the sarking, and breather membranes on wall and roof, and the first layer of battens to hold it in place. I will probably then board over the window openings temporarily and crack on with installing the floor. It's a bit lethal working stood on various temporary boards on top of the joists.
    Once we are wind and watertight, I can start working on the interior, and get on with the cladding on the good weather days.
    This is the site ready for installation of the ring beam.

    Ring beam and most of the joists installed
     

    Frame starts going up
     
     
    Ridge beam and rafters on- this is as far as I have got so far. It's been fun!
  15. Crofter
    I started the project with a pretty clear idea of what I wanted: the 'contemporary vernacular' style that Skye has embraced is a modern take on traditional proportions, using simple materials to create stunning properties with clean lines that sit well in the landscape.
    The best known examples are those drawn by Dualchas architects, with their designs featuring on Grand Designs and in various magazines. I seriously looked into a 'Heb Homes' kit but this would have been way out of my budget. Another contender was Loch Dhu. However whilst these provided inspiration, ultimately I decided to go it alone, both for budget reasons and because by now I had the bit between my teethe and wanted to give it a go.
     
    What all of these designs had in common were: simple, vernacular shapes with pitched roofs; vertical board on board timber cladding; roofing in corrugated or box profile steel; and simple, clean interiors. I felt that building in these materials could yield a comfortable, efficient, and value for money house which would be low maintenance and ideally suited to my requirements as a holiday let.
    The initial sketches I drew up were for a one bedroom build with an open plan kitchen/diner/lounge. Most of the glazing would be on the West side to make the most of the views out to the sea. The building would be a simple rectangle in plan, with a traditional 45 degree pitched roof. It would be about the least amount of house that the two of us felt we could be happy living in- so that if circumstances changed, we could sell our existing house and move in, without it feeling like too much of a compromise.
     
     
    The next big decision came about entirely thanks to the eBuild (now BuildHub) community: following a tipoff by the user 'ProDave', I discovered that an exemption from building regulations exists for houses that fit within certain criteria. The exemption is designed for mobile homes, caravans, and other portable buildings, and states that the building must be less than 6x18m, have an internal ceiling height of 3.048m or less, and be capable of being lifted or towed away in no more than two sections. Whilst it is probable that the writers of this exemption had in mind prefabricated buildings, this is not actually specified.
    Building without the need to adhere to building regulations would be a huge boost for me as a DIY builder. I would be able to put something up that I was happy with, without having to demonstrate to third parties that I was meeting various requirements. I would avoid the costs of a building warrant, the need for inspections, and the need to use certified equipment or installers.
     
    There is a significant downside to this build route. As I would not receive a completion certificate, it may not be possible to mortgage the building. However, for me this was not an issue, as I do not intend to sell, but rather keep the building as a means of supplementing our income. In addition, the building will sit on croft land and as such could not be mortgaged anyway, without applying for de-crofting first. One further benefit is that the building could be deemed as movable rather than heritable property, and therefore not accede to the croft as a permanent improvement. If the crofters' commission were ever to assign our croft to another person (a right that they can exercise if they feel that land is being neglected) we would at least be able to remove the building and look for an alternative site for it- although I expect that transportation costs would be considerable.
     
    Having made this decision, it was now time to finalise the design and prepare the planning application.

  16. Crofter
    This blog was originally begun over the now closed eBuild forum. I will be transferring most of the my blog posts over here in due course and taking the opportunity to tidy the blog up a little and fill in some of the gaps along the way.
     
    In 2013 I became the owner of a house and croft on the Isle of Skye, and set about looking for ways to make the most of this opportunity. In particular I was keen to set up some form of income generation to supplement my earnings.
    The first idea was to erect a wind turbine- we went a little way down the road of costing out the installation of an Evance 5kW unit. This would have cost about £32,000 and generated a predicted £2000 a year in FiT plus whatever savings we could accrue on our own electricity bills. However with the FiT rate about to take another cut we would have had to move quickly, and decided that we had simply not had enough time to fully evaluate the idea. In addition, as newcomers to the area we felt it might be a bit un-neighbourly to immediately stick up a wind turbine within a few weeks of moving in!
     
    The second, and far more exciting, idea was to build some form of holiday let. I was reasonably confident that we would be able to secure planning permission for a house on the croft over the road from us, as neighbouring crofts had done so, with one house in the process of completion as we were moving in. This would be a more risky project and almost certainly a more expensive one, but I was confident that the returns would be considerably higher than the wind turbine could produce.
     
    Quick costing up led me to realise that we were not going to be able to afford to get a builder in to put up a house for us, even a very small one. However I had accrued some building experience before, having fully renovated our previous house and converted the loft. I was confident that with enough research and patience, building a small and simple house should be within my capabilities. But this meant going truly DIY- I would be doing everything from designing and drawing, submitting the various permits, through to actually pouring concrete and building the timber frame, all by myself.
     
    At around this early stage in the project, I stumbled upon eBuild (the forerunner to BuildHub)- and ever since I have felt that I have been in good hands, with a wealth of advice and guidance available to keep me on track. From a slow early start, the build has progressed well and at the time of writing I have four walls and the structure of the roof all erected.
     
    Stay tuned for more updates, and feel free to comment or ask questions. I have learned so much in this project and would be glad to be able to pass advice on to others.
  17. Crofter
    This is a retrospective look at how the site was when we first started the project.
    Our croft is a typical long, narrow strip of land. Crofts were traditionally carved up in such a way that everybody got a share of the different bits of land- a bit of shoreline, a bit of lower good ground, and a bit of rough hill ground. In our case, the croft is 27m wide and nearly 500m in length! If nothing else it ensures plenty of work for fencing contractors.
    Our strip has two public roads running through it- at the bottom, a relatively busy trunk road, and about half way up a quiet single track township road. Our current house sits on one side of this road, but on the opposite side was just a field. Some of our neighbours had built houses or sheds on their equivalent patch of land, and some have also built at the lower end of their croft, with accesses onto the trunk road.
    We therefore had two options for the site. The lower site was fairly flat and in some ways may have been easier to develop, but the proximity to the busier road was a downside, as was the view, being less expansive (although still a nice enough view, over open agricultural and hill land). The upper site had some challenges with steep gradients, but a much better sea view, a quieter location, and was a handy 30s walk from our own house. We decided to put our effort into the upper site, with the knowledge that if our planning application failed we might have a second bite at the cherry on the lower site.
    A bit of rough surveying followed- it's handy when your Dad is a civil engineer- and this showed that there was a good spot to sit the house that should be more or less on the building line (i.e. in approximate line with other houses on that side of the road), whilst not blocking any neighbours' views, and having the best possible view out to Loch Snizort and the hills of Harris in the distance.
     
    Originally, there was a very rough a steep grassy track into the field. I knew that this would never satisfy the council as a vehicular access due to the poor visibility. It ran parallel to an earthen bank which we had been told concealed our own house's septic tank. The land fell away at an average 1:7 gradient over the first 50m or so, steeper in some patches.
    The positions of water stopcocks in the public road suggested that the water main lay on the upper side of the road, so we would need a road crossing to get the connection across. Similarly, low voltage power lines ran along the upper side of the road. Our neighbours had recently built a house on the lower side so we did hope that there might be space in their duct to avoid the need for our own road crossing, but this turned out not to be the case.
     
    I had a site visit from Sykes holiday cottages, who were very enthusiastic about my proposed build. They encouraged me to keep it small, and aim for the couples market rather than families, or big groups of hillwalkers etc. This confirmed what I had been assuming up to this point.
     
    It was time to roll up my sleeves, download a copy of Sketchup, and start throwing around design idea. More about that in part 3.

×
×
  • Create New...