Jump to content

Week 15 - UFH, screed, and render base coat


As promised, I spared you a Week 14 blog due to our visit to Yorkshire for a wedding and catch-up with old friends.  It was lovely to do something unrelated to the house and it made us realise how all-consuming our build has become.  We will definitely try to have some more non-house time through the rest of the build.


That said, it’s back to the matter in hand:
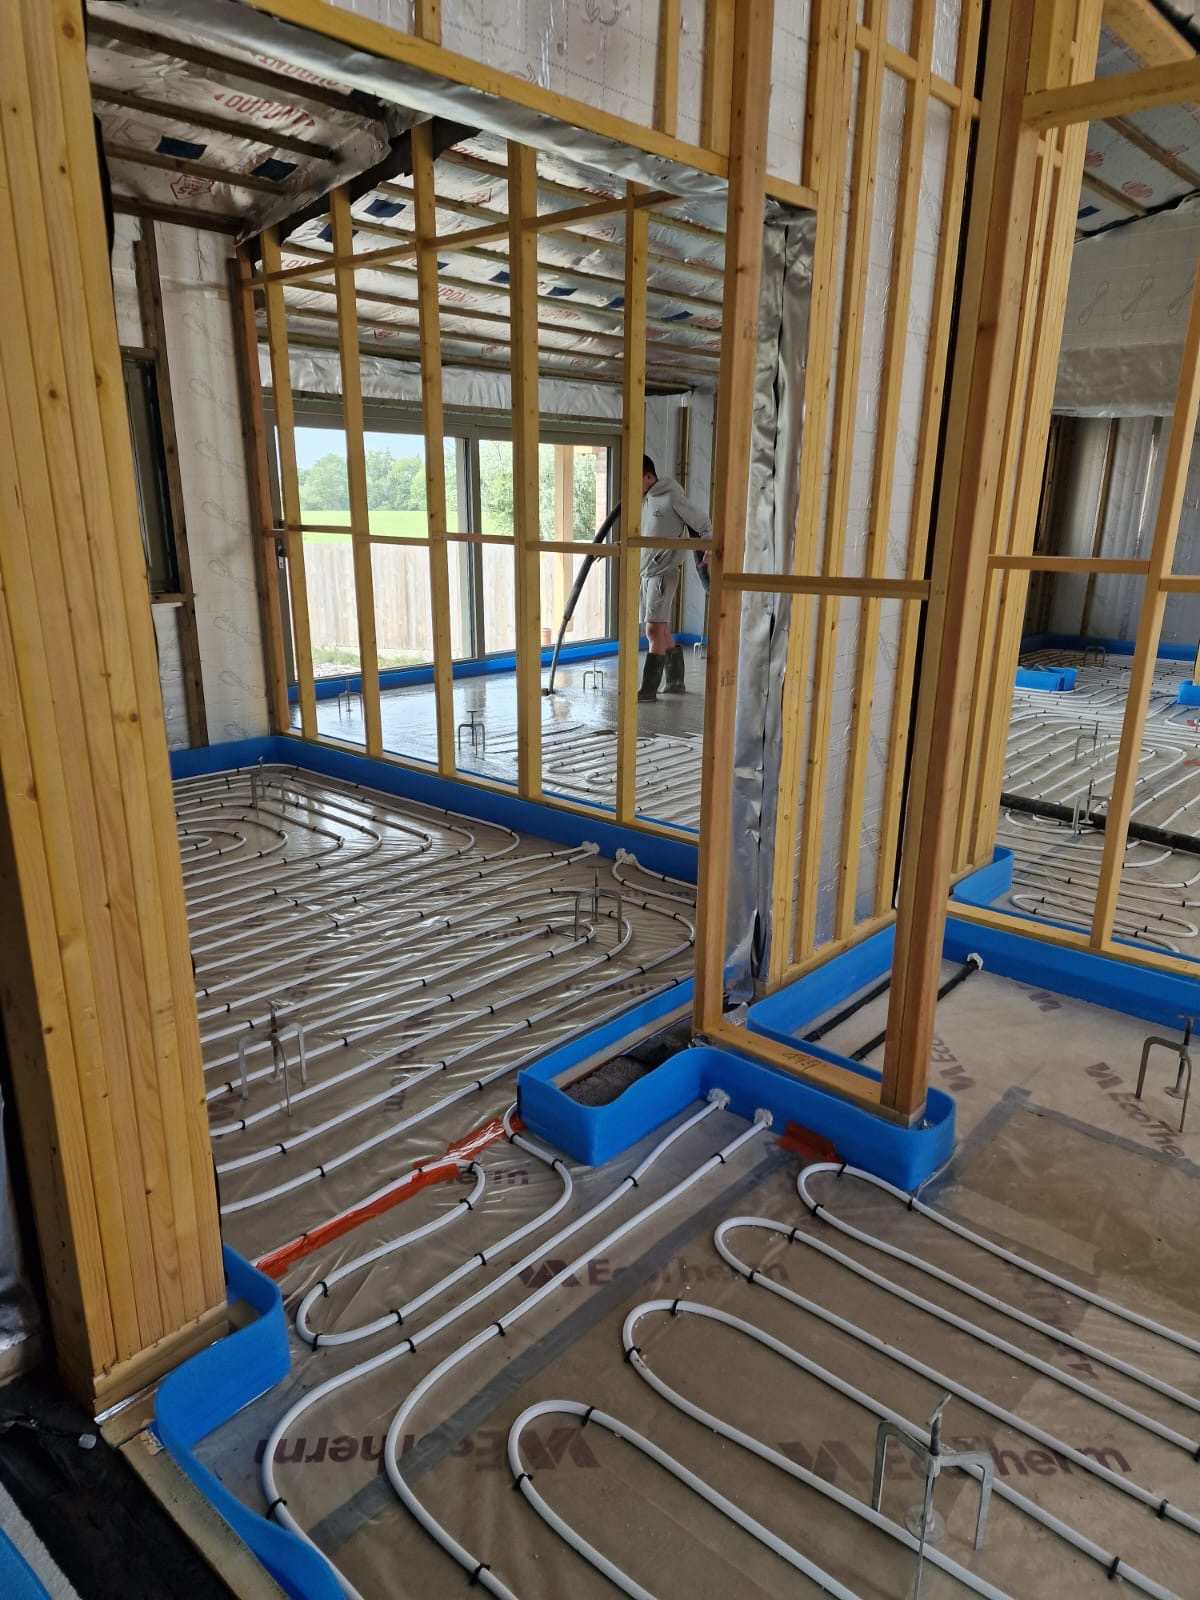
 

UFH

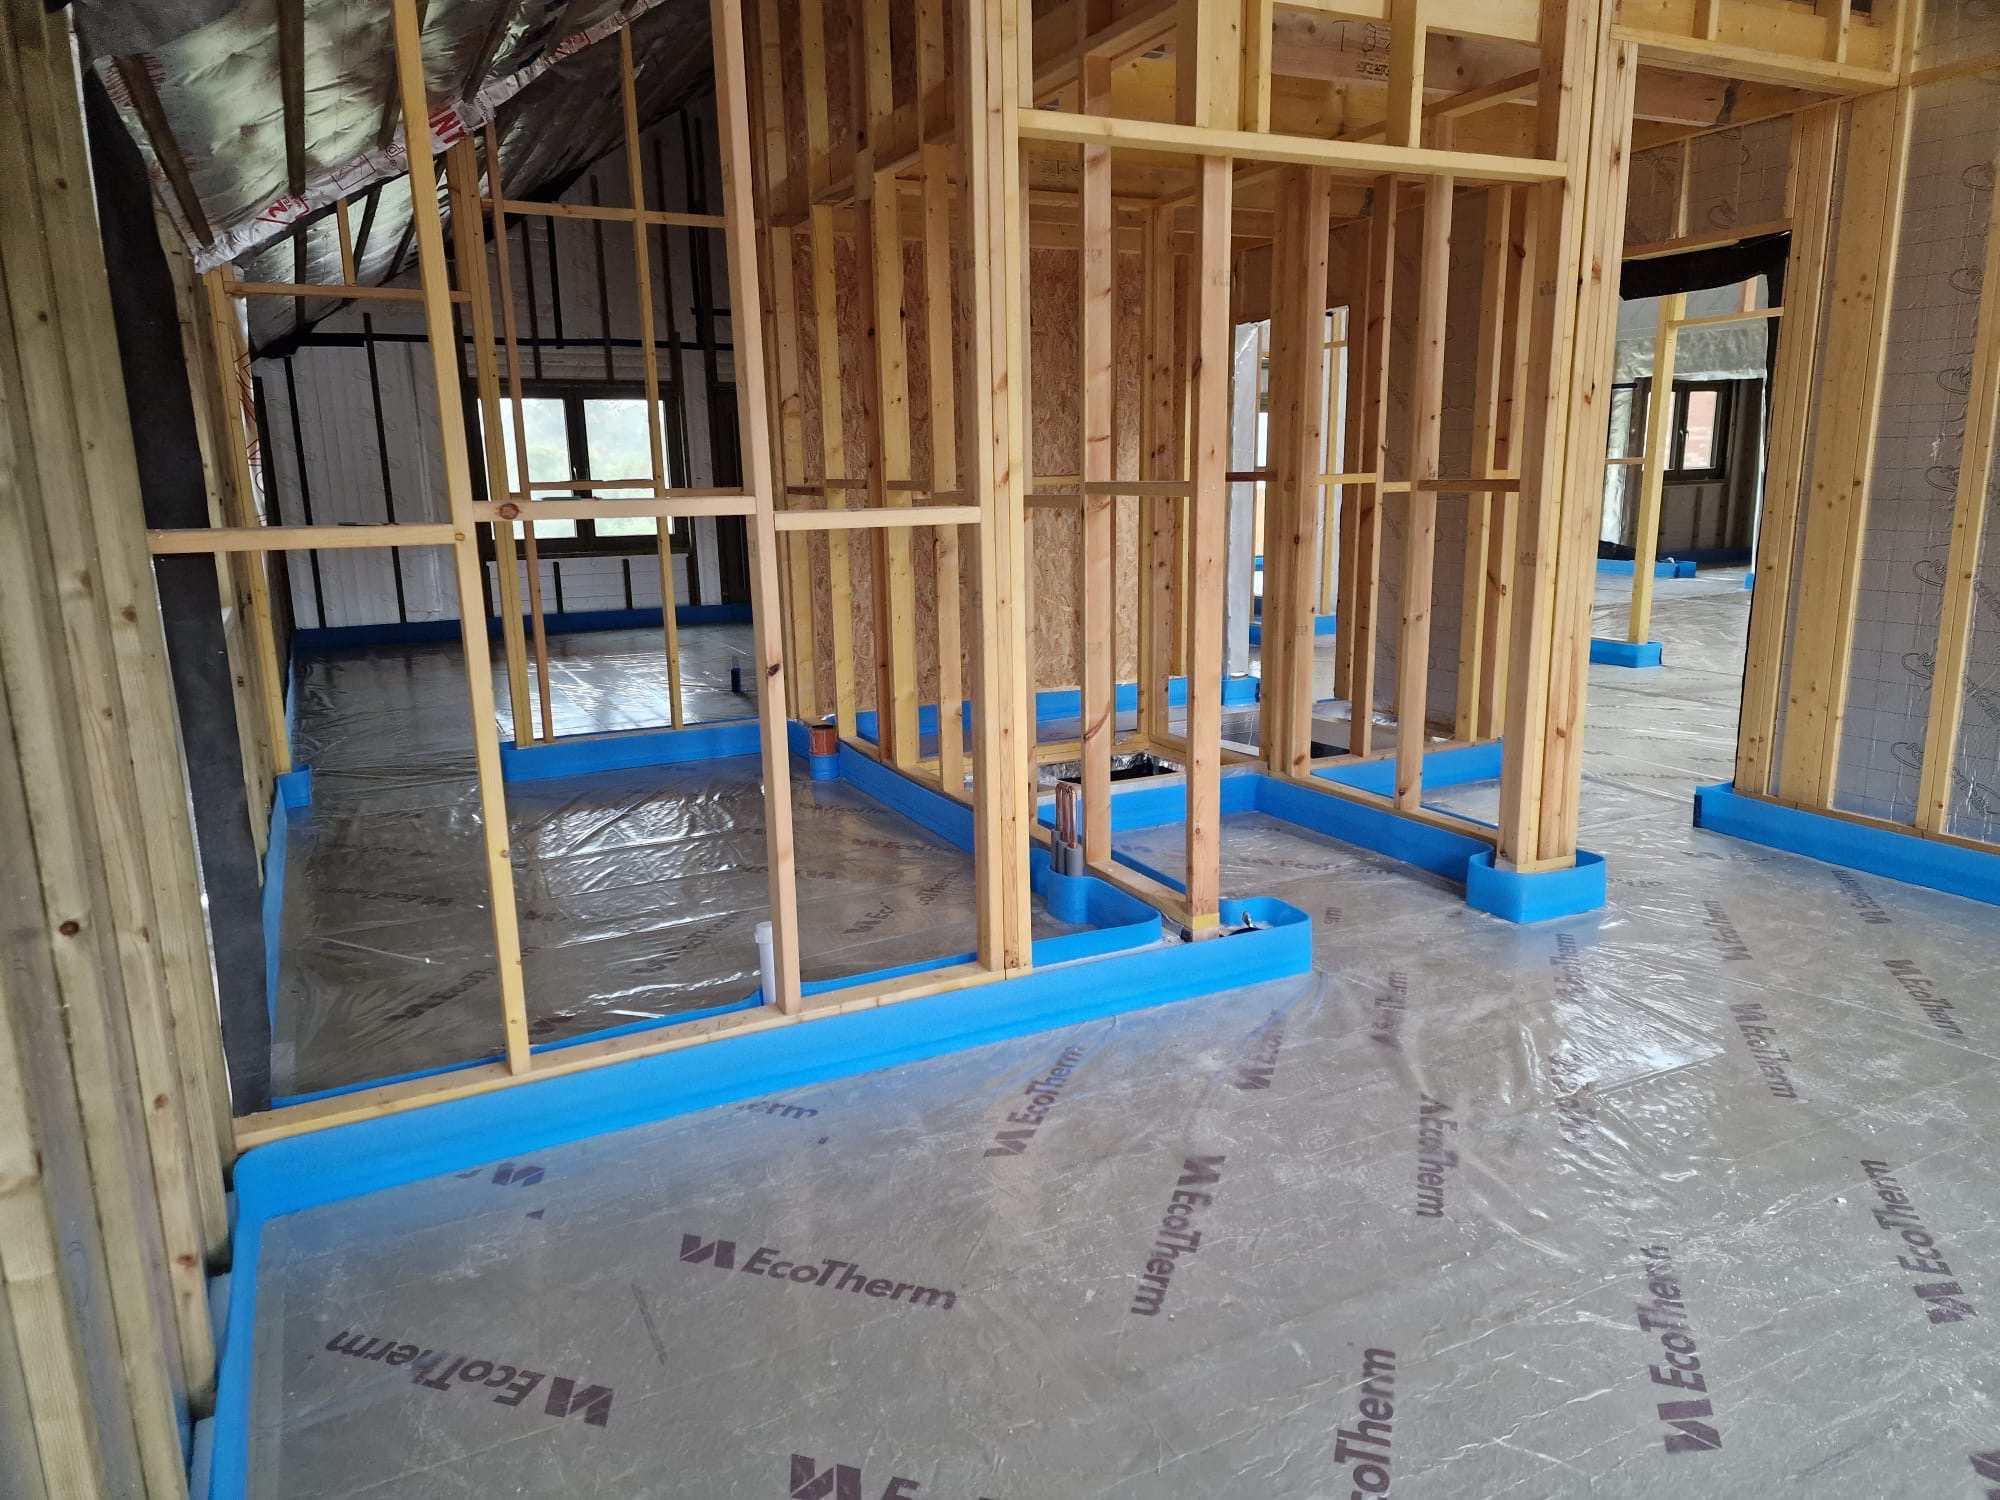
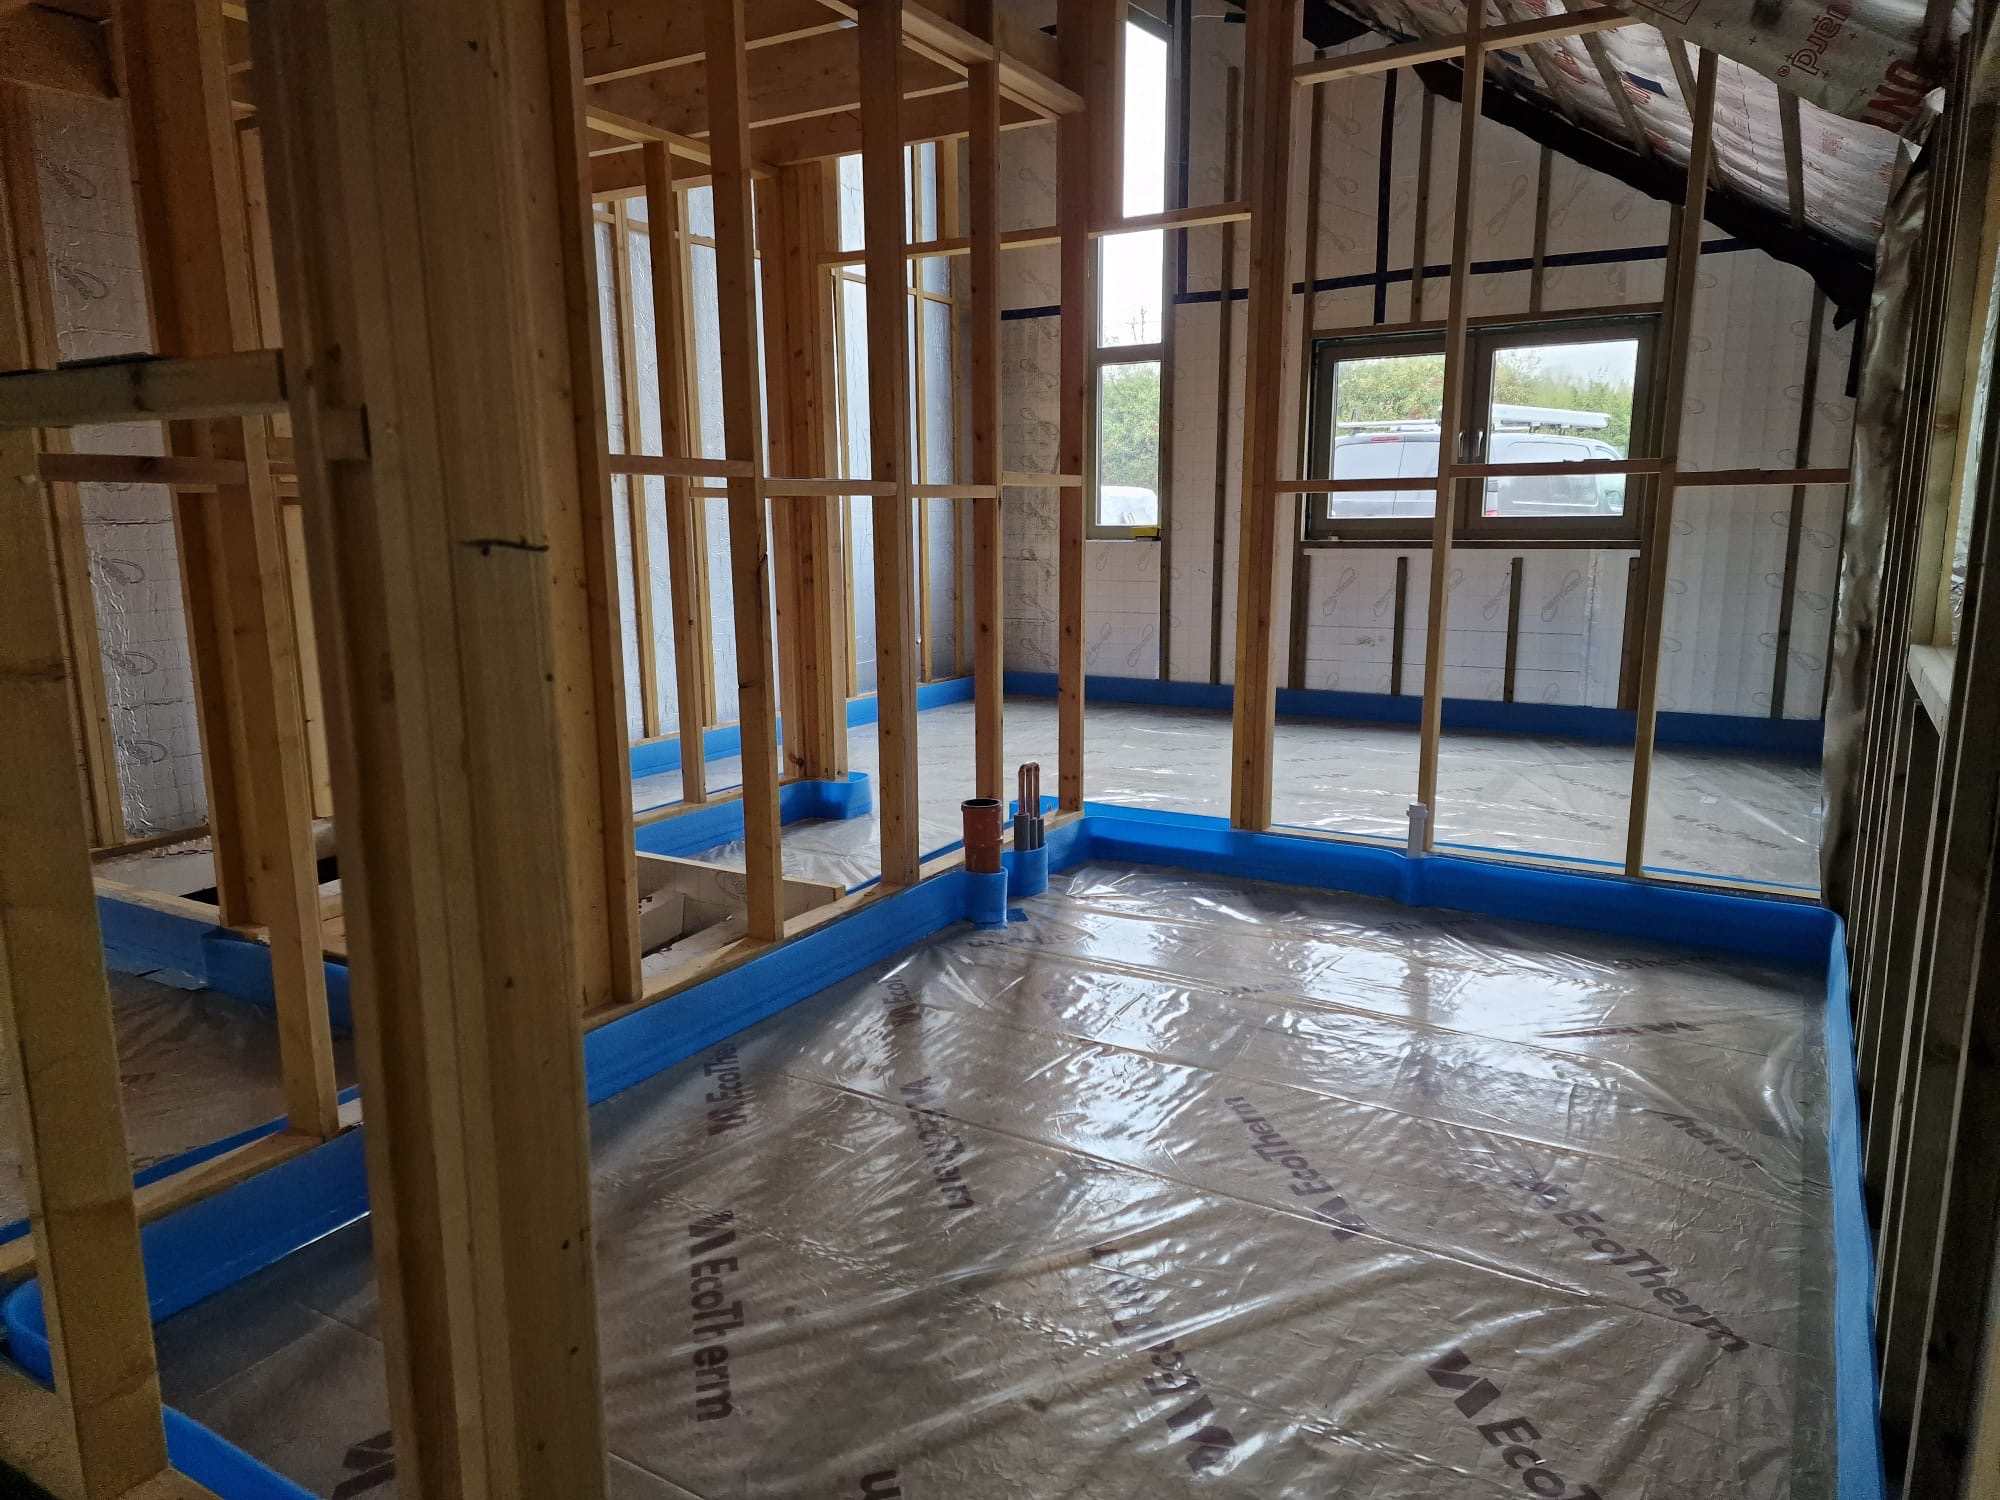
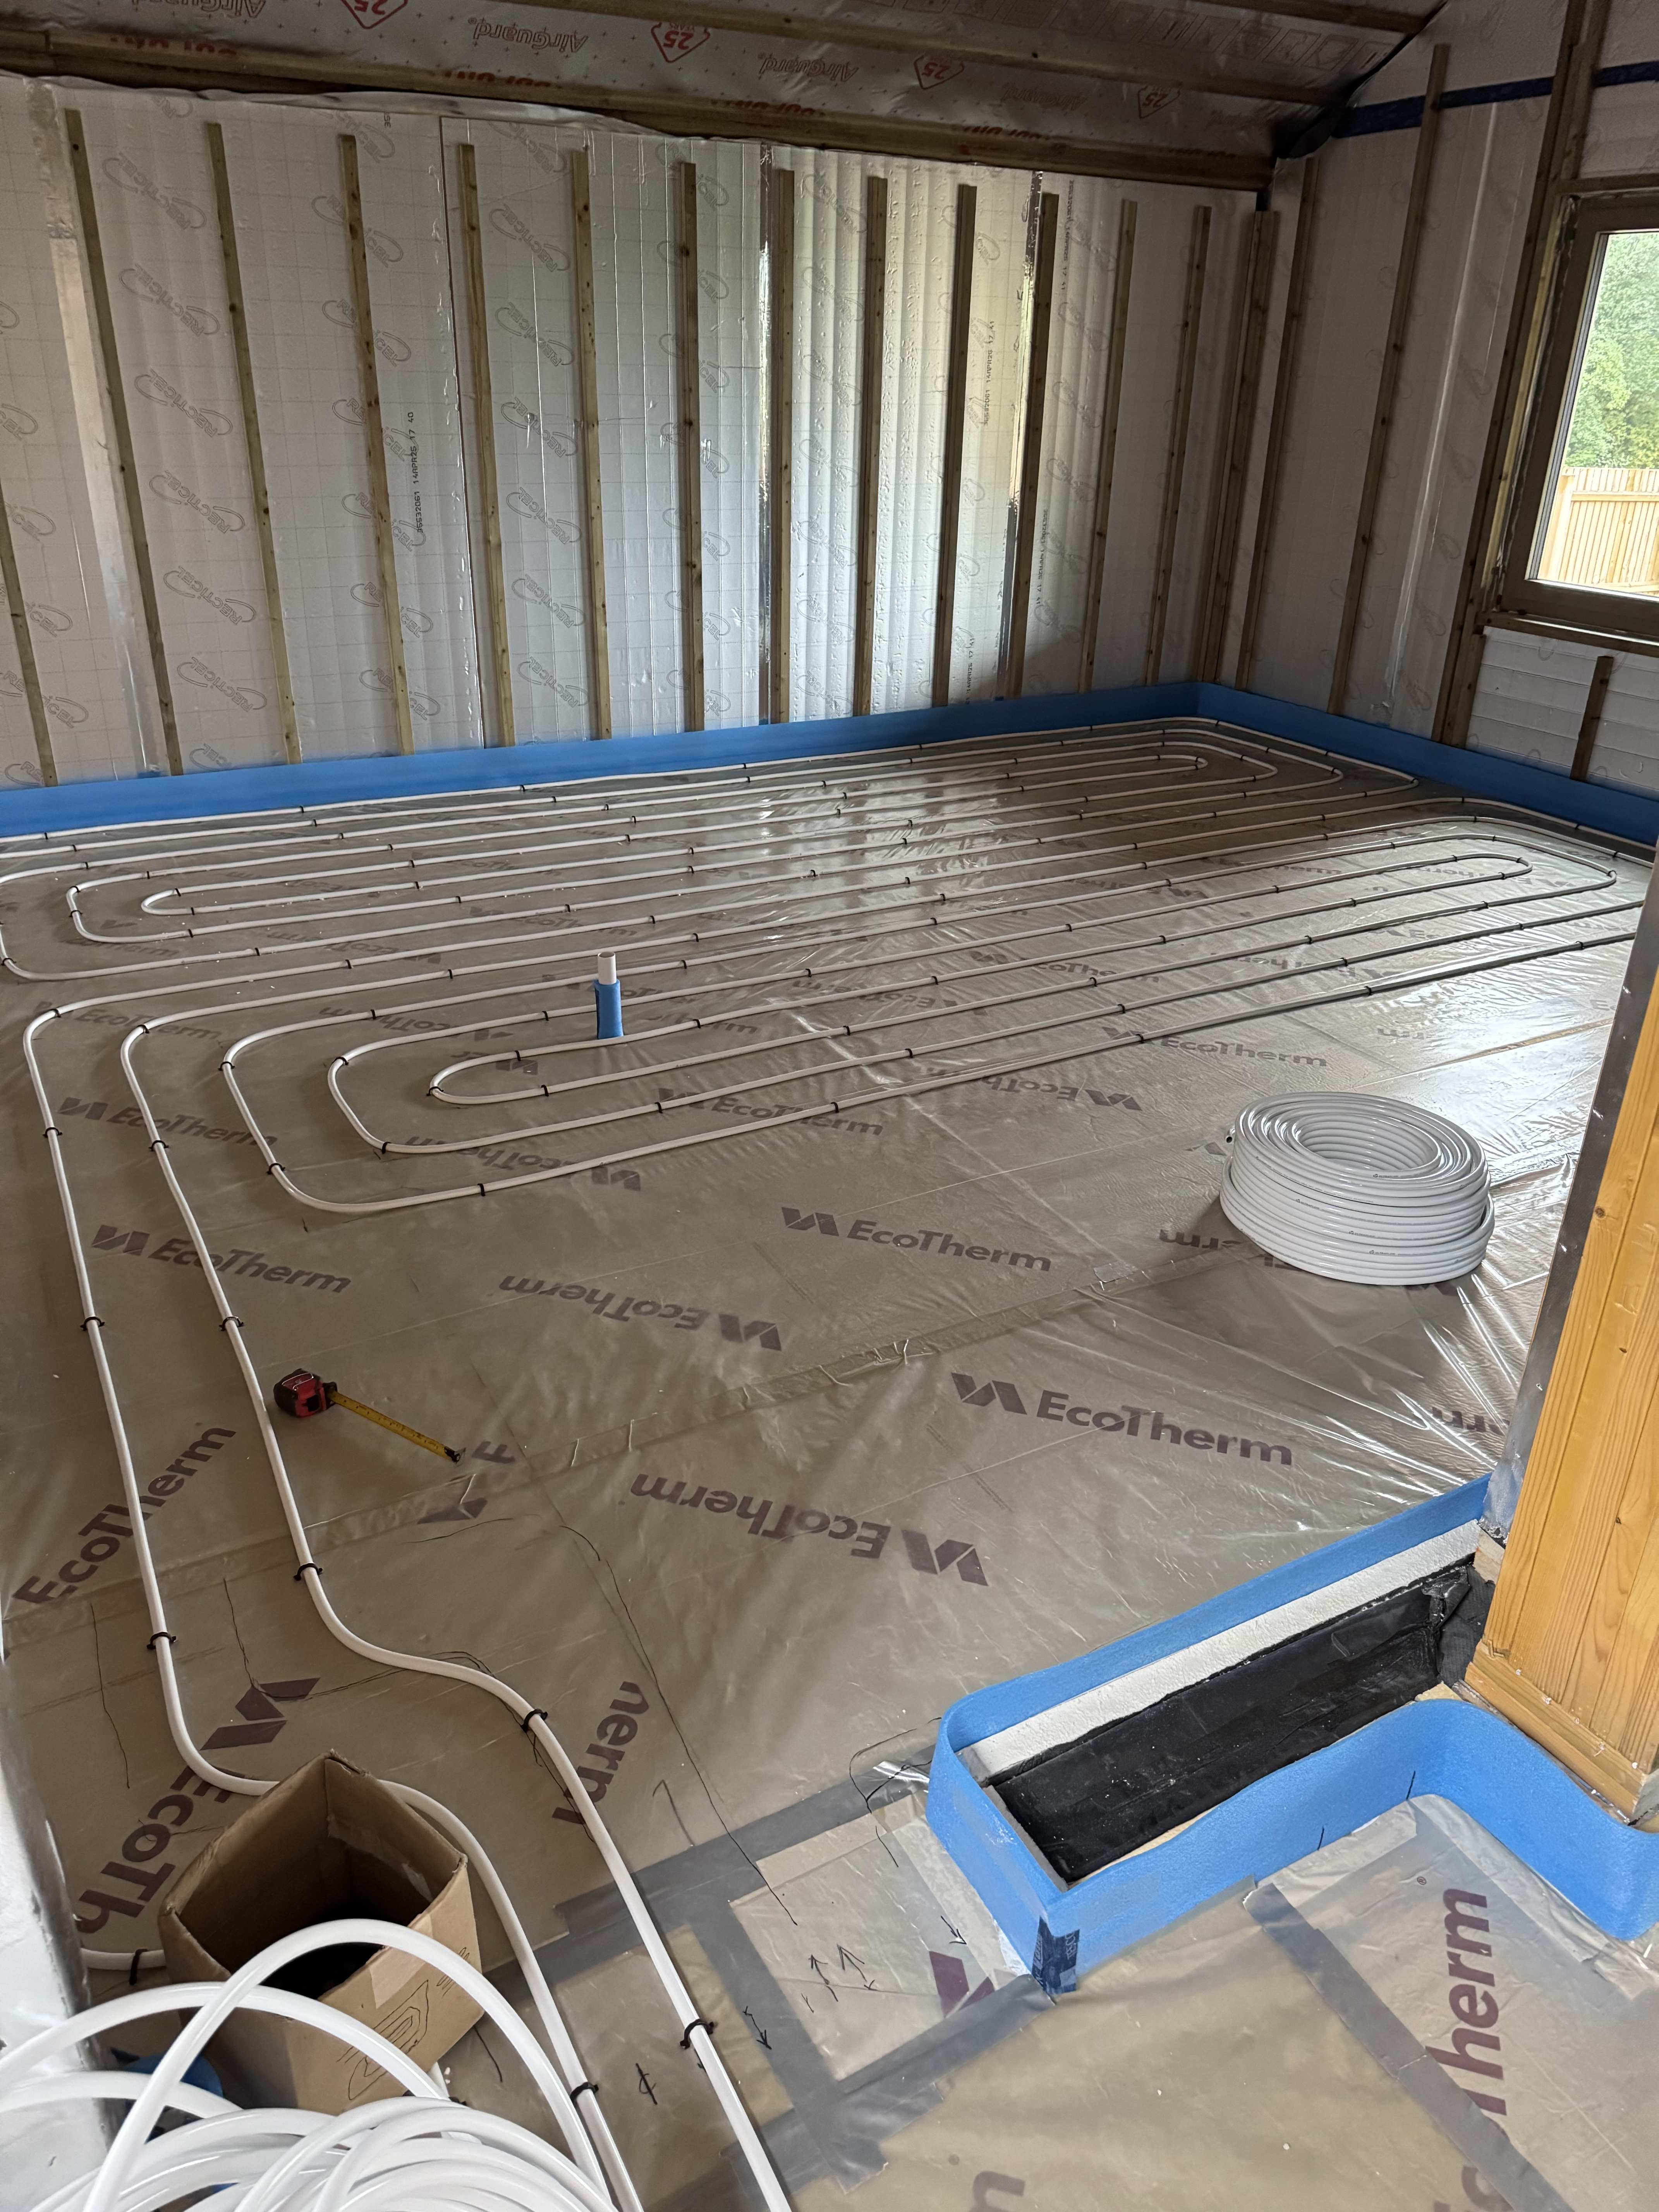
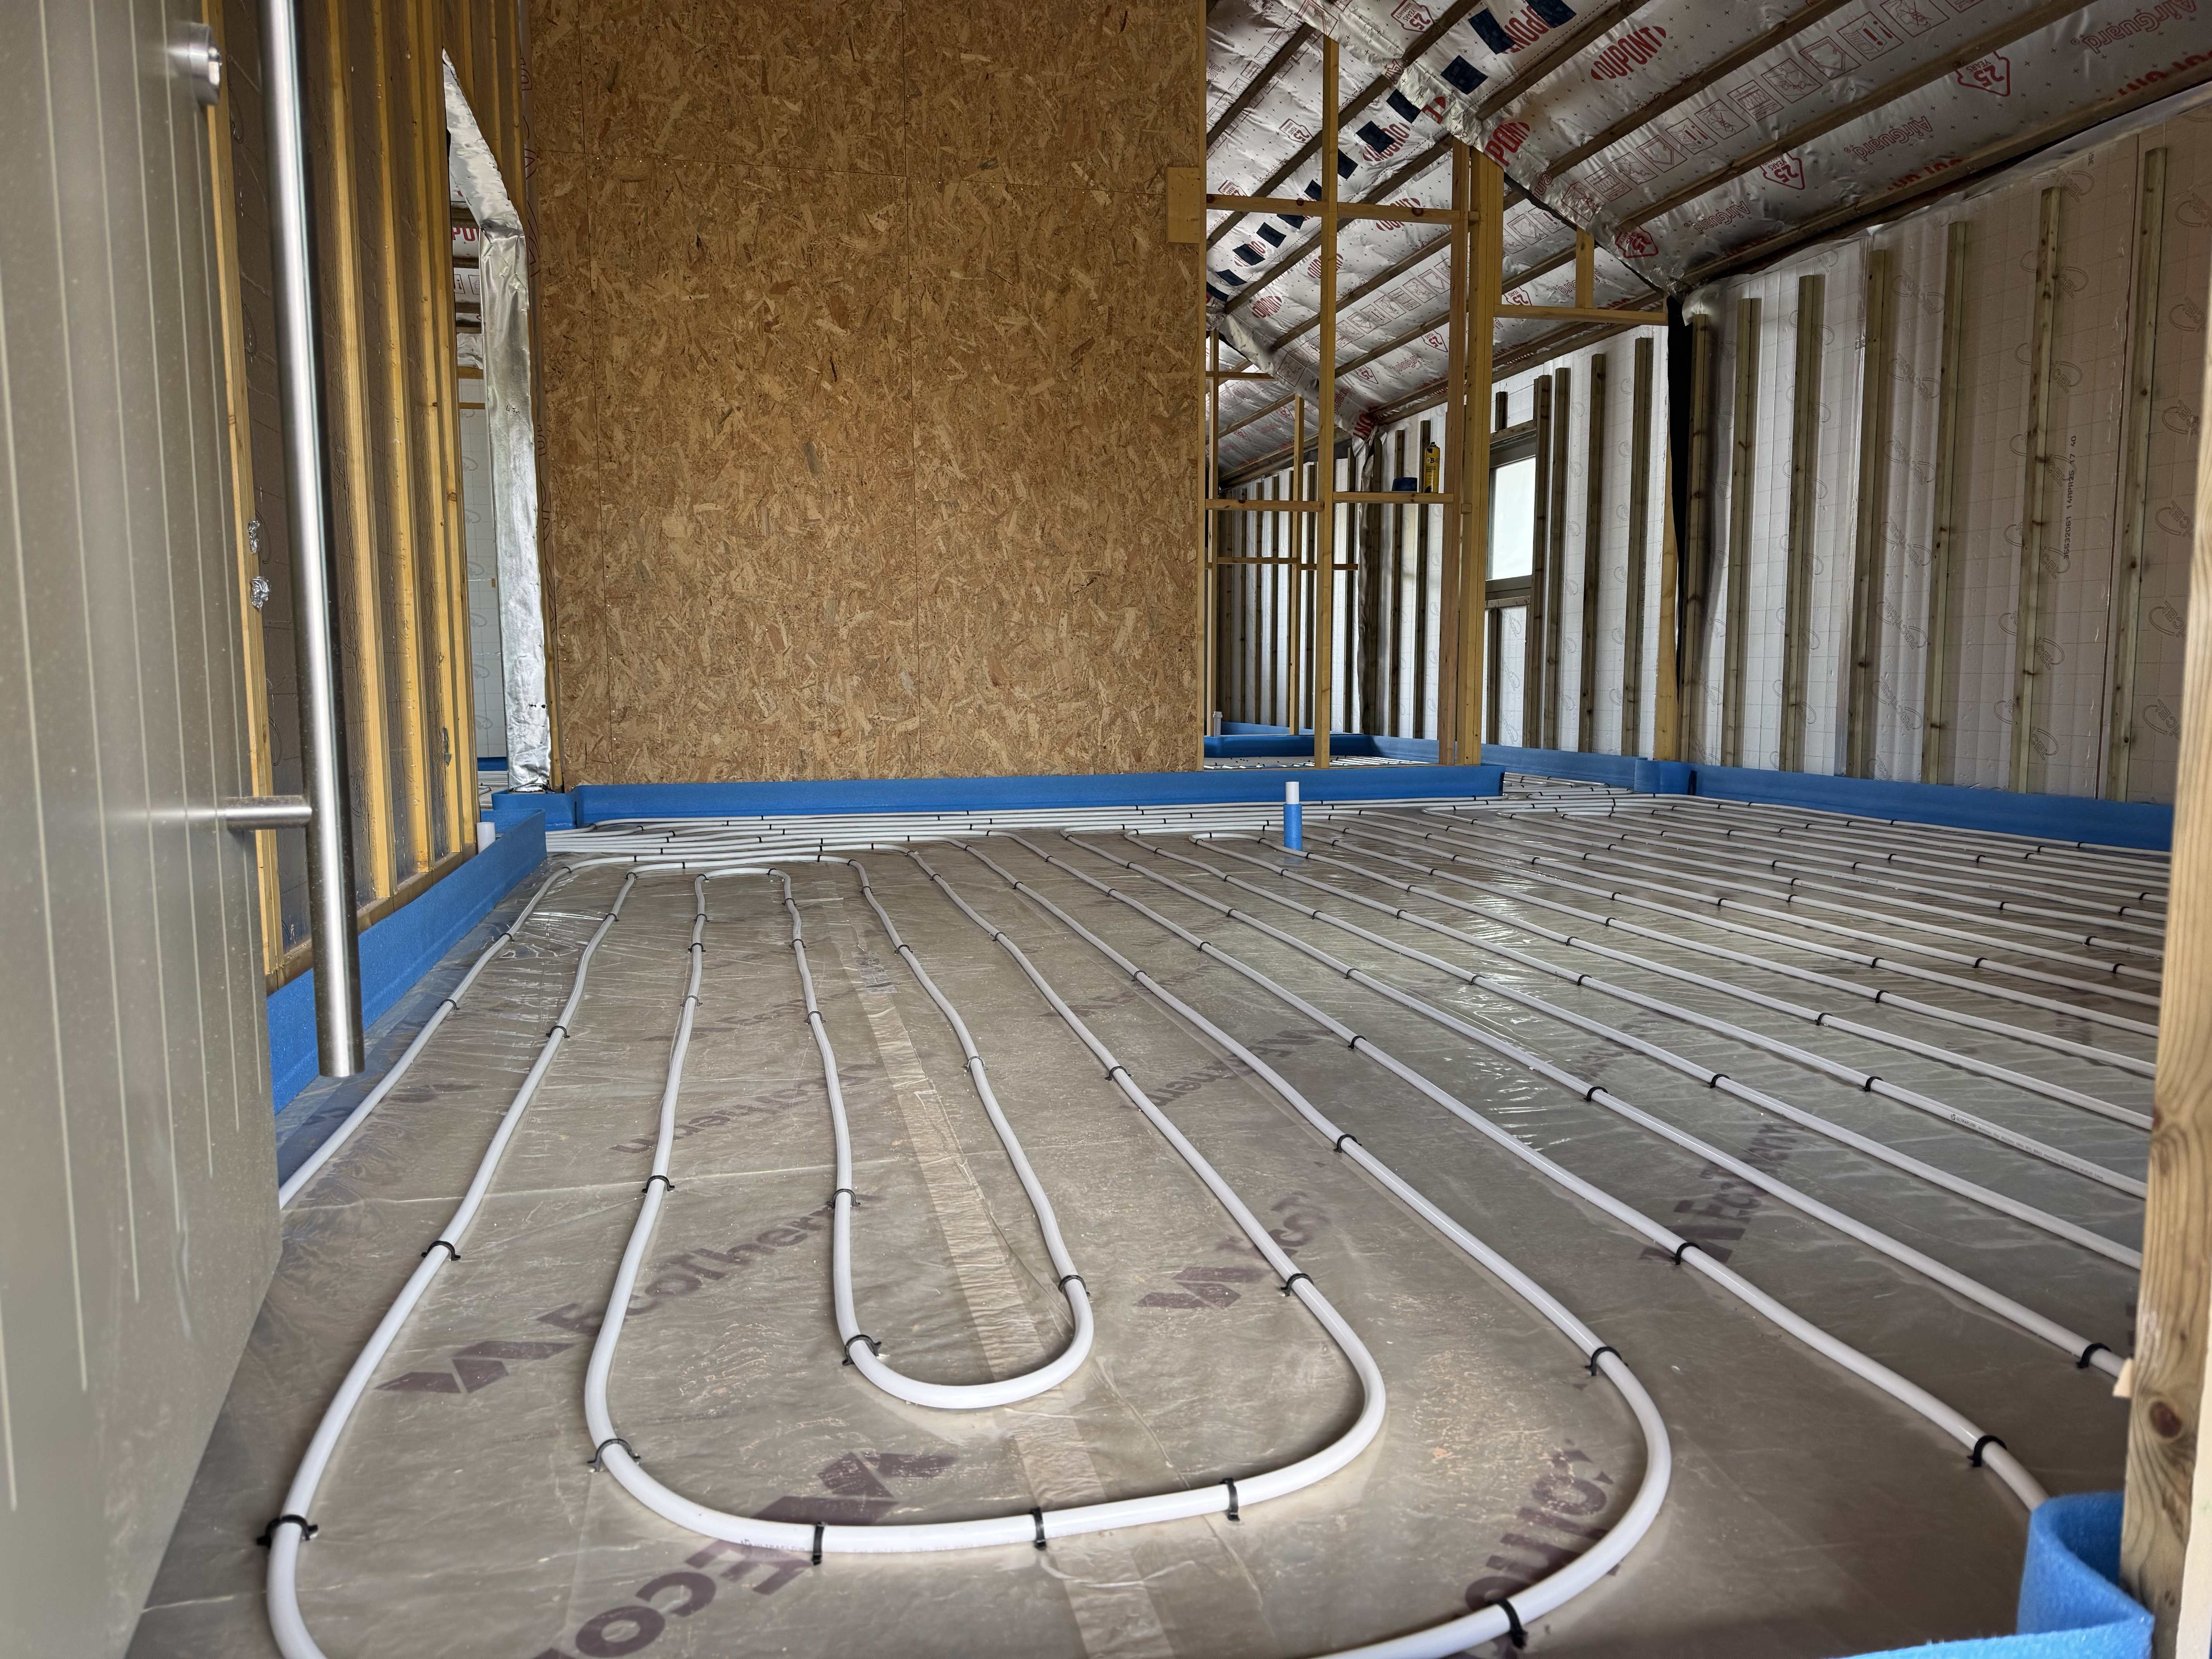
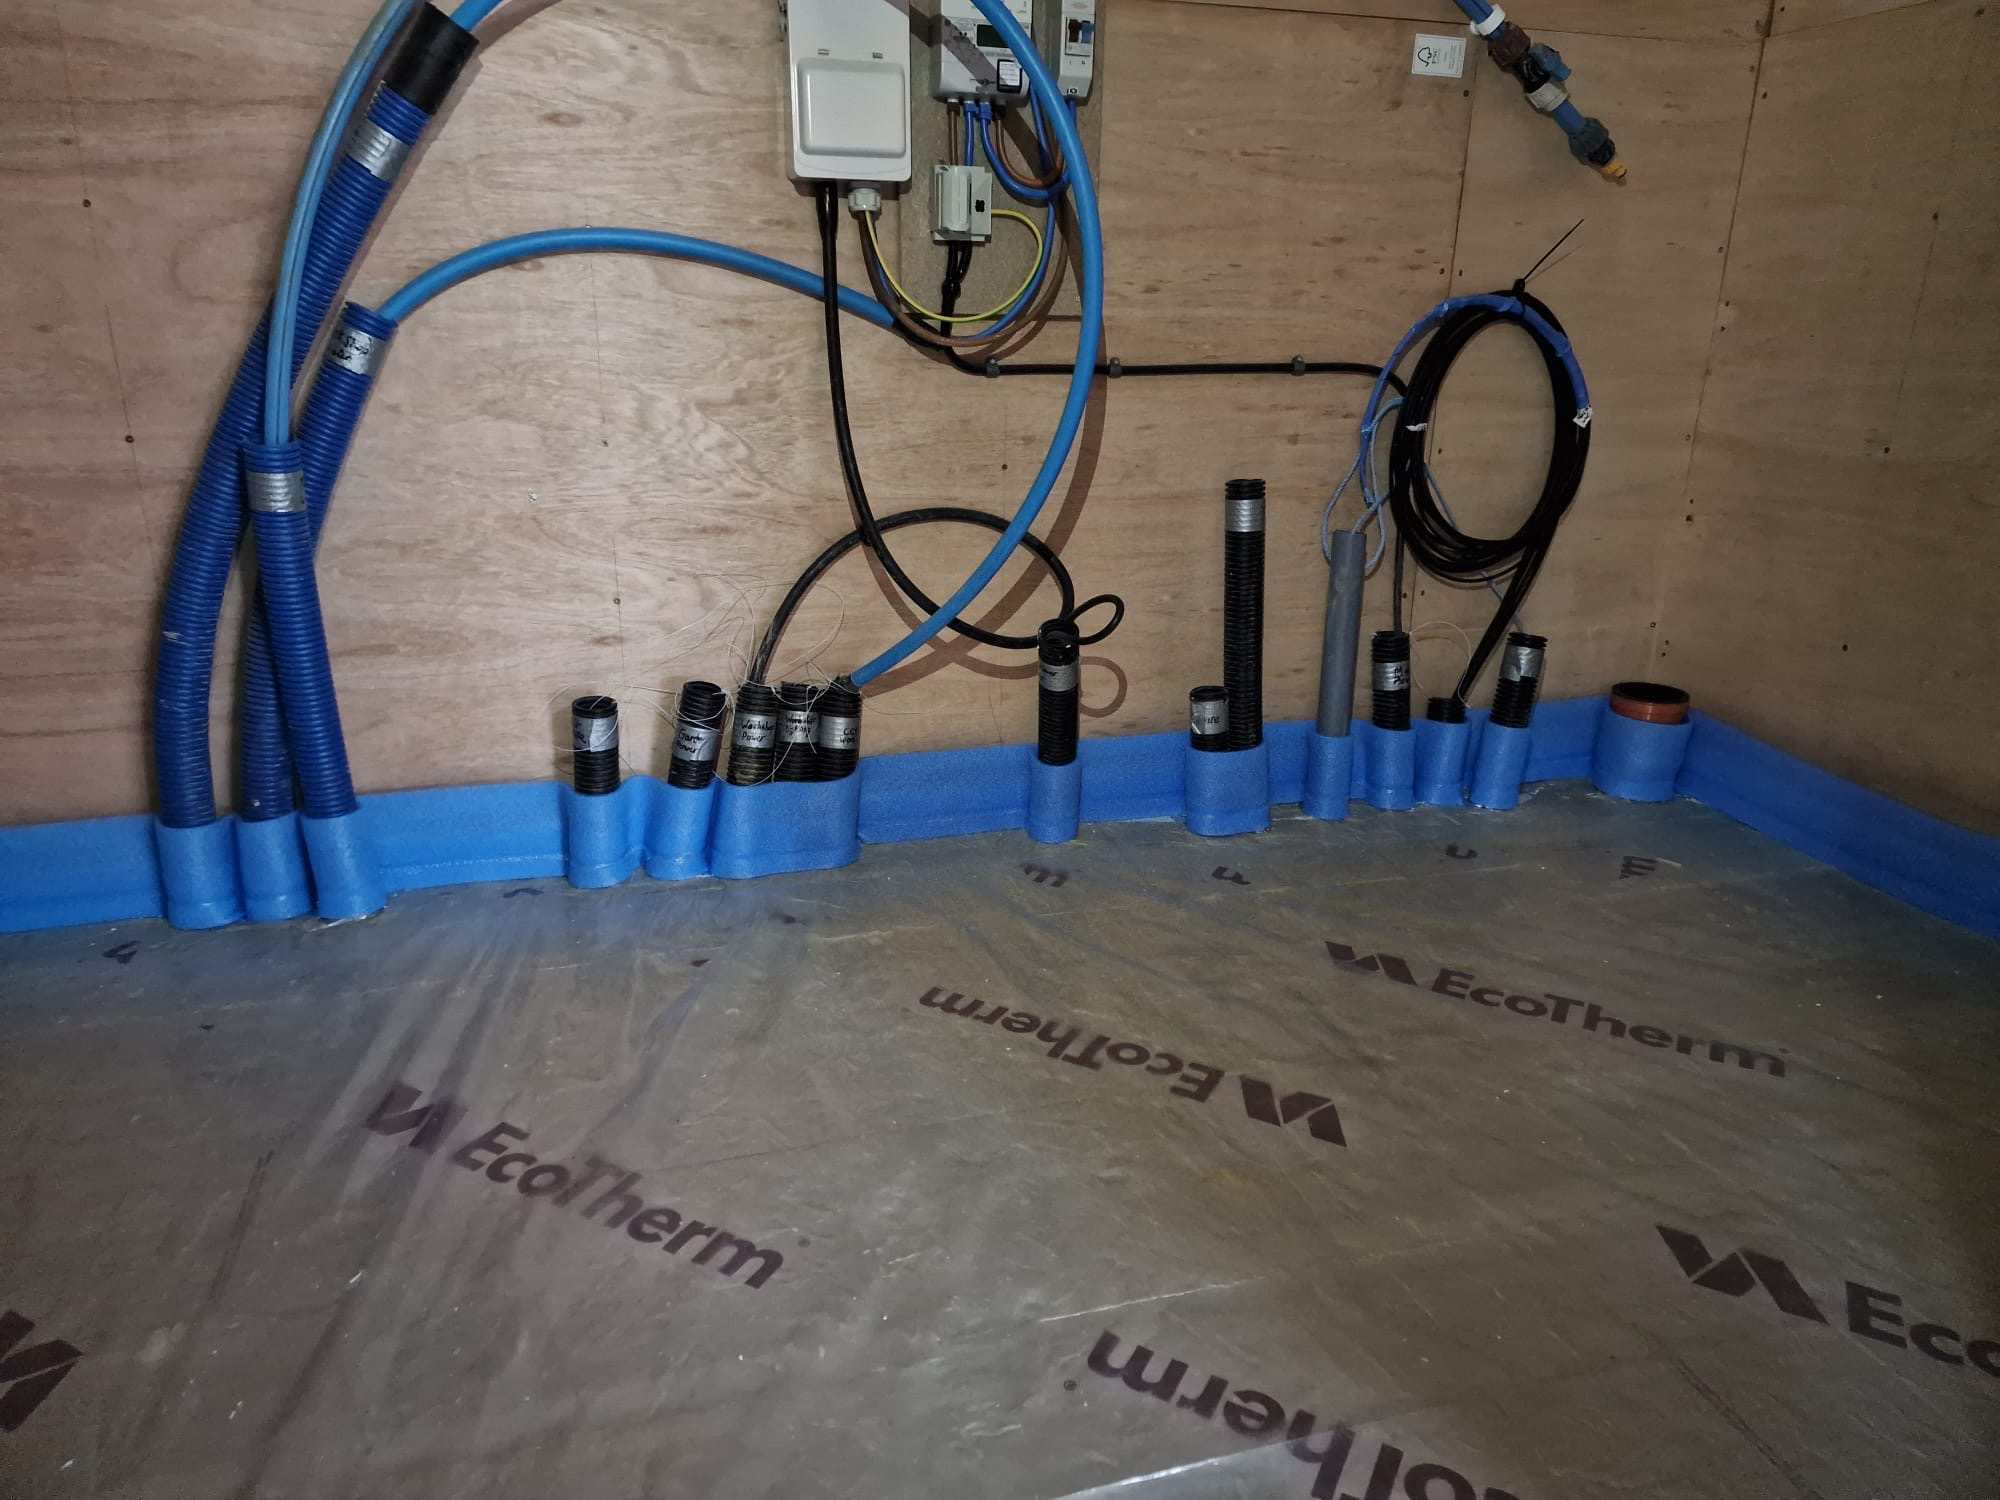
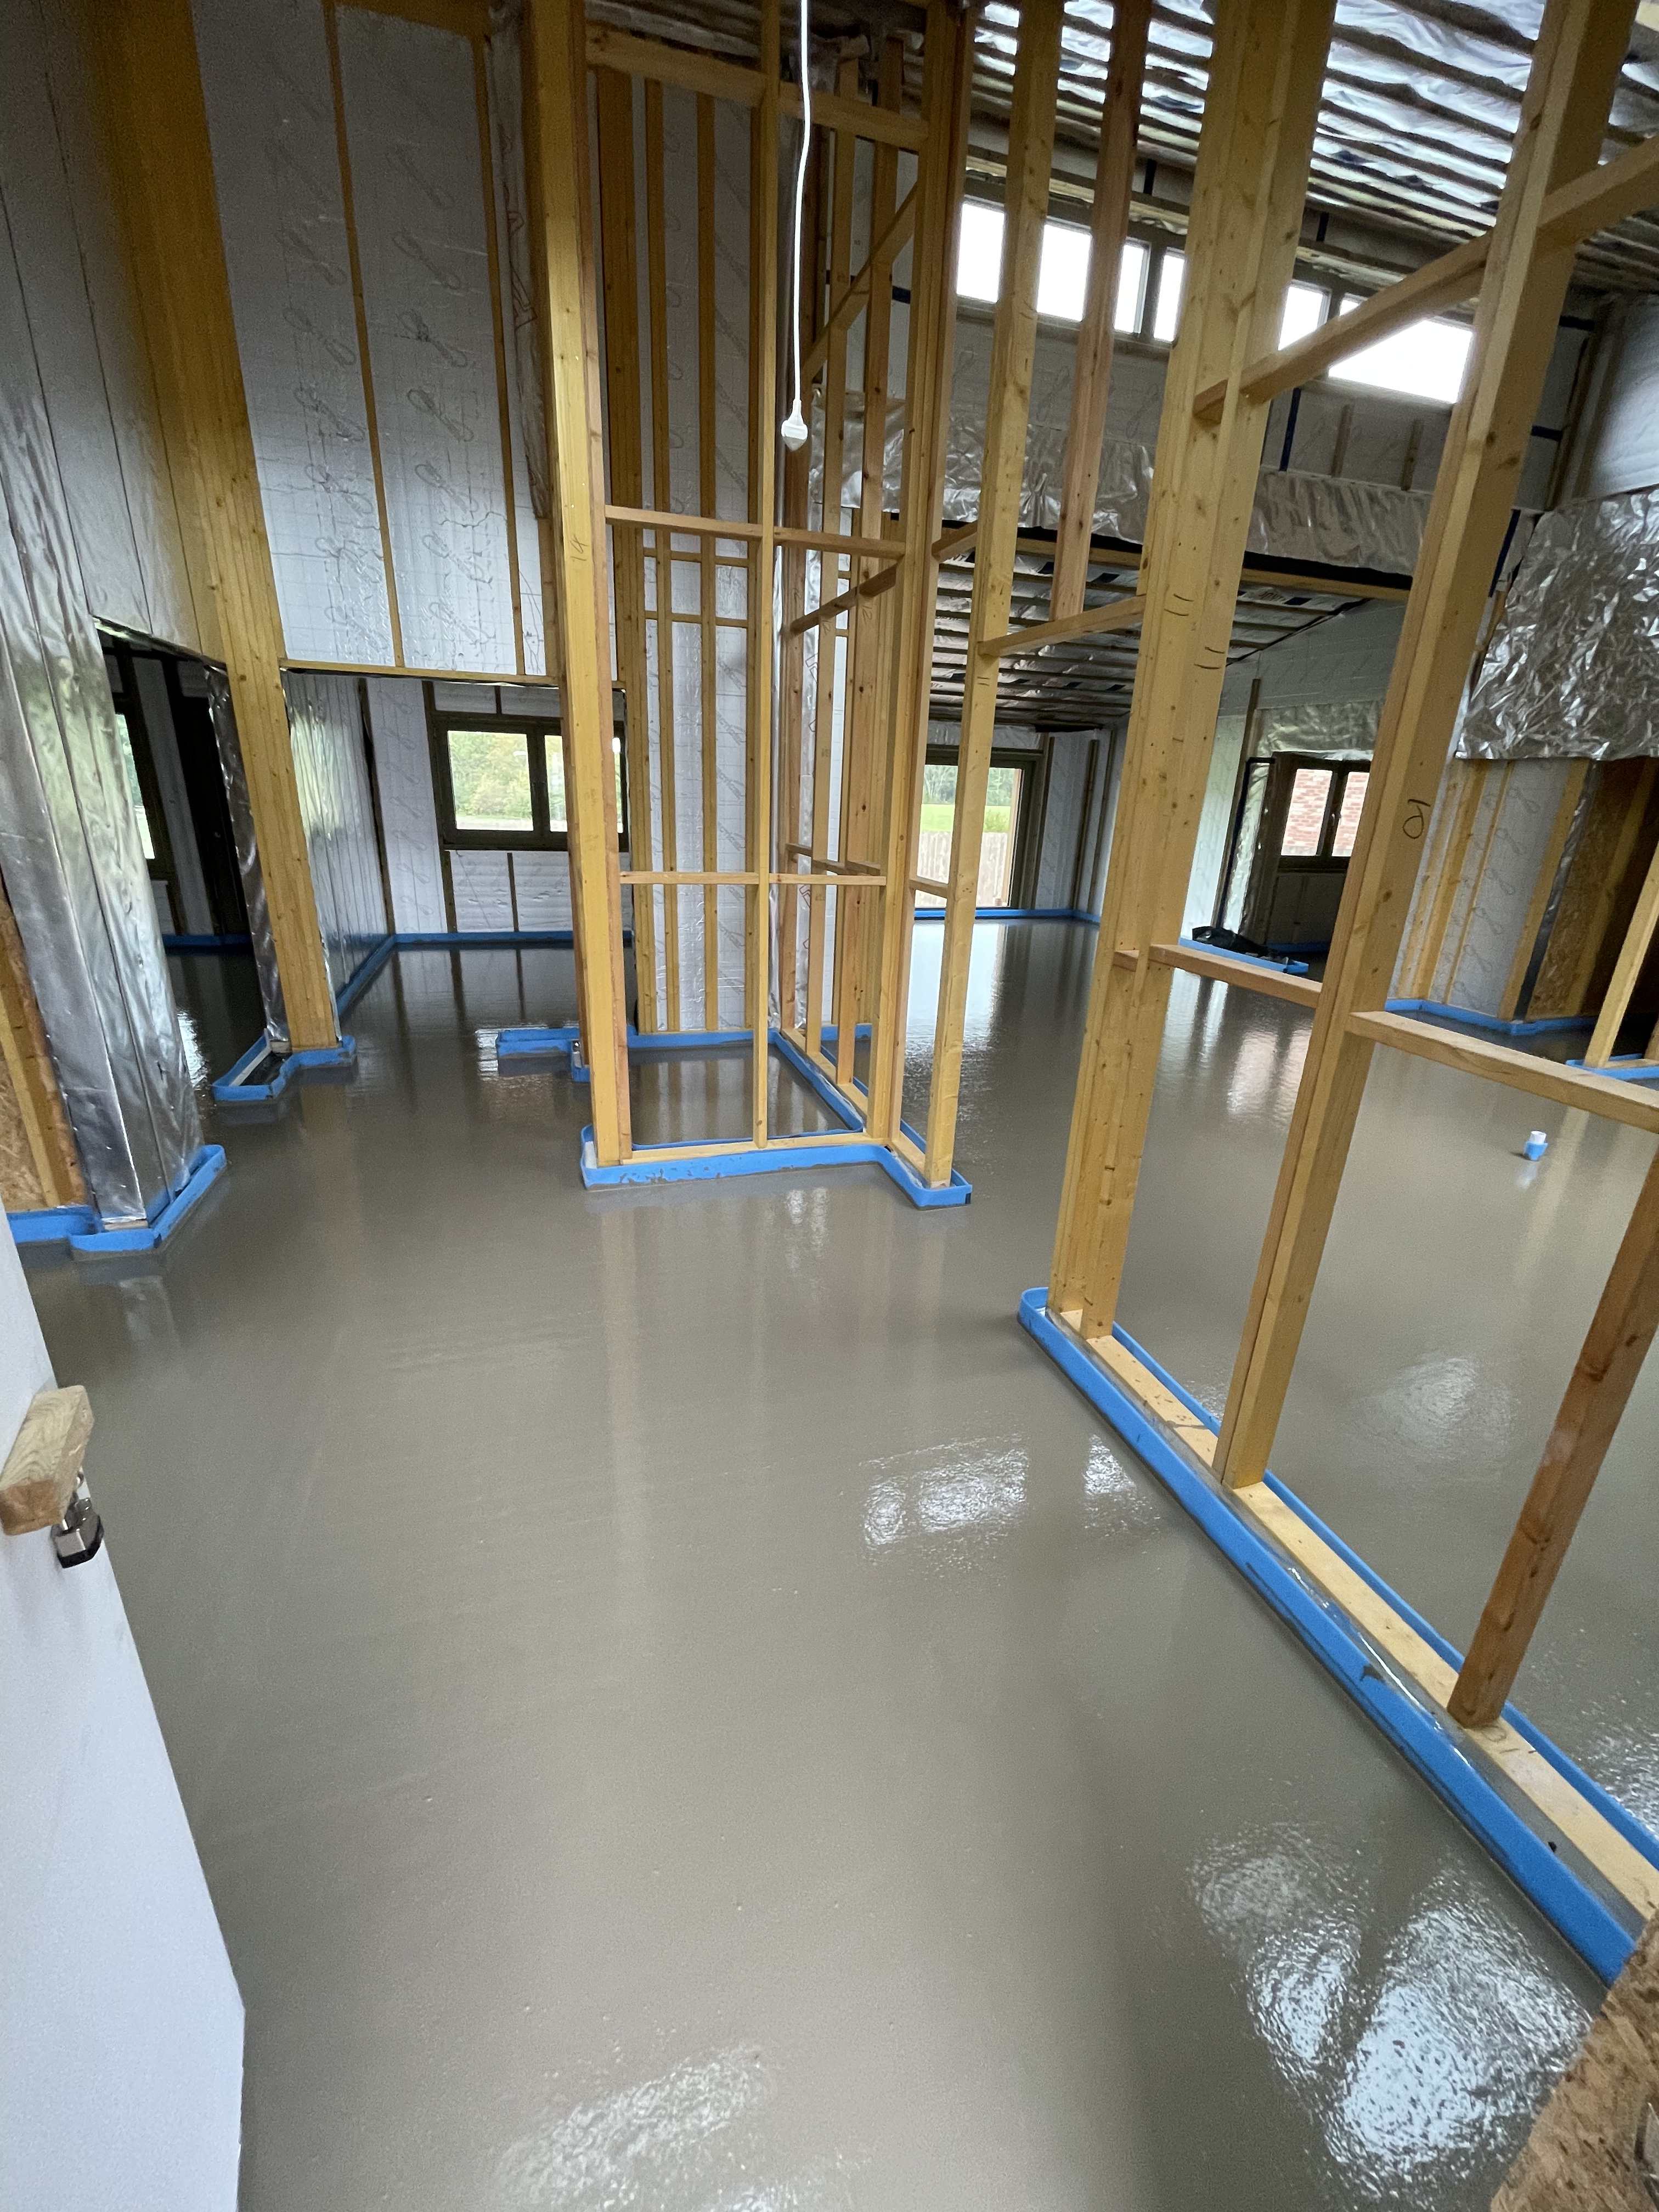
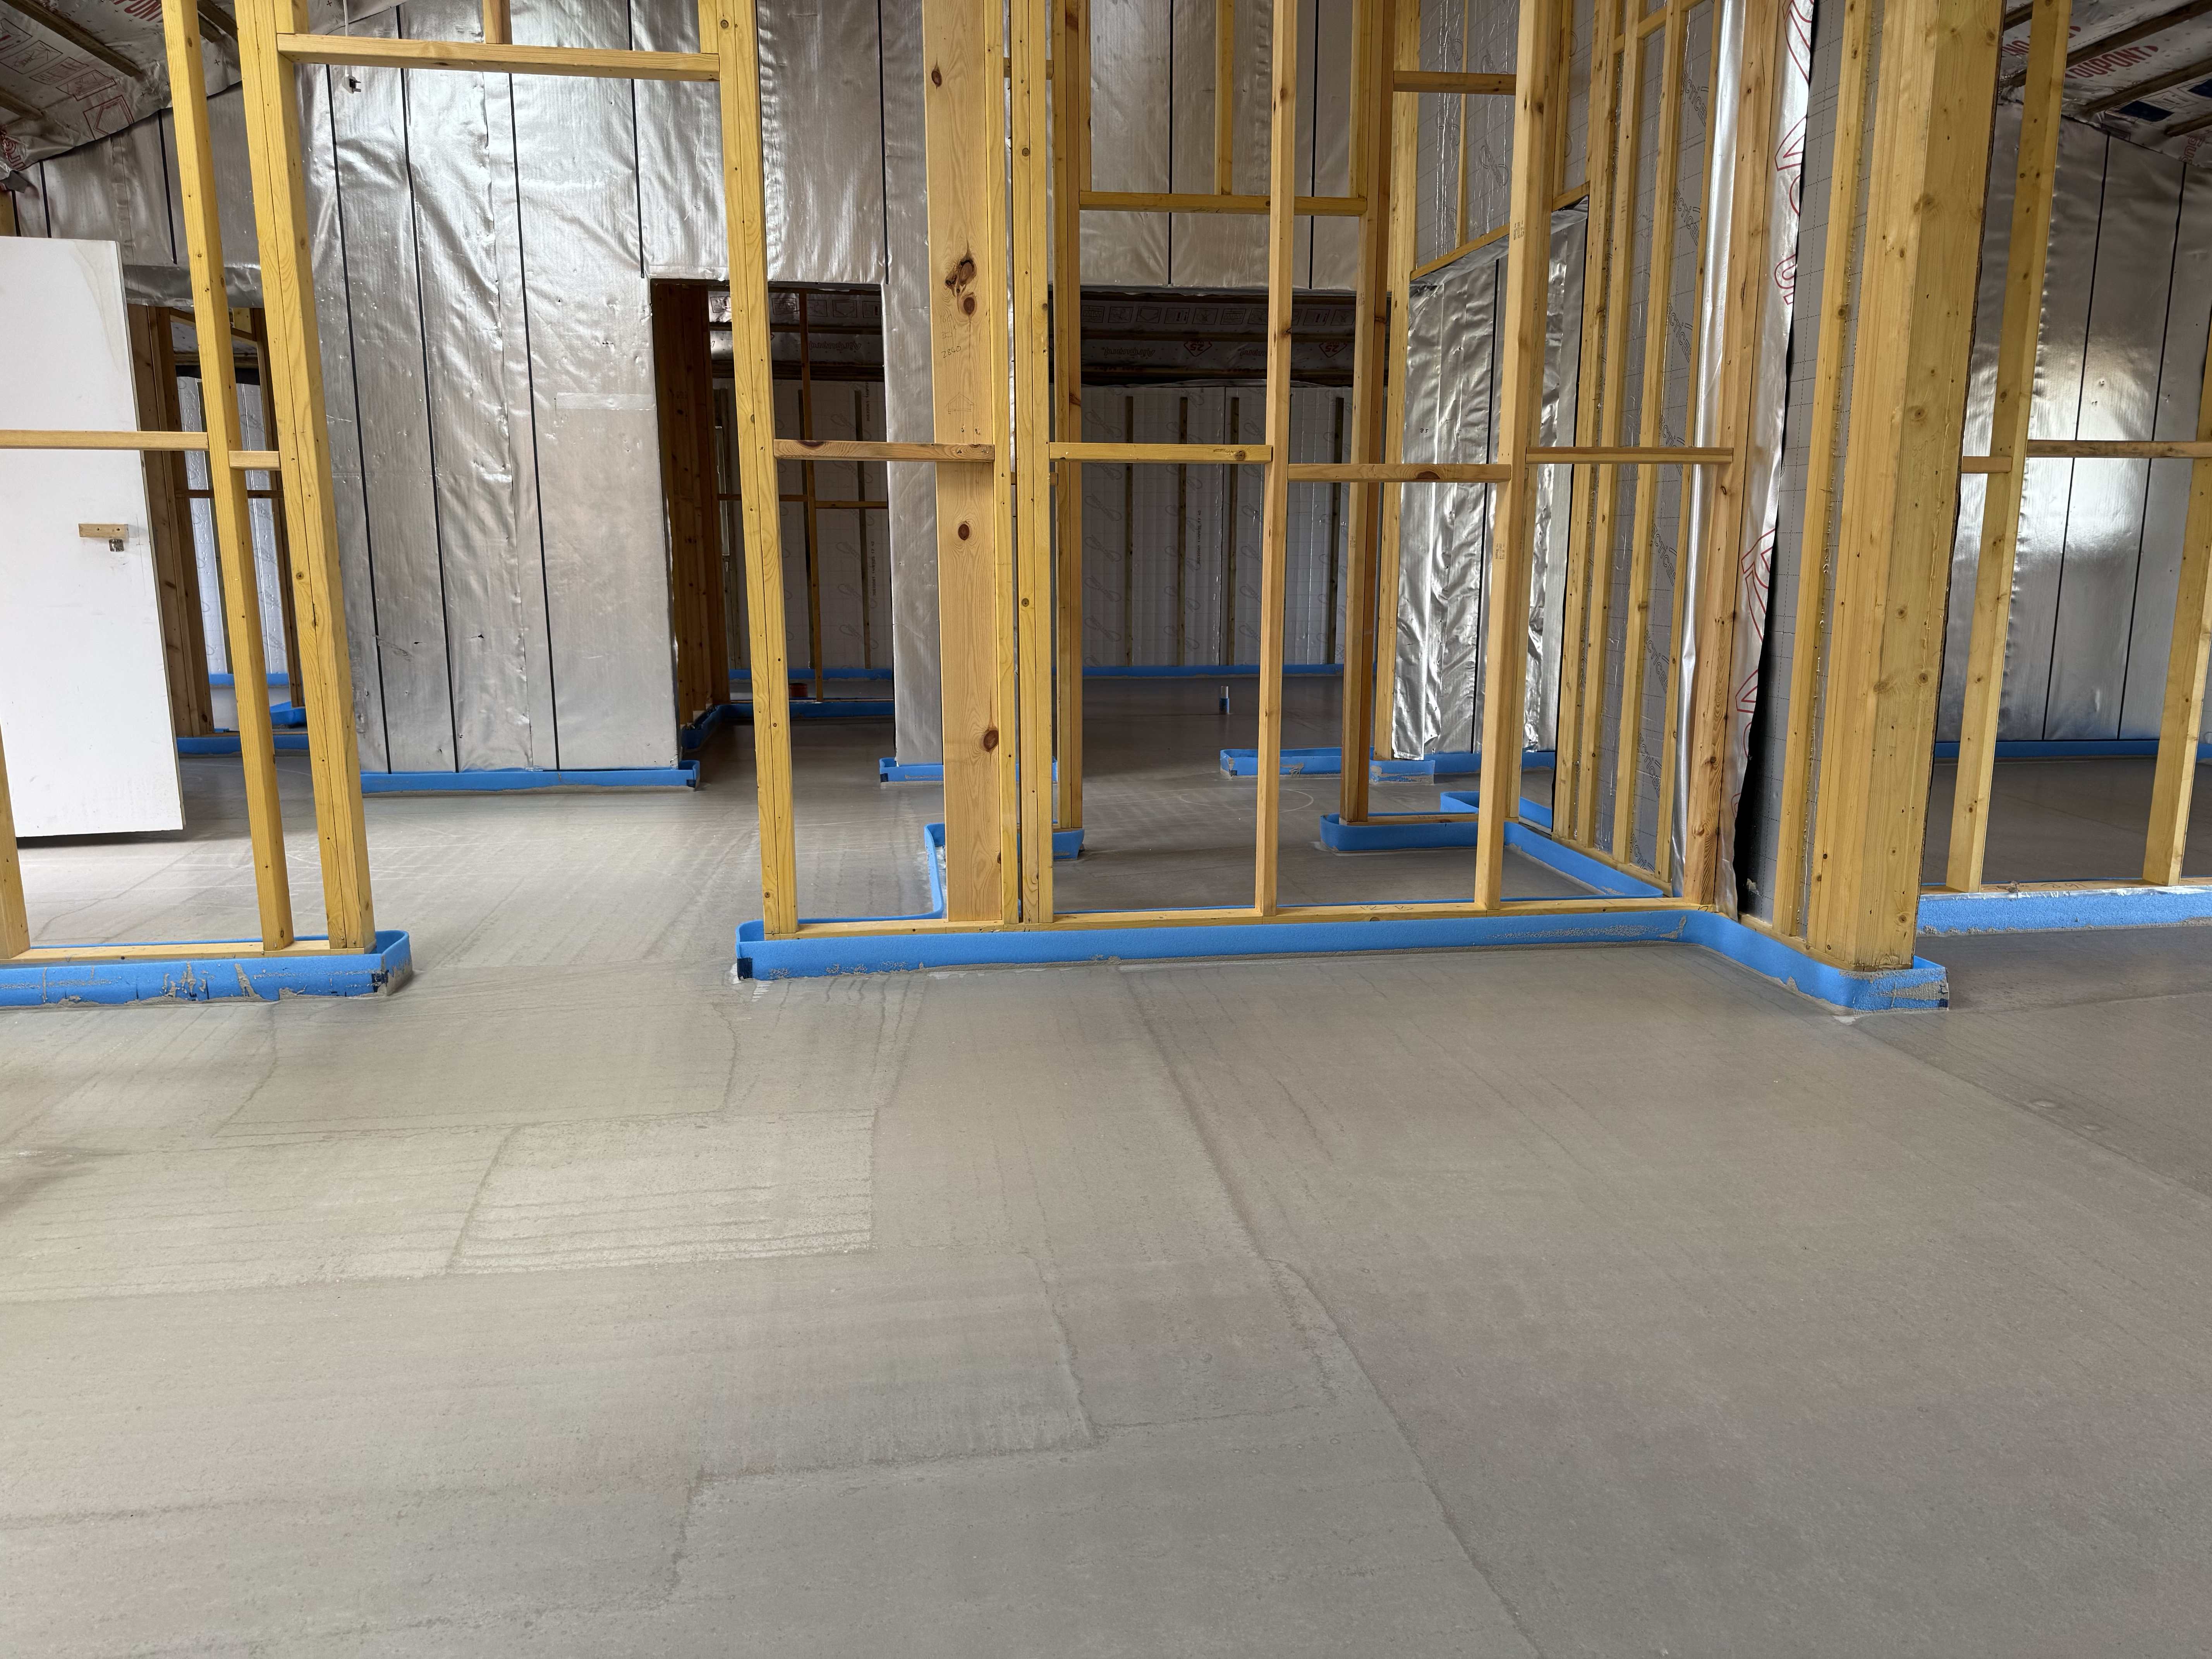
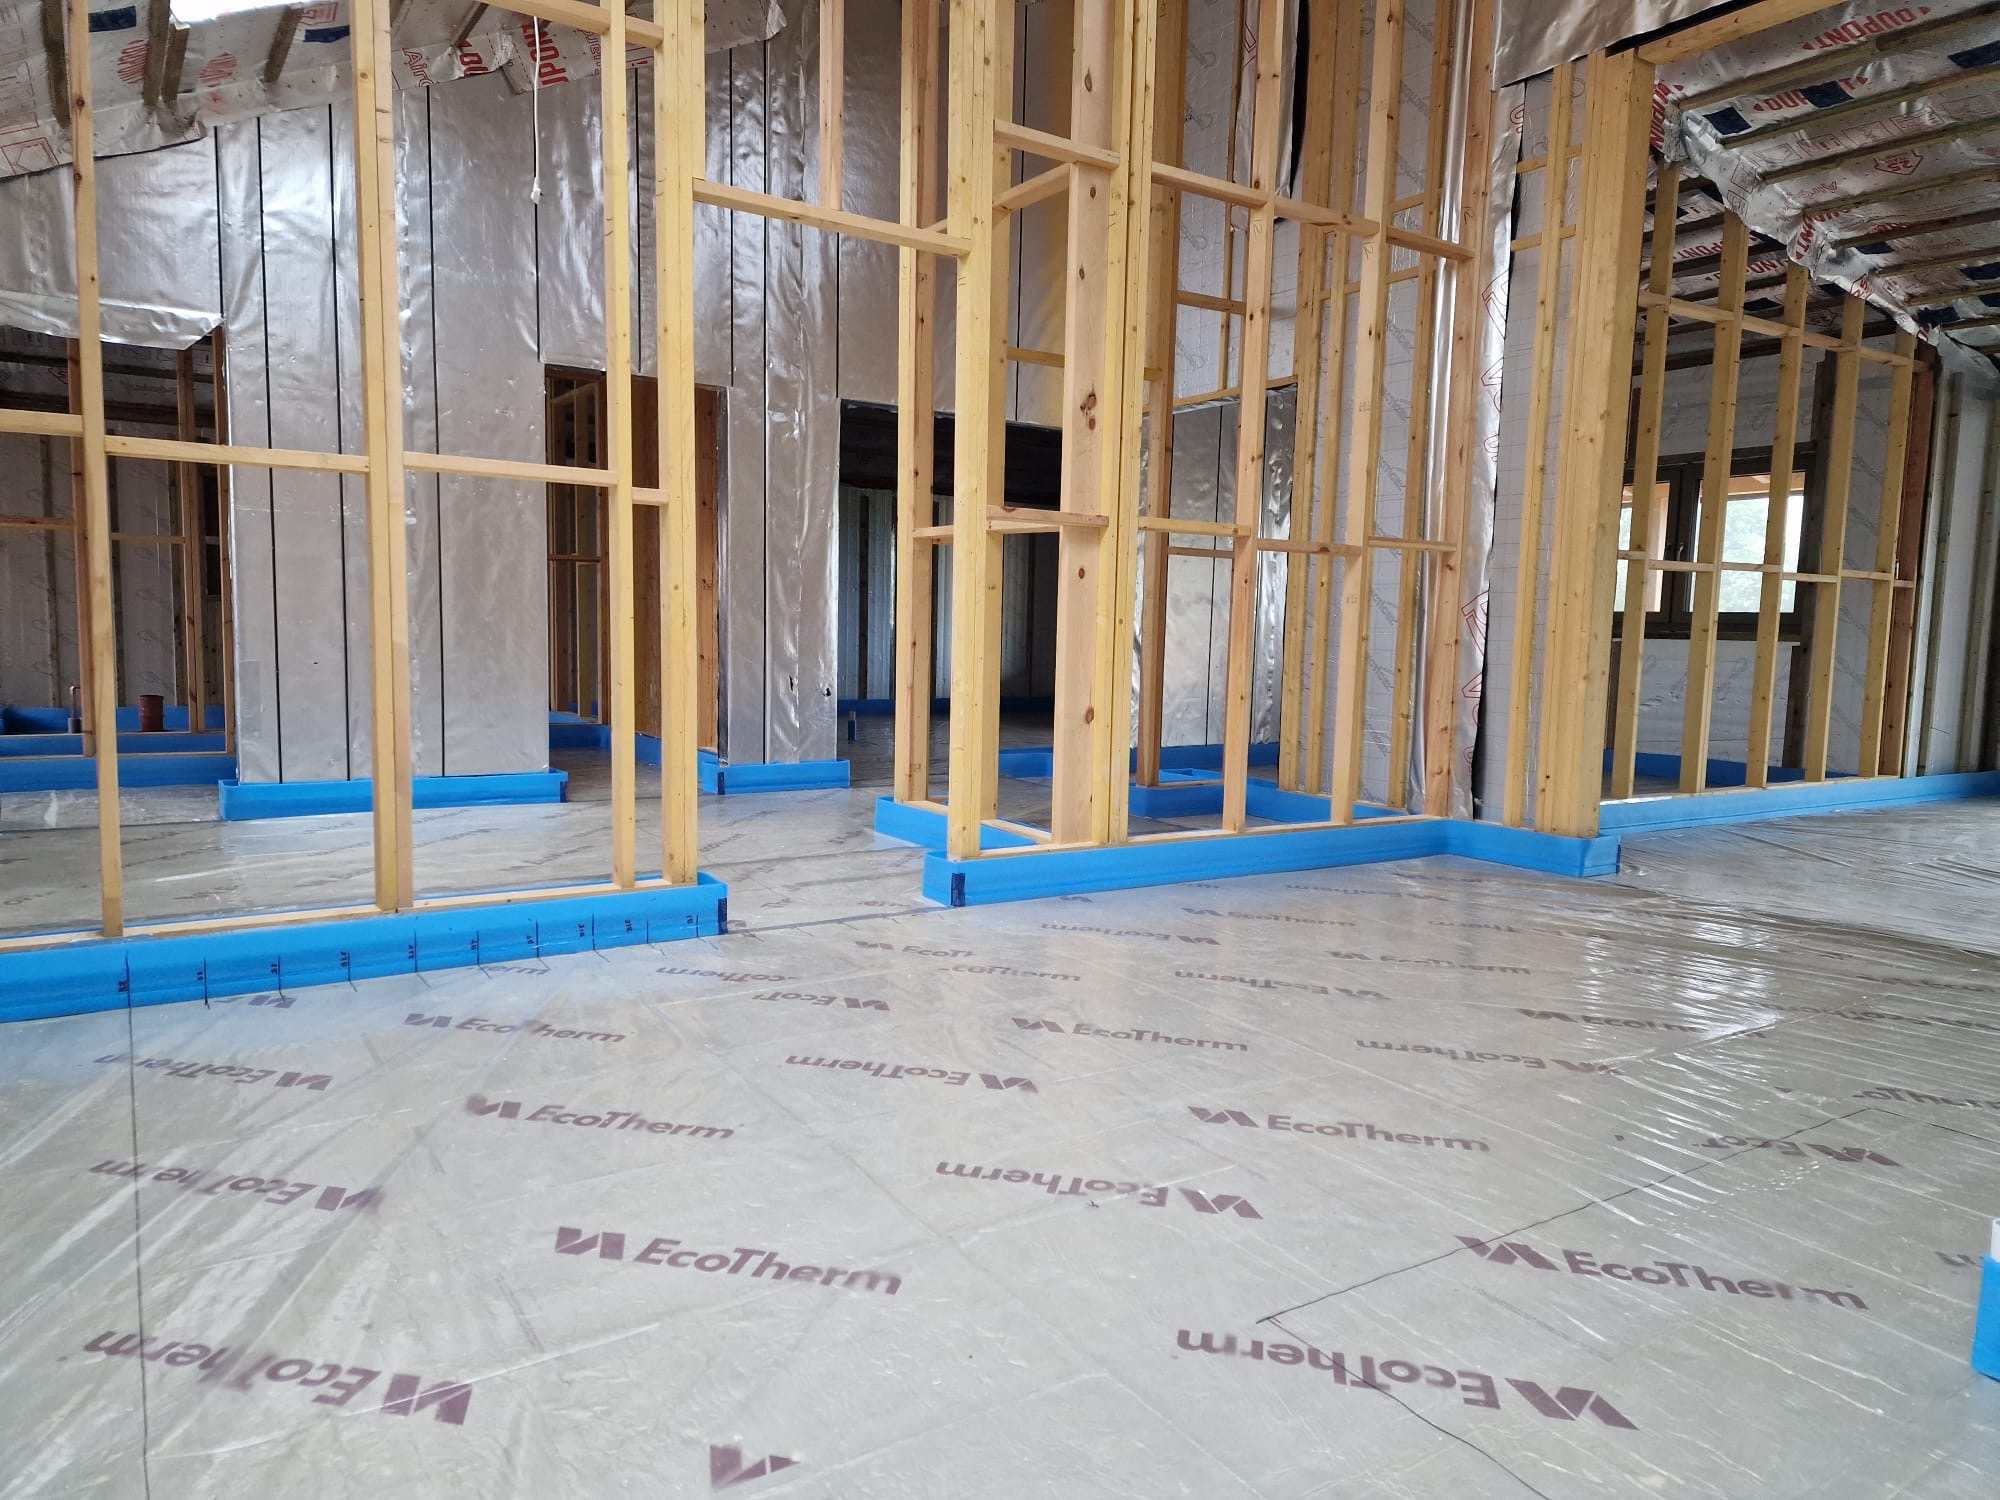
Two weeks ago the guys were battling through laying the floor insulation in preparation for laying the UFH pipes, ahead of the screed pour which was booked for 3rd September.


In the end it was a very close-run thing - the UFH pipes were ready by 13:30 and the screed arrived 10 minutes later.  Too close for comfort really:  Tight project scheduling is one thing but the stress of 11 cubic metres of unusable liquid screed potentially being dumped on the site was a very uncomfortable feeling.   
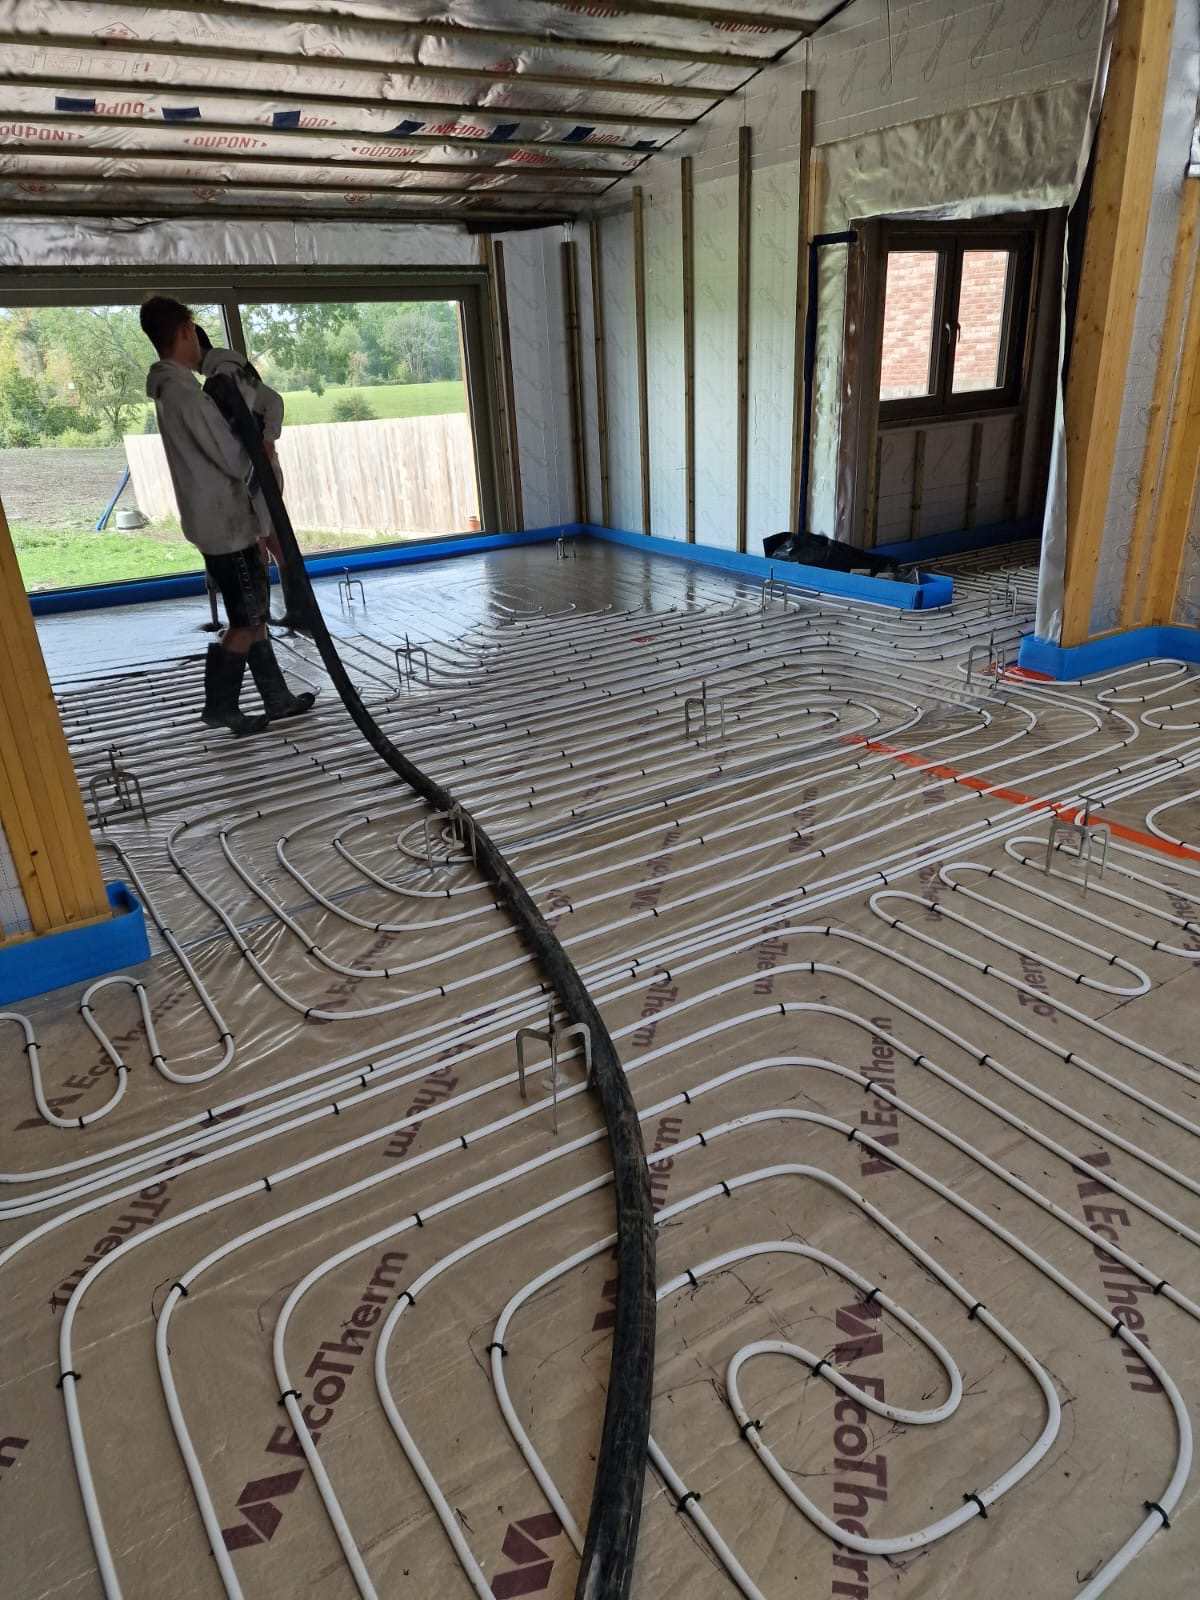
 

image.thumb.jpeg.58900e11600081665ec62d8e267f03d3.jpeg


image.thumb.jpeg.35645153714b3029029f8d683aad08cb.jpeg


image.thumb.jpeg.eba85e08b7ae611c18655d40b29af51f.jpeg


image.thumb.jpeg.344a6efe578af7285c61115741b6451d.jpeg


Screed

Once started, the screed pour itself (by Williams Walls and Floors) seemed to go very smoothly (hah!) and it looks fantastic.   We have had 65mm of Cemfloor Therm liquid screed laid.  Still in stressed-out mode I woke up before 4:00am the next day worrying about what would happen if the pipes floated up or the screed was laid too high (they didn’t; it wasn’t).  (I helpfully woke Mrs P. too just so that she could share the experience - she seemed not to appreciate it.)


image.jpeg.efd0a766d5591e1289b5dc415268b6bf.jpeg


image.jpeg.2a53b5c1583f92181aab55a663b1e434.jpeg


image.thumb.jpeg.48253b543f49246a78245318bdf17785.jpeg


image.thumb.jpeg.59286398e6cb49b196b198e848cfb5d8.jpeg
 

image.jpeg


image.thumb.jpeg.41da6b9140334963e9783df4d5d95fd3.jpeg


image.thumb.jpeg.c4458b0f770e397b7812ed224c2b5e59.jpeg


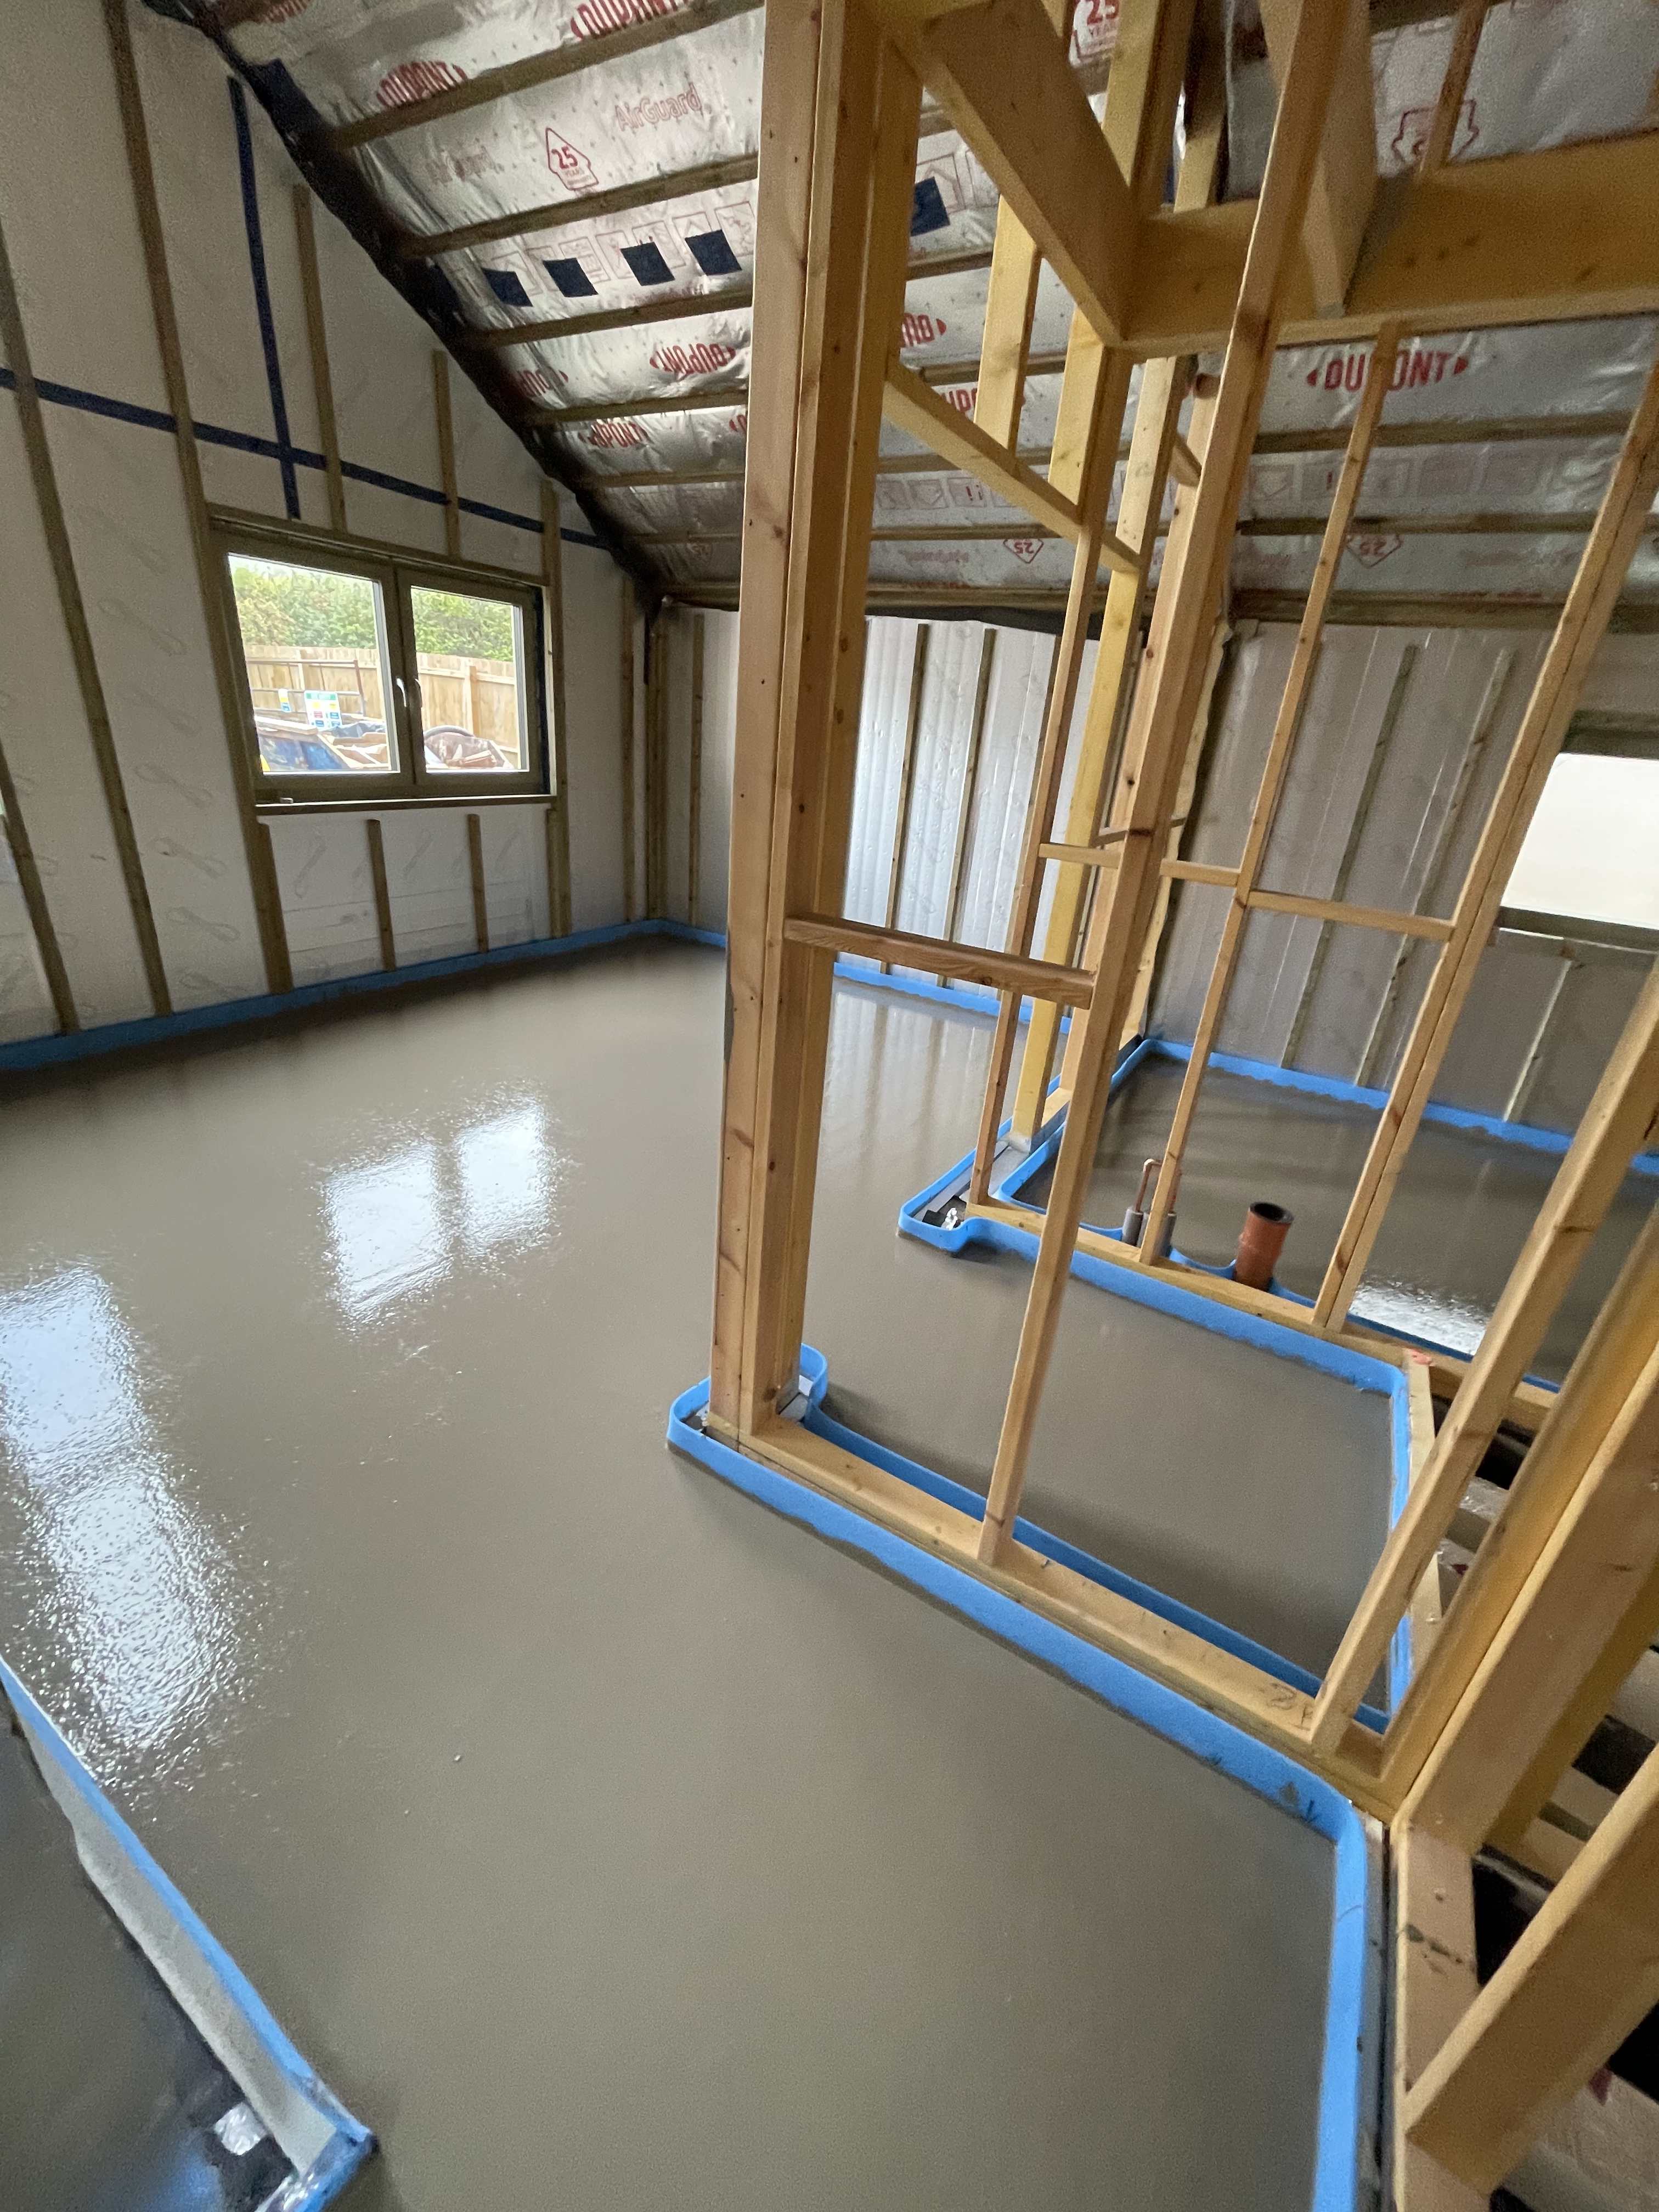
We left the house shut up for 24 hours as instructed by the screed man Rob Williams.  On Friday morning I went over and opened up to find we had a sauna!  All perfectly normal apparently, but the combination of heat from the screed setting reaction, the well-insulated relatively air-tight house and (presumably) 1000’s of gallons of water created an atmosphere that made Singapore seem like a desert.


image.thumb.jpeg.48204915e908ba974fee63a762c89666.jpeg


image.thumb.jpeg.73c1b62f09c97cceb538289e33829134.jpeg


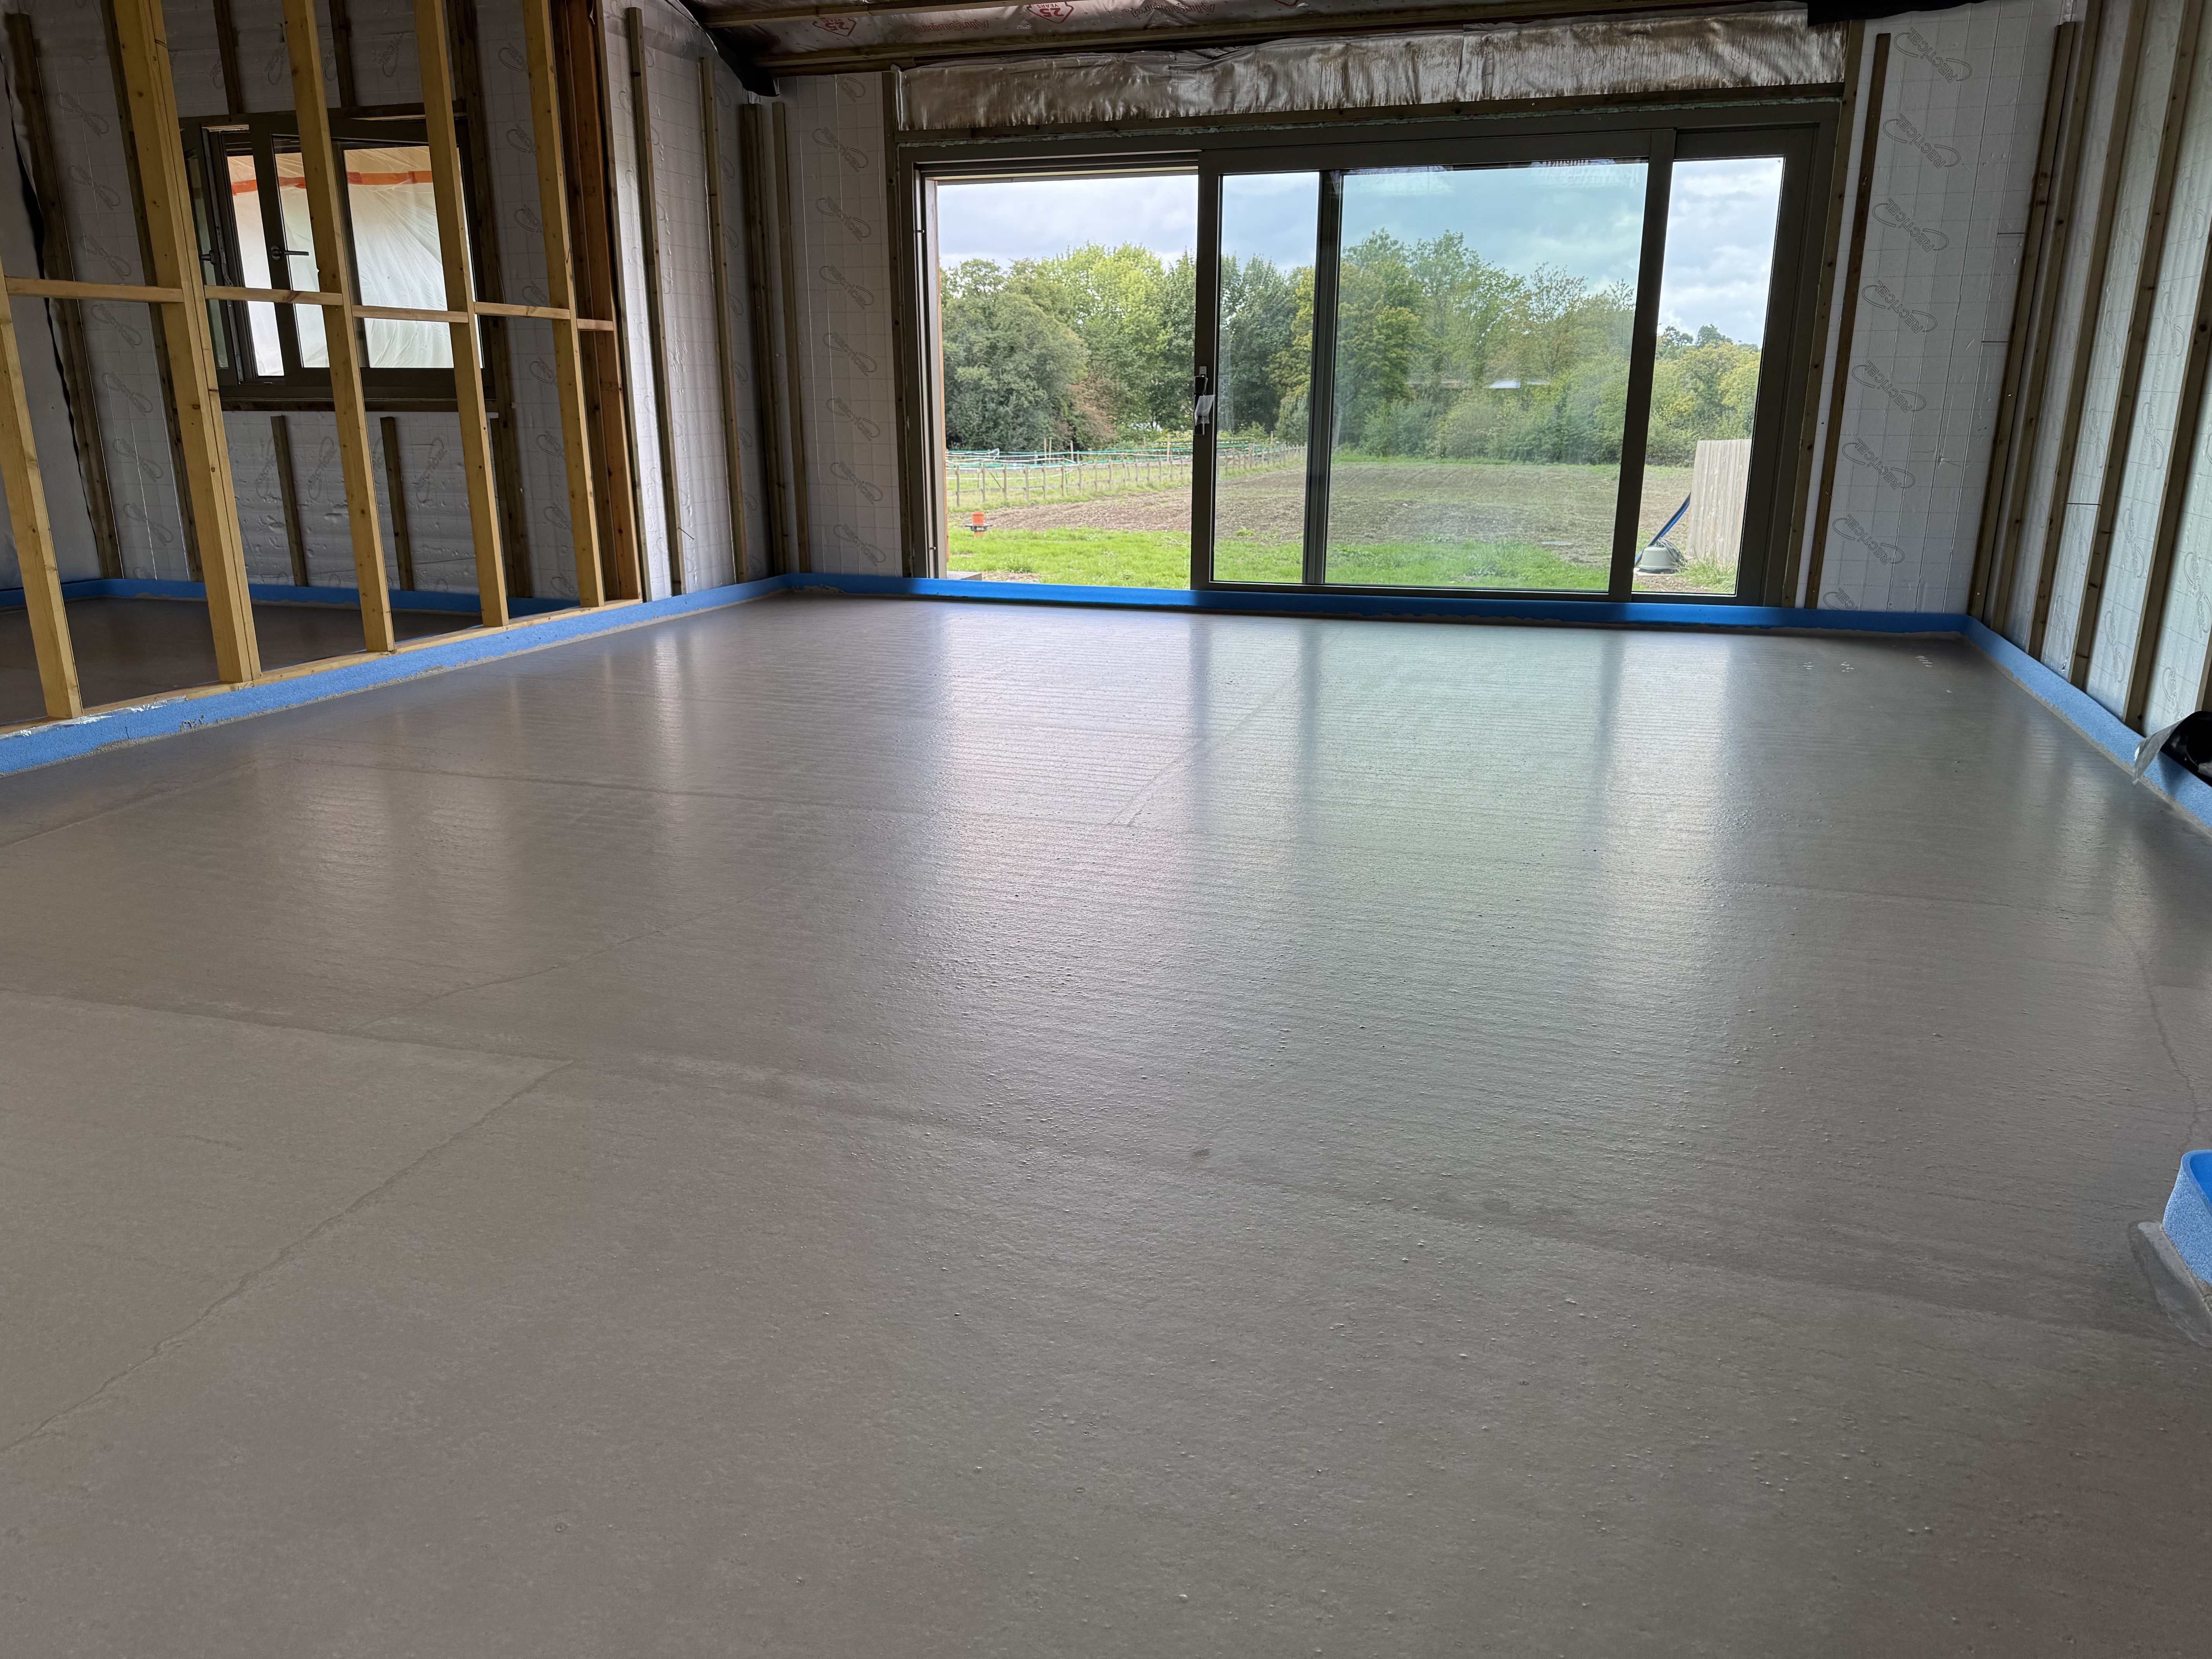
Sadly, I failed to get any photos of the clouds created as the windows were opened and the saturated ‘sauna’ atmosphere hit the September morning.   By the afternoon, with all the windows and doors open the inside of the house seemed perfectly normal again.


Seeing the screed poured in a few hours and reflecting on how fiddly all the underfloor insulation had been to lay, made me wish there was an option for a poured floor insulation - it would surely have been so much less effort and faster?


Edit: There is apparently - https://www.rtu.co.uk/assets/documents/RTU-Ultrabead-Brochure.pdf.  I have no idea if it is any good, what the pros and cons are etc, and it is too late for us but if we were doing another build (Mrs P: “We’re not!”), I’d certainly look into it.


Render

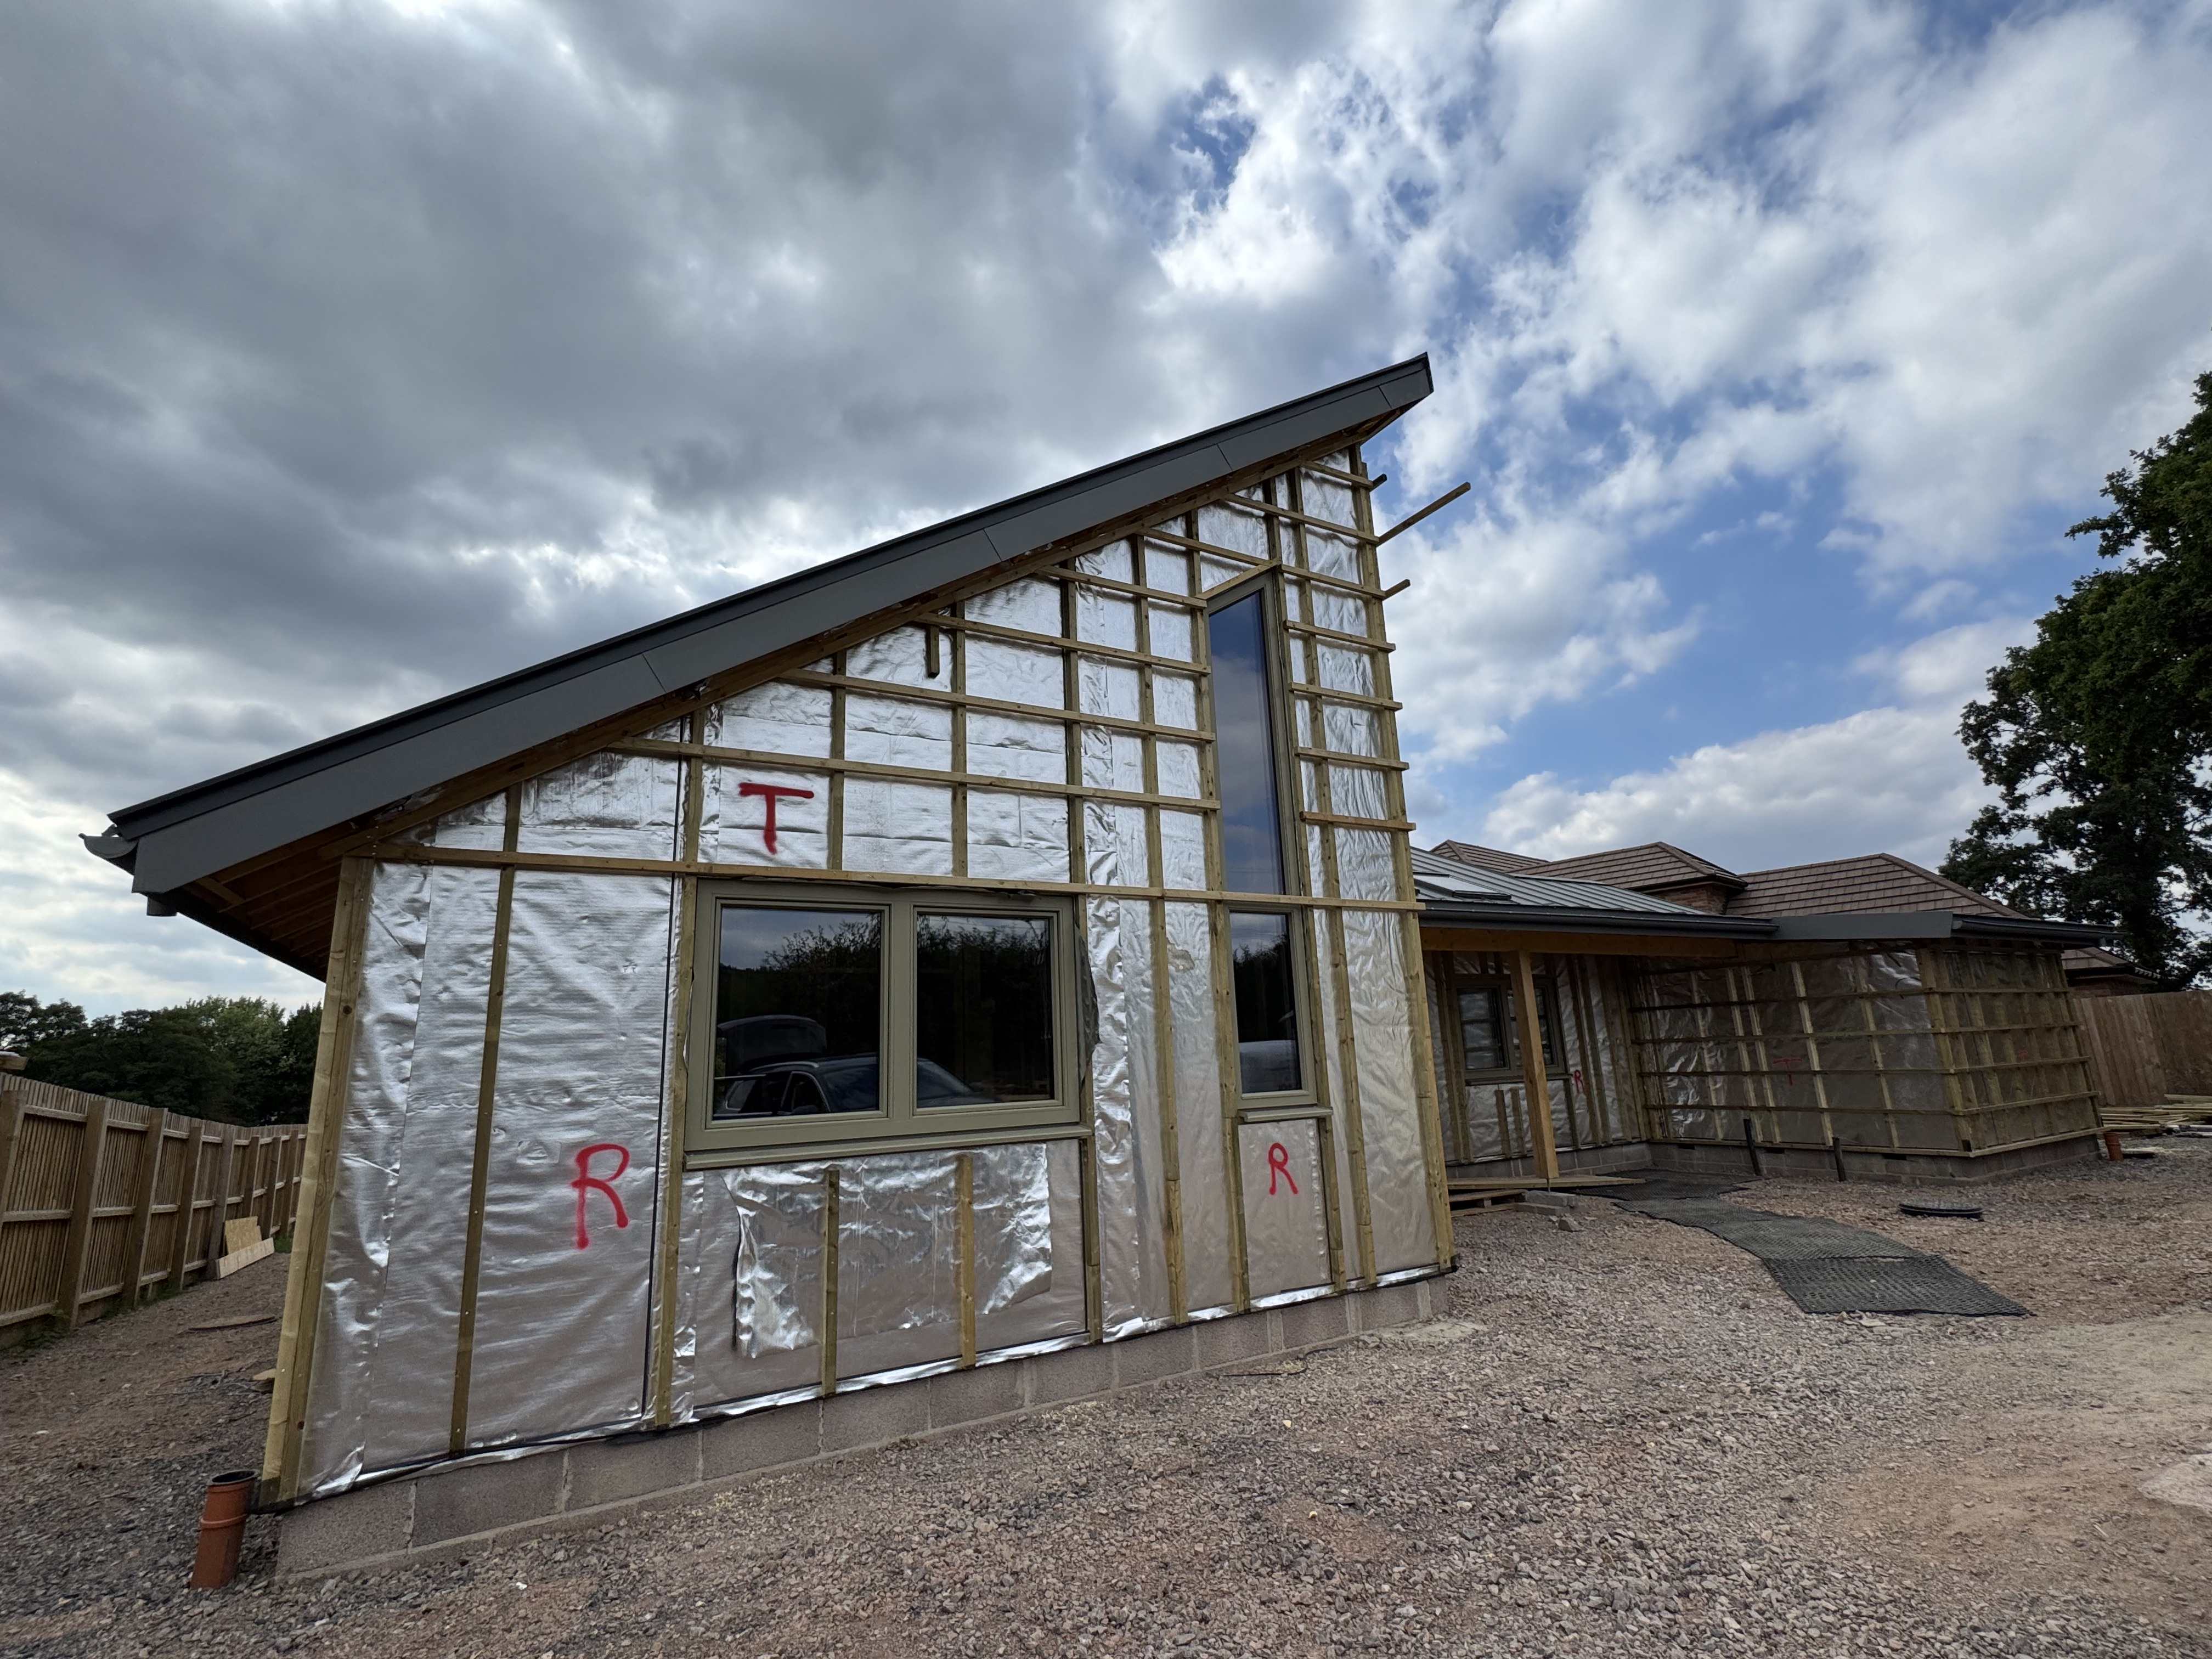
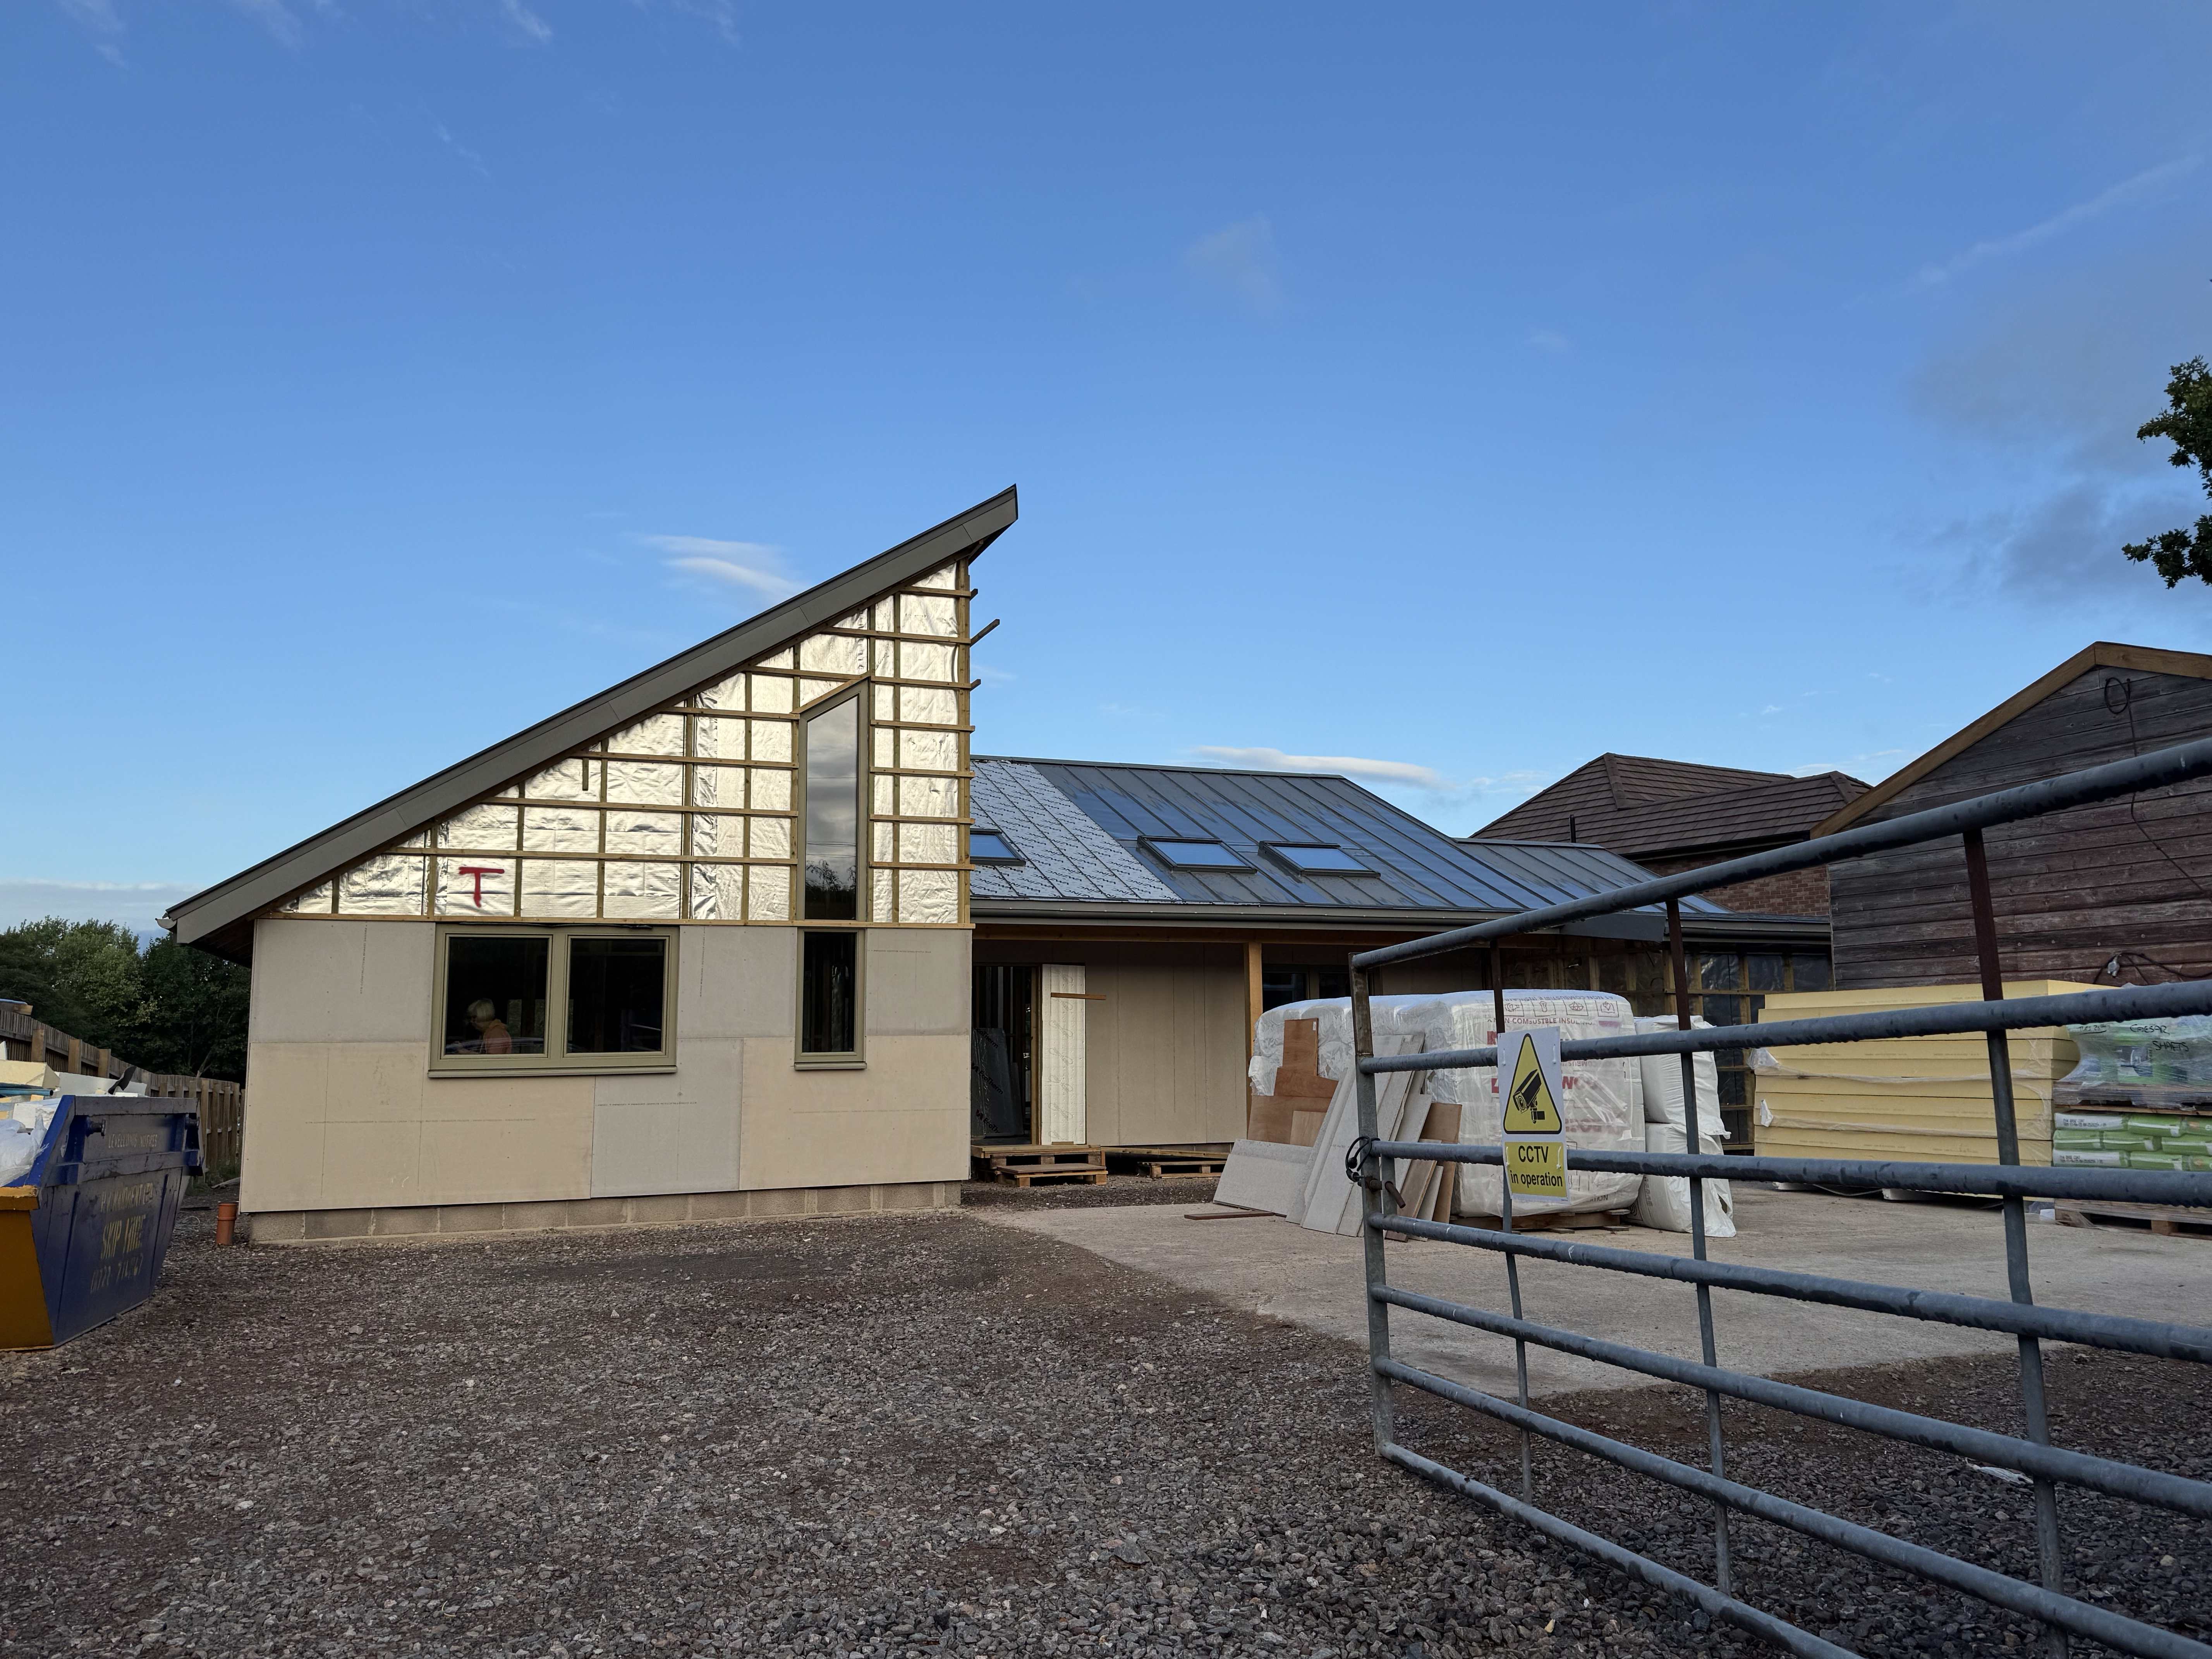
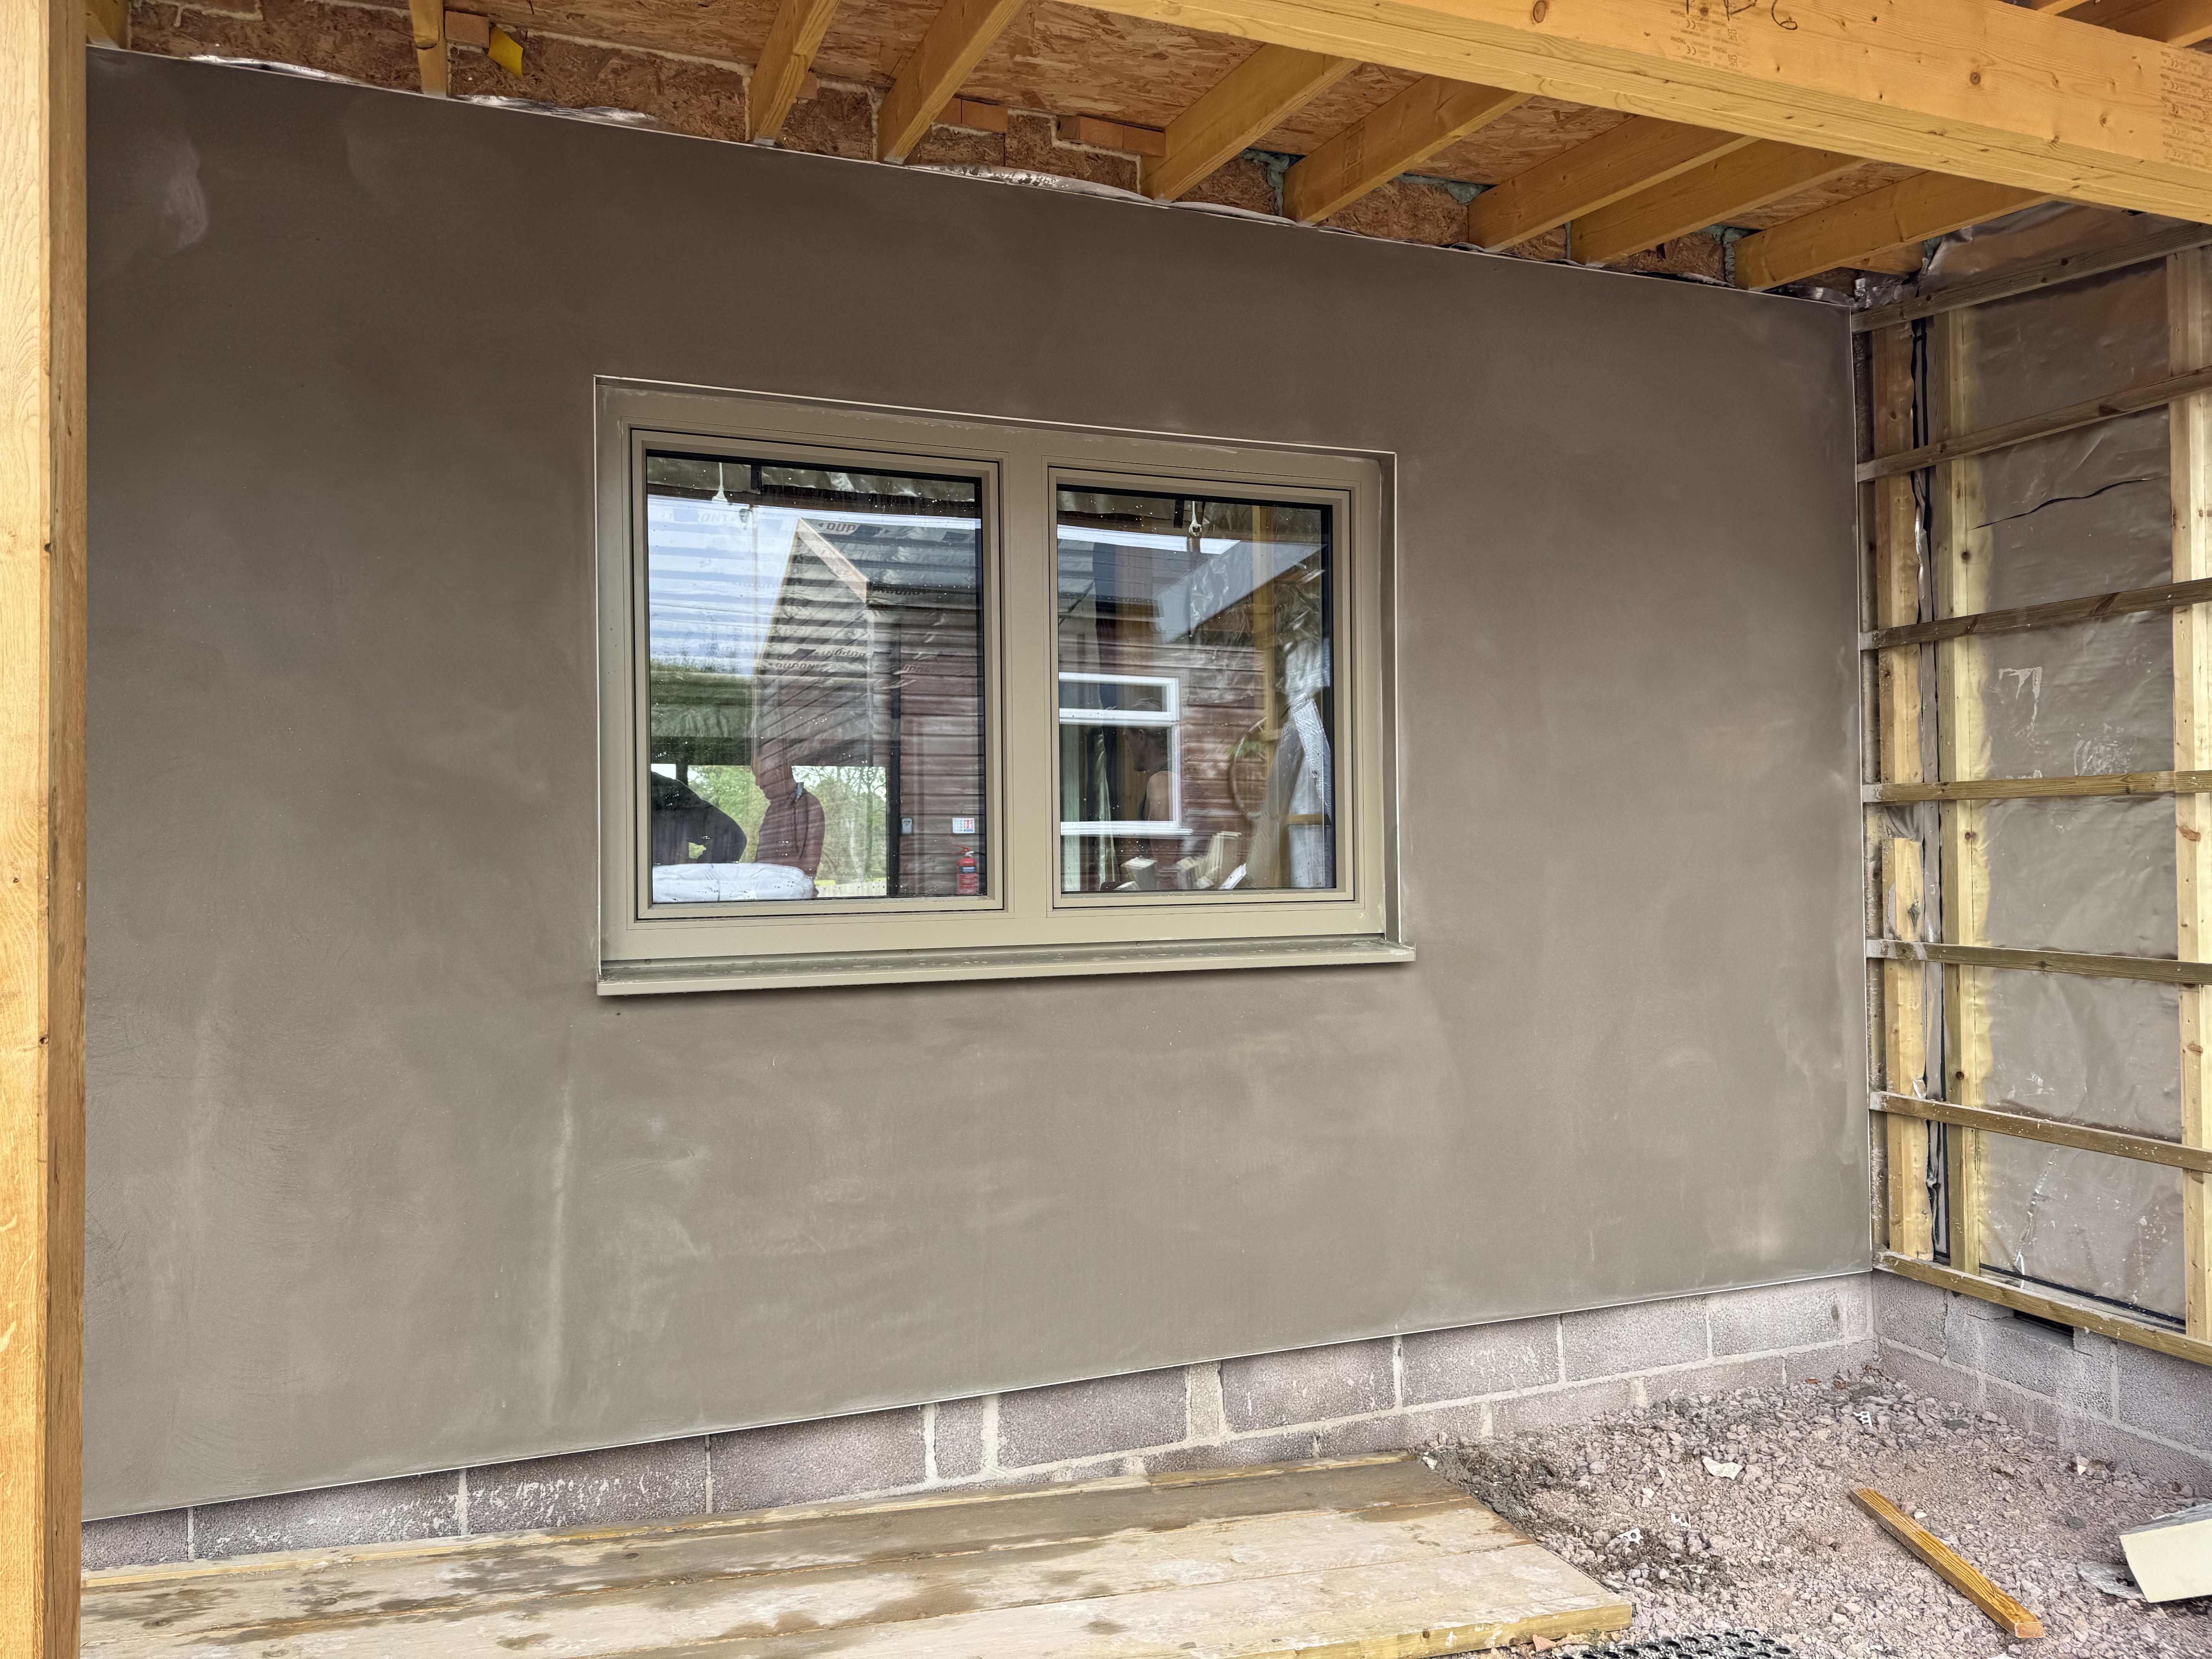
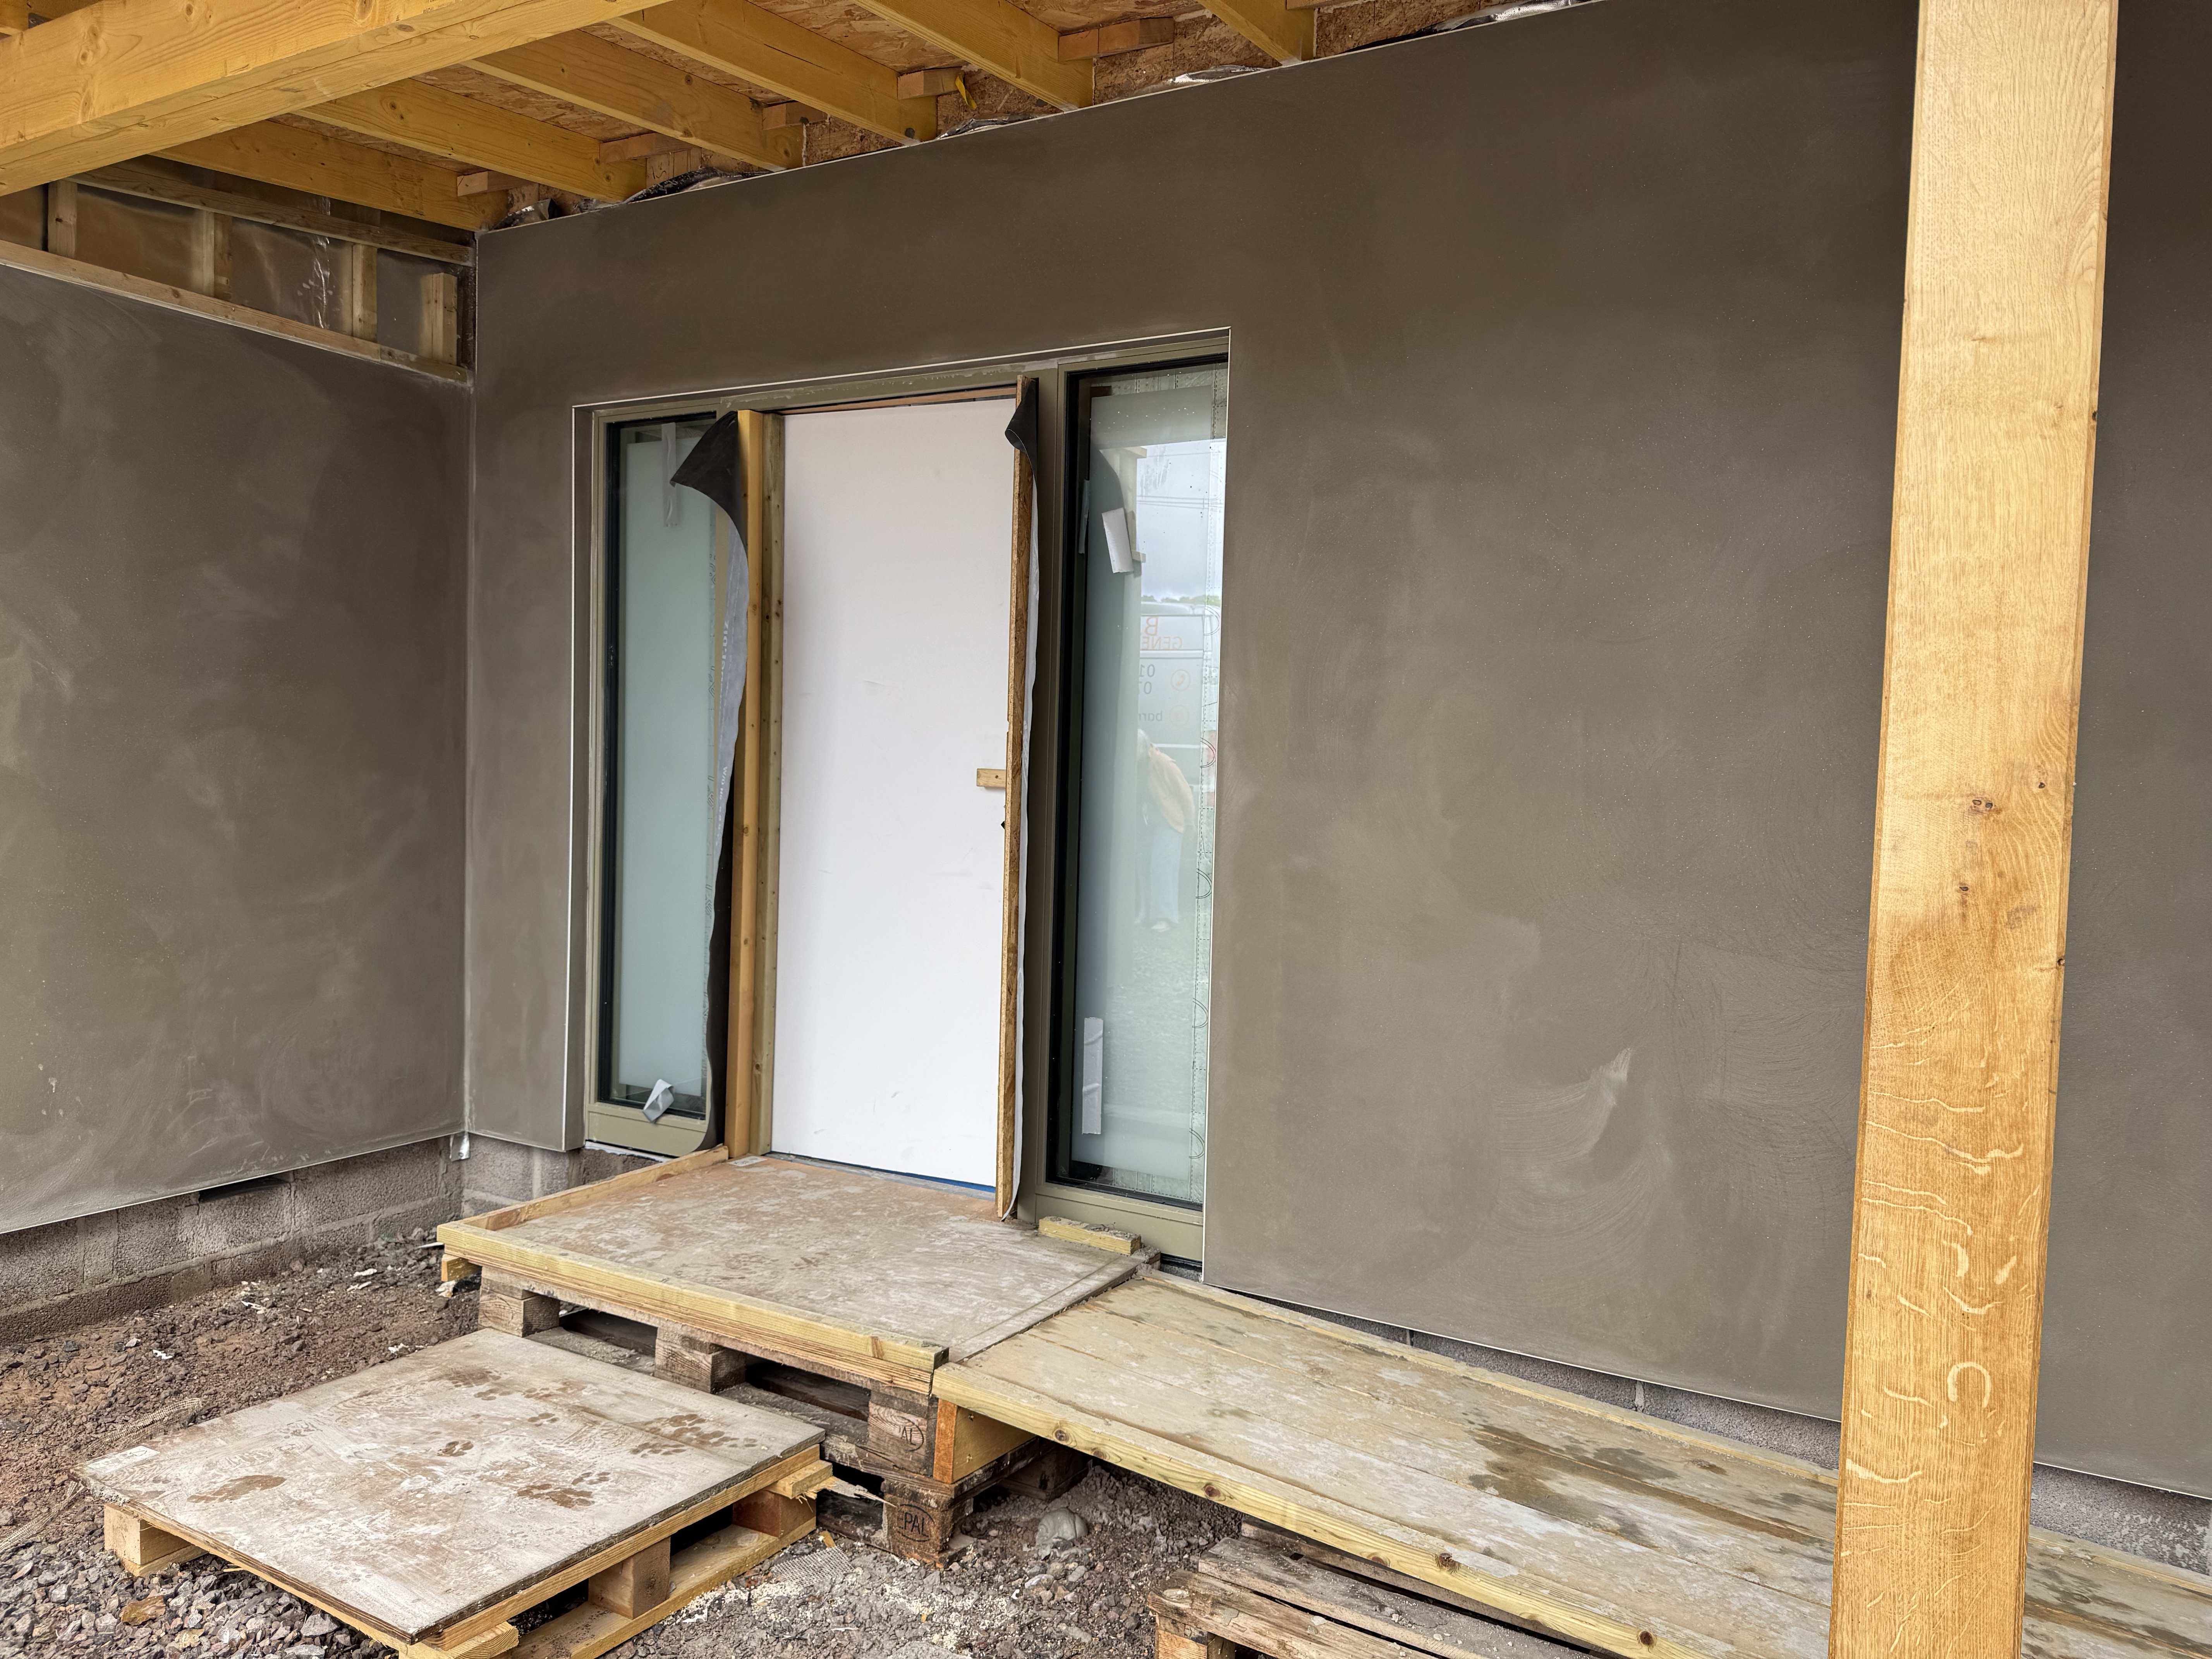
Just to make sure we weren’t missing an opportunity to get some outside work done while the focus was on the floor, we had booked our render team (Caesar Spray-rend and Plastering) to start boarding up the 50% or so of the external walls that are to be rendered (the other 50% will be vertically clad in Brimstone Ash).  So on week 14 the STS construction boards were fixed to battens and last week the base coat was sprayed and smoothed out.  It already looks a lot better just for some of the shiny breather membrane walls being covered up.  We now have to wait a week before the top coat can be applied.  We’re using EcoRend Thincoat for anyone who is interested.


image.thumb.jpeg.cd3729f5398884b3c9b7a5f63a10ef6e.jpeg


image.thumb.jpeg.b187ea6e39fe94f5fa39b886caa43780.jpeg


image.thumb.jpeg.18f862ba05f1e5c478bc429741849fd5.jpeg


image.thumb.jpeg.50f4fc2b4c56a641a946dd4d23d72268.jpeg


And finally…

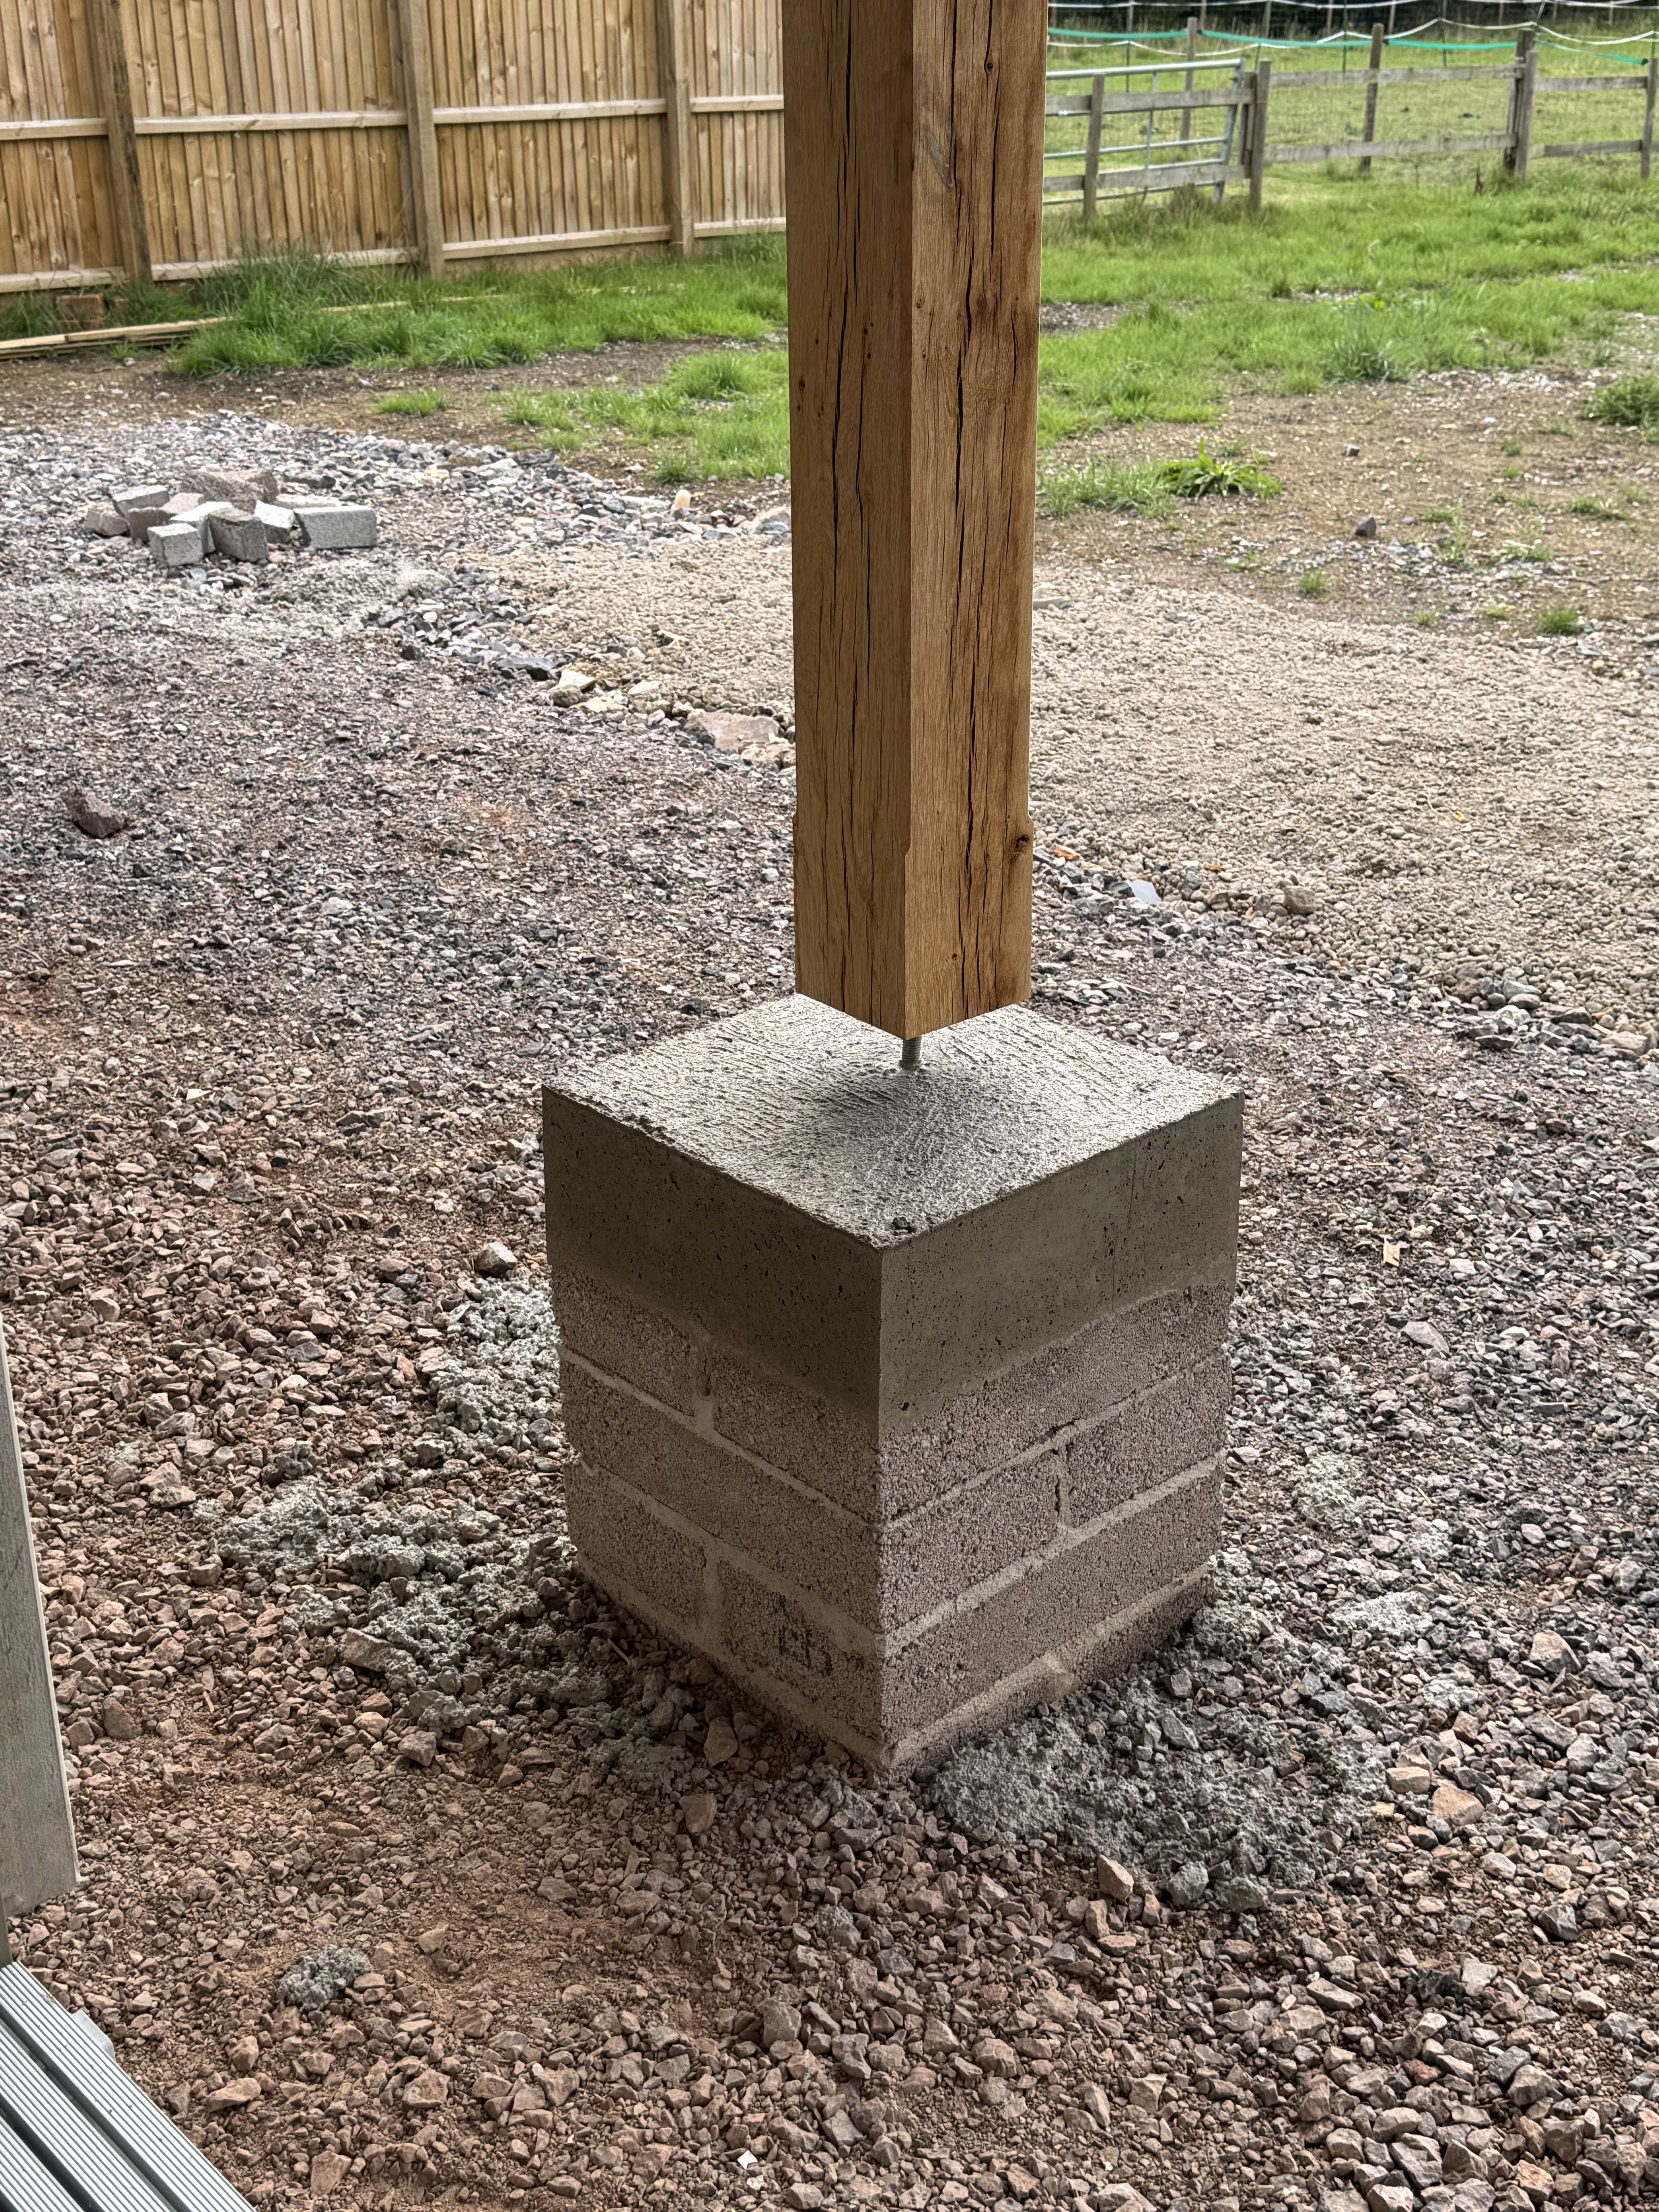
Marcus from our super groundworks team came in on Thursday to set all the stainless steel oak post brackets in concrete on top of their support pillars, and also to lay the smoothest, tidiest concrete slab you have ever seen to rest our ASHP on.


image.thumb.jpeg.982c681c43646eef7222a5c7ebf83c75.jpeg


image.thumb.jpeg.43717f5e032560dad13145df1c958e6f.jpeg


image.thumb.jpeg.a67c55724b3127cb458418cb0f3d0c1b.jpeg


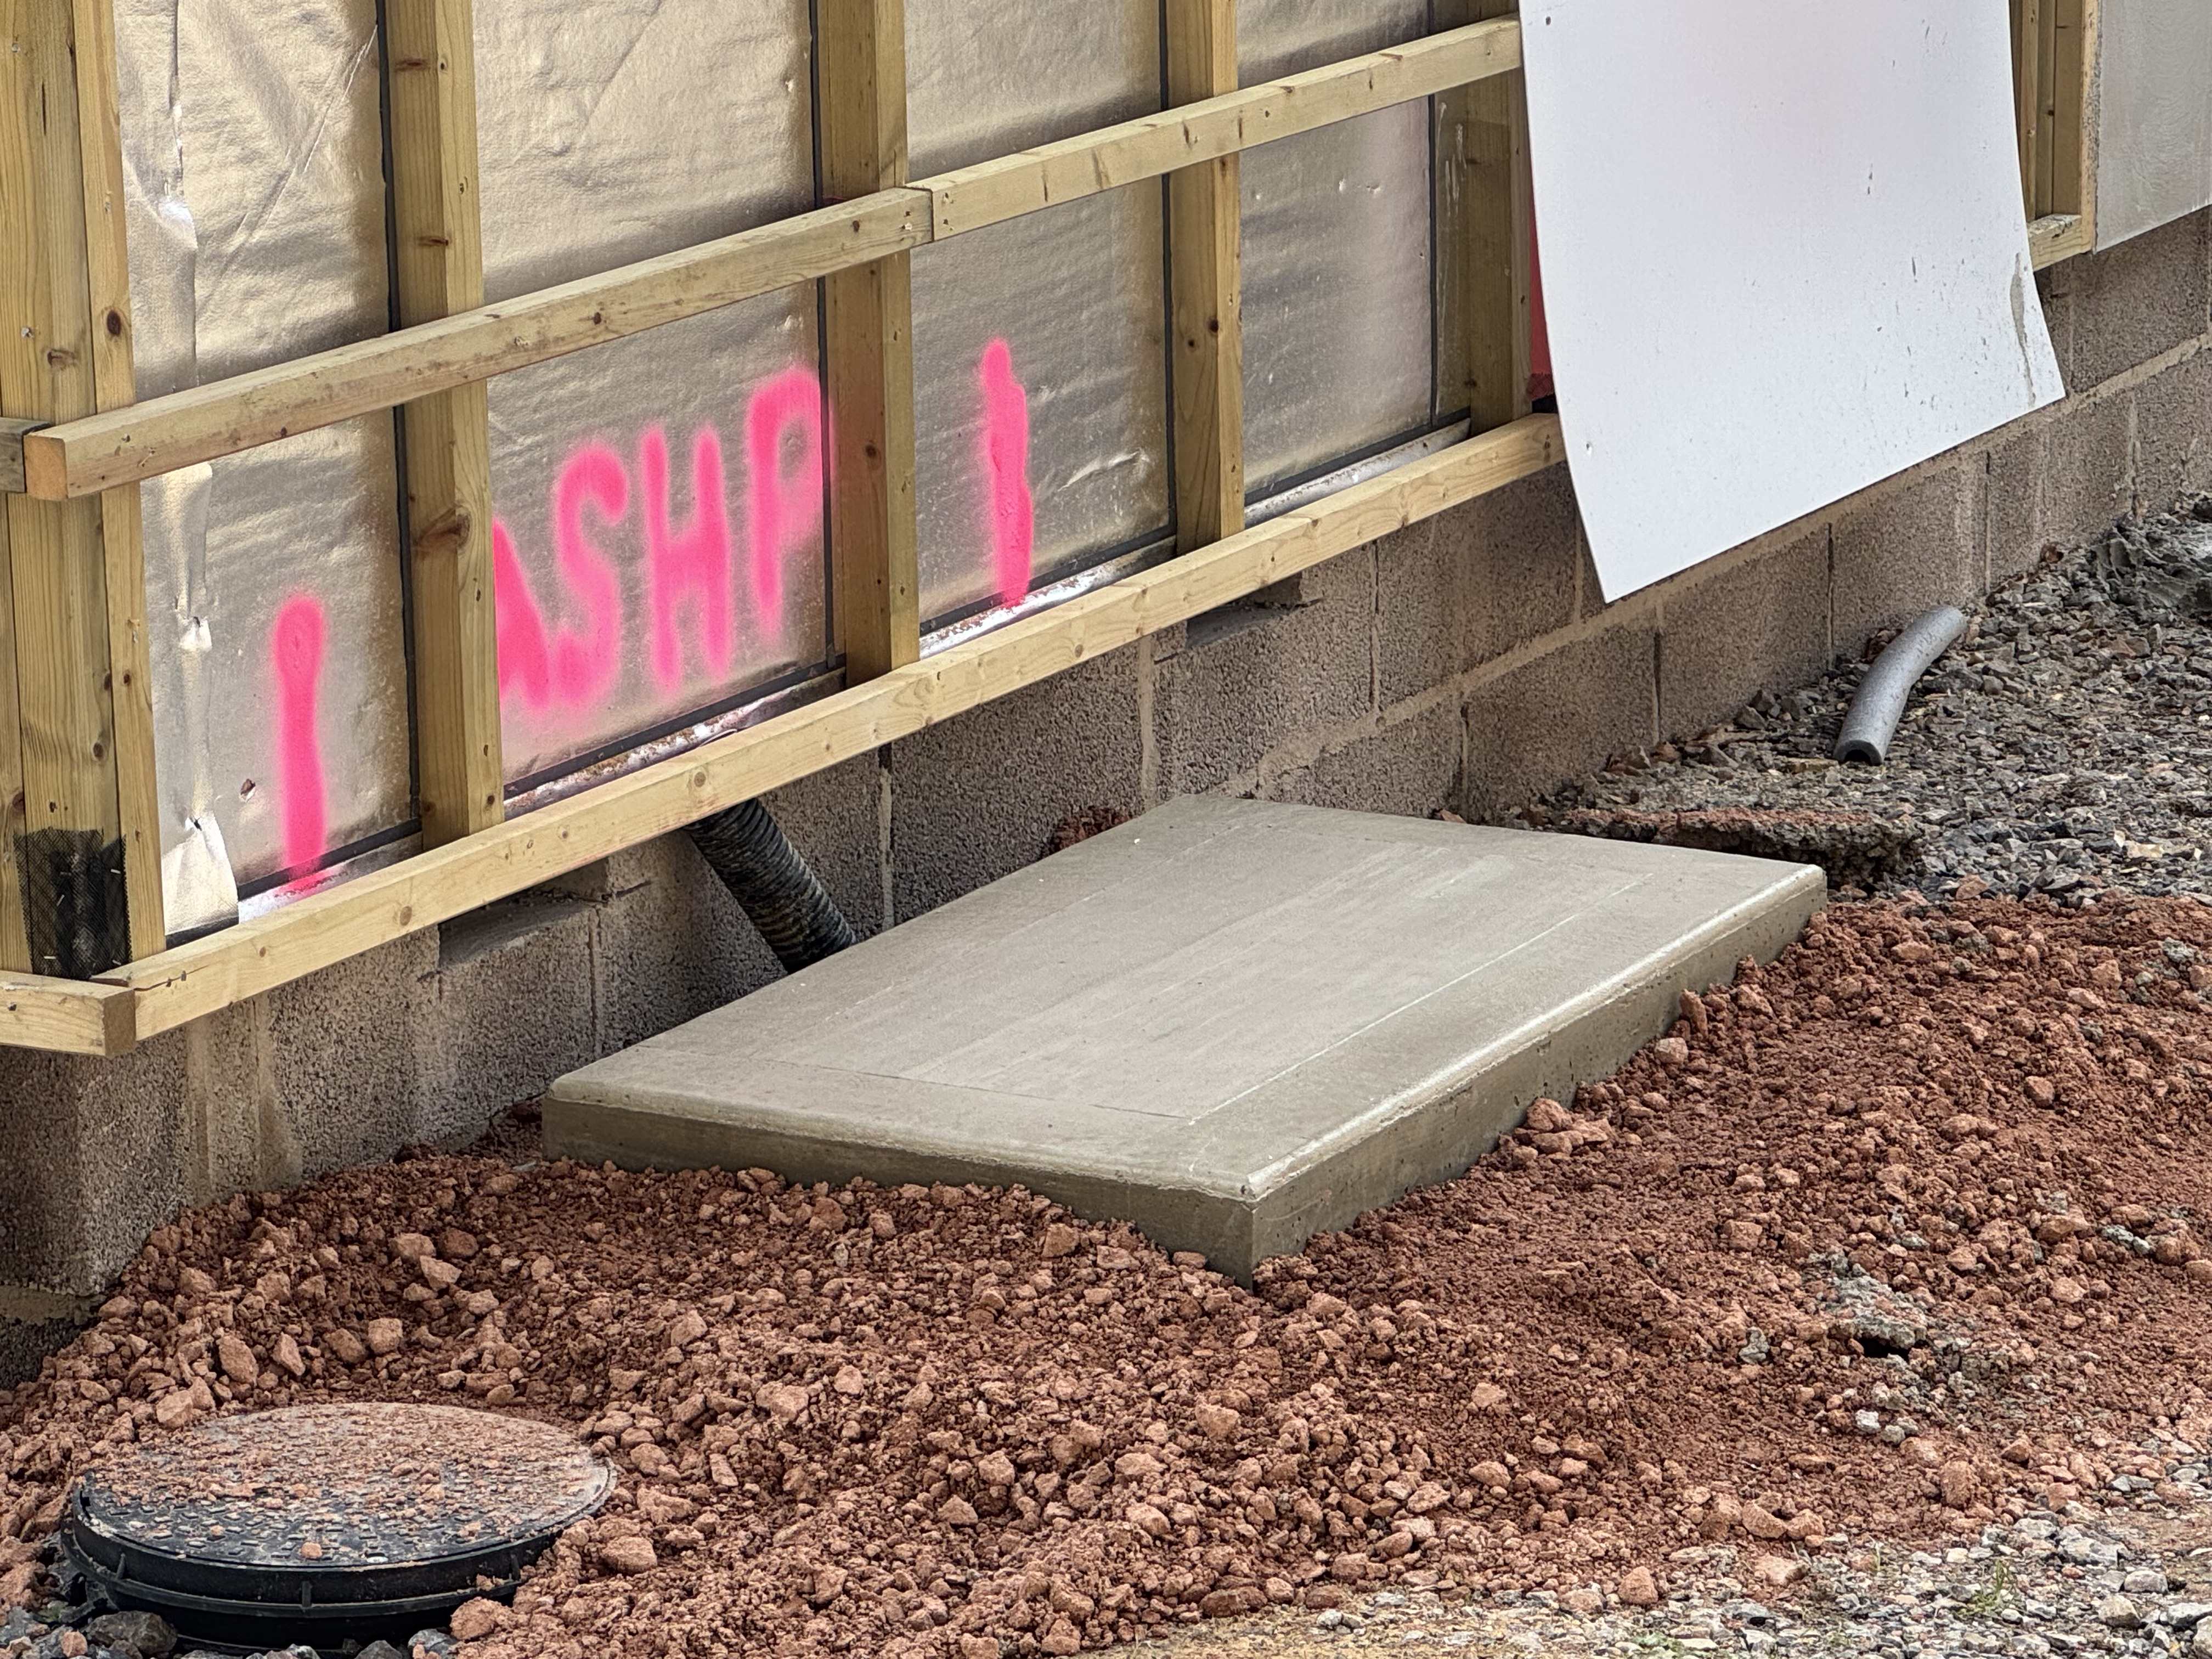
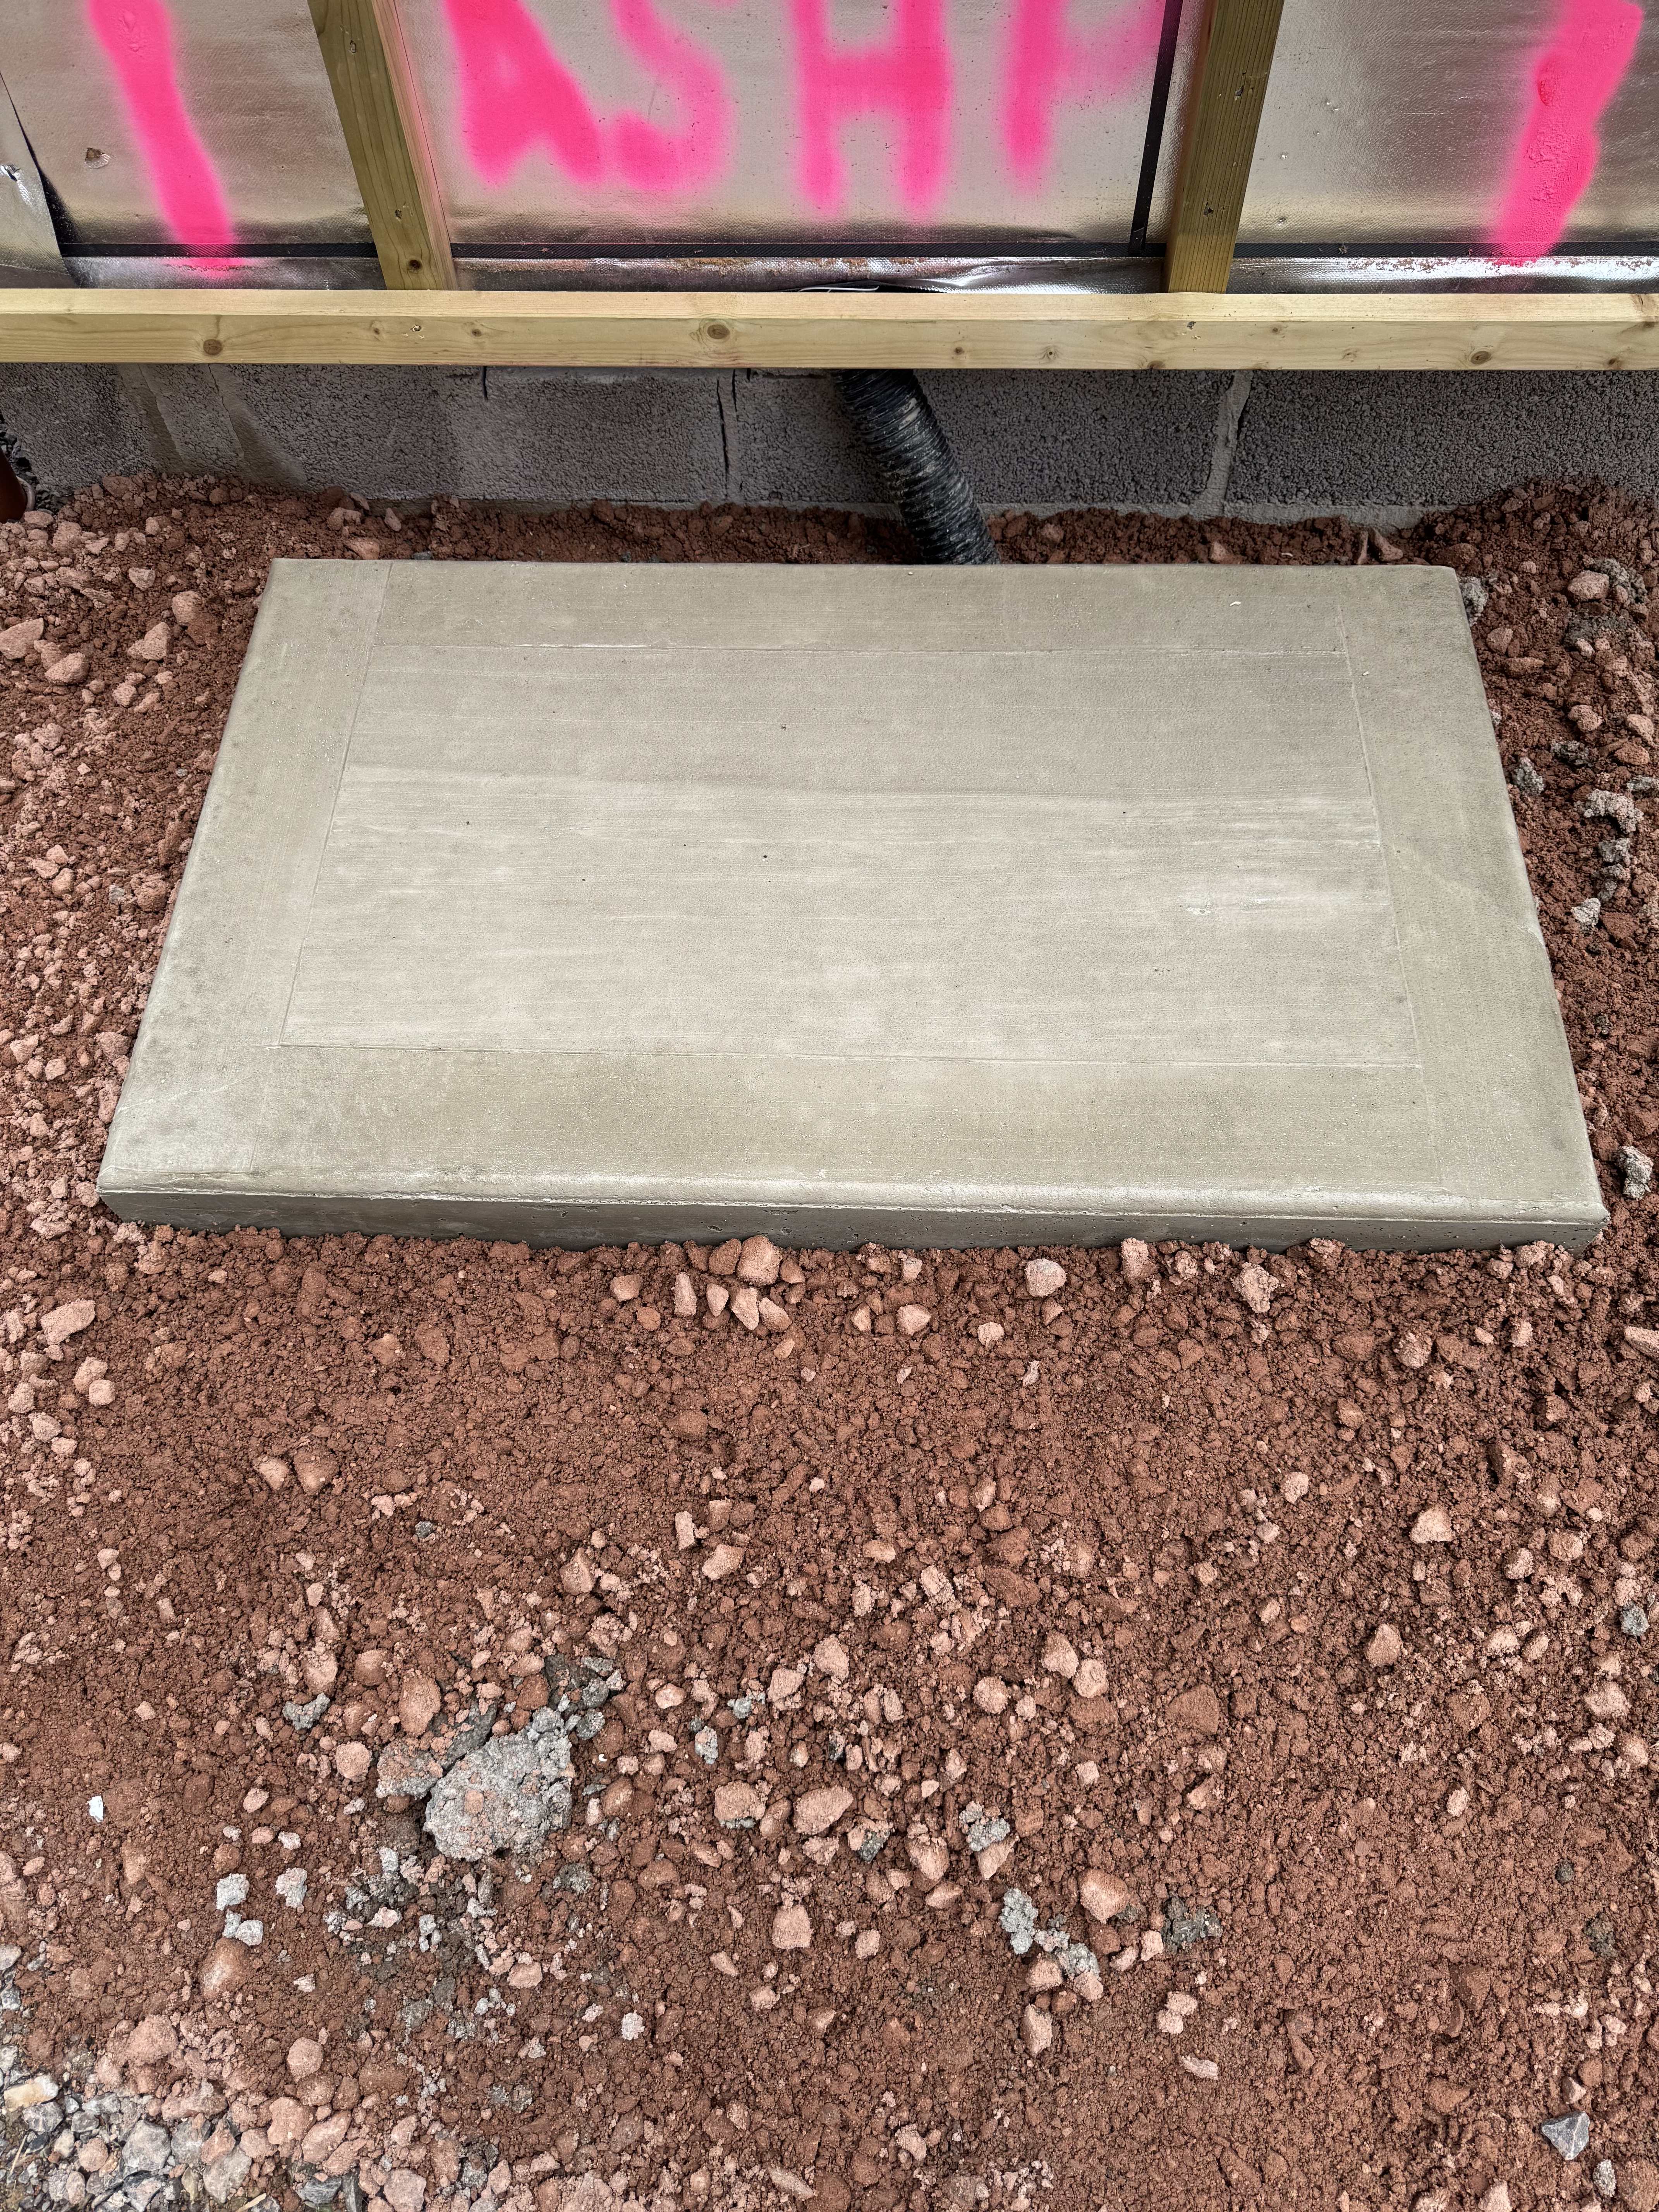
…Which is just as well because the ASHP arrives on Monday!


Dashboard:

Contractor days on site this week: 22

Contractor days on site previous week: 16

Contractor days on site since build start: 249


Budget: Getting more challenging tbh - beginning to eat into the contingency - mainly costs I hadn't properly estimated. 😱


Plan: Still on track to move in by Easter 2026.


Issues and worries closed this week:

  • UFH pipes laid.
  • Screed down! 


Current top issues and worries:

  • Insulation - the additional ceiling insulation is still a worry - scheduled for w/c 15th September.


image.jpeg


image.jpeg

  • Like 9

12 Comments


Recommended Comments

mjc55

Posted (edited)

I'm so impressed on how efficiently things are running for you.  Of course there are always things to think (and worry) about but tbh you are making great progress.

Edited by mjc55
  • Like 1
garrymartin

Posted

Such an inspiring blog. Look forward to reading your updates every week 🙂

G and J

Posted

"We will definitely try to have some more non-house time through the rest of the build."


Good luck with that and if you manage it let us know how....seriously going so well, and as you're a good few weeks ahead of us it's a flagging all the tidings (hopefully joyful) on their way to us.


Benpointer

Posted

Thanks for the kind words everyone - much appreciated. 


I wish I knew why the random pictures appear at the end of the blog entry!

Nickfromwales

Posted

57 minutes ago, Benpointer said:

Thanks for the kind words everyone - much appreciated. 


I wish I knew why the random pictures appear at the end of the blog entry!

Tried moving them about on my phone. Will tidy later on the desktop 👍

  • Like 1
Great_scot_selfbuild

Posted

Just came across this whilst browsing through the blogs - I'm planning our UFH and we'll be having a screed; what is the blue foam surround and is that part of the screeding process, or associated with laying the UFH pipes? I ask because I'm planning on laying the UFH pipes, but having someone in to do the screed.


Congrats on your build progress - looks amazing.

Nestor

Posted

48 minutes ago, Great_scot_selfbuild said:

Just came across this whilst browsing through the blogs - I'm planning our UFH and we'll be having a screed; what is the blue foam surround and is that part of the screeding process, or associated with laying the UFH pipes? I ask because I'm planning on laying the UFH pipes, but having someone in to do the screed.


Congrats on your build progress - looks amazing.


  • Thanks 1
junglejim

Posted (edited)

Really useful post. Thank you.

 Any chance you can share a close up of the detailing at the bottom corner of your windows externally where there will be cladding…. Just had a set back on our build… thought we were watertight but 90mph winds and torrential rain means water had found its way in at the bottom corner of windows. I thought I’d sealed/an everything well but think I had the cladding too tight to the cill so water couldn’t drain underneath. Still unsure what route it’s taken behind but interested to see how others detail this.


also… did you cut out studs in doorways? I have a sole plate with stud base plate ontop so essentially double sole plate internally. I’d like to cut out the top one in doorways so that I can run insulation and ufh and screed through easily. 


 Thank you

Edited by junglejim
Benpointer

Posted

20 hours ago, Great_scot_selfbuild said:

Just came across this whilst browsing through the blogs - I'm planning our UFH and we'll be having a screed; what is the blue foam surround and is that part of the screeding process, or associated with laying the UFH pipes? I ask because I'm planning on laying the UFH pipes, but having someone in to do the screed.


Congrats on your build progress - looks amazing.

The blue foam surround is perimeter expansion strip.  The screed layers insist on it.  I assume the screed slab expands a bit when the UFH is on and this foam allows some 'give'.


https://www.theunderfloorheatingstore.com/products/prowarm-premium-8mm-underfloor-heating-edge-insulation-50m


Our UFH pipes are buried in the screed - in as much as the screed was poured over the pipes.  If you are having someone lay the UFH pipes and the screed, I expect they will fit the perimeter expansion foam but you might want to double-check.

  • Thanks 1
Great_scot_selfbuild

Posted

49 minutes ago, Benpointer said:

If you are having someone lay the UFH pipes and the screed, I expect they will fit the perimeter expansion foam but you might want to double-check.

@Benpointer thanks - I plan on laying the pipes myself and having someone lay the screed. We're on full cost-saving mode now, having had most of the build so far involve work that I simply couldn't do myself (not if I want to actually get to live in it during my lifetime).

  • Like 1
Benpointer

Posted (edited)

3 hours ago, junglejim said:

Really useful post. Thank you.

 Any chance you can share a close up of the detailing at the bottom corner of your windows externally where there will be cladding…. Just had a set back on our build… thought we were watertight but 90mph winds and torrential rain means water had found its way in at the bottom corner of windows. I thought I’d sealed/an everything well but think I had the cladding too tight to the cill so water couldn’t drain underneath. Still unsure what route it’s taken behind but interested to see how others detail this.


also… did you cut out studs in doorways? I have a sole plate with stud base plate ontop so essentially double sole plate internally. I’d like to cut out the top one in doorways so that I can run insulation and ufh and screed through easily. 


 Thank you


Firstly, yes we cut out the sole plates in all the doorways.


Regarding the windows, I have trawled through our photos here's the best I can do.


First, Norrsken supplied and fitted the windows and they wrapped the breather membrane round into the reveals then filled fully the gap with sealant.  Here's a picture from the inside before they applied the sealant.

IMG_1827.thumb.jpeg.603237a3d137bfc955404ad5d85c6714.jpeg


You can see the sealant here (from the outside).  I think this sealant is the key.

IMG_1849.thumb.jpeg.9d4374c1a5832c960c0b9161205059c3.jpeg


Ventilated cavity on the outside, sills clipped in:

IMG_1911.thumb.jpeg.ee1649eec7ee3aa776ec3e002e8b34d0.jpeg


Cement board:

IMG_1919.thumb.jpeg.0a43ff159053cbd94cf92a6a7f2de5ec.jpeg


Beading

IMG_3812.thumb.jpeg.f9873b23f004e350a545c58b340c68b7.jpeg


Render + another bead of silicone

IMG_3867.thumb.jpeg.0d8a34e6761501df52937df7458febdf.jpeg


IMG_3648.jpeg

Edited by Benpointer

Create an account or sign in to comment

You need to be a member in order to leave a comment

Create an account

Sign up for a new account in our community. It's easy!

Register a new account

Sign in

Already have an account? Sign in here.

Sign In Now
×
×
  • Create New...