Johnny Jekyll
-
Posts
212 -
Joined
-
Last visited
Everything posted by Johnny Jekyll
-
It's time to install the Utilities on my 3 bed detached self build. The house is up and water tight. Thames Water are the supplier. In preparation for Thames Water to do their external installation, starting at the boundary, I need to: - Dig our trench (750mm to 1350mm deep and minimum 270mm from other services). I can do this. - Lay the supply pipe (32mm MDPE on our quote). I can do this. - Insulate the supply pipe above 750mm. I can do this, just need to know best insulation to use? - Bring the supply pipe up through the flexi-duct (already installed through the slab). I can do this. - Seal the flexi-duct at both ends. I can do this, just need to know best 'non-petroleum-based' product to use? - Fit a suitable internal stop valve / double check valve / servicing valve / tap / drain off / stop end. Need a plumber for this. Questions, links to products would really help thanks, just in case the plumber asks me to buy the products: 1. Is there a typical / good insulation to use around the water pipe? 2. Is there a typical / good 'non-petroleum-based' product to seal the flexi-duct? 3. Any links to suitable internal stop valves / double check valves / servicing valves / taps / drain offs / stop ends so I can see what needs to be fitted at the end of the water pipe? 4. Any other comments which you think may help? I'm not ready to get into the big plumbing / heating install just yet. Just need this done so that Thames Water (and the other services) can get going. Thanks very much.
-
Which heating system to use on our new build?
Johnny Jekyll replied to Johnny Jekyll's topic in Underfloor Heating
Thanks guys -
Which heating system to use on our new build?
Johnny Jekyll replied to Johnny Jekyll's topic in Underfloor Heating
@SteamyTea thanks for the reply. We are already up and water tight so may be a bit too far down the line for us. But will have a look in case it can help at all. Thanks again. -
Which heating system to use on our new build?
Johnny Jekyll replied to Johnny Jekyll's topic in Underfloor Heating
@SteamyTea thanks for this question, we have all the SAP Assessment Reports, but haven't done any thermal modelling. Building Control haven't asked for anything like that. I'm doing my best to build a really warm airtight good spec house to live in. Sorry can you provide a little more info on thermal modelling? where I can look into it? why I would need it? is it expensive? Thanks. -
Which heating system to use on our new build?
Johnny Jekyll replied to Johnny Jekyll's topic in Underfloor Heating
Indeed, fully on top of that. 👍 -
Which heating system to use on our new build?
Johnny Jekyll replied to Johnny Jekyll's topic in Underfloor Heating
@Iceverge I saw your original message in my email notification. Yes fully agree with everything you say. If only I could do it all again = It's a very long story (won't bore you). Airtightness should be excellent at the boundary. Am adding insulation inside to lessen cold bridge effect. Again it's a very long story...! -
Which heating system to use on our new build?
Johnny Jekyll replied to Johnny Jekyll's topic in Underfloor Heating
@ruggersSimply going to put 200+mm insulation between 9by2s and then another 200+mm over with loft legs up to loft floor, so will be minimum 400mm criss-crossing, plus wrapping well over into the eaves which are already at 200mm, plus high quality passive standard loft hatch to finish off. No reason other than doing my very best to insulate. -
Which heating system to use on our new build?
Johnny Jekyll replied to Johnny Jekyll's topic in Underfloor Heating
I'm currently looking at unvented systems. Any recommendations? Typical like Worcester Bosch boiler or another make? Would there be systems which are best to work with UFH downstairs and radiators upstairs? Sorry for the simple questions. Get to a new part of the build and start learning from scratch. Only ever had a combi in previous house. Also, best finish floor to use. I learnt that porcelain tiles are great for allowing heat to pass through, but would my preferred luxury vinyl tile perform much worse? -
Which heating system to use on our new build?
Johnny Jekyll replied to Johnny Jekyll's topic in Underfloor Heating
Thanks guys. Forgot to say have 2KW PV solar panels on south roof (45 degrees and no shading), so they should work well for what they are. @tonyshouse windows 1.3, front door 1.5, bi folds 1.6, I think these are the values - all secured by design, laminated, toughened. They will be fine but I understand not near passive levels. Walls will be pretty good once I fit the internal insulation to them. @joth two showers, yes constrained by plot size, yes will definitely do an air test before internal fit out. @Conor Thanks will look at unvented cylinder route in more detail, plant space is restricted which is why combi is not off the table, quite like the look of a powerful Viessmann if combi. @JohnMo good info thanks, UFH downstairs on single circuit, then towel rails in bathrooms and small radiator in bedrooms using smart heating thermostats. I don't know anything about thermal store upstream, looks like you have a good system there. @Marvin thanks is there an easy way to do a heat loss calculation? Thanks very much, all info is much appreciated. -
Hi everyone. Our new build is finally water tight. Traditional small 3 bed detached over two levels with cold loft for storage. Based in South London. So now to decide on which heating system to use? Any advice much appreciated. Insulation to be as follows: 300mm floor insulation (EPS and PIR) with screed (probably anhydrite) on top. 100mm full fill PIR with medium dense blocks both skins, will be adding 62.5mm PIR insulated plasterboard on the inside. 400mm loft insulation. Excellent airtightness utilizing parged walls, airtight paint and membrane where needed. MVHR. We are not going down the air source heat pump route. We are going for a more traditional gas boiler system. With the above in mind, what would you go with and reasons: Vented / Unvented / Combi? Radiators / Underfloor heating inside screed / Underfloor heating on top of screed e.g. Wunda? Thanks very much. With prices going through the roof, heating bills would I guess be a key consideration.
-
Airtightness - Parge Coat vs Airtight Paint
Johnny Jekyll replied to Johnny Jekyll's topic in Heat Insulation
The middle three blocks around the steel are done so far in this photo. -
Airtightness - Parge Coat vs Airtight Paint
Johnny Jekyll replied to Johnny Jekyll's topic in Heat Insulation
I have researched this quite a bit and finally settled on @JohnMo method. I mix approx one cement (mastercrete), three sand (building sand) and a bit of hydrated lime (hydralime), mix to a slurry / double cream thickness. I apply it by hand one block at a time with a block brush, rubbing into the surface so all holes are filled, then after 3/4 metres go back and brush the excess off with a softish brush. It's taking ages but doing a good job of it, and saving a huge amount of money compared to airtight paint / membranes etc. I'll be using the paint and tapes at junctions and windows but for the large wall sections this is going well. As they say, want a good job doing, do it yourself. Here's a photo of the mid floor area done, before fitting the wall plate for hanging the posi joists with joist hangers.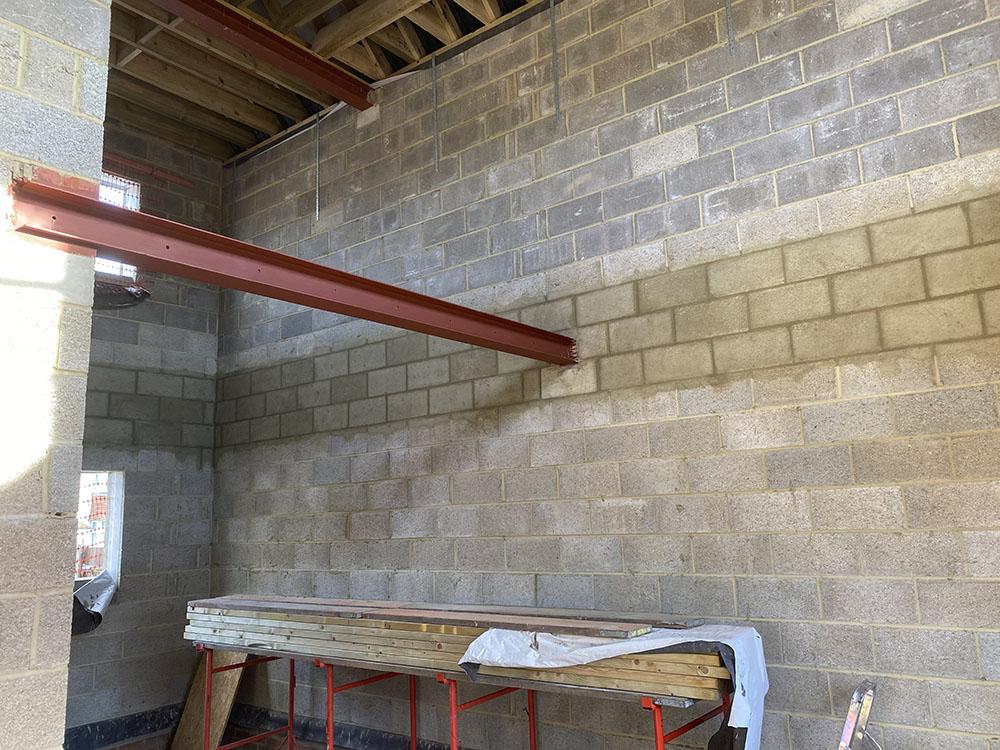
-
Excellent response. Perfectly explained.
-
Airtightness - Parge Coat vs Airtight Paint
Johnny Jekyll replied to Johnny Jekyll's topic in Heat Insulation
Great info and photo thanks JohnMo. -
Airtightness - Parge Coat vs Airtight Paint
Johnny Jekyll replied to Johnny Jekyll's topic in Heat Insulation
Thanks very much everyone, very helpful. The plan is to do the following myself - Parge coat, battens, plasterboard. Then bring in the plasterer to 3mm skim finish. May I ask regarding the parge coat for airtightness: JohnMo info is very helpful and so is nod for the bagged Parge coat comment. Rather than mixing everything from scratch, would Gyproc Soundcoat Plus do the job (or another brand)? And is it as simple as spreading it across the wall using a roller or broom? Achieving a generally even spread on the surface? Basically how would you best apply it? Trying to find a You Tube video to see the type of finish to look for. -
Didn't know which thread to post this in. Hope this is ok. For our new build, the walls are up and the roof is on, and my attention is turning to airtightness. We haven't installed the midfloor yet, so have nice full medium dense blockwork walls to work with. We will be installing a posi-joist midfloor and MVHR, and we will batten the walls (not dot n dab). My question is parge coat or airtight paint the walls? If airtight paint, will be brush applying it myself. If parge coat, how best to apply it myself? Declan52 said in another post to use a large bucket with water, bag of cement, sand, medusa, put it on with a roller? Is it that easy? If so what would the mix be? Thanks very much.
-
Roof Covering Insurance Backed Guarantee
Johnny Jekyll replied to Johnny Jekyll's topic in Roofing, Tiling & Slating
Thanks Mike -
Our roof carpentry construction for our new build has just about finished and the roofing company is due to start (felt and batten) next week. We're using the Marley Roof System which has a 15-year Marley guarantee (presume that's materials only), and the Marley (Viridian) Solar System. Should I get an insurance backed guarantee from the roofer for the installation? Just want to make sure I have all the correct paperwork. Thanks.
-
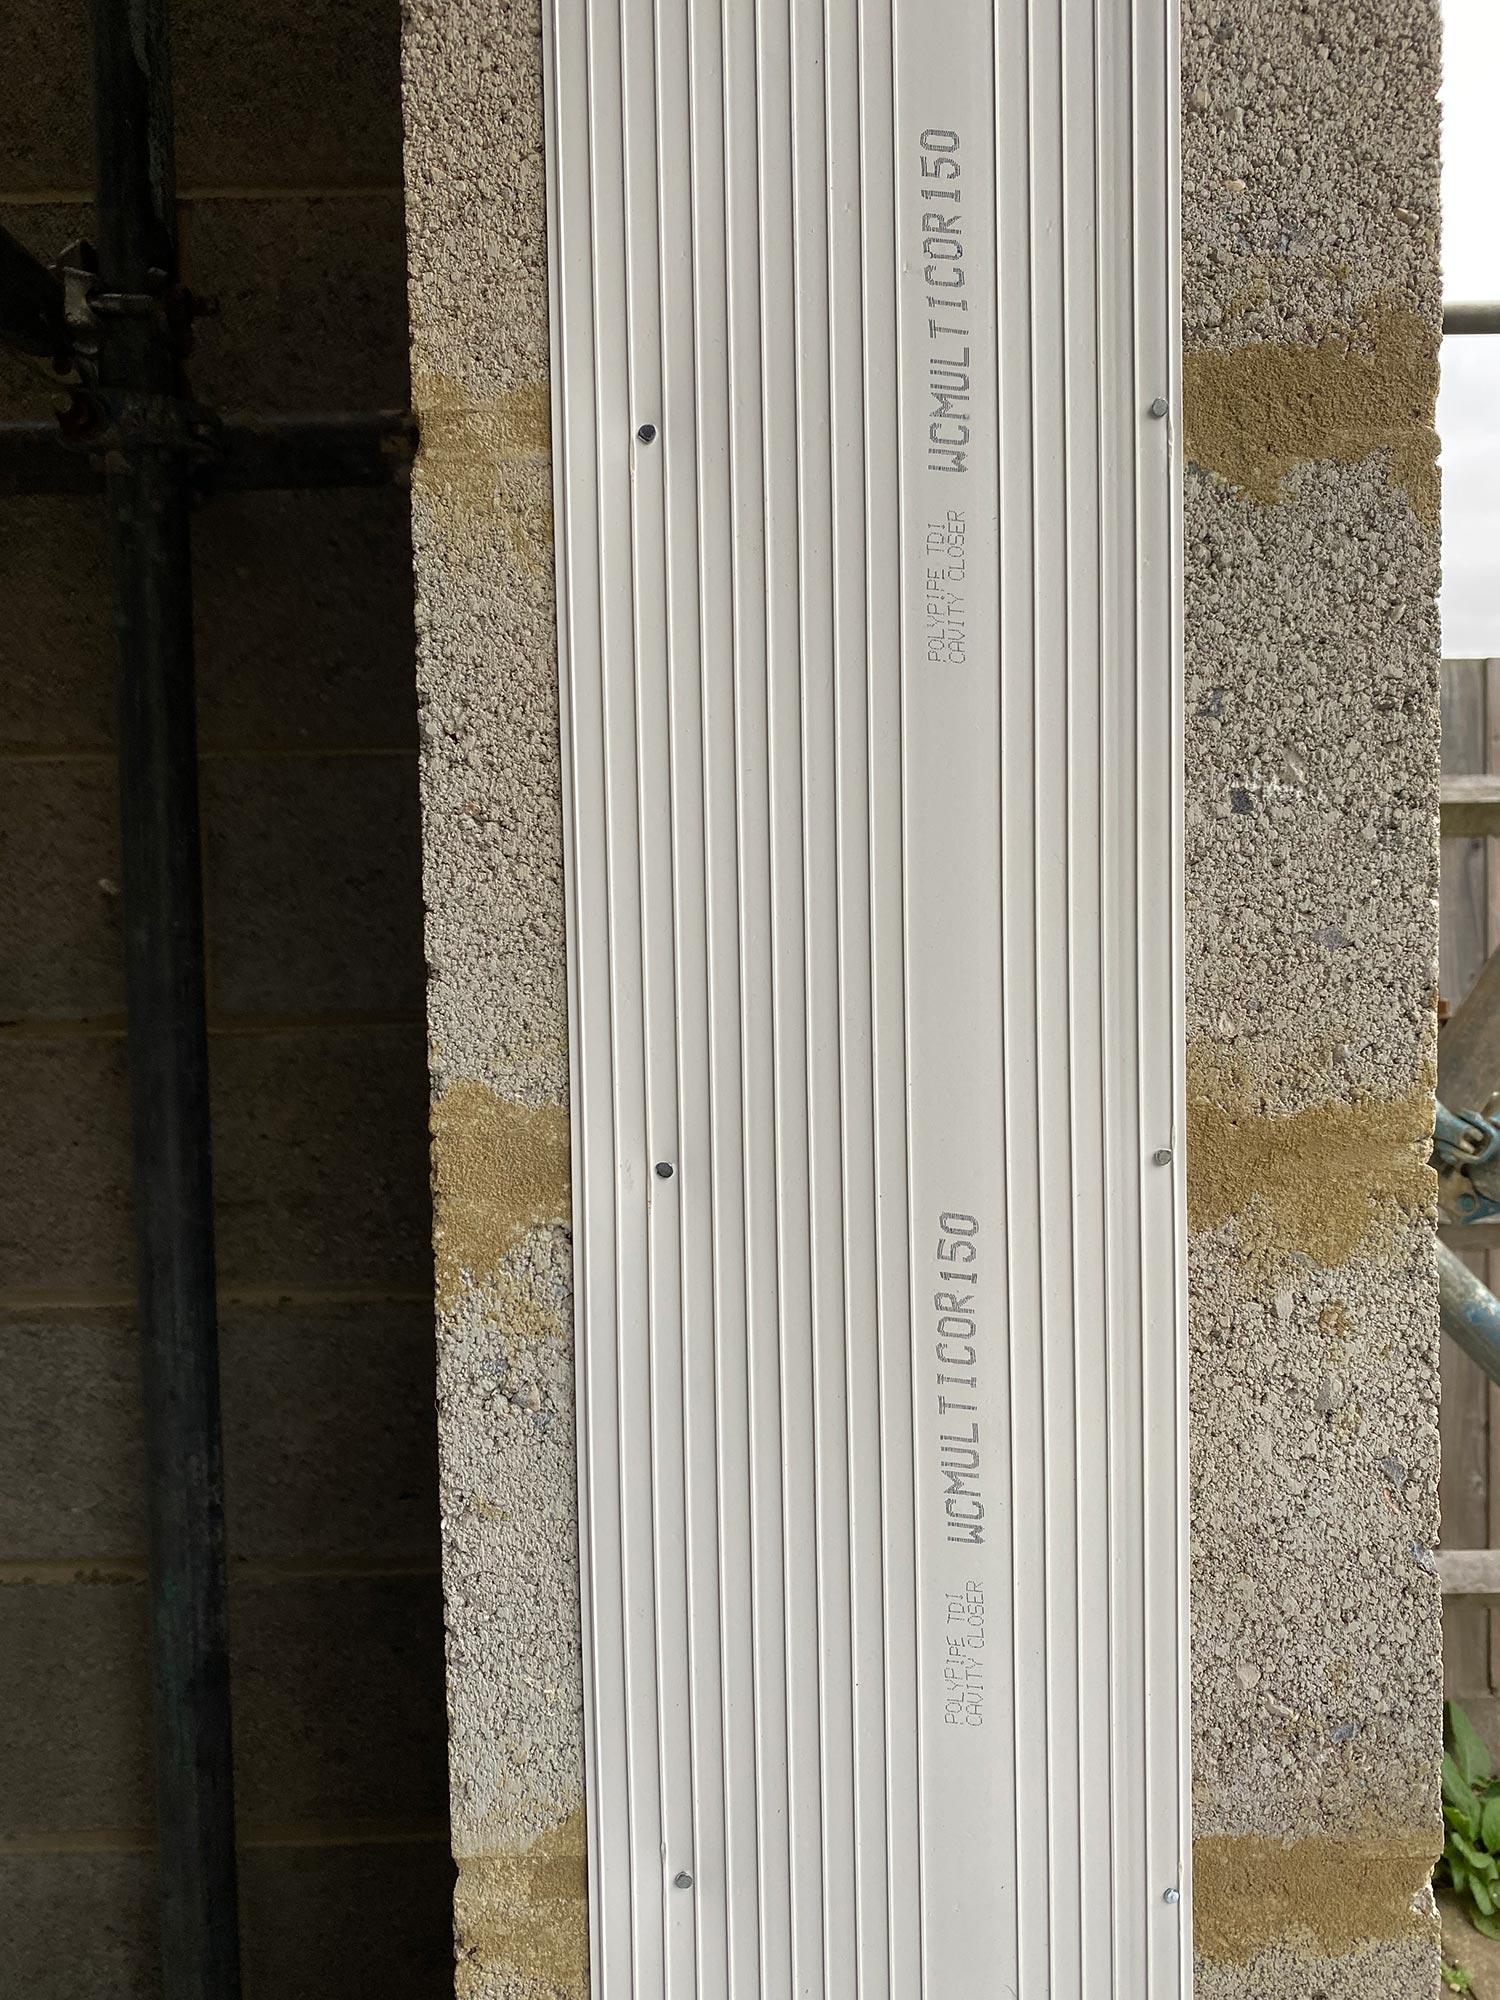
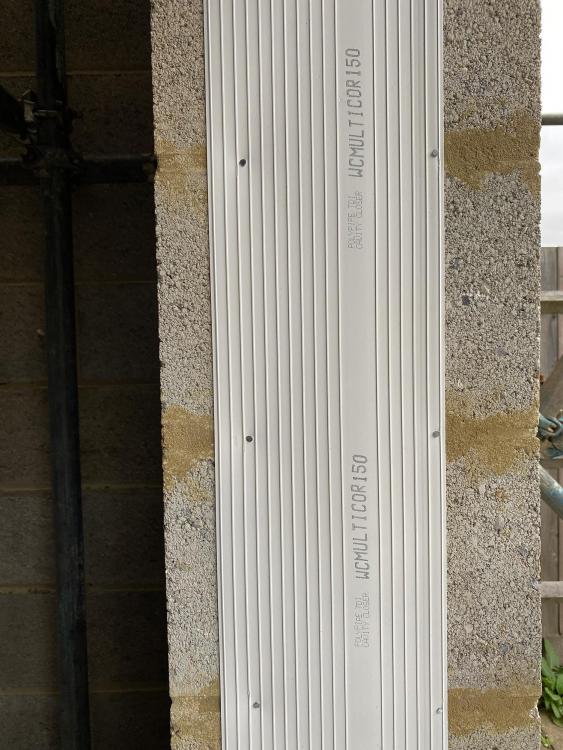
Thanks for the responses everyone. Our walls are already up, so pre-built closers aren't an option for us. Debated using them at the design stage but went with retrofit in the end. Will have a look at those screws and other masonry screws thanks Linto, but would need to be careful the blocks don't crack / pop when drilling in. May need pilot hole to help. Or may continue with simple little 25mm masonry nails where possible just to hold them. The idea behind CT1 is to simply seal the edges, as you can't get the closers that flush to the brickwork (no matter how good it is).
-
I'm fixing my cavity closers into place (normal flange fit closers pushed in). I'm fixing the internal edges with small masonry nails into the mortar (with CT1 behind). Those have gone in well. But using the masonry nails on the outside edge isn't holding the cavity closer against the wall. Mortar probably isn't solid enough. Do the closers need fixing on the outside? Surely they should be tight and silicon (in my case CT1) applied to seal them? Shall I use flat flange fit screws (into plugs) on the outside edge? If so which ones? Any advice / recommendations on doing this right, ready for the window fitters? Thanks very much.
-
Advice Needed - Cold Bridge Behind Full Fill PIR Insulation
Johnny Jekyll replied to Johnny Jekyll's topic in Heat Insulation
Very helpful photo thanks farm boy. Really appreciate it. What are those yellow clips you're using to help screw to the wall plate? If you don't mind, where did you get them? Thanks. -
The paint has been specified through computer model for the size of steels by the paint company so all good there. Can't thank everyone enough for all the advice. First self build and learning something new every day.
-
The intumescent paint is water based, so I'm worried that may encourage the rust. Or would that take hundreds of years and I just shouldn't worry about it? And simply it clean back and paint as you say?
-
Hi guys, any comments on post above thanks?
-
Advice Needed - Cold Bridge Behind Full Fill PIR Insulation
Johnny Jekyll replied to Johnny Jekyll's topic in Heat Insulation
Thanks Brickie. I'm all over it from this point up that's for sure.