


LeanTwo
-
Posts
67 -
Joined
-
Last visited
Everything posted by LeanTwo
-
Thanks Nick, very helpful. Yes, It's an open, vented system. Mains pressure isn't exactly explosive here but higher than my hot water pressure. I'll have a word with my plumbing supplier when I buy the tap.
-
Thanks for the reply Nickfromwales and yes, I'll hold off buying until I get the tap! We heat water on Economy 7, plus with a small water jacket on our multi-fuel stove to top this up.
-
Thanks for the reply Onoff. I've just seen some flexible connectors, with a built-in isolating valve from Wicks online. 500mm long so should do the job well. Any advice on balancing pressures or including a non-return valve in the system? https://www.wickes.co.uk/Wickes-Flexible-Compression-Connector-With-Isolating-Valve---15-x-12-x-500mm/p/160137
-
I'm going to fit a single mixer tap to my kitchen sink when it arrives but wanted to get started on the required plumbing. With separate hot and cold taps, they seem to be a fairly standard 180mm apart. However, if I'm supplying hot and cold water to a mixer then how close should the feed pipes be? Is there a recognised standard? Maybe there are flexible connectors available so it's not so important to set a precise distance? Will I need to have a balance between the hot and cold supply pressures or will the tap do this for me? Any information or advice would be great!
-
... we've got a TLC Direct about 25 miles away but at £3.60 for a next day delivery, I'd probably get it delivered and save my fuel. Over £50 it's free! I had a poke around on their website and the prices are good plus they do loads of other things, including lighting. Wish I'd known about them before. Thanks for the tip.
-
Thanks for your reply Nickfromwales. Useful advice and I'm checking out round to oblong/square converters now. The extractor I have in mind has a round outlet. The converters seem to be available but it's just a matter of finding the right sizes.
-
I'm just looking at the types of integrated kitchen extractor fans as I start to conclude my kitchen extension and I'm trying to find out whether they generally have round ducting requirements or an oblong section. I've seen converters on the web to go from round to oblong but it would be helpful to know what manufacturers generally start with on the appliance. I'm running the ducting along the top of the wall cupboards so want something that looks neat.
-
Dry-line or Floor Levelling First?
LeanTwo replied to LeanTwo's topic in General Construction Issues
Thanks for the replies, all very useful. My slab does have a dpm (and the building control officer checked it all out). However, I've been advised to think about another dpm before I put the underlay down for the wood floor. Is this a breathable membrane or could I use the can of Black Jack bitumen emulsion that I've got? Guessing that I could use this to seal the floor/wall junction as well? I'll allow 25mm (1") from the slab to the plasterboard, which should allow sufficient clearance for any self-levelling compound that runs back to my blockwork, under the plasterboard line. -
I'm at the stage with my single storey extension to start on the internal work. First-fit electrics are in and I'm now looking at dry-lining after the insulation goes in between the rafters. The floor slab went down some time ago with its dpm but it and the quarry tile floor of the old kitchen-diner will need levelling with some sort of screed. What's best to do first? Should I level the floor and then work the plasterboard to that level or plasterboard and then pour the screed? I've had advice favouring both! I have been told that I should ensure the plasterboard is slightly raised from any floor (as it loves to take up any moisture) so should be packed by a few millimetres on the bottom. I'm proposing to put an underlay on the screed (possibly with another semi-permeable underneath it) and then laying an interlocking engineered timber, final floor. I'm planning to dot and dab the plasterboard onto the inner leaf thermal blocks. Any advice on how to go about this stage would be helpful, including making any provision for skirting boards!
-
Has anyone used the Polymax range? I can get this from my local builder's merchant.
-
I'm about to start re-plumbing my kitchen in a new lean-to extension. The existing property has copper plumbing throughout. I'd be interested to hear views on the pros and cons of the plastic push fit system and the traditional copper system. I'm reasonably competent at most things and have achieved success with pre-soldered copper fittings before and it all has a sense of strength and permanence. The push-fit system, whilst being a little more expensive seems to be simpler to install. Any views or experience of the two systems would be appreciated.
-
I'm at the position with my project to build a lean-to extension where the cavity blockwork is in place and a window and folding doors are to be fitted soon. Cavity closers seem to be a good way of finishing the cavities, adding insulation and another barrier aginst damp. Is there any general advice on these that people have to offer on type, design, fitting etc? Are they fixed in place or do they just push in? My builder says why not just cut sections of 50mm insulation (Celotex type) and push it into the cavity? Also, is there an advantage to fitting closers on top of the wall cavity? Any thoughts?
-
Steel (Acro) Props - Needle or Strong Boy?
LeanTwo replied to LeanTwo's topic in General Construction Issues
Thanks for all the replies. I eventually installed four pairs of Acros about 800-900 mm apart supporting 100 mm square section steel needles (or pins as they get called in our part of the world!) All of the cavity blockwork and stone masonry facing has behaved itself! The padstones are now cast and once a steel plate has gone in over the two beams we can make up any gaps and rest the whole lot back on the beams. So far so good! -
I'm in a similar position myself and I'm no expert! Given the relatively low cost of cavity trays, I have used them where I think it would help, particularly over windows. I found a handy little guide with some good pictures in at my local builder's merchant. It's published by Cavity Trays and is called Wise Decisions, Best Practice Series, Volume 44. www.cavitytrays.com. Hope this helps.
-
Steel (Acro) Props - Needle or Strong Boy?
LeanTwo replied to LeanTwo's topic in General Construction Issues
Thanks for your reply Rich. The dimensions for wood needles ...about 200 x 100 mm? Doubled up? -
I am installing two steel beams (running parallel to each other) as part of my kitchen/diner extension and it would be helpful to know whether normal practice is to use a needle (as I think they are called) to go through the hole we will be making in the wall and be supported by steel props or if a strong-boy (looks to me like a bracket that goes on the top of the steel prop is better? I've seen a comment that using strong-boys limits the weight that can go on a steel prop to 340 kg. The wall that is going to be supported is a cavity (50mm) with a 150 mm stone face on the outer leaf. The full thickness of the wall is 400 mm and we are taking out approximately a 4m length to accommodate the steel beams. I'm going to place four pairs of steel props, approximately 1m apart. Any thoughts or observations?
-
Timber Windows - How to fix in place
LeanTwo replied to LeanTwo's topic in General Construction Issues
Thanks, Craig. Will this tape does away with the need for an expanding foam filler? Will I still need an inner sealing tape? -
I'm installing some new windows and one of them is in a bathroom. I will have to remove some of the old plasterwork inside as the new frames are deeper than the old ones. The new sashes are double glazed so I'm hoping that condensation issues in the bathroom may be reduced. However, what has happened over the years with the single glazed windows is that black mould has taken up residence in the plaster around the window and in the ceiling above. Is there anything that I can do at this stage, whilst I'm doing work to get rid of and prevent the mould returning?
-
Timber Windows - How to fix in place
LeanTwo replied to LeanTwo's topic in General Construction Issues
Craig, I could only find the following link to TP602, which was in German. Do you have another link, please? http://www.illbruck.com/de_DE/produkte/produktfinder/product/tp602-illmod-max/ -
Timber Windows - How to fix in place
LeanTwo replied to LeanTwo's topic in General Construction Issues
Craig, Thanks for the reply. I'm interested to know how the TP602 works. I'm guessing it's an expanding tape that forms such a good seal that the "middle" foam filler is not needed? The inner sealing tape is still a good idea though? -
Timber Windows - How to fix in place
LeanTwo replied to LeanTwo's topic in General Construction Issues
Thanks for the links. the three system approach looks good. With the outer expanding tape, I guess the trick is to make sure the tape is the correct spec to fill your expected variation in the gap between the frame to the masonry aperture? For random stone, this could be quite a lot. The inner sealing tape would appear to work well if it goes from the frame to a surface such as a concrete block or Thermalite? It might struggle if the masonry surface is random stone? With such a comprehensive system, is it necessary to have a dpc under the bottom edge of the frame? One of the videos showed a window fixing bracket used to go from the frame to one of the cavity wall leaves. Is this an alternative to a Fishcher/Screwfix type of approach? -
Timber Windows - How to fix in place
LeanTwo replied to LeanTwo's topic in General Construction Issues
Thank for your reply and the tip to look at Fischer fixings. I've been on their web site and they look good. Screwfix seem to do some good screws as well (as you might expect, given their name!). Any thoughts from anyone on the type of fillers to use or the idea for a mortar outer seal? -
I'm taking delivery of two double casements, double glazed windows, which have wooden (Accoya) frames. They are replacements for 30-year-old windows which are now largely filler! They are to be fitted into the existing aperture. The wall construction is a standard cavity wall, with Thermalite inner leaf, 100 mm cavity and concrete block outer leaf. The outer leaf is faced with random stone (sandstone and flint mix) at an average of 150 mm thickness, with a lime based mortar. The existing windows are fixed to the outermost random stone facing and appear to have been fixed by nails driven through the jambs. This seemed rather a crude way of fixing my new and expensive windows! I intend fitting the windows to the outer random stone facing layer. I have been advised that I could use concrete screws through the jambs into the mortar (being careful not to distort the frames) after having positioned the window with wedges. I have also seen something called a frame tie in my local builder's merchant's catalogue, which is a piece of mild steel with a 90-degree bend in it and holes drilled in it. Is this something different or could I use these to fix the frames to the concrete block leaf? Also any advice on sealing the window frame in the aperture? Are there particular fillers that I can use? Should I finish off with a mortar on the exterior of the filler? Thanks in anticipation!
-
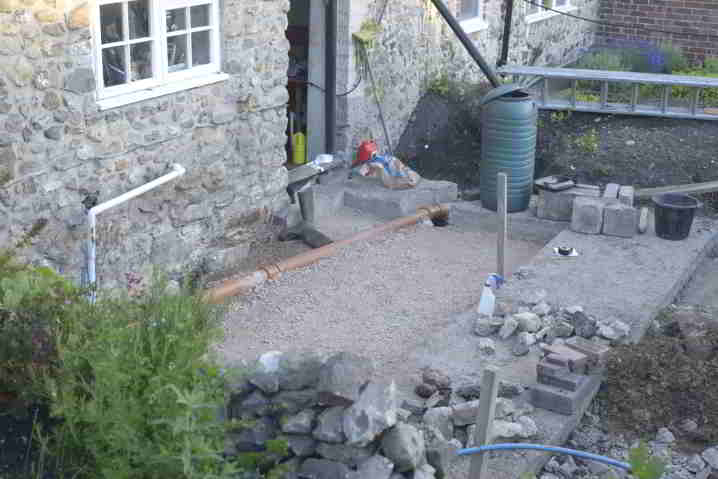
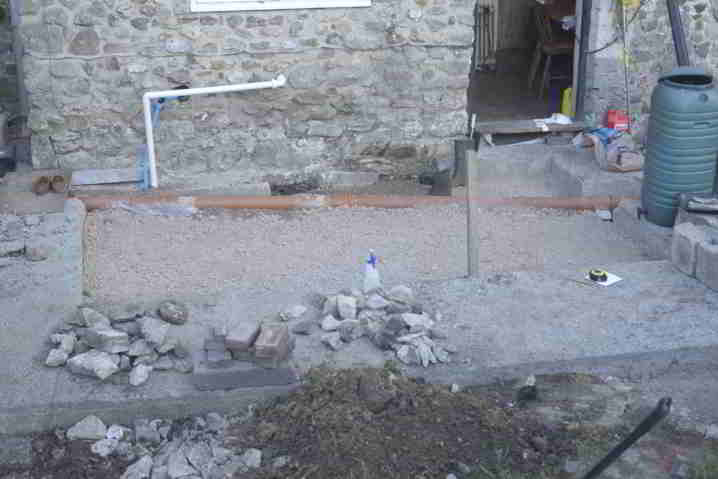
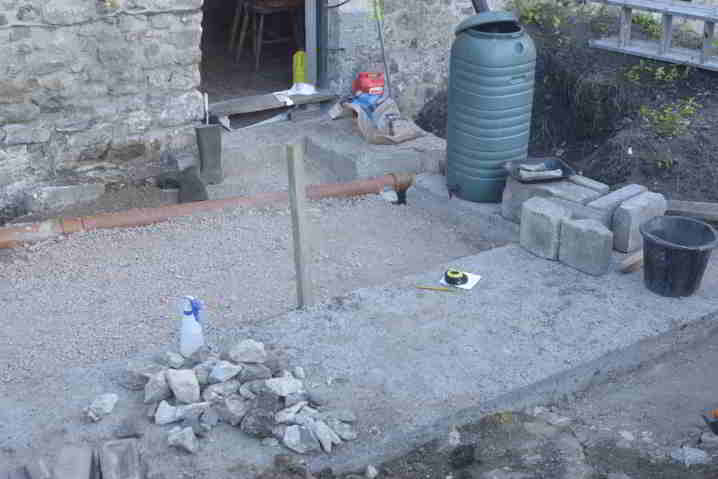
Many thanks for the additional advice and experience. I I've got some sawn planks (40 mm x 90 mm x 3600mm) that were actually used for making a ramp to get a mini digger onto the plot, which I'm thinking of using to make tamping rails. I'm planning to run the rails along the shorter sides of the slab so allowing me to tamp more than once if required. An alternative would be to run them along the longer side but I would have to fill and tamp as I go (so just the once). This orientation would make a board system for trowelling possible (shorter boards between the rails). I have a builder friend working with me who is very competent at troweling! The mix is being made by a local company and I can vary the mix to my requirements so a dryer mix would be possible if this helps to get a good surface. It has a 10mm aggregate in it, plus fibre and a retarder. I've (hopefully!) attached some pictures from today. They don't show the first block course, unfortunately as this is the next task after the hardcore/scalpings/sand layering. The back wall of the ground floor plus window and door will come out and the small kitchen/diner behind will be incorporated into one room.
-
Thanks for the additional explanation Nickfromwales. I've not got a huge slab to cast but I want to get it as near the desired finish as possible. The rafters idea is a good one as these should be sufficiently robust to keep their shape during the tamping process. The roof that I'm constructing will be approximately 3.25m X 4.5 meters, with Double Roman clay tiles. Not that I'm experienced in this but is a timber as big as 7"x2" needed? ..but I'm happy to buy whatever is needed to get the slab pour done!
