Kai casswell
-
Posts
37 -
Joined
-
Days Won
1
Everything posted by Kai casswell
-
FYI I always fill and flush panels without going on the roof, unless there is already scaffolding up. With the correct solar filling pump you dont need to..All the air gets dragged into the pump well and de gasses there. You can see the air coming out over an hour or so as the fluid turns from milky to clear. I probably get called out to about one or two of these every month.
-
I wonder if they would check that or if it’s actually specified how the 9m is measured. Would save a lot of hassle if I try permitted.
-
Probably for the best sun
-
HI we have space for a ground mounted array in our field. It would be about 150m from the house. Has anyone experience in applying for planning permission for this type of system? It will be bigger than the 9m2 permitted size. Also is it better to run longer DC cables and have inverter near the house, or the other way round. From scanning the forum longer DC seems better? My initial idea is about 10kW array going into a battery system near the house. many thanks!
-
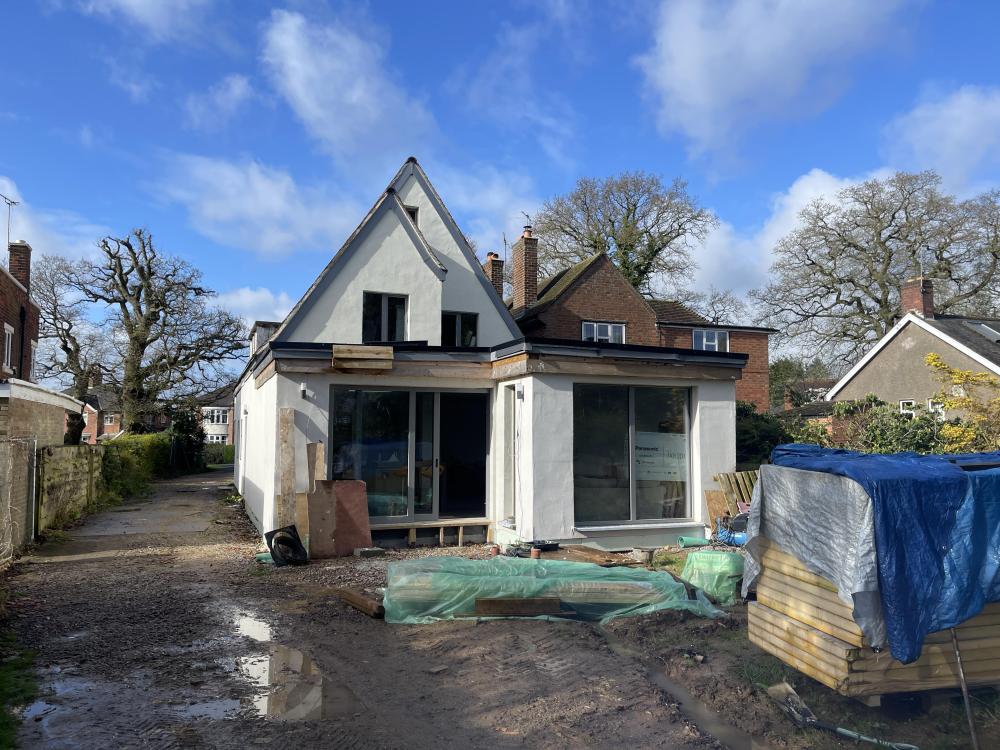
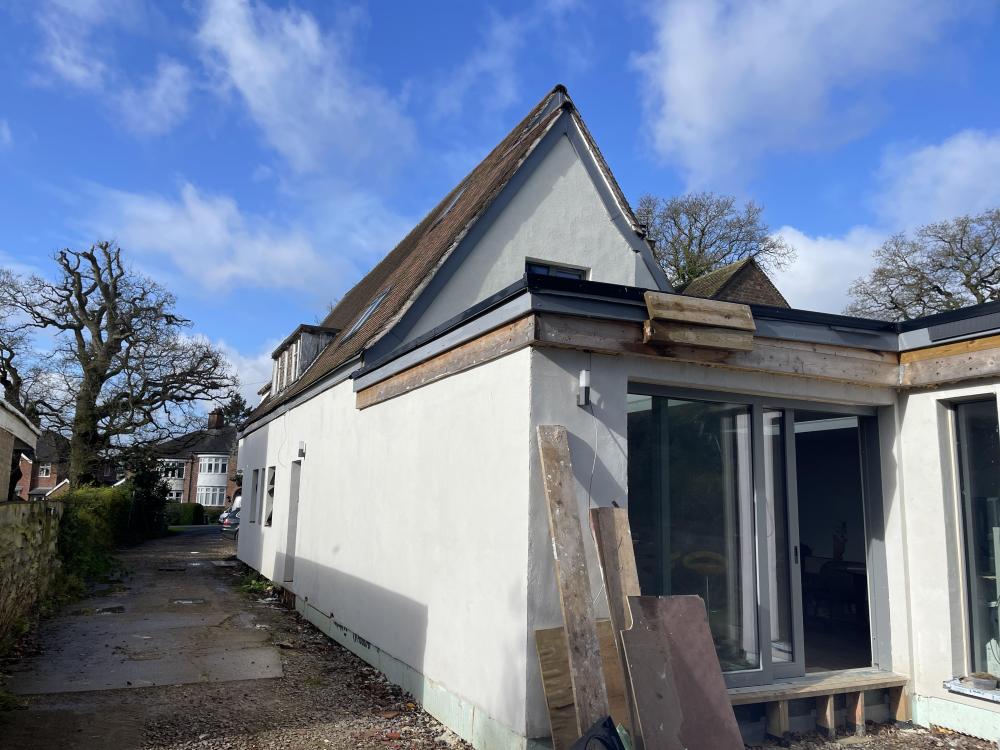
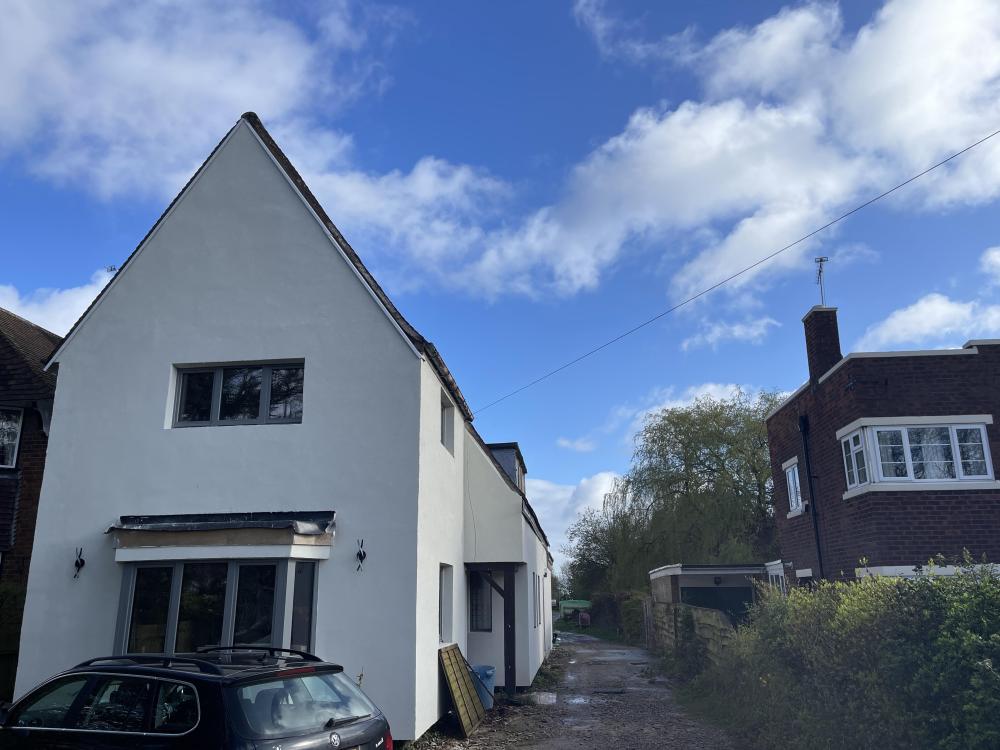
Here’s a quick update we moved in early January. Still got loads to finish off inside but we got all the EWI and render on before winter, fitted our kitchen and a bathroom and for two bedrooms done. Basement is done as well and still not leaking ! I’ll do a more detailed blog later but we are very happy with our self build / eco renovation / it’s just an extension isn’t it?! / (and the only other trade we used was my friend Pete the electrician)
-
Has anyone experience of finishing dormer cheeks side walls in edpm? The existing ones have very old leaky lead and I have edpm left over from my flat roof. I was going to redo the dormer roofs in edpm anyway. Can’t find much about it here or on Google. Thanks
-
So to recap: we bought an old house with a bit of land at the back. We tried to get permission to knock it down and do a new build passiv house in the backland. The council said no no no, we lost an appeal, then put in ridiculous plans for a massive extension with basement on the existing old house, plus a large stable block on the back land where we wanted the new build. Council said yes yes yes, thats fine, please go ahead.... Having never built anything major before, we hired a 9 ton digger and a small tipper truck and set about digging a hole. The basement would start over 4m back from the existing rear wall of the old house and as long as we graded the excavation where possible and used plenty of sheet pilings, it would work out fine. To get rid of the clay soil, we just spread it out on the land at the back saving quite a bit on grab lorries. We originally planned for a four week hire of the plant, but we ended up taking about six weeks. Prior to digging I made a few test trenches to check the soil and water level. We also found an in depth soil survey from a major development next door. Once we had the hole dug in the right place, and sorted some temporary drainage, we set about levelling and pouring the basement slab. This was designed to be 300mm concrete on top of a tanking membrane, with tons of rebar. We just followed the drawings and building control came a few times to check it all. The waterproofing was overseen at each stage so we could get the warranty as well. We poured the slab in winter of 2022 and had a few cancellations due to frost. In the end we made an insulated temporary roof over the basement and used gas heaters the night before the pour just to be safe. The concrete went in very well, i think it was two loads of waterproof concrete, then we could start on the nudura walls. The hardest part of this section was wiring all the rebar together and getting the 20mm OD L bars in place which connected the slab to the nudura walls. These were doubled up all around the perimeter every 8" and a pig to get in amongst all the rebar mesh. Assembling the nudura walls was very straight forward, once i got my head around the idea of a common seam - where due to the plan measurements, the nudura blocks needed cutting and joining together. We had done the nudura course and the rep was very helpful with all my questions. Once built up, building control came out again and we ordered another three loads of water proof concrete for the walls. Where the walls joined the slab, we used an expanding waterbar and kept it dry until we poured the walls. We hired a concrete pump for the pour and because it was a basement we just used the nudura walkways and scaffolding to allow the pump hose to get round the whole perimeter. I was concerned about blow outs- especially on the first load dropping down into the bottom of the wall so I over did the shuttering on the outside of the nudura - including 220mm x 50mm floor joists screwed all around the perimeter outer edge, plus lots of OSB shuttering at all the weak points. It all worked well and it was a major relief to get the walls filled up.
-
We have started fitting our external wall insulation and render. Whoever invented sponge floats need a knighthood. That’s all.
-
- 2
-

-
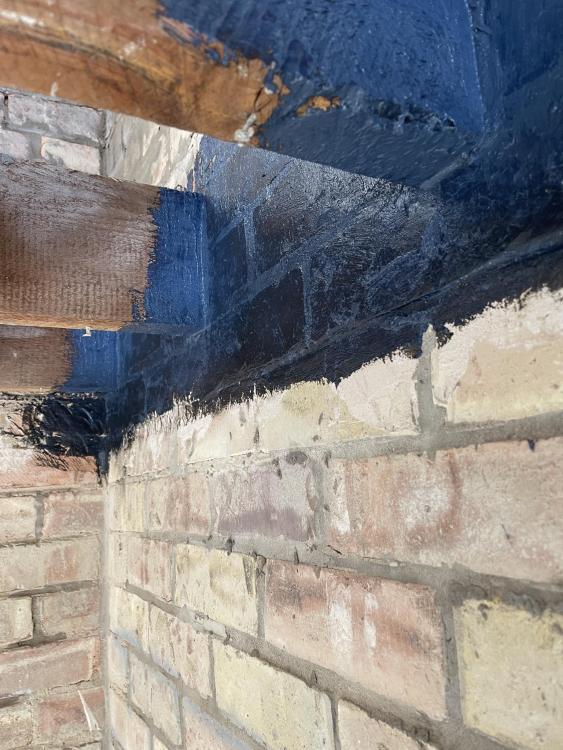
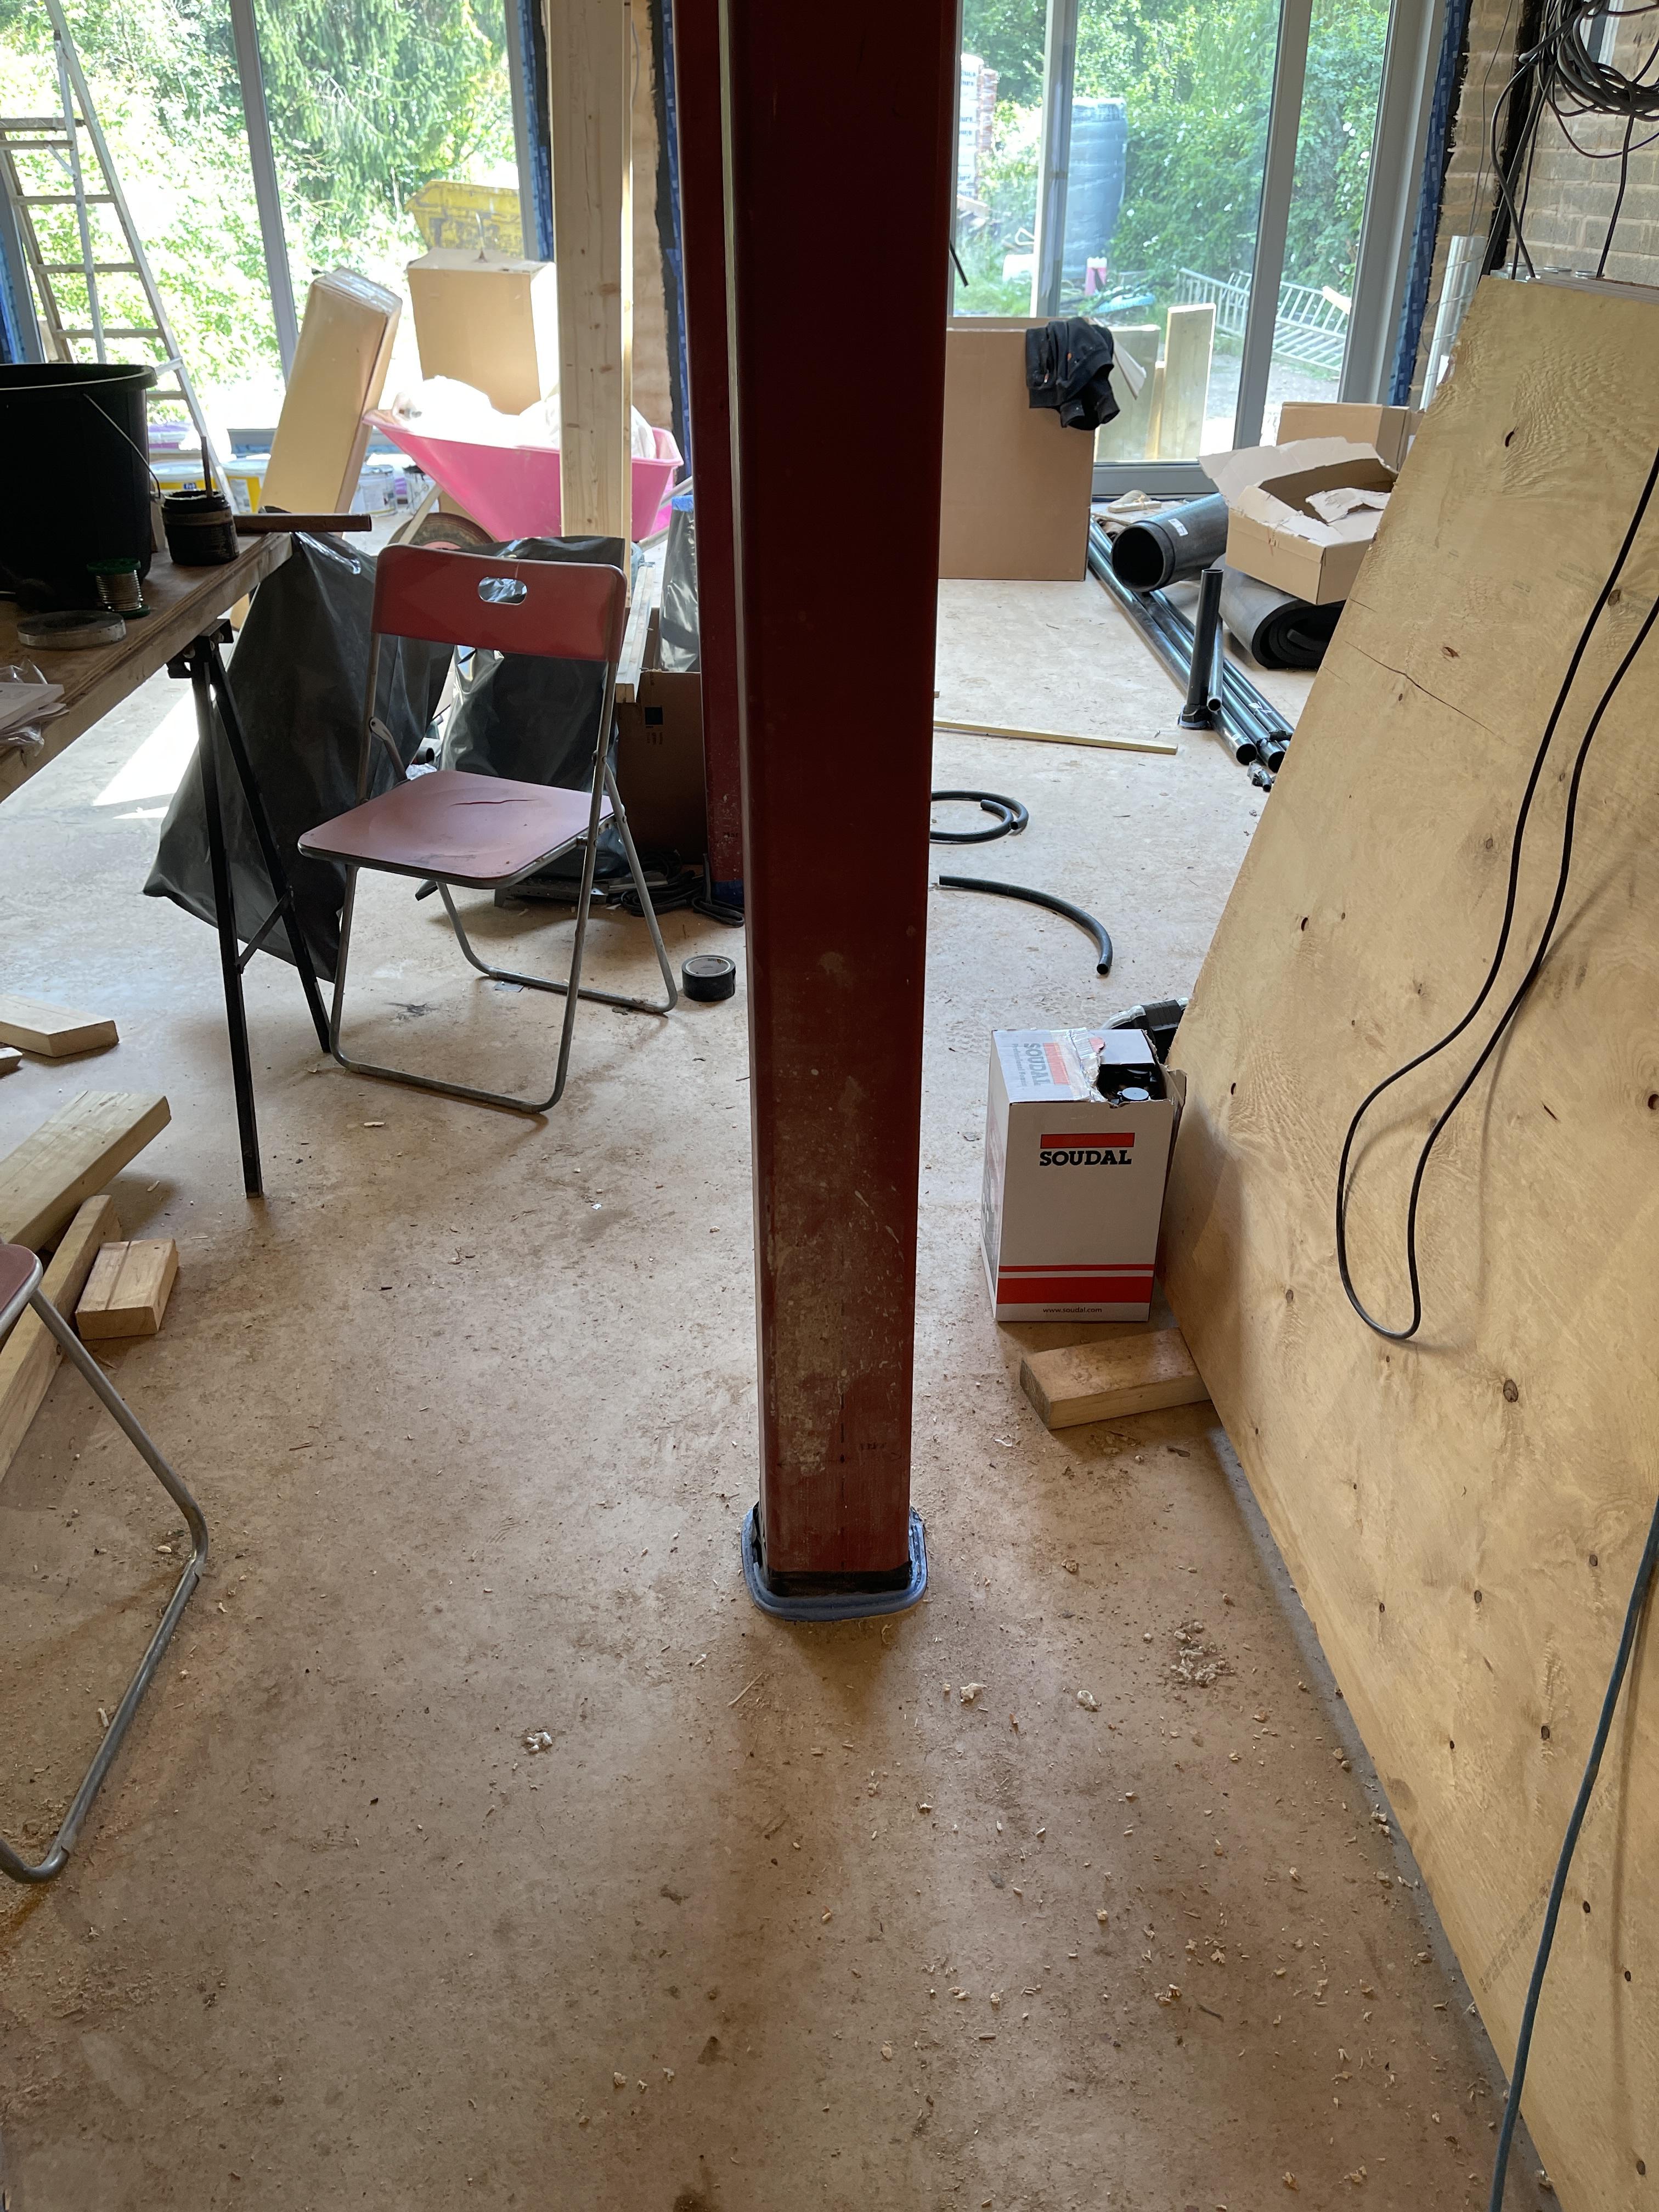
Insulation in steel columns.
Kai casswell replied to Kai casswell's topic in House Extensions & Conservatories
It is connected to 16 other steels. All within thermal envelope. But the foundation it’s on is 2m3 concrete on the ground below but this is within the foundation of the extension -
Insulation in steel columns.
Kai casswell replied to Kai casswell's topic in House Extensions & Conservatories
Thanks. BC suggested injecting them as well as covering. Im trying to Minimise all heat loss. Maybe it’s overkill. Just wondered if an else had done it -
Has anyone injected expanding foam into steel columns to help with heat loss?

-
whats this part of a roof called?
Kai casswell replied to Kai casswell's topic in Roofing, Tiling & Slating
Ah ha that’s brilliant. I’m using plain tiles double lap so should be able to make something. I Have done a bit of lead works over the years. thank you both for your help. -
whats this part of a roof called?
Kai casswell replied to Kai casswell's topic in Roofing, Tiling & Slating
All diy I’m afraid! -
whats this part of a roof called?
Kai casswell replied to Kai casswell's topic in Roofing, Tiling & Slating
That only shows a duo pitch onto a gable wall. Mines a little different and having searched the internet I still can’t find an example. I’ll try again using the keyword saddle as I expect that’s involved somehow- thanks. -
whats this part of a roof called?
Kai casswell replied to Kai casswell's topic in Roofing, Tiling & Slating
thanks for that. It’s the top lead around the ridge tile and how it joins with the main roof pitch I’m trying to work out. Can’t find any examples to copy. -
anyone know what this part of the roof is called - where a smaller outrigger pitched roof joins a larger gable and pitched roof. And is there a method for flashing the lower ridge tiles with the verge of the larger roof? roof detail.pdf
-
I have finished with these now. I will keep them safe in my lockup until the next person needs them. Please let me know. Thanks so much. Kai
-
Hi did you get this sorted? In my experience once it’s reached stagnation eg collector temp has risen so high the fluid has boiled, you need to wait till nighttime until it cools down again. If this is happening repeatedly everyday you may have a problem in the system. Each time the fluid boils and condenses it breaks down a little and will eventually sludge up the system. if you have a 300 litre cylinder and 3-5sqm of panels that is a good size for a family of 4-5 people but if you use less hot water it will overheat more often. the collector cooling and recooling functions can help but be very careful of letting the cylinder get to 95C especially as this is measured at the bottom of the cylinder - And so it will be even hotter at the top. Happy to help if you want to message me. I’ve been working on solar thermal since 2007. Kai
-
Advice to retrofit solid floor insulation
Kai casswell replied to Sophiae's topic in Heat Insulation
I've done it as well, but we weren't living in the house and we could get a micro digger in for bits. We also hire a little motorised dumper. We kept all the waste and crushed it down to hardcore. I also forced my family to help:

-
State of play 2019
Kai casswell commented on Kai casswell's blog entry in Major extension and eco renovation in Leicestershire
For nostalgia, here is a picture of our hoped for new build in the backland.....maybe one day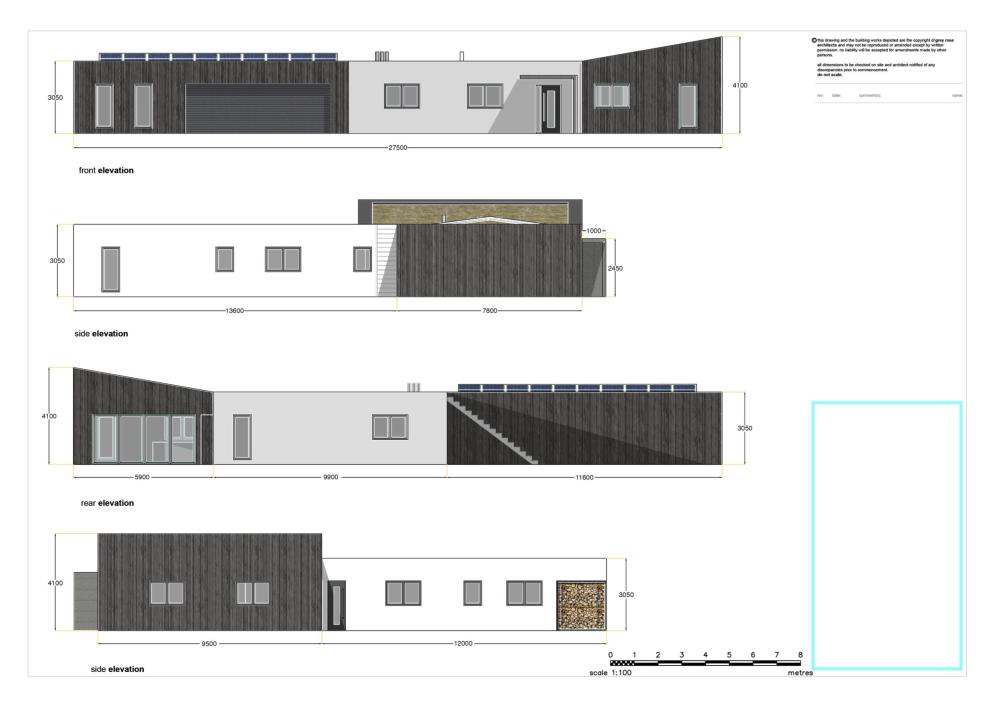
-
You think getting planning is the final hurdle, and then you start talking to building control, structural engineers and steel manufacturers! Thank goodness we didn't have to talk to builders as well, as we had made the bold decision to do it all ourselves. I am a plumber by trade with a weird niche sideline of repairing solar thermal systems so i have some site experience. Having worked on a lot of new build single plot sites and with a variety of builders, project managers and architects I assumed i would manage it all ok. As we had preemptively done the Nudura ICF course for our 'never to be new build', i decided to do the basement at least in ICF. I had considered doing the whole extension in ICF - see picture, but in the end stuck with just the basement. I would come to regret that decision later on.... Due to the slightly weird nature of the existing house with steep pitch roofs coming into the first floor rooms, the design needed a-lot of steel work. Also with the basement starting about 4m away from the back of the old house we need some fairly substantial foundations between the old house and the basement, as well as a couple of enormous steel posts to help hold up the extension walls. I had done a consulting call with The Green Building Store and discussed the options for making it all airtight and highly insulated. I decided on External Wall Insulation (EWI) over the whole building, and also filling the existing cavity with beads. As we were going to build the extension ourselves, and we weren't (yet) bricklayers, we decided on solid block-work walls for the new bit. They didn't have to be extra neat as it would all be covered by the EWI. The engineer suggested lay flat block-work, as it was stronger and would sit nicely on top of the basement ICF walls which have an 8" core. These were each 18kg 7N dense concrete blocks and i calculated we had to lay 2700 blocks. Like i said, i would come to regret that....
-
fast forward - 2022
Kai casswell posted a blog entry in Major extension and eco renovation in Leicestershire
Three years, two planning applications and an expensive appeal later we began preparing works. And no we didn't get permission for a new build. Instead we got planning permission for an 11m extension, basement and loft conversion of the old existing house, plus a large stable block in the back field. The new design involved extending the rear of the house out 4m as three stories and then a large flat roofed single storey a further 7m, which will sit over a 30sqm basement. The existing house is about 150sqm, 2" cavity brick construction, with solid concrete floor. The roof is a steep 55 degree pitch, double purlin on each side traditionally cut roof with 9m rafters. -
State of play 2019
Kai casswell posted a blog entry in Major extension and eco renovation in Leicestershire
This old house turned up for sale with a largish four acre plot at the back. Our "plan" was to knock it down and build a modern ICF passiv haus on the land, and also keep horses and pigs on the land. Well you know what they say, if you want to make God laugh then tell him you've got plans.... -
Anyone used these? Prices seem better than lots of the others.
-
What’s everyone’s preferred method for making blocks airtight ? I’ve got some aerosanna fibre paint and tapes for the tricky bits like joists and steels. But the main faces on my extension walls are all dense concrete blocks. The old part of the house is brickwork which I’ve repointed. It would cost a lot to paint the whole lot. reading threads some recommend gypsum soundcoat type parge coat or cement parge coat. Others say it’s all about the plasterboard - I was planning on battening out and making a service void then plasterboard.