tvrulesme
-
Posts
153 -
Joined
-
Last visited
tvrulesme's Achievements
Regular Member (4/5)
9
Reputation
-
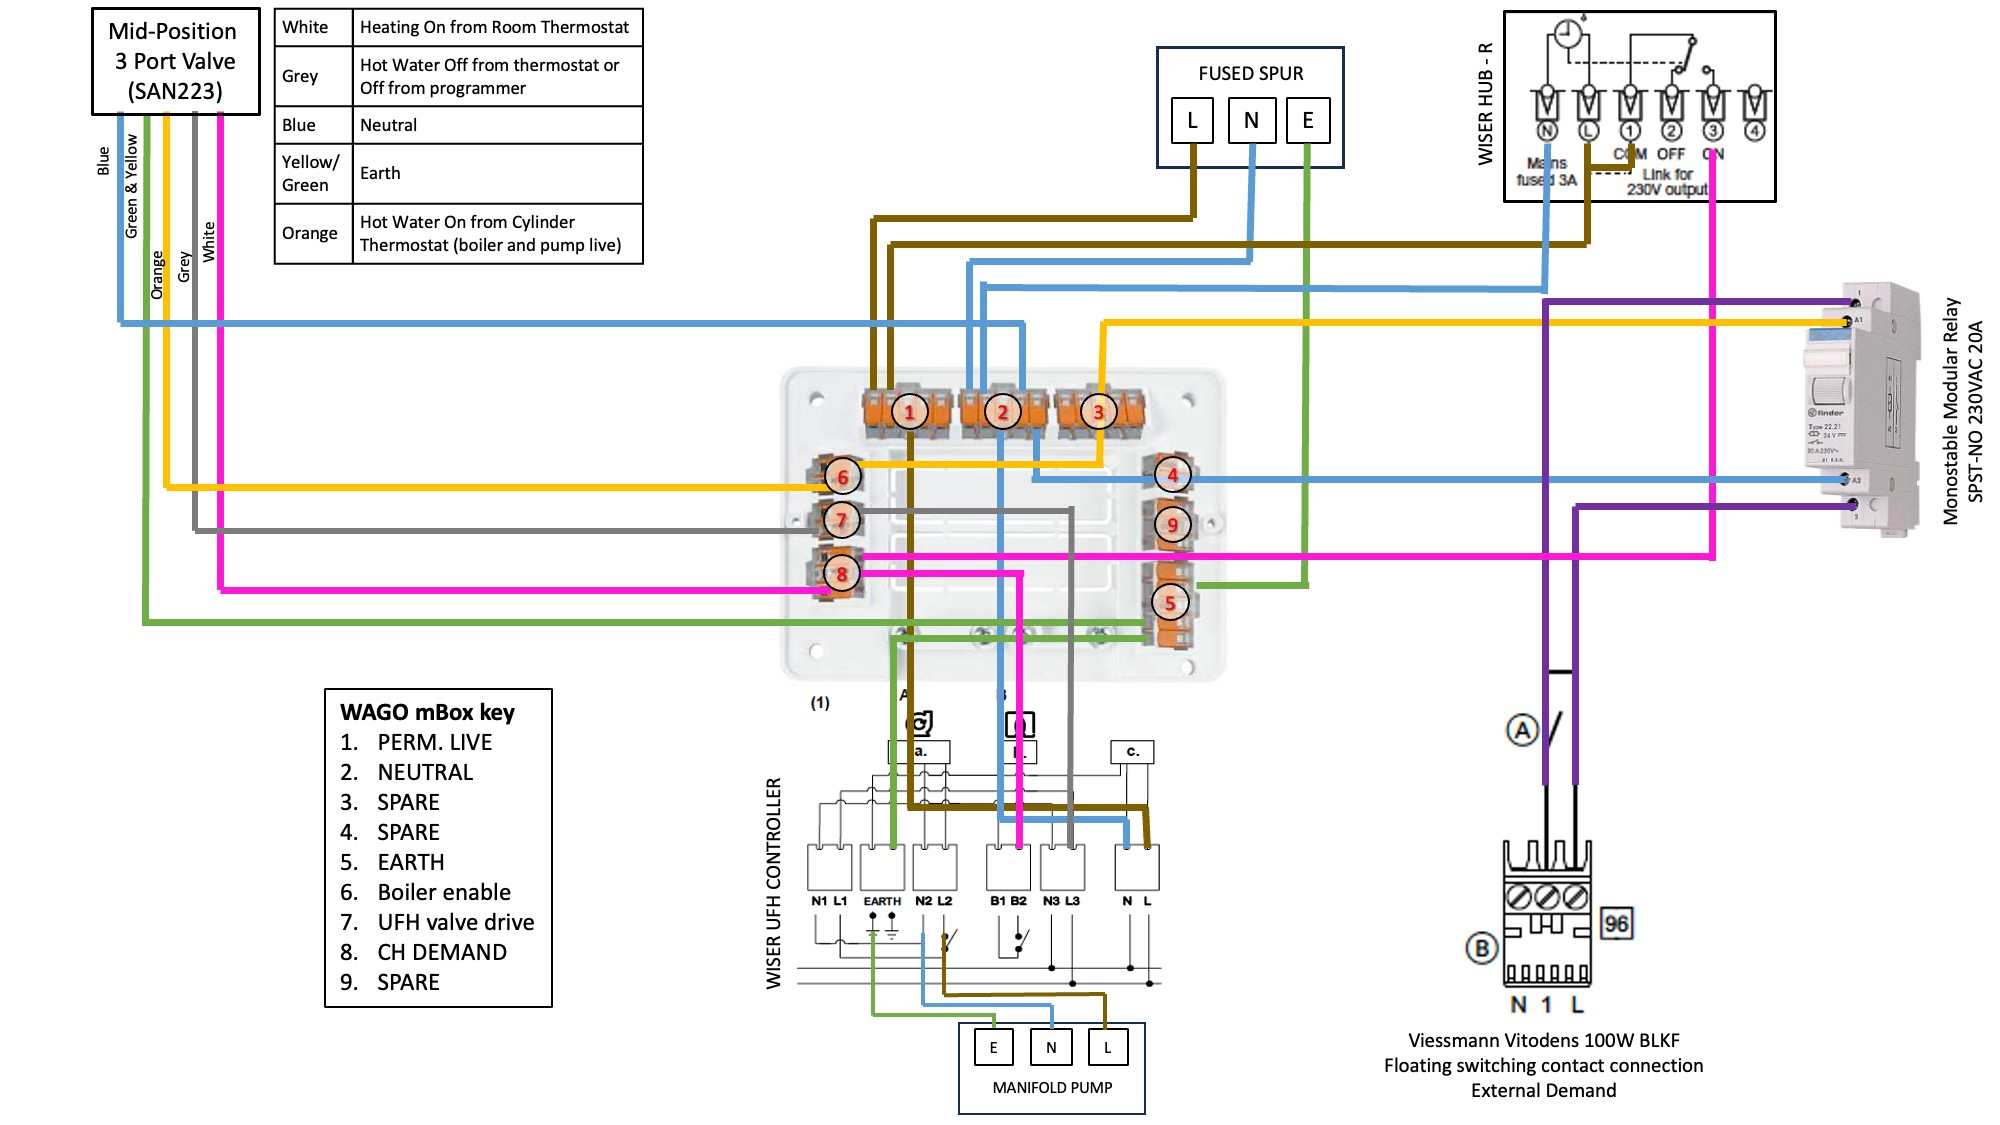
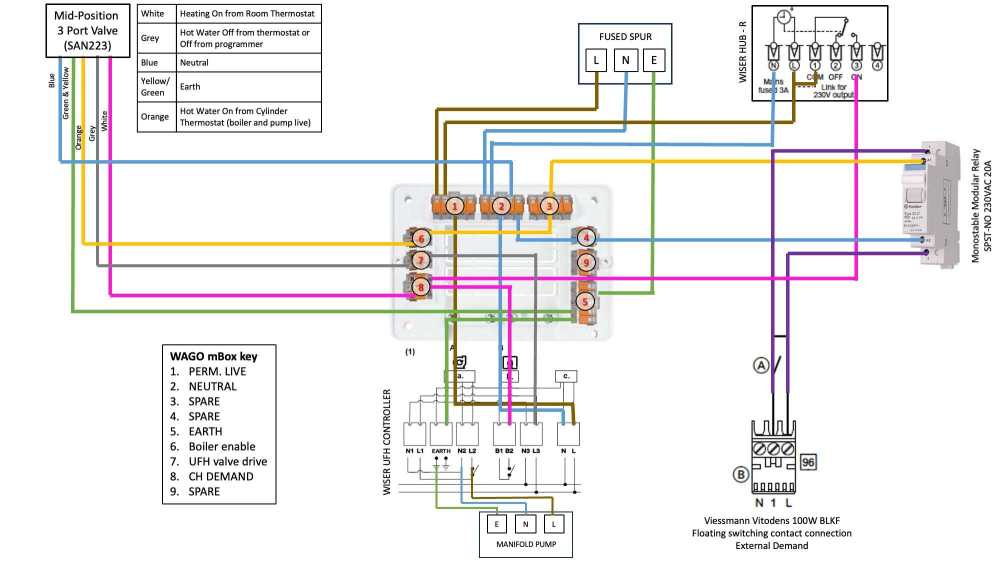
As part of an house extension, I am adding wet UFH to my existing central heating system. Current hardware: Viessmann Vitodens 100-W BLKF Drayton Wiser HubR Multiple wall and radiator thermostats Wago mBox Wiring Centre System is working great so keen to build on it rather than replace with something different. The main issue is that the Wiser HubR is connected to the boiler via Opentherm and according to Drayton this is not advised. My plumber kindly left the cables for the Floating Switch contact connection in the wiring centre ready to make the switch so no need to open the boiler. Future hardware: Viessmann Vitodens 100-W BLKF Drayton Wiser HubR Multiple wall and radiator thermostats Wago mBox Wiring Centre Drayton Wiser Underfloor Heating Controller Mid position 3 port valve (CH,UFH) Finder 22.21.8.230.4000 Monostable Modular Relay SPST-NO 230VAC 20A (boiler expects Could you please sanity check the wiring diagram below Reasoning Behind the Relay is that although the Hub-R and Wiser UFH Controller outputs are “voltage-free capable”, they must be linked from terminal L to provide 230 V. Once linked, they are no longer volt-free. To avoid sending 230 V into Viessmann Port 96, a relay isolates boiler demand completely. This is the part I am questioning myself over. Would be good to get a second opinion
-
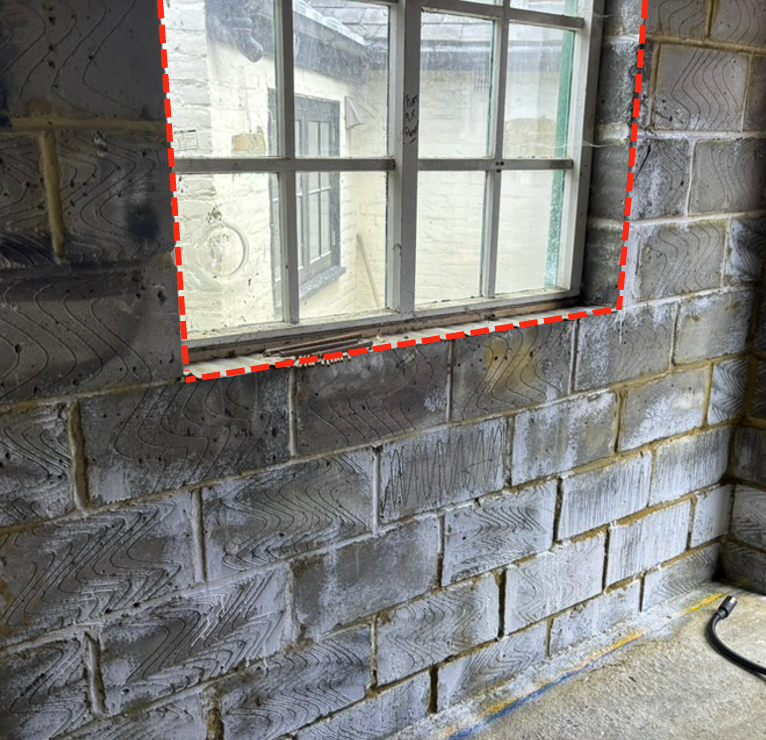
Outside is rendered so I was thinking of filling with render carrier board and render over it
-
Yes it's all going through building regs and I have all my calculations for walls, floors and ceilings. Building control didn't specify for this reveal so trying to get a head start before giving him a call
-
In the process of converting a garage to living accomodation. I'm replacing the old garage windows which were just about good enough for a shed with some high performance aluminium windows. The block walls will be insulated with insulated plasterboard mechanically fixed on to 25 x 47 battens. For the window reveals, I was wondering if it's sensible to use some 25mm PIR around the blockwork joining to the insulated plasterboard insulation layer and install the frames on top (through the PIR into the blockwork) to minimise thermal bridging. Does this make sense?
-
I was thinking of using a foil tape and silicone where the cables breach the vapour control layer based on: As per the literature supplied with the product - an effective air and vapour barrier can be achieved by the taping of board joints using suitable insulation tape, the inclusion of a separate proprietary vapour control layer or the use of a foil backed plasterboard all of these methods are acceptable forms of air/vapour control
-
Thanks @ProDave and @JohnMo. I blame Kingspan who I got the buildup from. I guess they care not of cables.
-
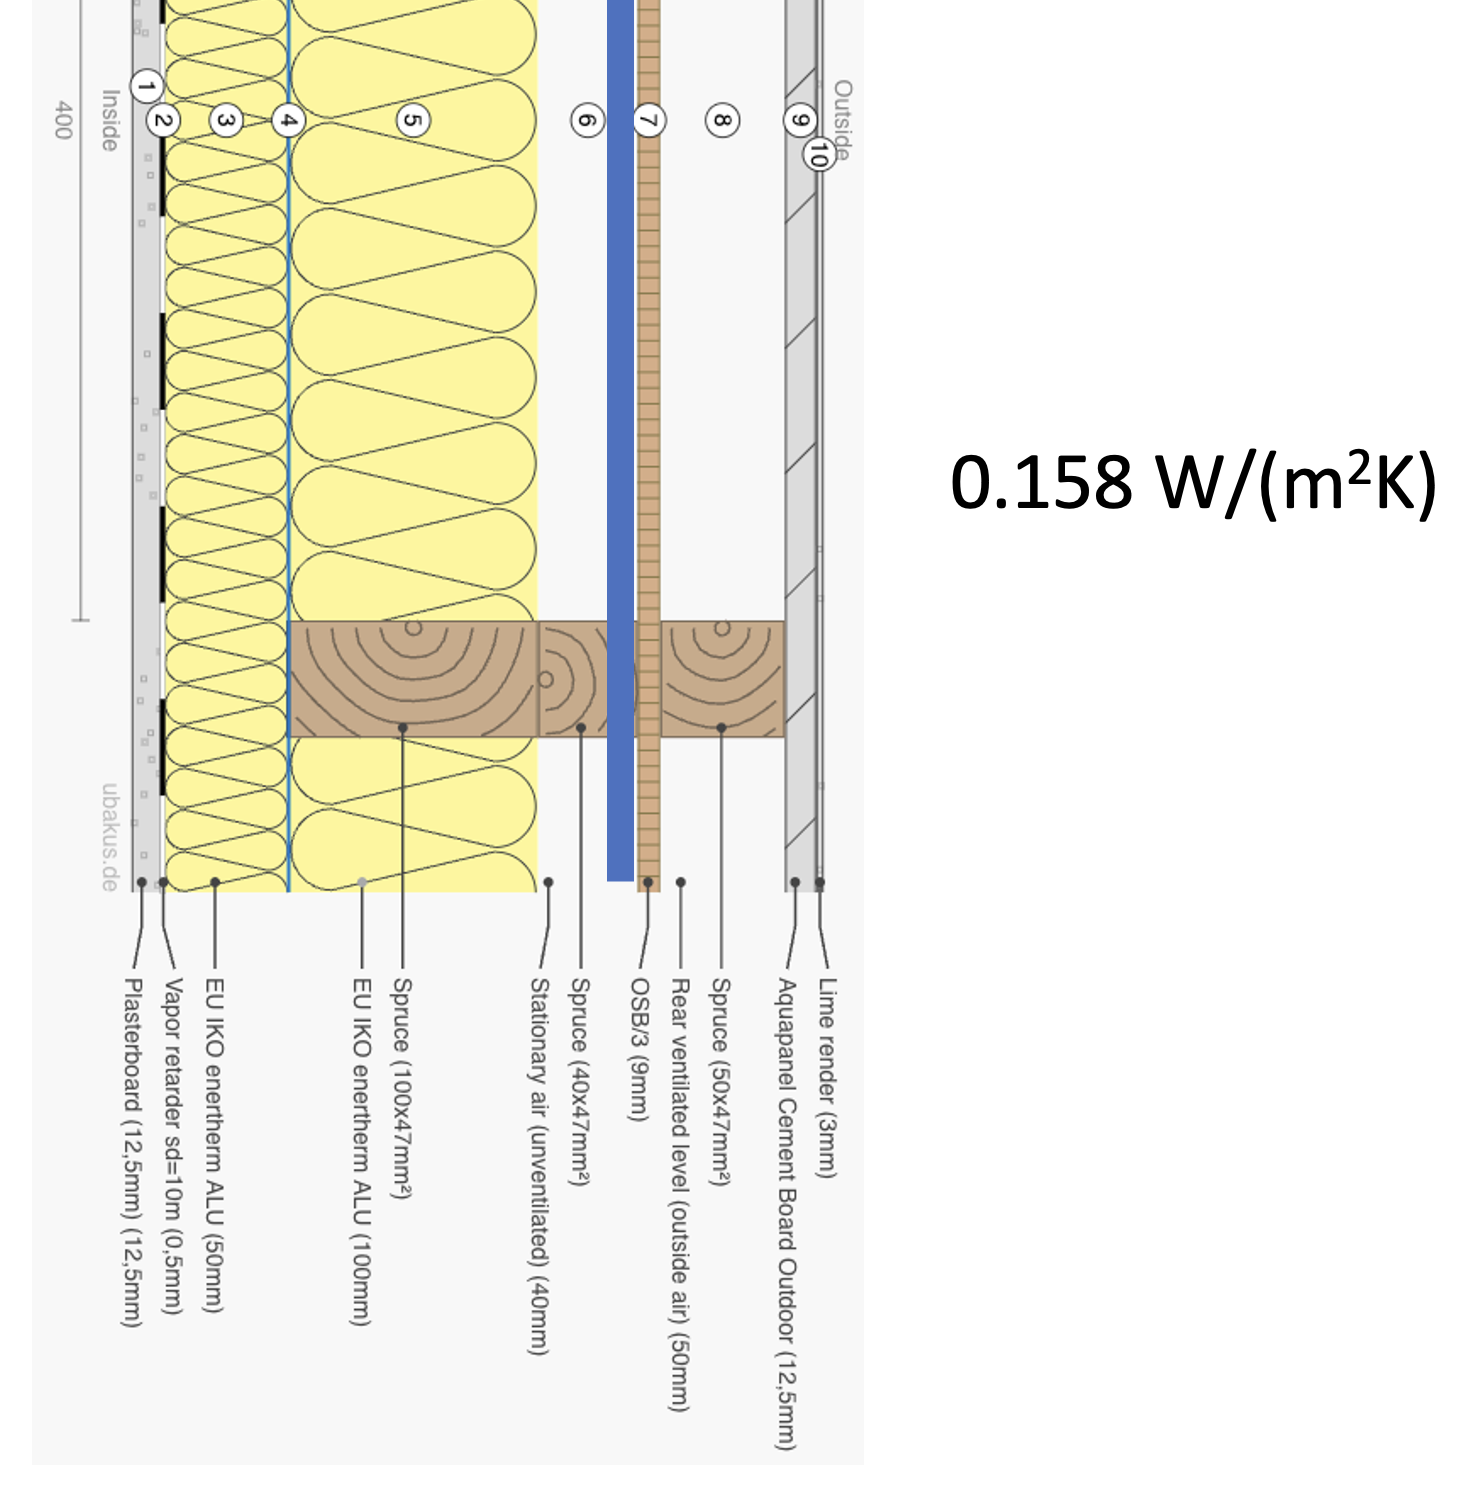
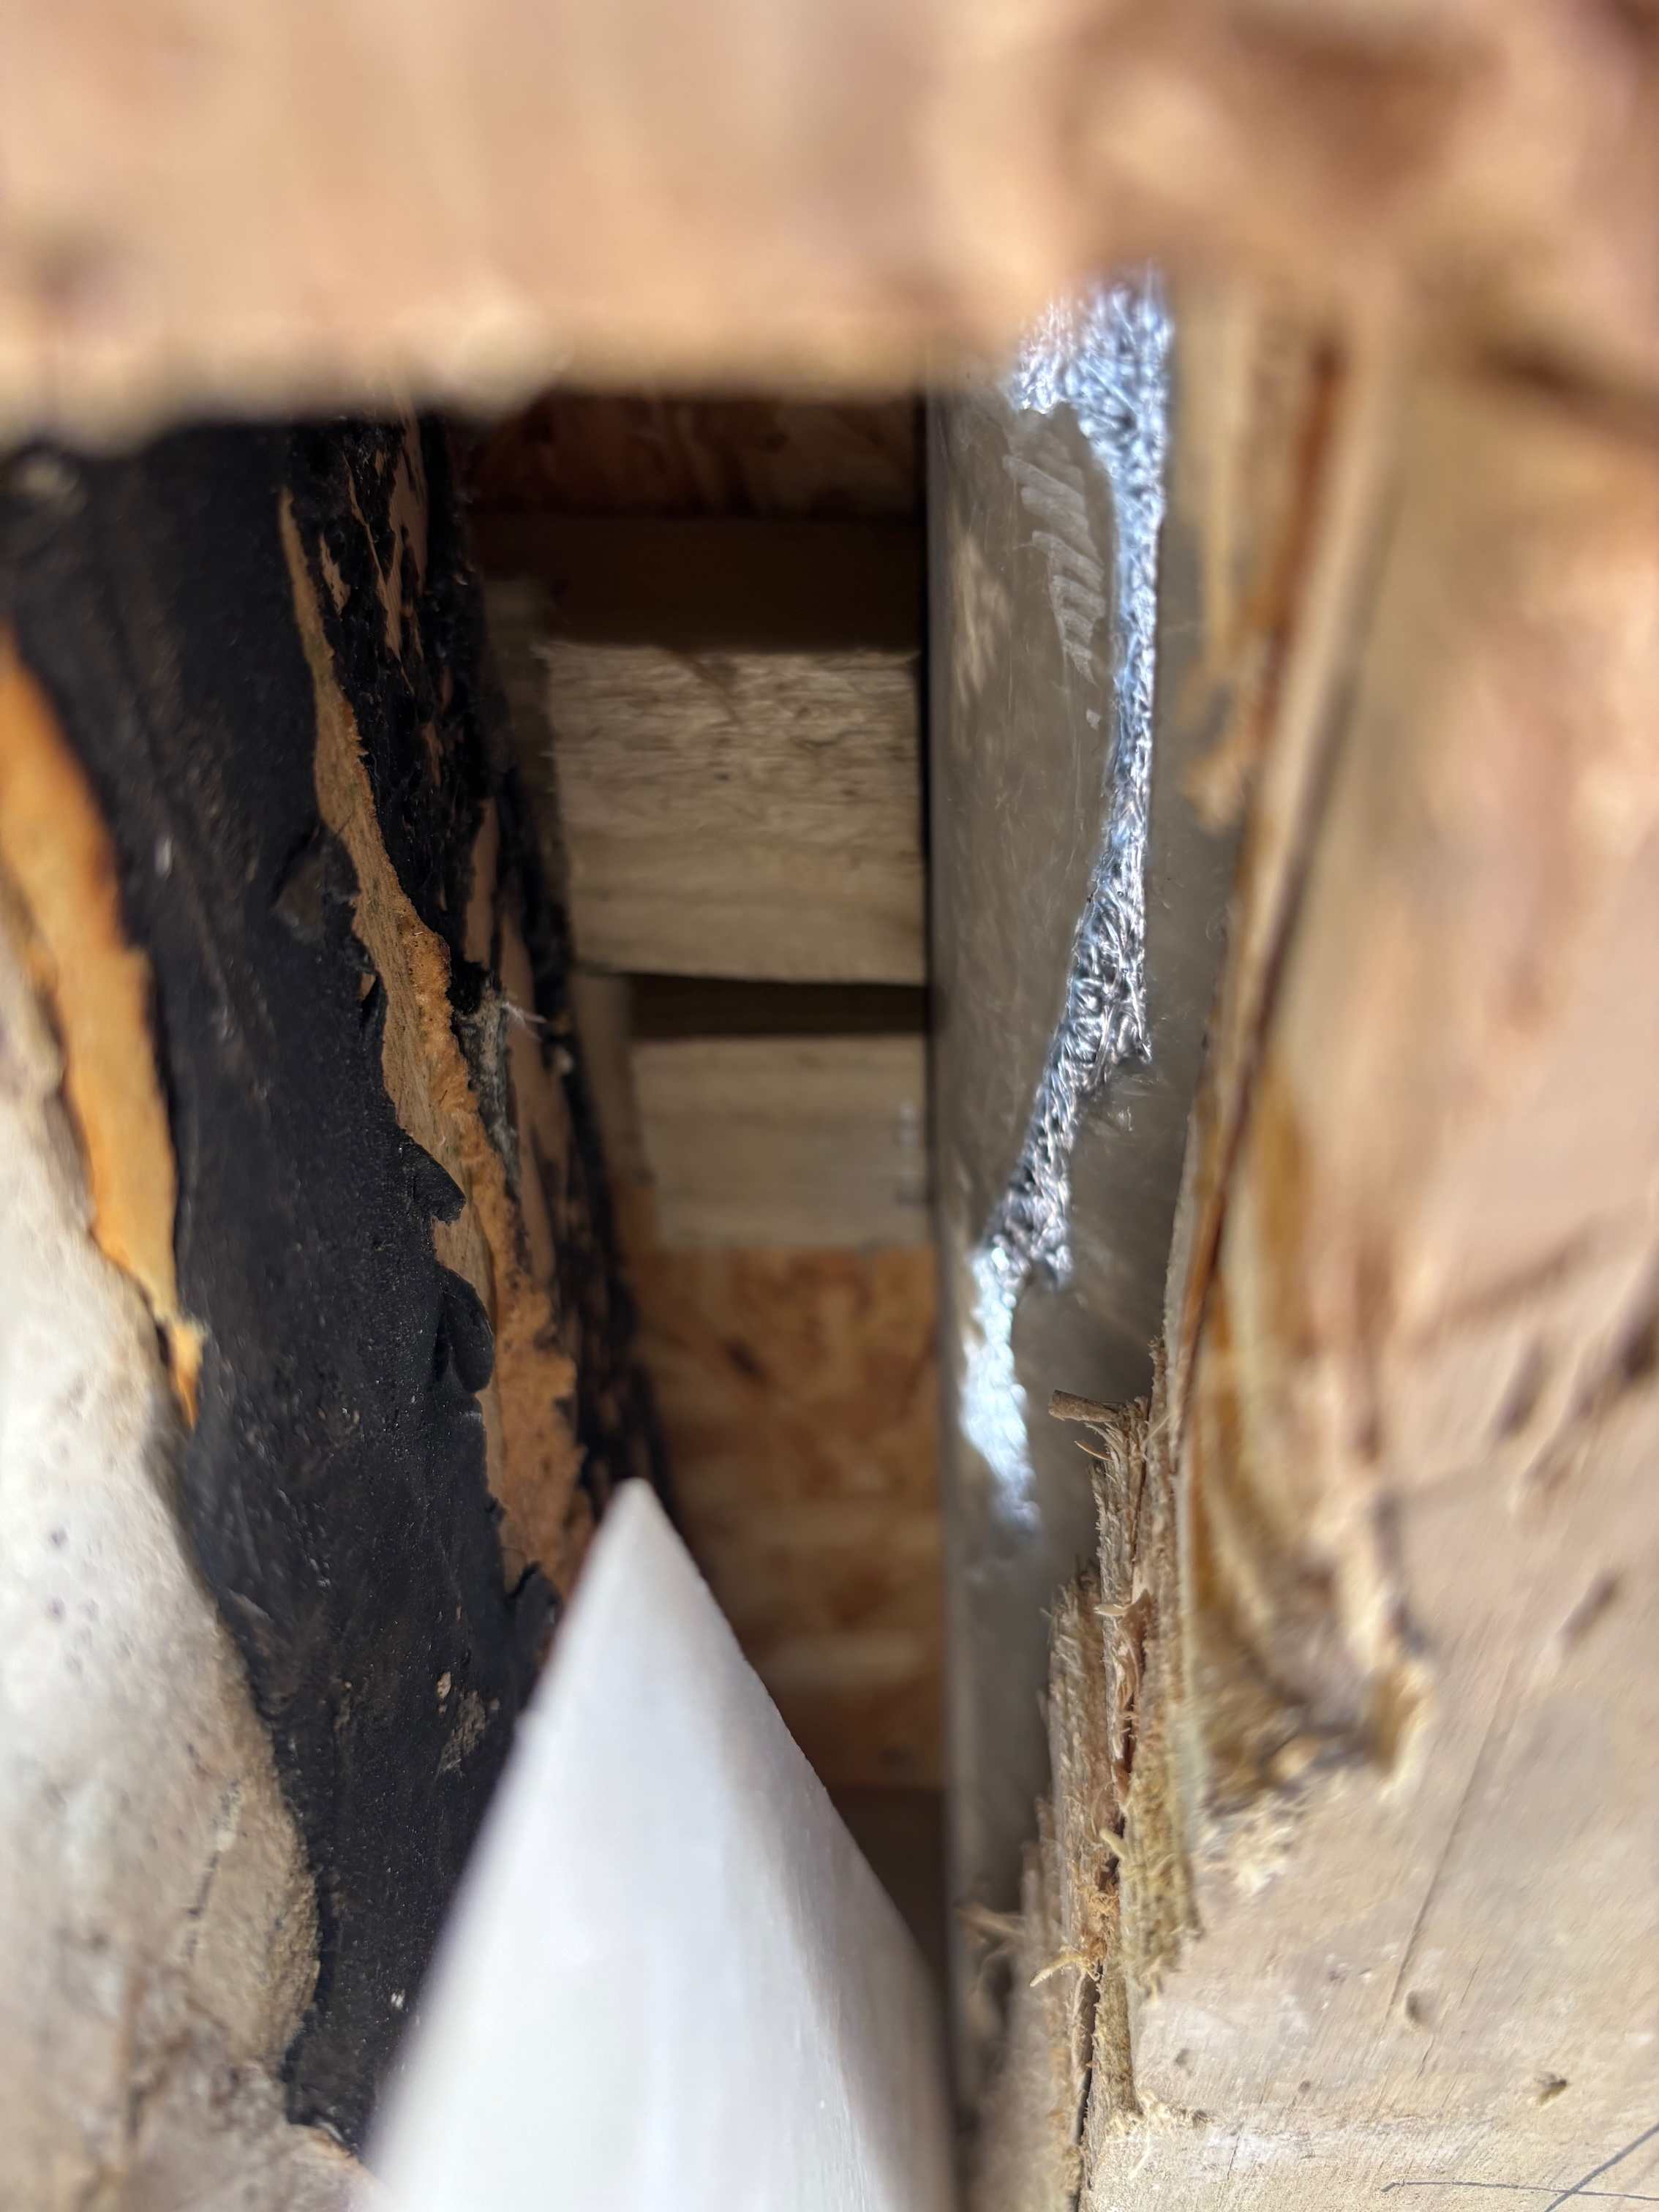
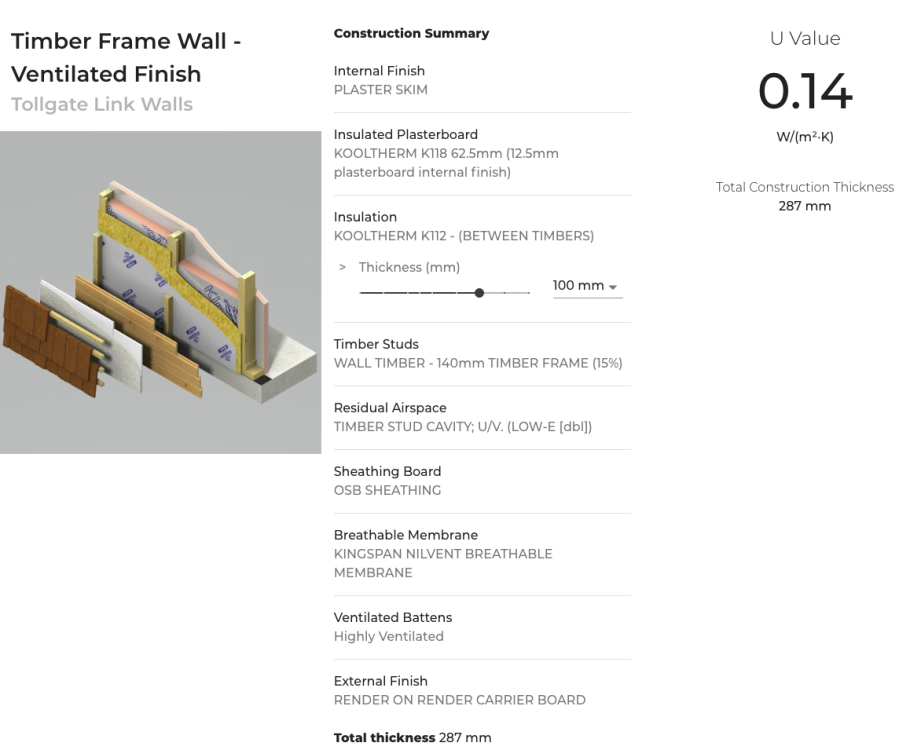
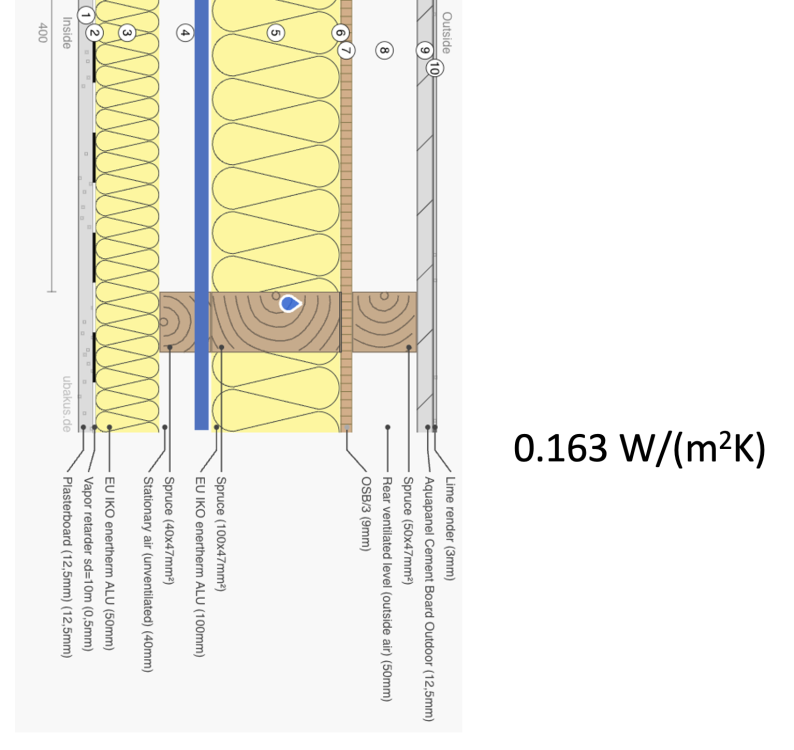
I'm building a small timber frame extension and planning the insulation and cable position currently. The studs are 140mm x 47mm C24 timber. First question is am I ok to notch cables (4mm T+E and 1.5mm 3 core and earth) into the studs which form the outer walls of the extention? I can see loads of info on notching joists but very little on studs. I have two options in terms of placement of the insulation (100mm PIR + 62.5mm Insulated plasterboard) which have an effect on the u-values according to the wonderful Ubakus. 1. Service void below the level of the insulated plasterboard (blue line is position of the cable notched into the studwork, inside to left) giving a u-value of 0.163 2. Service void behind both sheets of insulation (blue line is position of the cable notched into the studwork, inside to left) giving a u-value of 0.158 Which is better or does it not really matter and I go for best u-value?

-
Thank you @ToughButterCup. So I sent a very very extensive list of all the issues as soon as he sent the invoice. I was thinking this over last night and here's what i have done which I think is fair. I got a list of all materials (£503.50) I subtracted all materials which they had damaged or would need to be removed as part of remediation (Code 4 Lead, Some of the Timber, GRP edging which differed from what I specified (£180.34) I subtracted a list of materials I have had to buy to replace things they damaged so far (£131.57) Transferred over to his account this morning £191.59 and sent him a detailed breakdown explaining exactly what I had done. I specifically said I refuse to pay for labour given the quality of the work and have noted that this is a full and final settlement, that I won't be returning to request funds for as yet unknown damage and waived the guarantee he was due to send on payment. The guy was working on his own the first day and with his brother in law the following day so at worst it's just lost revenue in labour and an uncomfortable family discussion for him. I'll also not be writing any reviews which would have been damaging. Personally I think this feels about right but happy to be shot down
-
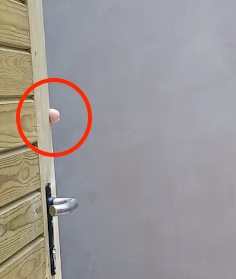
@Mr Punter Looking good, but I don't want to ask what this is hiding behind the door
-
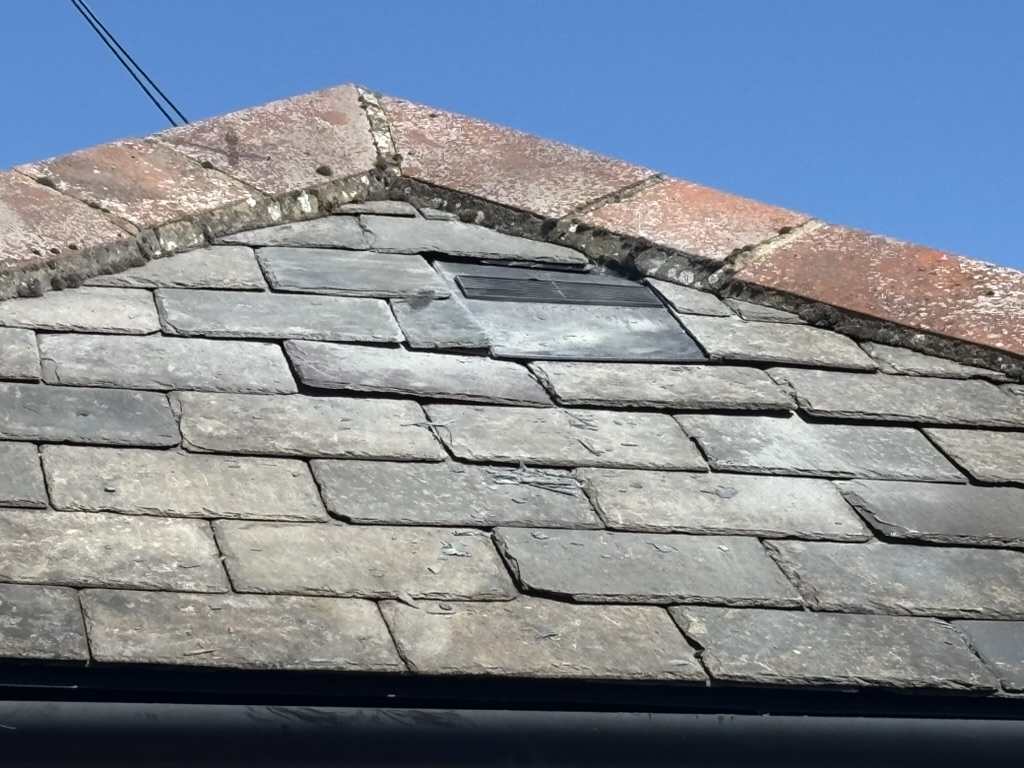
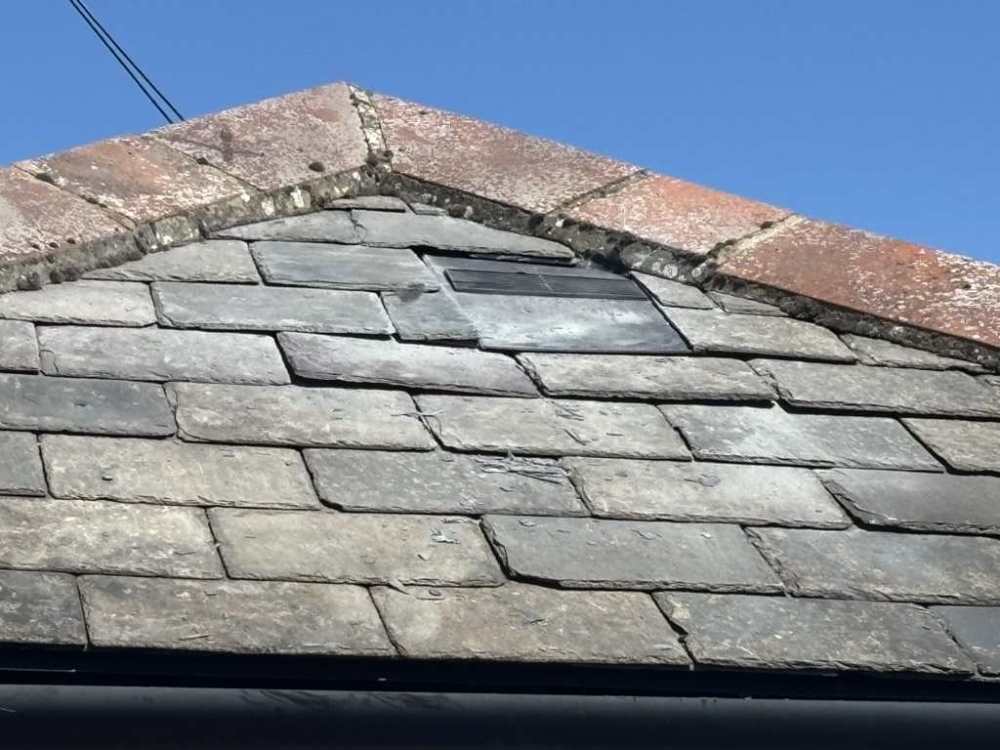
Thanks @Mr Punter. I hired a "roofer" for this job to lean on their expertise and advise on things like this. Problem here is that the quality of work is so bad I didn't trust him when he said that. Will put a centred vent out of my mind. I'm far more worried about the lovely old slates which have been decimated. They are supposed to have been neatly trimmed around the vent
-
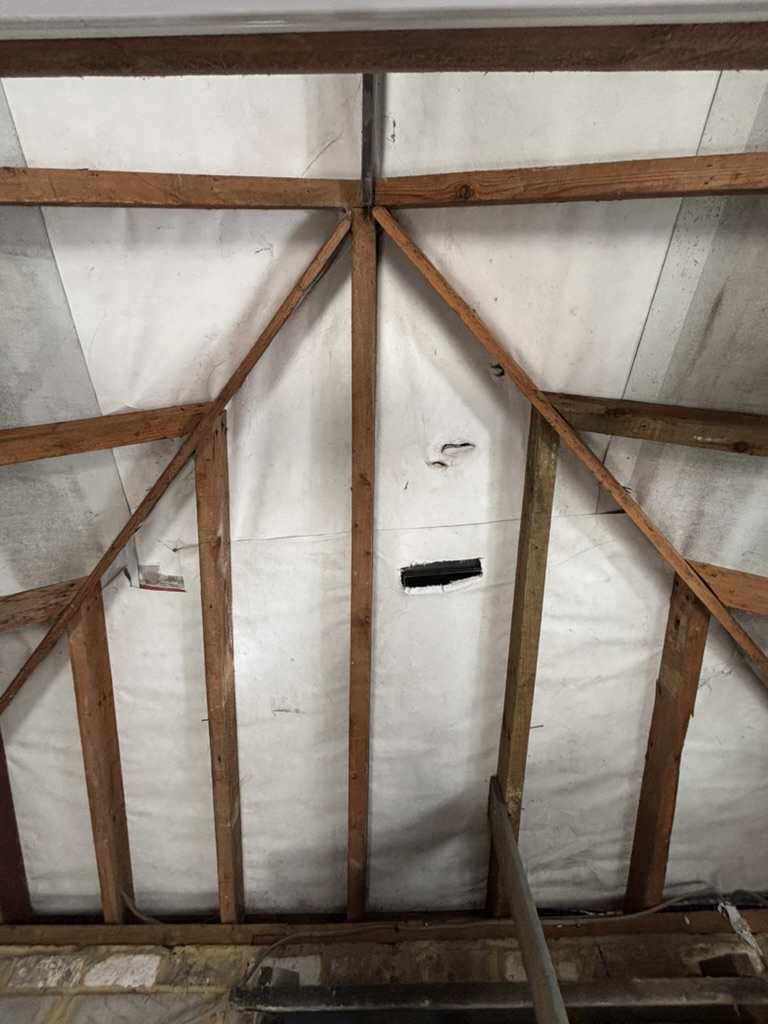
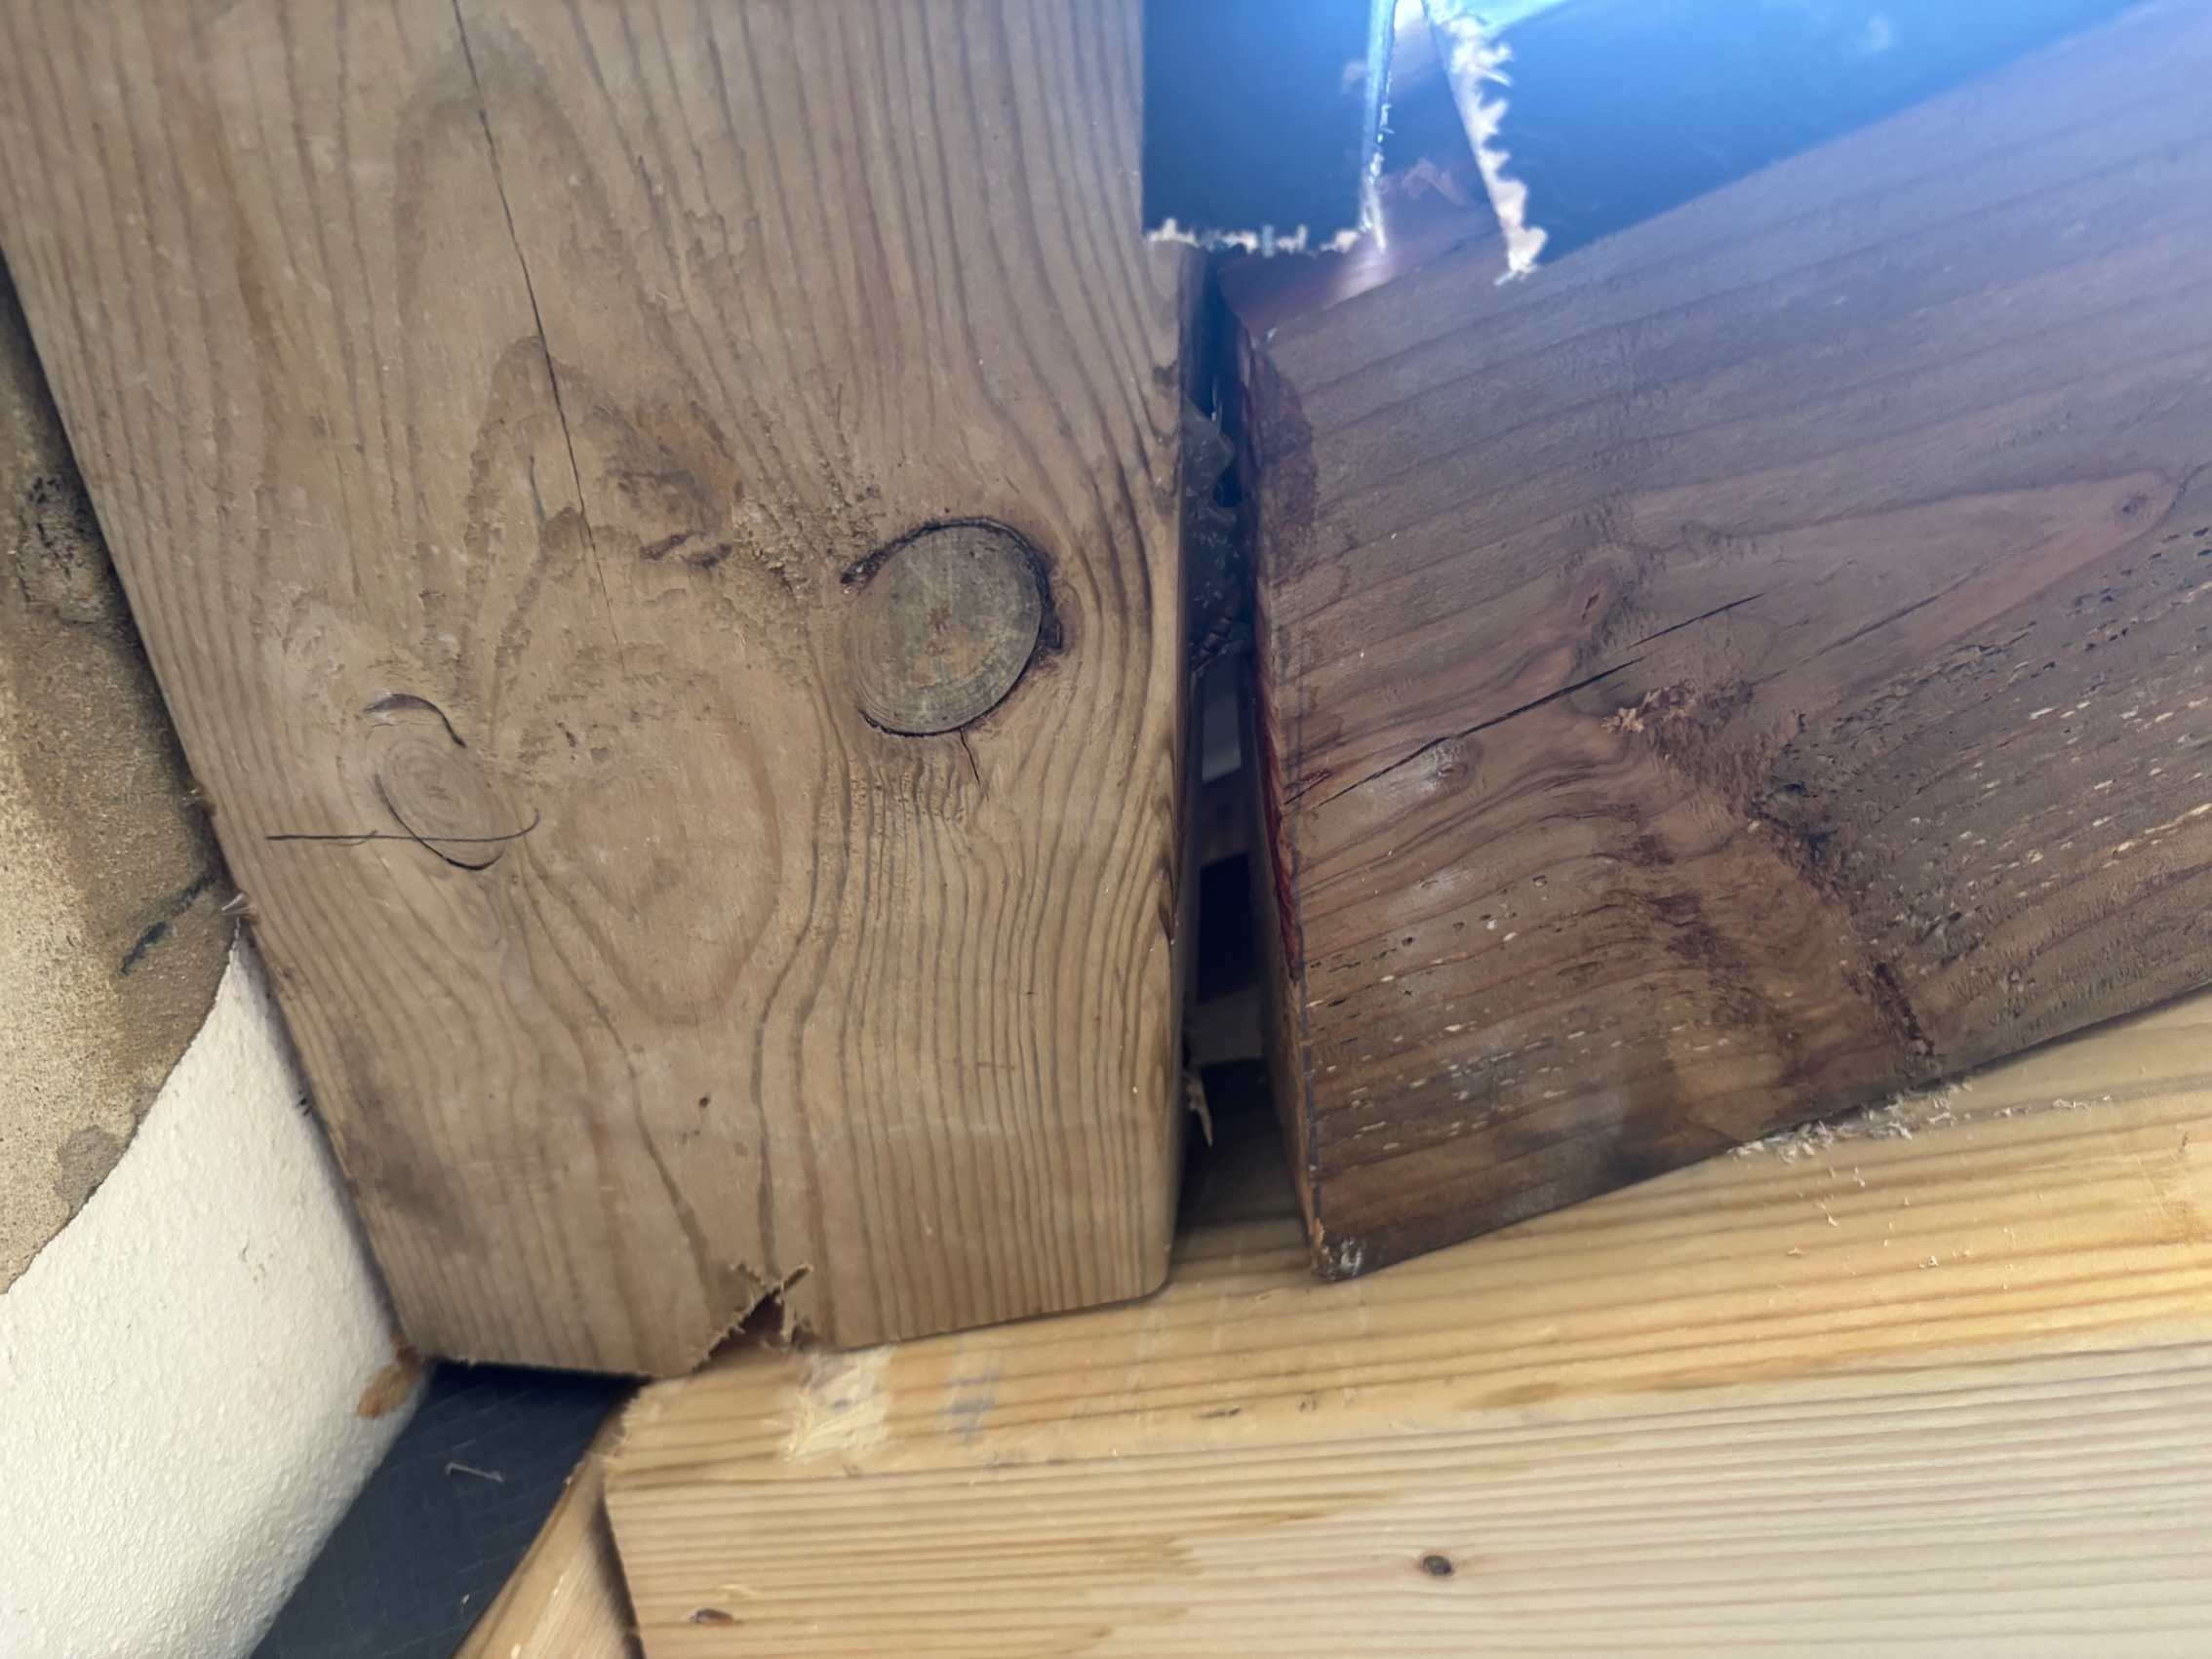
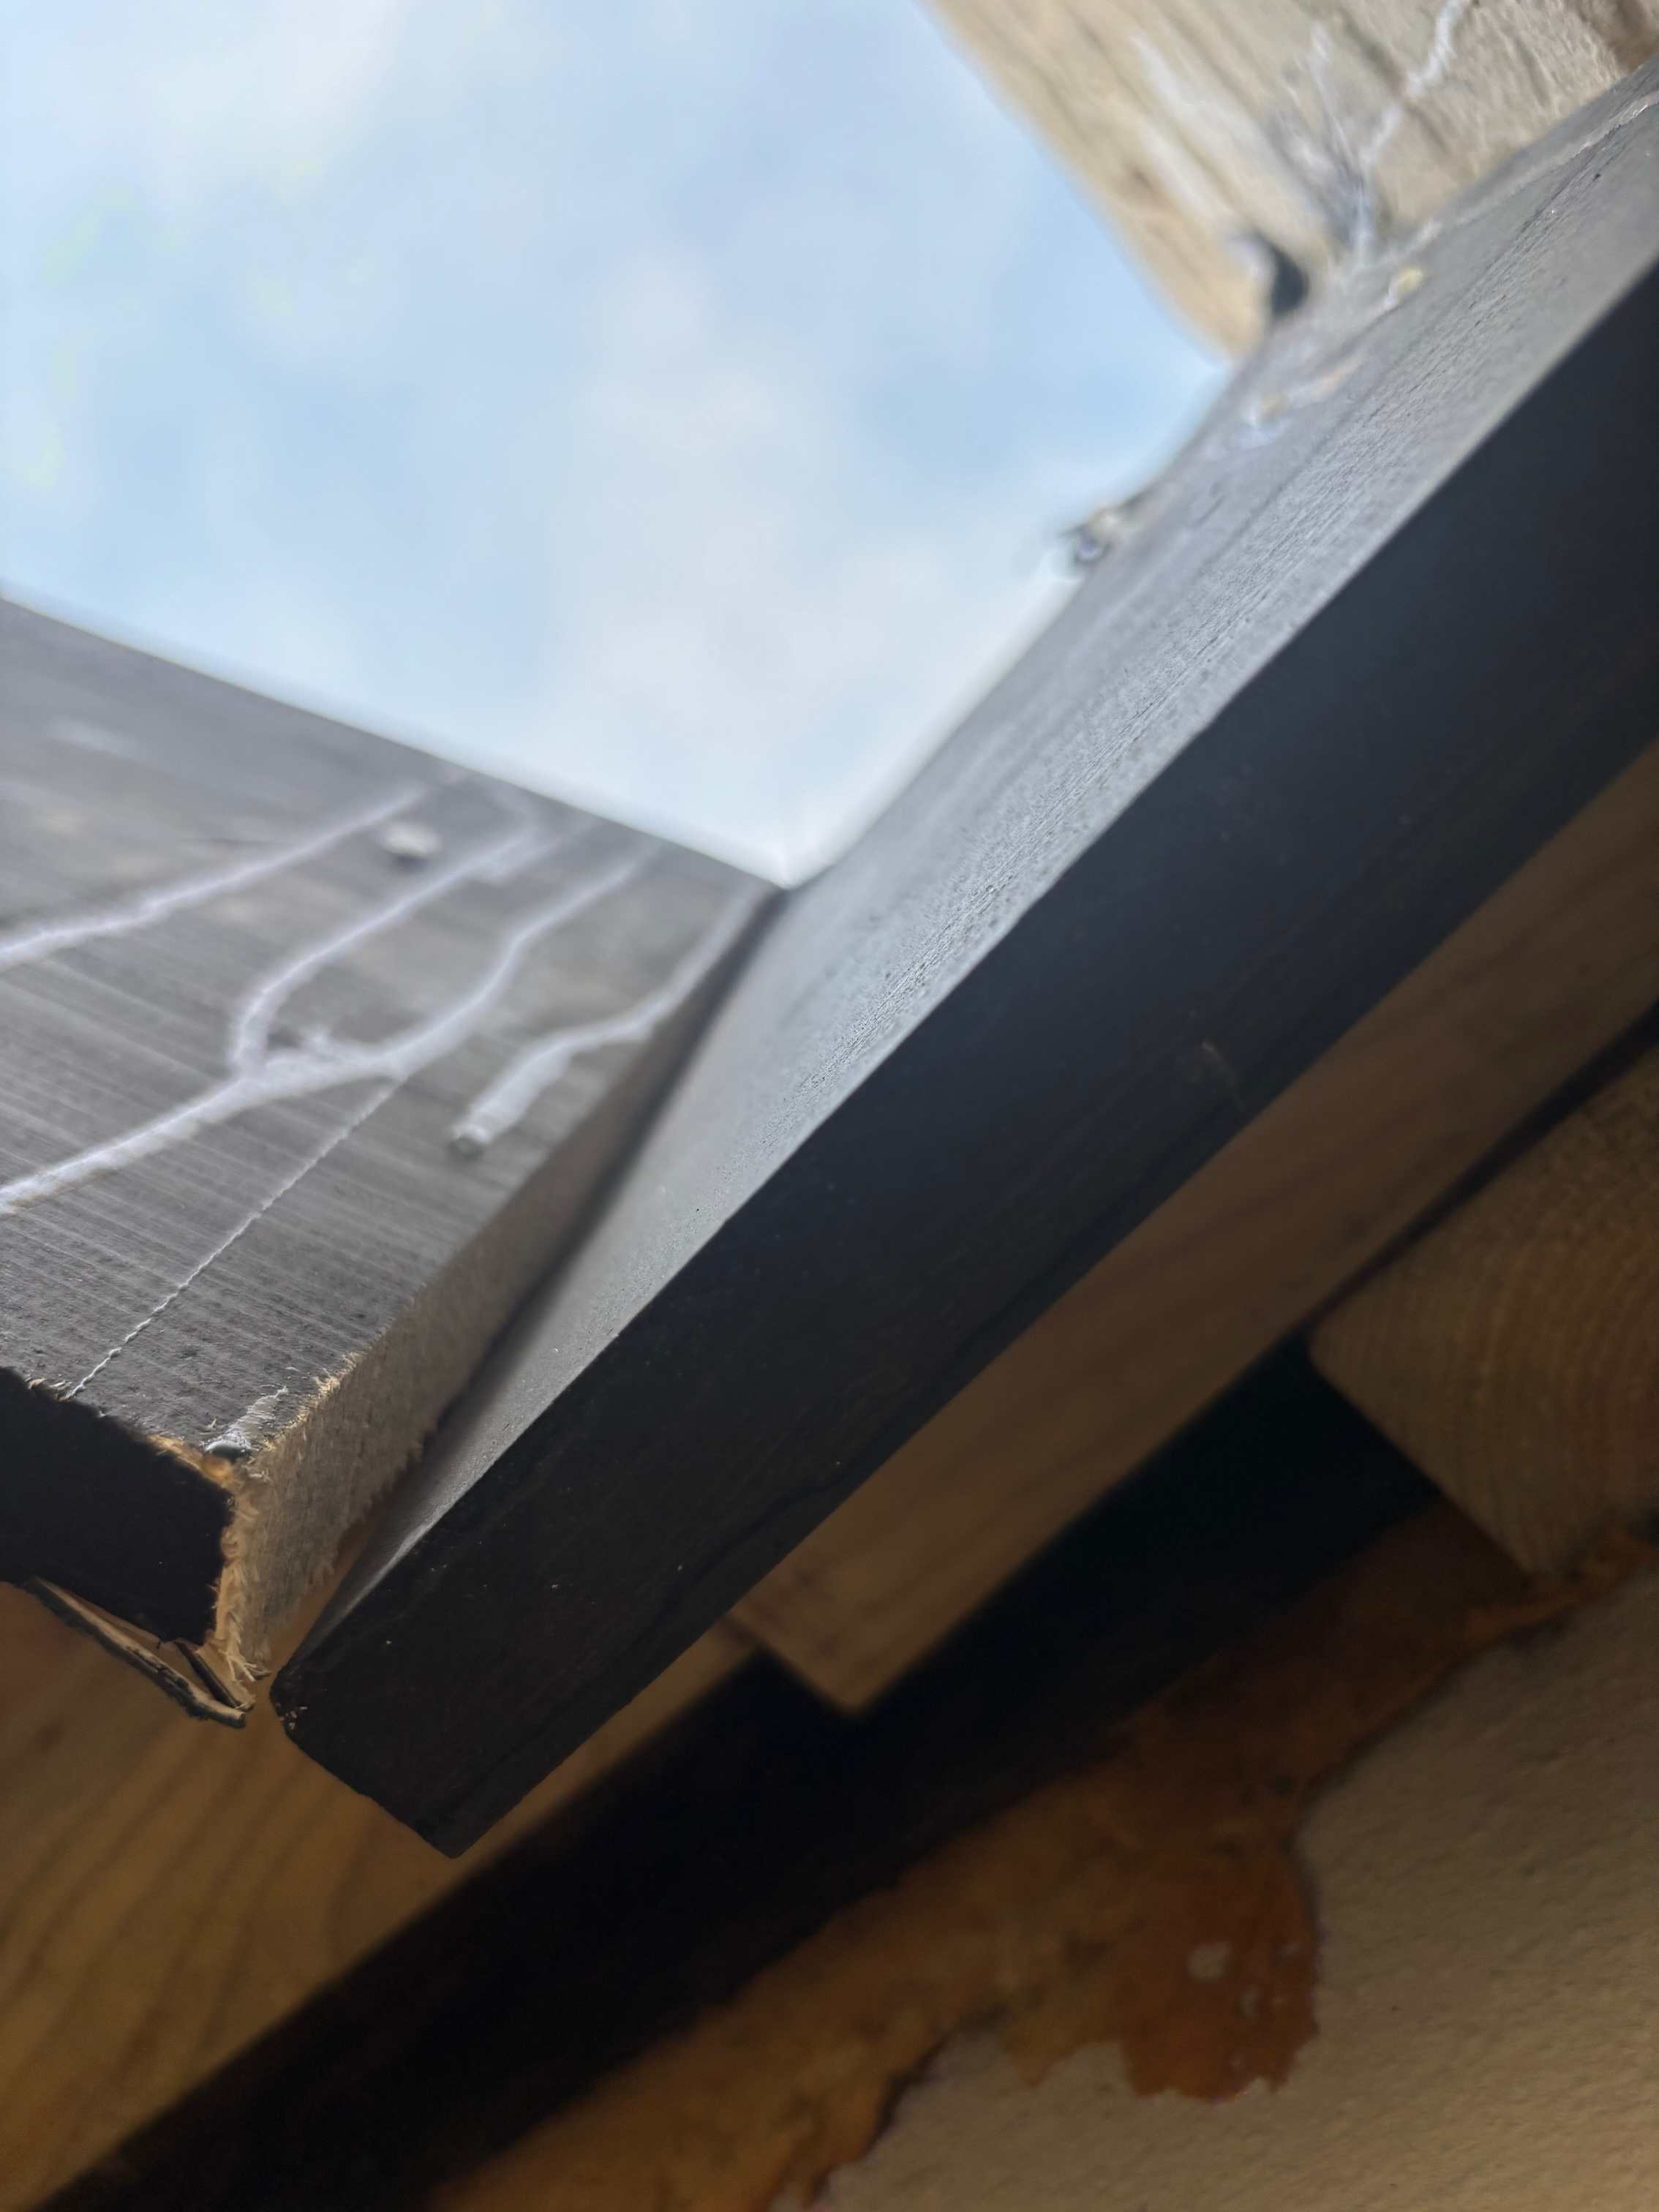
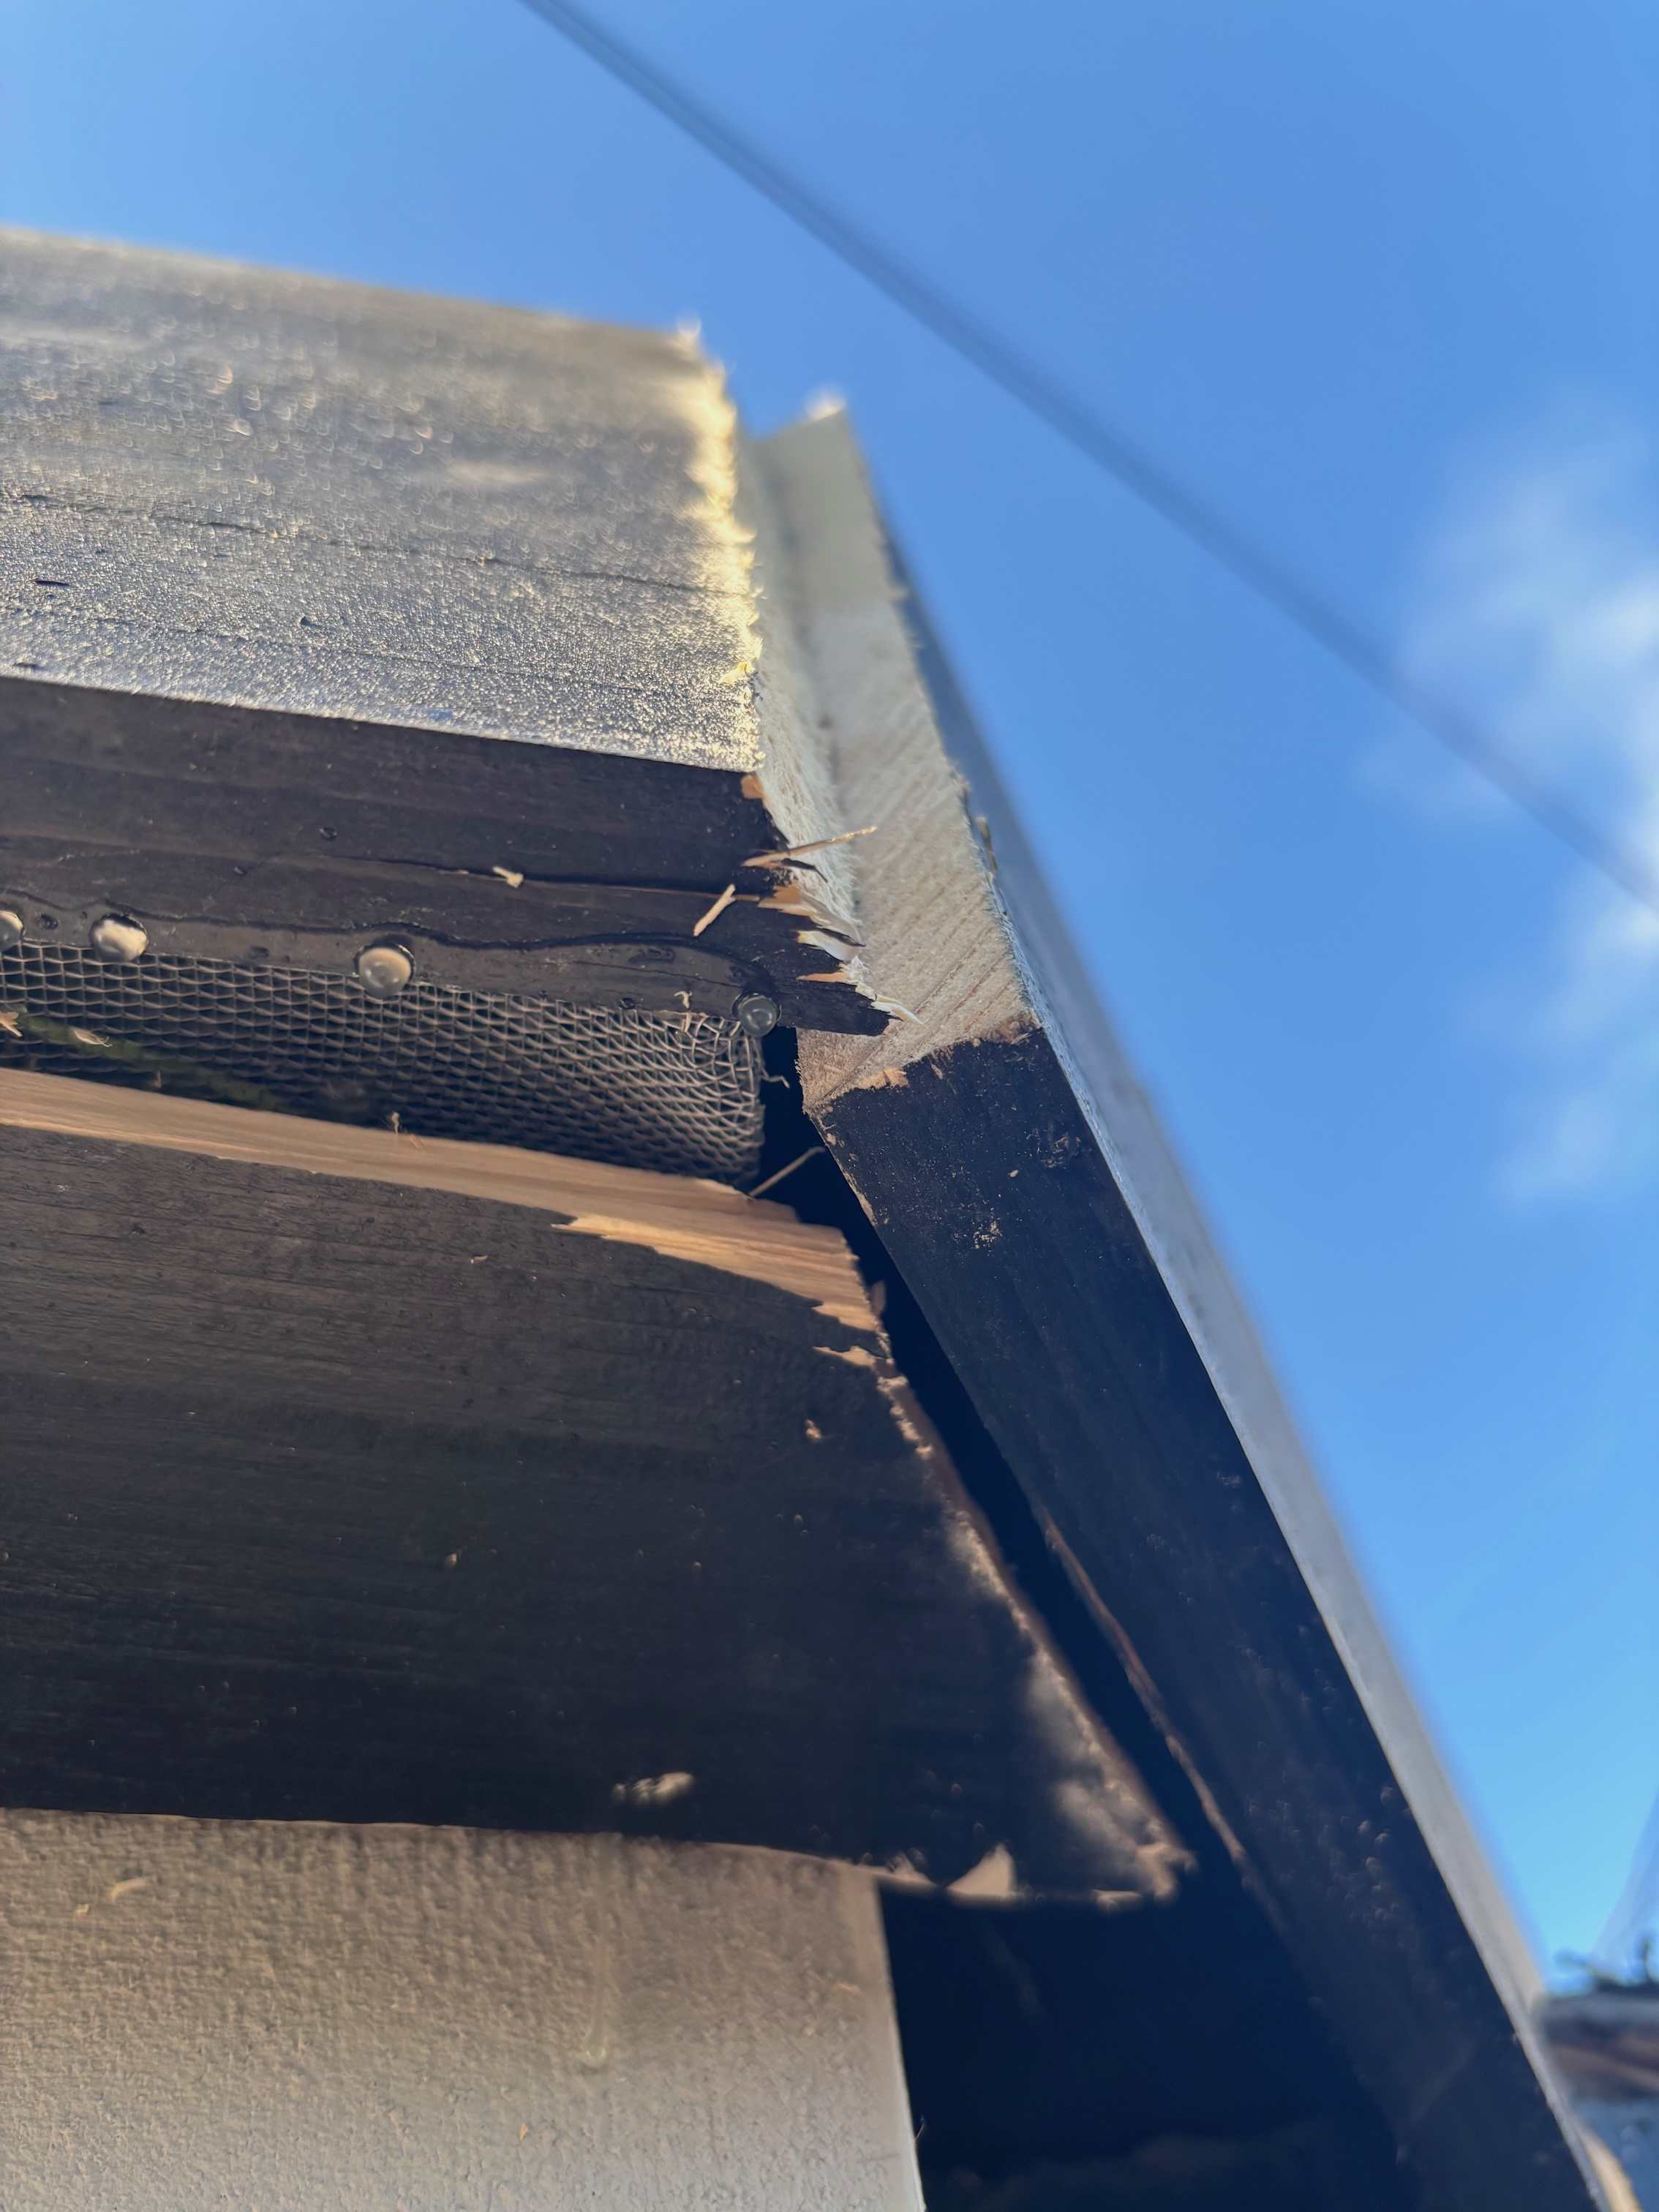
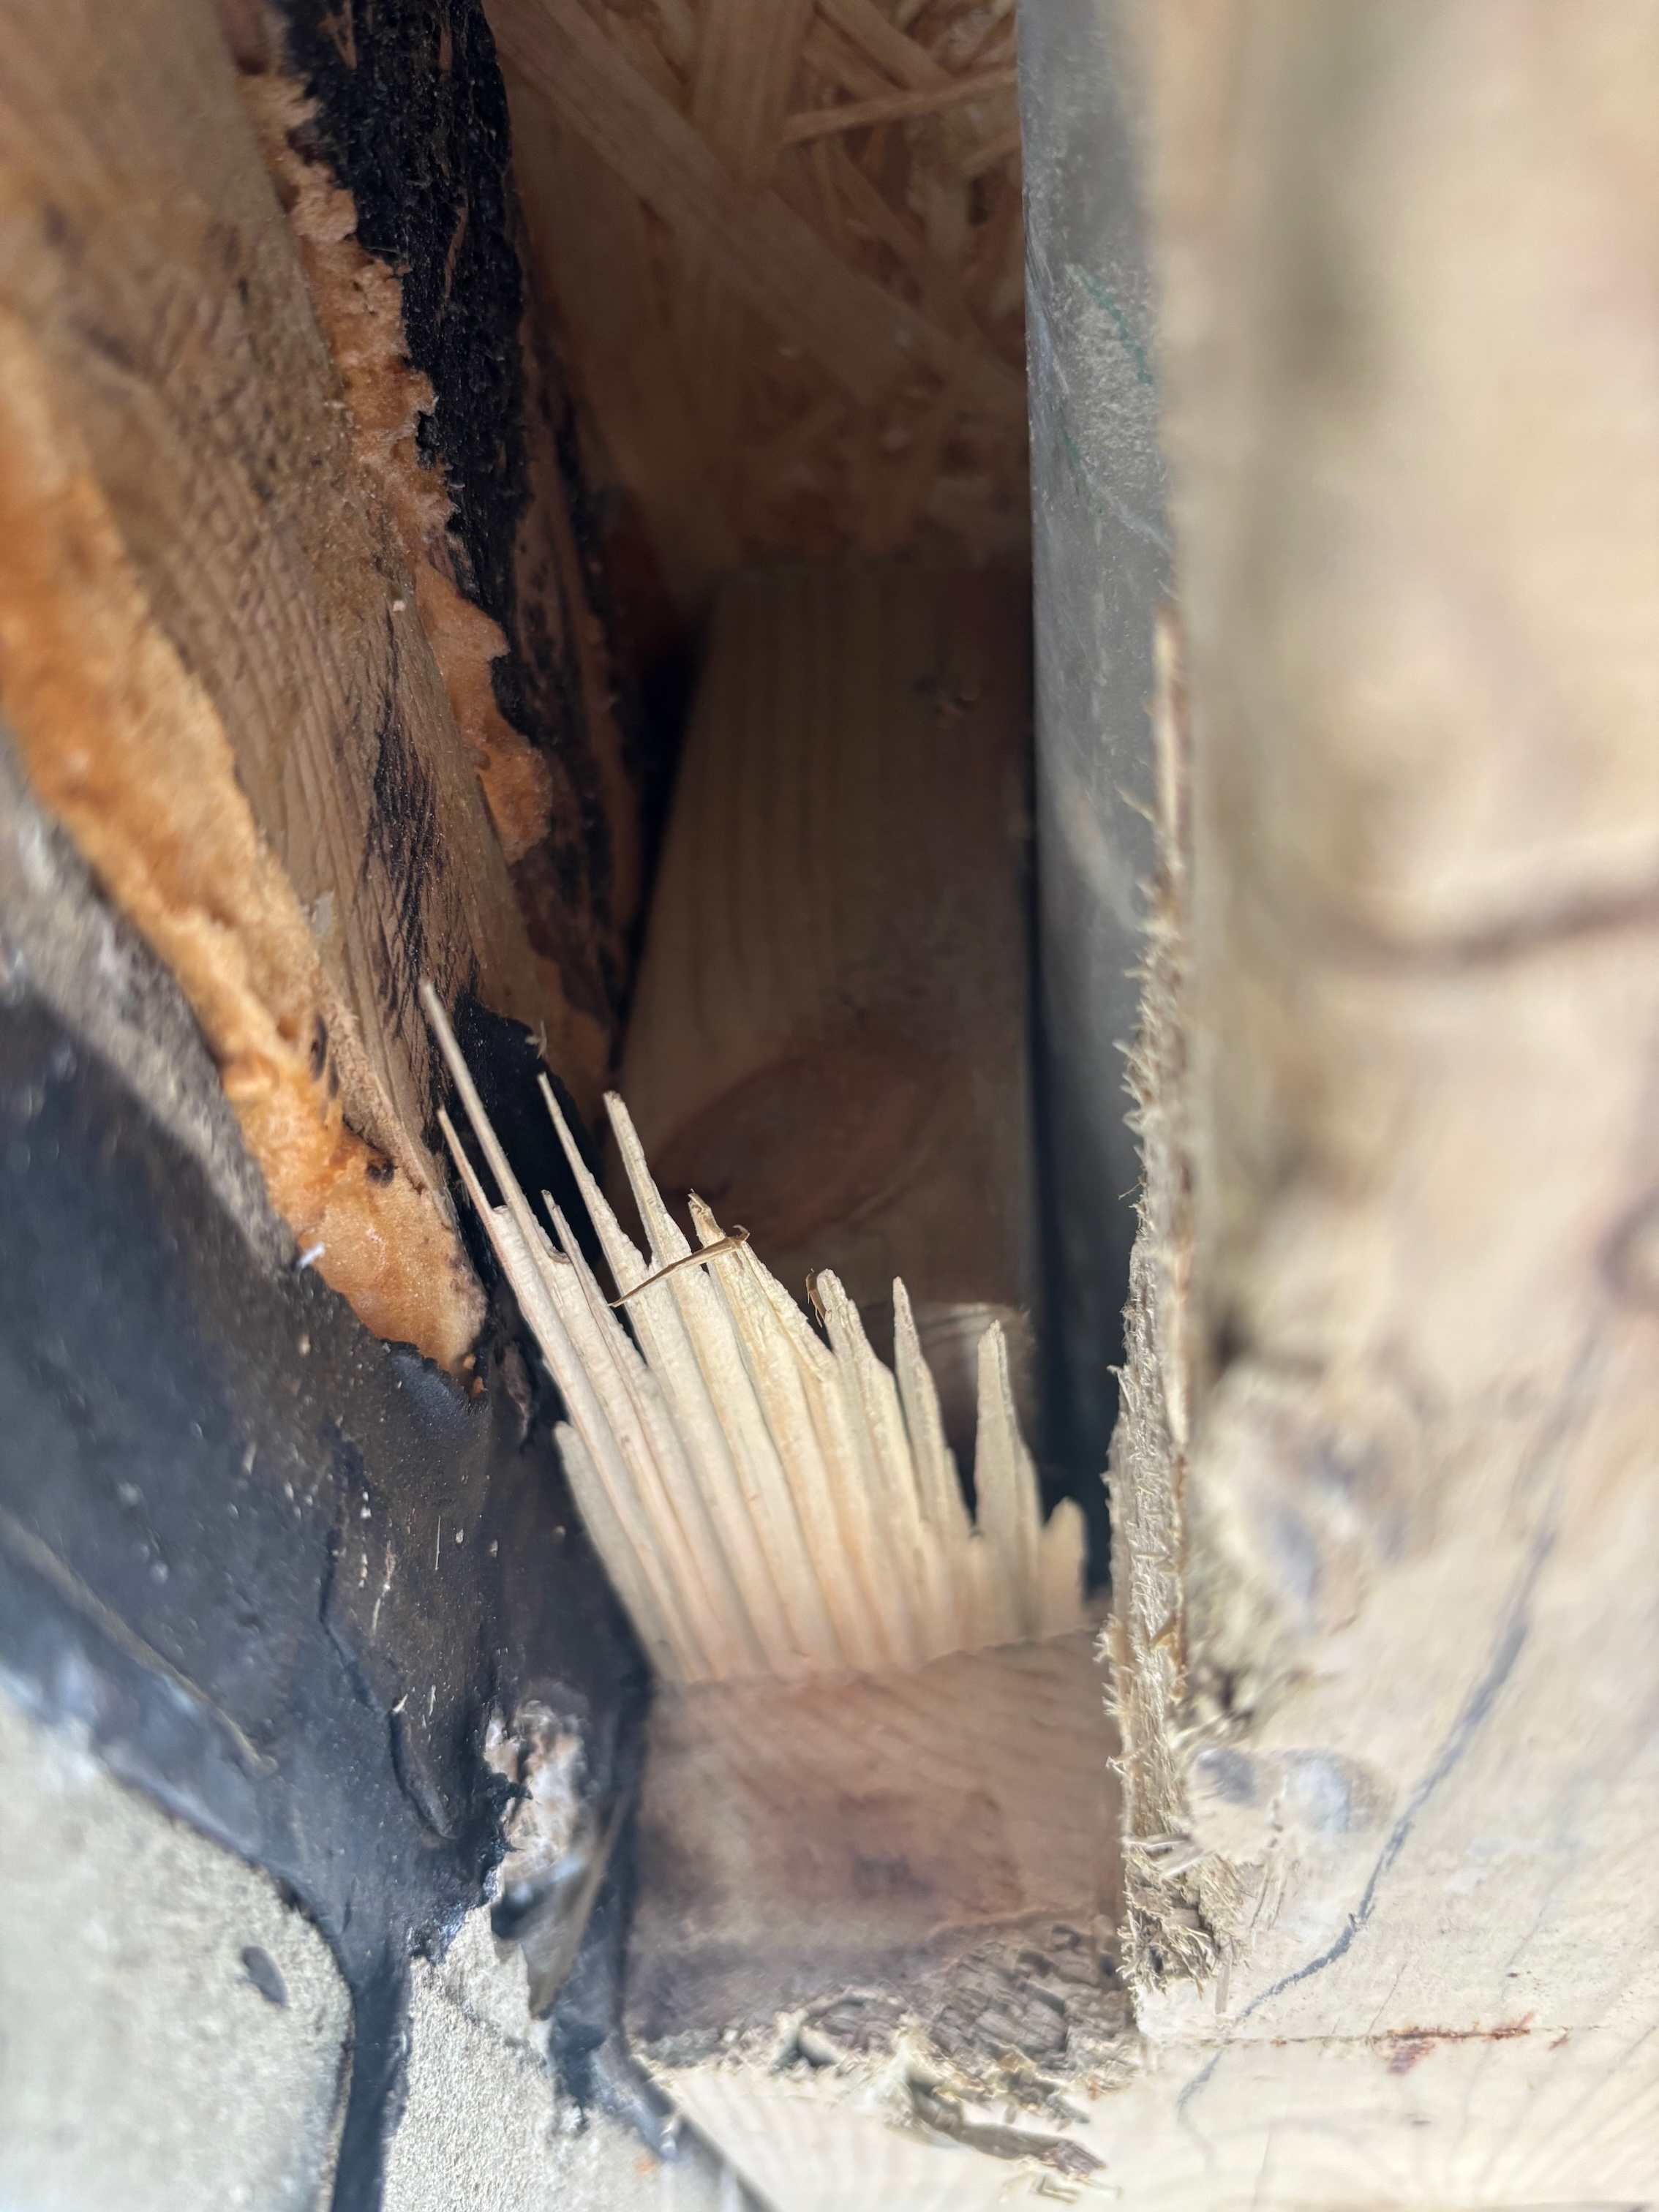
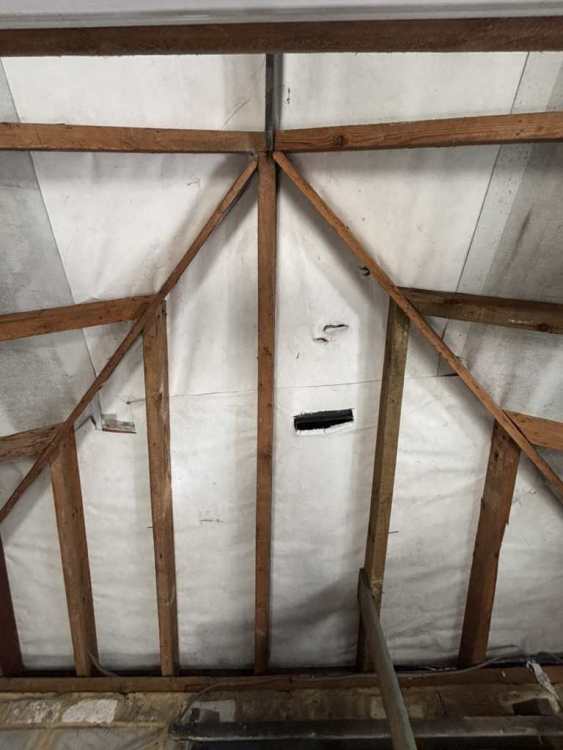
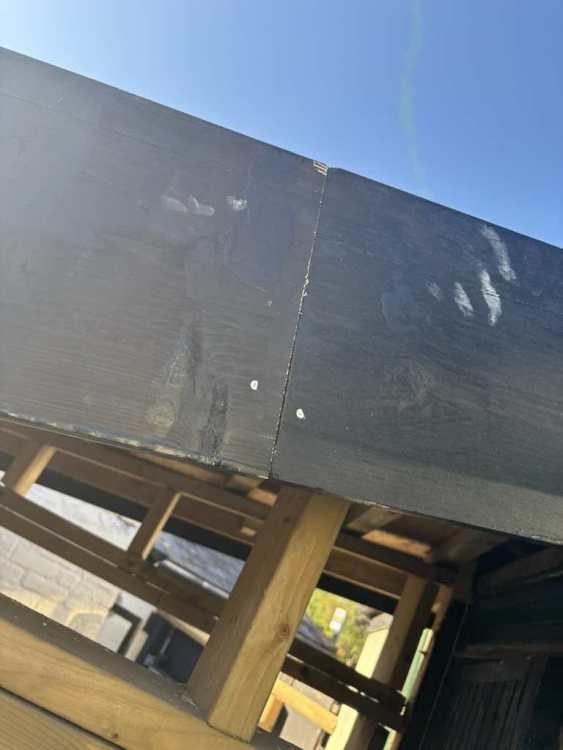
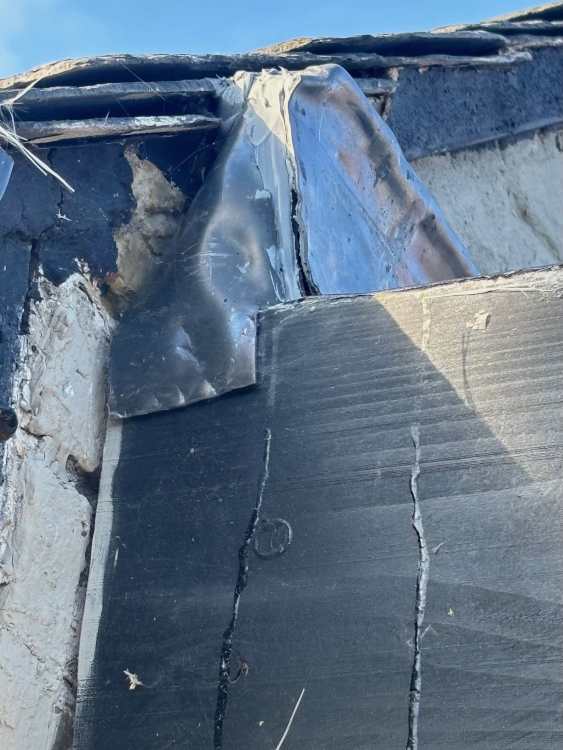
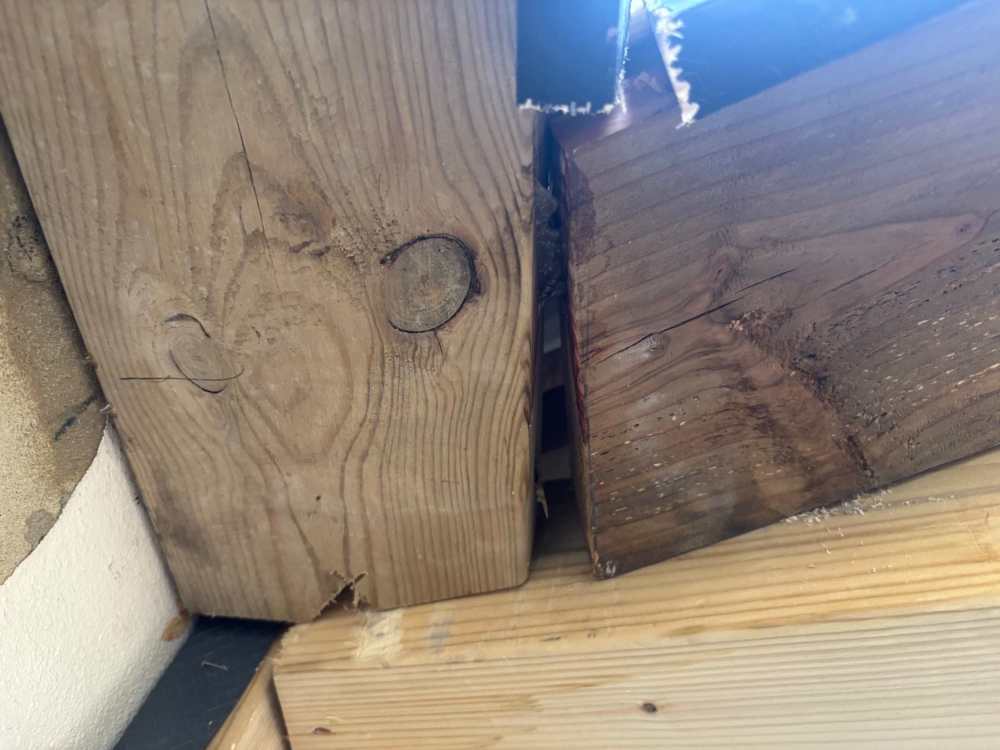
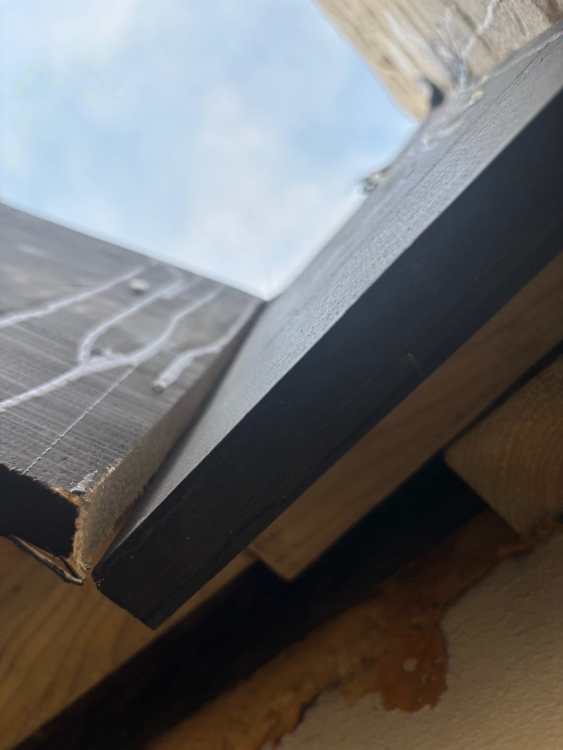
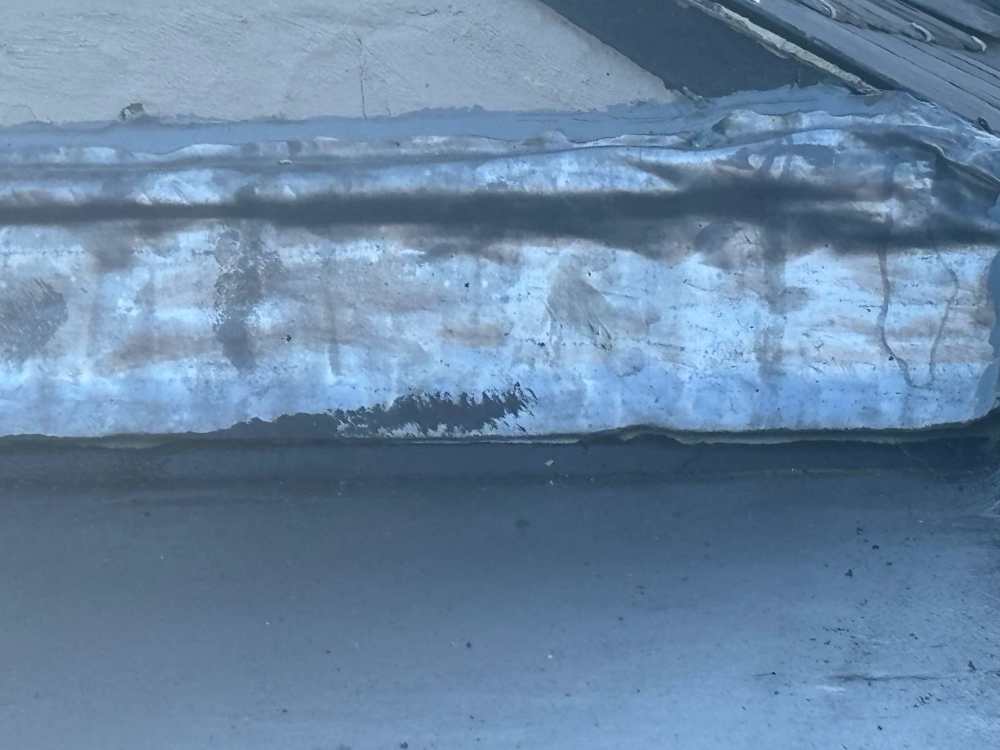
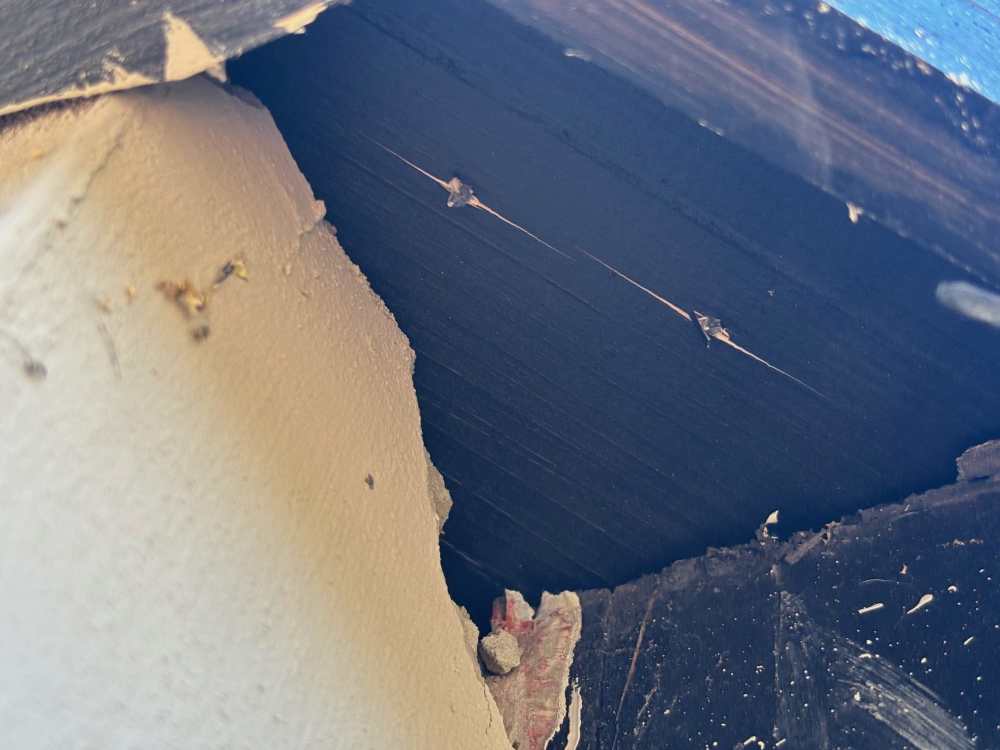
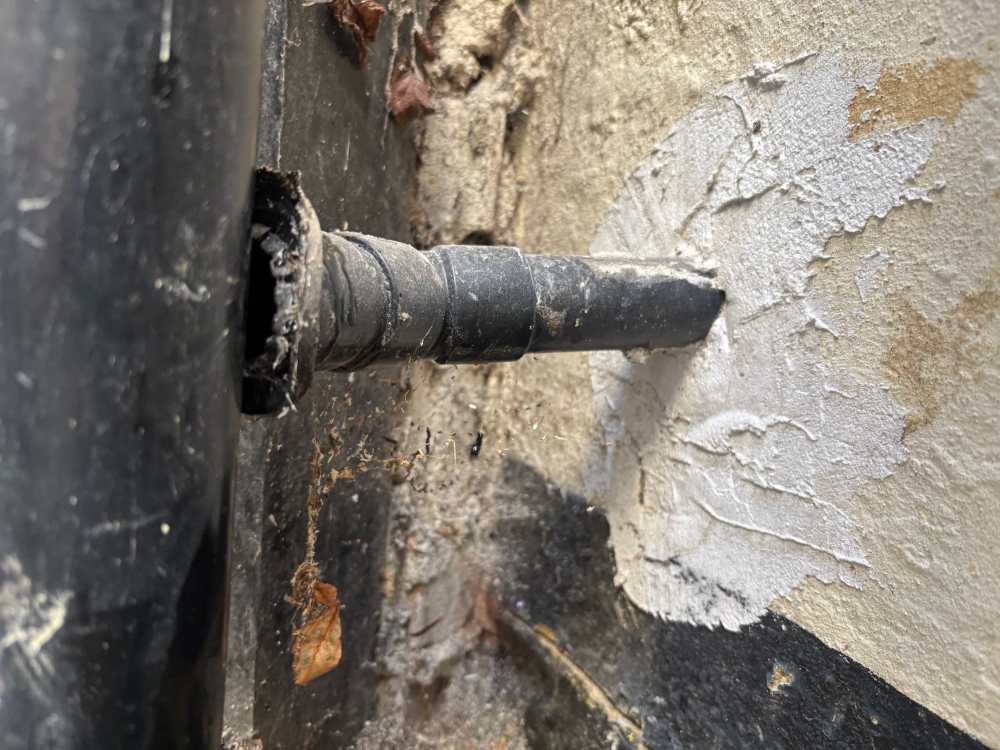
My photography is about as good as the carpentry. Apologies. Here's a few more showing the slate vent they installed (not in the middle because they couldn't be bothered to modify the rafters) where a lot of the old slates have been butchered, completely unneccessary joins on the fascia and resin leakage over the fascia they didn't bother to tidy up.

-
Looking for a bit of advice. I'm in the process of renovating an old listed building. Doing as much of the work myself as I can which I really enjoy, but getting in trades when I think something is above me (or the law dictates i.e. electrics). I put out detailed job specs on some of the big tradespeople sites, invite 3 or 4 to quote, compare the quotes, check the reviews and hire one. I don't haggle over the price (as I always wonder what they are cutting out), I pay the day the job finishes or the day after. I'm a decent client but want things done right. Just had some roofing work completed. Small job: Installation of timber fascia boards, guttering, drip edge and grp raised edge to a 12.5m2 flat roof Installation of a bespoke abutment vent Laying Fibreglass matting and resin and finishing with a GRP topcoat There were very detailed specs sent through, I hired one of the people who quoted (not the cheapest). I am very very unhappy with the quality of the work. Pictures attached so you can see the "finish" of the leadwork, fascia boards, and timber framing around etc. For the very first time ever, I don't want to pay. Putting right the work that these guys did is going to be expensive. They have damaged old real slate tiles. Lots of their work, if not all, will need to be ripped up, disposed of and started again. The "roofer" wants to come back and put things right but I have utterly lost trust in a person that would consider this a finish they are happy with and send over an invoice for the full amount. I'd rather get someone else in. My questions are: Am I the ar$ehole here? Is the work really not that bad? Should I offer to pay for materials (approx £550 if my calculations are correct) knowing that a lot of those materials will need to be pulled up and thrown away? How would you move forward? Interested to get the perspective of the pros on here as it's very easy to get the other side (take him to court blah blah)


-
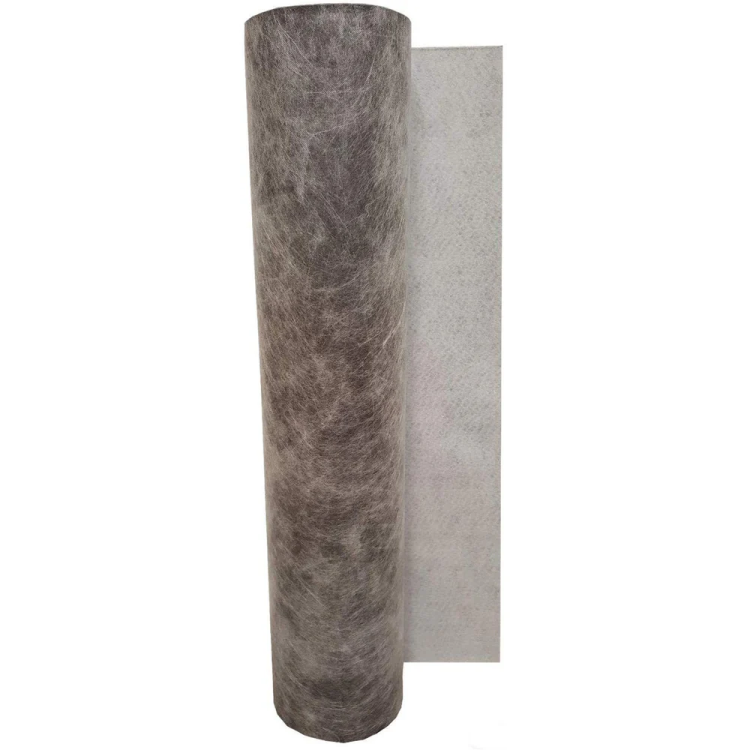
I'm looking to tile over an old concrete slab. It's not in bad condition but has a few cracks so I would like to lay an anti-crack membrane prior to tiling. Brand names aside I seem to have two choices. Waffle type https://nassboards.co.uk/products/orange-decoupling-membrane Or fleece type https://nassboards.co.uk/products/decoupling-anti-crack-membrane-waterproof-matting They are similar in price so wondering if one has an advantage over the other?

-
Will be short term let, probably AirBNB so worst case it will be out for a weekend. I go there weekly so not too worried about keeping batteries charged
- 12 replies
-
- 1
-

-
- smart
- smart home
- (and 4 more)
-
Love Shelly, hate the H&T. It was a PITA before I gave up and returned. I'm trying to minimise gadgets and wires everywhere so if wall thermostat measures humidity saves having another device