Alien
-
Posts
11 -
Joined
-
Last visited
Alien's Achievements
Member (3/5)
2
Reputation
-
Been hard work. Not too complicated but, as with everything house related - nothing fits the rule book. Huge admiration for those that do this for a living - tough men and women for sure. Adapt and overcome is the only way sometimes I guess!
-
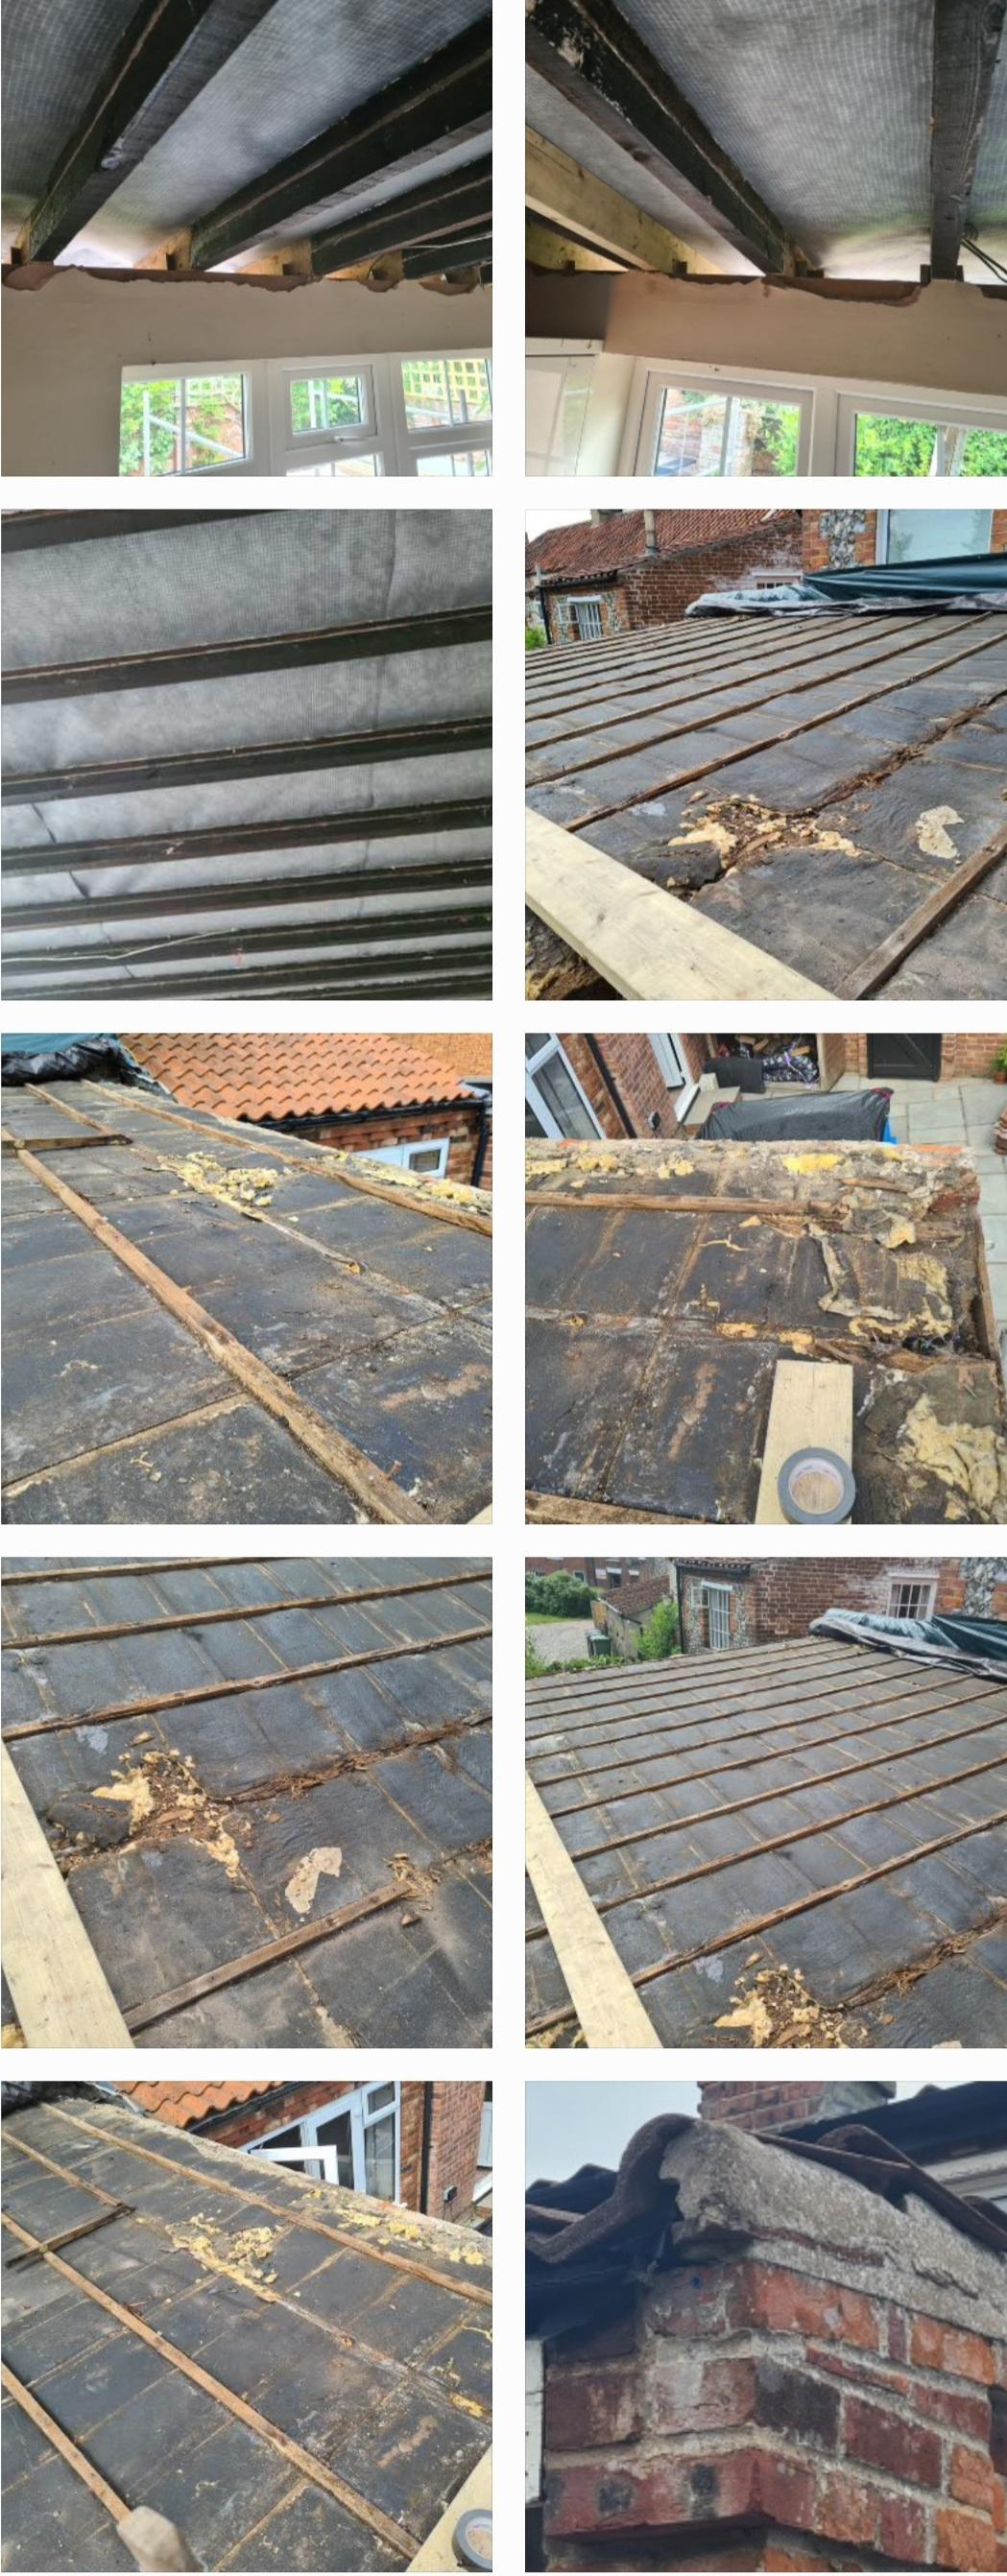
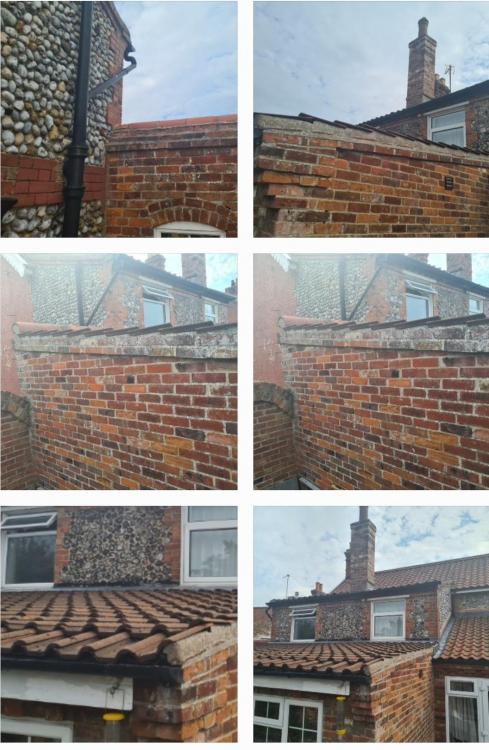
An update of my first attempt at roofing. Before and after piccies attached. Was much more work than expected but, have managed it. Had some serious rain storms recently and all is running well. Decided to go with the original lead line and managed to get ~75mm upstand and in most places 20mm into the flintwork. Couldn't secure with Hall clips (found another use for these though- spotted?) but rolled lead did the job. Sealed in the mortar line and added a 50mm lead sealant line over the top for security then sealed my flint work with water repellant. I secured any areas where the mortar line was shallow with lead straps secured with the tile screw. I don't think I'll ever make a roofer but, for first attempt I'm reasonably happy with my lead work. I'm sure the pros will disagree but, hey its done now. I'll keep a close eye on this over the next few years and if it deteriates I'll drag the flint work out and lay some bricks. Out of all house repair, brickwork is one I don't like. I'm just hopeless at it and it takes me all day to lay 20 bricks. ? Must cap the ends of the dry verge! On with the inside now. Vapour control done - just to board and skim. First pics are a 'before' collection - 6 days to clear that lot and it was minging. Black mould, everything absolutely soaked. Stank like rotting food.

-
- 1
-

-
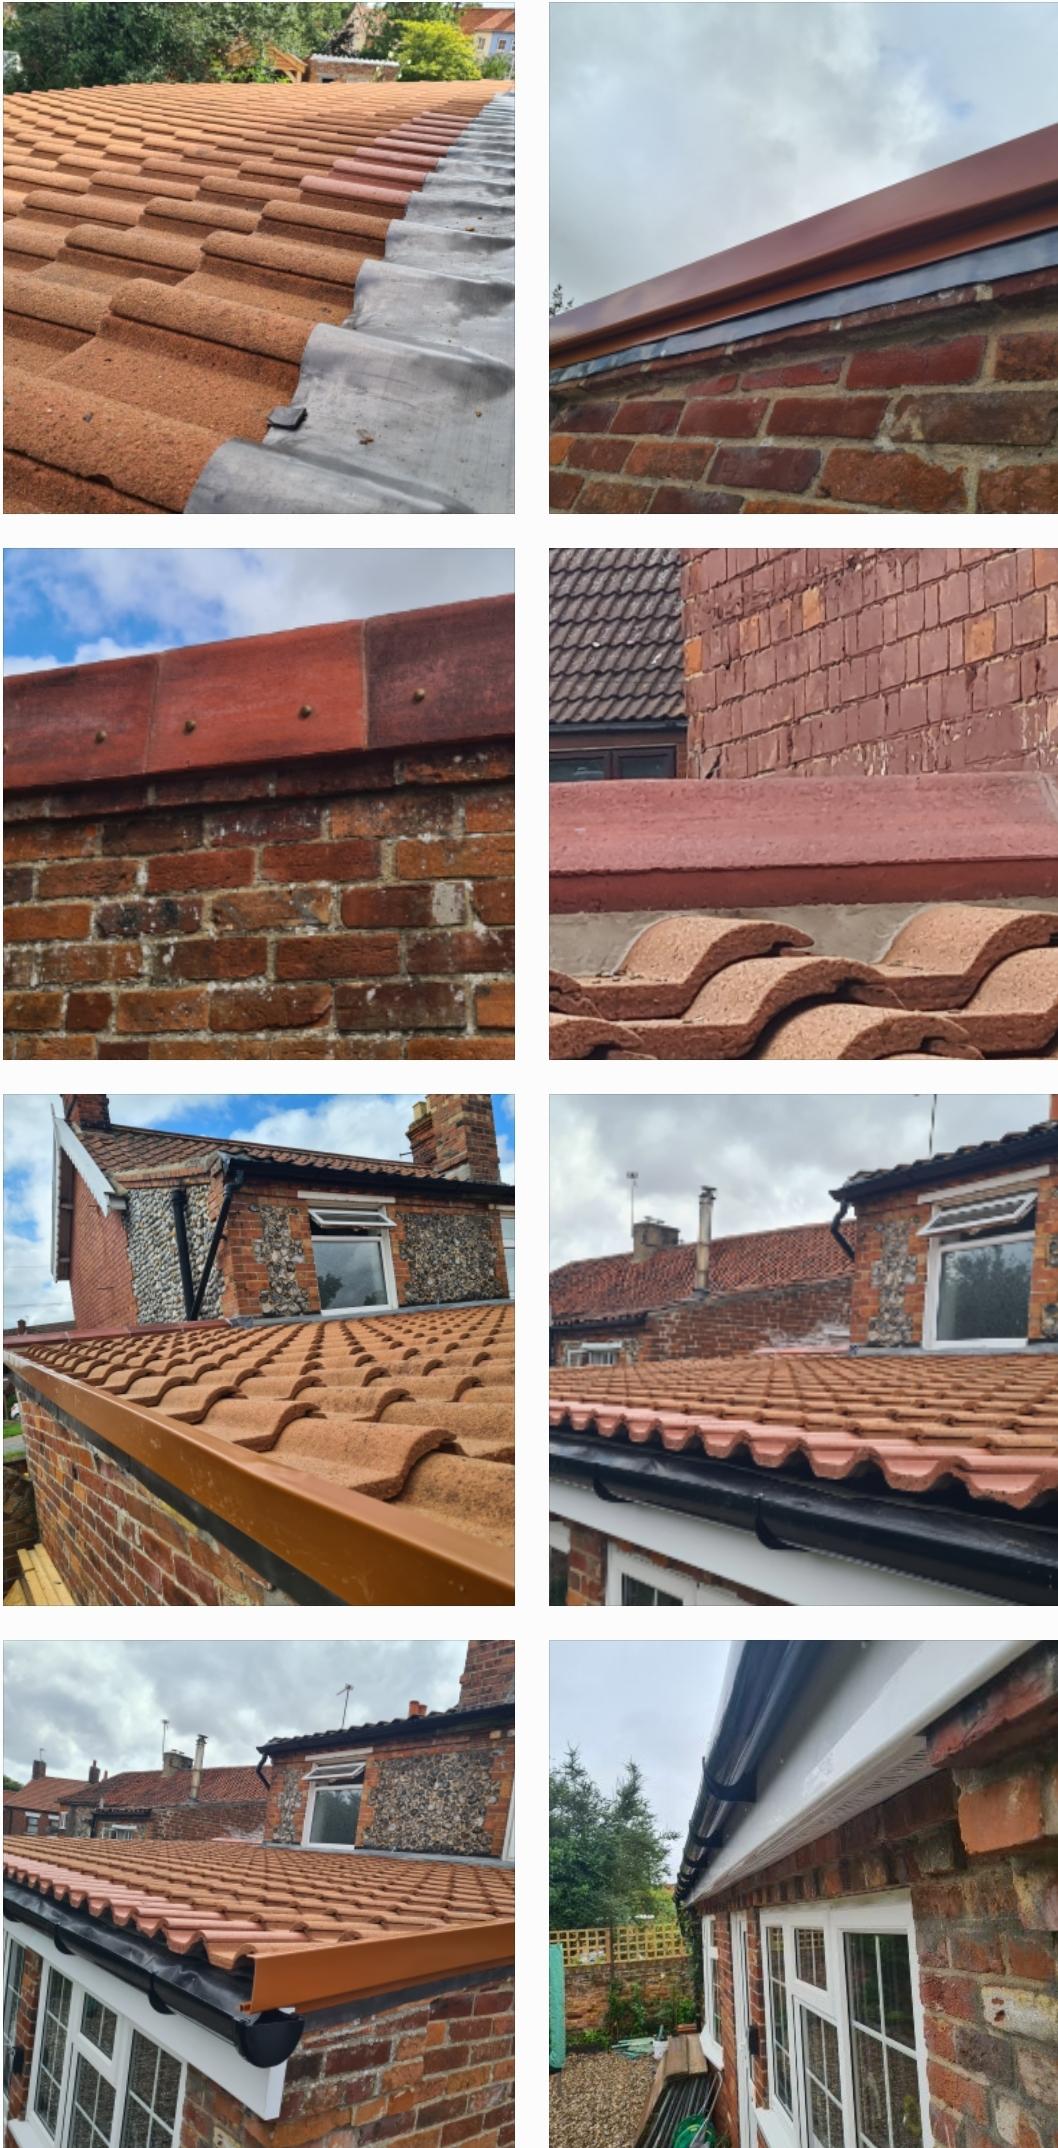
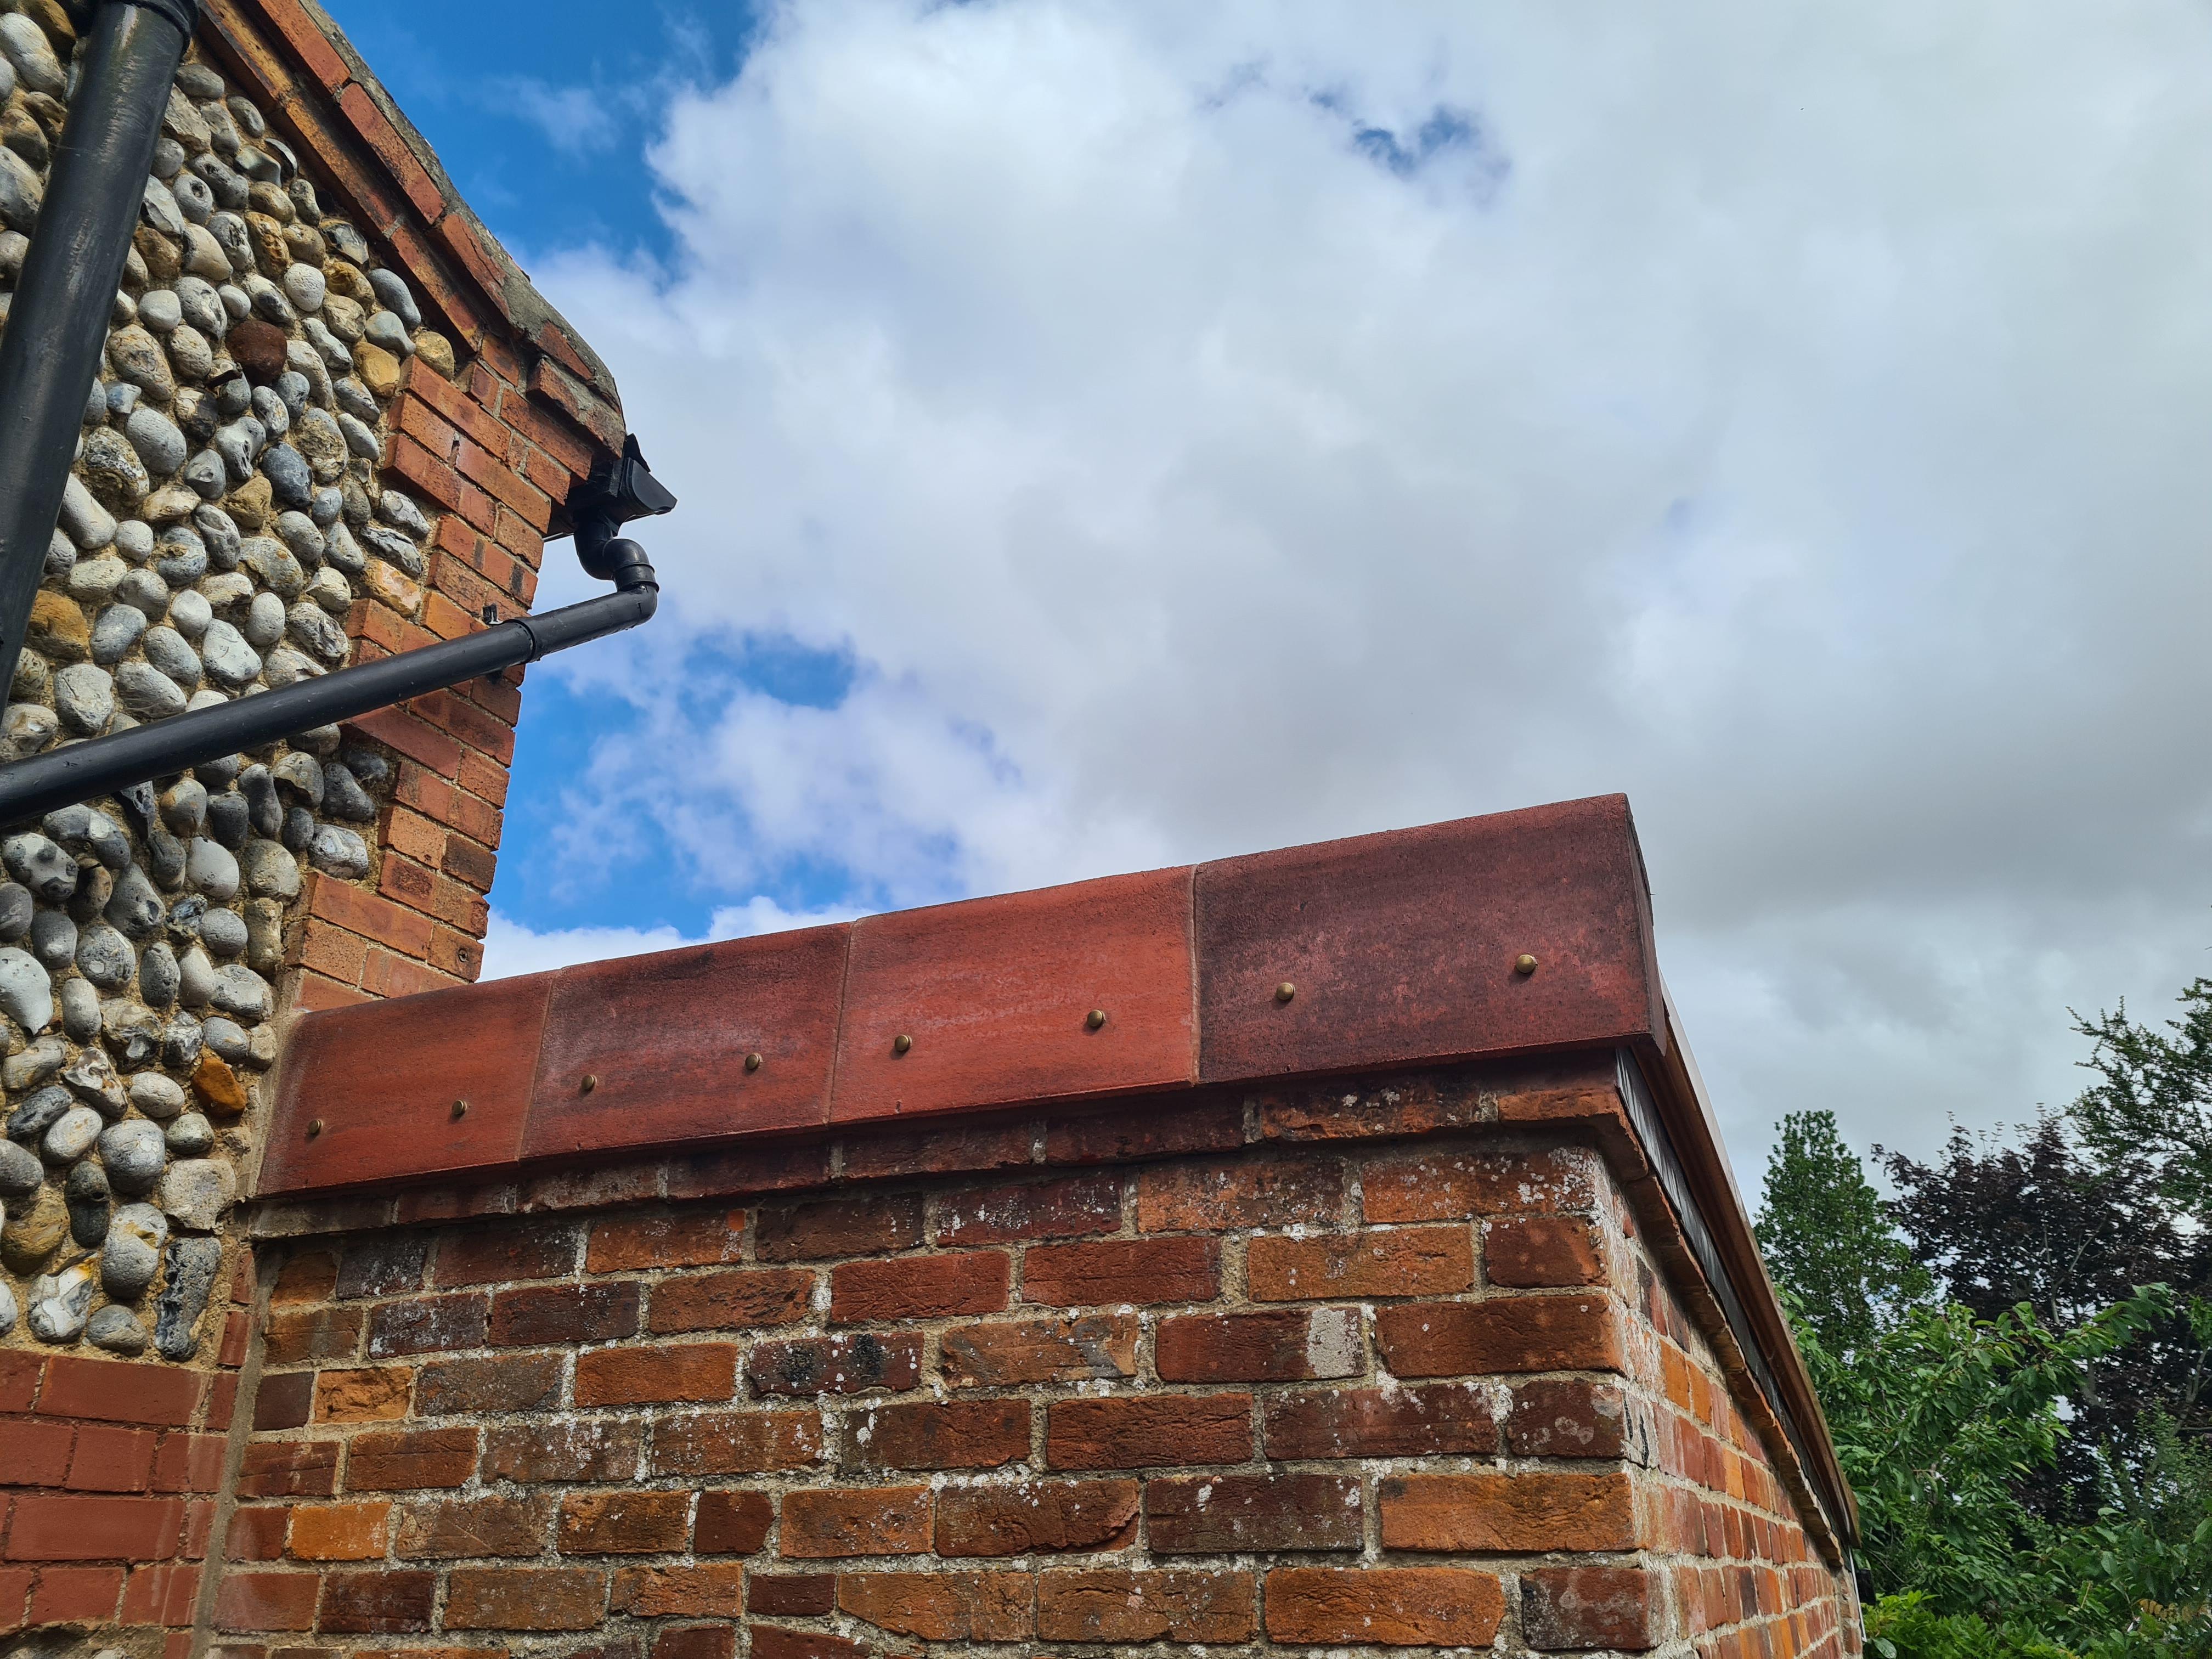
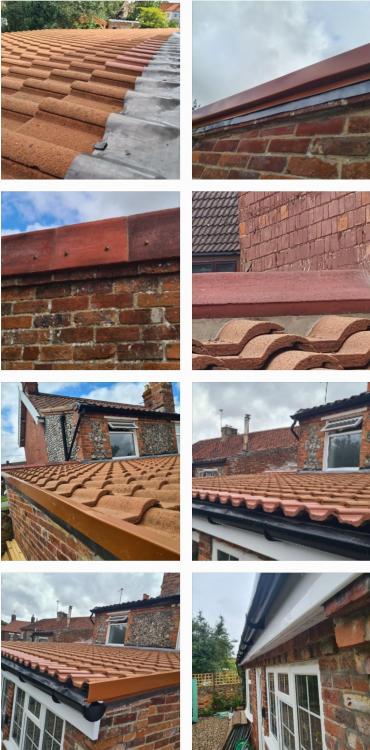
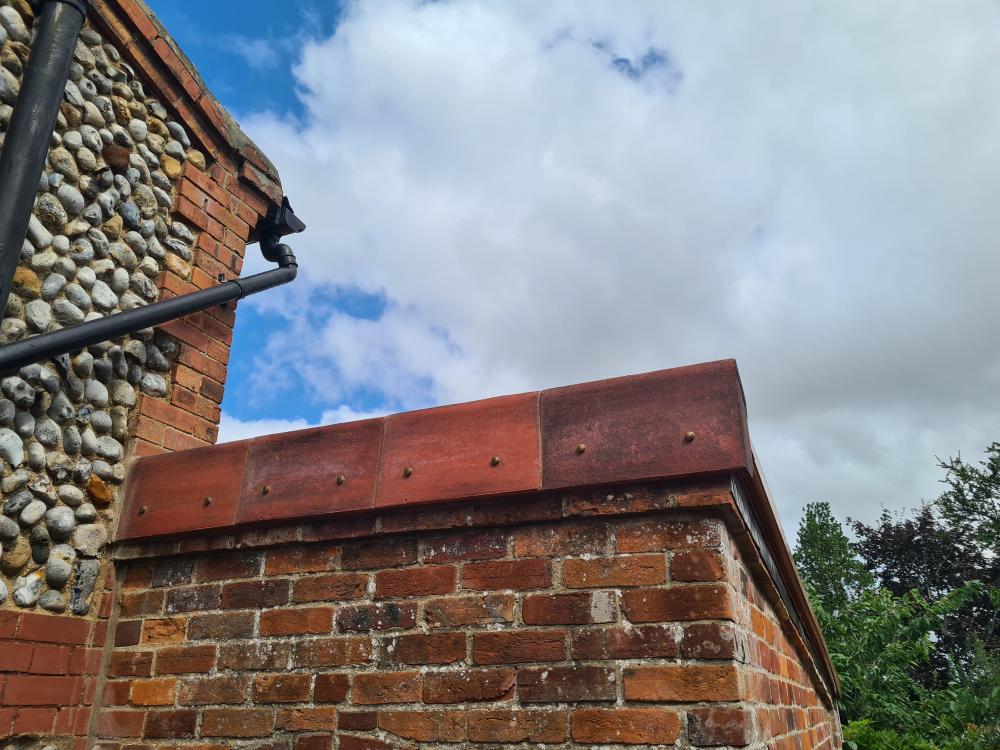
After a bit of deliberation I was lucky and the company that supplied some lesd work managed to get some ridge tiles made to order for me. Were very reasonable cost wise too. Happy with the result. Bonded on the inside of each ridge tile and on the joining faces and then finished with some sharp sand mortar on the tile side.

-
Thought I'd share this. The original job was done around 40 years ago. It has leaked over the last 3 or 4 due to rodent damage to the 3 layers of polythene and 3 layers of felt. Rodents now eradicated and roof re-layed. Looking around the county of Norfolk and asking around, this practise seems to have been common place around the era. Low pitch, high verge, poor spacing. Who's time-served and would like to discuss the 'job'? Was it the norm back then or was the builder in question out to get the old lady that lived here at the time? The roof joists are at 360mm intervals and they're chopped into the house wall by a considerable distance. Theres 21 of them over 7.5m with a 4m span. Again, the norm for the 80's? Clearly, we have evolved but, I'm just interested to know.

-
Yes. Certainly can. Already sent the pictures to a lead specialist in Yorkshire. They're just awaiting the final measurements. Have asked for complete section but, mulling over ideas! I may just have the corners made and pop the middle in myself. Not sure yet. Would like something maybe a bit unique. I'll see if Telephone number type prices return ?
-
I have been struggling for a number of supplies but, these are seemingly quite specific ones I.e mono ridge tiles. Insulation boards seem difficult to pin down in certain makes and thicknesses around my county. Replacement tiles have been very difficult to get hold of and reclaim was the best option. I used a reasonably local timber yard for all timber and they had plenty but, they did say that OSB and battons will be increasing massively in price at their next restock. I read a news article the other day that suggested HS2 was responsible for cement shortages - true?
-
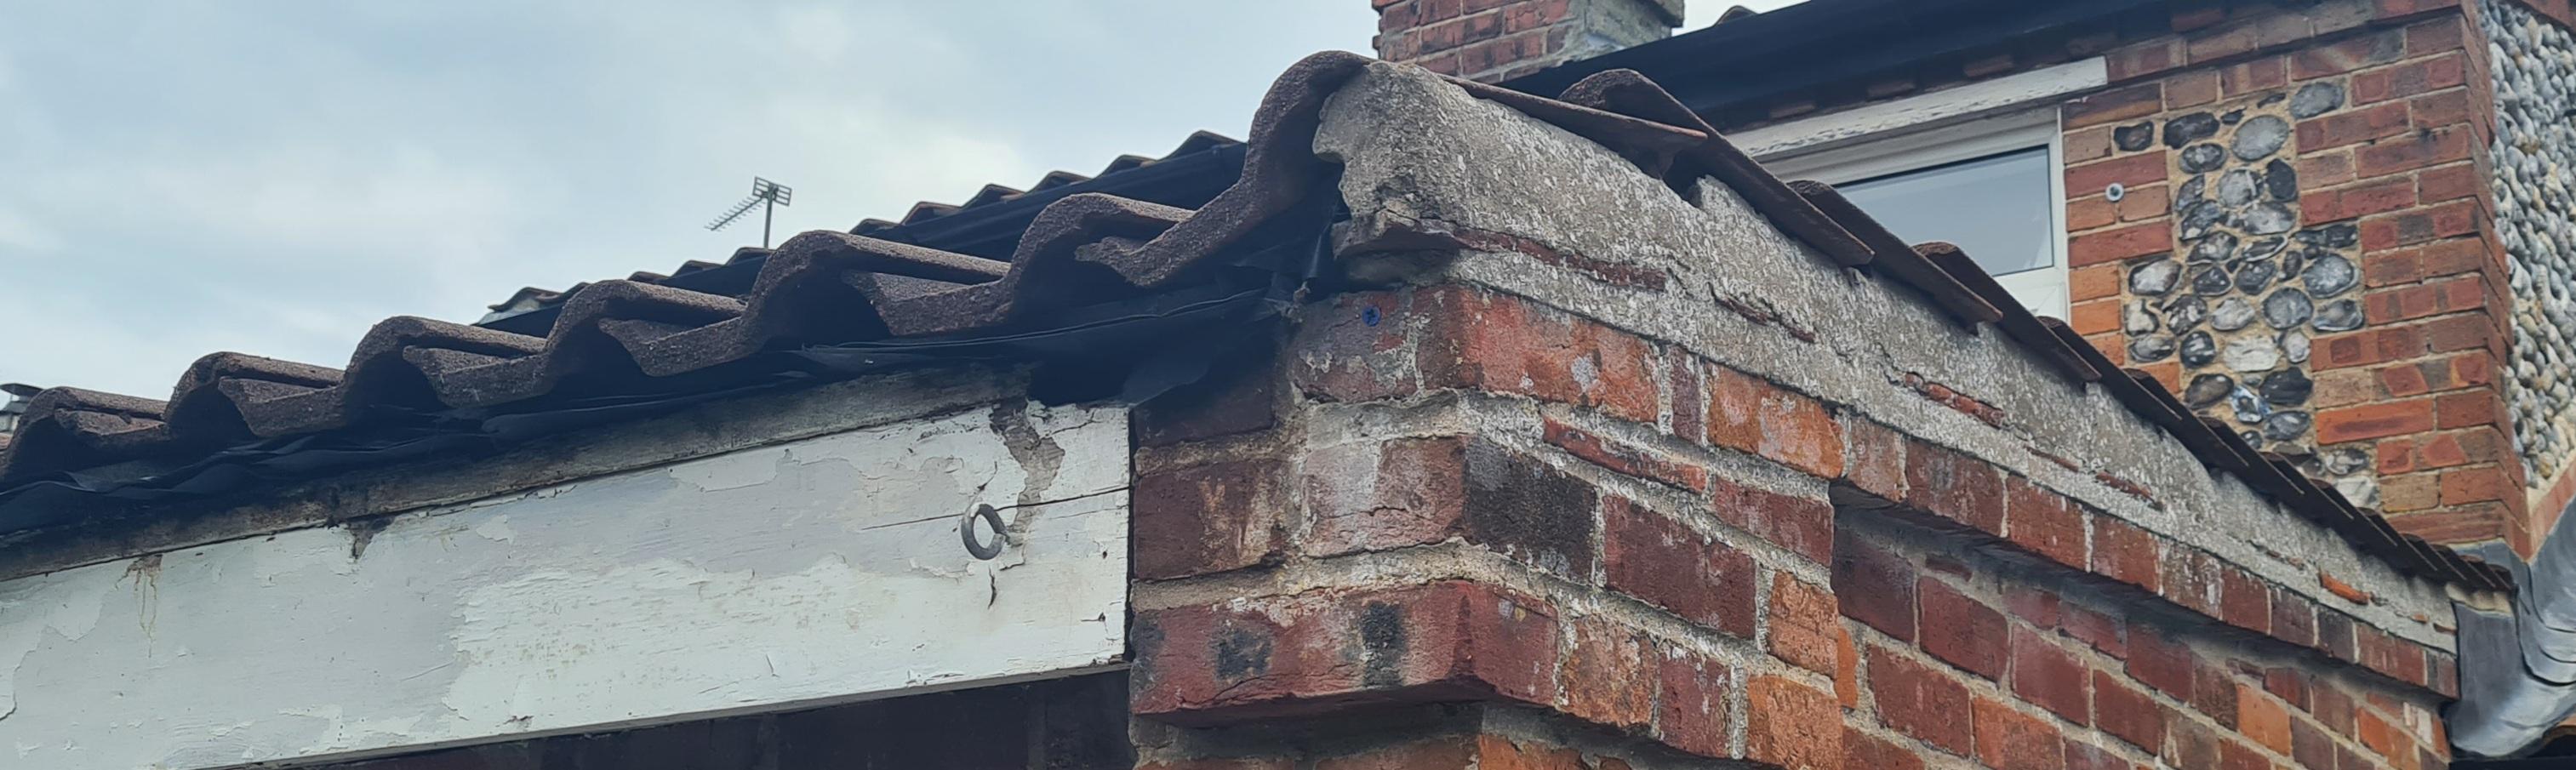
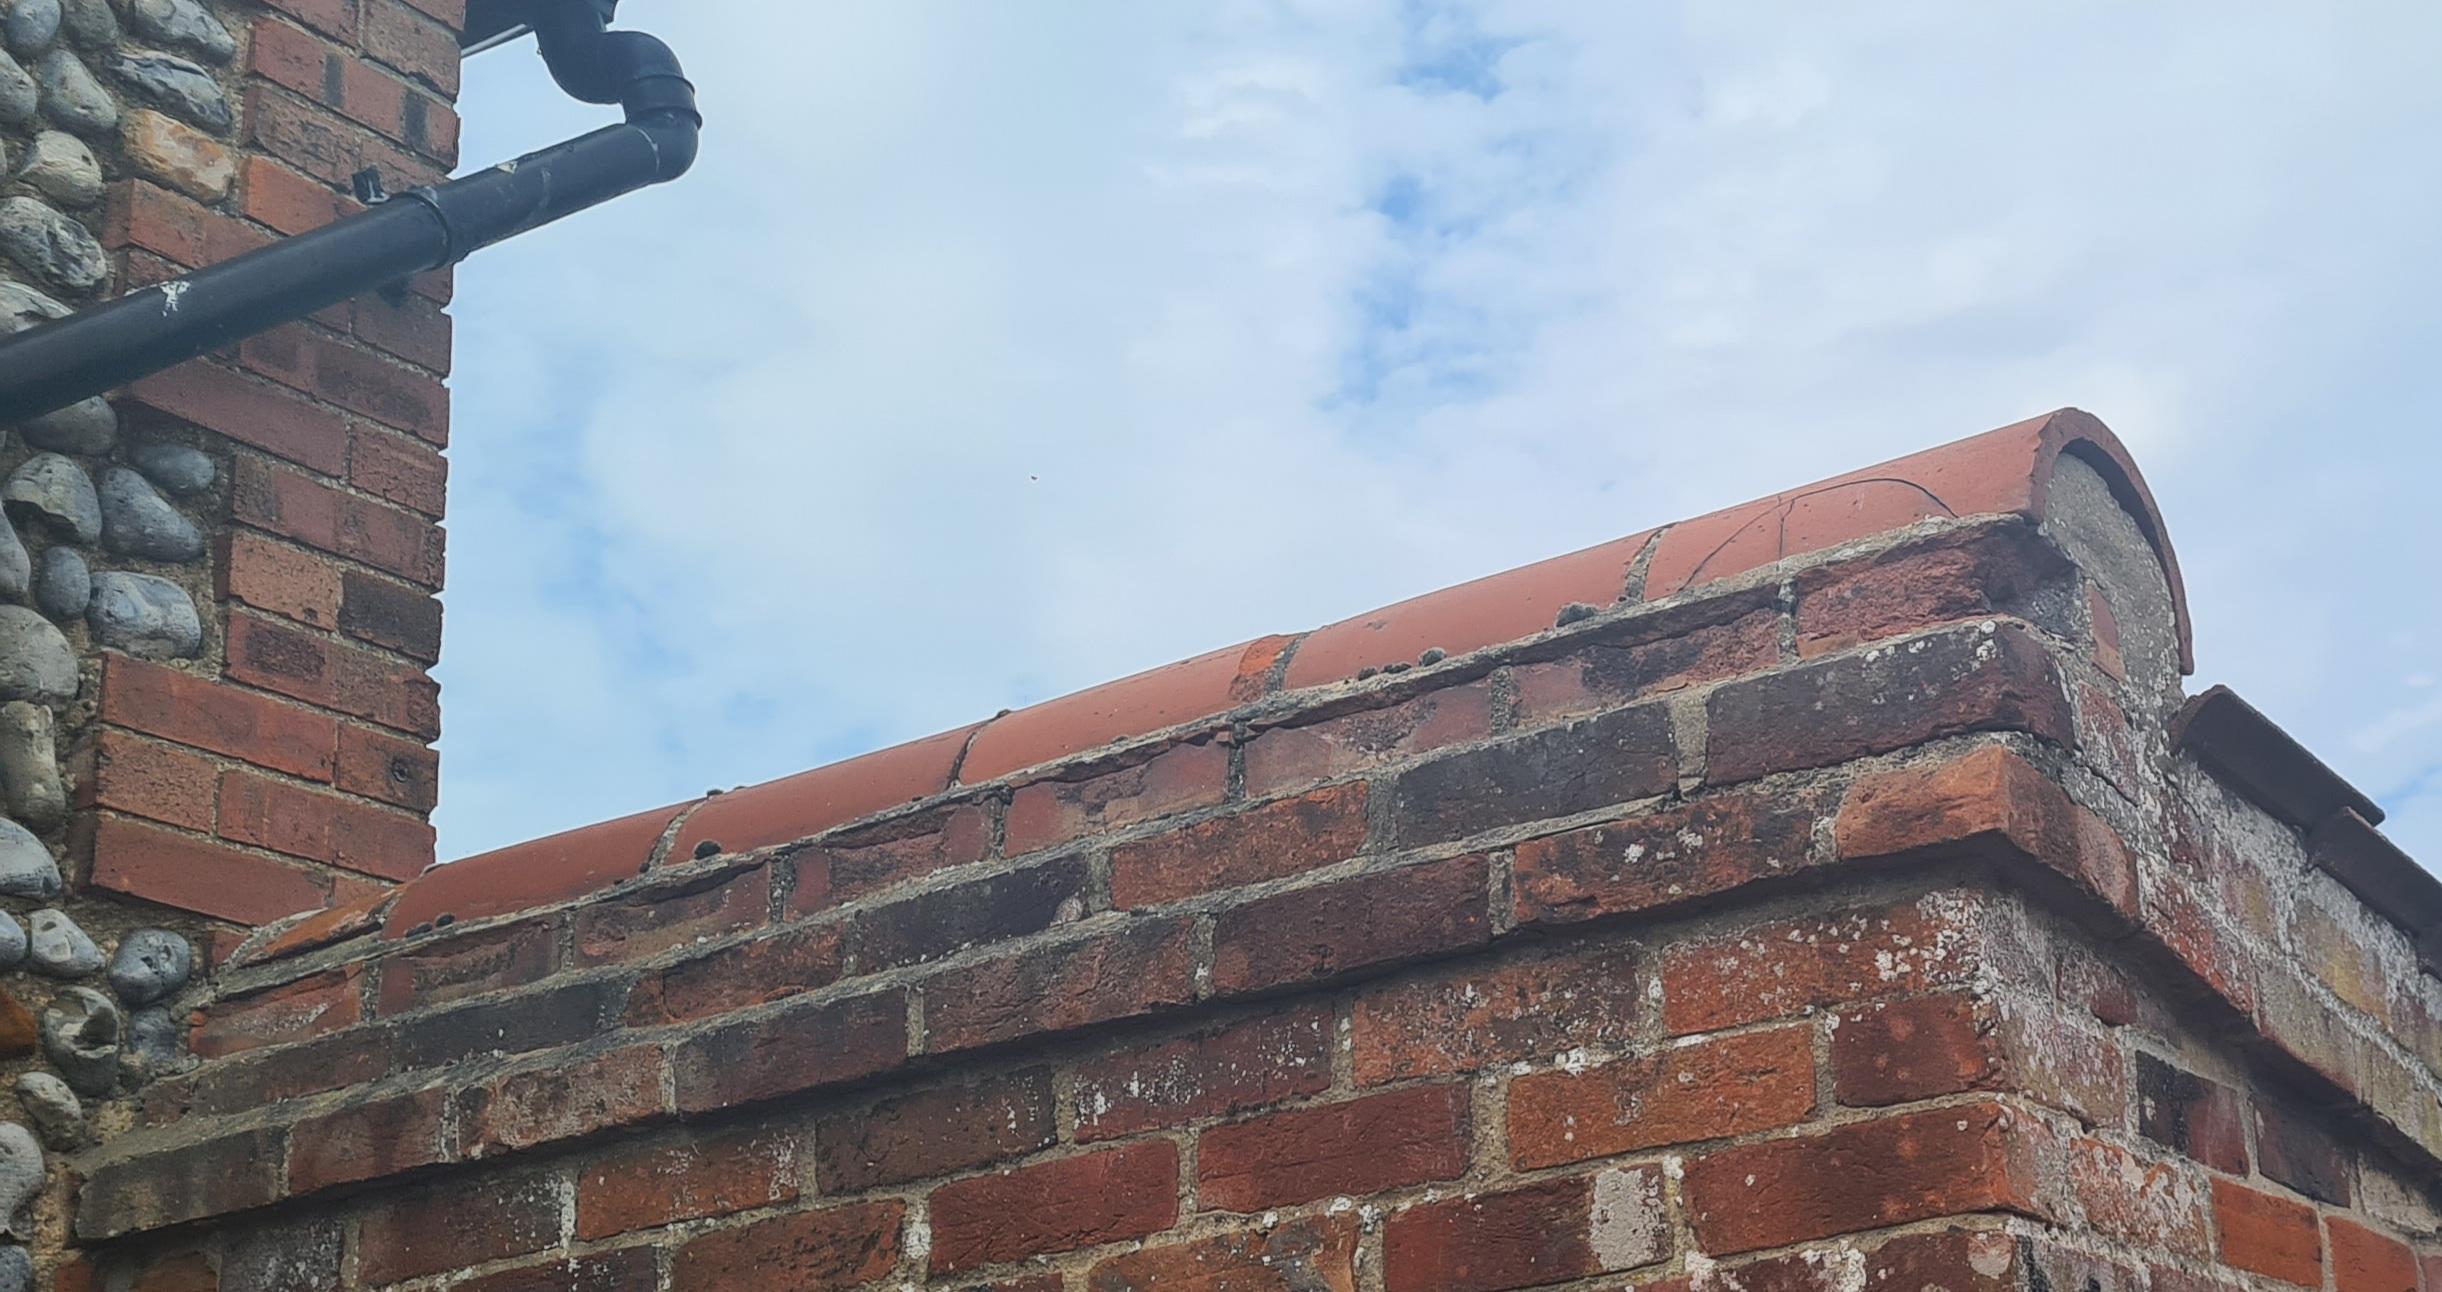
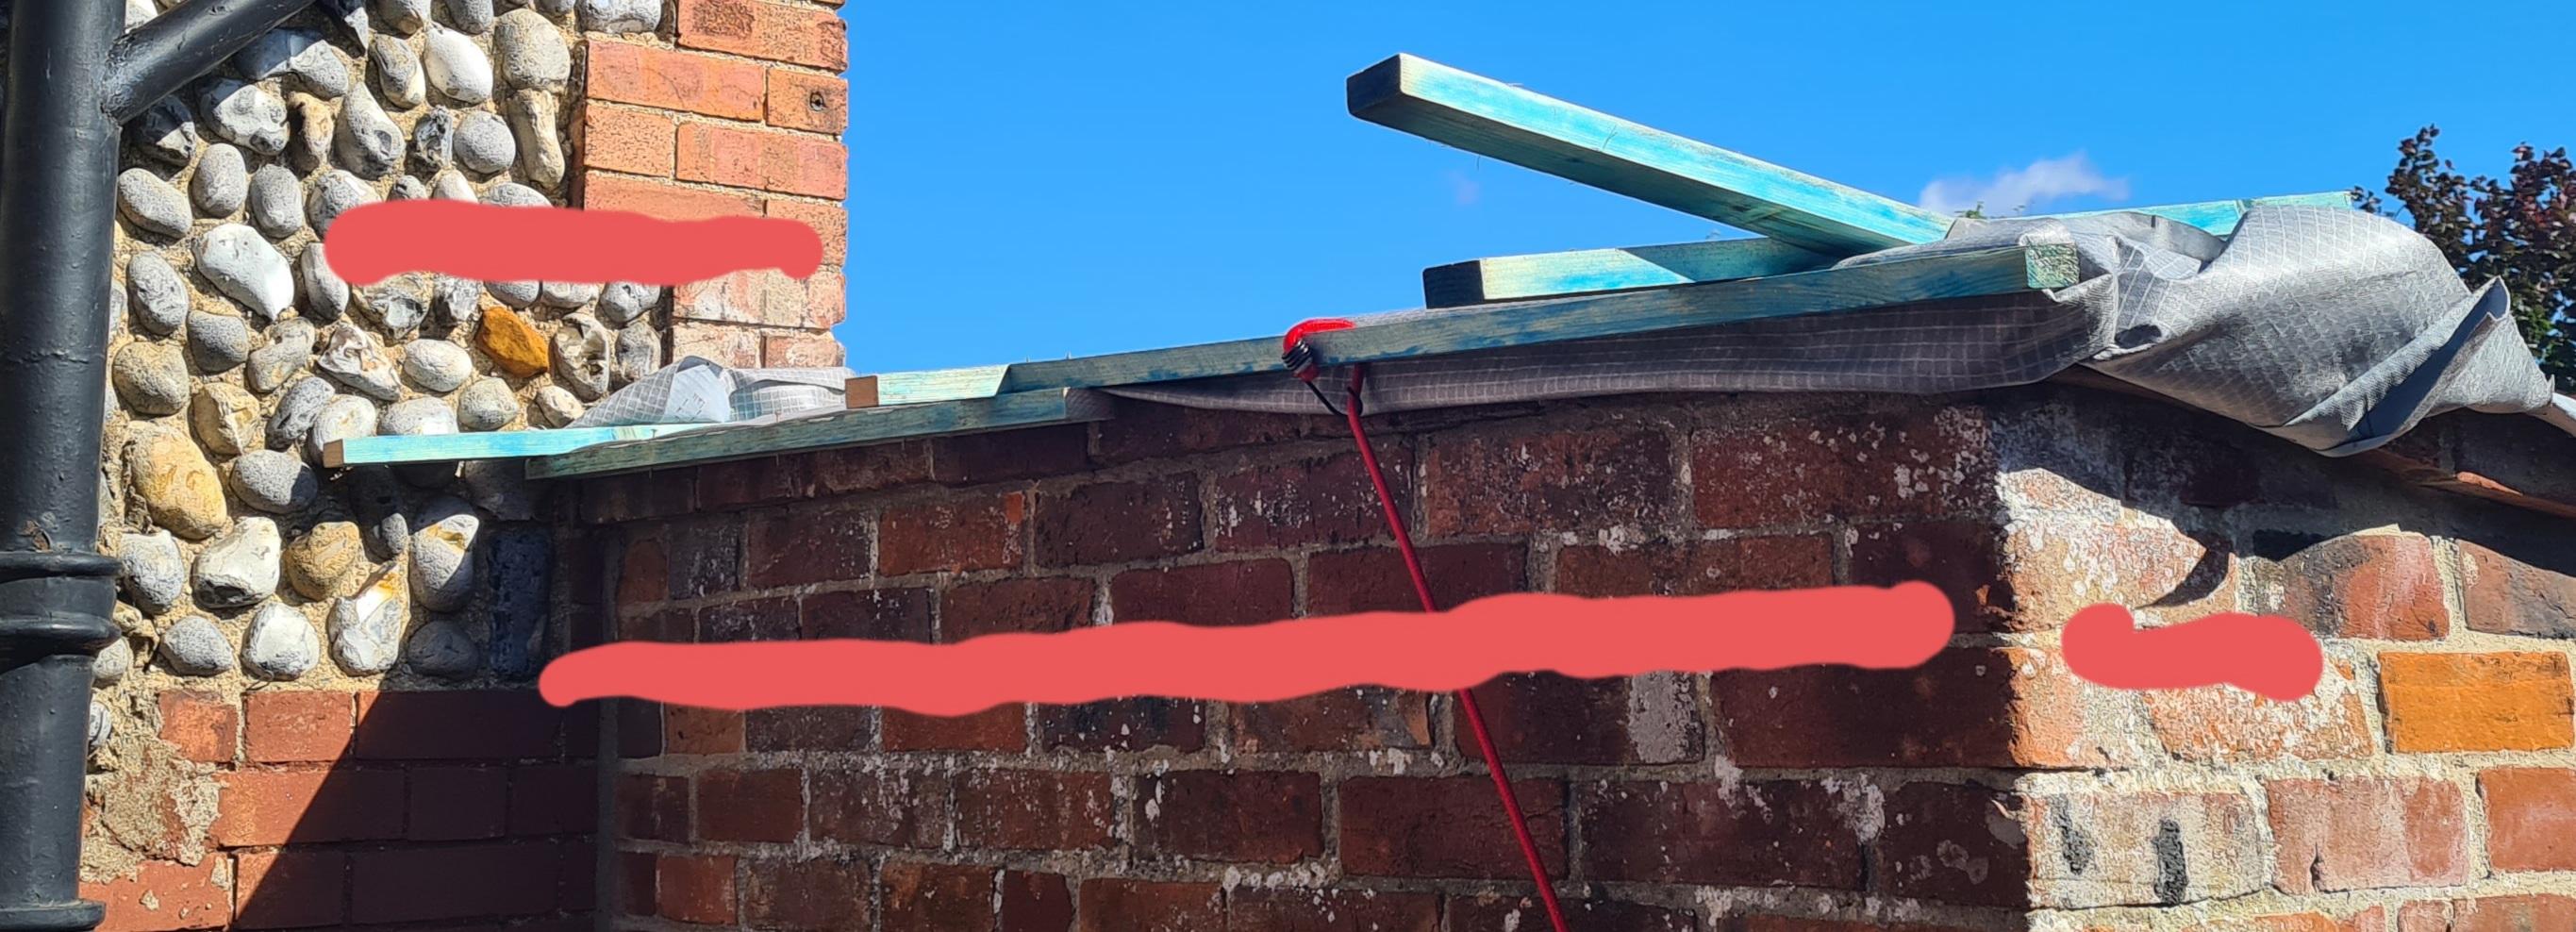
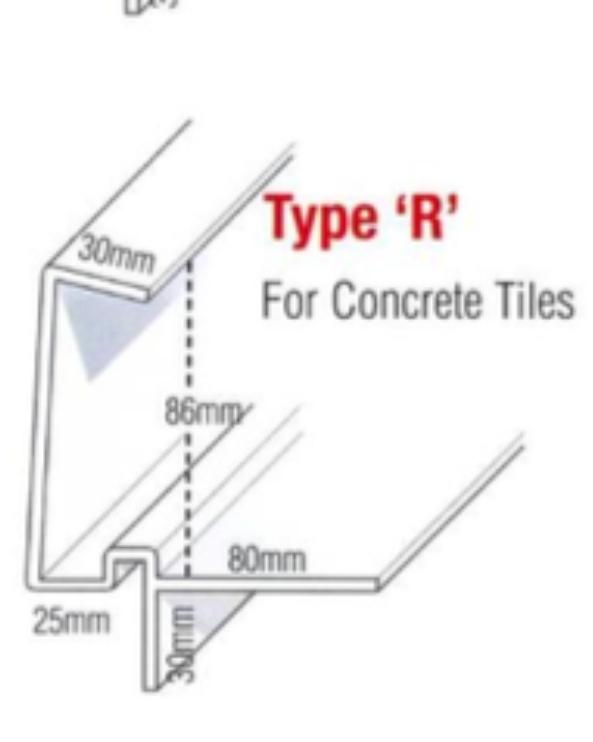
There are currently no mono ridge tiles available in the country it seems. I have a section of mono ridge that I am considering alternatives for. In the first picture you'll see it was finished with standard half round ridge. I have these ready but wasn't happy with I as it just looked odd. Ignore the red lines and the state of it, it's an old picture from a week or so ago. I've taken 2 course of bricks down and have now extended the batten and tiled area up and over this so it now takes full tiles to the wall line. Previously they were badly cut half tiles slobbered in mortar. This means that I will have a vertical line now which was to be capped with mono ridge tiles. I may change back to those when I can get some. I am finishing the verges in a continuous dry verge that looks surprisingly good for powder coated steel. It would fit quite nicely on top of the wall but, I have concerns over the wind driving water up the tiles and under. Tiles are fitted with ridge - forticrete centurion. What do you think to using the dry verge on the mono ridge and finishing the external corner with Lead? Did consider Lead and using a reverse type mortar joint on the wall side. Any other suggestions welcomed. ?


-
Thanks for the replies. Has anyone used render bead to create a mortar line for Lead? Someone whispered to me that they often do this over flint. Sounds like they secure the lead to the flint work on top of the bead, wrap straps around the lead in-between the bead and flashing and use the angle of the bead to create a mortar line in to the flint work. I am with you in that the existing line would be the easiest option just toying with ideas. I'm going to make another post on a mono ridge I have. You might have some ideas for that.
-
Cheers for the replies. The roof was built with the rafters through the wall. Whilst it was stripped down thoughts were given to the front wall plate but, without knocking the entire thing down it wasn't viable. So, unfortunately not. I was working at a 75mm upstand and can almost scrape that except for the sill if I follow the original line. The chase line is just below the flint. Neither. 18mm OSB - cold config. The thought of rubber and flat roof systems crossed my mind but, that would really take away from the property. So, decision made on replacing to as it was built back in the 80's. First time it's been apart since then and rodents were responsible for this necessity - quite a good job they made too. Removed, 3 layers of polythene, 3 layers of felt with 3 layers of insulation, 1/2 inch chipboard (with delightful original artex attached), celotex and 2 layers of plasterboard. There was some serious 'stuff' in there.
-
 Alien changed their profile photo
 -
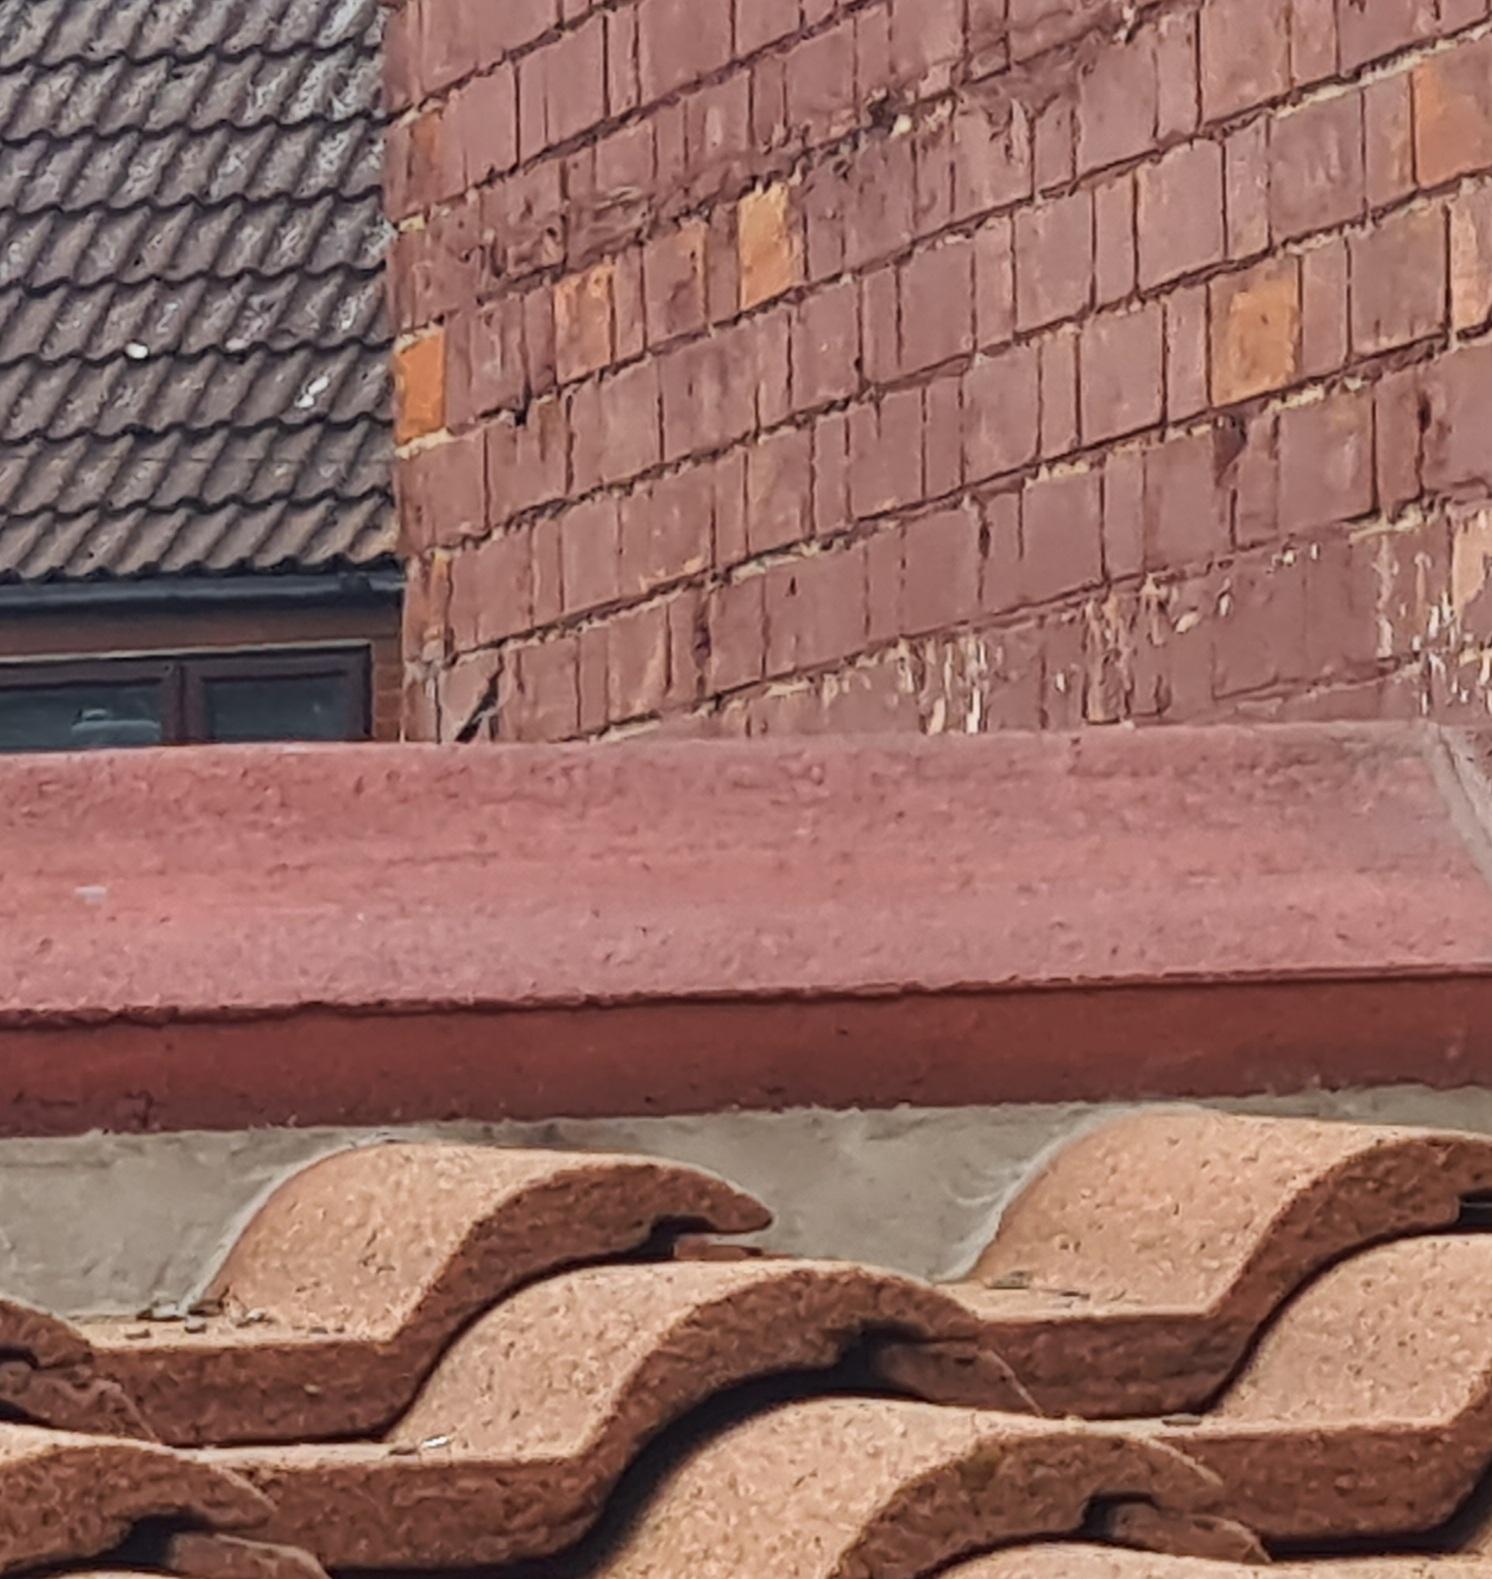
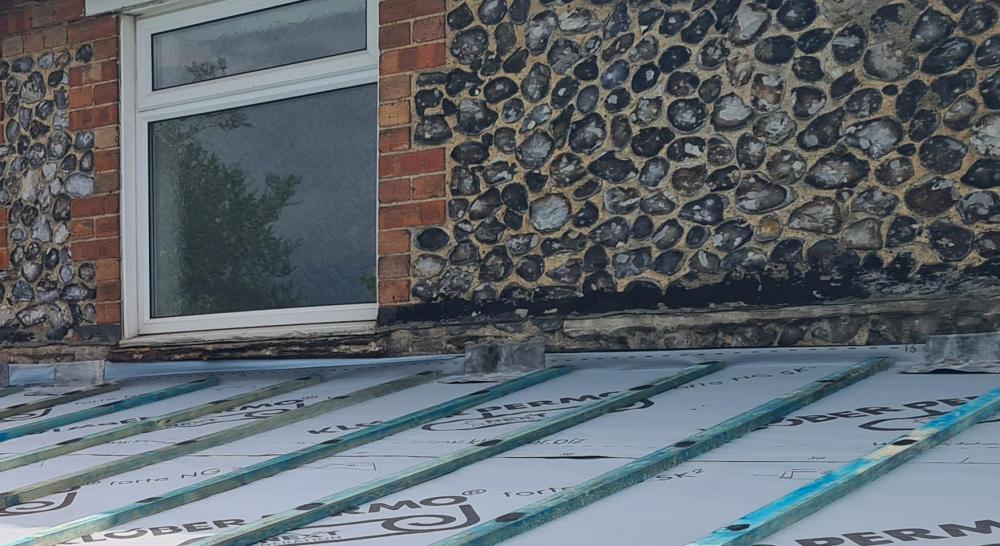
The kitchen in my property is an 80's addition. I'm looking for options with regards the lead flashing and flint work. Really keen to stick with a tile aesthetic externally. The previous lead chase was set very low to avoid the flint I assume. I have little choice but to go under the current window line. The sills are coming out next job. Probably just going to brick these up. What are your thougts/ideas on the best way to complete my flashing? Stick with the original line? Use render bead over the flint to seat the lead flashing to increase vertical lead height? Other ideas/recommendations? On another extended area I removed a 2 brick area of flint work and relayed with period bricks to seat the lead inbetween but clearly the windows define my options. Final draped membrane and tile battens to go on yet plus centurion which brings it very close to the window line. Ty in advance. Pictures attached.
-
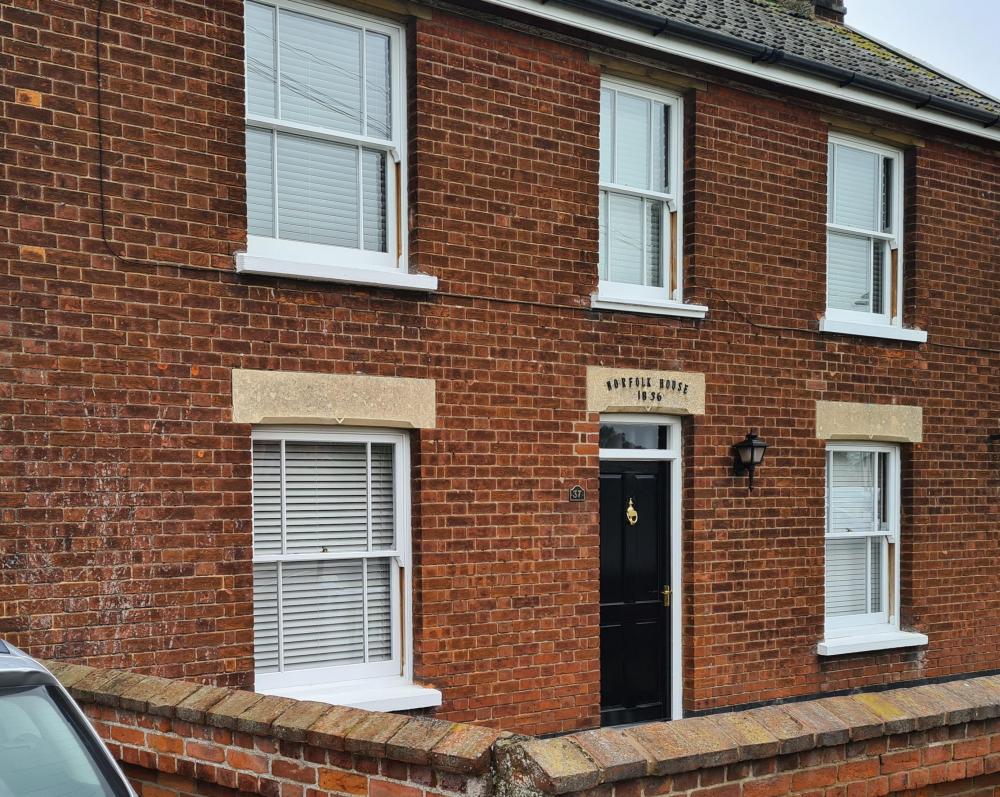
Hi all, Just adding the finishing touches to my 1836 restoration. Loads of history attached to my property. It was the local dentist for a good number of years! Got a few questions around the finishing and looking for some options that I may not have thought of for these areas so please offer advice or ideas to my posts. ?