
Mulberry View
-
Posts
761 -
Joined
-
Last visited
Everything posted by Mulberry View
-
Excellent reply, thank you. I'll get into those topics soon. I'd love you see your build, I'll drop you a message.
-
I have a Zinc contractor who is insistent on laying the insulation. It's going over 22mm of Class 3 Plywood (specified by the Architect?). I will check with the contractor how he feels about going over 200mm of insulation, but I think I've mentioned it already.
-
So, I've built this with very little outside help. I'm proud to say that I'm still working within about 3-4mm of all of the plan measurements. We have no support from our eye-wateringly expensive Architect any more, she's a Diva of the highest order with the worst temperament of anyone I have ever paid for a service, she left the project at a time when we still weren't certain of all the details. I have to admit that I feel out of my depth in understanding Air Tightness detailing and Insulation/u-Value requirements. I am simply aiming to improve on as many of the Architects details as possible. but after reading some posts on here, it's clear to me that there are bods on here that put my knowledge to shame and I'm desperate to get this right. Current concerns.... (not limited to) The relatively weak u-Value of the Nudura. On paper, the standard system doesn't present great u-Values, though I'm told that this isn't the only thing to consider. Should I be thinking of adding further insulation to the walls? I do kinda regret not going for the heftier blocks in all honesty. I'm minded to improve on the Architects spec of 150mm PIR in the floor (over Beam & Block). I have room for 200mm and am committed to that with interior FFL's now, but is it a sensible choice? I'm minded to improve on the Architects spec of 120mm in the Warm Roof. Again, I have room for 200mm, but is it worthwhile. I do not fully understand best practise with Air-Tight detailing, around windows/doors and so on. Our Architect arranged a SAP calculation at the design stage, and we're trying to control costs of course, but should I be talking to a consultant of some sort about this stuff? I would like to aim for 'near Passivehaus' levels and I'm not thinking as much about all-out return on investment but more having a comfortable home with as low as possible need for heating input. What's the best way to approach this?
-
Nudura Cast-in-Place Ledgers....
Mulberry View replied to Mulberry View's topic in Insulated Concrete Formwork (ICF)
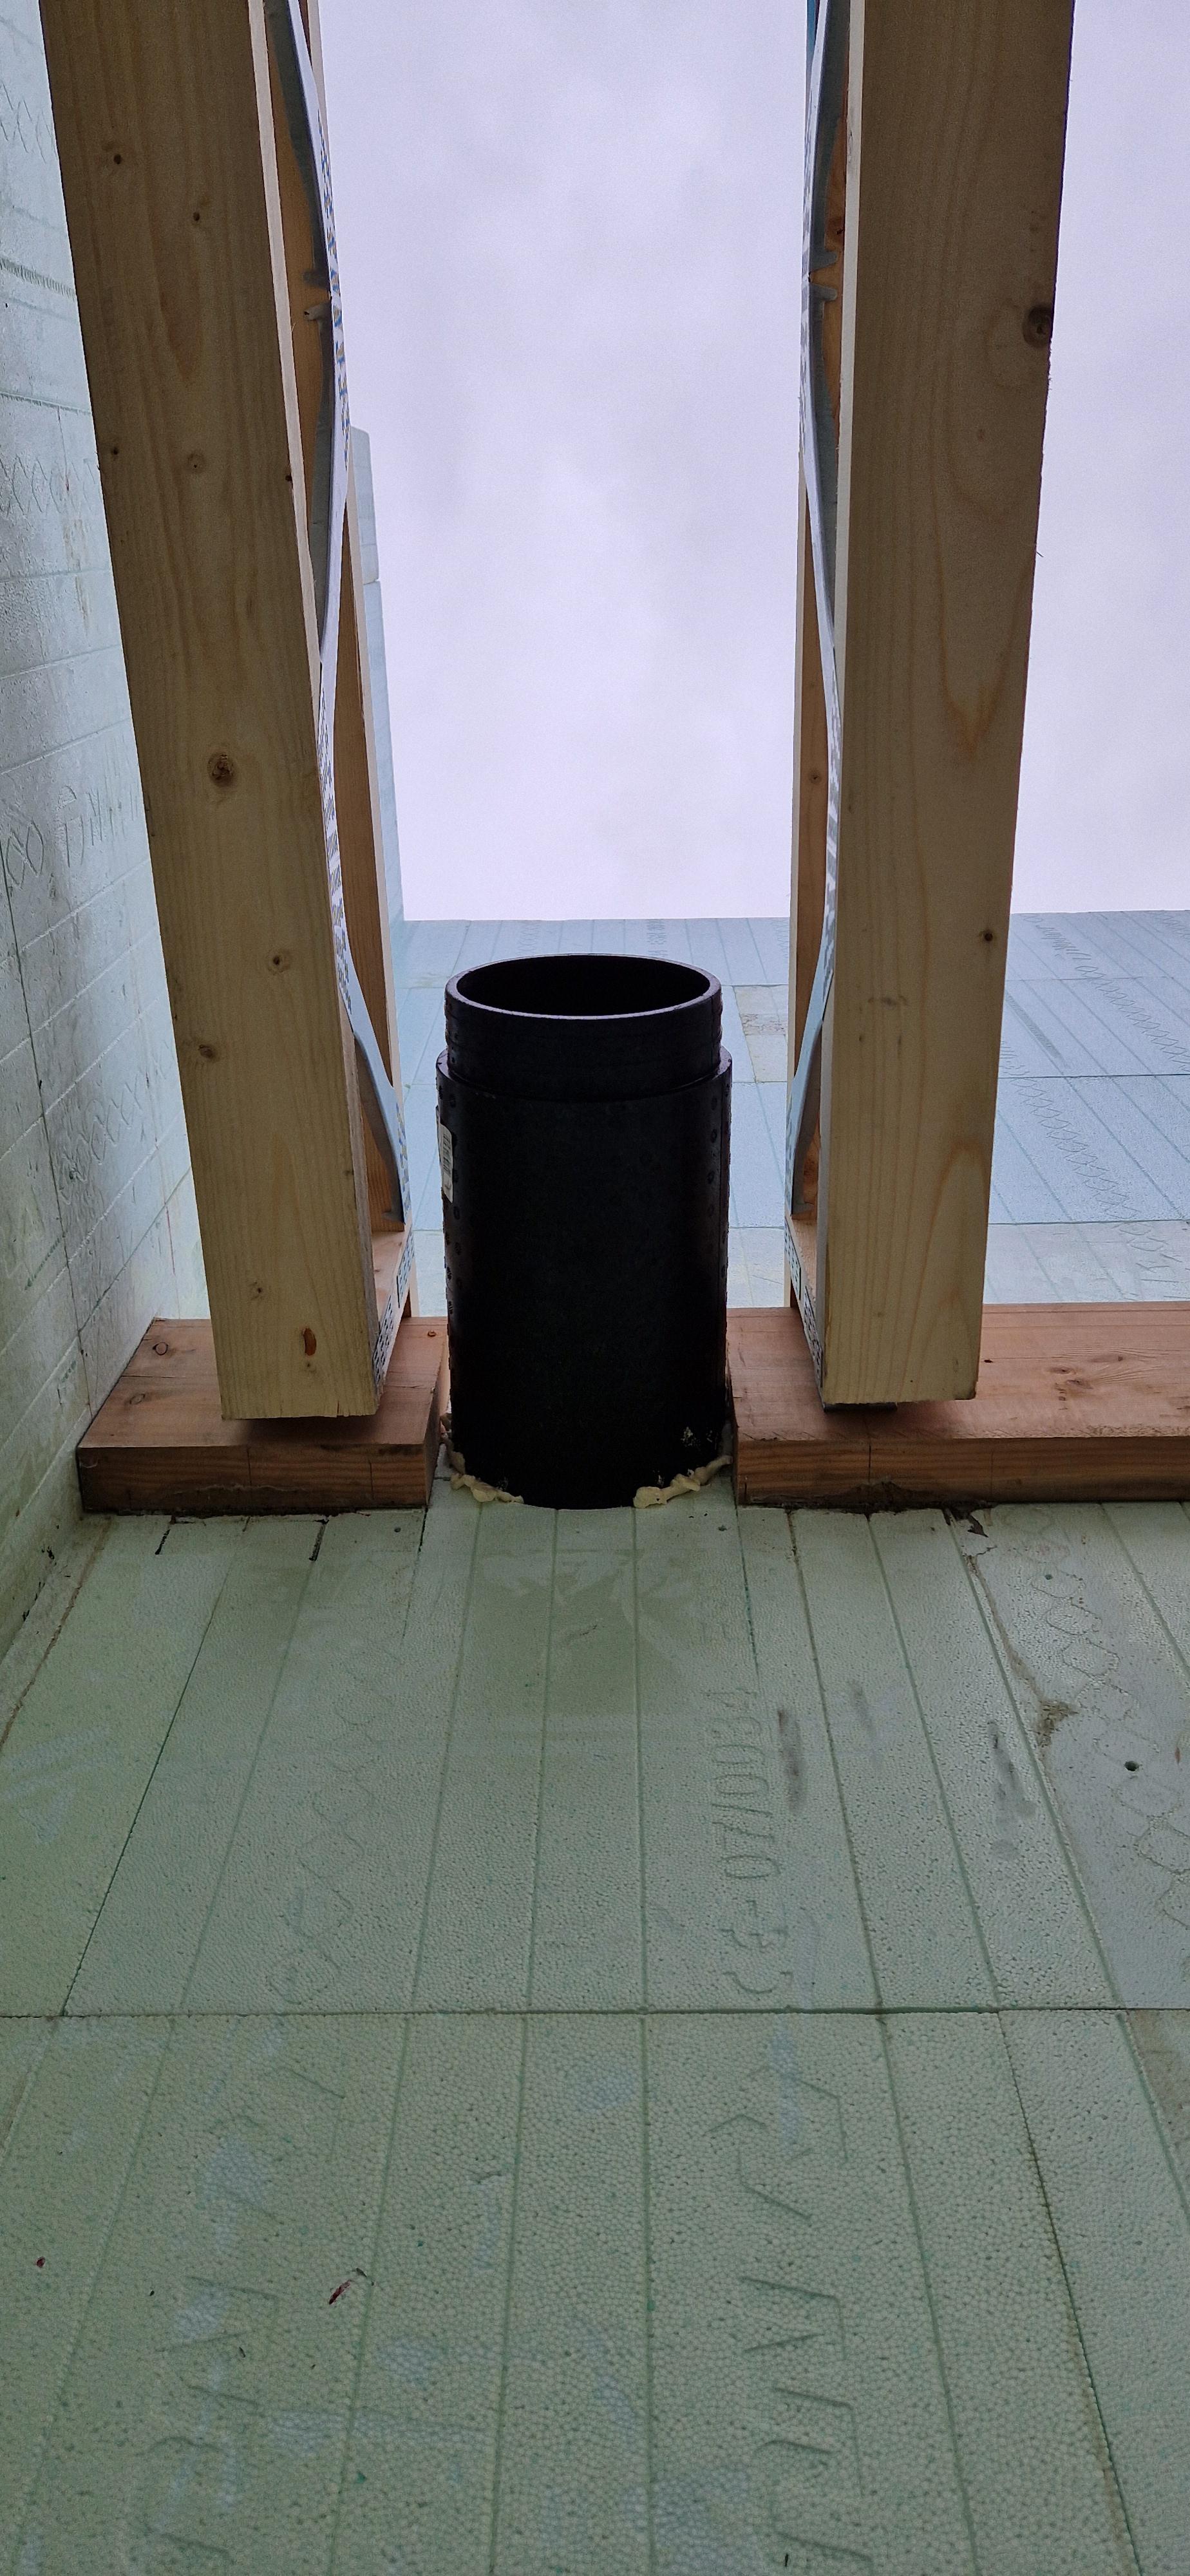
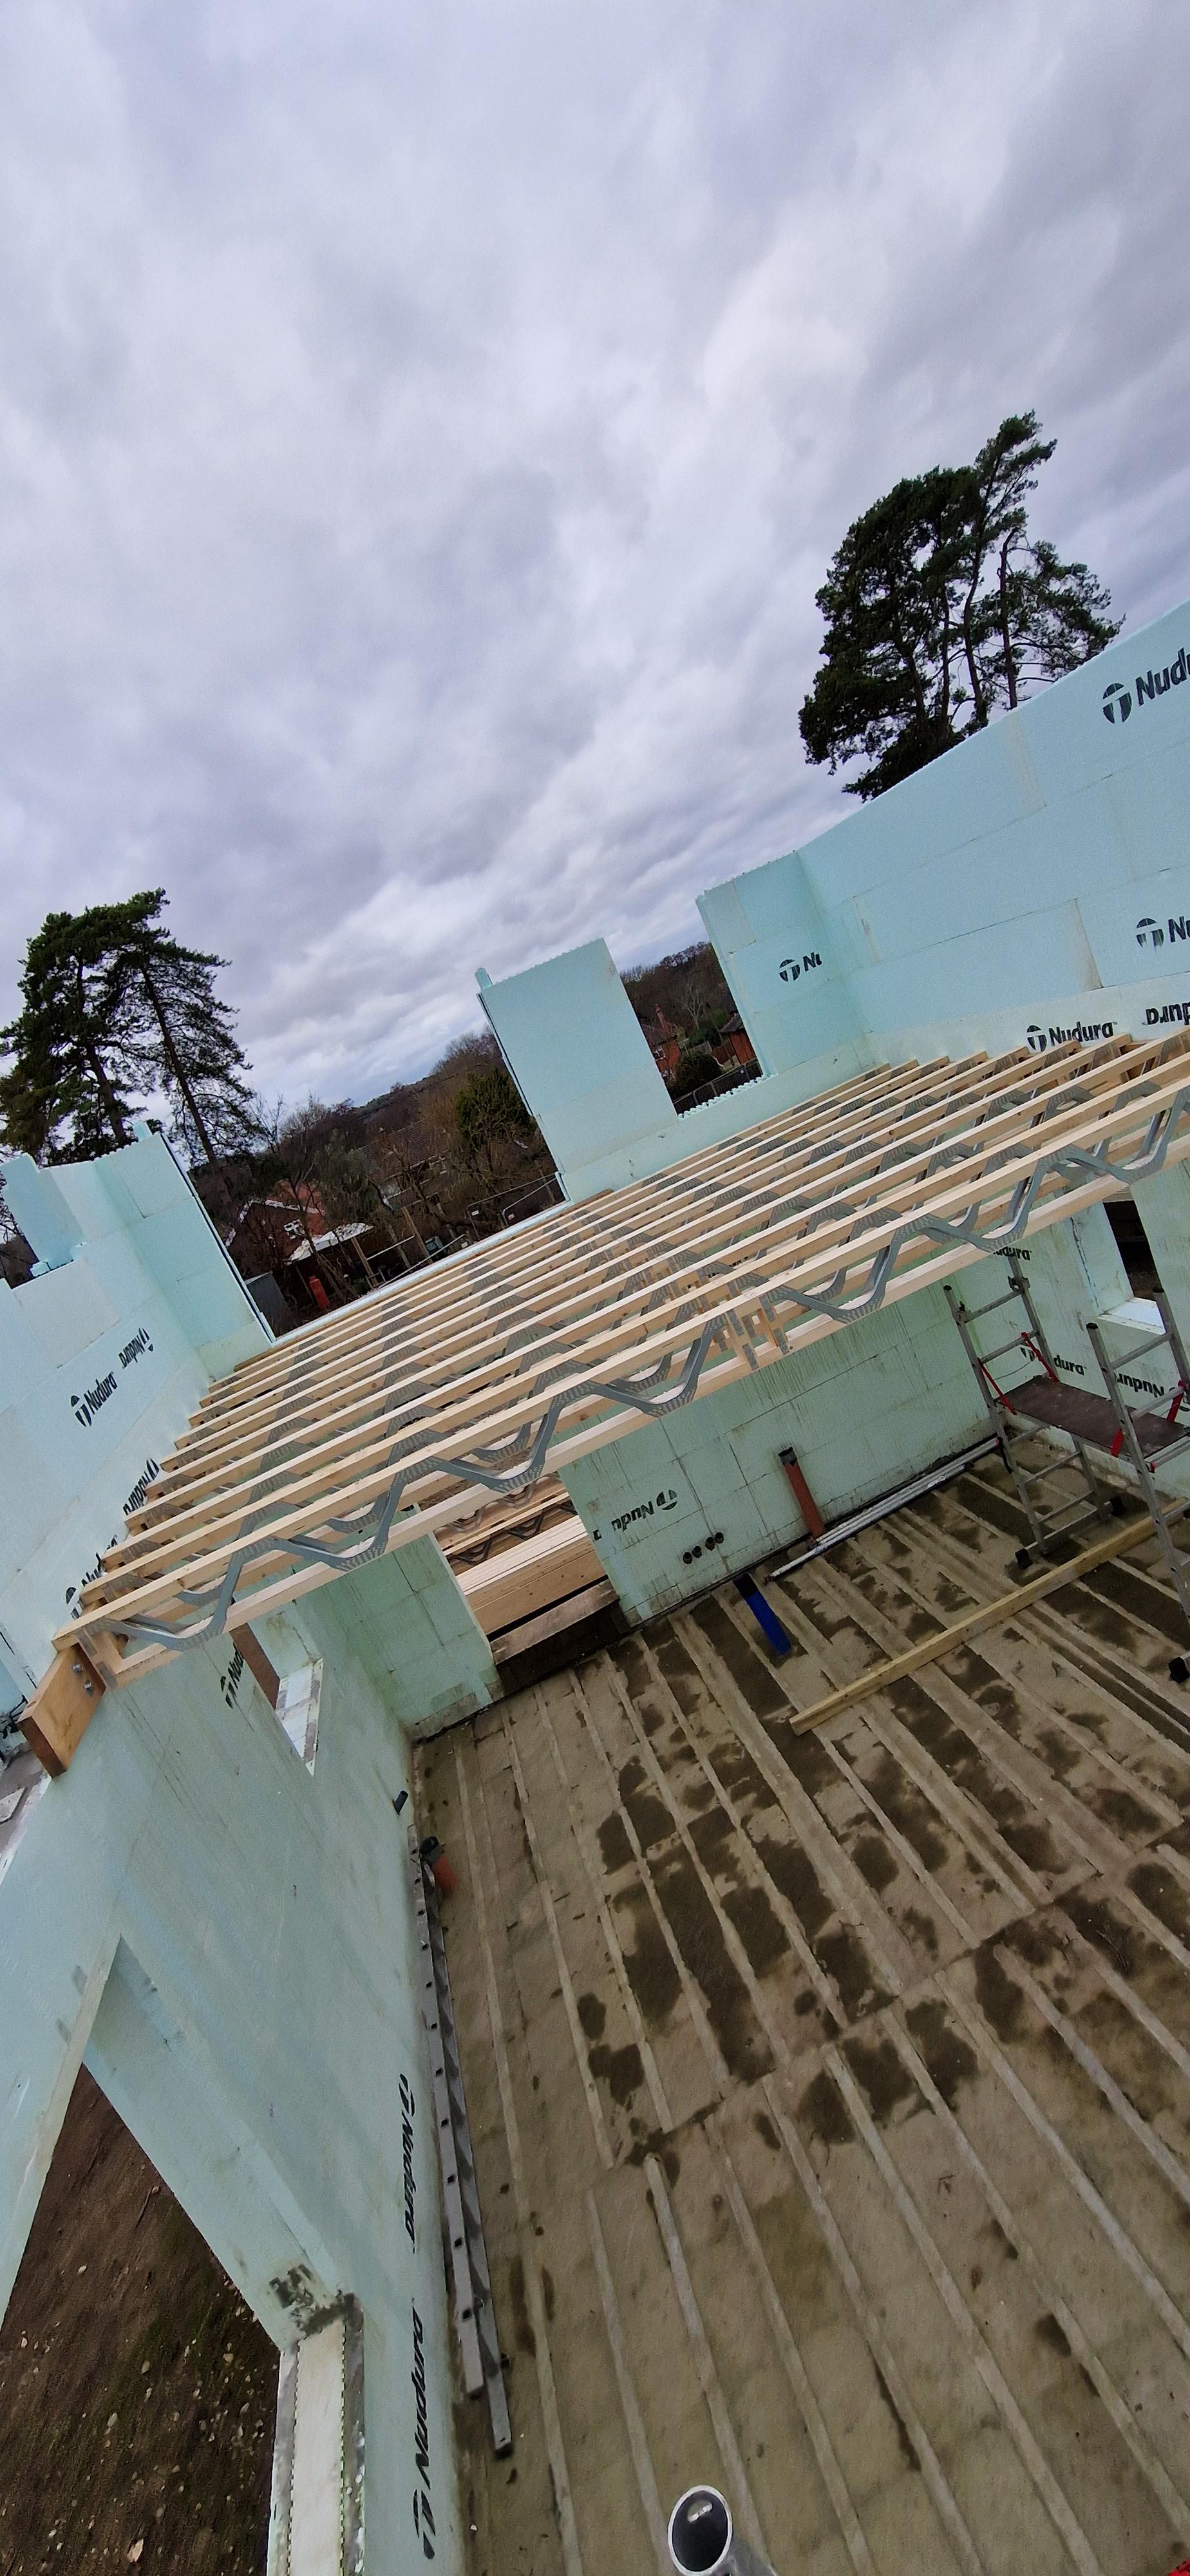
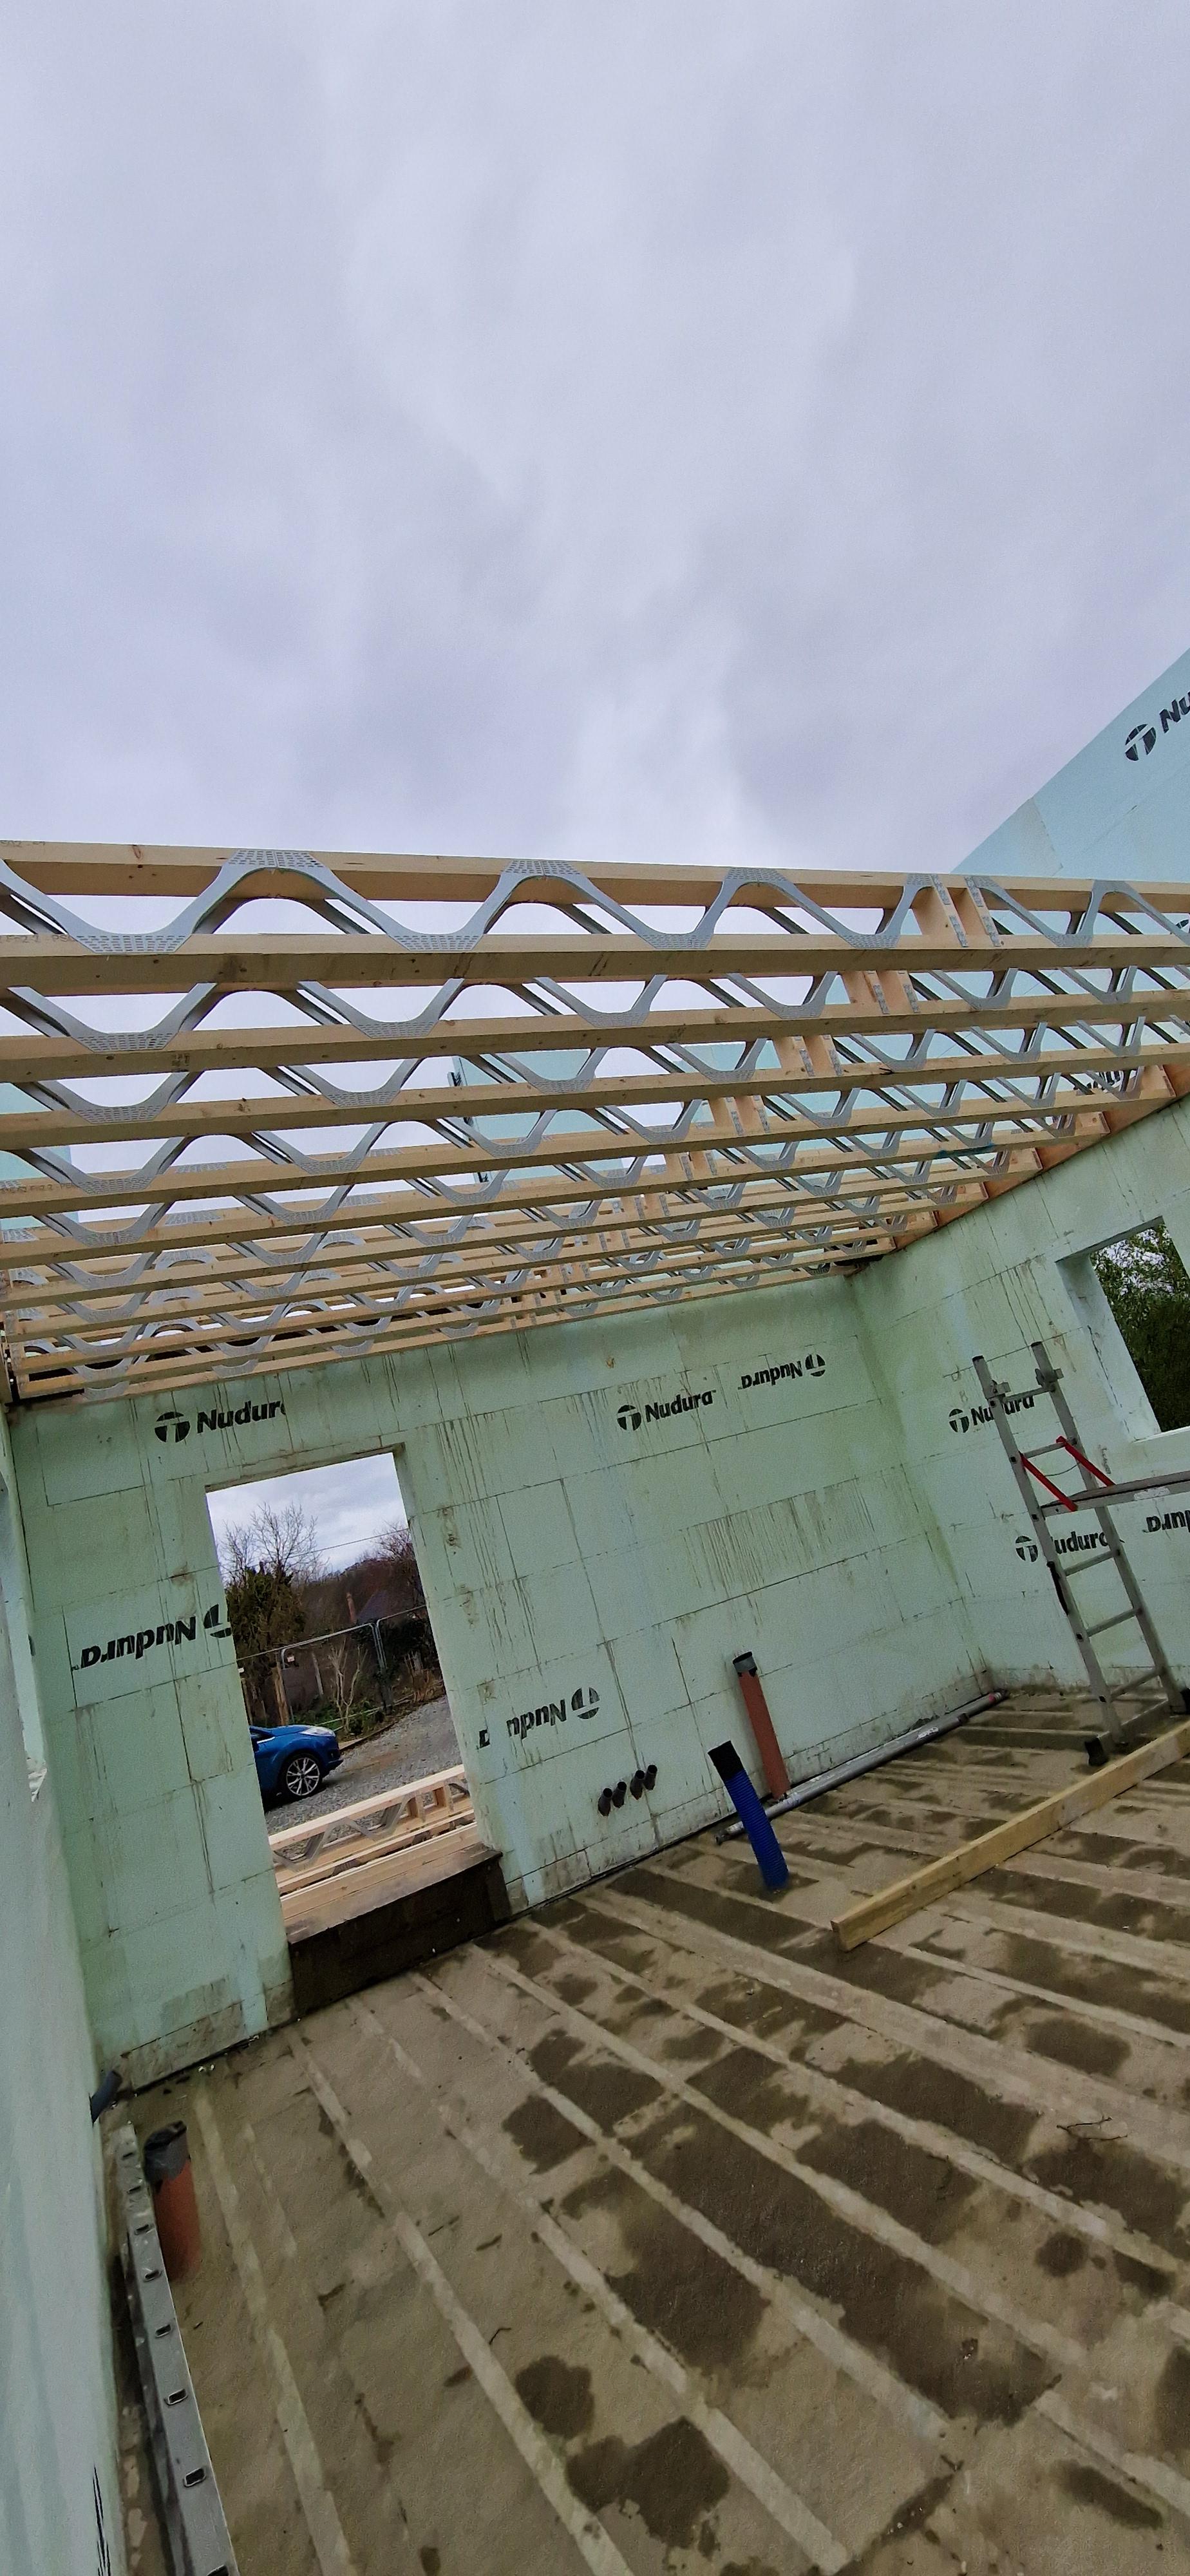
The Posi design included a tolerance gap below the Top Chord. This was not requested by me, but I ended up utilising it to deal with any clashes of Ledger fixings. I was able to plan the fixings to miss the Posi positions until I got half way along, where there was an irregular gap due to an internal wall position, but it didn't really matter. I planned the MVHR exhaust and inlet to fall within a 300mm gap between 2 Posis. These went through before the concrete and ended up as I intended. There is another of these on the opposing wall. They both head towards each other, the drop down into the plant room, either side of the Strongback, which doesn't interfere. I'm planning to infill between the joists with 47x50mm CLS, which I will cut to 300mm lengths to help me space the joists consistently. How should I fix the Posis to the Ledger? I'm thinking 2no 5x80mm screws in each, predrilled downwards through the top chord into the Ledger?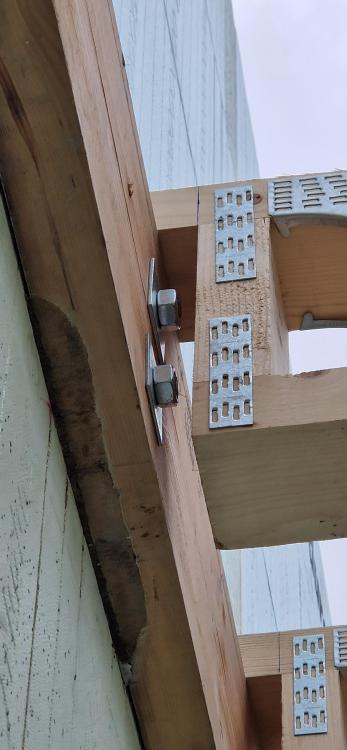

-
Nudura Cast-in-Place Ledgers....
Mulberry View replied to Mulberry View's topic in Insulated Concrete Formwork (ICF)
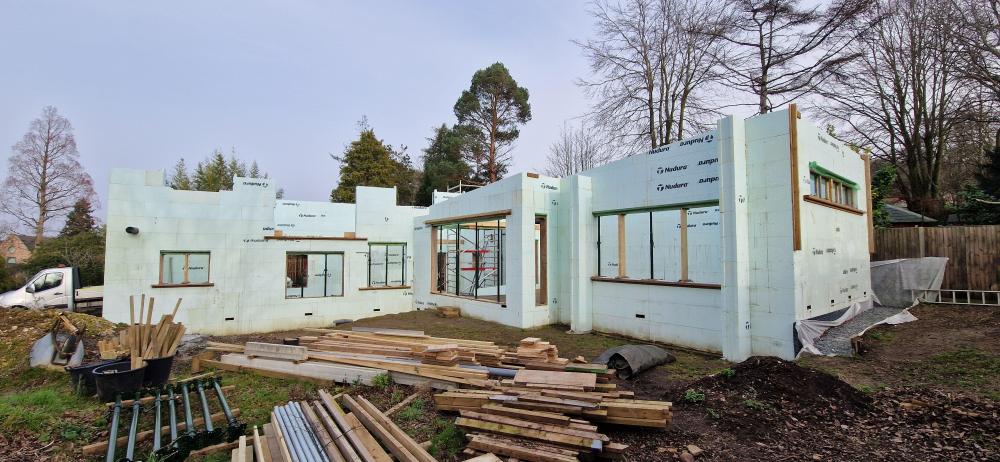
Posis are now on site. It is a simple design, this part of the building is rectangular, so the Posis fully span the width. One of the great things about doing it this way is that the 13.5m long walls were held not only with the props, but with the Ledgers too, so remained very straight. When I surveyed the width along the full length after the concrete had cured, I was a couple of millimetres out from the target measurement. We got the Posis up into position quickly, these are not fully fitted yet. These ones are 47x97 at 400mm spacings. The next bay to go up are 47x147, again at 400mm spacing as this is the Master Ensuite, which is to have a large bath. (these are now up, but not photographed).

-
2-Ply Glulam Beams - Nails?
Mulberry View replied to Mulberry View's topic in General Construction Issues
That's one heck of a reply, thanks @Gus Potter I have read over it, but I need to absorb what you're saying in more detail. To be clear though, this is a Posi solution only, my house is built from Nudura ICFs! As for the spec, my Posis were supplied by Pasquill. They have tolerated my relentless questions and constant push to improve the design. It's only a small First Floor area (around 80m2) but I wanted no discernible bounce, so they have worked to a deflection limit if 10mm, which my scheme comfortably exceeds and within that is the scope for us to install a large bath upstairs (worst case 225kg bath and 625kg for water and occupants - we're not likely to go *that* big). The overall scheme spec might be why the Glulams have been spec'd using a higher grade material, if I have read your comments correctly. With all that said, I'm new to this aspect of our build and keen to do the very best I can, so all words of advice are gratefully received. -
2-Ply Glulam Beams - Nails?
Mulberry View replied to Mulberry View's topic in General Construction Issues
I had thought I'd be building these on the floor, but the weight will be my limiting factor. -
2-Ply Glulam Beams - Nails?
Mulberry View replied to Mulberry View's topic in General Construction Issues
OK, will do. But can these be satisfactorily hand-nailed? What sort of nails should I buy? Like these...? https://tradefixdirect.com/p/stainless-steel-a2-304-annular-ring-nails-75-x-3-35mm/?gad_source=1&gclid=Cj0KCQiAzoeuBhDqARIsAMdH14F9e1wwi5PKmsk9mPj2vmeDJ4j4oaoRREkshvRn3p26U9MeNdI-V_8aAkteEALw_wcB -
2-Ply Glulam Beams - Nails?
Mulberry View replied to Mulberry View's topic in General Construction Issues
So could these be screwed instead if time weren't the critical factor? I have a 3-ply beam and the fixing pattern for that is 12x180 hex bolts, which I'm far more comfortable with. -


-
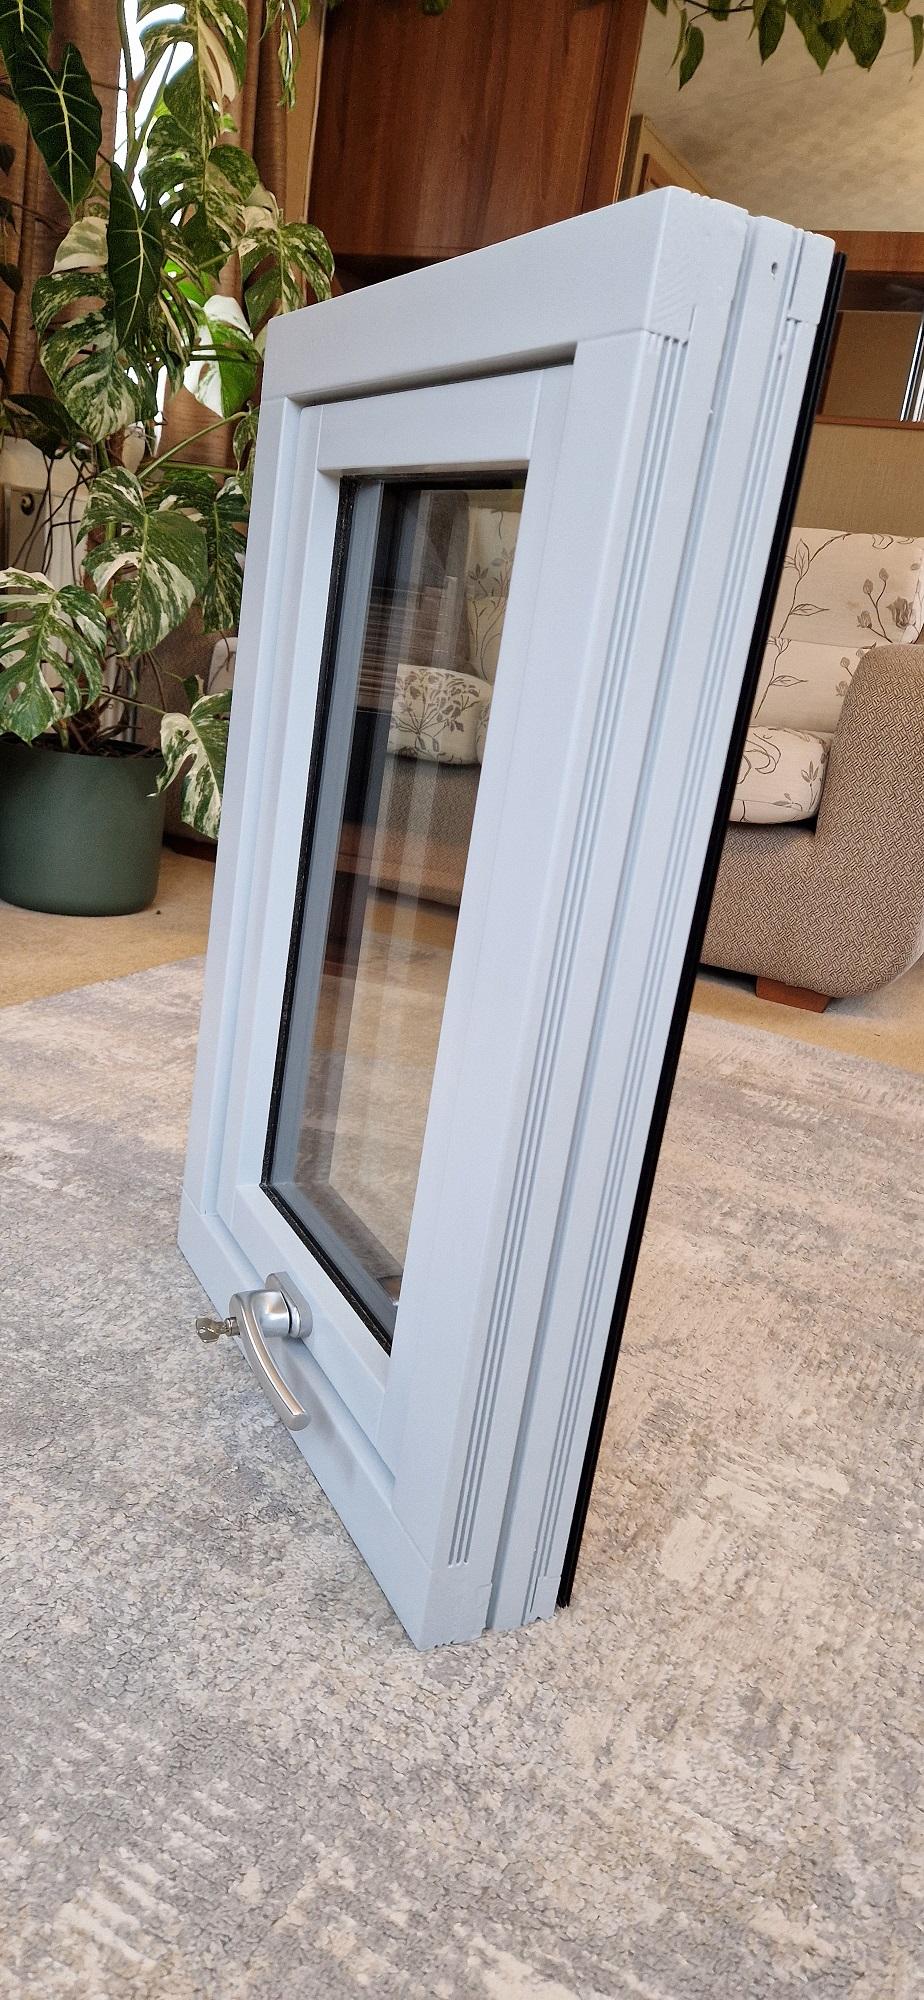
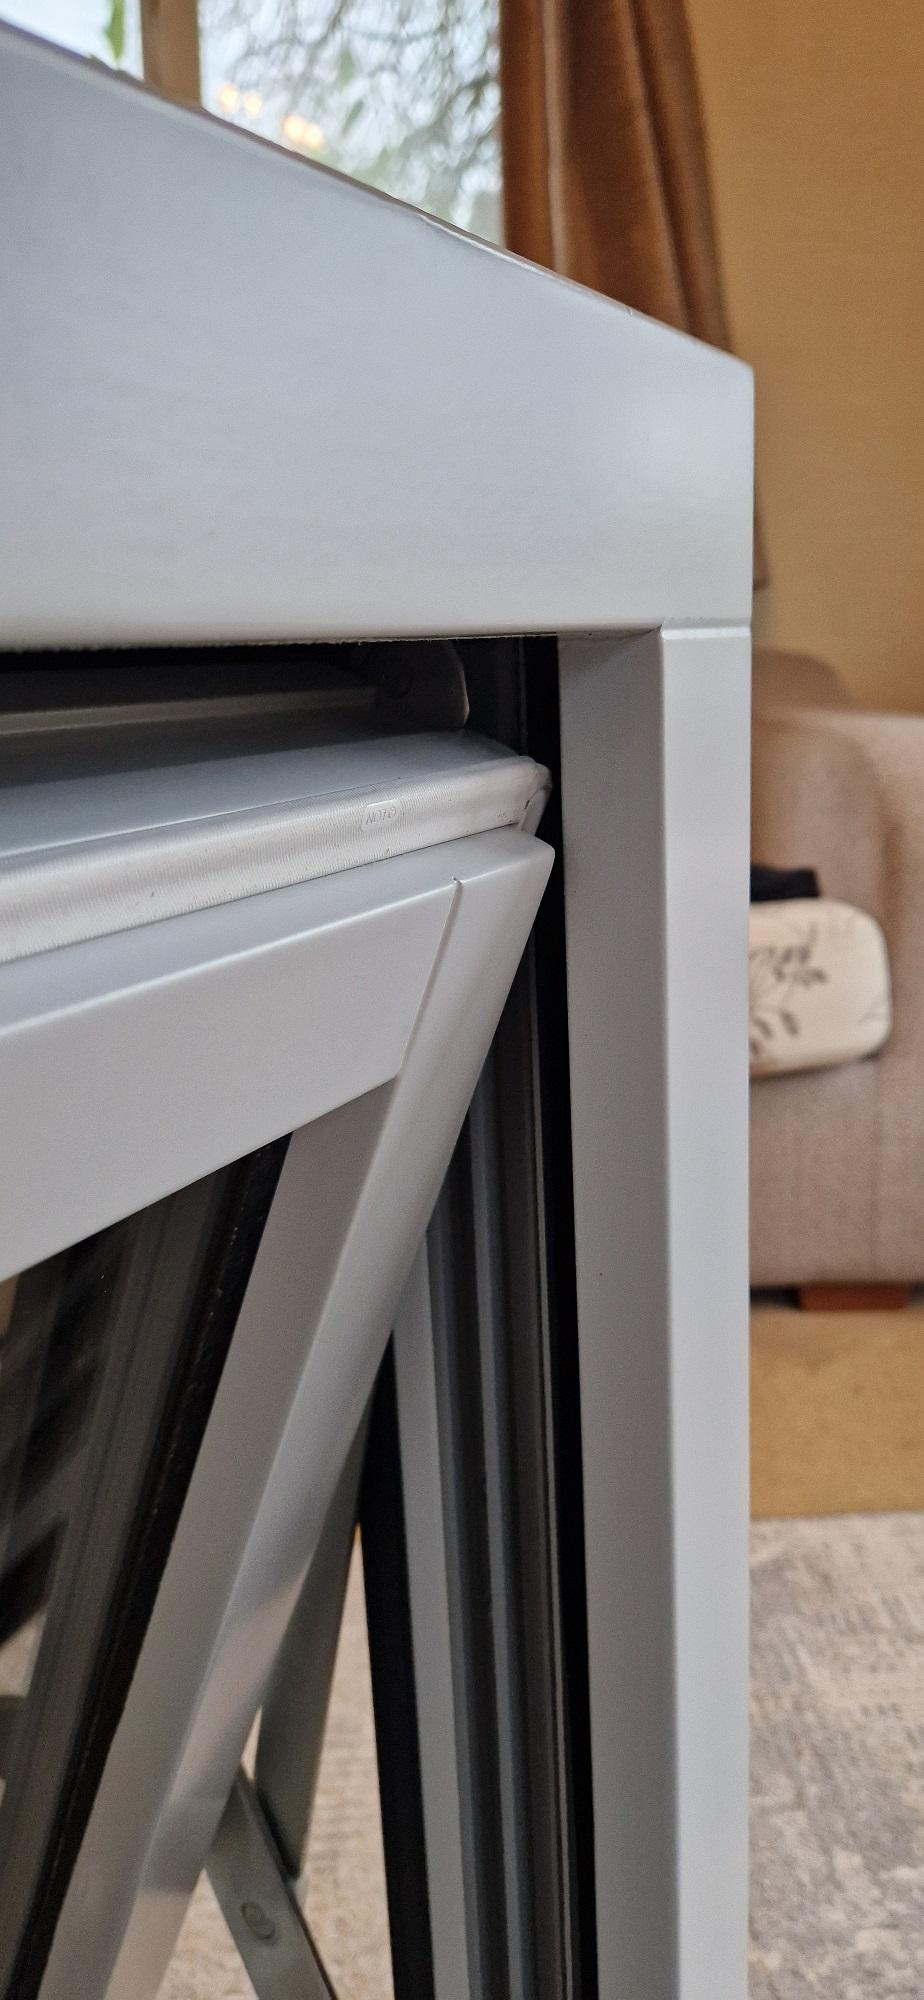
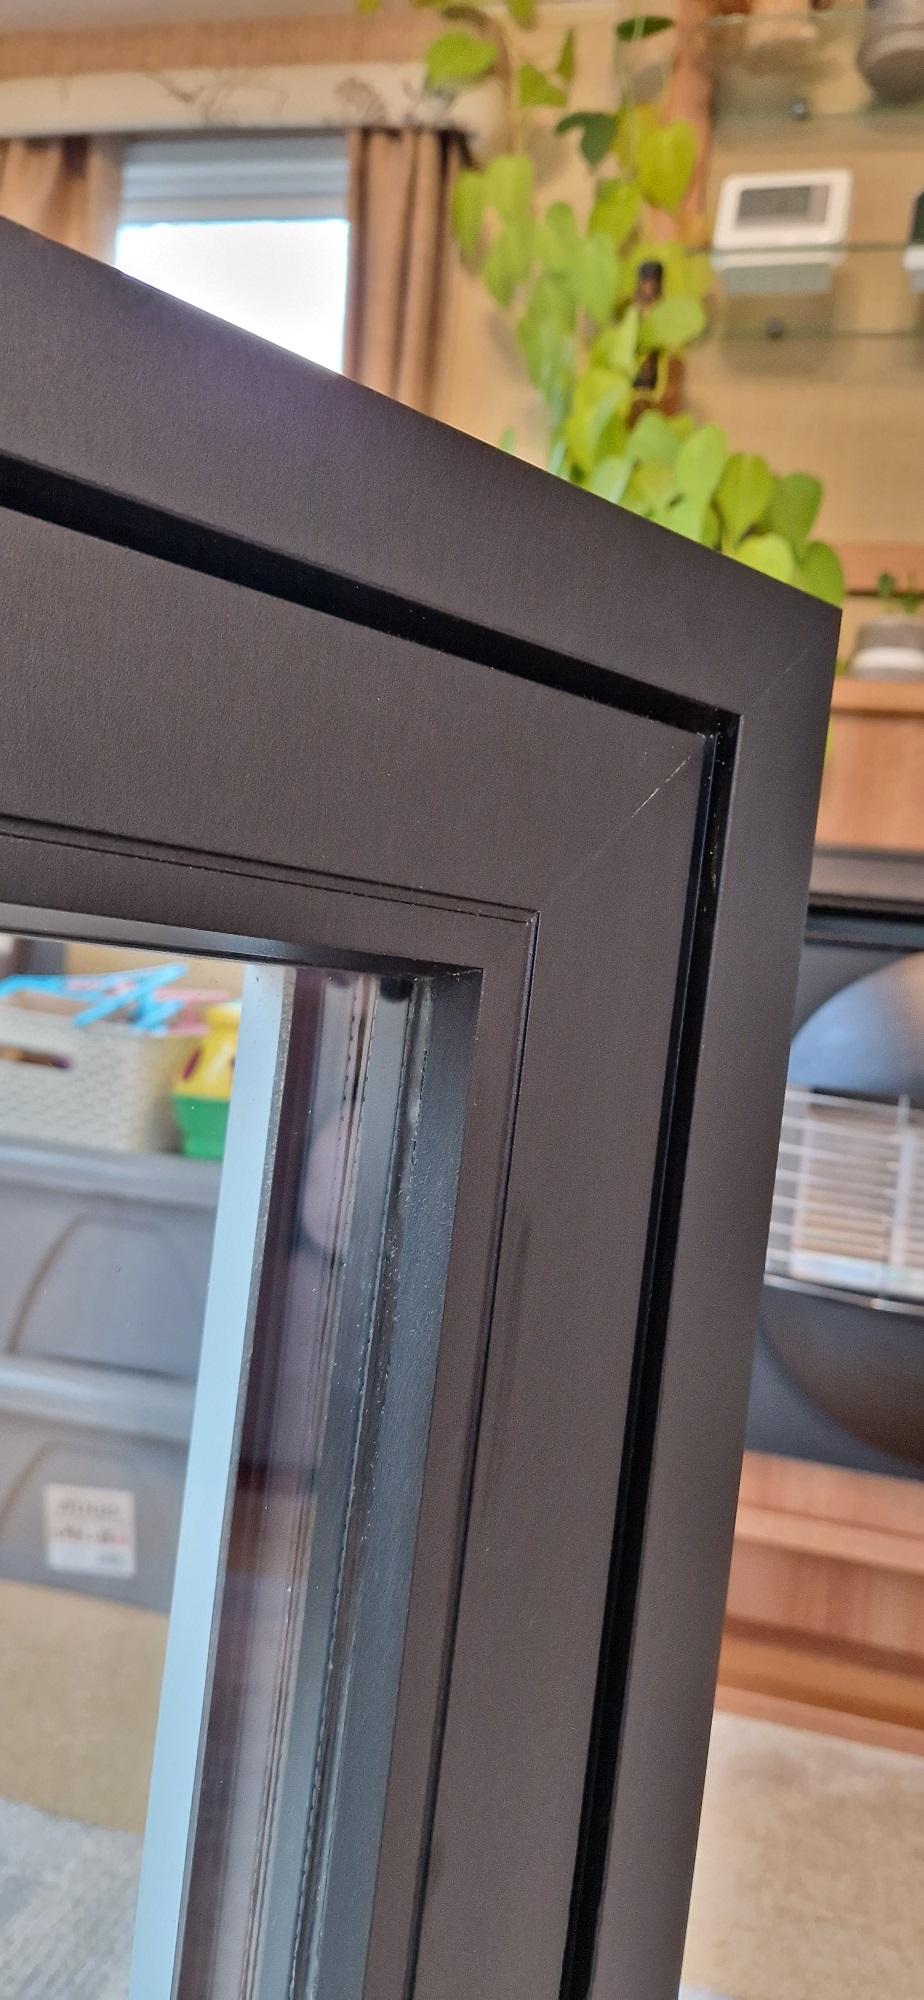
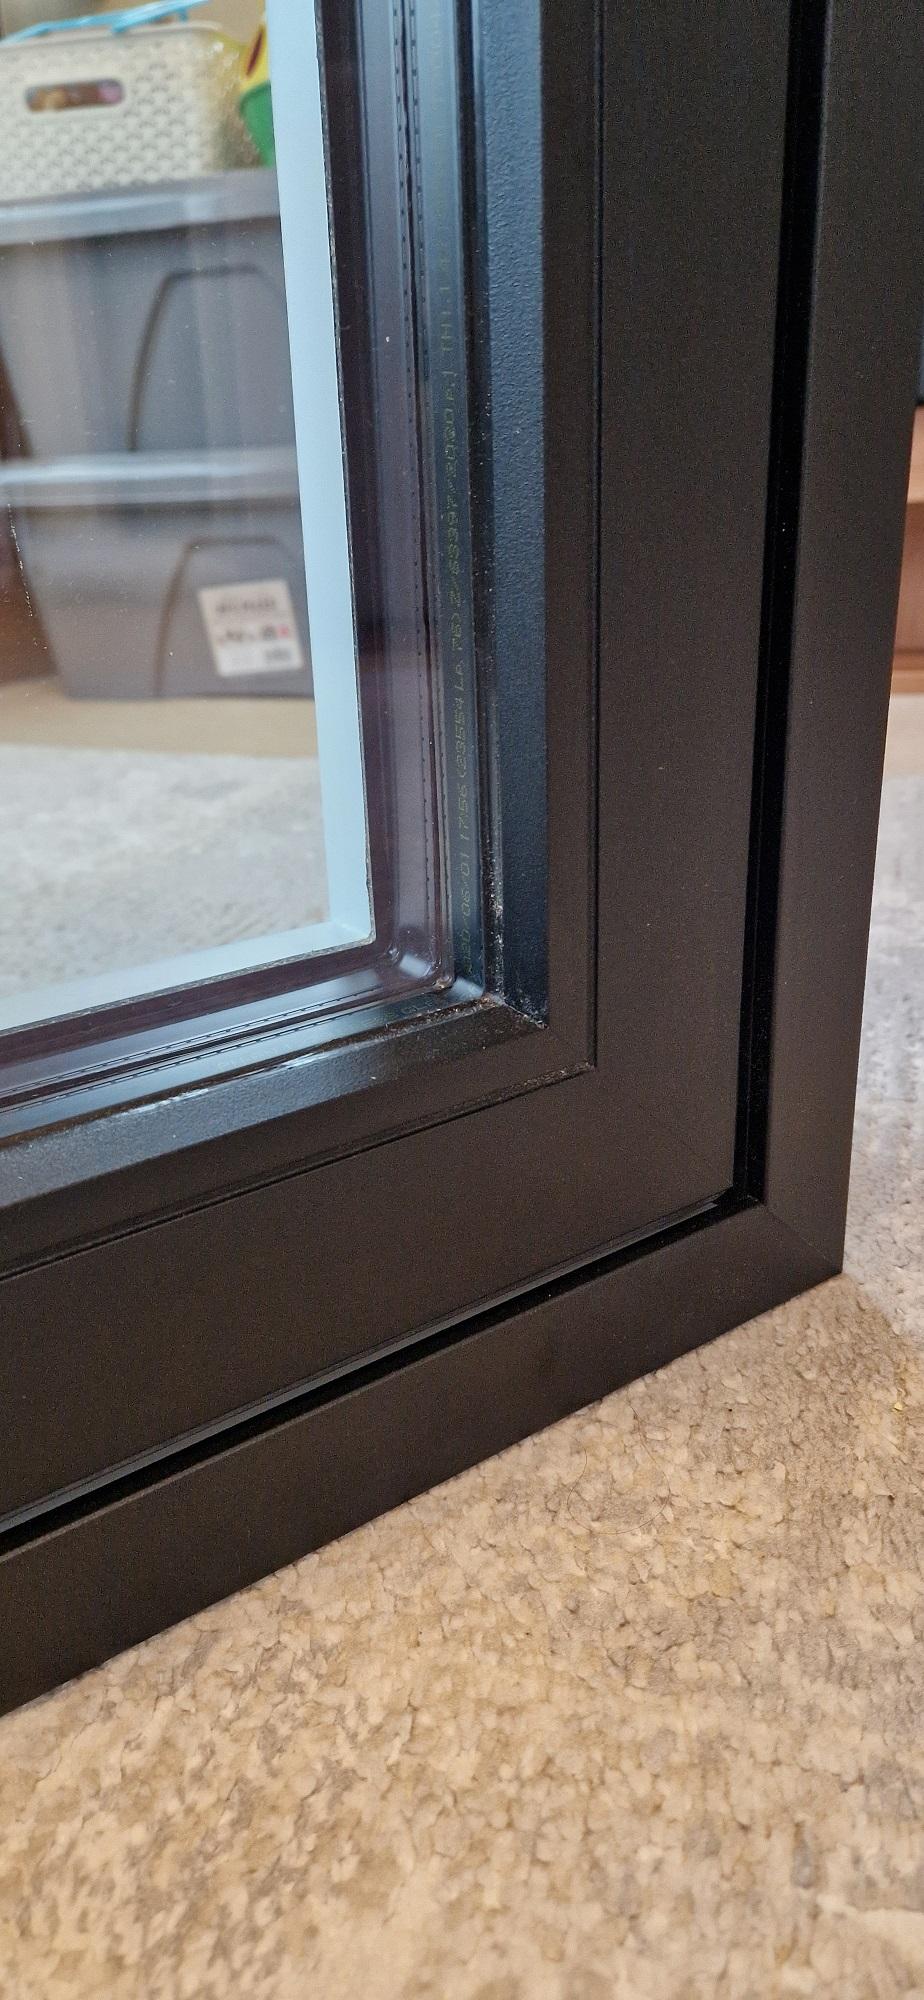
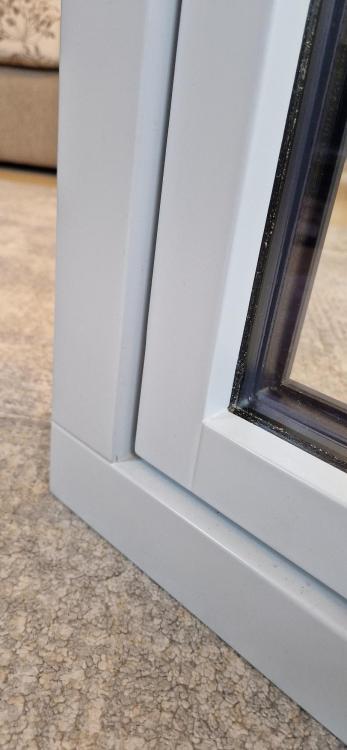
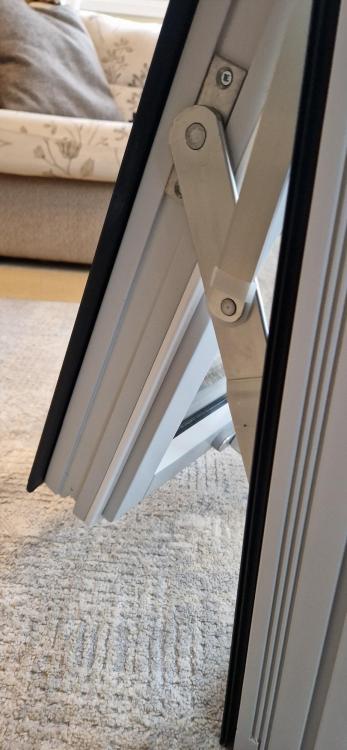
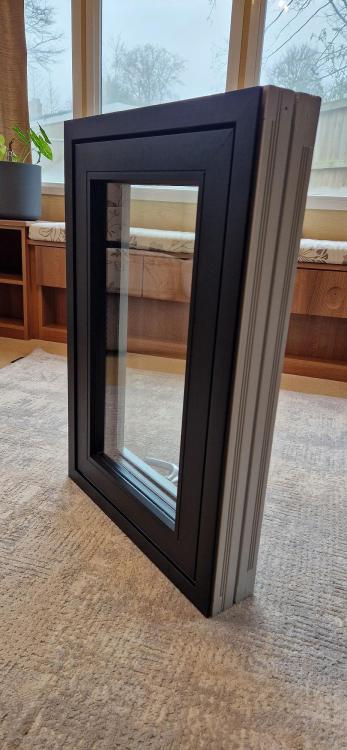
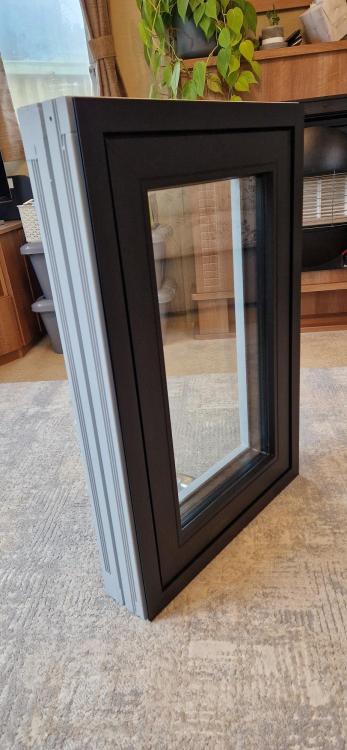
I've got a sample window here. It's an Aluclad system, made in Europe. They look lovely to me, but I'm no expert. Do any of you have a keen eye for this sort of stuff? They are triple-glazed and offer great u-Values. They come in under our all-Aluminium quotes.


-
I've got to build a number of 2-Ply Glulam Beams for my First Floor Posi design. The supplier has given me instructions like this... I've never done this, so need a bit of further guidance. Does this denote one nail at each location? Can these be hand nailed? I'm a self-taught DIY'er, so have always screwed everything! Using nails is new to me. LOL. What's the benefit of nailing over screwing?

-
Sorry, didn't mean to rear up. The underlying problem here is my Architect. She took £20k from us for RIBA Stage 4a and while we're happy with the design, some of the details were just not thought through. This is one of them. She did not fully understand Nudura and refused to get aligned with us on it. Her view was to trim out the window seat internally, I had always said I didn't want to do that as I didn't want it to eat in to the room, besides there is a step detail from the Kitchen into the Living Room that would have been compromised. At the moment, it's a nice wide 2-step. There were parts of the project where she forgot who the paying client is, but that's a whole other story. She made it clear she no longer wants to be involved on the project, so I have no choice but to deal with the legacy problems. In the end, I refused to proceed with a detail we weren't completely happy with, but by then she'd lost interest. Hence she cobbled this effort together and once she handed it over, that was basically it for us and when the structural complications emerged, we no longer had her support to revise it and its only been since it has become real that I can see a better way. I could show you other details that are similarly frustrating, it defies all logic, but we're not deeply experienced, so could not call all this stuff out until I actually started to progress. Sorry to waffle, please bear with me, I think you can see there's more to this than meets the eye! But I just want a way to bring it right, get what we want and build it.
-
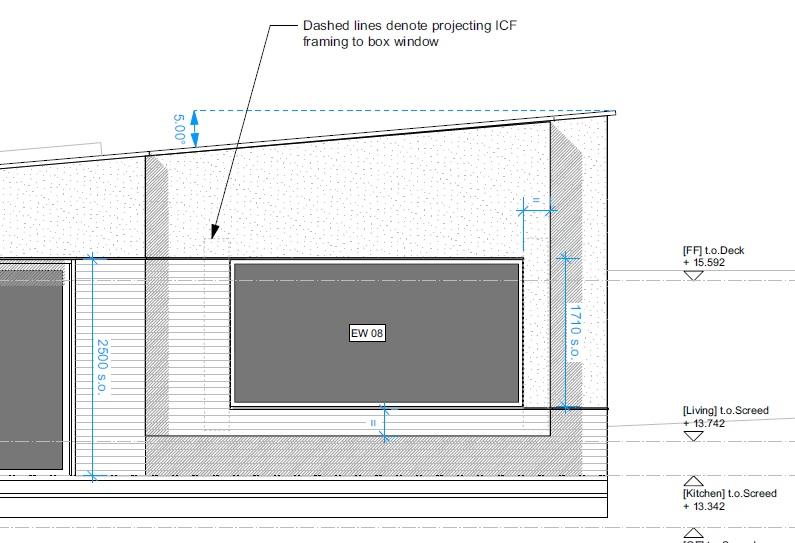
That is pretty much what we're seeking. We don't have any internal detailing like that, but the shape is mainly the same. It's not a bad idea to do it with Nudura, I have sufficient blocks. I would just have to wait to infill it until my next pour or mix it on site. The dissimilar materials thing isn't so much of a concern I don't think. If you look at the plan drawing above, the part denoted as being rendered would be infilled with Timber (the easiest way, I don't have to add a steel or concrete lintel then) and faced with EPS to match the Nudura and the part denoted as having brick slips would be infilled with blockwork. Or I could do the blocks in the slipped areas and timber in the rendered areas, then face the whole front face with EPS and be back to where I should have been had it been built 'properly'.
-
It's not the point of this post. Did you not notice that I have built it? I cannot make such a change at this stage. I'm just after advice about bricking up the section under the window, not a design critique. The metaphorical horse has already bolted.
-
1. It's a bit late for that (concrete is in). 2. We did it this was so as not to lose floor space, which it does. Internally, it looks great.
-
Yeah, I should have done that, but the concrete is in now so the monolithic idea is out of the window. The original idea was rejected by the Architect because it put it in the outer 2% of a very large tree root protection area. But now it's obvious that nobody gives a crap about that, I could have done it in Nudura. Instead of that, we're left having to make it work. The foundation I'm talking about adding is *just* in the protection area hence why we didn't do it first time, but I'm prepared to take the risk.
-
Yeah, there is. The add-on was designed after the Beam and Block floor was done, so no easy or even moderately easy way to make it into usable floor space. Believe me, the way I forced this design away from what the Architect suggested and into what it is today, is already a triumph. If only she'd listened first time around, we're very happy with the design, just not so much the problems that are surfacing now we're building it. The area to the left of the left-hand pier was drawn by the Architect as some sort of outside shelves. I made no sense to me, so I said we'd just fully box it in. It'll be blocked up from bottom to top, but there is no window to think about, so that's easier. I considered using it as an internal display area or shelving, but it all just upset our simple view of the window seat. It'll be a lovely grand feature when it's done. The seat will be 3.4m long and 600mm deep!
-
It's not a huge area. Our main foundation spec was 300mm minimum, but principally down to the hard chalk. When I dug for those piers, we went down to about 450mm and were well into the hard stuff in that area. It wouldn't be too hard to hand dig that little bit out and mix the concrete (about half a cube I reckon). I've got a brickie coming to do some work for me, so will get him to do this bit. I'd build it up in a proper way, i.e. with a DPC etc. Not sure where else moisture would be a concern, any moreso than with the original Architectural design. As I said, this design change happened late. Our Architect had all-but lost interest in the project by then. She punted out the revision, took her money and didn't care too much that it wouldn't all make sense in build. This is all better than when the design was floating, so I'm hoping to make it work.
-
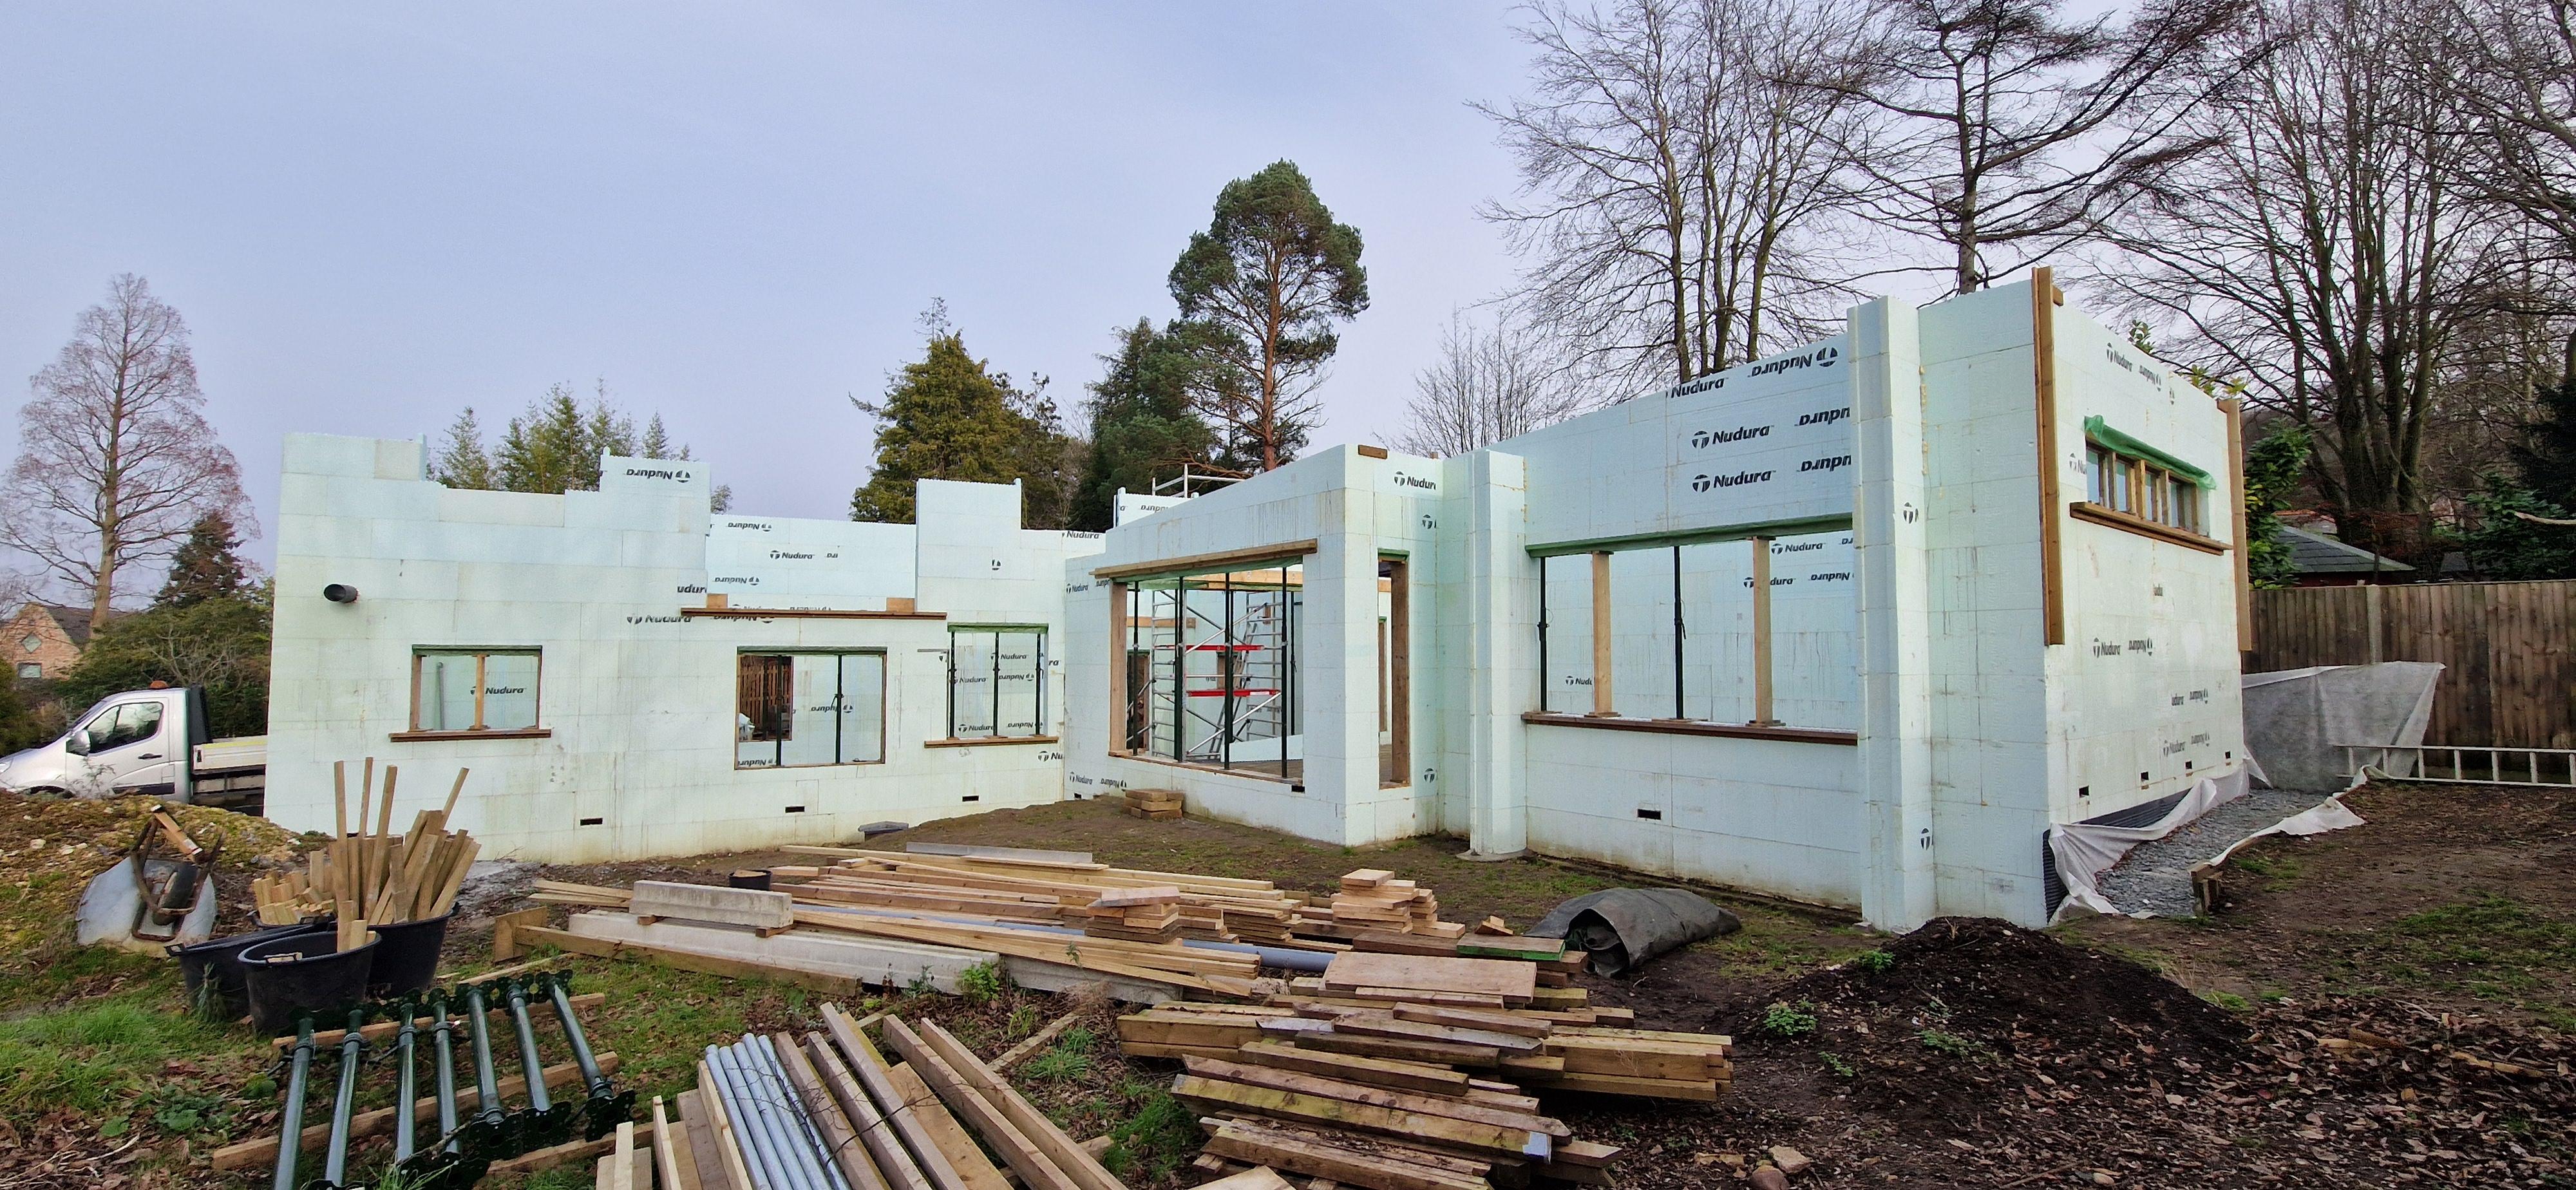
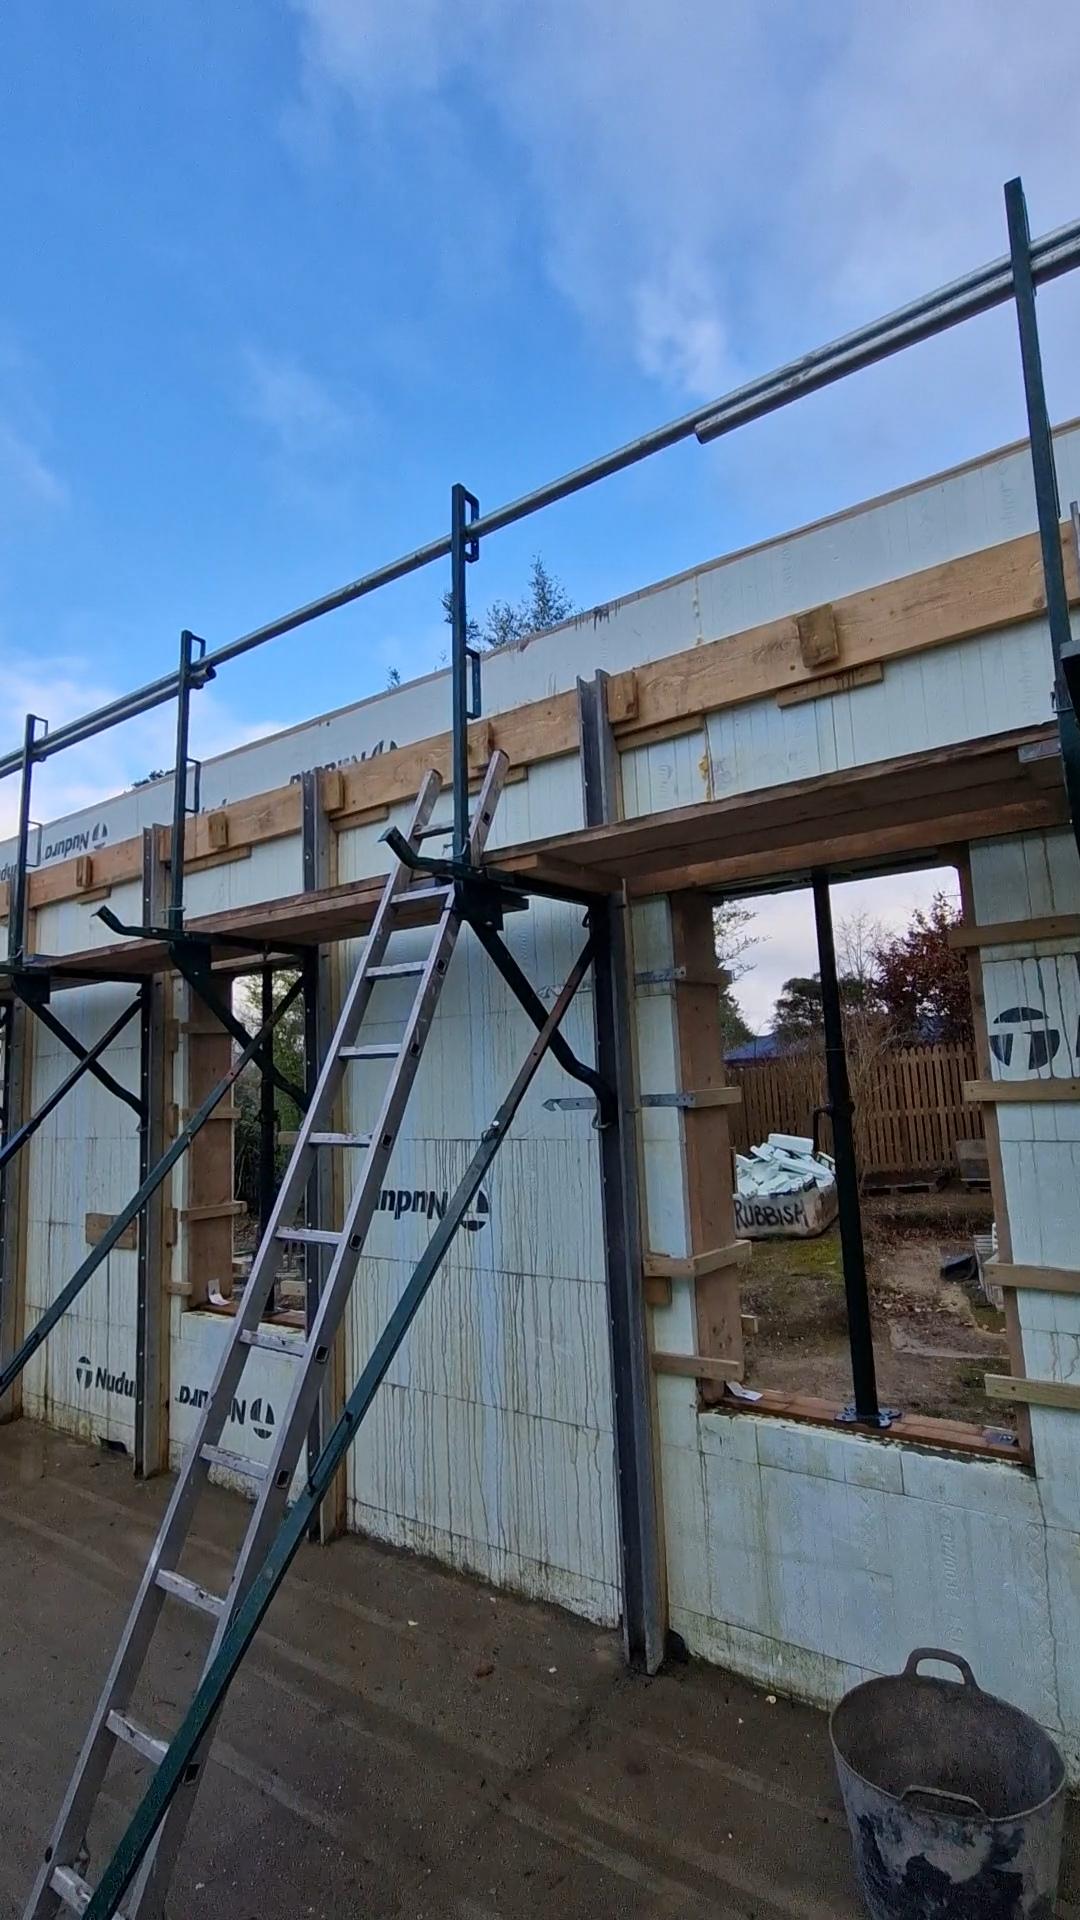
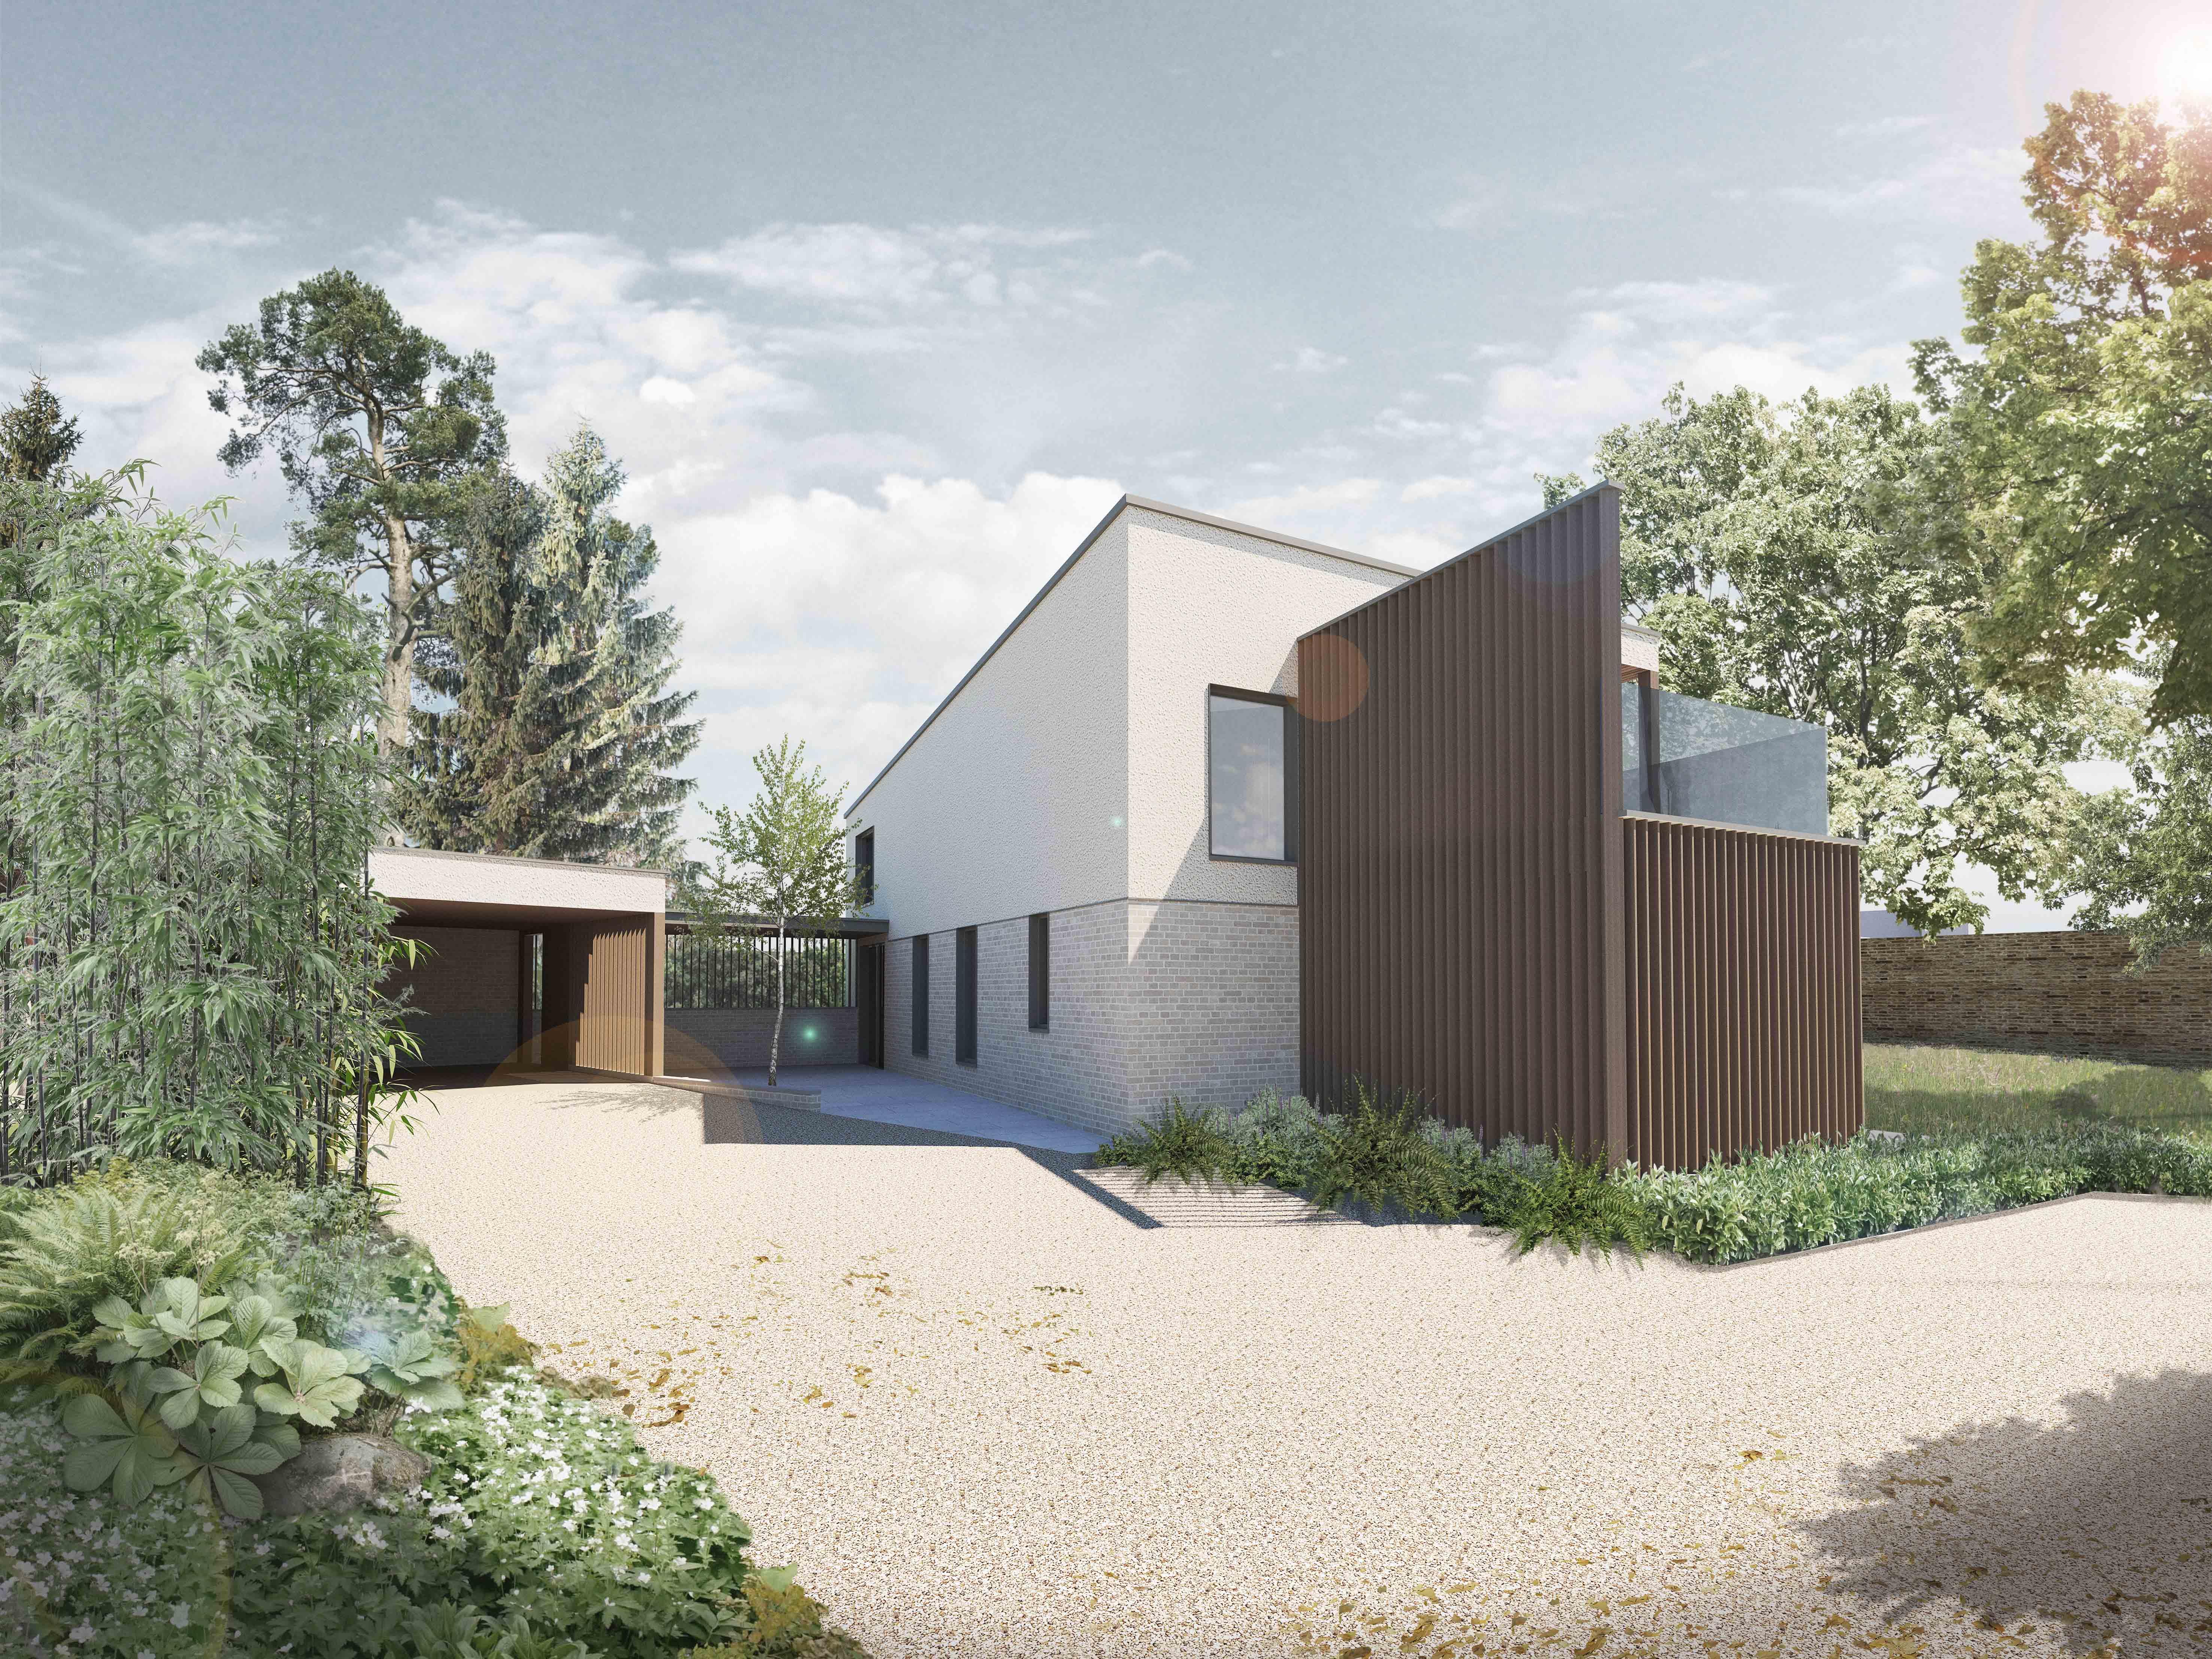
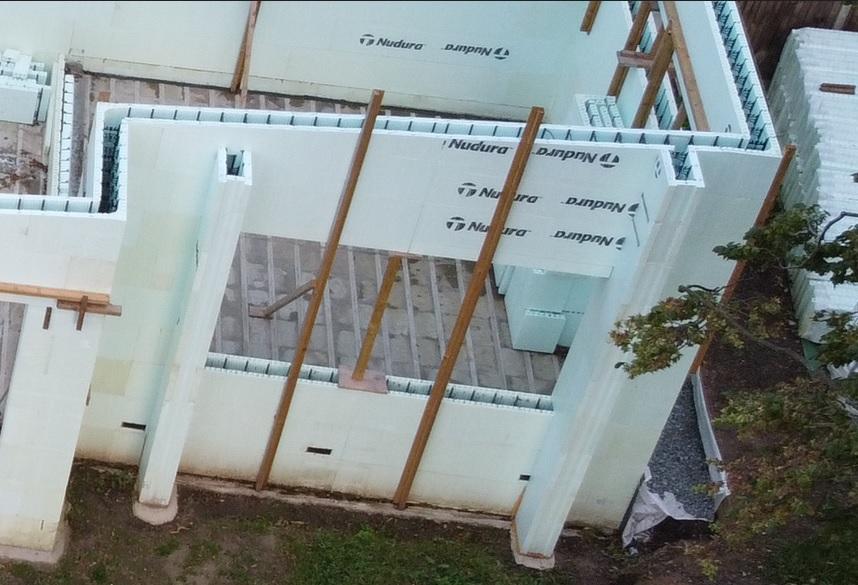
This is our Window Seat arrangement. It was designed as somewhat of an 'after-thought', not properly considered really in all honesty. This is how we decided to construct it. There were definitely better ways to build it, but we move on. The pic is a few weeks old, there is now concrete in it, including in those projecting 'piers', all is well so far. The idea was that we would push the window out from it's original design position, into a deep window seat. So we added the piers to provide structure for the window. The intention was to side-fix the window to the piers. The original design was a floating box, the piers were not intended to come down to the ground. The whole thing would be boxed in with timberwork to create a flat front. Despite an early indication of confidence from my SE, it turned out that the steel needed to make it work was extreme. So I added a couple of extra foundations and we brought it all the way down, this simplified the reinforcement no end. The solution was supported by my SE. On further thought about the boxing in, I am now thinking of adding a further foundation between the piers and erecting blockwork up to cill height of the window, this would have better ground-level resilience than anything else. Keep in mind the main envelope of the building is ICF. The opening will be insulated on both vertical sides by the existing ICF and to the top and bottom with PIR. Therefore the blockwork doesn't really need to be thermally considered. It's just an infill, but might as well bear some of the weight of the window I guess. I'm thinking of having it built as a 9" wall (with or without a cavity) so it can be used to pick up the inner cill too. Can anyone spot any flaws in my plan? If it's OK, what blocks should be used? The piece over the window up to the roofline will be timber as there is no need for it to be any other way.
-
Nudura Cast-in-Place Ledgers....
Mulberry View replied to Mulberry View's topic in Insulated Concrete Formwork (ICF)
As an update to this, I have been round with a laser level and can confirm that the Ledgers are at +/-2mm from their design height. Pretty much as they were before the pour. The only thing I would do differently if I did it again would be to add more timber screws to fix the Ledger to the ICF blocks. Although the Ledger was 'trapped' behind the props, in some places the blocks pushed away by a couple of mm. This won't cause an issue, but the timber screws would have prevented this. -
Nudura Cast-in-Place Ledgers....
Mulberry View replied to Mulberry View's topic in Insulated Concrete Formwork (ICF)
Me neither. For what purpose? -
Nudura Cast-in-Place Ledgers....
Mulberry View replied to Mulberry View's topic in Insulated Concrete Formwork (ICF)
What you see in the final picture is how we went into the pour. Ledgers in place. -
ICF wall hangers - Lavann..
Mulberry View replied to Big Neil's topic in Insulated Concrete Formwork (ICF)
Hi there. I've posted a new topic in this section. Feel free to check it out and ask any questions. It was a fair bit of prep, but eliminates the steps later on. -
Nudura Cast-in-Place Ledgers....
Mulberry View replied to Mulberry View's topic in Insulated Concrete Formwork (ICF)
Finally, I added a small piece of 4x1 and a single woodscrew to hold the bolts in place and prevent them pushing out when the concrete went in. The Ledger was levelled and secured with the 6.7mm Timber Screws, but was fairly tightly in place behind the props anyway. The concrete is now in and once it has fully cured, I'll go round and cram the nuts up. As an additional bonus, I think the Ledgers helped keep the wall nice and straight. Hope this helps someone out!