


Nick Thomas
-
Posts
383 -
Joined
-
Last visited
Nick Thomas's Achievements
Regular Member (4/5)
156
Reputation
-
I ended up using Farnovo dry paint, which is a bit cheaper than this, but not by a huge amount. They ship you 5kg of powder, you mix it with 3L of water to get ~5.5L of paint for ~£80, plus pigment. https://www.womersleys.co.uk/shop/paints/internal-paint/paints_for_internal_plaster/farnovo-dry-paint , https://www.womersleys.co.uk/Guides/TDS_DPM_Classic_Farnovo_en.pdf etc. Good coverage, but you do need two coats on top of lime - the first one mixed relatively thin. You can mix it into a thick paste to fill cracks or do decorative work too. Much cheaper, but I don't have any experience with it https://www.womersleys.co.uk/shop/paints/internal-paint/paints_for_internal_plaster/cornerstone-lime-paint
-
I had mine taken out by octopus a year ago. I was told that the gas network would be in touch to remove the pipe after the meter was gone, but if they are going to do it, they're taking their sweet time (NGN). I had a letter through the post a couple of months ago asking for details of "any new gas meter", but haven't heard anything more.
-
 Hah, thanks for the highlight @SteamyTea. @Selina there are at least a couple of straw bale builds on the Isle of Skye, which I would recommend you look up and try to chat to the owners about. They'll have plenty to say about how to do it in Scottish islands conditions, what works, what won't, etc. There was this little bothy in 2017 - https://strawworks.co.uk/projects/commercial/skye-strawbale-bothy/ - and I know a straw bale house got a lime render coat over there this summer. I wasn't involved but maybe it's "Vinca Petersen" ? Worth chatting with both projects if you haven't already. Site conditions matter a lot - wind-blown rain is definitely the enemy, but if you have a sheltered site it can be mitigate significantly. You also want a roof structure that will protect the walls (big overhang, generally) without being vulnerable to being ripped off by the wind (so maybe a full hip sort of thing). Lime render might or might not be suitable - I wouldn't rule it out *just* because you're on Islay. St Astier do NHLs and have some recommendations based on site conditions that you could look at. You can also harl a straw bale lime rendered wall, which might be more practical than the stone facing? Or a full timber / brick / block / stone / anything facade, which will definitely stand up to the rain. Just be sure to coat the straw with a coat of lime render to discourage rodents. I have one straw bale wall I built against a pre-existing brick wall which goes: brick : ~50mm air gap : vapour-permeable membrane : lime render : straw It's only been a year, but I've had no indications of issues with water, condensation, rodents, etc, so far. On structural straw bales vs. non-structural, honestly, having done the former, I would absolutely have a timber frame and then just infill with the straw, if I were to go again. You end up using so much wood anyway, for the roofplate and baseplate and window and door posts, etc, that some more uprights just aren't a big deal, while making everything else easier - it'd let you get the roof on before bringing any straw onsite, which will help to keep it dry during construction, and should keep things from getting wonky as you build. Straw SIPs are also fine. It's basically a technology / labour tradeoff, with structural straw bales being lowest technology but highest labour. So much labour. It *works*, but the technology to get the same result with less labour also exists, and it's fine to make use of it.
 -
More foundation fun - straw bale garden room on clay
Nick Thomas replied to Nick Thomas's topic in Foundations
Powerrrrrrrr. I'll cut some holes through the worktop for easy access to the sockets once the doors are on , and get some shelving in.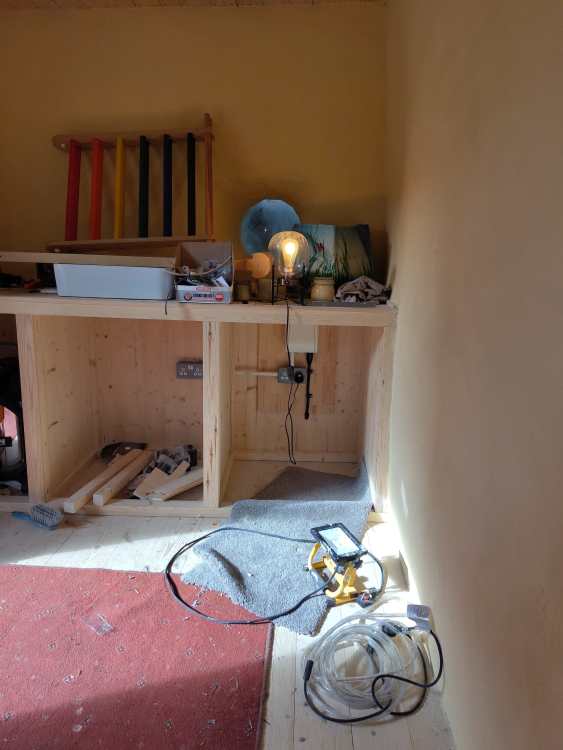
-
Thanks. It's done and I've got my certificate; no earth rod, and it seems he's just used the house earth through the 4mm² SWA. I questioned him lightly about it and he said that the separate earth might have been needed if the garden room had any metal in the construction ("external-conductive-parts" in Temp's PDF, I guess?) but since it didn't, he thinks it's fine as is. In the end it's gone: house CU -> 20A MCB -> 4mm² SWA -> garden room CU -> RCD -> 16A MCB.
-
Hah, no, I laughed too - as the ringing in my ears subsided. Got it built to the full 7M working / 5M platform height today, and discovered that close-up there's a hell of a lot more pigeon on the roof than expected. Also discovered that the roof is actually a bit more than 5M high, the feet on the access tower make for an uncomfortably wide gap between 5M platform and roof, and that the access paths up each side of the panels are uncomfortably narrow anyway. Long story short, I've sacked it in and will get some professionals to sort the pigeons out. The tower seems fine for wall-related jobs, though; I'll keep it around for the foreseeable. I hope your efforts go better than mine!
-
So I got my tower built up to 5M working height today (3M platform height). I'd say the outriggers are essential even at that level. Very wibbly wobbly without. Pigeon spikes arrived late today, so I wasn't really expecting to get it done; I'll be at it all day tomorrow. The first build involves a lot of messing around with screws and nuts and bolts and clamps, but it looks like subsequent builds will be quicker. Oh, and if you're not careful, the trapdoor whacks you on the head quite hard as you descend. Very clever. My original plan was to rent a scissor lift for a weekend (~£150); that or a cherry picker would definitely be less hassle than one of these.
-
I didn't think to ask about earthing. I'll mention it when he shows up on Monday; maybe he's planning to pop a separate earth in, I don't know.
-
I just bought one of these yesterday! It arrived today. Three heights - safe working height (~2M above platform height); scaffold height (~1M above platform height); and platform height - which is where your feet are. The 7M tower is 5M platform height. I measured the roof height (also ~5M for my two-story newish-build) by flying a drone up to the eaves and reading it off 🤷♂️. Once you've got one, you find any use for it you can, I think. Worth noting that the instructions all say "for god's sake don't climb onto a roof from one of these things, jesus christ please stop". I assume this is standard arse-covering, because that's exactly what I'm going to be doing. I guess the main risk is pushing the platform away as you push off - I'm planning to tie mine to the house somehow, to mitigate that. I had a read of the HSE's working at height guidelines and they're a bit less stressed about it: https://www.hse.gov.uk/pubns/priced/hsg33.pdf
-
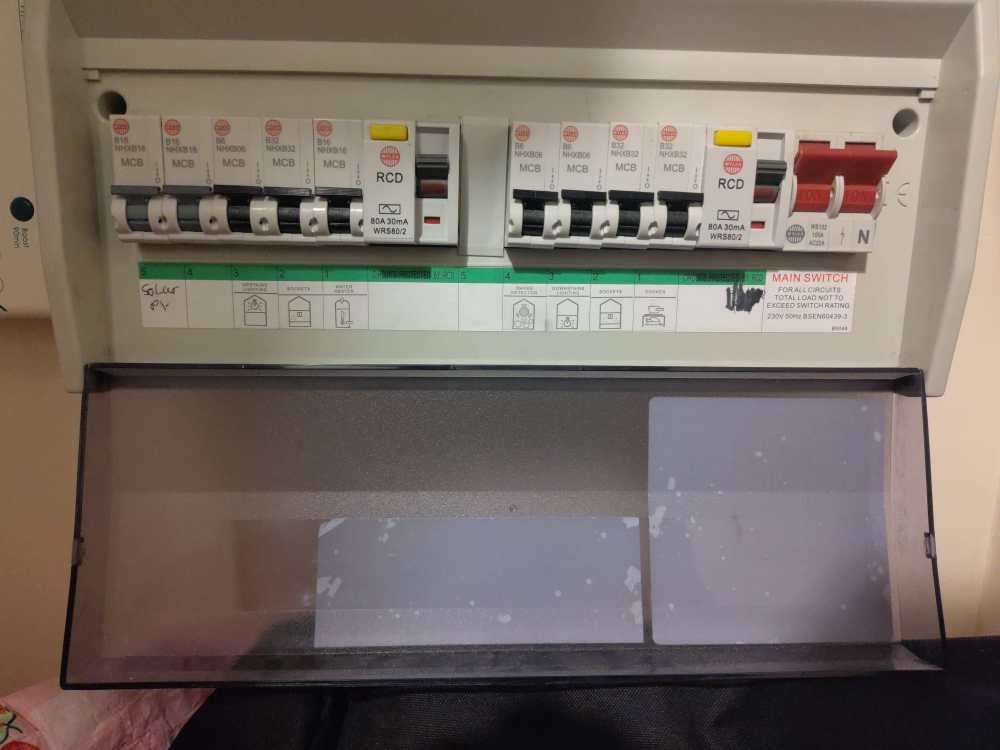
So I've got an electrician coming out Monday to wire up the garden room and give it a certificate. We talked through a couple of different ways of wiring it up to the consumer unit in the house, and I was hoping to double-check what we arrived at. The CU: So just the one slot left, protected by the "downstairs" 80A / 30mA RCD. The electrician has proposed moving that RCD and all its fuses left one, so the free slot is next to the 100A main switch. It would get a 16A fuse, then 4mm² SWA out from there, along the side of the house and into the attached garage at about shoulder height. From there, it'd join to another cable I've already laid - also 4mm² SWA, and 25M long - which goes out of the back of the garage, along the line of the fence in the back garden (in plastic conduit, for all that's worth), then under the decking - again in plastic conduit - then under the garden room and into it through some 68mm drainpipe I put through the wall. There'd be a tiny consumer unit on this side, with a 16A fuse and RCD protecting 2x double sockets. No lighting circuit. Total SWA run probably ~30M. The reasoning was that if there's a fault along that cable, or with an applicance in the garden room, it won't affect anything inside the house, which seemed compelling at the time. The more I think about though, the less I like the idea of that 30M cable run just having the 16A fuse on it. What do the good people of BuildHub think? Is this a sensible thing to do, or would RCD or RCBO protection for this cable in the house CU be worth it? If so, would you tag it onto an existing RCD or find a way to free up more slots, to make room for it to have its own? The leftmost slot 4 is the heat pump,and its cable goes the same way as the new cable will go, so if I did need to free up space, I was thinking I could have a CU in the garage (40A?), and have the HP go from that. I assume if I did that, I'd still want the CU in the garden room as well?
-
BUS voucher and gas line
Nick Thomas replied to allthatpebbledash's topic in Air Source Heat Pumps (ASHP)
Up to you of course, but just in case you weren't aware, you can get specialised induction hobs for at least woks, e.g: I have a friend who absolutely refuses to switch; I'm beginning to suspect she just likes the gas fumes ^^. No idea about karahi though. Best of luck with the refit! Keep us updated. -
Amazing what you notice when you start looking
Nick Thomas replied to Nick Thomas's topic in General Structural Issues
We did look at getting one of those at last year! Not practical for the regular inter-town trip with a baby seat, though. -
The right compactor for Geocell floor???
Nick Thomas replied to eros_poli's topic in Tools & Equipment
I assume the advertised U value depends on the recommended compaction level? Any idea how much reduced compaction would affect it? A quarter less material = multiply by 1.25? -
Amazing what you notice when you start looking
Nick Thomas replied to Nick Thomas's topic in General Structural Issues
Hah, yeah, definitely not safe to be on. The garage is a shade under 3M wide and there are 5 trusses, so 700-750mm between them. It was built at the same time as the house, back in 2011 or so. Even at this size it's pretty useless for putting a car into, so maximising storage makes sense. Just... not like this. -
BUS voucher and gas line
Nick Thomas replied to allthatpebbledash's topic in Air Source Heat Pumps (ASHP)
Ah, yes, good shout. Octopus did the paperwork on this for me and didn't charge, but others might. The BUS grant munching installers did the actual physical removal of the meter - or at least capped it off, I don't remember exactly - and didn't charge either. Apparently the network owners - Northern Gas Networks? - are meant to come along at some point and remove the line between the gas main and the property, where the meter used to be, for safety reasons. They sent me a questionnaire after about a year asking about any new meter, but I've not heard from them other than that.


