ElliotP
-
Posts
19 -
Joined
-
Last visited
ElliotP's Achievements
Member (3/5)
12
Reputation
-
Hi all, Back with a small update on this and looking for some validation if you don't mind. I've just started off with my architect and have advised on which way i want to go with the wall (200mm, eps pumped in). He's fired back some questions/advice (he's a good man and making sure), i just wondered if you could pick your brains, I think i've got it covered but just want to be sure. Lintels - he's advised that he can't find off the shelf thermally decoupled lintels for a 200mm cavity. To me this is an easy one - we're using two separate standard lintels, EPS goes between as with the rest of the cavity - it doesn't get better than that does it? Secondly he's advised that a 150mm cavity with Celotex 140mm Cavity Wall 21 would be thermally better than EPS. I've advised that while that's true, the benefits of EPS outweighs the thermal characteristics, that being, more guarantee of a full-fill, not having to rely on builders trying to install it (probably poorly), such as leaving gaps and holes, going around wall ties etc. As well as (i'm assuming) it's a hell of a lot cheaper than PIR. To me it seems like a perfect solution of let the brickies brick, and let the insulators insulate. Everyone knows what their doing and can (hopefully) do it well. Thanks as always!
-
Thank you both @joe90 / @Iceverge, that's really helpful and exactly what I needed - some real world validation on the diagrams I've been staring at.
-
Indeed, it was a 2 story extension, sizeable but not on the scale of this. However he's experienced, smart and enthusiastic. We dealt with plenty of curve balls together hidden sewers, build over agreement, deep footings etc. We got through it. We're not that close anyway 😁 That's interesting, and also slightly unnerving. When I say swimming pool - in the '£300k' (which admittedly i've pulled out of my ass), I'm nut budgeting the actual pool in that or even the hole in the ground - just the room to house it, which will be on the bottom of the 3 floors. So I'm hoping that given we're doing 3 stories will help. The garage and annexe will be combined, with the bedrooms above the garage, again looking at savings there. No idea on my m2 yet until I get some plans, but looking at yours, that's about £1400 / sqm just for the shell? Is this 2 stories? Ex VAT also assuming it's a new build? We'll need to get the plans and discuss with the builder before I have any idea where I am, there are certainly going to be tradeoffs. The reveal deal is also what I was concerned about, especially on a wide cavity. I had a quick research. Suggestion looks to be boarded with ply, and foamed for airtightness, and some more detailing I'm yet to understand. What kind of ties did you use? Are basalt a requirement due to the bridging or is it not worth it? So overall judging by the responses here, there hasn't been a suggestion of going timber frame which I expected to be honest. So this has kind of validated my traditional wall build up a little more, even at a wider cavity. I just need to nail down the slab, roof and junctions.
-
Thank you all for your replies. Location is South East. Right now there isn't a budget because I have no idea what to expect. I also plan to, if needed, draw this out over several years while the money comes in, doing what I can myself to complete it. In my mind, circa £300k to get it watertight (foundations/slab/walls/glass/roof) would be amazing, but I have no idea if this is even close to realistic. It's been 10 years since our last house when we built a sizeable extension, so my point of reference is some what out of date. GSHP - understood from all of the comments above to avoid. I have about an acre of land I could install into, and I was going to buy and old digger and let my retired Dad loose on it for a few weeks, but by the sounds of it that still won't make up the price difference. Batteries I already have 30kw (got a pallet job lot from China a few years ago, so was cost effective). So generally no huge issue with going to a 200mm - 300mm cavity in terms of construction cost? Wider the better? I must admit I would like to avoid PIR on the inside and keep the service void clear for... services. Understood - I think the preferred method will be EPS beads pumped in, avoiding cavity batts. I'm most likely going to be using a specific builder who is a family friend and who I have worked with before. They are by no means knowledgeable in this area, but I'm aiming to provide the design/input and have them implement it (properly), which is why I'm trying to get an idea of what system to base the design from. The slab and the roof designs are what is troubling me the most at the moment, knowing which direction to go in.
-
Hi All, So we're finally pushing ahead with our new build and I'd really appreciate some advice about the construction options available. We're a the planning stage, and have appointed an architect. I'll be project managing the build and doing the majority of internal work myself, but I'll be contracting the foundation, slab, walls, roof. The build will be quite large; a 6 bedroom house, over 3 floors, sizeable living rooms, kitchen. A swimming pool and gym. A connected triple garage and a 3 bedroom annex as well. Budget wise I'm not looking to go all-out, it will be *relatively* tight, so given the size of the build an economical (yet thermally efficient) build-up will result in significant construction cost savings. While I want to get close to passive haus standards, cost-benefit will be more important to me, such as not spending £50k in construction costs to gain thermal savings of £500 a year on heating for example (pie in the sky figures but you know what I mean). Heating will be ASHP or GSHP depending on costs and benefit again. Plenty of solar and battery storage. The style of the house is going to be something like the below but on a larger scale, with the majority of glass being north facing, solar gain shouldn't be too serious. From my point of view, I think the primary choice should have been timber frame, however I don't think it's going to make sense in terms of budget when we need facing bricks anyway. Therefor I was thinking more towards a traditional buildup, facing bricks, semi-wide cavity, blockwork on the inside. As I have seen mentioned in this thread by @PeterW , something like: 100mm brick 175mm cavity (widest before ties get expensive) blown EPS 100mm medium block Bonding parge coat 25mm batten Infil with 25mm PIR Board Skim As mentioned in that thread, with that build up you can use standard lintels which keeps cost down. Anything after the medium block I can handle myself too. For roof; which will be timber framed, and a passive roof system along the lines of one of the options here: https://www.firstinarchitecture.co.uk/passivhaus-roof-details/ For the foundation and slab. Some kind of Passive slab system such as http://www.viking-house.ie/passive-house-foundations.html ? Would appreciate any input on any of the above. What have you done? What should be avoided? Thanks in advance.

-
Sorry I didn't manage to check in over Christmas. Had a couple of people ask now so I may as well link this (hopefully it's allowed). I used these guys: https://ecclestons.com/shop/?filter=true&product_cat=polystyrene-bean-bag-bead-fill They're in Birmingham. I managed to secure a little discount on a bulk order compared to that price. it was an additional £200 ish delivery for a full LWB transit (35 bags they say they can squeeze in). Would be cheaper obviously if you're closer and/or have your own van. I shopped around a little, but didn't spend too much time on it, possibly cheaper elsewhere. I made sure what I got was fire retardant, although I didn't check in too much detail if it was the right spec. I did consider it - but the cost of beads would be astronomical I think (relative to the cost I was aiming for at least given this is a temporary job). If it was going to be a permanent or longer term I probably would have done it - it would have been easy enough to fire them in through the vents and/or though some 20mm holes through the floor in places. Would need to research the rot situation first, but at least if the floor fell through you'd have something nice and soft to land on!
-
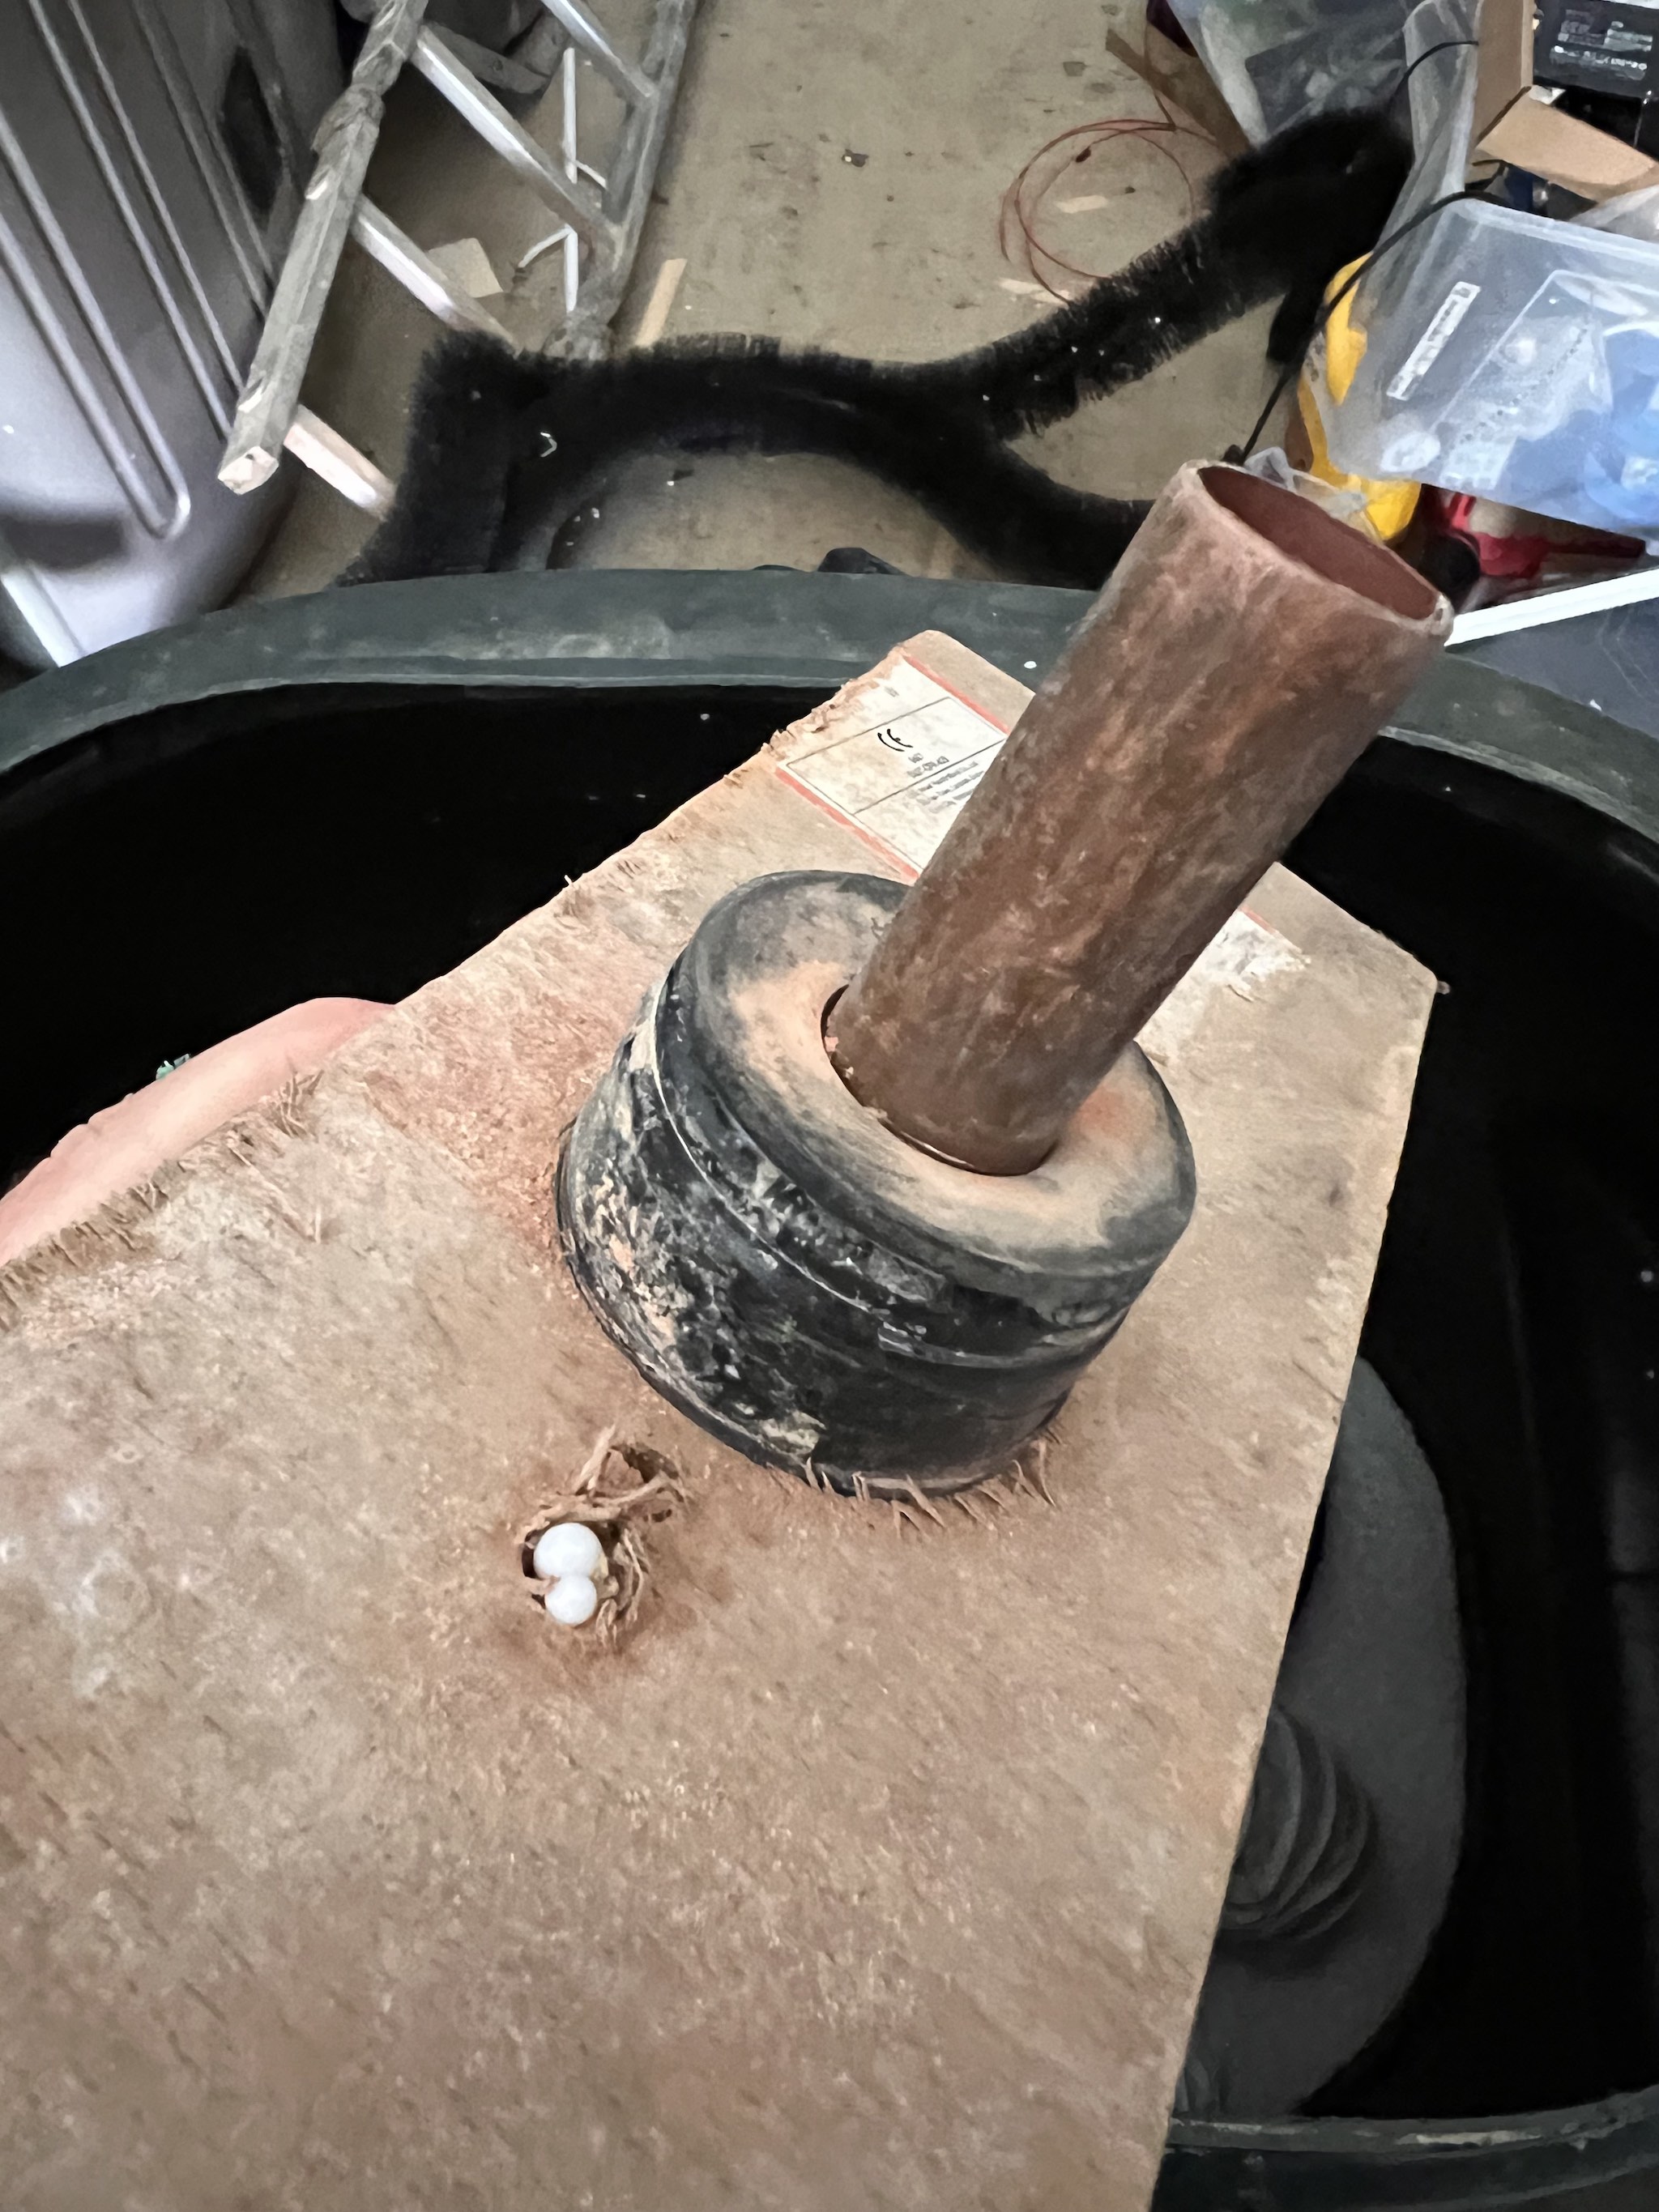
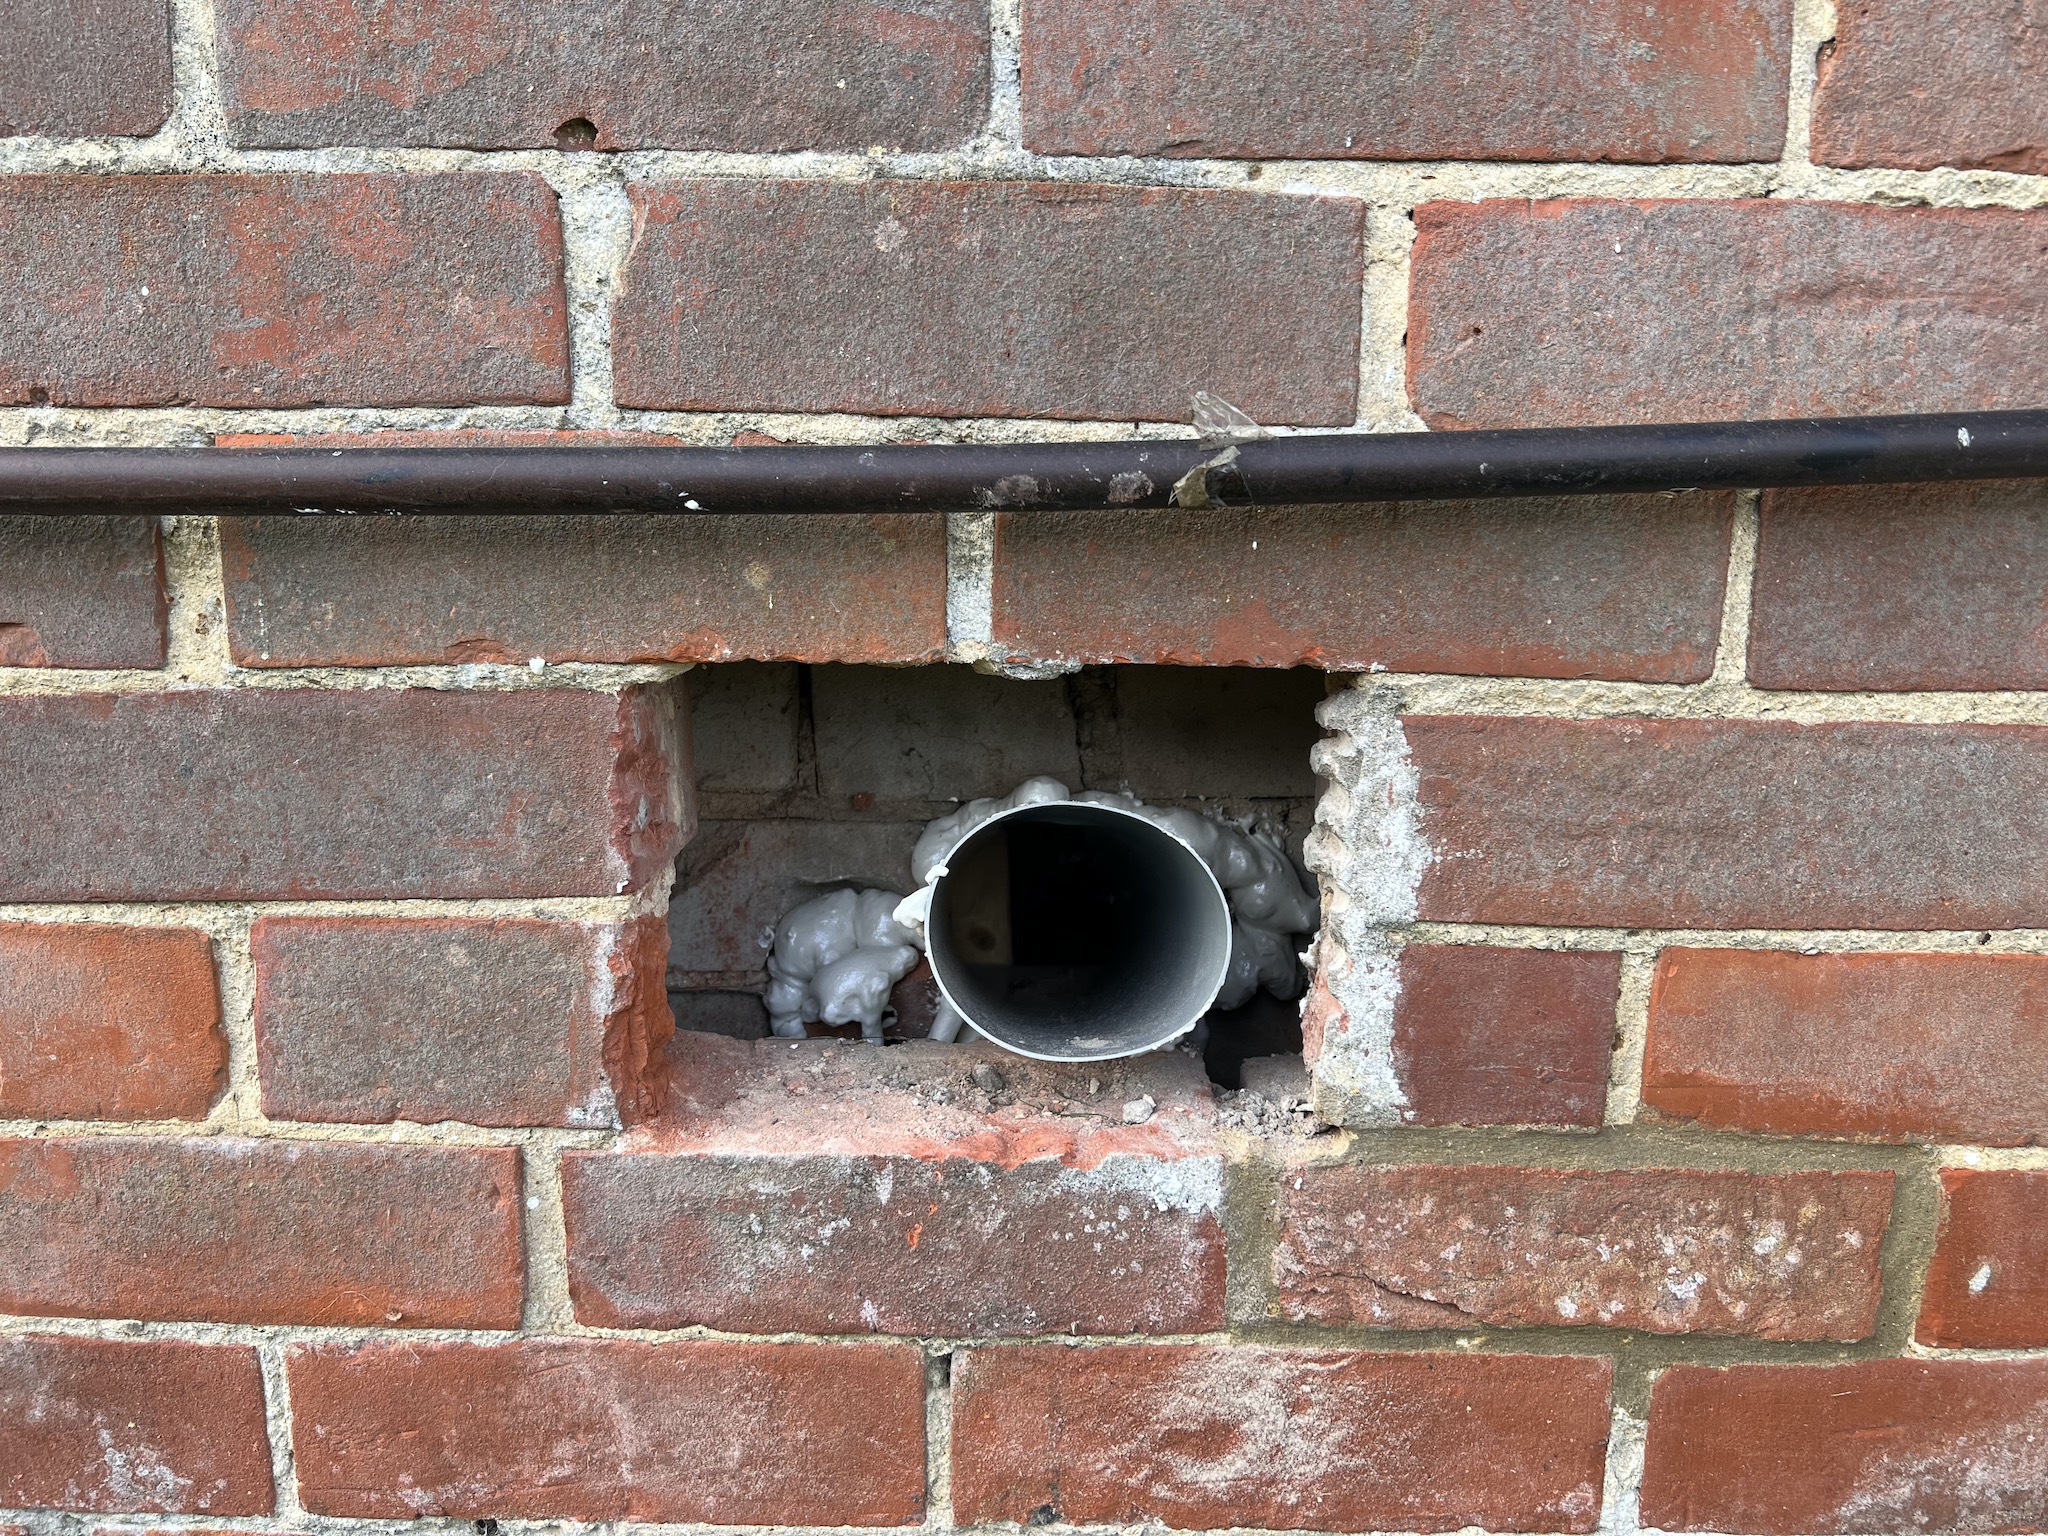
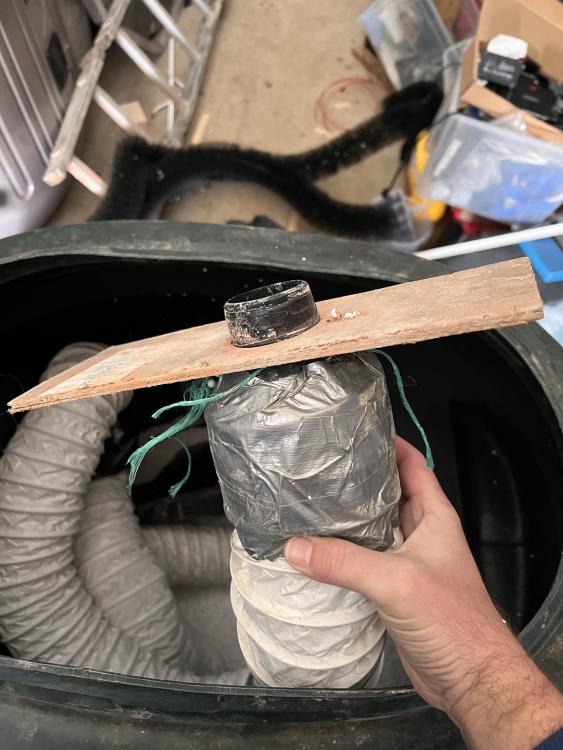
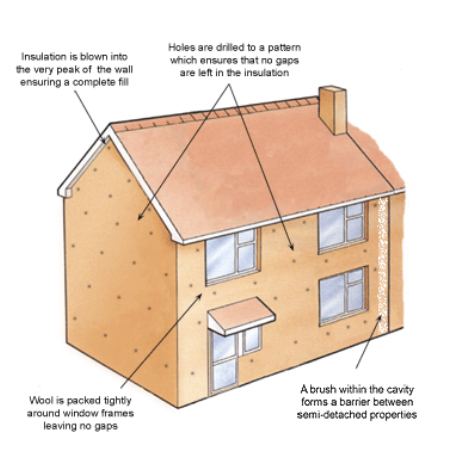
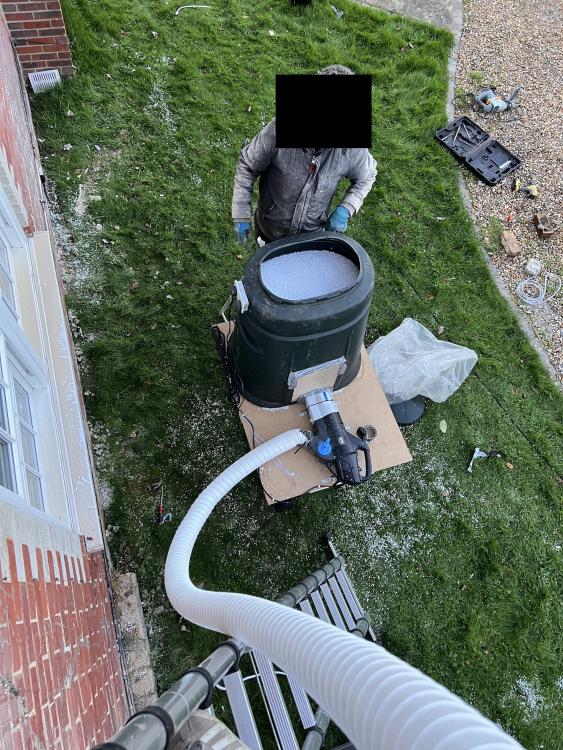
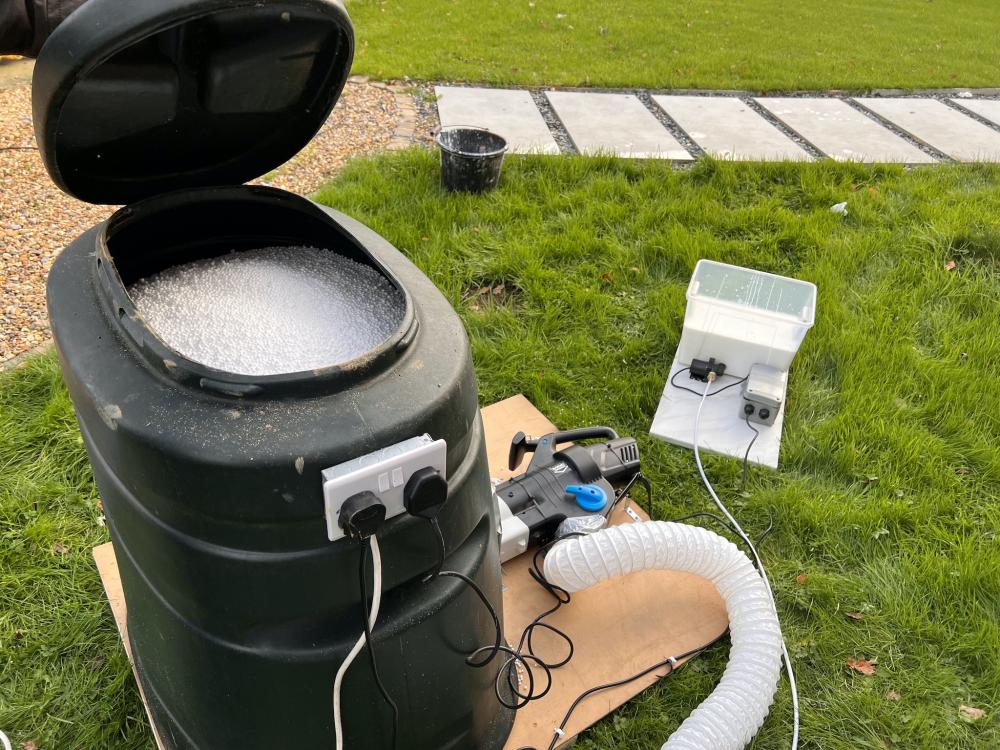
Had a few pm's asking about nozzle etc. Attached photos and a bit more info. Really pleased to share this info as i couldn't find much online after hours of Googling - and i think the more people that can do this the better, both for the environment and your wallet. Would I do this if i wasn't planning on knocking the place down? Probably not, I'd get it done properly - however would it be done properly? We spent a lot of time sorting those sub floor vents out - i don't think anyone else would. As far as i can see my cavities are full of EPS beads and the house is much more comfortable - and I saved £2k. So the first photo was v1, which was 100mm to 50mm reducer, and a bit of ply just bigger than the size of a brick to stop any 'splash back'. This worked great and filled the wall stupidly quick, but taking bricks out is not easy. The photo, is v2, this is a 50mm to 22mm waste bung (from Toolstation/Screwfix i think), then a bit of 22mm copper shoved in it. This worked great, but you do need to block off the 'suck' end of the leaf blower with a bit of ply or plastic, and cut a 22mm hole in it, so the leaf blower can't suck up too much too fast as it just blocks the tube up. This caught me out, hence i went with the brick removal solution - wish i figured it out first instead of having to remove bricks. For the intake, the leaf vacuum from Screwfix was great, seriously powerful. The vacuum lance comes in 3 pieces, but for safety you have to assemble the enter length of the vacuum otherwise it won't start, so i unscrewed the last piece, slid out the contact joiner (i assume it's just a bit of metal, maybe a resistor) and used that -this way i didn't need to use the full length of the lance so it made it a bit more compact. If you have a drum you could simply sit the vacuum in the top i think, it would still work just as well, no need to cut holes out the bottom really. My compost bin already had a hole here for compost removal, so it made sense to put the leaf blower lower down. Video of v1 nozzle in action: https://www.dropbox.com/s/vfdpo8oz1uc30m8/IMG_0087.MOV?dl=0 I'm not sure if I can link out to other sites here but a rough parts list was: For the bead blower: 100mm x 6m fan duct from Toolstation - £6 100mm to 50mm reducer from Amazon - £6 50mm to 22mm bung - already owned Little Copper pipe - already owned Container - already owned (compost bin) Leaf blower - Screwfix - £50 Plenty of gaffa tape / cable ties. For the pva pump: 12v dc pump - already owned 12v power supply - already owned 6mm silicone tube (£8 ebay) 1/2 bsp to 6mm brass fitting (£5 ebay) Ikea container - already owned Also attached the drawing i used for rough idea of hole frequency/position.

-
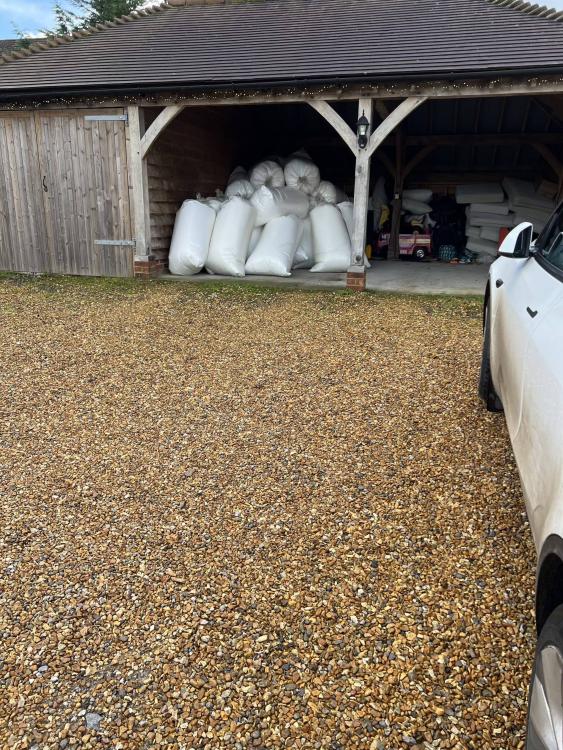
The beads!

-
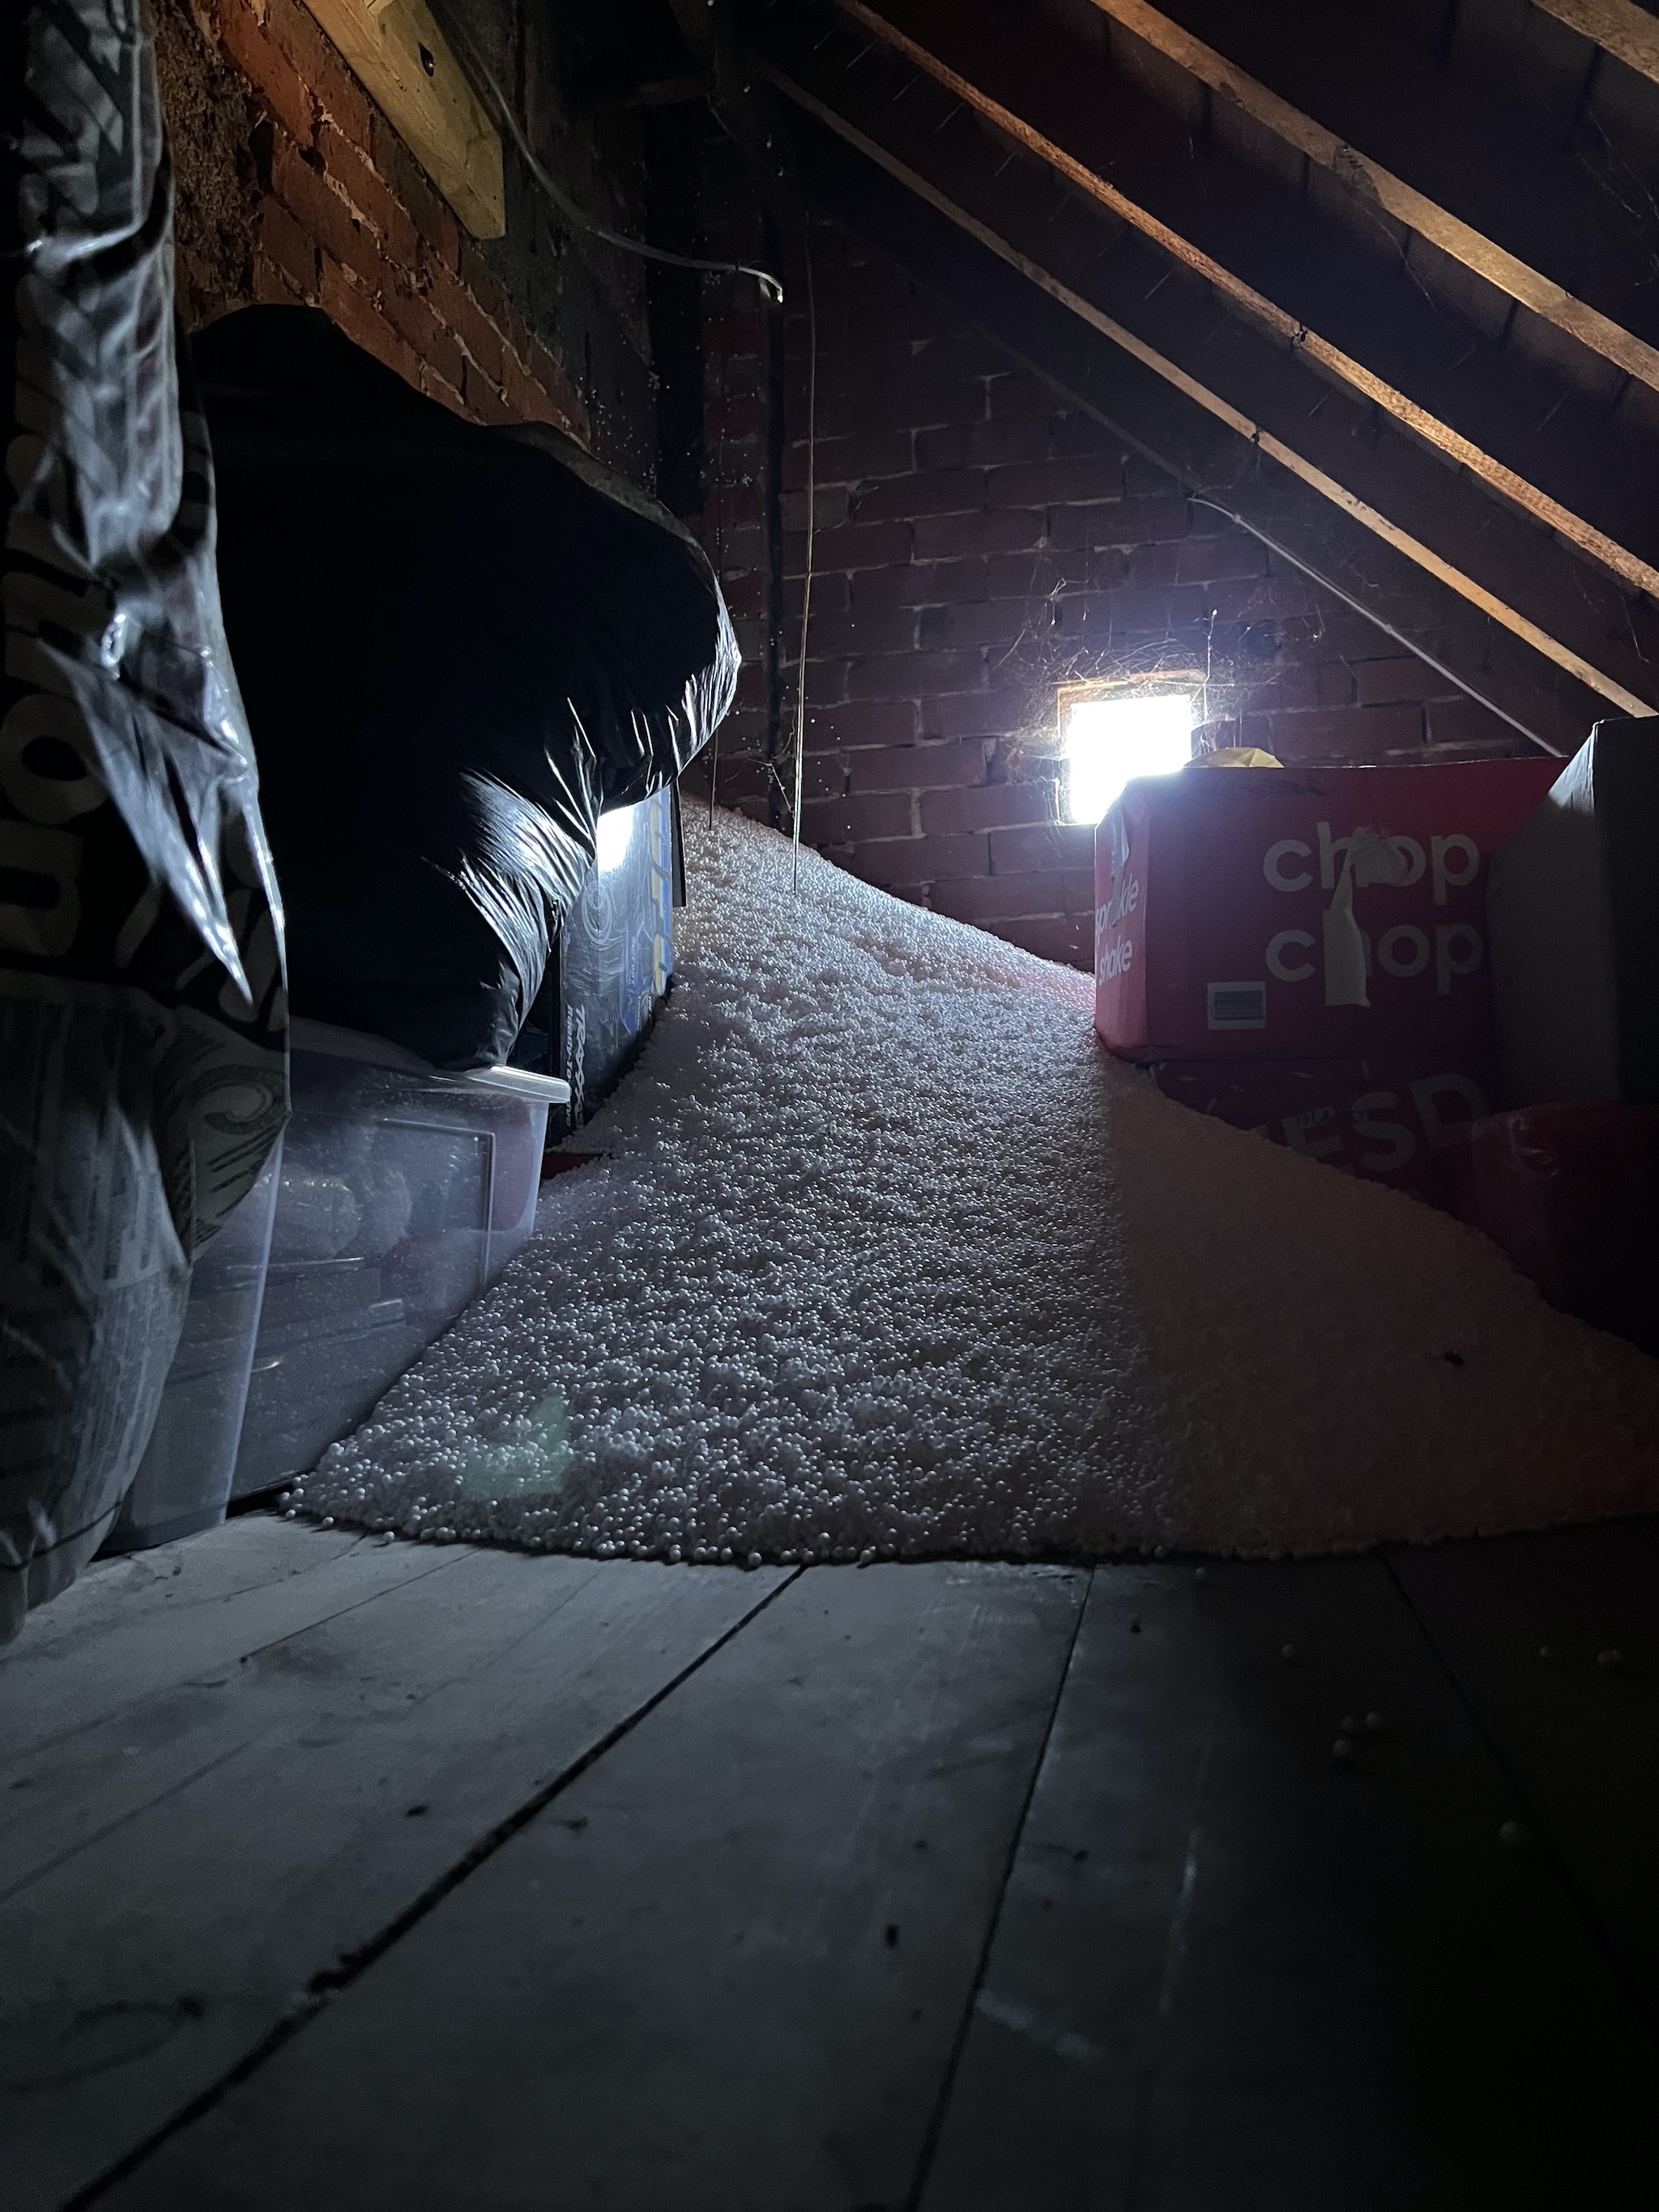
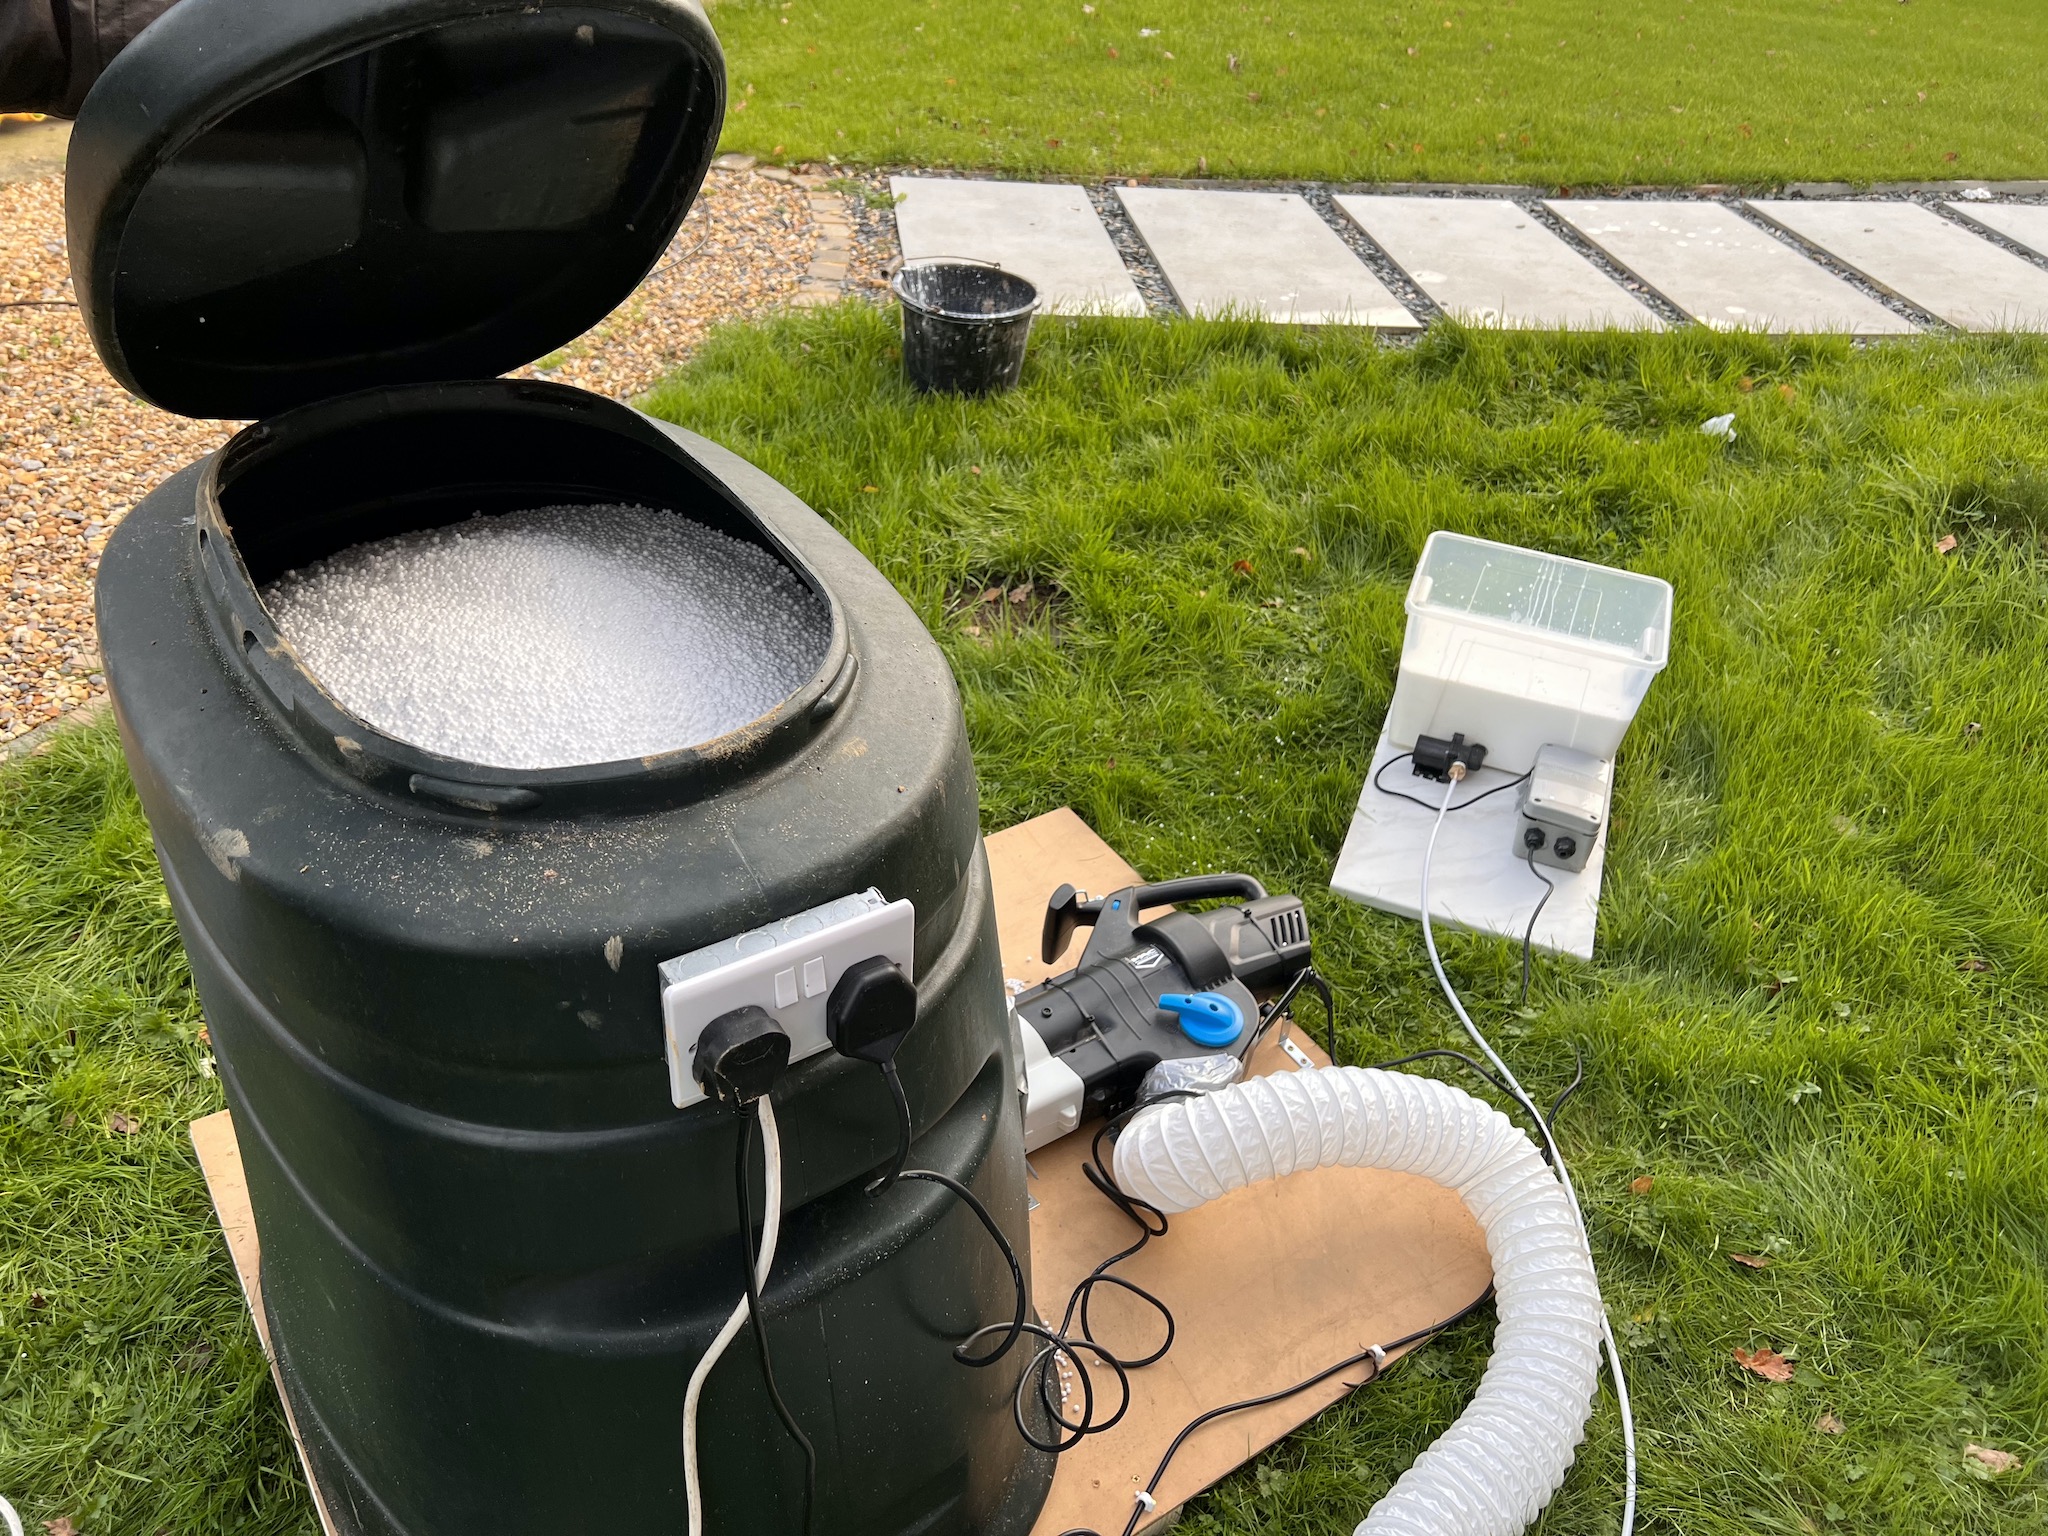
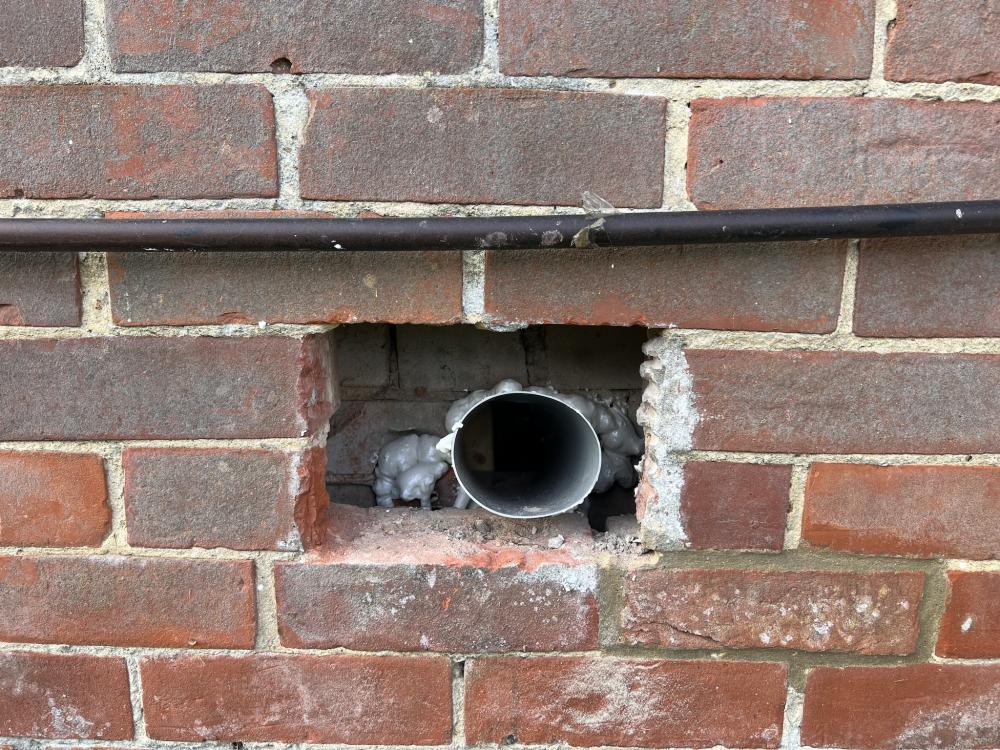
Just wanted to post a little update incase anyone else finds this and is thinking of it. It worked rather well. We've injected just under 10m3 into the cavities of the house, and it's already a lot more comfortable. I think probably what was worse than the lack of wall insulation was that the air bricks were not funnelled into the sub floor - it looks like some time in the past the floor has been replaced (i'm guessing it was circa the 80's) and all they simply knocked a hole through the inner skin into the subfloor, but the air bricks were letting freezing cold air all through the cavity. We installed 100mm pipes and foamed around the the inner skin to seal it up (to stop the EPS beads going under the floor), then mortar and (eventually) some vents over the exterior skinny to tidy it up. I've gone for closable vents on the outside so we can block off cold air to the sub floor during the freezing months. You can actually walk on the floor now and be comfortable - obviously yes there is a concern with rot of the timber, so i'll open them occasionally to air the sub floor out. The machine itself I made up in a couple of hours out of a piece of mdf base, an old compost bin i had laying around, and the £50 3kw leaf blower from Screwfix. I also made a PVA glue hopper out of an old pump and bits i had spare also. We watered down the PVA 3 to 1 and injected this near the nozzle so it coated the balls on the way through. Initially we were removing bricks as our nozzle was 50mm, any smaller and the machine would clog up. However i realised that if we blocked off the leaf blower inlet to 20mm, we could have a 20mm outlet and it worked perfectly, just a bit slower. So we did that, and used a short bit of 22mm copper pipe as our nozzle to inject through. However it meant we could drill 25mm holes with an SDS bit - much nicer than removing bricks. The main hose was a standard 100mm duct. The eps beads flew in with some serious pressure - worked great. We did have a little issue in the cavity wall not being closed in a small loft space above the utility room - bit of PIR and foam took care of that. I did take half a day having to get the beads back in the bags however to go again, however I did have to laugh when i popped my head through the loft hatch to see a giant pile of beads not where they were supposed to be. The jury is still out on the PVA - difficult to know if the mix was right, and if it was being pumped in quick enough to make any real difference. All in all, total cost of £500 for some beads and £100 on materials. £50 of which is the leaf blower which is fully useable again to actually blow leaves... I do plan to suck it back out the walls and re-use it whenever we come to demolish the house in the near future, save the landfill and a few quid!
-
4 and 9 year old. Child benefit, just about - but we're both relatively high income, so any grants /schemes i've looked at don't apply. Besides the fact I feel bad given we don't really need the grant, it could go to someone else, and even worse if we're knocking it down in a couple years. I've got a reasonable quote for EPS beads now, so I'm going to attempt this - it may end up being a disaster, but worth a go I think!
-
Thanks for your replies. The upstairs is as cold as the downstairs - although the radiators are off in the bedrooms given the anticipated convection, which never seems to materialise. Floor is freezing throughout but we can't do much about it without ripping it all up. In my last renovation I had every floor up, 100mm PIR and UFH on top - was wonderful. I have a 16kBTU portable air con/heat pump which is running 12 hours a day from the solar/battery storage, that's just about keeping it above 17 degrees at the moment. Got some heated blankets last week also, that's nice. My Wife is at home also, and the kids back from school early afternoon - the whole of the downstairs is generally in use all day every day, so heating just 1 room doesn't work. I'm sat here in a big fleece but still can't feel my fingers Landfill and waste - yes I have considered this, it will be a shame, but 2 winters of this, and the potentially rising gas prices next year, I feel i need to do something. Possibly if i go for loose cellulose i could recover it to some degree, even if it was used to insulate a garden room in the future. I didn't realise it was notifiable, this explains why I'm struggling to source materials and equipment hire.
-
Hi all, Please bear with me, it's going to sound stupid, but needs must. Current house is a 1930's standard brick build, 100mm cavity, no insulation. We're knocking it down in a couple of years and building new, but right now it's absolutely freezing. I work from home and run up £10 in gas yesterday and was still sat here at 18 degrees. Loft has been insulated properly at least, and we're double glazed. I've gone round with foam to make it airtight as possible, silicon around the skirtings etc. We're on a hill open to the elements, so we get battered by the wind. Quotes have come in at £3k+ for cavity insulation, I'll never get my money back if we knock it down in 2 years, so pointless. My plan (as others have done before) is to use a leaf vac, 100mm hose on the output side, reduced down to an empty tube of silicon with cut off nozzle at circa 20mm to inject the insulation. Will inject into holes drilled through the external masonry at circa 1m intervals. My issue is with materials, finding the best in terms of cost / suitability / availably. Volume requirement is about 12m3 1) EPS Bead - I know typically that it's injected with a binding agent to set solid. I could possibly rig something up to do this - such as slightly diluted PVA pumped into the nozzle on the way through. This is coming out quite cheap at about £400 for the materials, but i've gone for 'furniture grade' (fire resistant) beads, not anything specialist - will this work or will they be too small? And could I avoid the hassle of a binding agent. 2) Something like Thermofloc (although I don't believe this is strictly for use in external cavity), this is coming out more expensive - £1000 for materials. As mentioned this is only a temporary solution, so i'd like to be as little as possible on the material cost, but not something that is just going to be pointless. It seems to be that loose fill cavity wall insulation isn't generally available to the public as i'm finding it difficult to find suppliers. Judging by my google time today, In the US it seems pretty normal to be able to rent a blower and get on with it. In the UK, near impossible. Would gladly take any advice on the above, especially potential materials and suppliers. Thanks, Elliot
-
Suppliers of low u value / 3g quite large IGU?
ElliotP replied to ElliotP's topic in Windows & Glazing
Thanks all for the suggestions, I shall drop Internorm and Rationel a reply. @craig are you a fitter? I guess too far anyway given we're at opposite ends of the UK (Southampton for me). But i'll happily take recommendations if your supplier ships nationwide. On a related note, realistically what sort of manpower am I looking at to lift this? I believe i'm looking at something like 230kg? My thought was 4 people with triple pad suctions which are rated at 90kg each. 2 people each side. Is that unrealistic? We'd only need to go a couple of meters off the transport and straight into the frame on the front of the garage. -
Hi, I'm planning to frame the front of my oak garage in glass, each panel would be 1.8m x 2.7m and I would need 3 of them. I've spoken to several glazing companies and all of them so far have said they can't to 3g in that size. Budget is a concern, i've been quoted £1500 a unit (3 x 6mm, soft coat) then the company realised they couldn't manage that size, but this amount was swallowable. I'm wondering if anyone has any contacts that could manage this? Backup plan will be to brick up a bit higher or split the units down the middle and put some more uprights in, but would like to go full glass if possible. Thanks, Elliot
-
Hi, Thanks for the reply. Currently the wall buildup is simply studwork and cladding as per the photo above. Yes, I plan to remove the cladding, and put on breathable membrane (tyvek housewrap probably) and then clad back over. So i'm wondering should i just put the housewrap straight onto the studs and put the cladding back over, or should I/do I need some kind of panel sheathing - a lot of people say osb3, but given the price currently vs panelvent, and the fact panelvent is made for this purpose, I was planning for that - but can i 'get away' with out it? I have to be honest, after doing further research I don't think i'm going to get near PH requirements due to the amount of glass going at the front, and the oak beams thermal bridging. I'm going to PIR over most of the beams internally, but along the front of the building will be only Oak beams and 3g floating glass, which is going to be 9m x 1.8m of glass and oak only. I will still aim for airtightness however, and do the best possible insulation everywhere else, but in this case achieving PH insulation requirements is probably a lost cause.