Mr Blobby
-
Posts
600 -
Joined
-
Last visited
Mr Blobby's Achievements
Regular Member (4/5)
128
Reputation
-
What's the best way to fix this? Time machine? A dozen or so sockets are like this. 😕
-
First floor, underneath windows at front (SW) side are the worst. Diagonally down from corners. Tops of most doors the same. Diagonally upwards.
-
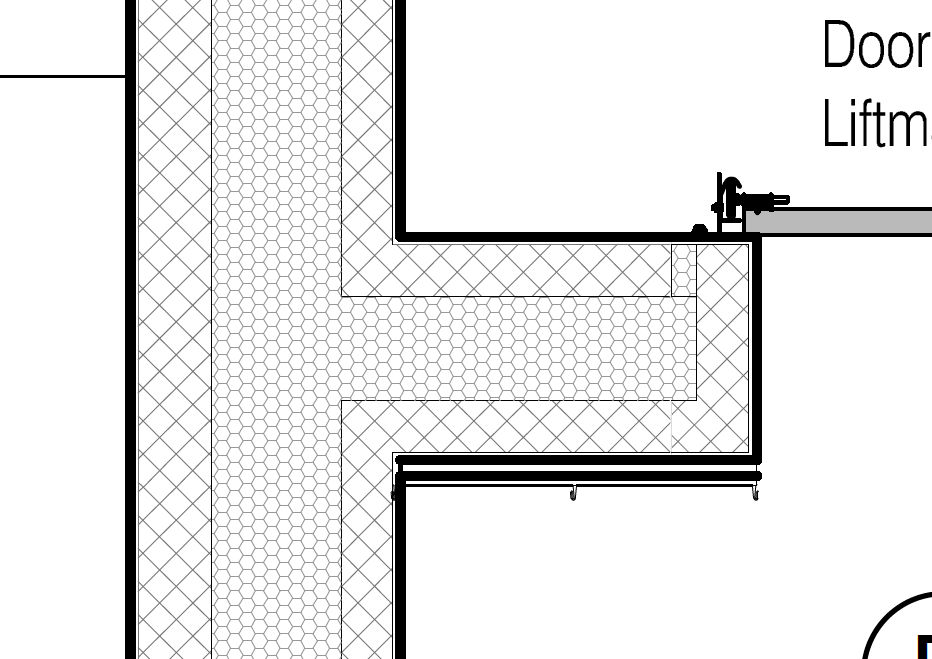
Like this... This is how ours is built. The bricklayers put a strip of PIR about 40mm wide into the blockwork. If I get down the site later I'll get a photo.
-
Assuming the black line is the garage door inside the reveal (as sectional doors are typically installed) then the inner leaf adjacent to the door should be thermally broken with a strip of PIR. This is because the reveal is on the cold side.
-
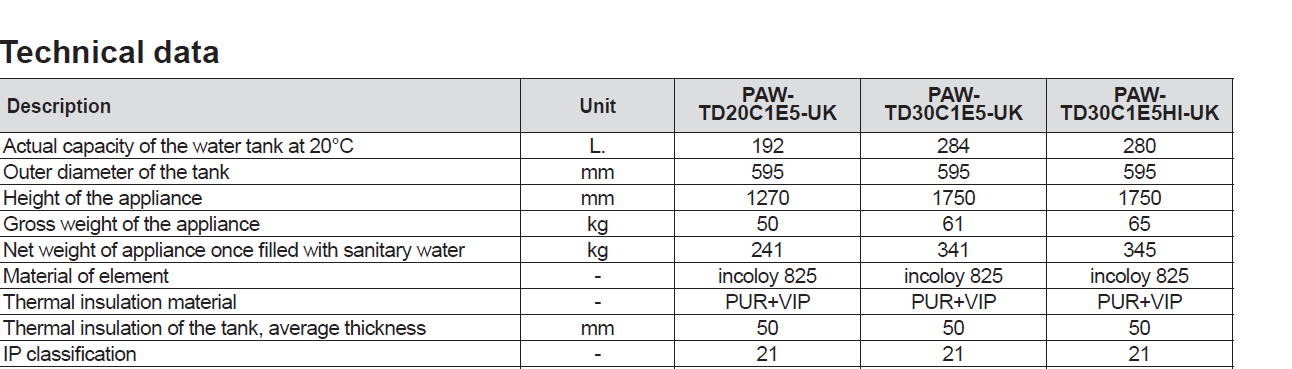
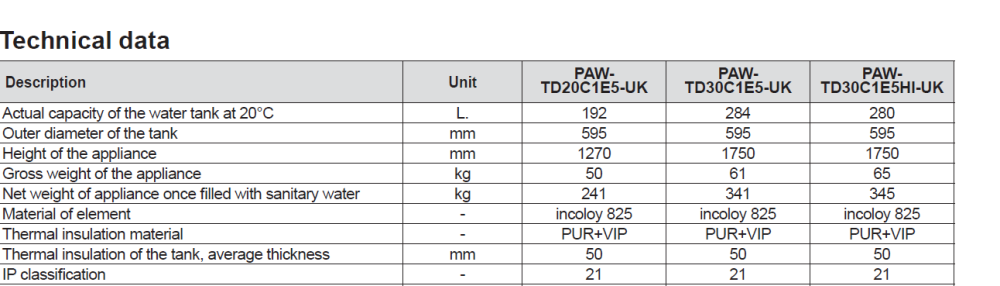
It is A Rated, and it looks like it does have Vacuum insulated panels and PUR. So where inside the cylinder are the vacuum panels and who thinks they are punctured? The tank is not yet filled or heated so I can't do a temperature test to identify heat loss around the penetrations to determine if the VIP are punctured. Plumber has the hump with me ever since I told him to change the manifold 😕 I think its about to get worse. 😬 What now?
-
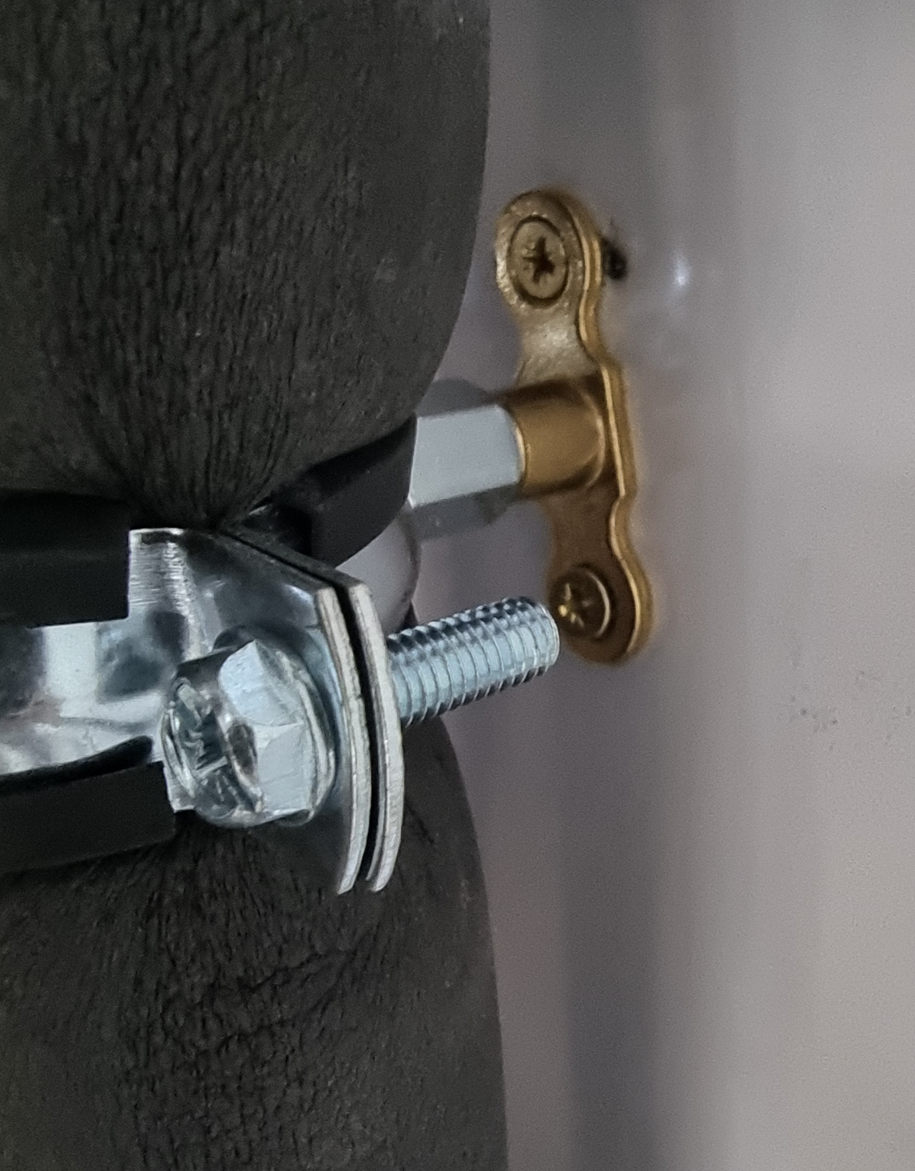
I can lift the screws on the top clamp with my fingernail, so its not doing much
-
Thank you for this. Definitely an oso cylinder. I had never heard of vacuum insulation on a cylinder, so I'll go take a look.
-

Weather Comp + independent zone valve
Mr Blobby replied to Mr Blobby's topic in Air Source Heat Pumps (ASHP)
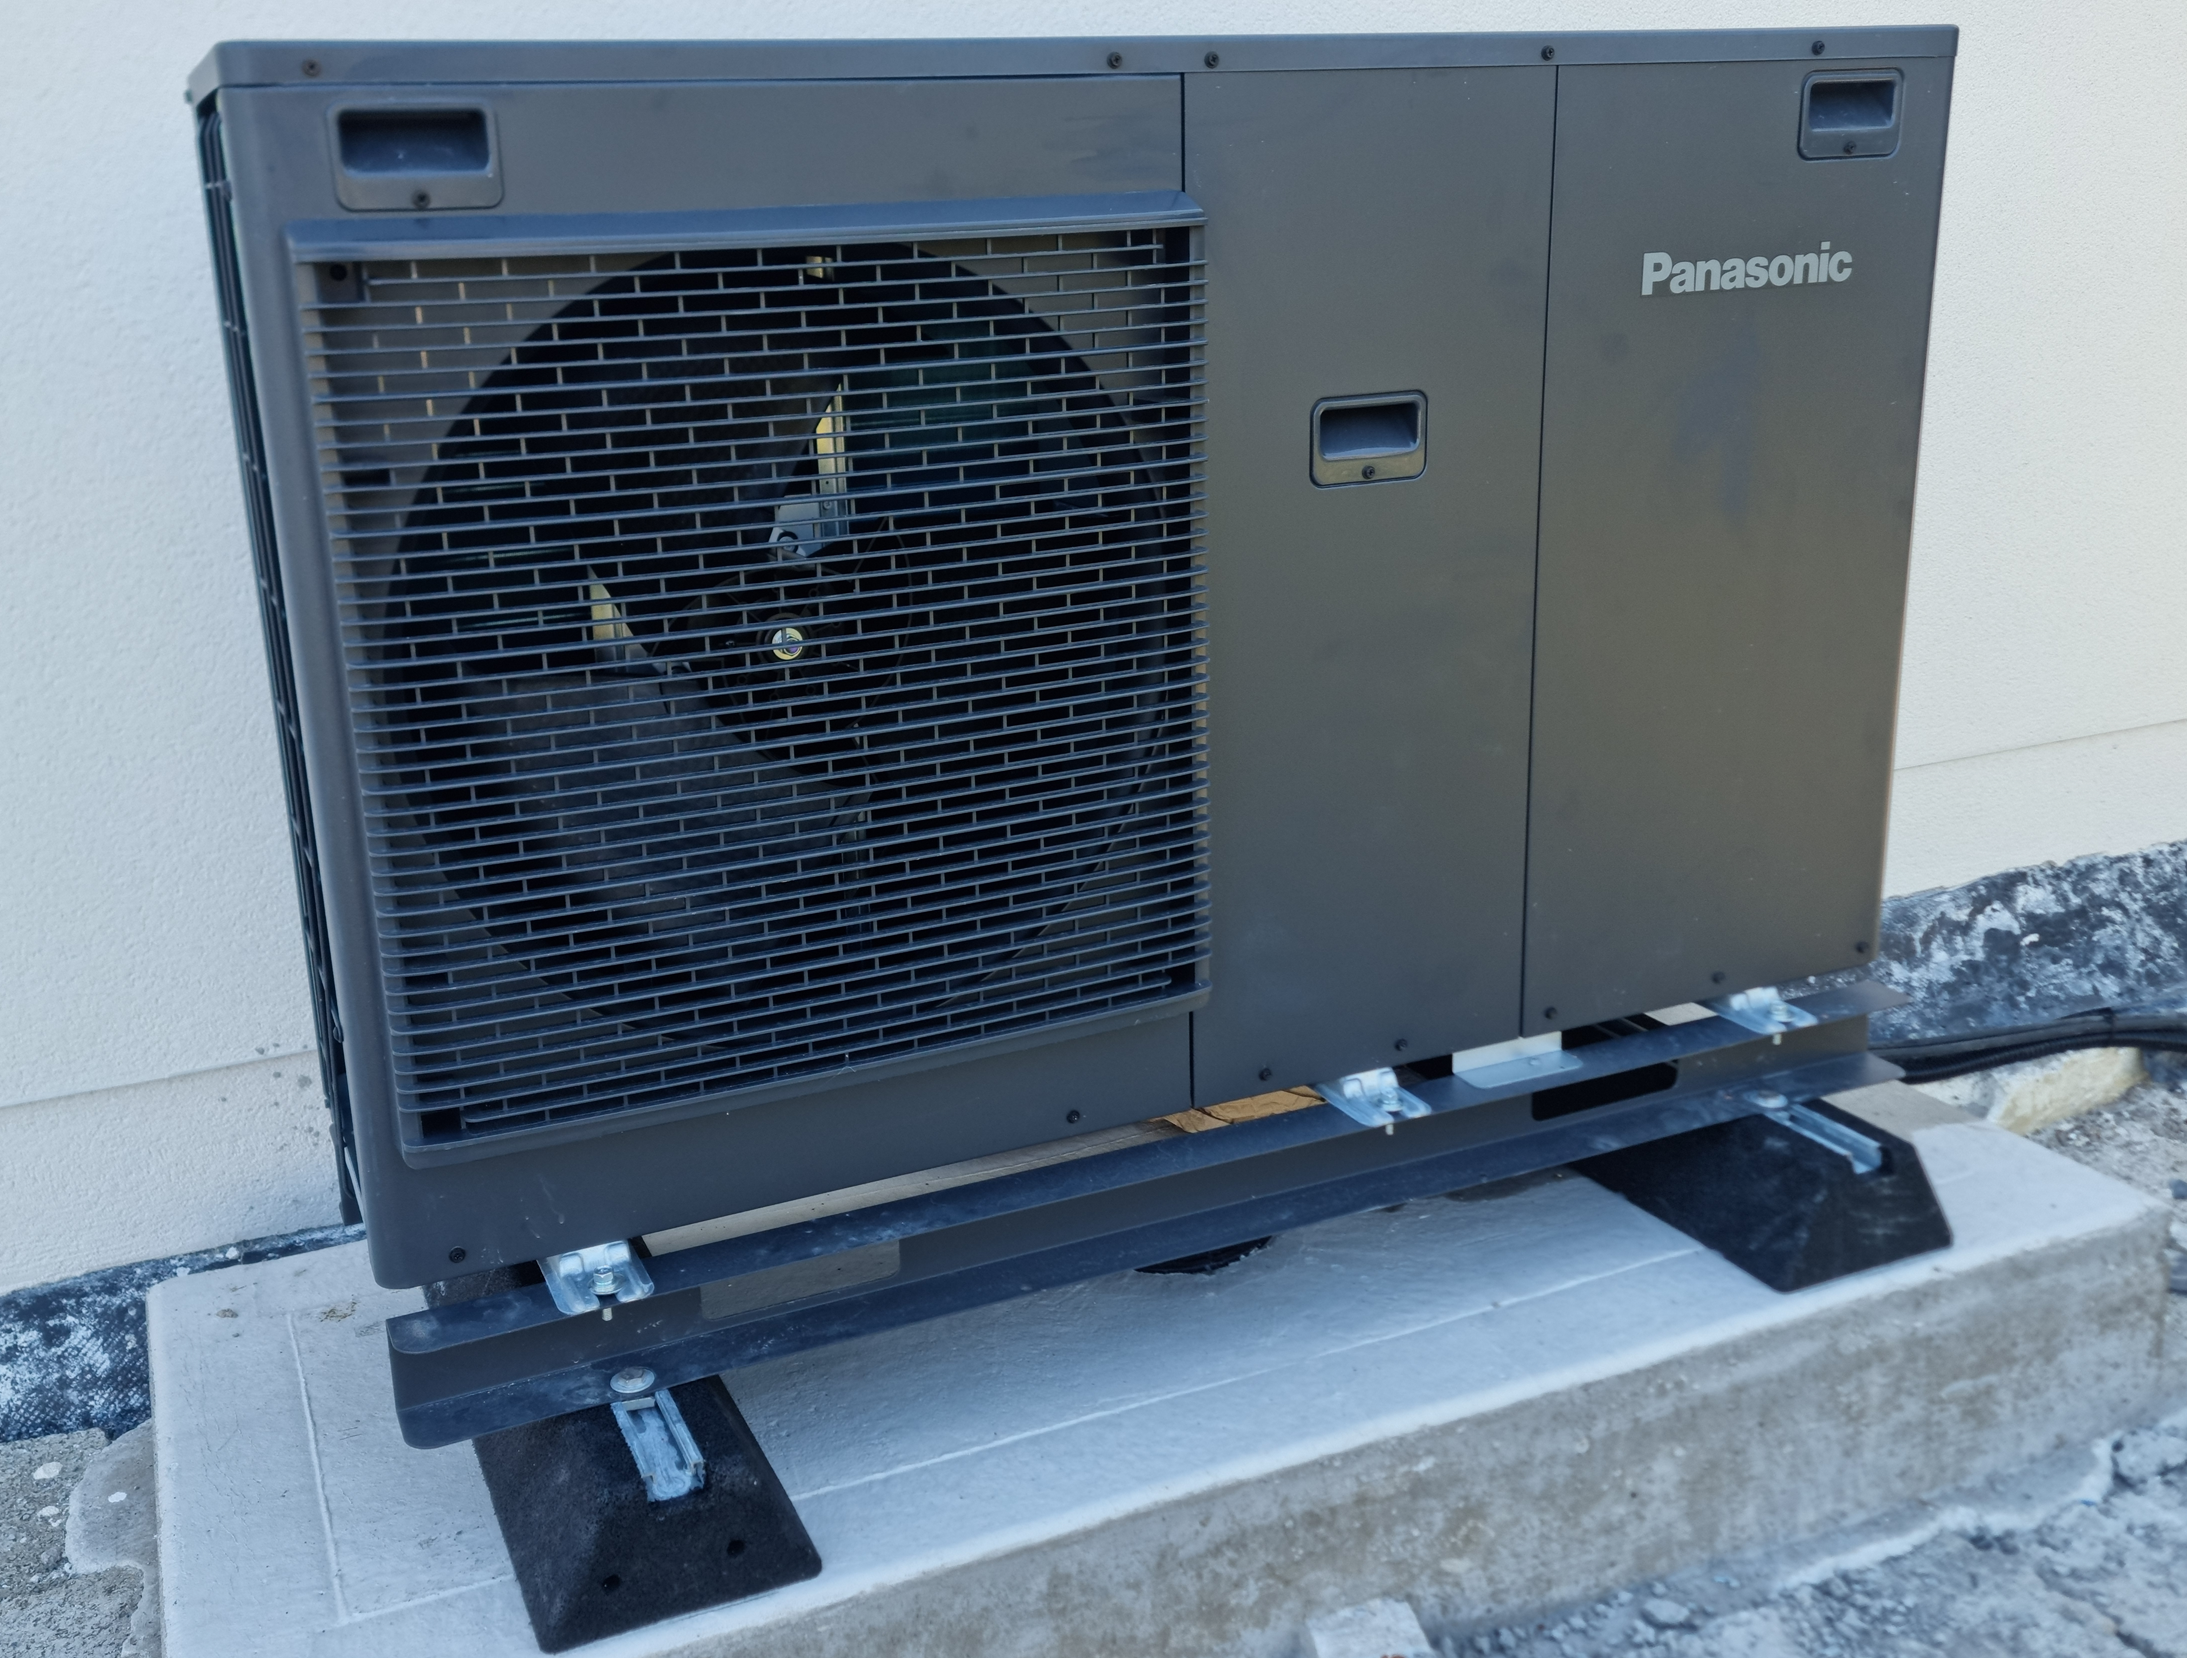
The heat pump is installed 😀. And its anthracite. And thanks to guidance on here, the single zone, two manifold system is running beautifully. No buffer, no pumps, no mixers, its as simple as can be. These Panasonic units seem incredibly easy to install and set up. I'm struggling to see why it needs to be commissioned by a Panasonic Pro partner. I'm not sure how they are going to add any value. Except for the extended warranty.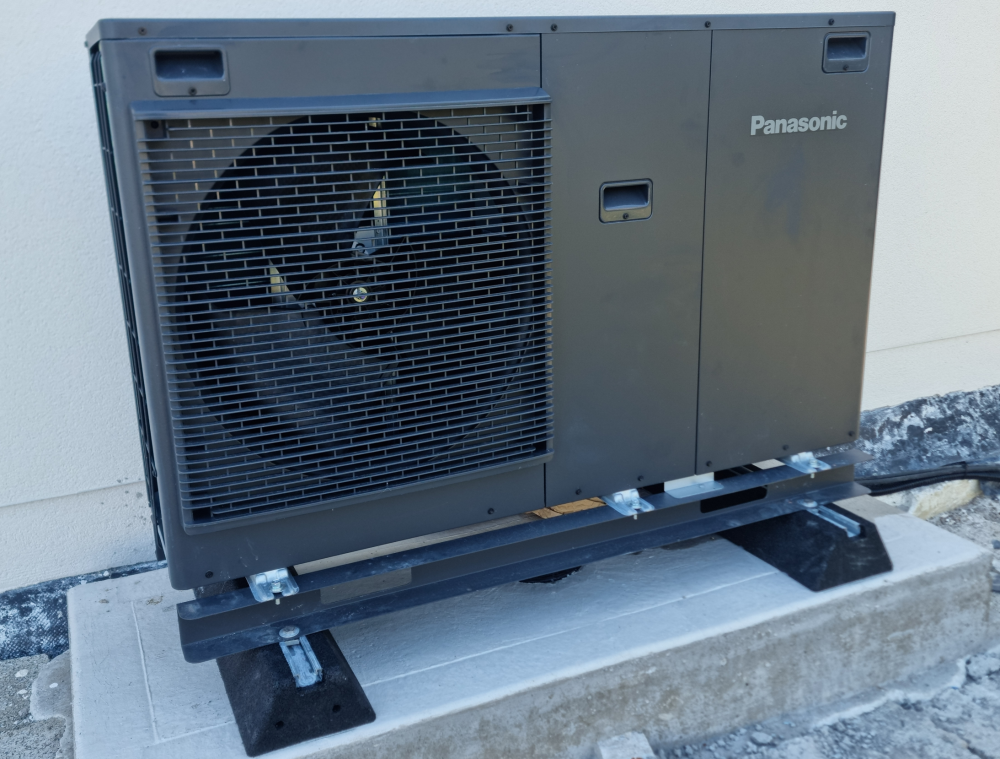
-
I was surprised, and rather disappointed to find our plumber had screwed into my lovely Panasonic cylinder to fix pipes. Googling around it seems this is common practice to fix into the cylinder so I'm much calmer now. However, the clips are all loose, suggesting the screws have not threaded onto the external skin of the tank. I have a box or short wide self tappers on site that would probably have been far more effective but its too late now. Any thoughts on this?

-
This was my first choice but Northern Ireland is shut down this week and all the merchants are closed. Hopefully somewhere will be open tomorrow. Daft question time. I attach the inhibitor to the filling loop, open the valve and then inject it. So there is enough pressure (>1.5 bar) in the inhibitor can to inject the inhibitor into the pressurised system? Or depressurise it?
-
The good news is that the UFH is finally, sort of, up and running and the heat pump is totally awesome. The bad news is the plumber left the bottle of inhibitor I gave him on the floor. I don't know what bit of "make sure you add this inhibitor and biocide when you fill the system" was not clear, but maybe I made it sound too complicated. Everything here in Northern Ireland is closed for the annual marching and rioting holiday period. The plumber is unlikely to return before August. Obviously the thought of my heat pump rusting away is rather unsettling, but am I being too dramatic? Its only a couple of weeks right? Or should the inhibitor be added as a matter of urgency? If it should be added now then how? Its impossible to get a plumber and I have no plumbing skills at all. The inhibitor is in a bottle, not the injector thingy, and we have no magnetic filter with a useful dosing thingy. I suppose I could maybe drain a manifold. Or just leave it. Whats the worst that can happen?
-
No, the floor is solid, its hollow core slabs so the only thing that flexes when I jump on it is my ageing knees. Thermally porcelain tiles may help the cooling, but aesthetically I'm not sure if SWMBO will accept pretend wood. I think I need to get her to a tile showroom.
-
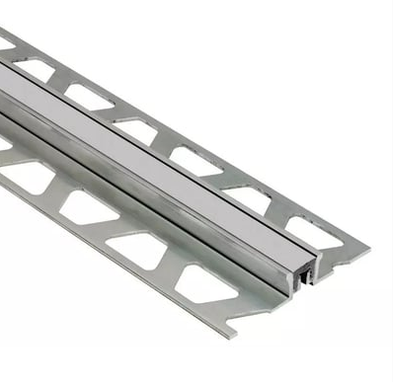
GF tiles have arrived and we are a week away from the tilers coming on site. Tiler says there is no need for expansion joints, he just leaves a gap and fills with silicone and then they are almost invisible. I'm naturally concerned. And I suspect that the only reason to run a bead of silicon is to save money on the expansion strip. Tiles are 120x60 on KORE slab. And its a big area, about 120 m2 total. Unlike screed there are no expansion breaks at door thresholds where I think the expansion strips would probably go. UFH in slab but uniform low stable temps. Do I need expansion gaps and if so then should I insist on proper aluminium (or stainless steel?) expansion joints instead of a line of silicone? What are the best ones to get? The schluter are twice the price of genesis. And how wide, 8mm? And should the floor be primed first? I think a uncoupling mat is probably unnecessary?
-
We put ufh loops on the first floor for exactly this reason. Not yet sure how effective it will be. UFH loops are in screed which is on insulated screed on bison slabs. If we go ahead as planned and install engineered timber on top of the screed then I am concerned that it may be too insulating and defeat the purpose of the FF UFH. (anyone installed porcelain fake timber planks on the FF?) I suggested to the builder to shutter out sections of the insulated screed so that the cooling from the ufh loops would get to the bison slabs to cool the problem rooms below. Like most of my other crazy suggestions this was ignored 😕
-
I think I did, TBH. I should have put the specs under people's noses and banged my fist on the table immediately prior to work being done. Lesson learned😖 Here's the cold feed to the kitchen, coming off the end of the manifold instead of the valved outlet. Apart from triggering my OCD and not looking as pretty, I'm going to assume this works ok. Besides, the merchant didn't have another manifold in stock (I could have picked one up quite easily of course). There is a valve in the pipe just under the photo. Manifold is now 1 inch, off a 22mm feed 😕.