maxdavie
Members-
Posts
58 -
Joined
-
Last visited
About maxdavie
- Birthday 10/19/1987
Recent Profile Visitors
The recent visitors block is disabled and is not being shown to other users.
maxdavie's Achievements

Member (3/5)
3
Reputation
-
Cutting bricks - how easy / time consuming is it ?
maxdavie replied to maxdavie's topic in Brick & Block
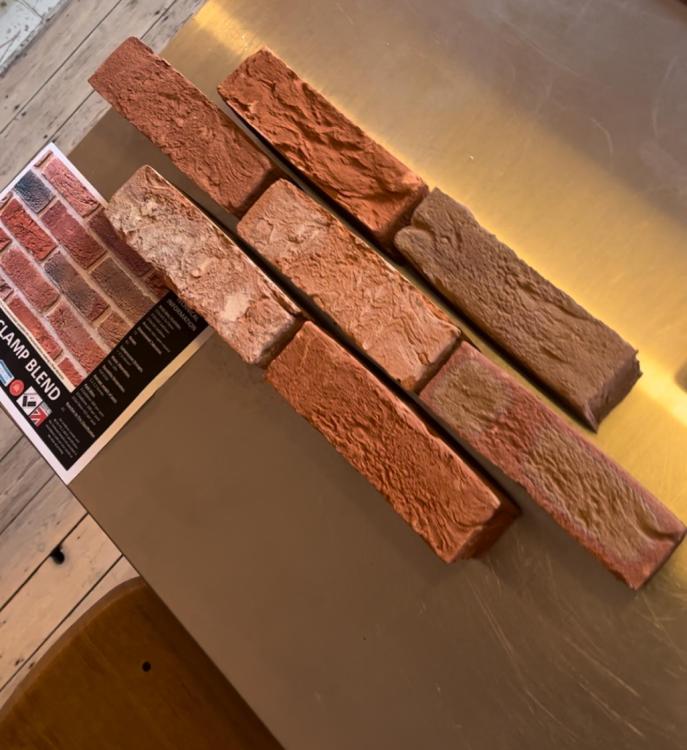
thanks for ref'! This project is near Winchester. Lots of bricks! It'll mainly be cutting the 215mm dim down to bespoke sizes. They will be posh handmade heritage bricks from York Handmade Brick. -
Cutting bricks - how easy / time consuming is it ?
maxdavie replied to maxdavie's topic in Brick & Block
How long does it take to cut a brick in half? -
Hello, Planning a grand design! We have some intricate brickwork and will need a very good bricky or perhaps a proper craftsperson. Anyway, to my question. To anyone who has experience laying bricks, how time consuming is it to cut a brick? I've tried before with an angle grinder and it took absolutely ages for one! But, then I don't really know what I'm doing. Can anyone suggest how long it might take a qualified bricklayer to cut a brick to a bespoke size? And, if possible, is there any trick of the trade to make it quicker? Tools / techniques etc? Just curious. Thanks! This will help me weigh up how much bespoke brick sizing to design out if possible.
-
Typical wall build-up at solid brick party wall
maxdavie replied to maxdavie's topic in House Extensions & Conservatories
Nice - yup that's a gd shout. Thanks for advice -
Typical wall build-up at solid brick party wall
maxdavie replied to maxdavie's topic in House Extensions & Conservatories
Thanks! Thought this could be the case. So, I guess timber is also prob out the question for the new inner leaf (no way to ensure its fully protected from the elements etc) So, a freestanding inner masonry wall? Insulation on internal side of that masonry? - not cavity between existing garden wall and new inner wall. Thanks again! -
Hello, I'm just doing a bit of research on wall build ups. This is often a good place to start. We're building an office out building at the end of a long narrow garden to a terrace house. The walls separating the two properties either side of the garden are solid brick and I'm assuming party walls and not boundary walls. I want to use these brick walls if I can as the sides of the building. My assumption re the wall build up is this (though, could be wrong, hence my research): the brick wall is currently 1500mm high, so first thing is to make it higher with new brick. Then, I'm wondering if I can line the interior side with dot-and-dabbed insulation-backed plasterboard. I'll cap the top of the wall with some form of DPM and coping. I'm not sure how you sufficiently waterproof it though - any ideas? What's the typical build up in these scenarios ? Any thoughts / pointers massively helpful! Thanks,
-
Cast Stone mortar joint - poor quality, any remedy?
maxdavie replied to maxdavie's topic in Bricklaying, Blockwork & Mortar
Is this just because its physically difficult? Or does it not lock the block sufficiently?- 4 replies
-
- archtecture
- home design
-
(and 1 more)
Tagged with:
-
Hello, We've had some very special cast stone plinth blocks installed in a sandy 'bath' colour. Our groundworker - a bricklayer by trade - has installed them with a 10mm joint using yellow mortar (despite us having a convo on site re the joints being as thin as possible, ie 3mm and in a colour-matched mortar). Given that we wanted to achieve something that looks seamless, I think it looks awful! - see photos at bottom. I'm going to ask him to repoint with a colour-matched mortar - sadly it'll be too late to achieve a thinner joint now. Has anyone worked with cast stone blocks who could offer some advice about how to point them neatly and what a good mortar to use is? Thanks!
- 4 replies
-
- archtecture
- home design
-
(and 1 more)
Tagged with:
-
Hello, We have an issue; the levelling compound we've used has now dried and it cracks/crunches when walked over. In one area, it has popped up and bubbled. In another room, a hairline crack has formed along the joint of the 4mm plywood boarding beneath. We are laying a lino floor over this. Are these issues anything to worry about? Can we just sand down and re-smooth the bubble? Is there anything that can be done about the cracking? The floor build up from floor finish down is: 2mm Lino floor on adhesive 4mm plywood 18mm floated tongue and groove board glued at joints and screwed down into concrete slab below 50mm PIR board Concrete slab Any thoughts greatly appreciated!
-
Thanks for thoughts. I’m using Wisa Spruce which has held up pretty well! The plies are spruce which has a durability class 4 ‘slightly durable’ (5-10yrs) and the glue layer is of bond class 3 (exterior grade) so it’s the next best thing really after marine ply. Re airtightness and breathability - these are not mutually exclusive. Airtightness just prevents bulk air loss and with it all the valuable heat it carries. The building can still breath. The VCL on the warm side however does slow the process considerably to prevent condensation accumulating faster than it can escape as it moves to the cold side.
-
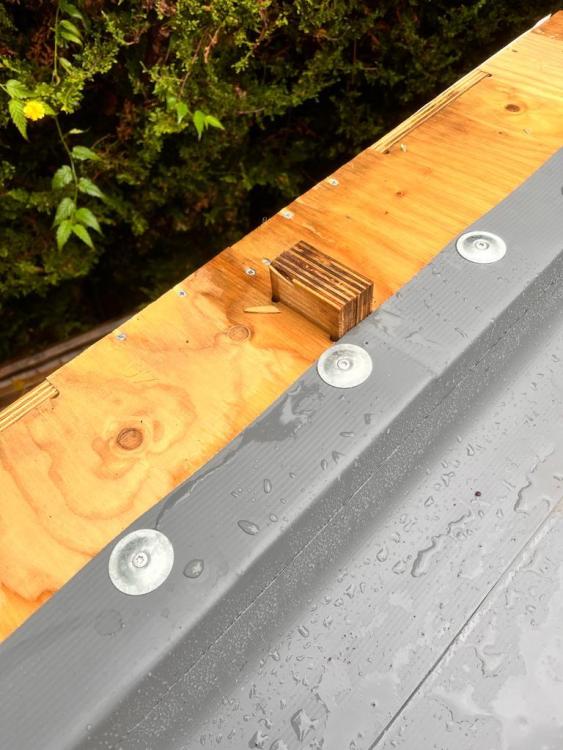
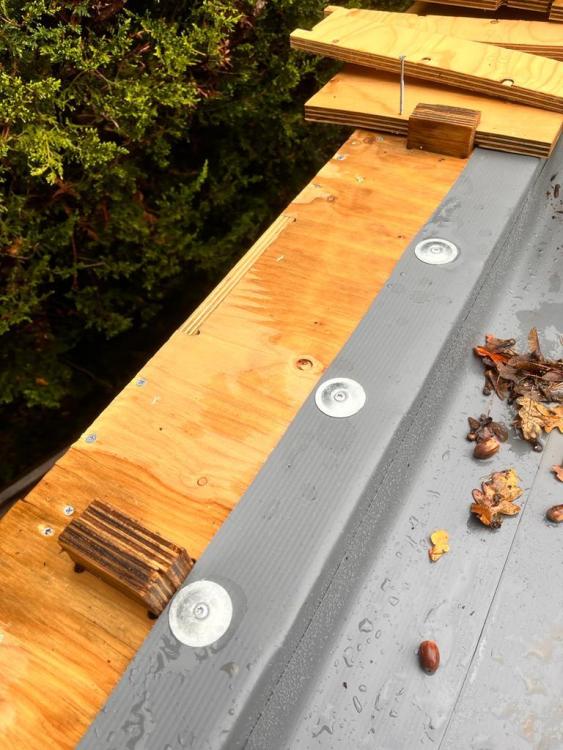
Hello fellow builders, I have what I think may be a major issue. For context - I'm an architect, so know about buildings in theory, not so much in practice; this is my first build; the purpose of this build - apart from providing us with a garden room - is to pilot a cnc-cut kit-of-parts construction system assembled from plywood. We assembled the entire building open to the elements during the summer months. It got wet occasionally, but dried out soon after. The roofing single ply membrane went down over a tapered insulation scheme. They lapped it up over a low parapet wall and stopped it half way over the top. Over the next few days, I adhered our airtight breather membrane to the walls, lapping this up and over the parapet wall and stopping 20mm or so from the roofing membrane (I now know I should have done these two activities in reverse order). I designed the system so that we'd slot plywood coping boards over the parapet wall top. The idea was that we'd then cap this ply coping support board with metal coping pieces. We have had a lot rain since the breather membrane went on. The coping support boards have been soaked and barely had time to dry before the rain came again and soaked them. I'm now waiting for a few dry days so I can install the metal coping. The major issue is this: water/moisture has moved straight through the double-plywood coping and reached the underside; water/moisture may have travelled beneath the single ply roofing membrane; water/moisture may have travelled down through the plies in the plywood and into the building. I know that trapping moisture is a major issue and as a rule in timber frame building, things should be totally weather tight before walls are sealed up with finishes. We've been cracking on in the interior with our VCL, plasterboard and skim. Floors have been raised and levelled with compounds etc, ie we are sealing things up. I want to know if other people see this as a major issue or think that it will just dry out in time before the timber begins to deteriorate. Is it possible to use a dehumidifier to help it dry from the inside? If there is moisture trapped beneath the single ply roofing membrane, will it find its way through the insulation, the VCL over the roof deck and into the plywood roof deck itself. Thanks for sharing any thoughts.
-
I need to raise the FFL up off a concrete raft slab by approx 76mm. It is a warm slab, so both DPM and insulation are beneath it. To achieve this my plan was to install 50mm of PIR board and then float a P5 T&G deck over it, before using a latex levelling compound beneath a linoleum final floor finish. A local guy has carried this work out this work for me up to the T&G flooring. The work is shoddy and prompted me to do more research (much too late!) There are no expansion gaps anywhere and in places the floor bounces. On top of this, I'm told that no levelling compound - even if it has a degree of flex - is suitable for installation over a floated floor and should only really be used over one that has been mechanically fixed. I'm now thinking we need to rip it all out and start again. It's 25 Sqm in total - Grrrrrhhhhhhh! My new plan after ripping it out is to secure some 50mm battens into the slab with a DPC beneath (to protect them from a more or less constantly-curing slab). Then mech' fix the T&G flooring over these paying attention and adhering to all the guidelines re expansion joints etc etc. Before I make another £££ mistake. Can anyone see any issue with my new plan? Thanks!


.thumb.jpeg.75ecc2954ff679940f17433c560cc350.jpeg)
.thumb.jpeg.6e056096dda0d1a55666d874e4f300b0.jpeg)
