maznaz
-
Posts
23 -
Joined
-
Last visited
maznaz's Achievements
Member (3/5)
0
Reputation
-
As far as I can determine that's the only factor that deems them unsuitable; the render adhesion. We did some tests and using thin coats of the render along with scuffing the surface of the foil we got a really good adhesion that held over the winter. If that's the only factor the BCO has said it's acceptable, but I need a definitive statement from someone, ideally Recticel that confirms that's the issue. Fingers crossed I guess.
-
Hi there, I'm DIY renovating a big old stone walled house and I decided I wanted to do it properly and got the local council building control involved. I got my first inspection after I'd taken off a load of old plaster from the external walls and was told by the BCO that since I'd done that I'd now have to insulate them all to a retrofit standard. I've never done that before so I went into R&D mode for a while and eventually arrived at a combination of internal and external wall insulation. The house is in a conservation area and semi-detached so full EWI wasn't possible. Anyway due to my own error I ended up specifying and ordering PIR insulation (Recticel Eurothane GP) and attaching it to the wall. I told the BCO by email that's what I was doing but at the time he just said as long as the U value was met it was fine. Now that he's seen it in situ as the render is going over, he's correctly queried the suitability of PIR for this purpose. I was sure I'd read it was fine, but I can't for the life of me find anyone who can corroborate that. I really don't know what to do, as the budget being super tight was why I was messing around ordering bits myself rather than a full system from EWI store or similar. I can't afford to take it off and redo it. It's about 80 square metres total. Does anybody have any practical advice? Is there any way to mitigate the weaknesses of this type of insulation for this purpose? I know it exceeds the U value we need and it's more fire retardant than EPS so I can't work out what would actually make it unsuitable. If it's just compatibility with render systems I can work around that. Many thanks.
-
Cold water feed passing under new concrete slab
maznaz replied to maznaz's topic in General Plumbing
Thanks for that. It’s blue mdpe into the house, then into 22mm copper and a15mm copper tee is what we’re needing to pass under the slab. Should that transition back into mdpe then? -
Cold water feed passing under new concrete slab
maznaz replied to maznaz's topic in General Plumbing
thanks, I'll ask the BCO about this option as it would definitely be easiest -
Cold water feed passing under new concrete slab
maznaz replied to maznaz's topic in General Plumbing
The problem I encountered was the 22mm plastic water pipe wouldn't negotiate the bends in the 32mm waste pipe without kinking. It was perfectly fine in the straight run of course but needs a 90 at each end to run up the wall to the main house. -
Cold water feed passing under new concrete slab
maznaz replied to maznaz's topic in General Plumbing
Thanks, ducting it makes sense then. What kind of ducting is suitable for this purpose? A builder told me to use 32mm waste pipe but there's no way I can get my 22mm plastic pipe through that. -
Hi there, I'm biting the bullet and putting a new insulated slab in the ground floor of a renovation project. I've finished the main soil runs and they're bedded in pea gravel waiting for the sub-base to go on top. I also need to run a cold water feed from the main supply to the other side of the property. Should that be run in the sub-base or on the warm side of the insulation? My proposed build-up is actually sub-base 100mm, PIR, UFH pipes and 100mm of concrete over the top so if the cold water pipe goes on the warm side of the insulation it'll be within the slab that's acting as my thermal mass, which doesn't seem correct. If it's meant to be run through the sub base, what pipe would be correct to use for that, and does it need to be in conduit? Cheers, Maz
-
Long shower waste run - can I avoid a stub stack?
maznaz replied to maznaz's topic in General Plumbing
Thanks both. I'll have another chat with him. -
Hi there. I'm renovating a bathroom entirely with the proposed layout. The joists are doubled around the bath so I can't really change the layout much at this stage. The joists run left to right across the room. My issue is the existing soil stack (blue blob) necessitates a shower waste run that exceeds the permitted distance for any size pipe I can use. My BCO has suggested we install a secondary stack (green blob) but there's quite a lot involved in that, either teeing into the soil before it hits the sewer, or paying a substantial amount to go direct into the sewer. This is a first floor bathroom and the room below is a kitchen but all in progress right now so digging etc is okay. Is there any way I can run that waste for the required distance, which is about 5 metres, using an air admittance valve or something? The building control officer was pretty sure I needed another stack but it does seem overkill for one shower. Thanks for thoughts!

-
Thanks folks. I'll update here with what I did once I get there, so there's a reference if it comes up in searches.
-
Correct - those are the old windows which I'll be replacing. The bay is a first floor, sitting on a slightly rotten wooden lintel which explains the sagging. I'll be replacing that, probably with a concrete one prior to doing this bit of the masonry renovation. Noted, thank you. The house is in a conservation area which makes it very tricky to get EWI into the equation. Any insulation will need to be internal which is what I'm considering. Thanks!
-
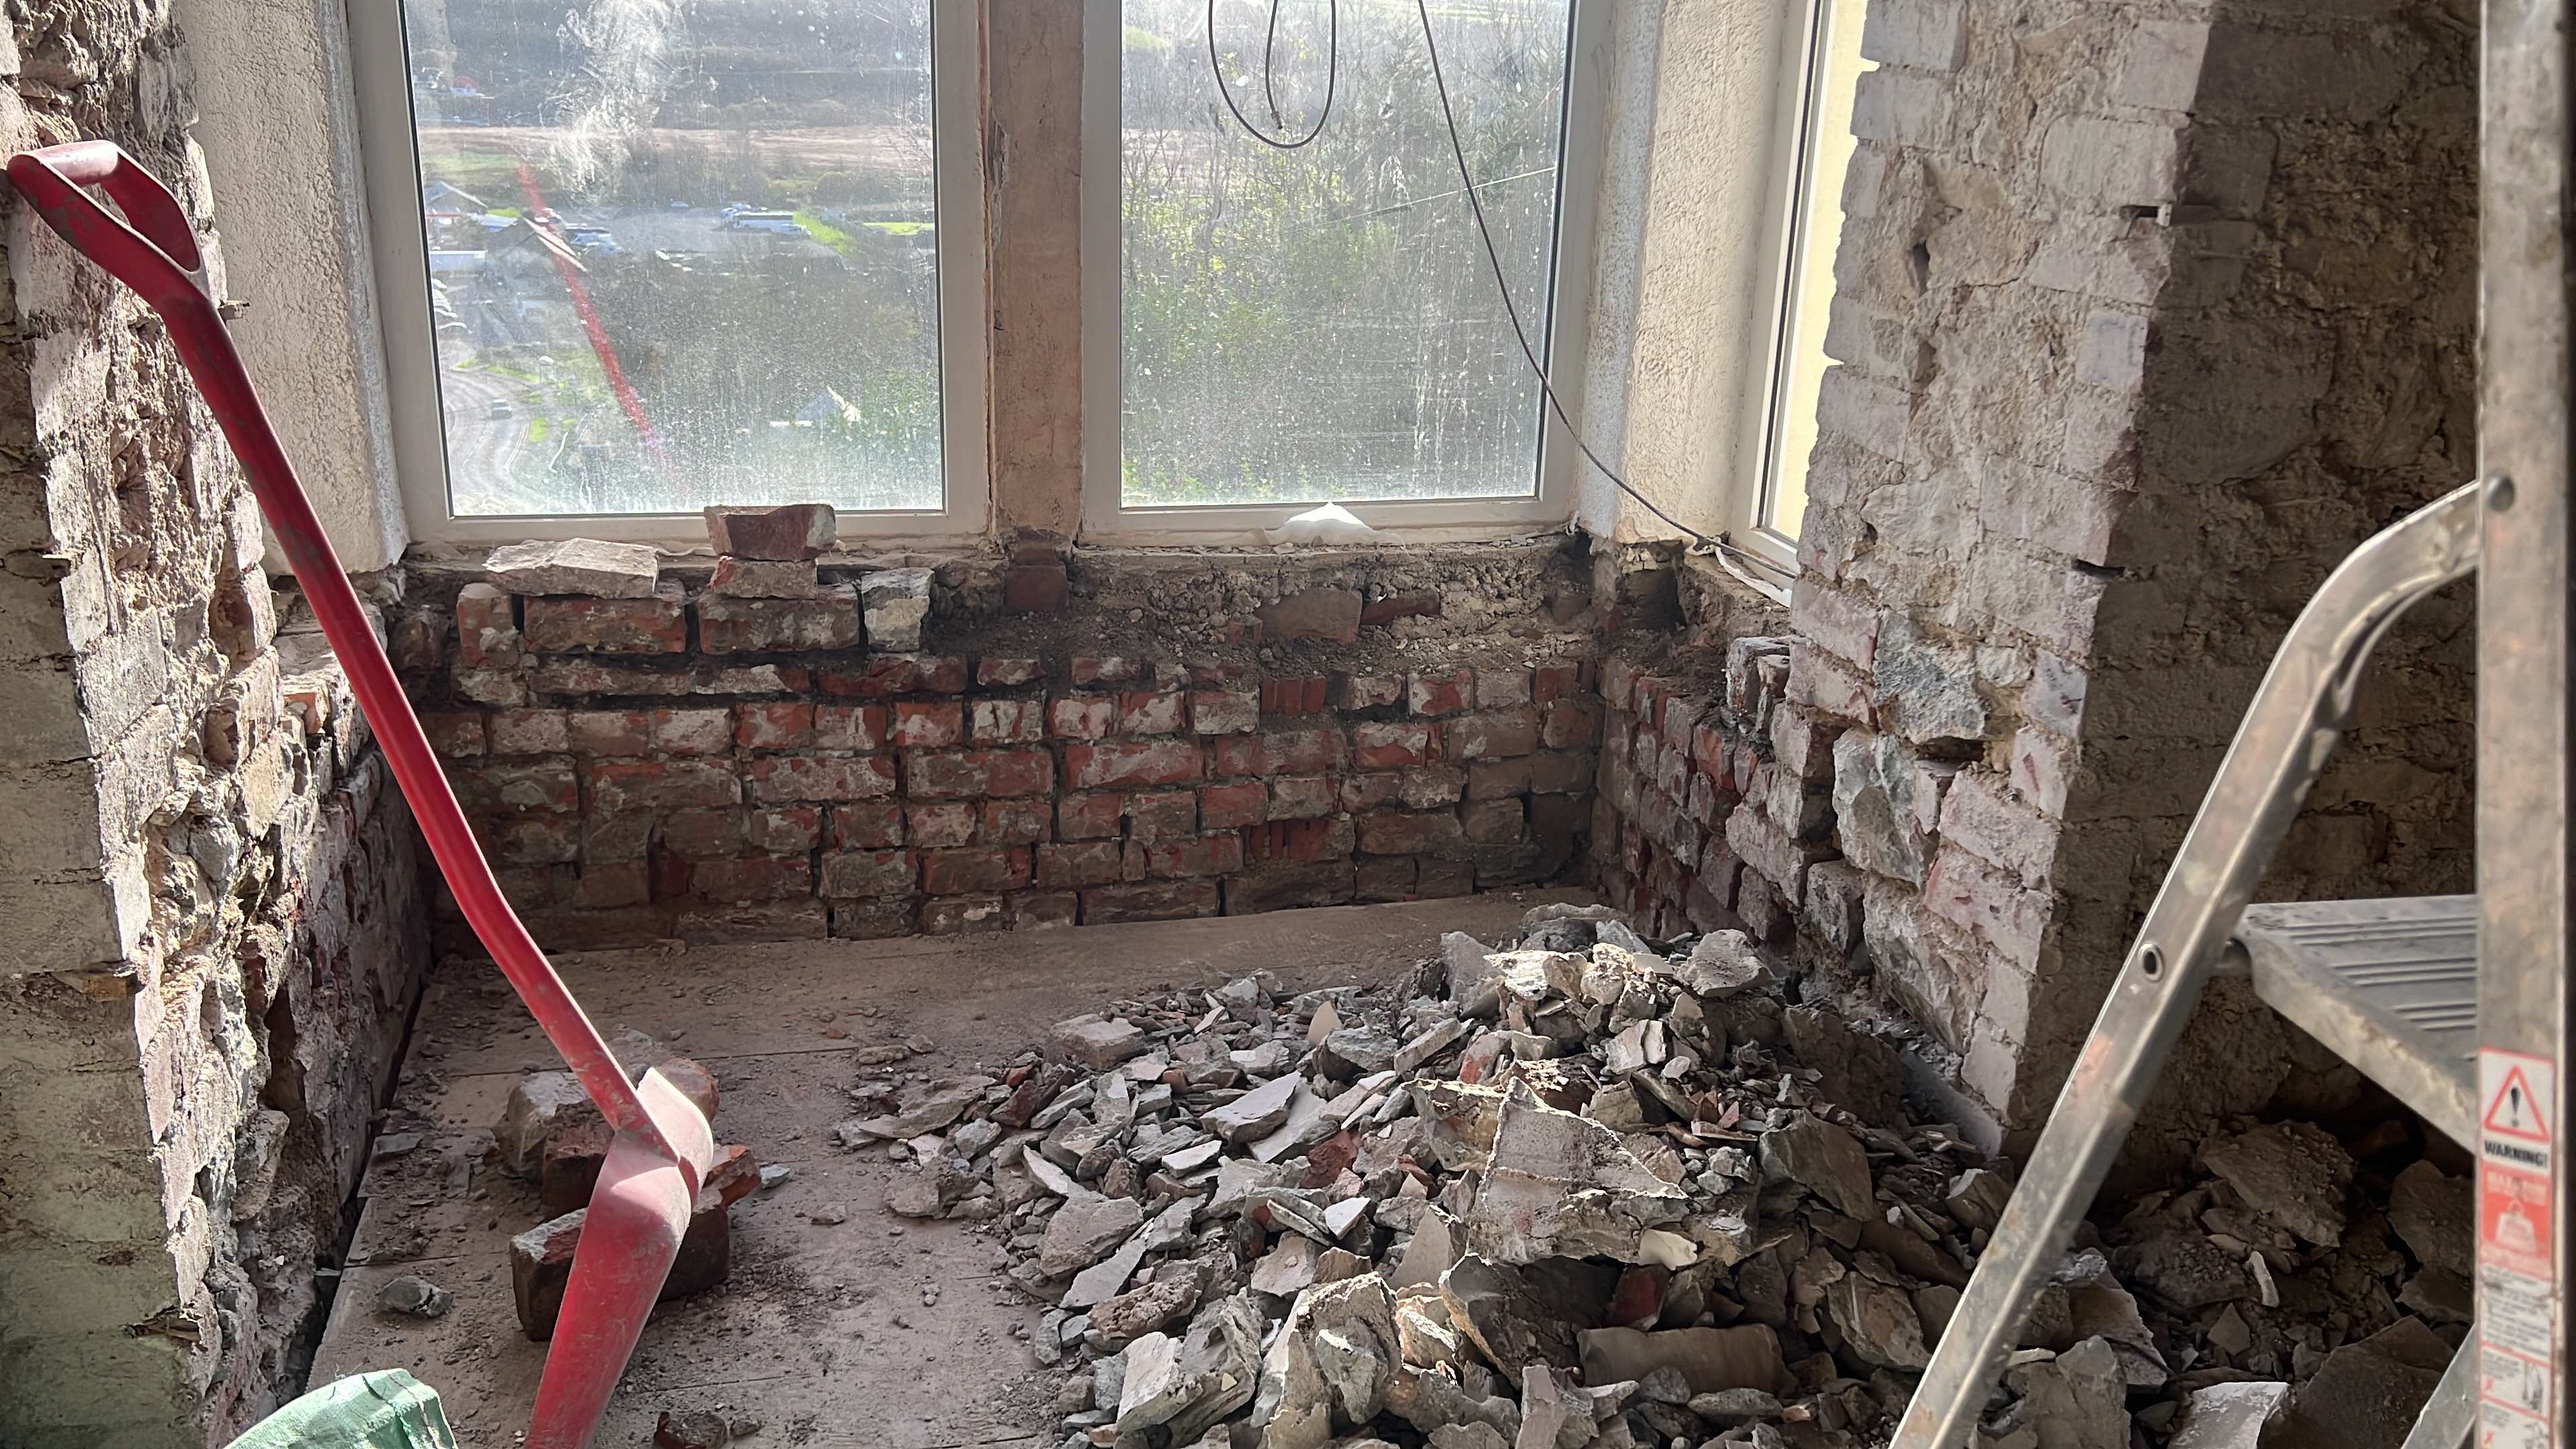
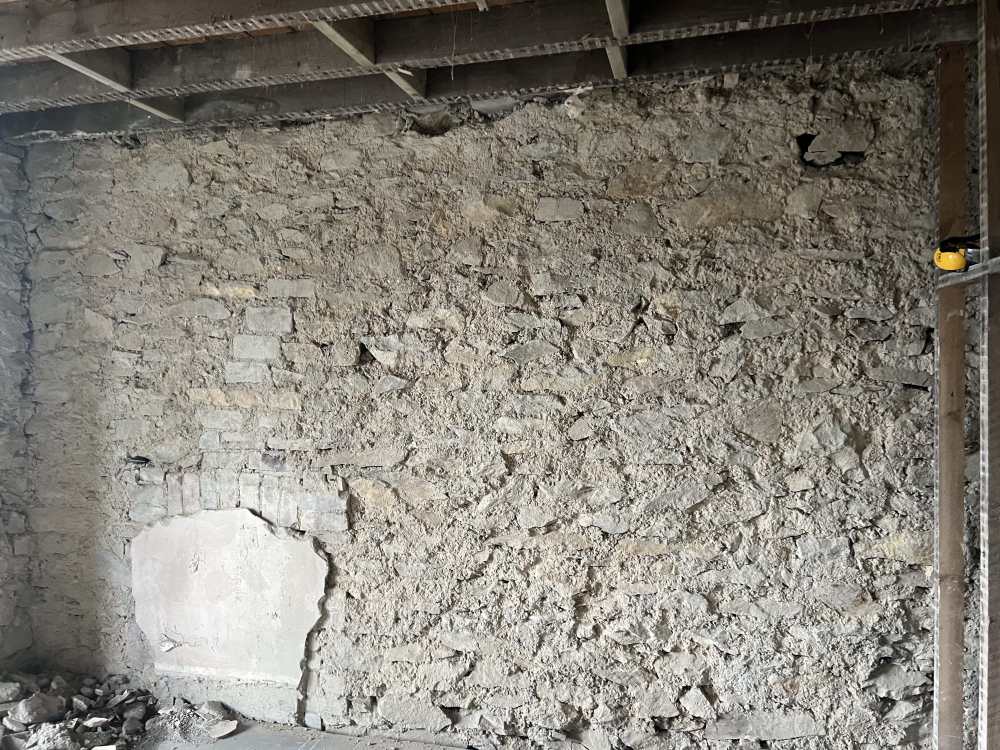
Hi there, I'm renovating my second house, after a 1908 brick-build victorian house that I got some advice from here about. I recently bought a house exactly the same age in a different part of the world (West Wales) and found quite a lot of differences in construction that are giving me a bit of pause for thought. The house is a semi detached, 3 storey house with room in roof construction and a blend of construction methods, namely stone exterior walls, brick bay windows, a replacement gable made from concrete blocks and an extension made also with concrete blocks. I've initially removed all the interior wall coverings as they were cement with plaster over and largely all failing. Behind them I've found incredibly loose lime mortar between the stone and brick portions. In the bay windows, where the windows themselves were poorly detailed and letting in water the mortar is basically wet soil and in some extreme cases muddy. I've left it all exposed to dry out while I decide what to tackle next. The first and most important thing I need help on is how to stabilise the walls so that I can do things like replace rotten lintels, put new windows in, block up fireplaces etc without risking a collapse. 1. Stone walls with dry crumbly lime mortar, several voids and two first floor fireplaces that need covering up - How do I make this good to work with without bits falling out and to give a solid surface to fix in if I decide to batten? I was thinking a lime mortar using NHL3.5 but there is a lot of differing advice in period property forums ranging from pva to Limewash to lime mortar to just sand and cement. 2. Brick walls with wet crumbly mortar around the bay windows - I want these to be stable to receive new windows and they are currently slowly drying out. I would like to redo the looser courses of bricks with lime mortar to give a firm substrate to work with but I am concerned that I can't do so until they are fully dry which could take ages. Should I just rebuild with lime mortar before it dries? Externally both of these walls are cement rendered and it might be a bridge too far to remove all that so I was hoping to make the interior breathable to compensate.

-
Thanks this all makes sense and is reassuring, thank you. I am doing my best with airtightness. I originally didn't gravitate to the insulated plasterboard but I can't remember why. I'll make some different thickness samples and have a test.
-
This is a nice idea, I'll do that
-
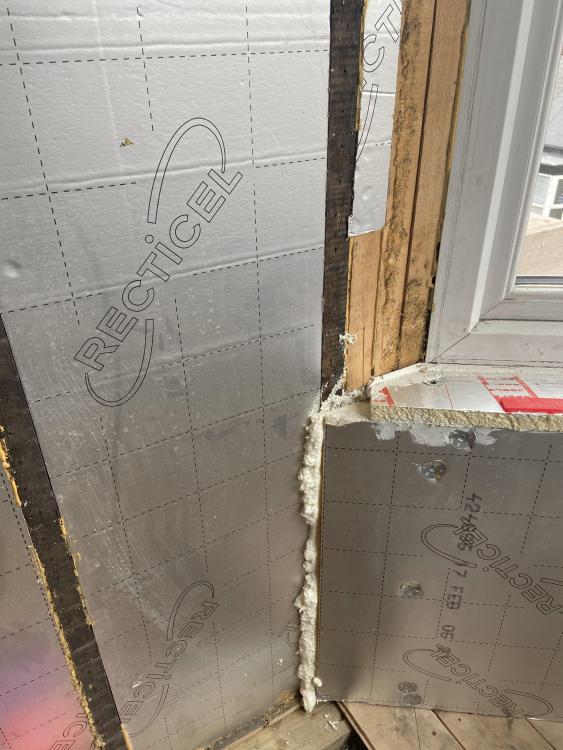
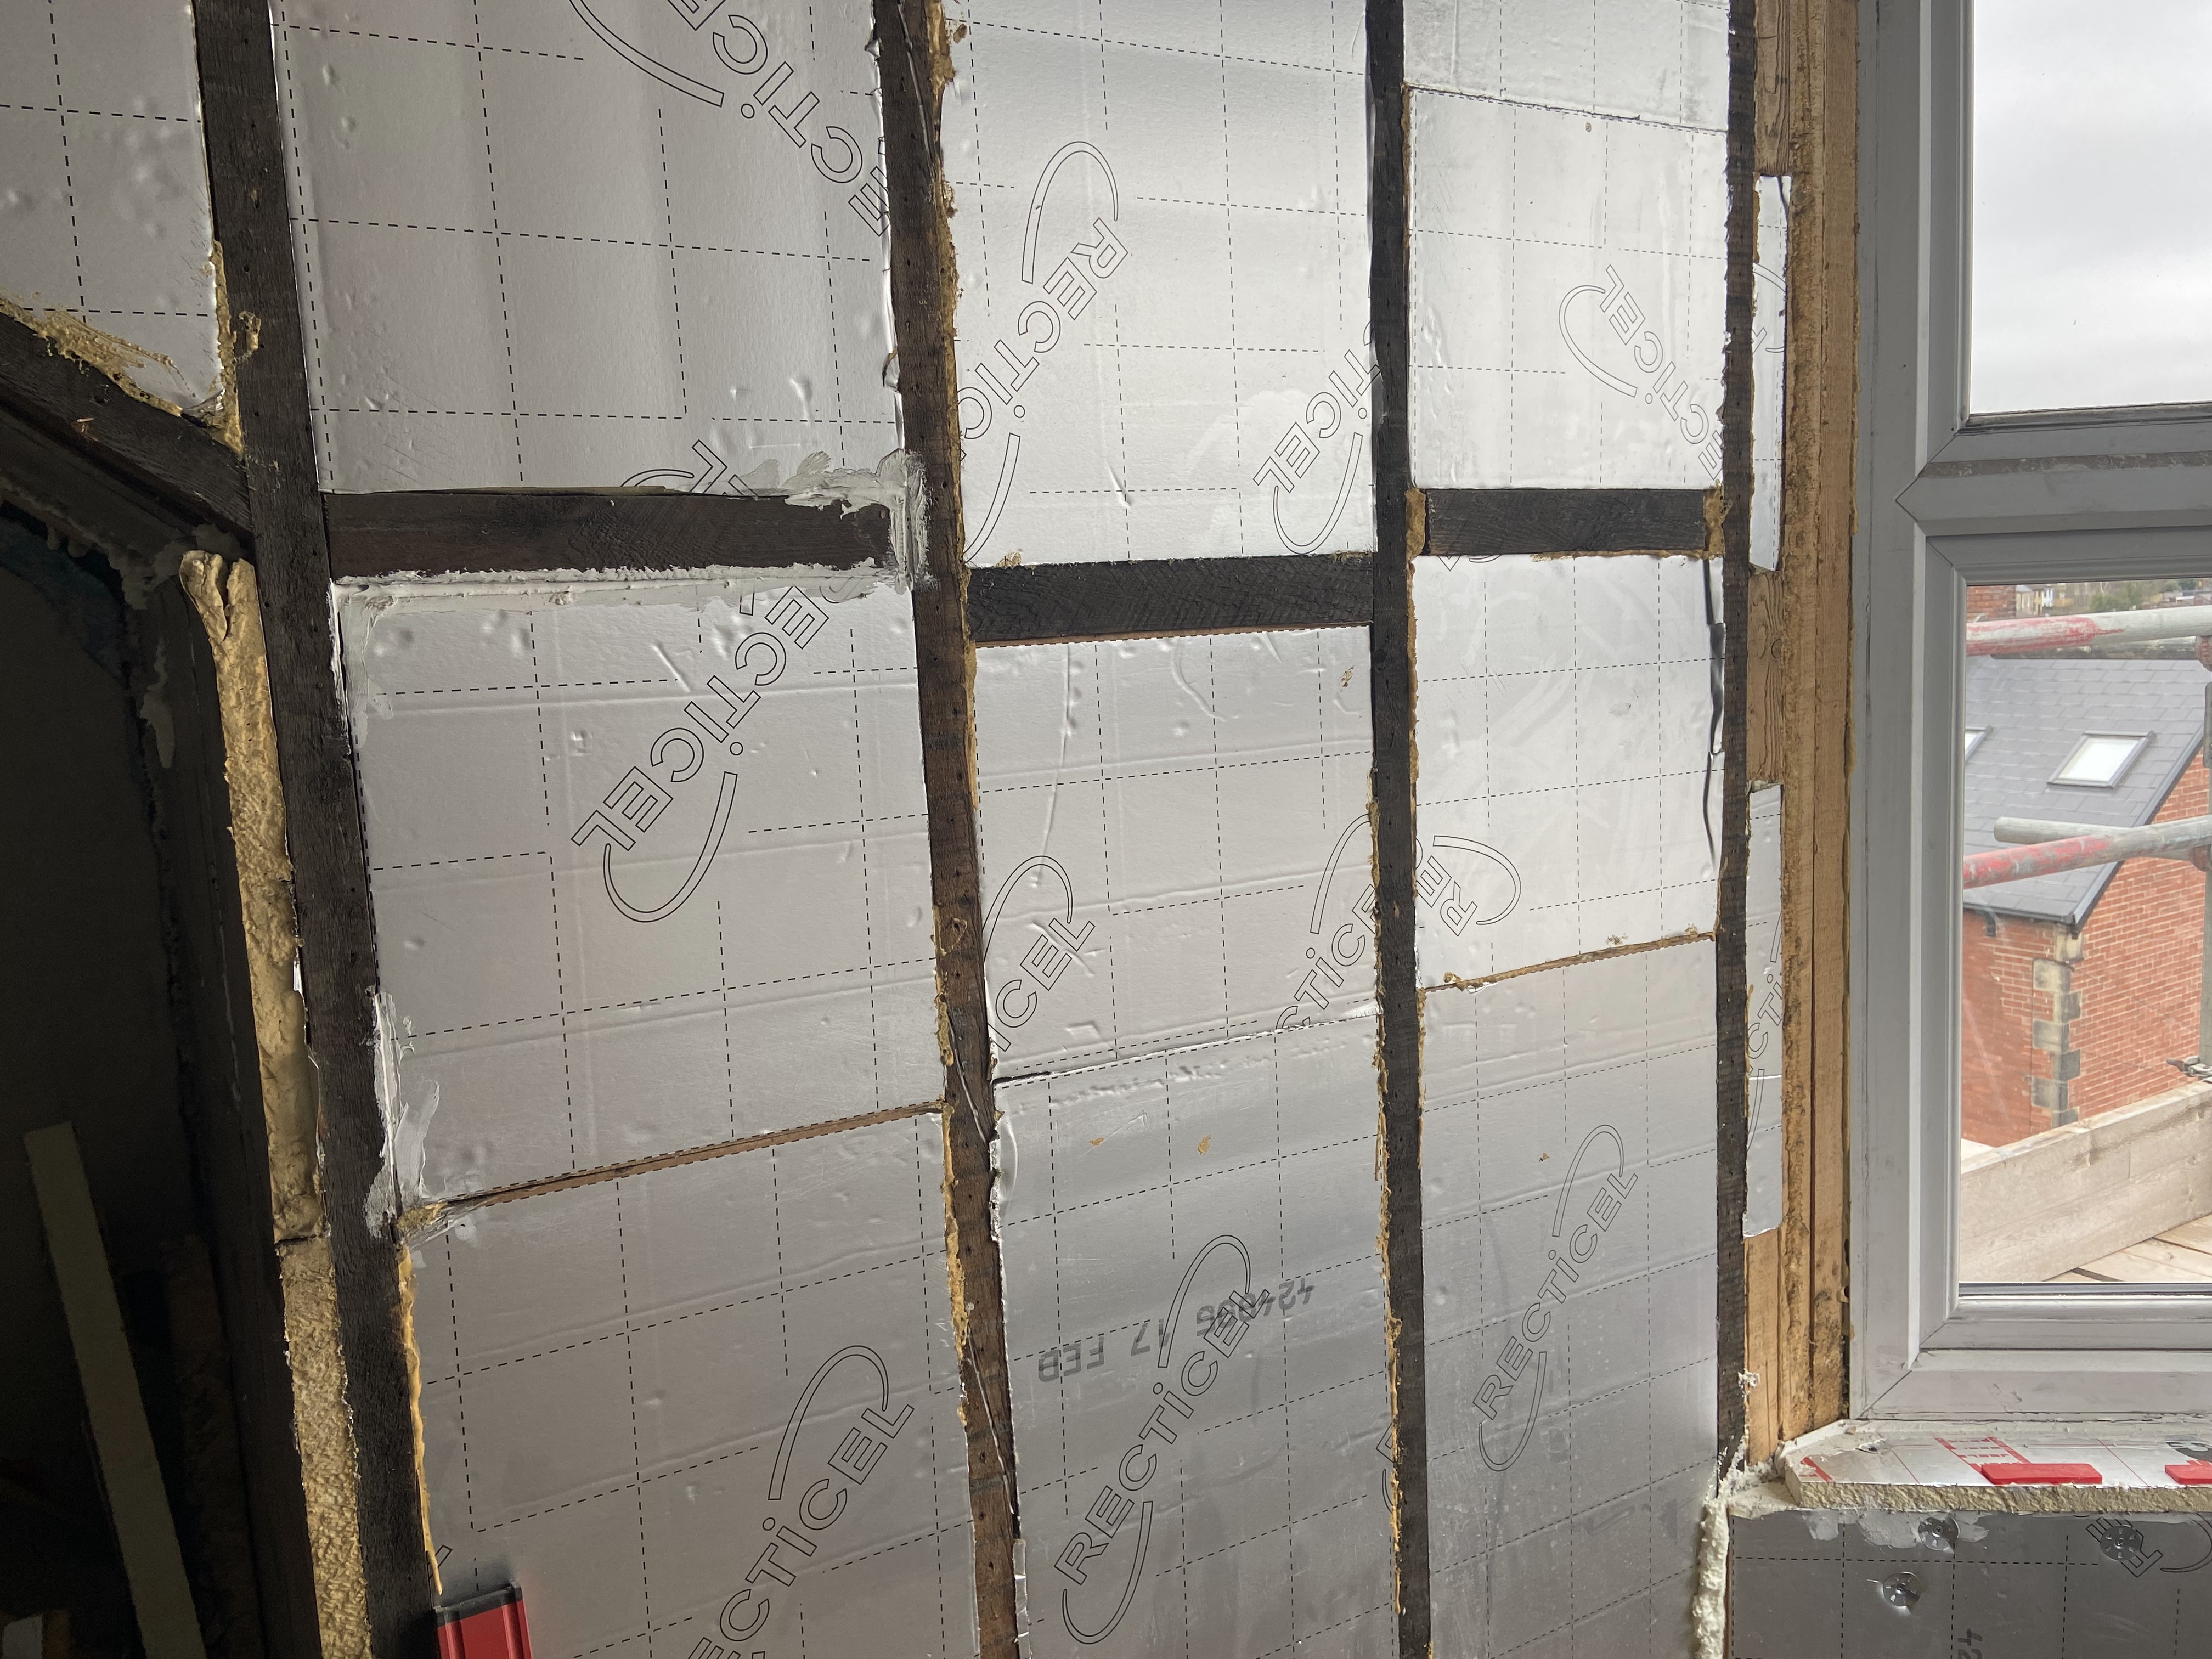
Hi there. I'm slowly renovating a Edwardian house that has a room-in-roof construction with a bay dormer that has been fitted with some ugly but warm UPVC windows. I've rebuilt the bay with 100mm of PIR and put 50mm of PIR between the dormer cheek framing and I was intending to overlay 25mm PIR on the dormer cheeks and window frame area to prevent cold-bridging. I am not certain that there's enough space to actually achieve that once plasterboard and skim are taken into account. I do intend to use architrave at the transition which would mitigate some of the impact. 1. How important is it to minimise cold-bridging in this aspect? The wooden frame portion is basically uninsulated on the cold side, with some light cladding. The dormer cheek is a ventilated roof cavity. 2. Would it make sense to use a thinner laminated insulation material incorporating aerogel or similar? It would potentially be quite costly to do the whole area. 3. Does it matter if the walls come in a little narrower than the window itself. I could taper back out to the full width of the window. Would this look awful? Pictures follow: