pstunt
Members-
Posts
102 -
Joined
-
Last visited
Personal Information
-
Location
Co Durham
Recent Profile Visitors
The recent visitors block is disabled and is not being shown to other users.
pstunt's Achievements

Regular Member (4/5)
5
Reputation
-
Hi, Not yet. We waited a bit until their Black Friday sale, which saved us a reasonable amount but awaiting delivery. Hopefully be with us in the next week or so.
-
Thanks for all this. I am going to now look closer in to them and get some costs.
-
Thanks, I am guessing they would cost quite a bit more but probably more in keeping with my skills. There are many suppliers but can anyone recommend one ?
-
Ha, it's a nice idea but being halfway down a valley and a little exposed to the elements, I fear I will find it in at the bottom of the valley in the river one morning. It definitely needs to be secured to the ground somehow.
-
Yes, my issue with not uploading the pictures probably didnt make this clear but the kit is comes with a complete floor and frame but it needs to be raised off the ground.
-
-
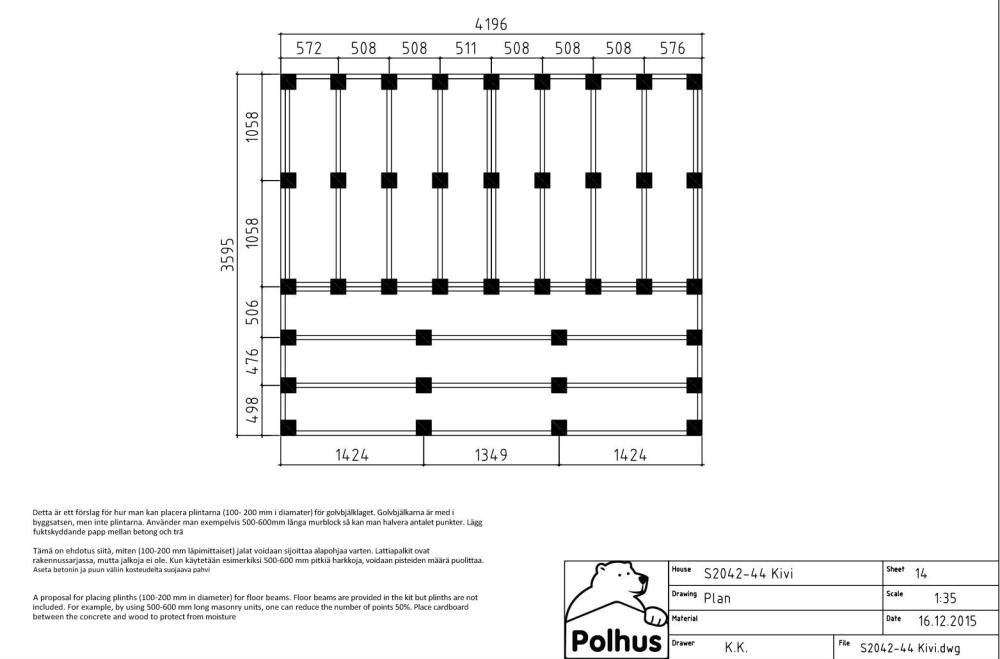
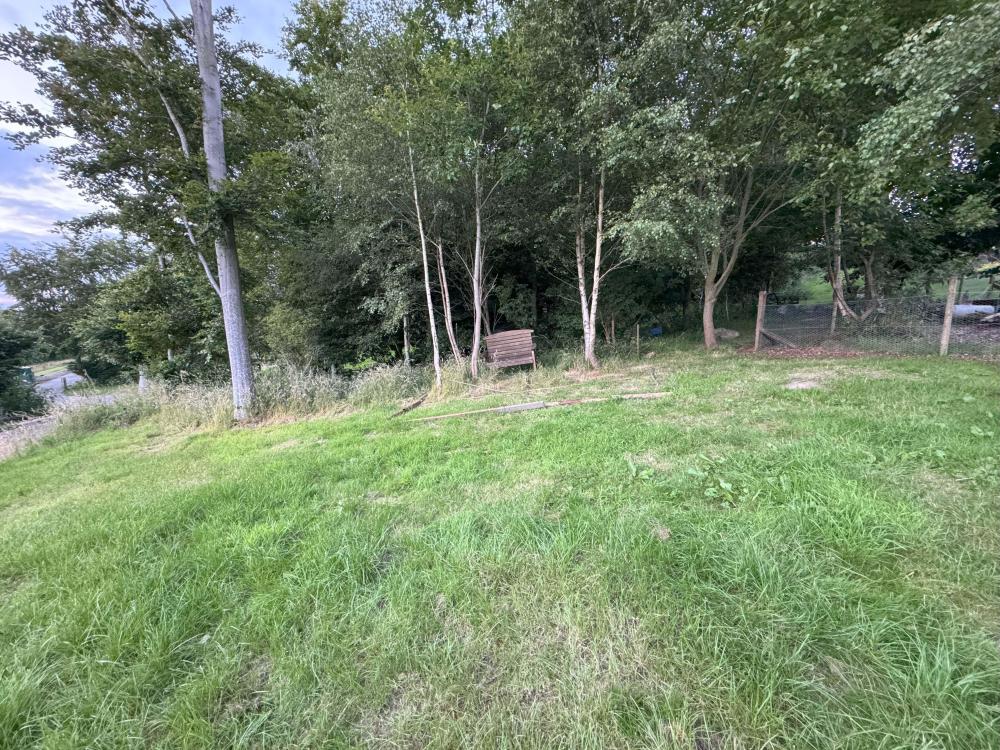
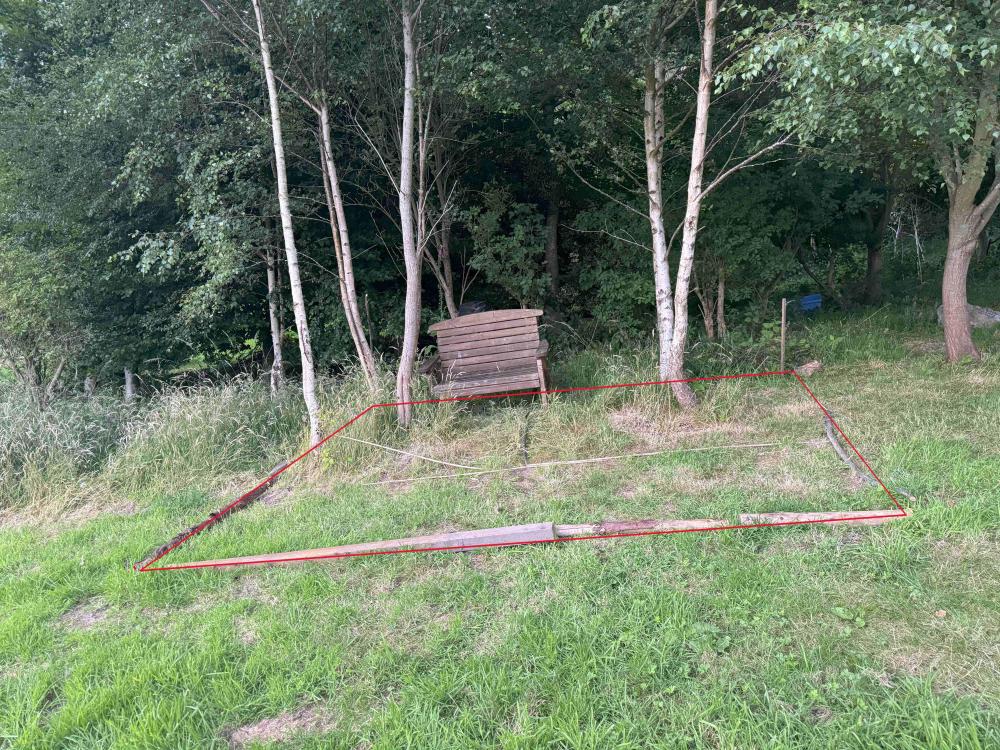
I am looking to build an outside sauna, which basically is a posh shed, which will be supplied in kit form and I am looking for some ideas on how best to approach the base. This is a rural farm location and the chosen spot is on a bit of a slope. I have provided a couple of pictures to give you a rough idea. The shed / sauna is going to be a about 4.2m x 3.6m in size and the suppliers recommend a series of plinths to go under the supplied floor beams, spaced at specific points. You will see in the picture there are some small self seeded trees I will be removing and then I was considering using a digger to scrape away about half of the height difference from the higher points and then putting type one down and whacking down to try and make a level(ish) surface. I have about 30 heavy duty old 600x600 slabs which I could put down on a suitable concrete / sand mix, which I can then lay concrete blocks on as the plinths to keep the shed base off the floor. I wasn't sure if the slabs are necessary and maybe the concrete blocks on the type 1 would be sufficient ? Should I be looking to use cement mortar to lay the blocks to help get everything level ? I have also looked at the ground screw option which I believe may be a more simpler approach and allow easier adjustments to get things level but will come at extra cost. I would love to hear any ideas on the bets way to approach this.
-
Thanks. That’s what I was thinking. I can only conclude then the marks are as a result of the manufacturing process. Will just have to live with it.
-
-
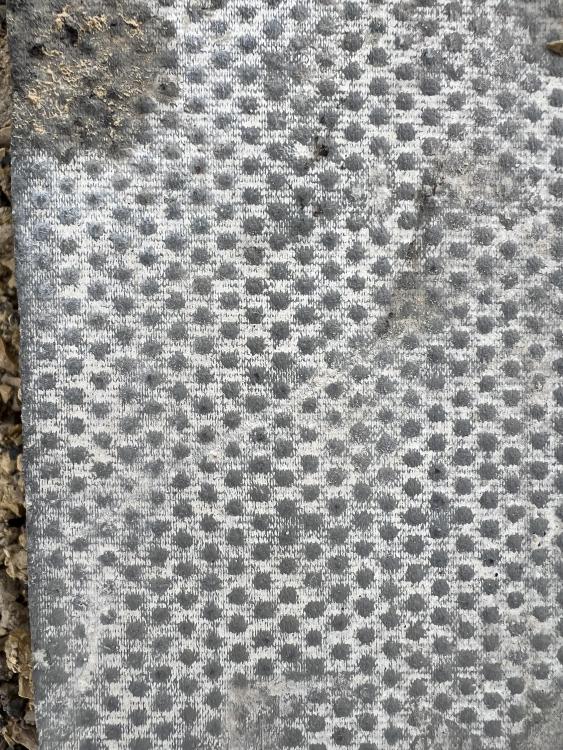
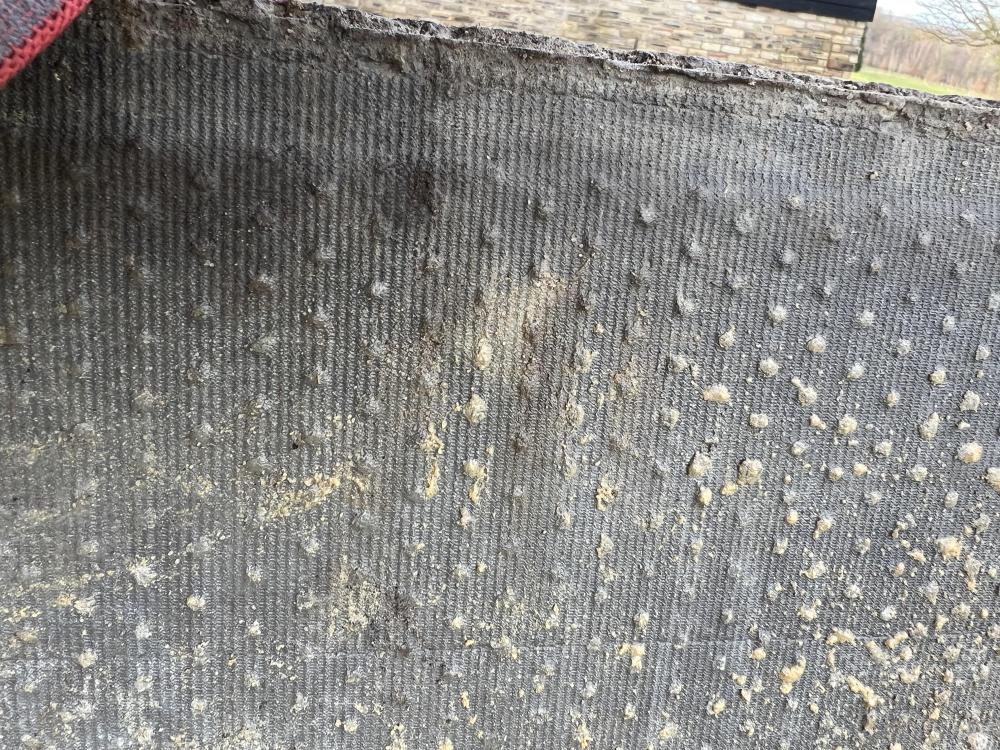
Well, this was the underside. Larger what I would describe as dimples and spaced apart. To my untrained eye, I wouldn’t know which is the correct way around.
-
Thanks. i will flip one over tomorrow and compare.
-
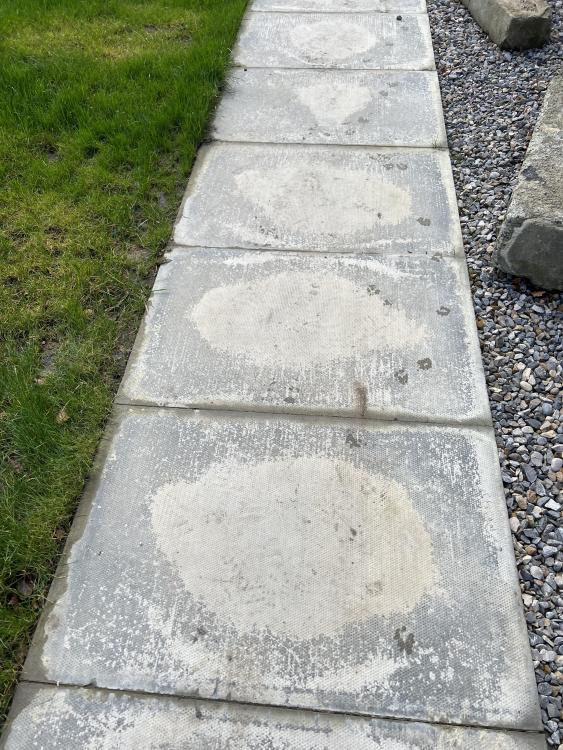
Thank you but wow! Really ? Is there a way to tell what the way right way round is, as these patches aren’t always obvious ? Is it a case of someone who actually knows how to lay these types of slabs properly would know this ?
-
Can someone kindly tell me if this is normal for bog standard council paving slabs. We had the slabs laid about 6 months ago and they have this circle in the middle. They have been there pretty much since being laid but I didn’t think much of it but my wife keeps asking what they are and I haven’t a clue. Any ideas ?
-
Improving an "ok at best" ASHP installation
pstunt replied to pstunt's topic in Air Source Heat Pumps (ASHP)
I think you may have given me an idea what the issue may be. I checked the figures this morning and the flow and return were 30/28 c respectively but the temperature of the tiled floor was about 23c with a 19.5 room temp. The flow and return at the individual pipes of each circuit on the manifiold was 29 / 24. (ish) I was using a laser thermometer on the pipes and floor to these figures so they are only rough guides but the flow and return values from the HP come from the device itself. I will get some pictures to explain this better when I can but there seems to be some kind of pipework loop with the combi bolier, coupled with some valves which seem to be pressure adjustable ( sorry for the poor description but pics to follow ) and perhaps allowing some of the warmer water to return too soon. Hence the return value being too high. It could of course be the HP reporting a dubious value but I can try and put the laser thermometer at the different points on the pipe work as a guide. -
Improving an "ok at best" ASHP installation
pstunt replied to pstunt's topic in Air Source Heat Pumps (ASHP)
Yes, it was over the full 24 hours. We were getting ok temperatures. I reckon I could have raised the max LWT from 32 a degree or so if I was totally reliant on the HP but we also have a log burner in the open living area, which can top up when needed. We live on a farm so no shortage of wood. However, as much as I love the burner it can way too much at times. Reassuring to hear that it's not too bad. I have no idea how the performance fairs.


