Ed21
Members-
Posts
64 -
Joined
-
Last visited
Recent Profile Visitors
The recent visitors block is disabled and is not being shown to other users.
Ed21's Achievements

Member (3/5)
1
Reputation
-
Bought a tube, but used a smear of drinking water rated silicone grease on the seals and it worked !!!! Still a good shout though, will add to the backups.
-
First read that and thought no, then thought why not? Fitting will have to come apart anyway, so will get a tube and see
-
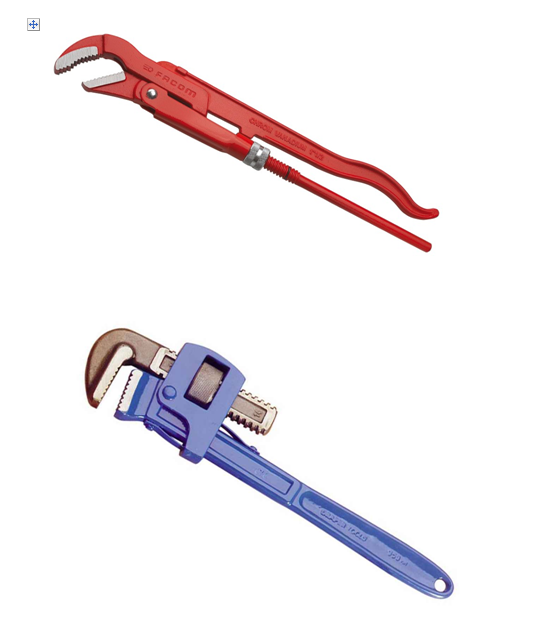
Yeah black was straight, but the blue had a curve although this bit didn't leak. Used 450mm adjustable monkey wrench for the collar and same sized stilsons for the body. Tigtened up as far as I dare whiile watching the thead. It's tight.
-
Yes I deburred it, but will be dilligent when I do it again. Was a new fitting and seals all good. Blue was a pain, usual rolled up transport storage curve, but black was straught as coiuld be. Just going to do it again and check every stage.
-
-
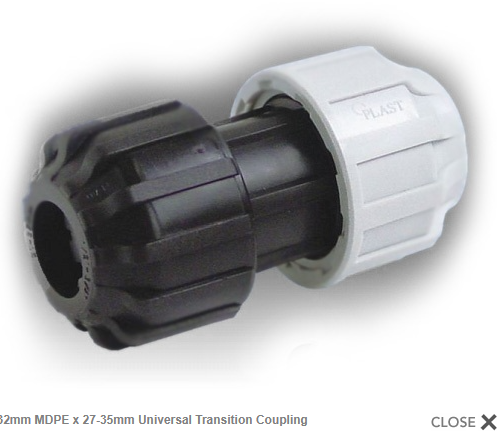
Yes I've done all the usual It's Blue 32mm standard > going to a 25mm-33mm Universal adapater > Black Imperial It's got a cone star shaped hard rubber seal that looks to reduce when screwed up. By the looks of it the smaller diameters will push in a lot further, so gain more grip. Next size up was 35mm + so was too big. Will be doing it again, but was thinking that maybe using some silicone grease (suitable for drinking water) in the cone might be enough to get it in a bit further and aid the seal . Pipes wioll be flused after - any reason why not?
-
Hi All, lI'm using an adapter to join blue MDPE with the older black Alkathene? pipe. Blue no problem and tight, but the black joint is weeping a bit. This will be burried so although it's not leaking much, not exactly happy with it like that. I'm resigned to having to take apart again, but with the exception of a squirt of silicone spray any ideas as to how to ensure the joint is tight? Thanks - Ed
-
Hi All I'm about to start tiling on some STS ceramic foam backing board, primed with SBR using 600 X 300 x 10mm Porcelain tiles. The plan was to use the 4 bags of Dunlop CF-O3 that have been kept dry inside a heated house and is now a year out of date. Bags look good, all as bought and visibly looks no different. So the question is will this be ok to use? Current price is £40 a bag and have 4 of them so could be £160 wasted
-
Just done a trial run using some 5mm laminate foam underlay. The compression on the high spots is down to under 1mm and all the voids are fully filled. The tray is now fully grounded with no further compression possible, it's created a solid bed across the underside of the whole tray. If anybody has any opinion as to why this is not a good idea, can you please let me know before I make it permanent. Cheers all = Ed
-
Just to add to the above as can't edit. What about thin polystyrene or PIR sheet etc. as well, would these be any good? Ed
-
Hi all, I've got a large 1700 x 800 stone shower tray that weighs a ton. It will be fitted in an alcove against foam/cement board on three sides and will have a mira upstand all round before trapping the tray on the edge with 12mm large tiles. The floor in front is being tiled upto the shower tray edge and the floor has been reinforced and extra beams put in just in case. The whole lot has 18mm ply and is dead flat. Pinned on all 4 sides along with its own weight to say that this tray is going nowhere is an understatement. The underside of the tray is flat but rough (think stipple) so some very small high spots. It's possible I might (although not certain) that I'll be making some alterations where the tray may need to come out and I'd like to avoid a permanent fix or one that if the tray was removed it may damage tray. floor or wall. So the question is seeing that the only reason for having any bedding etc. would be to take away any high spots on the stipple underside, would a foam type pad as used on laminate flooring etc. suffice instead? If not foam what about rubber etc? Any advice appreciated ? Ed
-
As it's just a repair got no option but to match the existing, adding depth or a different surface they won't like (not my call TBH). The outside ply has to be removed anyway as it's delaminating in places, so thought why not add some way better insulation. Options are to fully fill the void. Partially fill the void with a gap before the inside ply or partially fill the void with a gap before the outside ply. Doesn't have any barrier at the moment, but if added could add one pinned to the outside of the battens only. I'm sure kingspan will be better than what's there now, but don't want to add if I end up making it worse.
-
That's good as it's It's mostly 1930's old lime plaster, with the odd bit of modern drywall, but that's easy to remove. Thanks for the reply
-
I've been asked to help replace about 4m2 of an exposed outside caravan wall. Inside is 6mm faced ply glued onto 2X1 studding and the thinnest of rockwool insulation that no way covers the whole area. On the outside it's got 9mm ply with a thick resin type stipple. None of this has any vapor barrier. It's easy enough to cut out and patch with new plywood on the outside, but was thinking at the very least to add some kingspan. Gap is 50mm, so to keep it simple, was thinking of 40mm board to allow a small 10mm gap. Question is would the gap be better on the outside edge or the inside one?.
-
I'm extending a shed base which needs some infill and also have a lot of old plaster from a few lath and plaster ceilings. Any reason not to chuck it in the mixer with some new cement as a binder and use it to fill in? it's got no load to speak of and once down will be under solid concrete.


