Oxbow16
-
Posts
442 -
Joined
-
Last visited
Oxbow16's Achievements
Regular Member (4/5)
19
Reputation
-
Round Concrete Inspection Chamber Lid - where to get one?
Oxbow16 replied to Oxbow16's topic in Waste & Sewerage
Great, thank you. Don't know how I managed to fail to find them! Must have been using the wrong terms. Seems they're no good for a driveway though anyhow, as you say, so will look for 320mm alternatives that are rated for vehicles. And hope that they fit! -
Round Concrete Inspection Chamber Lid - where to get one?
Oxbow16 posted a topic in Waste & Sewerage
Hi folks I'm looking for a replacement one of these but can't even find an image of one online, let alone one to buy. Am I looking in the wrong places and/or using the wrong search terms? Or are they hard to come buy? The inner diameter of the plastic ring the lid sits in is 343mm. Any tips on where I might be able to buy one would be great. If not, what would be the best option to use? It's on a driveway so needs to be able to stand up to that... Many thanks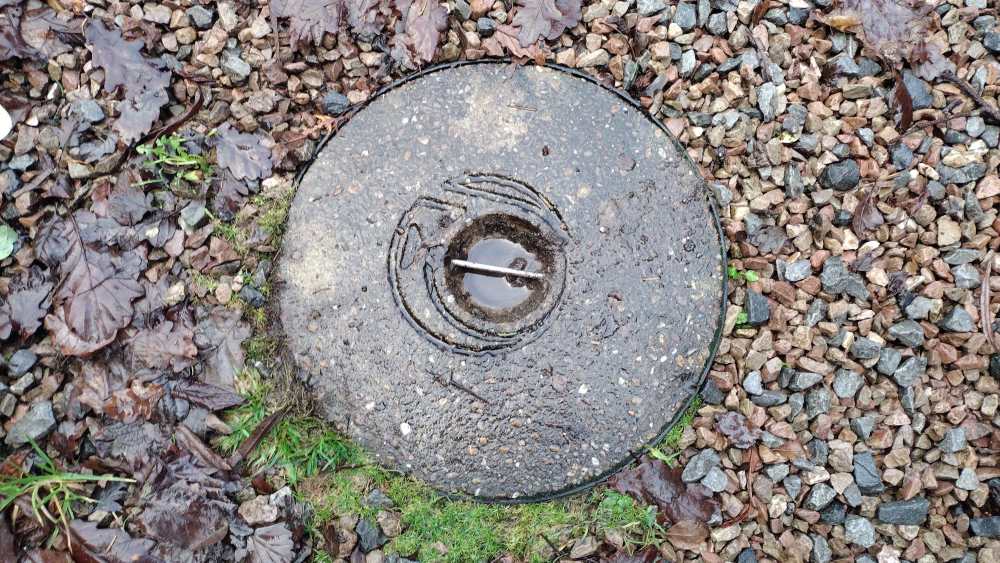
-
Thanks Nick, that's all very helpful indeed. I hadn't even thought of the dishwasher slurps and noises that would be heard using a "stubby" pre-trap connection, so I'm pleased you pointed that out. I'm good with the idea of using a standpipe for the dishwasher, but I'm confused as to how and where the sink waste and standpipe would connect, especially given their different heights. Are you able to explain please? Also, what height does the standpipe need to be relative to the appliance and/or sink? is there a minimum or maximum? Thanks again
-
Hi all Sorry for the long title but thought best to bung all these general plumbing questions together. I'll be fitting a new kitchen sink soon and am unsure on the following... 1. Compression vs Push Fit for outside? I know solvent weld is the preferred and professional choice, but I'd really like to be able to dismantle every so often and clean out the pipes... 2. Which pipe for outside? If I'm using push fit then I guess the answer is obvious! but if using compression I've read I can use either type of pipe. Which stands up best to the elements? And do both types need painting (have read various answers on that question)? 3. Do I need an AAV valve? I'm totally confused as to when they are/aren't needed. For context, the kitchen sink is not connected to any other wastes. And it is open ended , i.e. the open end of the pipe sits just inside the drain cover grate. EDIT - I should add. There is no AAV in the existing set up. However, in case it matters, I will be going from a sink and a half to a single sink, and I'll be adding a dishwasher where does was none before. Any help would be much appreciated. Thanks for reading
-
Hi all Direct air / External air… Additional air requirements are mandatory for stoves above 5kW in older houses, and for any stoves in newer houses (post-2008) or houses with an air permeability of 5 m3/hm2 or less. I can understand the logic in having DA when the alternative would be an air vent (hole in the wall); although even then there are arguments on both sides. But putting that aside a moment, when no additional air requirements are needed for a stove, is DA still a worthwhile option? I’ve spent the day reading up on this and thought I’d post what I’ve found, as much to share my research as to get feedback and thoughts from people if anyone is interested in discussing it. ***In Favour of DA*** - Draughts. There are quite a few people on the internet who can’t say enough good things about DA and highly recommend using it whenever possible to reduce draughts and cold air in the room. It’s an enticing idea! However, I did notice that this is usually as opposed to having to have an air vent. When the alternative to DA is no air vent (for a 5kW or less stove), I’m not so sure how many of these people would still recommend it. - Draughts – Anecdotes. That being said, I found instances where people were saying they used to have a stove which took air from the room, they weren’t happy with the draughts being created, and so retrofitted a DA feed and it made a world of difference. - Wasting Heated Air. Some say that without DA, you are wasting air in the room that has already been heated and replacing it with cold air. This quote sums it up: “…I would definitely fit a direct air supply not only [for] the prevention of draughts but for the conservation of heat. Using room air you would be using air already heated and a wood burner will use a considerable amount of combustion air out of the room you have heated.” REBUTTAL: However, stoves actually use quite a small amount of air when compared to the average standard air changes required in a room. The air changes will have to happen one way or another, so unless MVHR is used, won’t hot air still have to be replaced with a fresh cold supply regardless? - Colder Air Burns Better. Quote: “The colder the air – the denser it is and more oxygen per unit volume it contains, so it must be good to assist combustion.” REBUTTAL: However, I’m sure I’ve also heard the opposite, that colder denser air is detrimental to combustion. Not sure which is right. - Cold Air Expands When Heated. The claim therefore is that this can assist chimney draw as it is taken away up the flue. - Control. Although DA means less air changes compared to air from the room, it means you have more control over when you ventilate the house. IE – opening windows in the morning, or before going out. You can control the ventilation, and separate the times to ventilate from the times to heat. Also, you can introduce more ventilation when required due to the weather (damp days) and less when not (dry crisp days). As one person puts it, “Using the stove air to ventilate, means you wouldn't ventilate the right amount at the right time.” I thought this article was particularly useful in highlighting benefits, although note the “conditions” on page 2. https://mtbest.net/wp-content/uploads/sites/12/2023/02/cold-air-intake-1.pdf ***Against DA*** - Simply Not Needed. Many people claim DA is not necessary, for various reasons. Also, all of the installers and stove shops I have spoken to (which is quite a few!) have unanimously said not to bother and that we would not gain anything. The “Outdoor Air Myth Exposed” article – link below – claims that it has been studied and DA (or even just air vents) are most often of no benefit. - Stoves Don’t Create Draughts. Some say it is not true that you feel draughts. They say to try putting your hand by the stove’s air inlet, where the air is being sucked through a small aperture and should therefore be the aggregate of all air being pulled. If there were draughts you would feel it there, but you don’t. - Cold Air Cools the Stove. Pulling cold air directly into the stove will be worse for combustion and will cool the internal temperature of the firebox. - Cold Air When Not in Use. The duct will be cold and will emit cold air, especially when the stove is not in use (or even when the stove is in use, to be fair, as it’s still sucking in cold air). Thermal bridge to outdoors. - DA is Worse for Ventilation and Humidity. If the stove takes air from the room, it encourages more air changes in the house. This in turn can increase ventilation and help with humidity too. Outside air is almost always drier/lower RH, so frequent air changes help. - MVHR. Of those people who think DA is a good idea, they sometimes add that MVHR is needed too for air changes. Without MVHR, some say it’s best to vent the stove from the room air. I don’t and won’t have MVHR, so that’s an “against” for me. - Wind and External Air Pressure (Backdraught) Problems. If the wind is at a particular strength and direction it can cause smoke to blow back into the room, as well as CO. It can also make it difficult to start the stove. Unpredictable and variable. There can also be a potential fire risk if the reversal of the flue system flow results in the hot gases being expelled from the DA intake. Also, if mechanical extraction in the house de-pressurises more than the chimney draw, smoke and gases can be drawn out of the stove and into the room. REBUTTAL: See “cold-air-intake” pdf (link above). He says to have the external vent positioned in a place where there will be no wind (consistent known pressure), which would deal with this problem. If that’s not possible, I wonder is something like the DR21 could help with this? - Air from Below Stove (and Entry Into Ash Pan Area). See “cold-air-intake” pdf (link above). He states that the DA needs to be supplied from below the fire as a requirement for it to be effective. This is not possible for many wood only stoves as they have no ash pan. - More Money! Kits are often £100+. Fitting will add to the bill as well (unless DIYing). - Historic Precedent. It’s not how they used to do it in the old days! Older houses need older methods? The strongest article I found arguing DA – and air vents in general – and claiming that studies have proved it: https://www.woodheat.org/the-outdoor-air-myth-exposed.html I appreciate the post is long, and probably quite boring! So feel free to ignore it; although if you've got this far then I guess it's a bit late to say that! But if it interests anyone, I’d love to hear your thoughts, arguments and agreements. Personal experiences always great to hear as well. Cheers
-
Thanks @JohnMo - appreciate your reply Every kW is welcome in our house, very little risk of overheating! Also, the house is laid in a way where various doors can be opened / closed to allow heat to circulate and escape more, or be concentrated in the room where the stove is. Any further experiences or thoughts from people on single vs twin wall? Ta
-
Hi Back again with a second wood stove query, if anyone would be kind enough to share their thoughts please... We're planning to have a stove fitted into a single storey room. The stove has a 5" flue. The installers who have quoted said they think the flue will need to be a total height of 4.5m. It will be a straight run, no bends. If there were to be a single wall flue in the room up until where it has to change to twin to pass through the ceiling, the single wall section would be around 1.6 to 1.7m. The rest would be twin wall, although most of it would be outdoors. We only burn well seasoned hardwoods. From what I've learnt, the advantage of single wall would be more heat to the room. One installer said he thinks for each 1m of single wall flue you get 1kW of heat, which would be a great bonus. I'll also admit a bias - I think the stove looks so much nicer with the single wall 5" flue. I've only found a couple of photos online where the same stove has been installed with twin wall and to be honest I think it looks f-ugly. Also, more space on the stove top for a kettle etc would be an extra bonus. However, I've also learnt that the advantage of twin wall is the flue maintains a higher internal heat, creating a better draw, which results in a stove that is easier to start, runs better, and a flue that doesn't block with creosote so much. (Although I should add that some say they have none of these problems with single wall). It seems to be a very divided topic, with strong opinions on both sides. While I want the aesthetics and extra heat to sway me to single wall, I also don't want a stove that is tough to light and doesn't run well. So over to you guys for some thoughts and insights... Many thanks
-
Hi We're looking to have a new wood stove installed and have narrowed it down to a Dik Geurts Ivar 5. It's a good size and shape for where we'll be putting it, we like the aesthetic, and it seems to get great reviews on the whole. I wondered if anyone here has one and could share their experiences if so? Or if anyone is familiar with it and has an opinion, good or bad, regarding that particular stove. More wood stove questions may follow over the next few days! Many thanks
-
Thank you all for the replies, much appreciated. I've just had a look at prices and it seems it would be 1,000%+ on bituminous paint. Ouch! How much better would it be do you imagine? And if the cold galvanising would last another few decades, how long by comparison would you expect bituminous paint to last? Interesting that they use just that, as it is regarded a primer so seems odd to not put anything over the top. I'll look into it further, thanks. Comparable price to bituminous. Thanks also for the tip. I'm getting spoilt for choice now Seems about x2 / x3 more expensive than bituminous. Do you think it is worth the extra outlay? Longer protection? Cheers
-
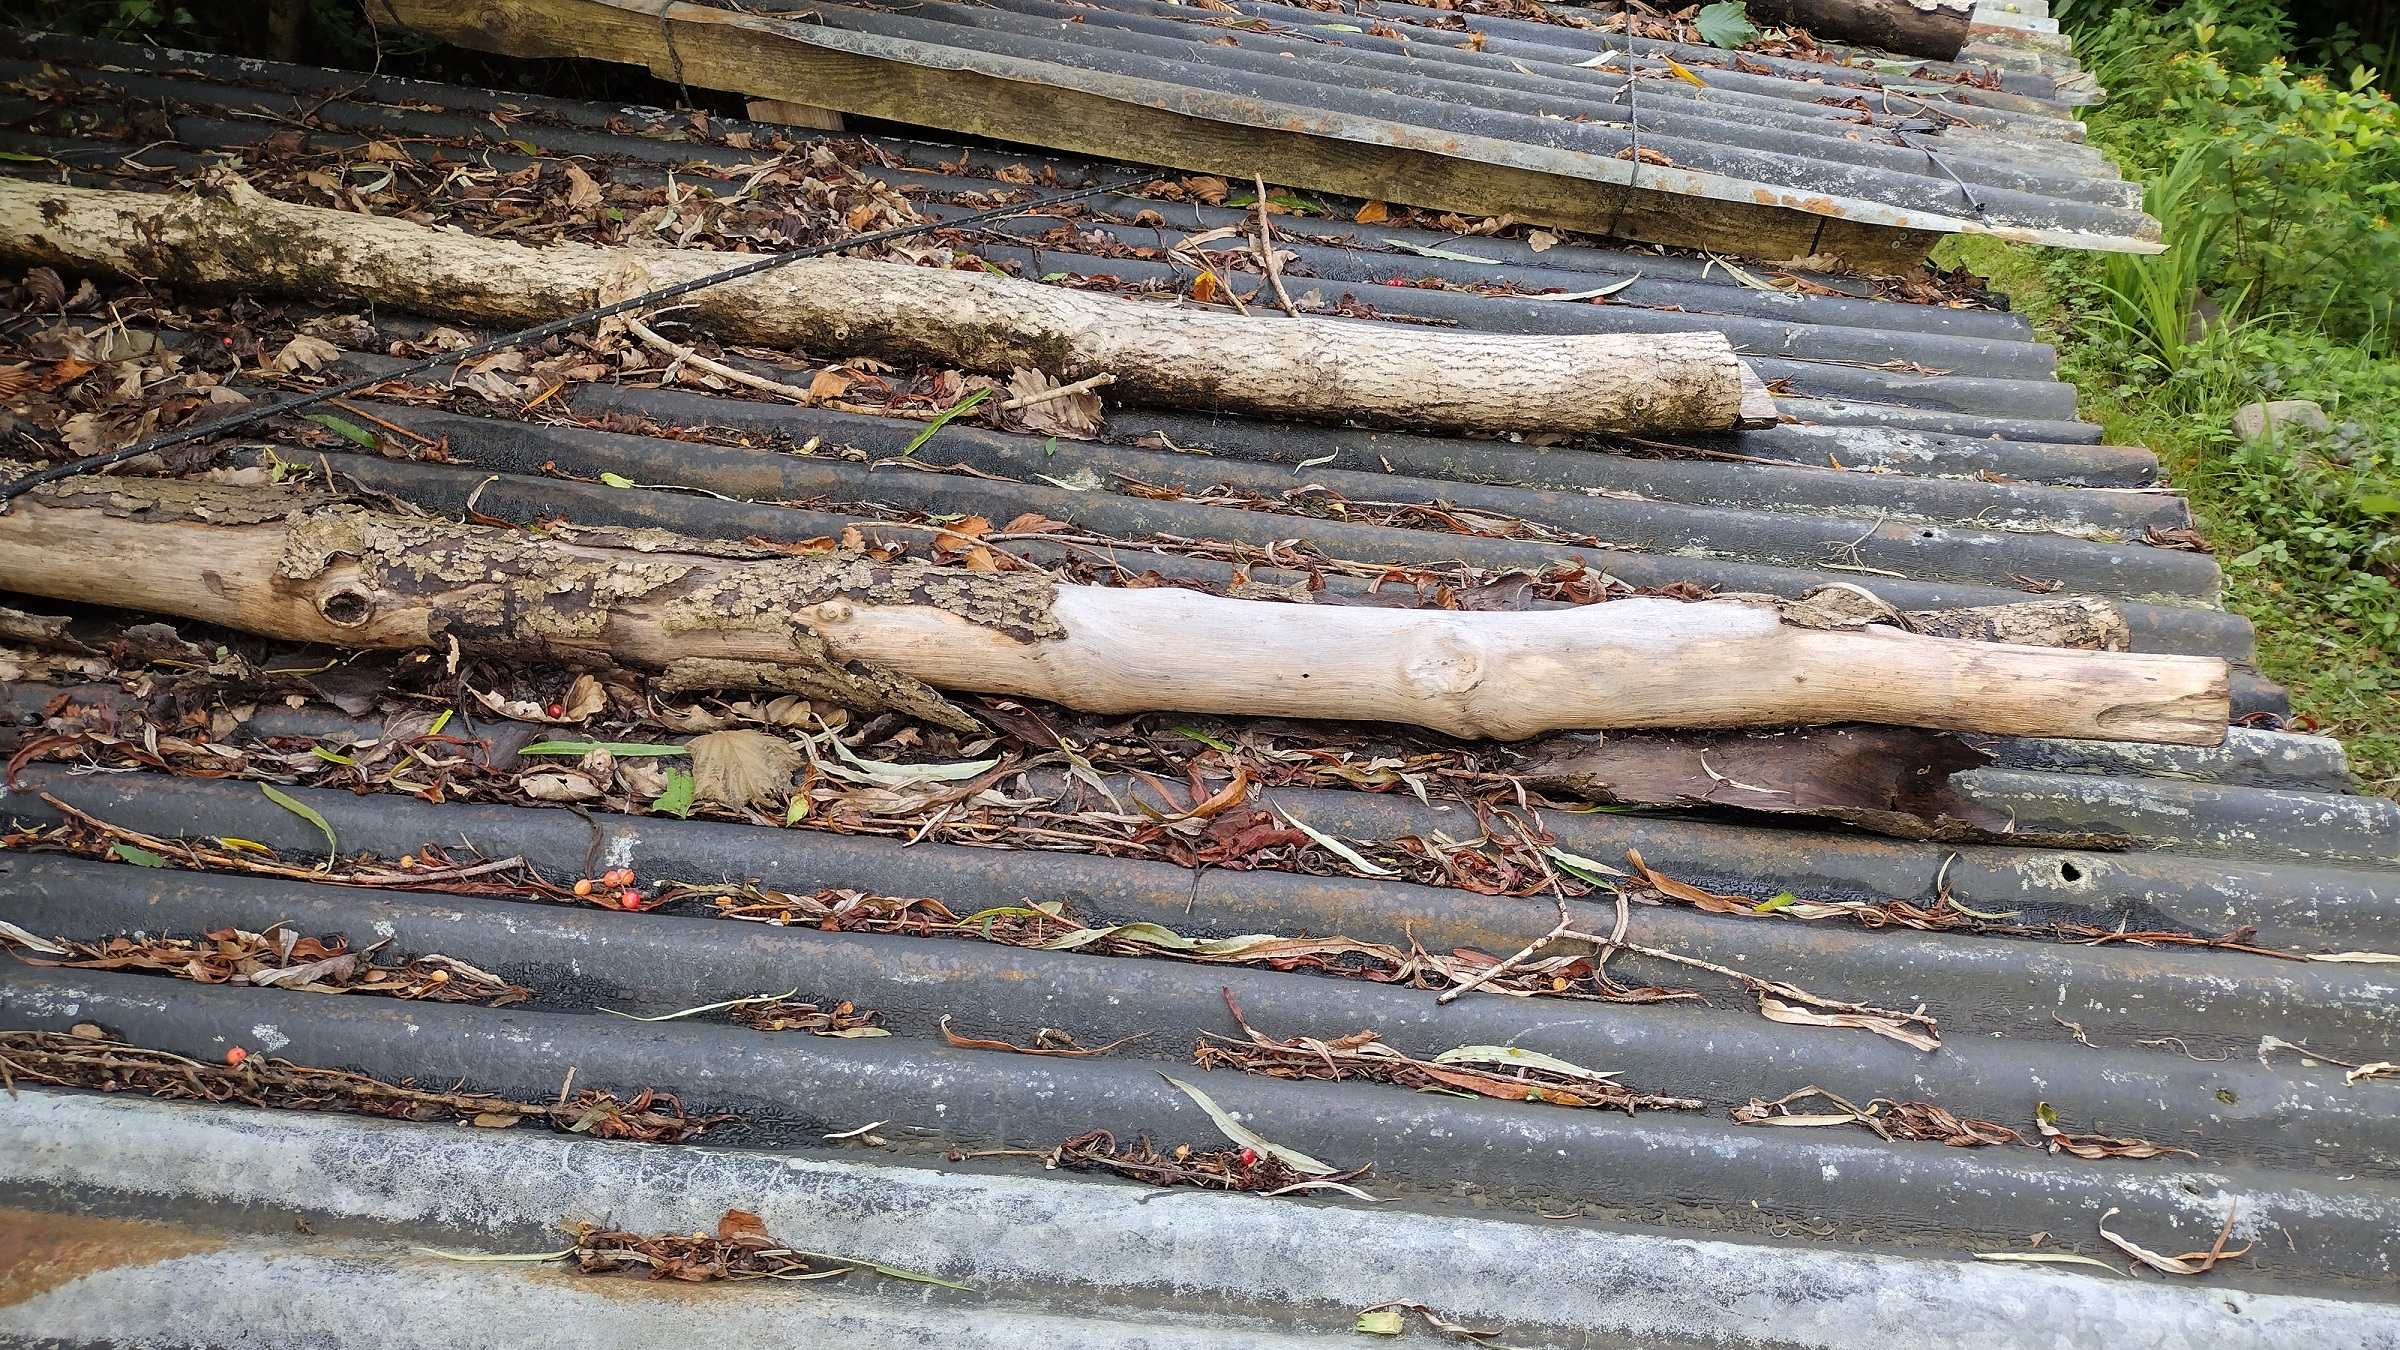
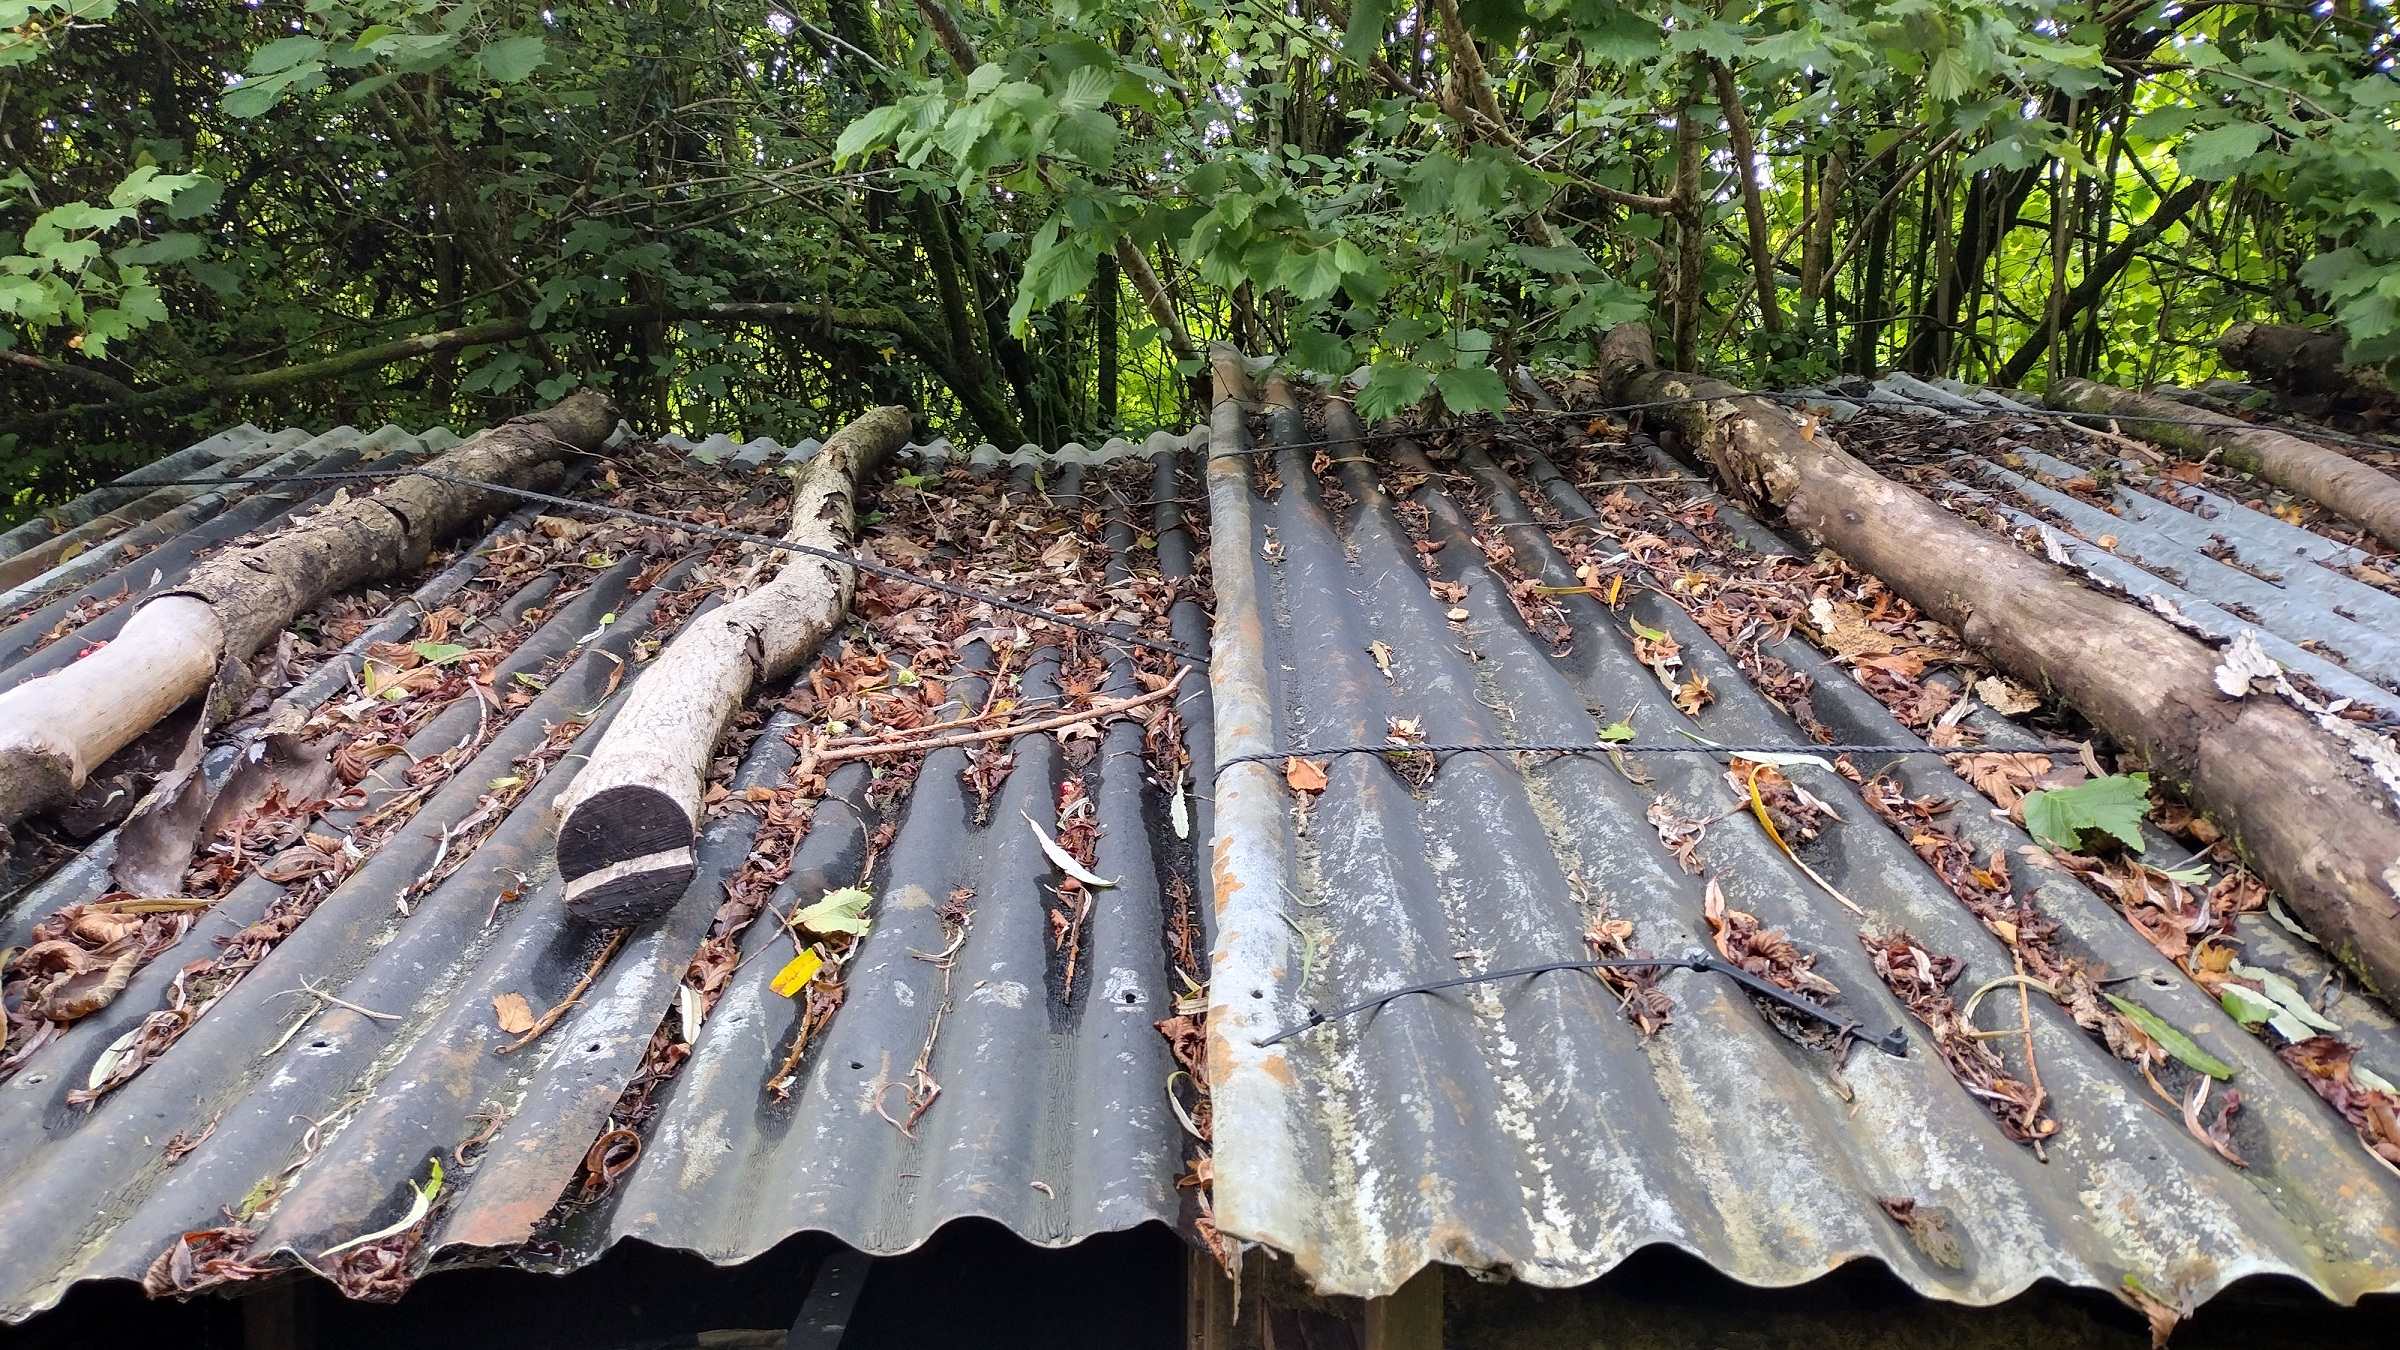
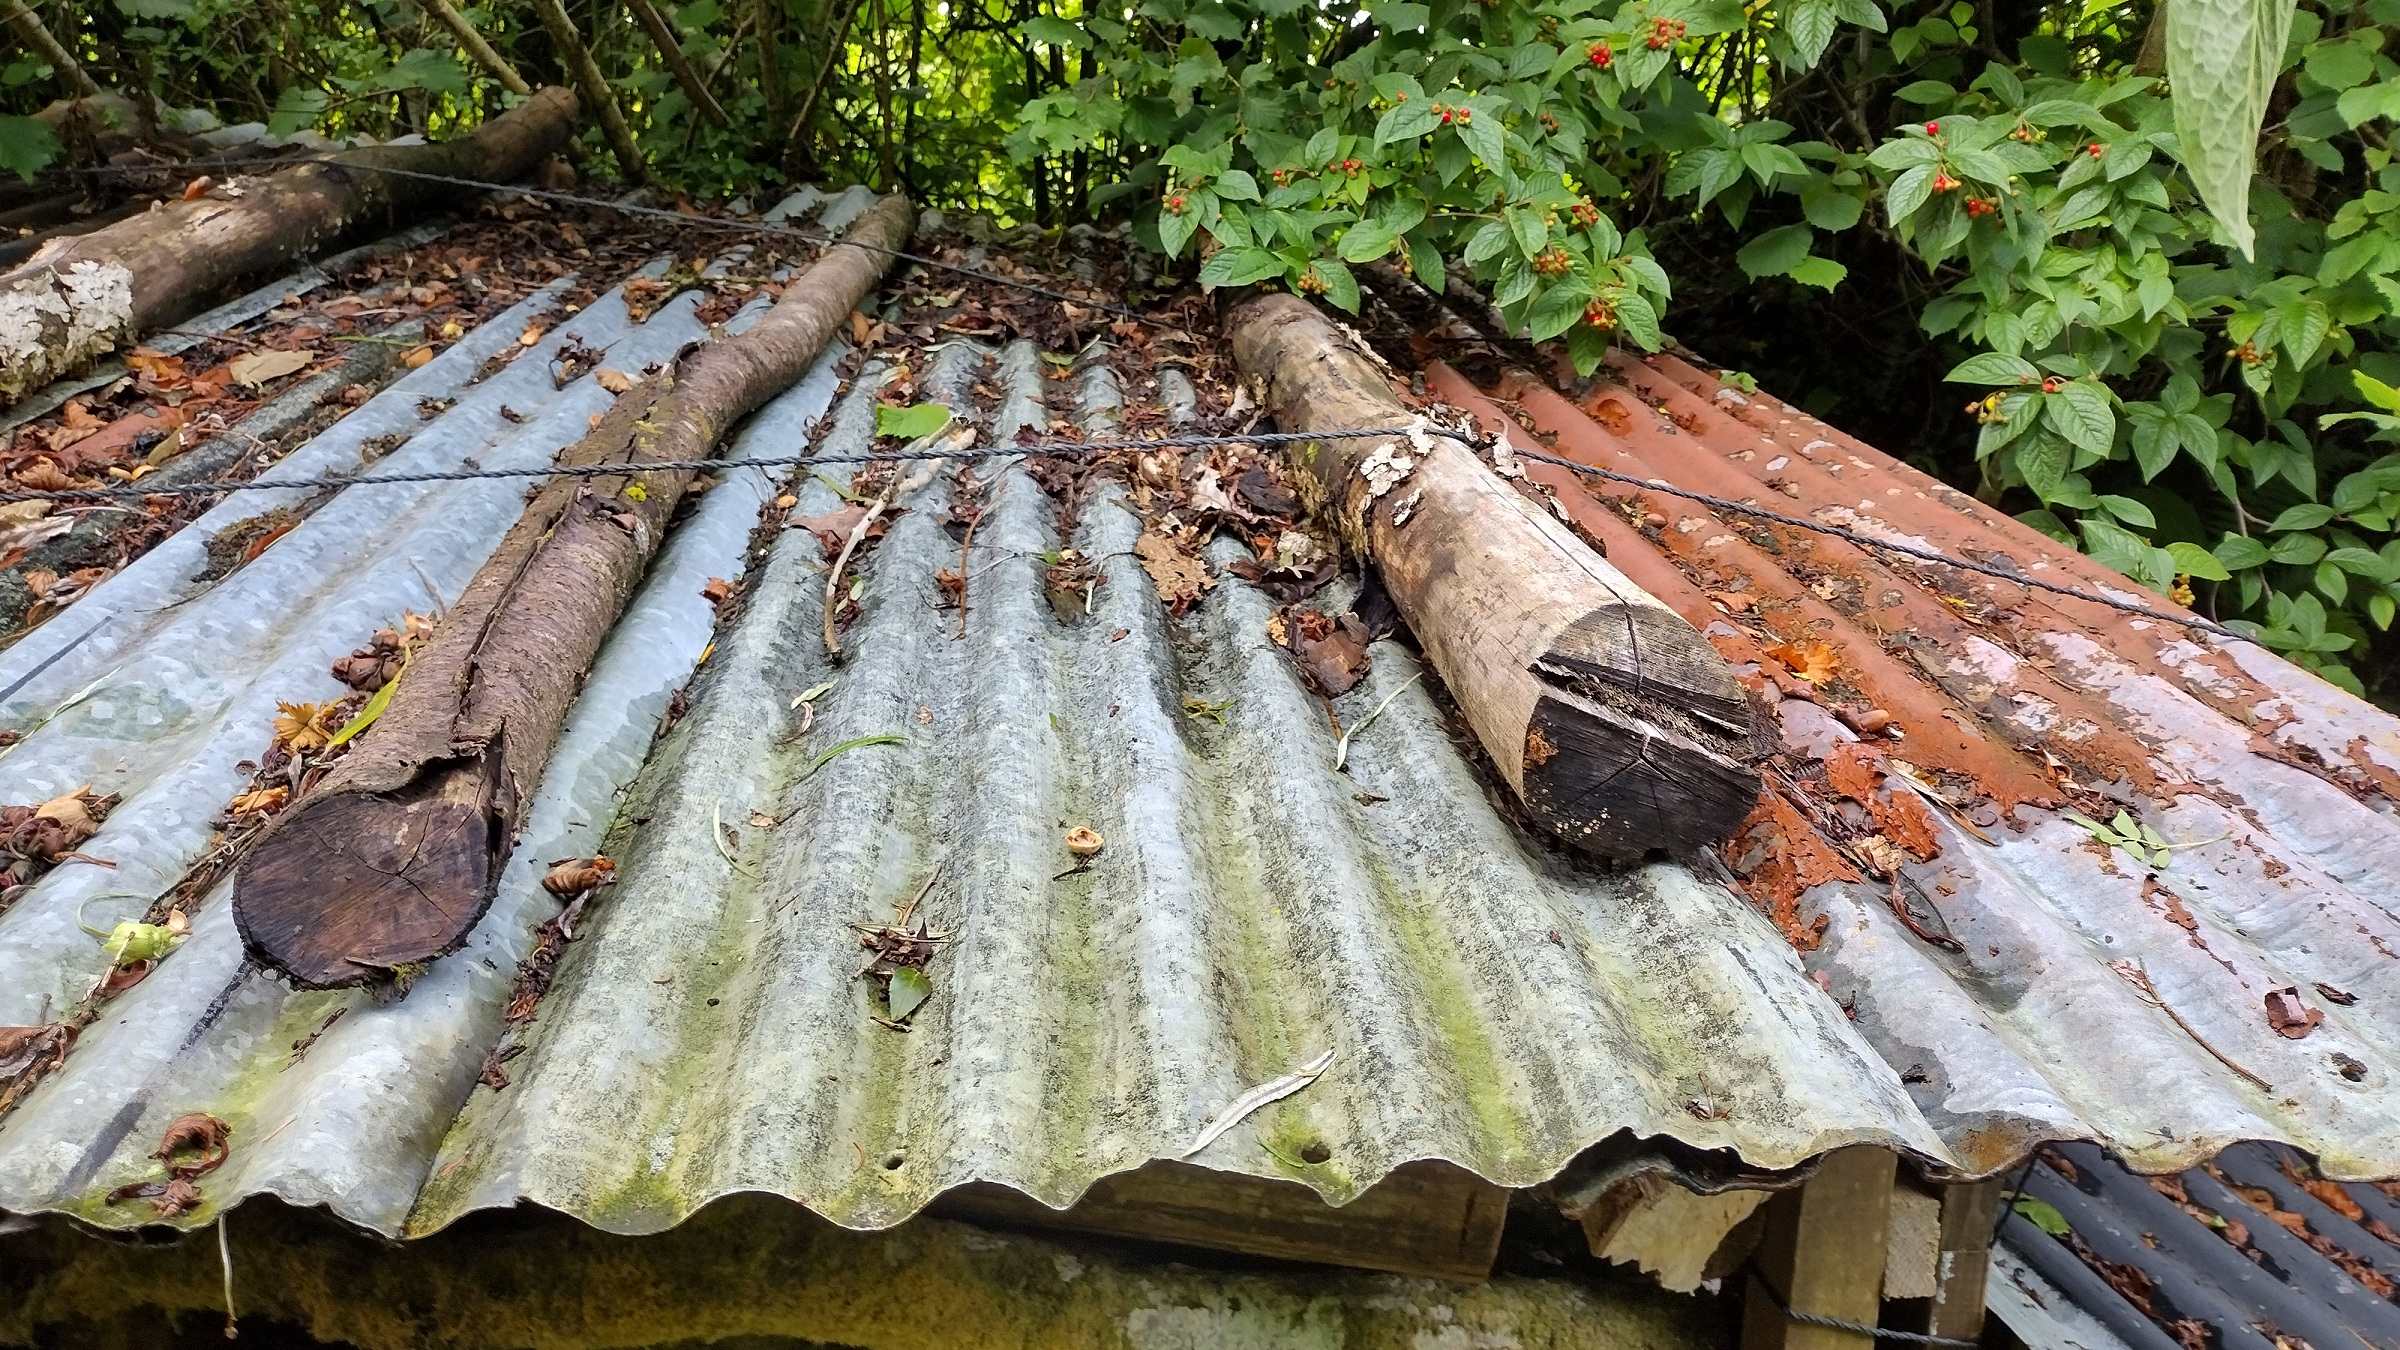
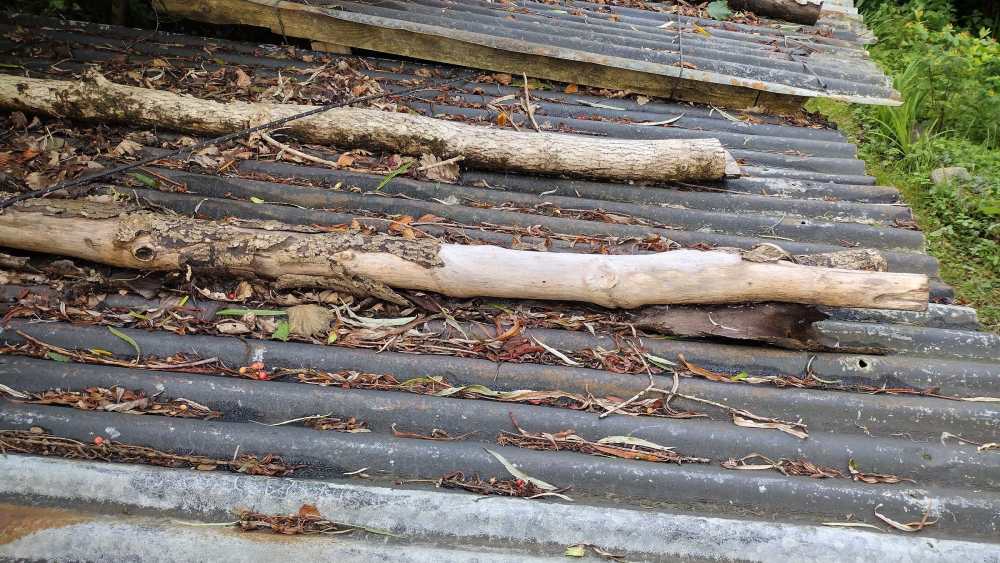
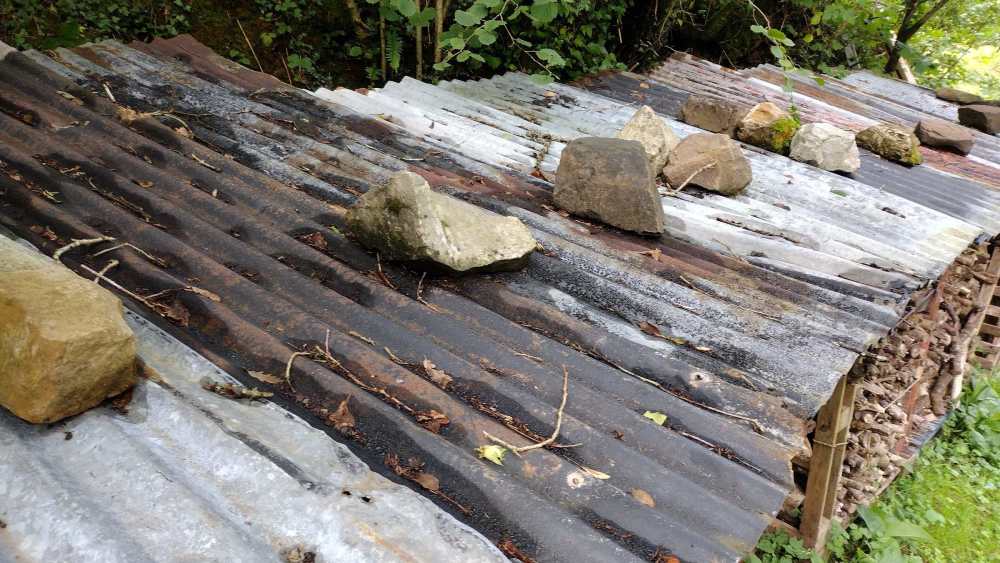
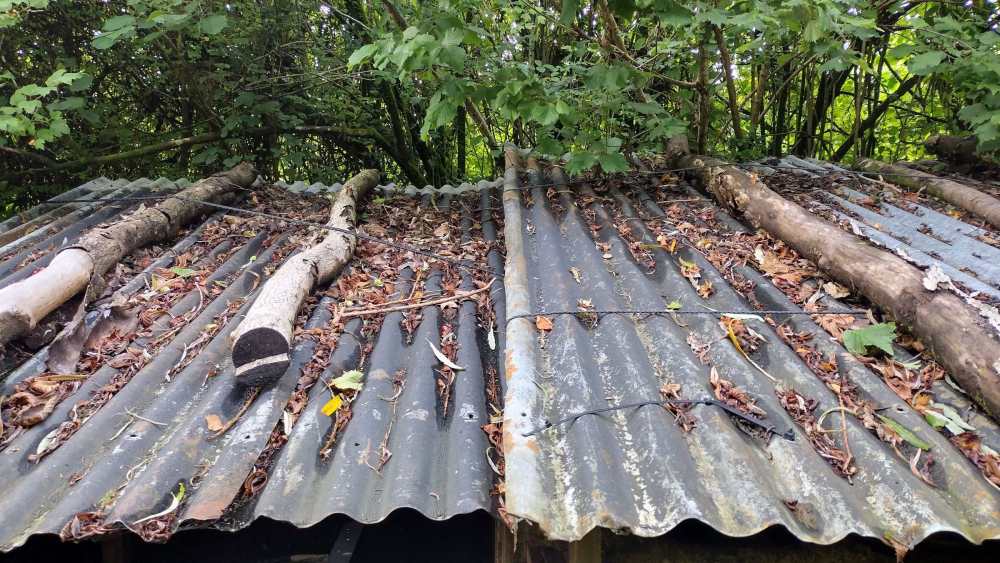
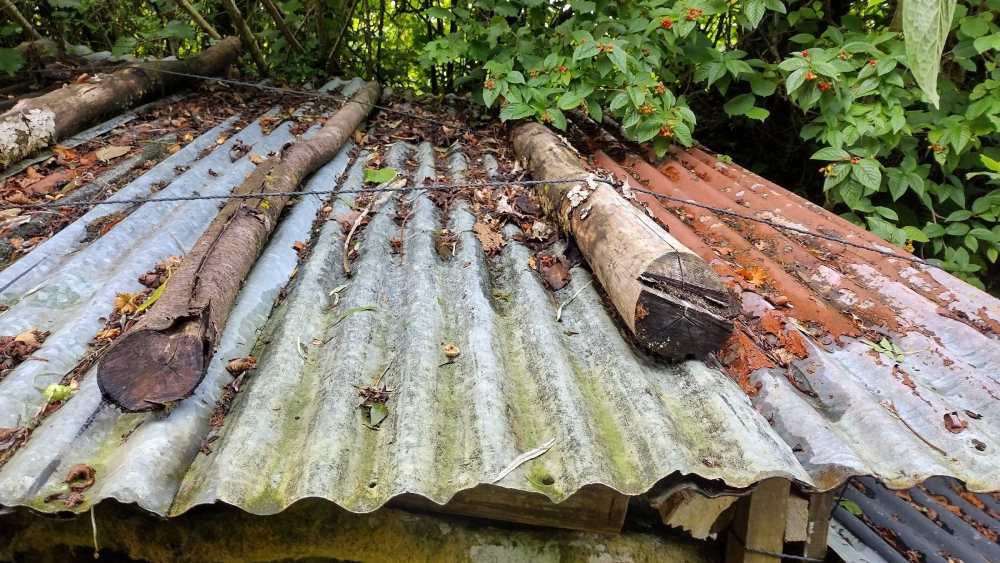
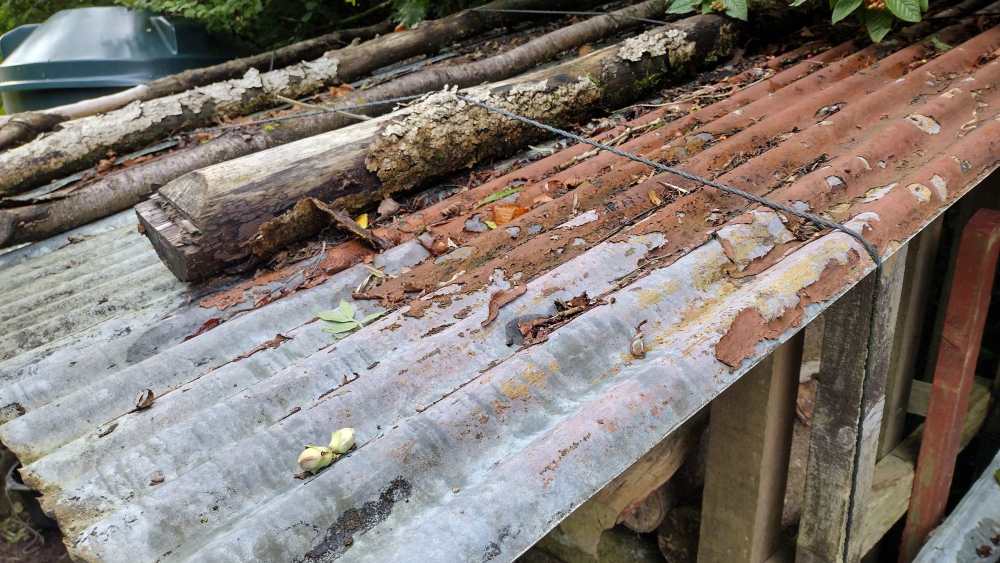
Hi I was donated some "corrugated iron" sheets and have been using them for a couple of years in a makeshift shanty town style array to cover firewood. I want to build proper wood shelters before winter and plan to make use of these sheets. But I'd like to clean them up and protect them as part of the project. It doesn't have to be amazing, the main objective is just to make sure they last as long as possible. I'm pretty sure the sheets are galvanised. There's some old black paint in them which has blistered, flaked and peeled in places. There's also remnants of an old orangey/rusty coloured paint on them which you might mistake for rust at first glance. That being said, there is some rust in places but they're not too bad overall. Bitumen paint seems a common choice. What do you guys think to that? Or are there better alternatives? Also, would I need to use a primer or anything else prior to painting? I've read about rust inhibitors, etch primer, and various other things, some of which people say you should use on galvanised, while others say not to. So feeling a bit confused and hoping you guys can put me on the right path. Many thanks PS - I will be fixing them down properly. Please ignore all the wood and rocks!
-
Hi The tank is around 7 years old. Any ideas what causes it and/or whether it is a problem? Sorry the photo is not great, it's the best I can get through the small opening. Many thanks

-
Fair play re following manufacturer's advice. But what I find interesting is that nearly all of the sealants are a low modulus, neutral cure silicone. And yet the advice on how to use them is not consistent between manufacturers. One example is how some say it is best to fill the chase with sealant, while others say the point adhesion must be avoided (by using a backer rod or similar). Perhaps while the main elements of the sealants are the same, there are other ingredients which mean they perform differently? And this explains the variance in application. Or perhaps not?!! I think mortar would be easier and cheaper. I've read several others who prefer it, some quite strongly. And I guess if lead has been used for centuries, and lime mortar has been used for centuries, then it is a tried and tested combination. But then again, all these sealants claim to solve the long standing problem of mortar not moving at the same rate as the lead, thereby cracking and causing leaks. Whether it's a modern solution to an age old problem, or a snake oil (more convenience than solution), I've no idea!
-
Hi I'm finishing a lead flashing job and now need to seal the flashing that's turned into the chase. The lead has been fixed using hall clips. It's an old stone wall, with undressed stone. So nothing is straight or flat! Although some seem to favour mortar, I've decided to use lead sealant. Some of the sealants specify that a width to depth ratio of 2:1 must be used (I guess at the end of the say this is a silicone, and the same ratio is also specified for other silicones such as sanitary types, etc). Where this ratio cannot be achieved what might the implications be? Having read/watch videos about the topic, it has got me to thinking. Lead flashing is commonly used against brick walls. The typical mortar joint is 10mm wide. The recommended chase depth of the lead is 25mm. So in this scenario, there would be a width to depth ratio of 1:2.5 and therefore well off the recommended 2:1 ratio. In fact, here's a couple of manufacturer's videos which seem to show the full depth of the chase being filled with sealant. The brickwork looks standard, so I presume the chase is no more than 10mm wide. especially at 1:29. at 6:30 Similarly, I can't imagine every plumber using silicone adheres to the ratio. So I wondered whether you guys think about this ratio business? Cheers
-
Repair gap between external wall and concrete slab
Oxbow16 replied to Oxbow16's topic in General Self Build & DIY Discussion
Good weather and a BH weekend, so hoping to get something done with this this weekend... If nothing else, I was thinking to remove the existing knackered fillet, repair obvious cracks and defects in the ground-wall join with a concrete repair mastic, followed by a new fillet. I figured and hoped that if this worked in the past hopefully it will again. I've no idea what mix of cement to use, whether to use SBR, etc. - so any thoughts on that would be great. And with the additional info and measurements I added last week, any other thoughts most welcomed too. Many thanks -
Repair gap between external wall and concrete slab
Oxbow16 replied to Oxbow16's topic in General Self Build & DIY Discussion
Hi Got a few more details to add... I've measured up and the ground level outside is 230mm lower than inside (including the two layers of tiles on the inside, without those it's more like 170-180mm difference). The DPC (if it is in fact the DPC) is 160mm above ground level. I'm not sure tbh, but I was thinking maybe a bit of both. It has been ridiculously wet recently and over winter generally. Locals say it's the wettest they can remember. But also, as you can see in the photos, the old fillet (is that the right term?) is in quite a bad way and was possibly done in the wrong material to begin with. There are cracks all of it, some of it is loose. Plus there are cracks perpendicular and leading up to the wall. So yes, my thoughts were the abundant rain and the deterioration of the "fillet" were the likely cause. But replies here seem to suggest otherwise... Any further thoughts? Cheers